Honda CR-V (2022 year). Manual in english - page 21
 

  Index      Manuals     Honda CR-V (2022 year). Manual in english


Search            copyright infringement  


Content      ..     19      20      21      22     ..


Honda CR-V (2022 year). Manual in english - page 21


Continued

333

uu

Audio System Basic Operation

u

Audio/Information Screen

Features

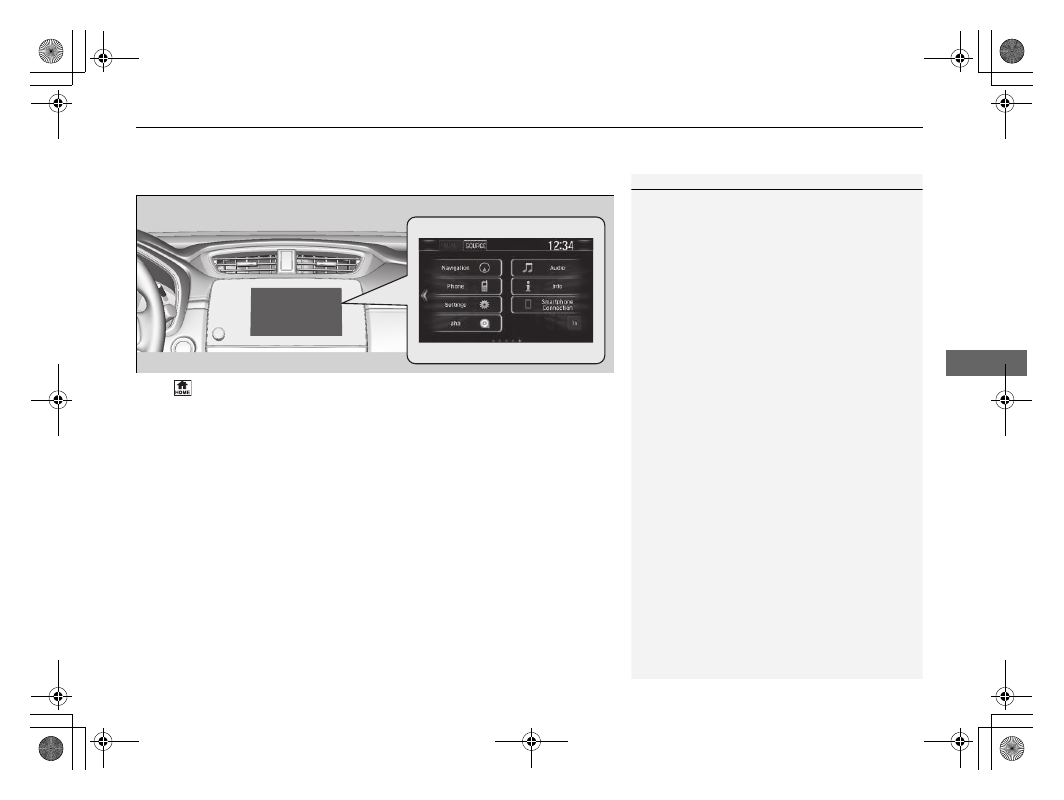
Using the audio/information screen

Select 

 to go to the home screen.

Select the following icons on the home screen.

Phone

Displays the HFT information.

2

Hands-Free Telephone System

 P. 457

1

Using the audio/information screen

Touchscreen operation

Use simple gestures - including touching, swiping 
and scrolling - to operate certain audio functions.

Some items may be greyed out during driving to 
reduce the potential for distraction.

You can select them when the vehicle is stopped or 
use voice commands

*

.

Wearing gloves may limit or prevent touchscreen 
response.

You can change the touchscreen sensitivity setting.

2

Customized Features

 P. 408

Home Screen

* Not available on all models

334

uu

Audio System Basic Operation

u

Audio/Information Screen

Features

Info

Displays 

Trip Computer

Voice Info

*

Clock/wallpaper

/

Clock

, or 

System/Device 

Information

. Select 

MENU

 on the 

Info Menu

 screen to see all available options: 

Trip Computer

Voice Info

*

Clock/wallpaper

/

Clock

 and 

System/Device 

Information

.

Trip Computer

:

Current Drive

 tab: Displays the current trip information.

History of Trip A

 tab: Displays information for the three previous drives. The 

information is stored every time you reset Trip A.
To delete the history manually, select 

Delete history

 on the 

History of Trip A


tab. The confirmation message appears on the screen, then select 

Yes

.

Voice Info

*

: Displays a list of all voice commands.

Clock/wallpaper

/

Clock

: Displays the clock and wallpaper.

System/Device Information

:

System Info

: Displays the software version of the audio system.

USB info

: Displays the memory usage of the USB device.

Audio

Displays the current audio information.

Settings

Enters the customizing menu screen.

2

Customized Features

 P. 408

* Not available on all models

335

uu

Audio System Basic Operation

u

Audio/Information Screen

Continued

Features

Navigation

*

Displays the navigation screen.

2

Refer to the Navigation System Manual

Smartphone Connection

Connects with your smartphone

*1

 and allows some apps on your smartphone to be 

used on the audio system, and displays the Apple CarPlay or Android Auto.

2

Smartphone Connection

 P. 380

2

Apple CarPlay

 P. 385

2

Android Auto

 P. 389

aha

Displays the Aha

TM

 screen.

2

Playing Aha

TM

 P. 373

App Centre

Displays Honda App Centre.

2

On Board Apps

 P. 379

TA

Turns on and off the traffic information.

App List

Adds or removes apps or widgets on the home screen.

2

Home Screen

 P. 342

 (instrument panel)

Selects from three customizable settings for the driver information interface.

*1: Available on specific phones only. Ask a dealer for compatible phones for feature details.

* Not available on all models

uu

Audio System Basic Operation

u

Audio/Information Screen

336

Features

1.

Select .

2.

Select and hold an icon.

u

The screen switches to the customization 
screen.

3.

Drag and drop the icon to where you want 
it to be.

4.

Select 

OK

.

u

The screen will return to the home 
screen.

You can edit, add, or delete the meter contents on the driver information interface.

1.
2. Settings
3. System
4. Configuration of Instrument Panel

Changing the Home Screen Icon Layout

Customizing the Meter

1

Customizing the Meter

You can store up to three customized configurations. 
To select or customize a configuration, select 

Swap 

Config.

.

When you select 

Swap Config.

 during 

customization, the settings you changed will be 
saved.
When you select 

 during customization, the 

settings you changed will not be saved and you will 
be returned to the 

Instrument Panel

 screen.

Continued

337

uu

Audio System Basic Operation

u

Audio/Information Screen

Features

Editing order

To change the order of the icons on the driver information interface, first select:

1. Edit Order

2.

Select the icon you want to move.

u

You will see arrows on both sides of the 
selected icon.

3.

Select the left or right arrow repeatedly to 
move the icon to your desired position.

4.

Select 

OK

.

u

The screen will return to the 

Instrument 

Panel

 screen.

1

Editing order

You can use an alternative method to change the 
order of the icons. First select:
1.

Edit Order

2. Select and hold the icon you want to move.
3. Drag and drop the icon to where you want it to 

be.

4. Select 

OK

.

u

The screen will return to the 

Instrument Panel


screen.

Edit Order

Select

Arrow icons

OK

uu

Audio System Basic Operation

u

Audio/Information Screen

338

Features

Adding contents

You can add icons to the driver information interface. To add icons, first select:

1. Add

2.

Select an icon you want to add.

u

You will see a plus mark on the upper 
right hand corner of the selected icon.

3.

Select 

OK

.

u

The screen will return to the 

Instrument 

Panel

 screen.

1

Adding contents

Icons that are greyed out cannot be selected.

If an icon has a plus mark in the upper-right corner, it 
means that the icon has already been added.

Add

Select

OK

Continued

339

uu

Audio System Basic Operation

u

Audio/Information Screen

Features

Deleting contents

To delete contents on the driver information interface, first select:

1. Delete

2.

Select an icon you want to delete.

u

The icon with an X on the upper right 
hand corner can be deleted.

3.

Select 

OK

.

u

The screen will return to the 

Instrument 

Panel

 screen.

1

Deleting contents

You can also delete contents by selecting:
1.

Delete

 or 

Edit Order

2. Select and hold an icon you want to delete.
3. Drag and drop the icon to the trash icon.
4. Select 

OK

.

u

The screen will return to the 

Instrument Panel


screen.

Delete

Select

OK

uu

Audio System Basic Operation

u

Audio/Information Screen

340

Features

You can change, store, and delete the wallpaper on the audio/information screen.

Import wallpaper

You can import up to five images, one at a time, for wallpaper from a USB flash 
drive.

1.

Connect the USB flash drive to the USB 
port.

2

USB Port(s)

 P. 299

2.

Select 

Settings

.

3.

Select 

Clock

.

4.

Select 

Clock/Wallpaper Type

, then open 

the 

Wallpaper

 tab.

5.

Select 

Add New

.

u

The picture name is displayed on the list.

6.

Select a desired picture.

u

The preview is displayed on the left side 
on the screen.

7.

Select 

Start Import

 to save the data.

u

The display will return to the wallpaper 
list.

Wallpaper Setup

1

Wallpaper Setup

The wallpaper you set up on 

Clock/Wallpaper Type


cannot be displayed on the driver information 
interface.

When importing wallpaper files, the image must be 
in the USB flash drive’s root directory. 
Images in a folder cannot be imported.

The file name must be fewer than 256 bytes.

The file format of the image that can be imported 
is BMP (bmp) or JPEG (jpg).

The individual file size limit is 5 MB.

The maximum image size is 4,096 × 4,096 pixels. If 
the image size is less than 800 × 480 pixels, the 
image is displayed in the middle of the screen with 
the extra area appearing in black.

If the USB flash drive does not have any pictures, 
the 

No files detected

 message appears.

After changing the screen interface design, you can 
change the wallpaper by following procedure.
1. Select .
2. Select .
3. Select and hold empty space on the home screen.

The pop-up menu appears on the screen.

4. Select 

Change wallpaper

.

5. Select 

Gallery

Live wallpapers

, or 

Wallpapers

.

Continued

341

uu

Audio System Basic Operation

u

Audio/Information Screen

Features

Select wallpaper

1.

Select 

Settings

.

2.

Select 

Clock

.

3.

Select 

Clock/Wallpaper Type

, then open the 

Wallpaper

 tab.

u

The screen changes to the wallpaper list.

4.

Select a desired wallpaper.

u

The preview is displayed on the left side on the screen.

u

The pop-up menu appears on the screen.

5.

Select 

Set

.

u

The display will return to the wallpaper list.

To view wallpaper once it is set

1.

Select .

2.

Select 

Info

.

3.

Select 

MENU

.

4.

Select 

Clock/wallpaper

.

Delete wallpaper

1.

Select 

Settings

.

2.

Select 

Clock

.

3.

Select 

Clock/Wallpaper Type

, then open the 

Wallpaper

 tab.

u

The screen changes to the wallpaper list.

4.

Select a wallpaper that you want to delete.

u

The preview is displayed on the left side on the screen.

u

The pop-up menu appears on the screen.

5.

Select 

Delete

.

u

A confirmation message appears on the screen.

6.

Select 

Yes

 to delete completely.

u

The display will return to the wallpaper list.

1

Wallpaper Setup

From the pop-up menu, select 

Preview

 to see a 

preview at full-size screen.

To go back to the previous screen, select 

OK

, or 

select .

When the file size is large, it takes a while to be 
previewed.

To delete all wallpapers you add, select 

Delete All

then 

Yes

.

uu

Audio System Basic Operation

u

Audio/Information Screen

342

Features

To change to a next screen

Selecting   or  , or swiping the screen left or right changes to the next screen.

Home Screen

1

Home Screen

The home screen has 5 pages (fixed). You cannot add 
any more pages.

Select 

 to go directly back to the first page of the 

home screen from any page.

Swipe

 Icon

 Icon

Current page position

Continued

343

uu

Audio System Basic Operation

u

Audio/Information Screen

Features

To use apps or widgets

1.

Select .

2.

Select 

App List

.

u

The apps screen appears.

3.

Select the app or widget you want to use.

Preinstalled app list:

 (Browser): Displays the web browser 

utilized by smartphone and Wi-Fi 
connection.

 (Calculator): Displays Calculator.

 (Gallery): Displays images.

 (Downloads): Displays the data 

downloaded from the web browser and so 
on.

 (App installer): Check with a Honda 

dealer for apps that are available for 
installation.

 (Search): Displays various retrieval 

screen.

1

To use apps or widgets

Select and hold a selected app or widget to add that 
app’s or widget’s shortcut on the home screen.

Pre-installed apps may not start up normally. If this 
occurs, you need to reset the system.

2

Defaulting All the Settings

 P. 435

If you perform 

Factory Data Reset

, it may reset all 

the settings to their factory default.

2

Defaulting All the Settings

 P. 435

In case those apps still do not startup normally even 
after 

Factory Data Reset

, contact your dealer.

There is a possibility that a browser is shut down in 
the situation of the use. In that situation, the screen 
will return to before the browser startup.

Do not install apps other than those confirmed by a 
Honda dealer. Installation of unauthorised apps may 
introduce data corruption risks to your vehicle’s 
information and your privacy.

You can delete user installed apps by the following 
procedure.
1. Select .
2. Select 

Settings

.

3. Select 

System

.

4. Select the 

Others

 tab.

5. Select 

Detailed Information

.

6. Select an App that you want to delete.
7. Select 

Delete

.

Pre-installed apps cannot be deleted.

App List

344

uu

Audio System Basic Operation

u

Audio/Information Screen

Features

To add app or widget icons on the home screen

App or widget icons can be added on the home screen.

1.

Select .

2.

Select .

3.

Select and hold empty space on the home 
screen.

u

The pop-up menu appears on the screen.

4.

Select 

Add App

 or 

Add Widget

.

u

The apps/widget screen appears.

Select and hold.

345

uu

Audio System Basic Operation

u

Audio/Information Screen

Continued

Features

5.

Select and hold an app or widget icon you 
want to add.

u

The screen switches to the customization 
screen.

6.

Drag and drop the icon to where you want 
it to be.

7.

Select 

OK

.

u

The screen will return to the home 
screen.

Select and hold.

Drag and drop.

uu

Audio System Basic Operation

u

Audio/Information Screen

346

Features

To move icons on the home screen

You can change location on the home screen.

1.

Select and hold an icon.

u

The screen switches to the customization 
screen.

2.

Drag and drop the icon to where you want 
it to be.

3.

Select 

OK

.

u

The screen will return to the home 
screen.

1

To move icons on the home screen

You can also move the 

Phone

Info

Audio

Settings

Navigation

*

Smartphone Connection

aha

App Centre

TA

App List

, and 

 (instrument 

panel) icons in the same manner.

Select and hold.

Drag and drop.

* Not available on all models

Continued

347

uu

Audio System Basic Operation

u

Audio/Information Screen

Features

To remove icons on the home screen

You can delete the icons on the home screen.

1.

Select and hold an icon.

u

The screen switches to the customization 
screen.

2.

Drag and drop the icon you want to remove 
to the trash icon.

u

The icon is removed from the home 
screen.

3.

Select 

OK

.

u

The screen will return to the home 
screen.

1

To remove icons on the home screen

You cannot delete the 

Phone

Info

Audio

Settings

Navigation

*

Smartphone Connection

aha

App Centre

TA

App List

, and 

 (instrument 

panel) icons.

Apps or widgets will not be deleted by deleting the 
icon on the home screen.

Select and hold.

Drag and drop to 
trash icon.

* Not available on all models

348

uu

Audio System Basic Operation

u

Audio/Information Screen

Features

To change the home screen wallpaper

You can change a wallpaper of the home screen.

1.

Select and hold empty space on the home 
screen.

u

The pop-up menu appears on the screen.

2.

Select 

Change wallpaper

.

u

The pop-up menu appears on the screen.

3.

Select an app for selecting wallpapers.

4.

Select the wallpaper you want to change.

5.

Select 

Set wallpaper

.

u

The wallpaper is changed, then the 
screen will return to the home screen.


Content      ..     19      20      21      22     ..