Harley Davidson Electra Glide. Service manual (1959 to 1969) - page 6
3. To straighten a bent and twisted rod
(combination of a bend and twist) remove bend first and then remove
twist.
After rods have been aligned check to see that pistons center in
crankcase cylinder opening, without side pressure on upper rod ends. If
further realigning is necessary to center pistons, correct by dressing
off end of rod bushing on interfering side with a file. This allows the
piston to shift slightly on rod to find a more suitable alignment of
rod, piston, and cylinder bore.
ASSEMBLING CYLINDER AND PISTON
Attach piston to connecting rod with a piston pin. Position piston so
lug on piston pin boss inside piston skirt is to right side of engine.
See Fig. 3C-13.
Clean lock ring groove and install lock ring on end of pin that is not
slotted if it was removed. Start slotted end of pin into piston boss
from left side and drive through in the same manner in which pin was
removed.
If the piston is heated in boiling water, the pin may be inserted into
piston as a slip fit.
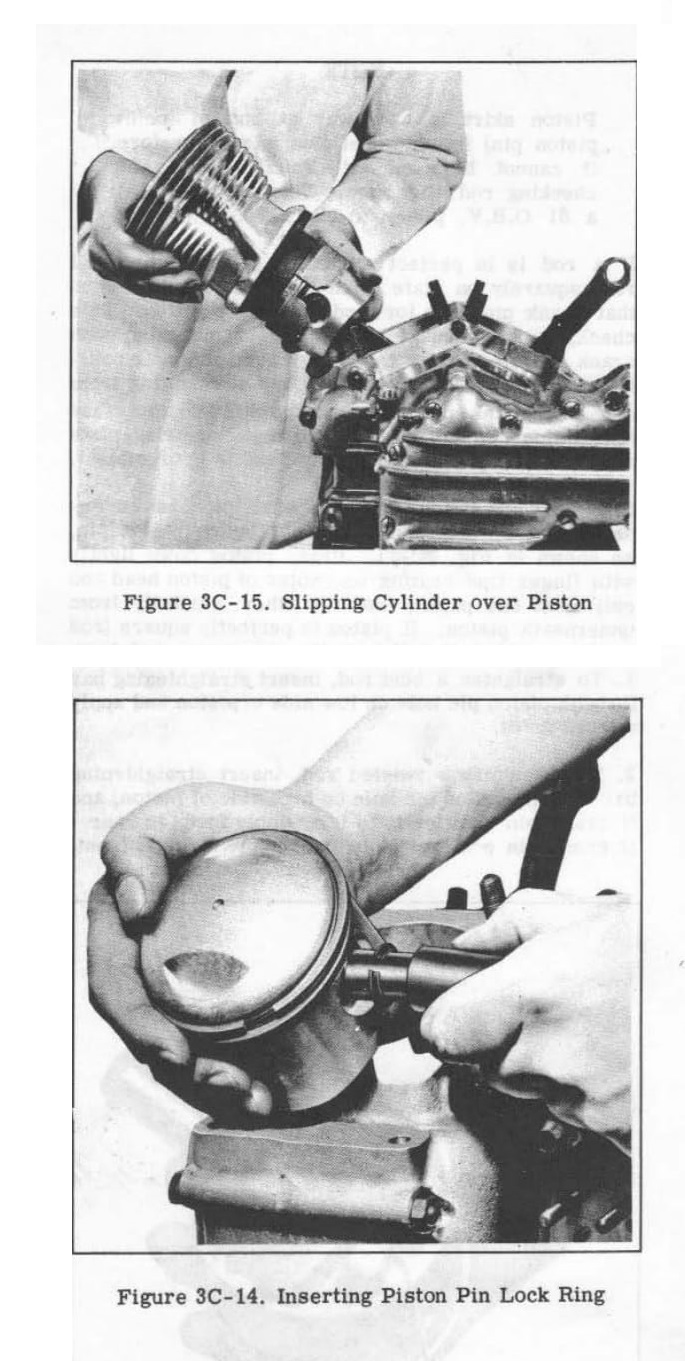
After pin is in place, clean lock ring groove and install the other lock
ring (see Fig. 3C-14). It is important that special Lock Ring Tool, Part
No. 96780-32A be used for installing lock rings.
NOTE
Lock ring is expanded just enough to go over end of pin. Other means of
installing may over-expand ring and possibly crack it. Make sure ring
groove is clean and that ring seats firmly in groove.
A lock ring incorrectly installed will soon loosen in service and
finally come off pin, resulting in both piston and cylinder being
damaged beyond repair. Never install a used lock ring or a new one that
has been installed and then removed. Always use an unused lock ring.
Lubricate cylinder walls, pistons, pins and rod bushings with engine
oil. Rotate rings until gaps are equidistant around rear piston. Turn
engine until crank pin is at bottom center. Install new cylinder base
gasket. Position Piston Inserter Ring Tool, Part No. 96333-51A on rear
piston and slip rear cylinder down over piston as shown in Fig. 3C-15.
Install lock washers and nuts and pull them down evenly. Repeat process
to assemble front cylinder.
Assemble cylinder heads and remaining portions of motorcycle as
indicated in "Assembling Cylinder Heads," Section 3B, and reverse order
of "Stripping Motorcycle for Engine Repair," Section ЗА, steps 10
through 1.