содержание .. 50 51 52 53 54 55 56 57 ..
Geely FC. Manual part - 56
Change
1. Reclaim HFC-134a (R134a)
(a) Turn A/C switch to ON.
(b) Keep the engine speed at 1000 rpm, and rotate cooling compressor for 5 to 6 minutes to make
refrigerant cycle, this could collect the Refrigerant oil in each part in cooling compressor as possible.
(c) Extinguish the engine.
(d) Drain the refrigerant.
2. Fill refrigerant
(a) Use vacuum pump to take out vacuum.
(b) Fill the refrigerant HFC-134a (R134a)
Standard quantity: 660 ± 10g
3. Heat the engine
4. Check whether the refrigerant leaks.
Air conditioner--Refrigerant
221
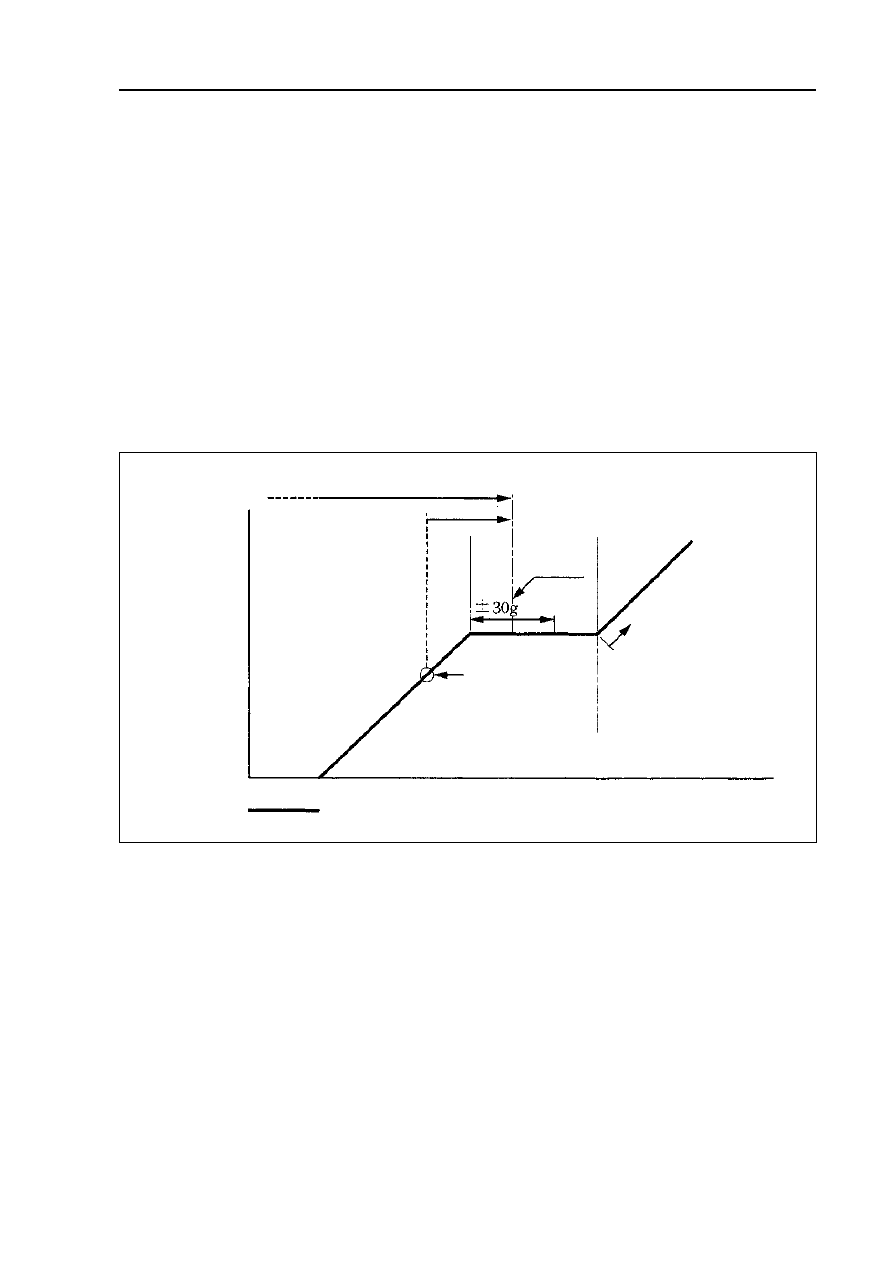
Bubble
disappearing
point
Too much filling refrigerant
Increase 100g
Filling quantity of refrigerant
Pressure at
the high
pressure side
Refrigerant quantity
Auxiliary condenser system
Applicable
filling scope