Ford Transit (2022 year). Manual in english - page 26
 

  Index      Manuals     Ford Transit (2022 year). Manual in english


Search            copyright infringement  


Content      ..     24      25      26      27     ..


Ford Transit (2022 year). Manual in english - page 26


USING SNOW CHAINS

WARNING: 

Do not exceed 30 mph

(50 km/h). Failure to follow this
instruction could result in the loss of
control of your vehicle, personal injury or
death.

WARNING: 

Do not use snow chains

on snow-free roads.

WARNING: 

Only fit snow chains to

specified tires.

WARNING: 

If your vehicle is fitted

with wheel trims, remove them before
fitting snow chains.

Your vehicle has all-weather tires designed
to provide traction in all weather
conditions. In some conditions you may
need to use snow chains or cables.

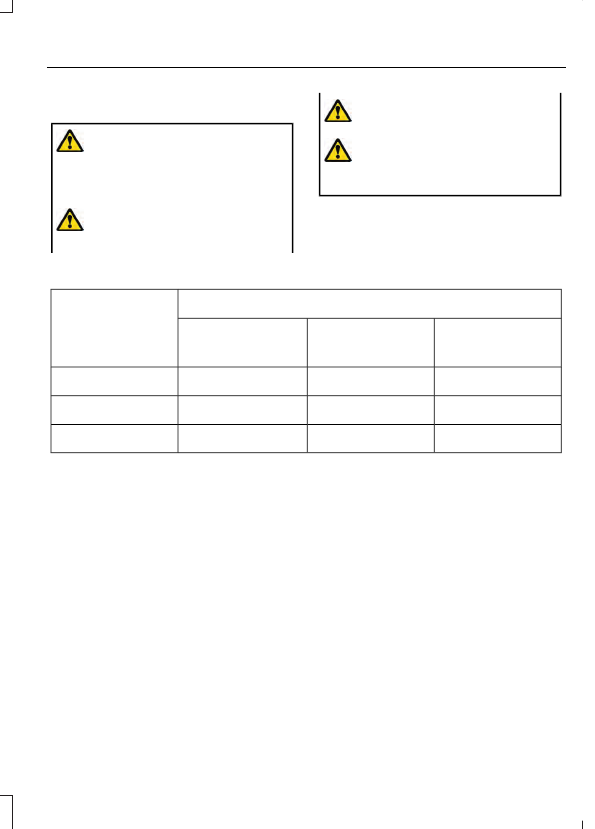
Snow Chain Use by Tire Size

Variant

3

Tire Size

All-Wheel Drive

Rear Wheel Drive -

Vehicles With Dual

Rear Wheels

Rear Wheel Drive -

Vehicles With Single

Rear Wheels

N/A

Yes.

1

N/A

195/75R16C

Yes.

2

Yes.

1

N/A

205/75R16C

Yes.

2

N/A

Yes.

235/65R16C

Only fit snow chains to the outer tires.

Only fit snow chains to the rear tires.

To ascertain the variant of your vehicle, refer to the vehicle identification plate. See

Vehicle Identification Number Overview

 (page 465).

Note:

Maintain correct tire pressures.

Note:

The anti-lock brake system continues

to correctly operate.

Note:

We recommend that you switch the

traction control system off.  See 

Switching

Traction Control On and Off

 (page 251).

Do not use self-tensioning snow chains.

Avoid fully loading your vehicle.

Only use SAE Class S snow chains or
cables of 0.4 in (10 mm) or smaller in
diameter.

We recommend that steel wheels of the
correct size and specification are used.
Snow chains or cables could damage alloy
wheels.

421

Wheel and Tire Information

CHECKING THE TIRE
PRESSURES

Safe operation of your vehicle
requires that your tires are
properly inflated. Every day before
you drive, check your tires.

At least once a month and before
long trips, inspect each tire and
check the tire pressure with a tire
gauge. Inflate all tires to the
recommended inflation pressure.
See 

Inflating the Tires

 (page

422).

INFLATING THE TIRES

WARNING: 

Under-inflation

is the most common cause of
tire failures and may result in
severe tire cracking, tread
separation or blowout, with
unexpected loss of vehicle
control and increased risk of
injury. Under-inflation increases
sidewall flexing and rolling
resistance, resulting in heat
buildup and internal damage to
the tire. It also may result in
unnecessary tire stress, irregular
wear, loss of vehicle control and
accidents. A tire can lose up to
half of its air pressure and not
appear to be flat!

WARNING: 

Do not use the

tire pressure displayed in the
information display as a tire
pressure gauge. Failure to follow
this instruction could result in
personal injury or death.

Use the recommended cold
inflation pressure for optimum tire
performance and wear.
Under-inflation or over-inflation

may cause uneven treadwear
patterns.

Inflate your tires to the
recommended inflation pressure
even if it is less than the maximum
inflation pressure information
found on the tire. You can find the
tire label with the recommended
tire inflation pressure next to the
tire size on the B-Pillar or the edge
of the driver door.

The recommended tire inflation
pressure is also found on the
Safety Compliance Certification
Label, affixed to either the door
hinge pillar, door-latch post, or the
door edge that meets the
door-latch on the B-pillar, or on
the edge of the driver door.

Failure to follow the tire pressure
recommendations can cause
uneven treadwear patterns and
adversely affect the way your
vehicle handles.

422

Tire Care

INSPECTING THE TIRE FOR
WEAR

E142546

When the tread is worn down to
one sixteenth of an inch (2 mm),
tires must be replaced to help
prevent your vehicle from skidding
and hydroplaning. Built-in
treadwear indicators, or wear bars,
which look like narrow strips of
smooth rubber across the tread
will appear on the tire when the
tread is worn down to one
sixteenth of an inch (2 mm).

When the tire tread wears down
to the same height as these wear
bars, the tire is worn out and must
be replaced.

The tires should also be balanced
periodically. An unbalanced tire
and wheel assembly may result in
irregular tire wear.

Periodically inspect the tire treads
for uneven or excessive wear and
remove objects such as stones,
nails or glass that may be wedged
in the tread grooves.

INSPECTING THE TIRE FOR
DAMAGE

Inspect the tire sidewalls for
cracking, cuts, bruises and other
signs of damage or excessive
wear. If internal damage to the tire
is suspected, have the tire
dismounted and inspected in case
it needs to be repaired or replaced.
For your safety, tires that are
damaged or show signs of
excessive wear should not be used
because they are more likely to
blow out or fail.

Periodically inspect the tire treads
and sidewalls for damage, such
as bulges in the tread or sidewalls,
cracks in the tread groove and
separation in the tread or sidewall.
If damage is observed or
suspected, have the tire inspected
by a tire professional.

Safety Practices

WARNING: 

If your vehicle

is stuck in snow, mud or sand, do
not rapidly spin the tires;
spinning the tires can tear the
tire and cause an explosion. A
tire can explode in as little as
three to five seconds.

WARNING: 

Do not spin the

wheels at over 34 mph
(55 km/h). The tires may fail and
injure a passenger or bystander.

423

Tire Care

Highway Hazards

No matter how carefully you drive,
there is always the possibility that
you could eventually have a flat
tire on the highway. Drive slowly
to the closest safe area out of
traffic. This could further damage
the flat tire, but your safety is
more important.

If you feel a sudden vibration or
ride disturbance while driving, or
you suspect your tire or vehicle
has been damaged, immediately
reduce your speed. Drive with
caution until you can safely pull
off the road. Stop and inspect the
tires for damage. If a tire is
under-inflated or damaged,
deflate it, remove the wheel and
replace it with your spare tire and
wheel. If you cannot detect a
cause, have the vehicle towed to
the nearest repair facility or tire
dealer to have the vehicle
inspected.

Tire and Wheel Alignment

A bad jolt from hitting a curb or
pothole can cause the front end
of your vehicle to become
misaligned or cause damage to
your tires. If your vehicle seems to
pull to one side when you are
driving, the wheels could be out of
alignment. Have an authorized
dealer check the wheel alignment
periodically.

Wheel misalignment in the front
or the rear can cause uneven and
rapid treadwear of your tires and
should be corrected by an
authorized dealer.

INSPECTING THE WHEEL
VALVE STEMS

Check the valve stems for holes,
cracks, or cuts that could permit
air leakage.

TIRE ROTATION

WARNING: 

If the tire label

shows different tire pressures for
the front and rear tires and the
vehicle has a tire pressure
monitoring system, then you
need to update the settings for
the system sensors. Always
perform the system reset
procedure after tire rotation. If
you do not reset the system, it
may not provide a low tire
pressure warning when
necessary.

Rotating your tires at the
recommended interval will help
your tires wear more evenly,
providing better tire performance
and longer tire life.

Note:

If your tires show any uneven

wear have the alignment checked
by an authorized dealer before
rotating tires.

424

Tire Care

Note:

If you have a dissimilar spare

wheel and tire assembly, it is
intended for temporary use only
and should not be used in a tire
rotation.

Note:

After having your tires

rotated, inflation pressure must be
checked and adjusted to the
vehicle requirements.

Tire Rotation Diagram

Follow the diagram indicating the
correct tire locations for rotating
the tires.

E142548

425

Tire Care

WHAT IS THE TIRE PRESSURE
MONITORING SYSTEM

The tire pressure monitoring
system measures the vehicle's
tire pressures. A warning lamp

illuminates if one or more tires are
significantly underinflated or if there is a
system malfunction.

TIRE PRESSURE MONITORING
SYSTEM OVERVIEW

WARNING: 

If the tire pressure

monitor sensor becomes damaged it
may not function.

WARNING: 

Under-inflation is the

most common cause of tire failures and
may result in severe tire cracking, tread
separation or blowout, with unexpected
loss of vehicle control and increased risk
of injury. Under-inflation increases
sidewall flexing and rolling resistance,
resulting in heat buildup and internal
damage to the tire. It also may result in
unnecessary tire stress, irregular wear,
loss of vehicle control and accidents. A
tire can lose up to half of its air pressure
and not appear to be flat!

WARNING: 

To determine the

required pressure(s) for your vehicle, see
the Safety Compliance Certification
Label (on the door hinge pillar,
door-latch post or the door edge that
meets the door-latch post, next to the
driver seat) or the Tire Label on the
B-Pillar or the edge of the driver door.

Each tire, including the spare (if provided),
should be checked monthly when cold and
inflated to the inflation pressure
recommended by the vehicle manufacturer
on the vehicle placard or tire inflation
pressure label. (If your vehicle has tires of
a different size than the size indicated on
the vehicle placard or tire inflation pressure
label, you should determine the proper tire
inflation pressure for those tires).

As an added safety feature, your vehicle
has been equipped with a Tire Pressure
Monitoring System (TPMS) that
illuminates a low tire pressure telltale
when one or more of your tires is
significantly under-inflated. Accordingly,
when the low tire pressure telltale
illuminates, you should stop and check
your tires as soon as possible, and inflate
them to the proper pressure. Driving on a
significantly under-inflated tire causes the
tire to overheat and can lead to tire failure.
Under-inflation also reduces fuel efficiency
and tire tread life, and may affect the
vehicle’s handling and stopping ability.

Please note that the TPMS is not a
substitute for proper tire maintenance, and
it is the driver’s responsibility to maintain
correct tire pressure, even if under-inflation
has not reached the level to trigger
illumination of the TPMS low tire pressure
telltale.

Your vehicle has also been equipped with
a TPMS malfunction indicator to indicate
when the system is not operating properly.
The TPMS malfunction indicator is
combined with the low tire pressure
telltale. When the system detects a
malfunction, the telltale will flash for
approximately one minute and then remain
continuously illuminated. This sequence
will continue upon subsequent vehicle
start-ups as long as the malfunction exists.

426

Tire Pressure Monitoring System

 (If Equipped)

When the malfunction indicator is
illuminated, the system may not be able
to detect or signal low tire pressure as
intended. TPMS malfunctions may occur
for a variety of reasons, including the
installation of replacement or alternate
tires or wheels on the vehicle that prevent
the TPMS from functioning properly.
Always check the TPMS malfunction
telltale after replacing one or more tires or
wheels on your vehicle to ensure that the
replacement or alternate tires and wheels
allow the TPMS to continue to function
properly.

WARNING: 

Changes or

modifications not expressively approved
by the party responsible for compliance
could void the user's authority to operate
the equipment. The term "IC:" before the
radio certification number only signifies
that Industry Canada technical
specifications were met.

This device complies with Part 15 of the
FCC Rules and with License exempt RSS
Standards of Industry Canada. Operation
is subject to the following two conditions:

1.

This device may not cause harmful
interference, and

2. This device must accept any

interference received, including
interference that may cause undesired
operation.

TIRE PRESSURE MONITORING
SYSTEM PRECAUTIONS

WARNING: 

The tire pressure

monitoring system is not a substitute for
manually checking tire pressures. You
should periodically check tire pressures
using a pressure gauge. Failure to
correctly maintain tire pressures could
increase the risk of tire failure, loss of
control, vehicle rollover and personal
injury.

WARNING: 

Do not use the tire

pressure displayed in the information
display as a tire pressure gauge. Failure
to follow this instruction could result in
personal injury or death.

Note:

The use of tire sealants can damage

the tire pressure monitoring system.

TIRE PRESSURE MONITORING
SYSTEM LIMITATIONS

When the outside temperature drops
significantly, the tire pressure could
decrease and activate the low tire pressure
warning lamp.

The warning lamp could also illuminate
when you use a spare wheel, or tire sealant
from the inflator kit.

Note:

Regularly checking the vehicle tire

pressures can reduce the possibility for the
warning lamp to illuminate due to outside
air temperature changes.

Note:

After you inflate the tires to the

recommended pressure it could take up to
two minutes of driving over 20 mph
(32 km/h) for the warning indicator to turn
off.

427

Tire Pressure Monitoring System

 (If Equipped)

VIEWING THE TIRE
PRESSURES

E250820

To view the current tire pressures, use the
information display or touchscreen.

RESETTING TIRE PRESSURE
MONITORING SYSTEM

Tire Pressure Monitoring System
Reset Procedure

WARNING: 

To determine the

required pressure(s) for your vehicle, see
the Safety Compliance Certification
Label (on the door hinge pillar,
door-latch post or the door edge that
meets the door-latch post, next to the
driver seat) or the Tire Label on the
B-Pillar or the edge of the driver door.

You must reset the tire pressure monitoring
system after each tire rotation on vehicles
that require different recommended tire
pressures in the front tires as compared to
the rear tires.

Note:

To reduce the chances of interference

from another vehicle, perform the system
reset procedure at least three feet, one
meter, away from another vehicle
undergoing the system reset procedure at
the same time.

Note:

Do not wait more than two minutes

between resetting each tire sensor or the
system can time-out and you need to repeat
the entire procedure on all four wheels.

1.

Drive the vehicle above 20 mph
(32 km/h) for at least two minutes,
then park in a safe location where you
can easily get to all four tires and have
access to an air pump.

2. Switch the ignition off.

3. Switch the ignition on but do not start

the engine.

4. Switch the hazard flashers on then off

three times.

Note:

You must accomplish this within 10

seconds. If you successfully enter the reset
mode, the horn sounds once, the system
indicator flashes and a message shows in
the information display.

Note:

If the system does not enter reset

mode, try again starting at Step 2. If after
repeated attempts to enter the reset mode,
the horn does not sound, the system
indicator does not flash and no message
shows in the information display, contact
your authorized dealer.

5. Remove the valve cap from the valve

stem on the left front tire. Decrease the
air pressure until the horn sounds.

Note:

The single horn tone confirms that

the sensor identification code has been
learned by the module for this position. If
the horn sounds twice, the reset procedure
was unsuccessful, and you must repeat it.

6. Remove the valve cap from the valve

stem on the right front tire. Decrease
the air pressure until the horn sounds.

428

Tire Pressure Monitoring System

 (If Equipped)

7.

Repeat the previous step on the right
rear tire and then on the left rear tire.

8. Switch the ignition off.

Note:

If the horn sounds twice again after

switching the ignition off, and repeating the
procedure, contact your authorized dealer
and have your vehicle checked as soon as
possible.

9. Set all four tires to the recommended

air pressure as indicated on the Safety
Compliance Certification Label.

TIRE PRESSURE MONITORING
SYSTEM –
TROUBLESHOOTING

TIRE PRESSURE MONITORING
SYSTEM – WARNING LAMPS

The low tire pressure warning
lamp has combined functions,
as it warns you when your tires

need air, and when the system is no longer
capable of functioning as intended.

Action Required

Possible Cause

Warning Lamp

After inflating your tires to the manufac-
turer’s recommended pressure as shown
on the tire label, on the edge of driver
door or the B-pillar, drive your vehicle for
at least two minutes over 20 mph
(32 km/h) before the light turns off.

One or more tires are

significantly under

inflated

Solid warning lamp

Repair the damaged road wheel and tire
and refit it to your vehicle to restore
operation of the system.

Temporary spare wheel

in use

Solid warning lamp
or flashing warning

lamp

If the tires are inflated to the recom-
mended tire pressures and the temporary
spare wheel is not in use, the system
detected a fault that requires service.
Have your vehicle checked as soon as
possible.

Tire pressure monitoring

system malfunction

429

Tire Pressure Monitoring System

 (If Equipped)

TIRE PRESSURE MONITORING SYSTEM – INFORMATION MESSAGES

Action

Message

After inflating your tires to the manufacturer’s recommended

pressure as shown on the tire label, on the edge of the driver

door or the B-pillar, drive your vehicle for at least two minutes

over 20 mph (32 km/h) before the light turns off.

Tire Pressure Low

The system has detected a fault that requires service.  Have

your vehicle checked as soon as possible.

Tire Pressure Monitor

Fault

The system has detected a fault that requires service or a

spare tire is in use.  Have your vehicle checked as soon as

possible.

Tire Pressure Sensor

Fault

430

Tire Pressure Monitoring System

 (If Equipped)

CHANGING A FLAT TIRE - 3.5L
DURATEC/3.5L ECOBOOST™

WARNING: 

Failure to follow these

guidelines could result in an increased
risk of loss of vehicle control, injury or
death.

WARNING: 

Do not attempt to

change a tire on the side of the vehicle
close to moving traffic. Pull far enough
off the road to not obstruct the flow of
traffic and avoid the danger of being hit
when operating the jack or changing the
wheel.

WARNING: 

Switch the ignition off

and apply the parking brake. If your
vehicle has a manual transmission, shift
into first or reverse gear. If your vehicle
has an automatic transmission, shift into
park (P).

WARNING: 

Make sure that your

vehicle is on firm and level ground with
the front wheels pointing straight ahead
and set up a warning triangle if available.

WARNING: 

To help prevent your

vehicle from moving when changing a
wheel, use an appropriate block or wheel
chock to secure the wheel diagonally
opposite to the wheel being changed.
For example, when changing the front
left wheel, place an appropriate block or
wheel chock on the right rear wheel.

Make sure all passengers are out of your
vehicle.

Note:

: The use of tire sealants can damage

the tire pressure monitoring system.

Note:

The tire pressure monitoring system

indicator light illuminates when the spare
tire is in use. To restore the full function of
the monitoring system, all road wheels
equipped with tire pressure monitoring
sensors must be mounted on this vehicle.

Note:

If your vehicle has a tire pressure

monitoring system, the warning indicator
flashes if you fit the spare wheel to your
vehicle. To restore the correct operation of
the tire pressure monitoring system, you
must have the repaired road wheel and tire
assembly refitted to your vehicle.  See 

Tire

Pressure Monitoring System – Warning
Lamps

 (page 429).  To prevent damage

occurring to the tire pressure monitoring
system sensors, make sure you have the
damaged tire repaired or replaced by a tire
professional.

If the spare wheel is the same type and
size as your vehicle road wheel, you can fit
the spare wheel and continue to drive in
the normal manner.

If the spare wheel is not the same type and
size as your vehicle road wheel, it has a
label showing the maximum driving speed
limit.

The spare wheel is under the rear of your
vehicle.

Locking Lug Nuts

 (If Equipped)

You can obtain replacement locking lug
nuts or a locking lug nut key using the
reference number certificate.

The locking lug nut key is located in the
glove box or in the storage compartment
in the front right-hand side stepwell.

431

Changing a Road Wheel

Van, Bus or Wagon

E145138

1.

Open the rear doors and remove the
grommet.

E358083

2. Insert the square end of the wheel

brace or the short arm of the jack
handle into the socket. Turn
counterclockwise until the spare wheel
rests on the ground and the cable is
loose.

E146811

3. Raise the cable end cover.

E146812

1

2

4. Rotate the cable through 90 degrees.

Slide the cable through the slot to
release the spare wheel bracket from
the winch.

432

Changing a Road Wheel

E146813

5. Remove the retaining nut to release

the spare wheel bracket.

6. Leave the cable extended. You need

to use it to stow the flat wheel and tire
assembly.

Note:

 Do not raise the spare wheel bracket

without a wheel attached.  Damage to the
winch mechanism could occur.

Chassis Cab and Cutaway

E358084

1.

Insert the square end of the wheel
brace or the short arm of the jack
handle into the socket. Turn
counterclockwise until the spare wheel
rests on the ground and the cable is
loose.

E146811

2. Raise the cable end cover.

E146812

1

2

3. Rotate the cable through 90 degrees.

Slide the cable through the slot to
release the spare wheel bracket from
the winch.

433

Changing a Road Wheel

E146813

4. Remove the retaining nut to release

the spare wheel bracket.

5. Leave the cable extended. You need

to use it to stow the flat wheel and tire
assembly.

Note:

 Do not raise the spare wheel bracket

without a wheel attached.  Damage to the
winch mechanism could occur.

Vehicle Jack

WARNING: 

Only use the jack

provided as original equipment with your
vehicle.

WARNING: 

The jack supplied with

this vehicle is only intended for changing
a flat tire in an emergency. Do not
attempt to do any other work on your
vehicle when it is supported by the jack,
as your vehicle could slip off the jack.
Failure to follow this instruction could
result in personal injury or death.

WARNING: 

Switch off the running

boards before jacking or placing any
object under your vehicle. Never place
your hand between the extended running
board and your vehicle. A moving running
board may cause injury.

WARNING: 

Never place anything

between the vehicle jack and your
vehicle.

WARNING: 

Never place anything

between the vehicle jack and the ground.

WARNING: 

Do not get under a

vehicle that is supported by a jack.

E166722

434

Changing a Road Wheel

Vehicle Jack Storage

E358085

The jack, jack handle and wheel brace are
in a storage compartment in the front
right-hand side stepwell.

Note:

The vehicle jack is in the load space

area on vehicles with rear climate control.

E297495

1.

Assemble the jack handle.

2. Insert the jack handle into the jack.

3. Insert the end of the jack handle into

the wheel brace and rotate clockwise
to raise your vehicle.

Front Jacking Points

WARNING: 

Only use the specified

jacking points. If you use any other
locations you could damage vehicle
components, such as brake lines.

WARNING: 

No person should place

any portion of their body under a vehicle
that is supported by a jack.

Note:

If your vehicle has rear air

conditioning make sure the vehicle jack does
not come in contact with the air conditioning
lines.

435

Changing a Road Wheel

E358086

Position the head of the vehicle jack under
the protrusions at the rear of front
sub-frame.

Rear Jacking Points

WARNING: 

Only use the specified

jacking points. If you use any other
locations you could damage vehicle
components, such as brake lines.

WARNING: 

No person should place

any portion of their body under a vehicle
that is supported by a jack.

E358087

Position the head of the vehicle jack under
the rear axle.

Removing a Wheel Trim

 (If Equipped)

Vehicles With Steel Wheels

1.

Insert the flat end of the lug wrench
between the wheel rim and the wheel
trim.

2. Carefully remove the wheel trim.

436

Changing a Road Wheel


Content      ..     24      25      26      27     ..