Ford Falcon. Manual - part 27
204-01-15 Front
Suspension 204-01-15
REMOVAL AND INSTALLATION (Continued)
Installation
Spring and/or Shock Absorber
1. Ensure that the bumpstop, washer and dirtshield
Assembly
fitted are correctly fitted onto the shock absorber;
compress the spring in the spring compressor and
Removal
assemble the shock absorber into it.
1. Remove the coolant bottle or the air cleaner box
2. Set the stop of the shock absorber spring seat,
depending upon which side is to be removed.
against the spring lower end, fit the upper spring
seat insulator and rotate it’s stop against the
upper end of the spring. Fit the spring cap with
any of the three studs at the specified angle
relative to the centre line of the shock absorber
assembly to lower control arm mounting bolt
(lower spring seat stop end).
3. Assemble the dual path shear mount and nut onto
the shock absorber piston rod.
4. Partly release the spring compressor and torque
the nut to specification whilst preventing the
spring cap from rotating by use of a soft lever (eg:
piece of wood) against two of the three studs.
5. Fully release the spring compressor.
6. Install the shock absorber/spring assembly into
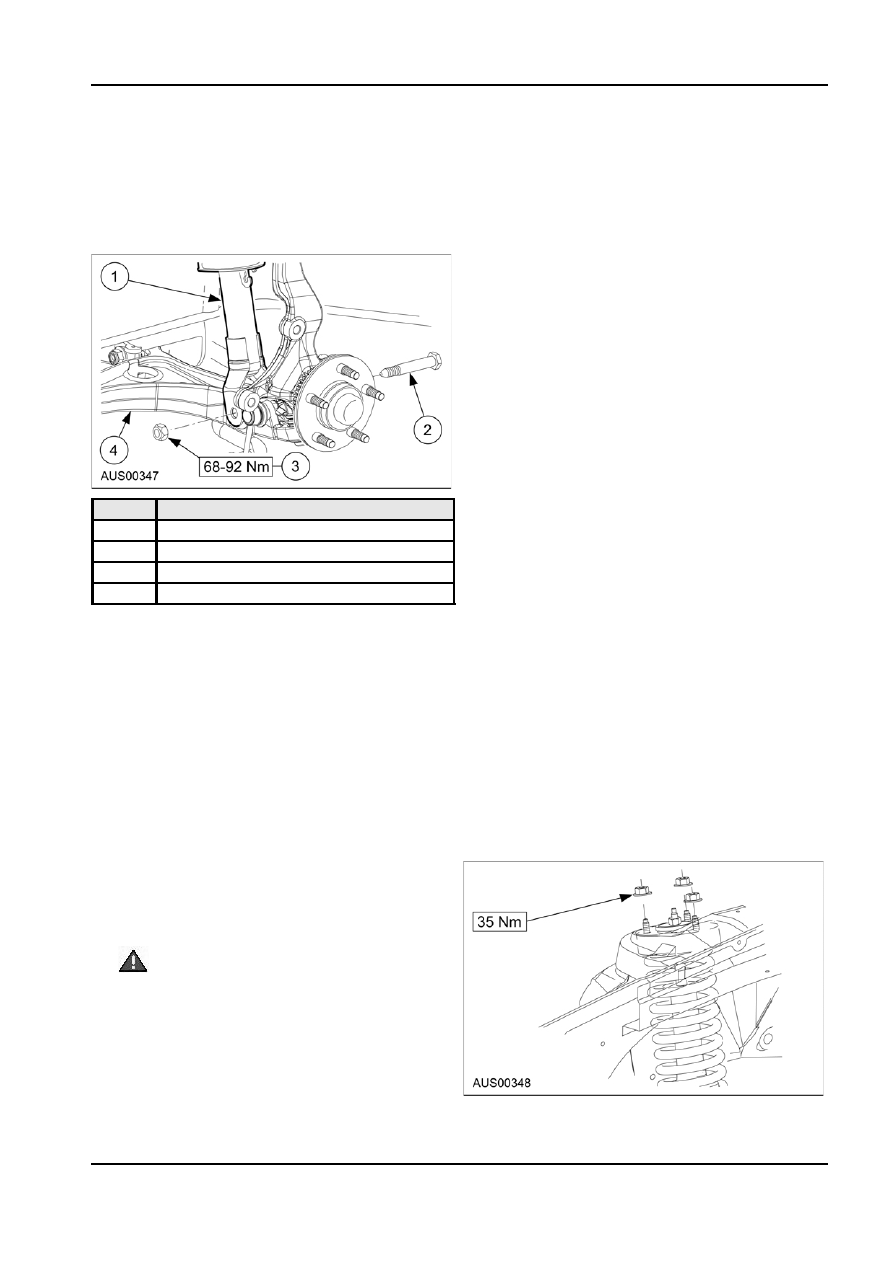
Item
Description
the vehicle. The lower spring tail is to be to the
1
Shock Absorber Ftr
front on LHS and to the rear on RHS. Take care
2
Bolt Hex Hd M14
not to damage boot of the lower ball joint, or the
ABS wire (where fitted) and loosly fit one of the
3
Nut M14
nuts supporting the assembly to suspension
4
Arm Assy Frt Susp Lwr
tower.
2. Remove the two of the three nuts securing the
7. Fit the shock absorber lower mounting bolt and
shock absorber/sprlng assembly to the
loosely fit the nut.
suspension tower and loosen the third nut.
NOTE: Bolt thread must point towards the front of
3. Raise the vehicle - supporting it under the body
the vehicle.
rails.
8. Fit the upper ball joint stud to the spindle; fit the
4. Remove the wheel and separate the upper ball
clamp bolt and nut. torque the nut.
joint stud from the spindle.
9. Fit the two remaining nuts securing the upper
5. Remove the shock absorber lower mounting bolt.
spring seat cap to the tower.
6. Remove the third nut supporting the shock
10. Fit the wheel.
absorber/spring assembly to the suspension
11. With the vehicle weight on it’s wheels, torque the
tower, gently ease down the lower arm and
shock absorber lower mounting hardware and the
remove the assembly, taking care to ensure that
three nuts on the suspension tower, to
the shock absorber lower brackets do not damage
specification.
the dust boot of the lower ball joint. Also take care
not to damage the ABS wire (where fitted).
7. Install the shock absorber/spring assembly onto
the spring compressor and compress the spring to
relieve the tension from the shock absorber piston
rod.
WARNING: Do not attempt to separate the
spring from the shock absorber until the
spring is restrained by the use of a spring
compressor.
8. Remove the nut, dual path shear mount and
spring seat insulator from the shock absorber
piston rod and withdraw the shock absorber.
9. Release the tension from the spring if the spring
is to be changed.
G48703 en