Ford Focus RS (2011 year). Instruction - part 129
Quarter Panel LH — 3-Door
1. Replacement parts
• Quarter panel
Removal
1. General notes
• Necessary removal work: door, weatherstrip,
side window, rear seat, wheelhouse trim
panel, rear lamp, rear bumper, quarter panel
trim.
• Move the carpeting and the wiring away from
the working area.
• Depending on the extent of the damage, the
forced air extraction gusset should also be
replaced.
2. NOTE: If the B-pillar is also being renewed,
the cut in the area of the upper B-pillar must
be made according to dimensions.
Otherwise, this cut can be varied according
to damage.
Quarter panel (B-pillar)
• Cut point.
E56540
60 mm
3. NOTE: When making the cut on the rocker
panel, bear in mind the length of the
replacement part.
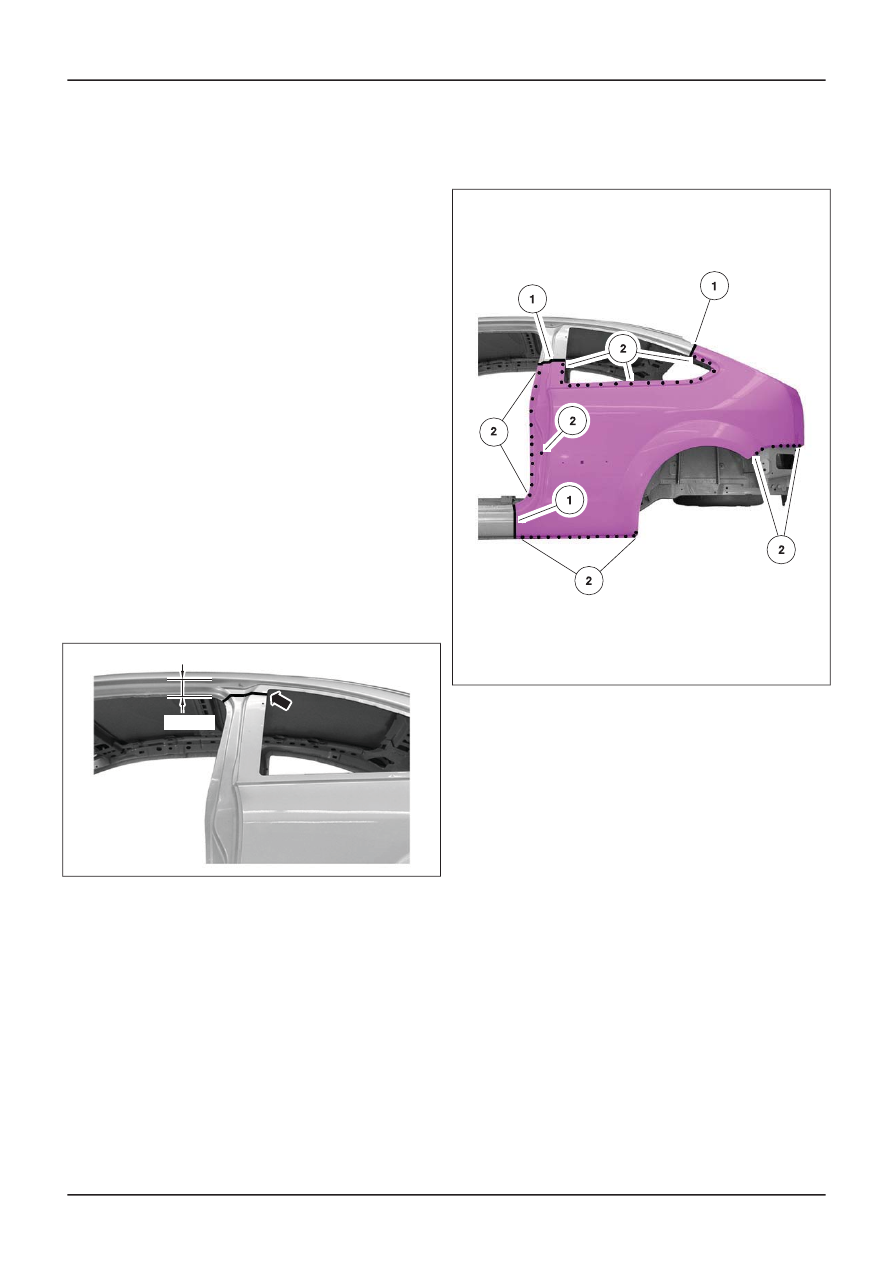
Quarter panel
1. Cut locations.
2. Mill out the spot welds.
E56541
4. Quarter panel
1. Grind down one panel thickness at the wheel
arch edge.
G450969en
501-30-
4
Rear End Sheet Metal Repairs
501-30-
4
REMOVAL AND INSTALLATION