Dodge Durango (2022 year). Manual in english - page 7
 

  Index      Manuals     Dodge Durango (2022 year). Manual in english


Search            copyright infringement  


Content      ..     5      6      7      8     ..


Dodge Durango (2022 year). Manual in english - page 7


106

STARTING AND OPERATING


In the event of a mismatch between the gear 

selector position and the actual transmission 

gear (for example, driver selects PARK while 

driving), the position indicator will blink continu

-

ously until the selector is returned to the proper 

position, or the requested shift can be 

completed.

The electronically controlled transmission adapts 

its shift schedule based on driver inputs, along 

with environmental and road conditions.
Only shift from DRIVE to PARK or REVERSE when 

the accelerator pedal is released and the vehicle is 

stopped. Be sure to keep your foot on the brake 

pedal when shifting between these gears.
The transmission gear selector provides PARK, 

REVERSE, NEUTRAL, DRIVE, and MANUAL 

(AutoStick) shift positions. Manual shifts can be 

made using the AutoStick shift control. Toggling 

the gear selector forward (-) or rearward (+) while 

in the MANUAL (AutoStick) position (beside the 

DRIVE position), or tapping the paddle

shifters (+/-) (if equipped) will manually select

the transmission gear, and will display the current 

gear in the instrument cluster  

Ú

page 108.

Transmission Gear Selector

NOTE:

If the gear selector cannot be moved to the

PARK, REVERSE, or NEUTRAL position (when 

pushed forward) it is probably in the MANUAL 

(AutoStick, +/-) position (beside the DRIVE 

position). In MANUAL (AutoStick) mode, the trans

-

mission gear is displayed in the instrument cluster 

(as 1, 2, 3, etc.). Move the gear selector to the right 

(into the DRIVE [D] position) for access to PARK, 

REVERSE, and NEUTRAL.

Gear Ranges 

Do not press the accelerator pedal when shifting 

out of PARK (P) or NEUTRAL (N).
NOTE:

After selecting any gear range, wait a moment to 

allow the selected gear to engage before acceler

-

ating. This is especially important when the engine 

is cold.

PARK (P)

This range supplements the parking brake by 

locking the transmission. The engine can be 

started in this range. Never attempt to use PARK 

while the vehicle is in motion. Apply the parking 

brake when exiting the vehicle in this range.
When parking on a hill, apply the parking brake 

before shifting the transmission to PARK. As an 

added precaution, turn the front wheels toward the 

curb on a downhill grade and away from the curb 

on an uphill grade.
NOTE:

On vehicles equipped with the electronically 

shifted transfer case, ensure that the transfer case 

is in AWD AUTO or LOW RANGE position on the 

AWD Control Switch. Ensure that the NEUTRAL 

position light is NOT illuminated.

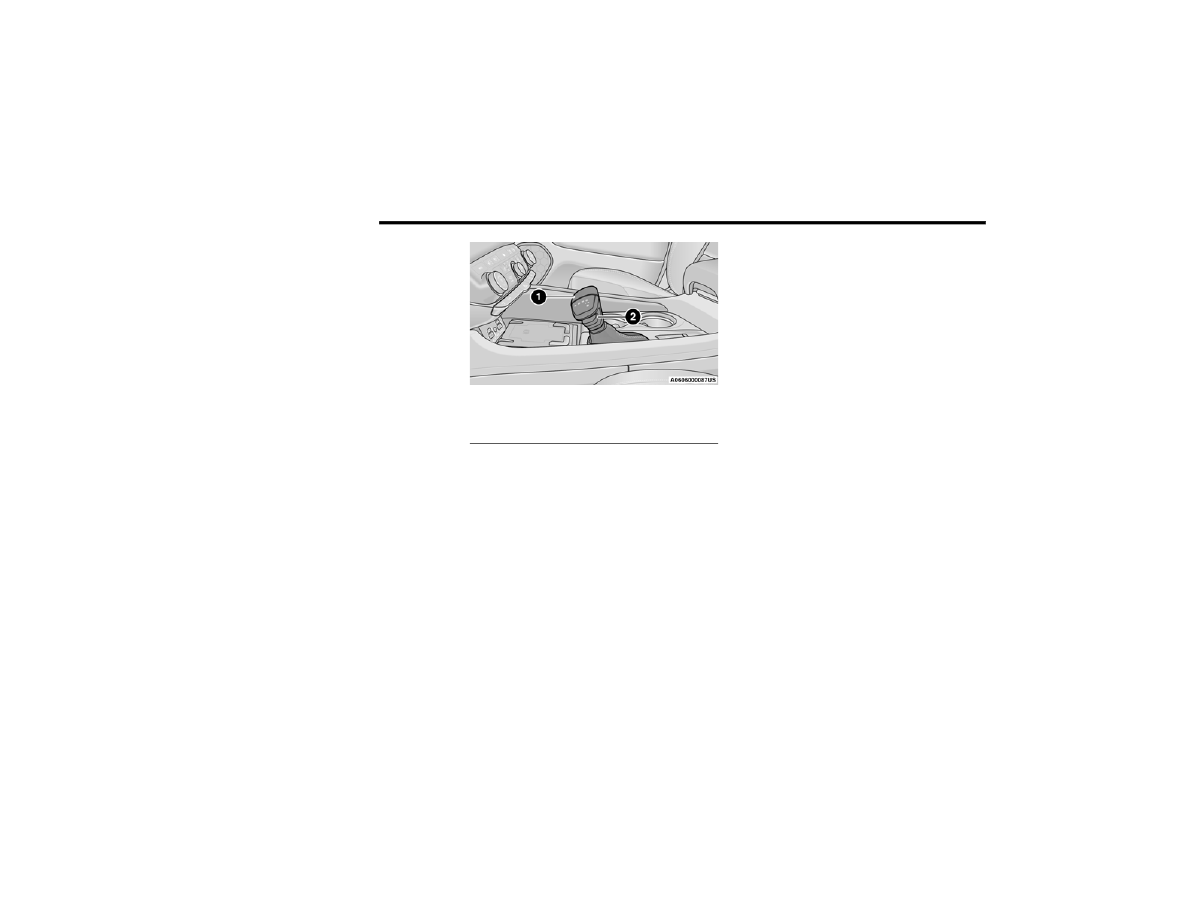
1 — Gear Selector
2 — Lock Button

STARTING AND OPERATING

107

When exiting the vehicle, always:

Apply the parking brake.

Shift the transmission into PARK.

Turn the ignition OFF.

Remove the key fob from the vehicle.

The following indicators should be used to ensure 

that you have properly engaged the transmission 

into the PARK position:

When shifting into PARK, push the lock button 

on the gear selector and firmly move the 

selector all the way forward until it stops and is 

fully seated.

Look at the transmission gear position display 

and verify that it indicates the PARK position (P), 

and is not blinking.

With brake pedal released, verify that the gear 

selector will not move out of PARK.

REVERSE (R)

This range is for moving the vehicle backward. 

Shift into REVERSE only after the vehicle has come 

to a complete stop.

NEUTRAL (N)

Use this range when the vehicle is standing for 

prolonged periods with the engine running. Apply 

the parking brake and shift the transmission into 

PARK (P) if you must exit the vehicle.

DRIVE (D)

This range should be used for most city and 

highway driving. It provides the smoothest upshifts 

and downshifts, and the best fuel economy. The 

transmission automatically upshifts through all 

forward gears.
When frequent transmission shifting occurs (such 

as when operating the vehicle under heavy loading 

conditions, in hilly terrain, traveling into strong 

head winds, or while towing a heavy trailer), use 

the AutoStick shift control to select a lower gear  

Ú

page 108. Under these conditions, using a lower 

gear will improve performance and extend 

transmission life by reducing excessive shifting 

and heat buildup.
During cold temperatures, transmission operation 

may be modified depending on engine and 

transmission temperature as well as vehicle 

speed. This feature improves warm up time of the 

engine and transmission to achieve maximum 

efficiency. Engagement of the torque converter 

clutch is inhibited until the transmission fluid is 

warm. Normal operation will resume once the 

transmission temperature has risen to a suitable 

level.

CAUTION!

Before moving the transmission gear selector 

out of PARK, you must start the engine, and 

also press the brake pedal. Otherwise, 

damage to the gear selector could result.

DO NOT race the engine when shifting from 

PARK or NEUTRAL into another gear range, as 

this can damage the drivetrain.

WARNING!

Do not coast in NEUTRAL and never turn off the 

ignition to coast down a hill. These are unsafe 

practices that limit your response to changing 

traffic or road conditions. You might lose control 

of the vehicle and have a collision.

CAUTION!

Towing the vehicle, coasting, or driving for any 

other reason with the transmission in NEUTRAL 

can cause severe transmission damage.
For Recreational Towing  

Ú

page 149.

For Towing A Disabled Vehicle  

Ú

page 253.

4

108

STARTING AND OPERATING


Manual (M)
The MANUAL (M, +/-) position (beside the DRIVE 

position) enables full manual control of 

transmission shifting (also known as AutoStick 

mode  

Ú

page 108). Toggling the gear selector 

forward (-) or rearward (+) while in the MANUAL 

(AutoStick) position will manually select the 

transmission gear, and will display the current gear 

in the instrument cluster as 1, 2, 3, etc.

Transmission Limp Home Mode

Transmission function is monitored electronically 

for abnormal conditions. If a condition is detected 

that could result in transmission damage, 

Transmission Limp Home Mode is activated. In this 

mode, the transmission may operate only in 

certain gears, or may not shift at all. Vehicle 

performance may be severely degraded and the 

engine may stall. In some situations, the 

transmission may not re-engage if the engine is 

turned off and restarted. The Malfunction Indicator 

Light (MIL) may be illuminated. A message in the 

instrument cluster will inform the driver of the 

more serious conditions, and indicate what actions 

may be necessary.
In the event of a momentary problem, the 

transmission can be reset to regain all forward 

gears by performing the following steps:

NOTE:

In cases where the instrument cluster message 

indicates the transmission may not re-engage after 

engine shutdown, perform this procedure only in a 

desired location (preferably, at an authorized 

dealer):
1. Stop the vehicle.
2. Shift the transmission into PARK (P), if 

possible. If not, shift the transmission to 

NEUTRAL (N).

3. Push and hold the ignition switch until the 

engine turns off.

4. Wait approximately 30 seconds.
5. Restart the engine.
6. Shift into the desired gear range. If the 

problem is no longer detected, the 

transmission will return to normal operation.

NOTE:

Even if the transmission can be reset, we 

recommend that you visit an authorized dealer at 

your earliest possible convenience. An authorized 

dealer has diagnostic equipment to assess the 

condition of your transmission. If the transmission 

cannot be reset, authorized dealer service is 

required.

AutoStick — If Equipped

AutoStick is a driver-interactive transmission 

feature providing manual shift control, giving you 

more control of the vehicle. AutoStick allows you to 

maximize engine braking, eliminate undesirable 

upshifts and downshifts, and improve overall 

vehicle performance. This feature can also provide 

you with more control during passing, city driving, 

cold slippery conditions, mountain driving, trailer 

towing, and many other situations.
Operation
In AutoStick mode, you can use the gear selector 

(in the MANUAL position), or the paddle shifters to 

the MANUAL (M) position (beside the DRIVE (D) 

position), or tap one of the paddle shifters on the 

steering wheel. Tapping the (-) paddle shifter to 

enter AutoStick mode will downshift the 

transmission to the next lower gear, while 

tapping (+) to enter AutoStick mode will retain the 

current gear. The current transmission gear will be 

displayed in the instrument cluster.
NOTE:

The paddle shifters (if equipped) may be disabled 

using the Uconnect Personal Settings.

STARTING AND OPERATING

109

AutoStick mode has the following operational 

benefits:

The transmission will automatically downshift 

as the vehicle slows (to prevent engine lugging) 

and will display the current gear.

The transmission will automatically downshift to 

FIRST gear when coming to a stop. After a stop, 

the driver should manually upshift (+) the trans

-

mission as the vehicle is accelerated.

You can start out, from a stop, in FIRST or 

SECOND gear. Tapping (+) at a stop will allow 

starting in SECOND gear. Starting out in 

SECOND gear can be helpful in snowy or icy 

conditions.

If a requested downshift would cause the 

engine to over-speed, that shift will not occur.

The system will ignore attempts to upshift at too 

low of a vehicle speed.

Holding the (-) paddle pressed, or holding the 

gear selector in the (-) position, will downshift 

the transmission to the lowest gear possible at 

the current speed.

Transmission shifting will be more noticeable 

when AutoStick is enabled.

The system may revert to automatic shift mode 

if a fault or overheat condition is detected.

To disengage AutoStick mode, return the gear 

selector to the DRIVE (D) position, or press and 

hold the (+) paddle shifter until "D" is indicated in 

the instrument cluster. You can shift in or out of 

AutoStick mode at any time without taking your 

foot off the accelerator pedal.

SPORT MODE — IF EQUIPPED

Your vehicle is equipped with a SPORT Mode 

feature. The engine, transmission, and steering 

systems are all set to their SPORT settings. SPORT 

Mode will provide improved throttle response and 

modified transmission shift points for an enhanced 

driving experience, as well as greater amount of 

steering feel. This mode may be activated and 

deactivated by pushing the SPORT button on the 

instrument panel switch bank.

ALL-WHEEL DRIVE OPERATION

S

INGLE

-S

PEED

 O

PERATING


I

NSTRUCTIONS

/P

RECAUTIONS

 — 

I

F

 E

QUIPPED


This system contains a single-speed (HI range only) 

transfer case, which provides convenient full-time 

All-Wheel Drive (AWD). No driver interaction is 

required. The Brake Traction Control (BTC) System, 

which combines standard ABS and Traction 

Control, provides resistance to any wheel that is 

slipping to allow additional torque transfer to 

wheels with traction.
NOTE:

This system is not appropriate for conditions where 

AWD LOW is recommended  

Ú

page 153.

E

LECTRONICALLY

 S

HIFTED

 T

RANSFER


C

ASE

 — I

F

 E

QUIPPED

This is an electronically shifted transfer case and it 

is operated by the AWD control switch, which is 

located on the center console.

WARNING!

Do not downshift for additional engine braking 

on a slippery surface. The drive wheels could 

lose their grip and the vehicle could skid, 

causing a collision or personal injury.

4

110

STARTING AND OPERATING


AWD Control Switch

This electronically shifted transfer case provides 

three positions:

All-wheel drive auto range (AWD AUTO)

All-wheel drive low range (AWD LOW)

N (Neutral)

When additional traction is required, the transfer 

case AWD LOW position can be used to lock the 

front and rear driveshafts together forcing the front 

and rear wheels to rotate at the same speed. This 

is accomplished by pushing the AWD LOW switch  

Ú

page 111. The AWD LOW position is designed for 

loose, slippery road surfaces only. Driving in the 

AWD LOW position on dry, hard surfaced roads 

may cause increased tire wear and damage to the 

driveline components.

Transfer Case Position Indicator Messages

The Transfer Case Position Indicator message 

(AWD LOW) is located in the instrument cluster and 

indicate the current and desired transfer case 

selection  

Ú

page 81. When you select a different 

transfer case position, the position indicator lights 

will do the following:
If All Shift Conditions Are Met:
1. The current position indicator light will 

turn off.

2. The selected position indicator light will flash 

until the transfer case completes the shift.

3. When the shift is complete, the indicator light 

for the selected position will stop flashing and 

remain on.

If shift conditions are not met, one or more of the 

following events may occur:
1. The indicator light for the current position will 

remain on.

2. The newly selected position indicator light will 

continue to flash.

3. The transfer case will not shift.

NOTE:

Before retrying a selection, make certain that all 

the necessary requirements for selecting a new 

transfer case position have been met  

Ú

page 111.

The SERV AWD Warning Light monitors the 

electronic shift all-wheel drive system. If this light 

remains on after engine start-up or illuminates 

during driving, it means that the all-wheel drive 

system is not functioning properly and that service 

is required.

NOTE:

Do not attempt to make a shift while only the front 

or rear wheels are spinning. This could cause 

damage to driveline components.
When operating your vehicle in AWD LOW, the 

engine speed is approximately three times that of 

the AWD AUTO position at a given road speed. Take 

care not to overspeed the engine and do not 

exceed 25 mph (40 km/h).

WARNING!

Always engage the parking brake when powering 

down the vehicle if the “SERV AWD” Warning 

Light is illuminated. Not engaging the parking 

brake may allow the vehicle to roll which may 

cause personal injury.

STARTING AND OPERATING

111

Proper operation of all-wheel drive vehicles 

depends on tires of equal size, type and 

circumference on each wheel. Any difference in 

tire size can cause damage to the transfer case.
Because all-wheel drive provides improved 

traction, there is a tendency to exceed safe turning 

and stopping speeds. Do not go faster than road 

conditions permit.
For additional information on the appropriate use 

of each transfer case position, see the information 

below:
AWD LOW
All-Wheel Drive Low Range – This range provides 

low speed all-wheel drive. Locks the front and rear 

driveshafts together forcing the front and rear 

wheels to rotate at the same speed. Additional 

traction and maximum pulling power for loose, 

slippery road surfaces only. Do not exceed 25 mph 

(40 km/h).
N (Neutral)
This range disengages both the front and rear 

driveshafts from the powertrain. To be used for flat 

towing behind another vehicle  

Ú

page 149.

S

HIFTING

 P

ROCEDURE

NOTE:

If any of the requirements to select a new 

transfer case position have not been met, the 

transfer case will not shift. The position indi

-

cator light for the previous position will remain 

on and the newly selected position indicator 

light will continue to flash until all the require

-

ments for the selected position have been met. 

To retry a shift: return the control switch back to 

the original position, make certain all shift 

requirements have been met, wait five seconds 

and try the shift again.

If all the requirements to select a new transfer 

case position have been met, the current posi

-

tion indicator light will turn off, the selected posi

-

tion indicator light will flash until the transfer 

case completes the shift. When the shift is 

complete, the position indicator light for the 

selected position will stop flashing and remain 

on.

AWD AUTO To AWD LOW

NOTE:

When shifting into or out of AWD LOW some gear 

noise may be heard. This noise is normal and is not 

detrimental to the vehicle or occupants.
Shifting can be performed with the vehicle rolling 

2 to 3 mph (3 to 5 km/h) or completely stopped. 

Use either of the following procedures:
Preferred Procedure
1. With the engine running, slow the vehicle to 

2 to 3 mph (3 to 5 km/h).

2. Shift the transmission into NEUTRAL.
3. While still rolling, push the AWD LOW control 

switch.

4. After the AWD LOW position indicator light is on 

(not flashing), shift the transmission back into 

gear.

WARNING!

You or others could be injured or killed if you 

leave the vehicle unattended with the transfer 

case in the N (Neutral) position without first fully 

engaging the parking brake. The transfer case N 

(Neutral) position disengages both the front and 

rear drive shafts from the powertrain and will 

allow the vehicle to roll, even if the transmission 

is in PARK. The parking brake should always be 

applied when the driver is not in the vehicle.

4

112

STARTING AND OPERATING


Alternate Procedure
1. Bring the vehicle to complete stop.
2. With the ignition in ON/RUN position and 

engine running, shift the transmission to 

NEUTRAL.

3. Push the AWD LOW control switch.
4. After the AWD LOW position indicator light is

on (not flashing), shift the transmission back 

into gear.

NOTE:

If steps 1 or 2 of either the “Preferred” or

“Alternate Procedure” are not satisfied prior to 

attempting the shift or if they no longer are 

being met while the shift attempt is in process, 

the desired position indicator light will flash 

continuously while the original position indicator 

light is on, until all requirements have been met.

The ignition switch must be in the ON/RUN posi

-

tion for a shift to take place and for the position 

indicator lights to be operable. If the ignition 

switch is not in the ON/RUN position, then the 

shift will not take place and no position indicator 

lights will be on or flashing.

N (Neutral) Shift Procedure

For information regarding the transfer case N 

(Neutral) shift procedure  

Ú

page 151.

TOW N GO — IF EQUIPPED

Tow N Go combines the capabilities of the vehicle 

control systems, along with driver input, to provide 

optimum performance for road conditions.
Push any one of the four drive mode buttons to 

select the desired mode.

Drive Mode Buttons

Tow N Go consists of the following positions:

TRACK – Optimizes settings for transmission, 

engine, driveline, and suspension in order to 

maximize vehicle performance. Also the electric 

power steering offers more feedback of the tire 

gripping the road. This feature will reset to AUTO 

upon an ignition cycle. To turn off Electronic 

Stability Control (ESC)  

Ú

page 185.

SPORT – Dry weather, on-road calibration. 

Performance based tuning that provides a 

rear-wheel drive feel but with improved handling 

and acceleration over a two-wheel drive vehicle. 

This feature will reset to AUTO upon an ignition 

cycle.

TOW – TOW drive mode also optimizes the 

transmission shifting for towing, as well as maxi

-

mizing straight line traction by optimizing drive

-

line settings on AWD system. Use this mode for 

towing/hauling. Vehicle suspension will go to 

SPORT mode. Trailer Sway Control (TSC) is 

always enabled in all drive modes provided that 

the ESC OFF indicator light is not illuminated. 

TSC is disabled when the ESC OFF lamp is illumi

-

nated. This feature will reset to AUTO upon an 

ignition cycle.

SNOW – Tuning set for additional stability in 

inclement weather. Use on and off-road on 

loose traction surfaces such as snow. This 

feature will reset to AUTO upon an ignition cycle.

1 — TRACK
2 — SPORT
3 — TOW
4 — SNOW

STARTING AND OPERATING

113

G

UIDELINES

 F

OR

 T

RACK

 U

SE

NOTE:

The standard Black Brembo Brake Pads are not 

recommended for track use. Only the Red Brembo 

Performance calipers are appropriate for track 

use.

If your vehicle is equipped with Drive Modes, 

they will alter the vehicle’s performance in 

various driving situations. It is recommended 

that your vehicle operates in SPORT or TRACK 

modes during the track event.

Prior to each track event, verify all fluids are at 

the correct levels.

Prior to each track event, verify the front and 

rear brake pads have more than half pad thick

-

ness remaining. If the brake pads require 

changing, complete a brake burnish procedure 

prior to track outing at full pace.

NOTE:

Use of DOT 4 brake fluid is suggested for extended 

track usage due to increased thermal capacity.

At the conclusion of each track event, it is 

recommended that a brake bleed procedure is 

performed to maintain the pedal feel and stop

-

ping capability of your Brembo High Perfor

-

mance brake system.

It is recommended that each track outing 

should end with a minimum of one cooldown lap 

using minimal braking.

It is recommended that the suspension system, 

brake system, prop shaft, and half shaft boots 

be checked for wear or damage after every track 

event.

Track usage results in increased operating 

temperatures of the engine, transmission, drive

-

line and brake system. This may affect Noise 

Vibration Harshness (NVH) countermeasures 

designed into your vehicle. New components 

may need to be installed to return the system to 

the original NVH performance.

Tire pressure:

Recommended tire pressure of 33 psi 

(230 kPa) when tires are cold, or below 

42 psi (290 kPa) when hot.

NOTE:

It is recommended that you target below 42 psi 

(290 kPa) when tires are hot at the conclusion of 

each track session. Starting at 33 psi (230 kPa) 

cold and adjusting based on ambient and track 

conditions is recommended. Tire pressure can be 

monitored via the instrument cluster display and 

can assist with adjustments.
Track burnishing your brakes
To avoid “green lining fade” during track use, the 

brake pads and rotors must have a thermal 

burnish for factory-installed components or when 

new brake friction components are installed:

1. Use one track session to burnish brakes by 

driving at 75% speed. Brake at approximately 

0.60 - 0.80g max without Anti-Lock Brake 

System (ABS) intervention.

2. Complete one lap in this manner until you start 

smelling the brakes. Continue for another half 

lap at speed, then complete a two lap 

cooldown with minimal brake applications. 

Ensure the brakes are not smoking. If they are, 

complete another cooldown lap.

3. Getting the brakes to smoke is an indication 

that the brakes have overheated and may 

negatively affect future track usage.

4. Allow vehicle to sit and cool for at least 

30 minutes. If an infrared thermal gun is 

available, allow rotors to cool to 200°F 

(93.3°C) before returning to the track.

5. There should be a thin layer of ash when 

inspecting the brake pads. Having the ash 

layer go more than half the thickness of the 

pad material is a sign of an overly aggressive 

burnish.

6. Occasionally, a second burnish session is 

required. If the brake pads begin to emit an 

odor during the next track session, reduce 

vehicle speed and braking deceleration rate to 

burnish targets and follow steps 2-4.

4

114

STARTING AND OPERATING


7. New brake pads installed on old rotors require 

a burnish. New rotors installed with old brake 

pads should be burnished at the track or 

driven for 300 miles (485 km) of city driving to 

develop an adequate lining transfer layer on 

the rotor surface prior to track use.

8. Rotors that pulsate during track use should be 

replaced.

NOTE:

Resurfacing of the rotors is not recommended, as 

it removes mass from the rotor, reducing its 

thermal capacity. Resurfacing also thins the rotor 

cheek, making it less robust and increasing the 

likelihood of pulsation in further track use.

FUEL SAVER TECHNOLOGY 5.7L ONLY —

IF EQUIPPED

This feature offers improved fuel economy by 

shutting off four of the engine's eight cylinders 

during light load and cruise conditions. The system 

is automatic with no driver inputs.
NOTE:

This system may take some time to return to full 

functionality after a battery disconnect.

POWER STEERING

The electric power steering system will provide 

increased vehicle response and ease of 

maneuverability. The power steering system 

adapts to different driving conditions and adjusts 

accordingly.

Alternate electric power steering efforts can be 

selected through the Uconnect System  

Ú

page 156.

If the Electric Power Steering warning icon is 

displayed and the “SERVICE POWER STEERING” or 

the “POWER STEERING ASSIST OFF – SERVICE 

SYSTEM” message is displayed within the 

instrument cluster display, this indicates the 

vehicle needs to be taken to the dealer for service  

Ú

page 89.

NOTE:

Even if the power steering assistance is no 

longer operational, it is still possible to steer the 

vehicle. Under these conditions there will be a 

substantial increase in steering effort, espe

-

cially at low speeds and during parking maneu

-

vers.

If the condition persists, see an authorized 

dealer for service.

If the Steering icon is displayed and the “POWER 

STEERING SYSTEM OVER TEMP” message is 

displayed on the instrument cluster screen, this 

indicates an over temperature condition in the 

power steering system. Once driving conditions are 

safe, pull over and let the vehicle idle for a few 

moments until the icon and message turn off.

STOP/START SYSTEM — IF EQUIPPED

The Stop/Start function is developed to reduce 

fuel consumption. The system will stop the engine 

automatically during a vehicle stop if the required 

conditions are met. Releasing the brake pedal or 

pressing the accelerator pedal will automatically 

re-start the engine.
This vehicle has been upgraded with a heavy duty 

starter, enhanced battery, and other upgraded 

engine parts, to handle the additional engine 

starts.

WARNING!

Continued operation with reduced assist could 

pose a safety risk to yourself and others. Service 

should be obtained as soon as possible.

STARTING AND OPERATING

115

A

UTOSTOP

 M

ODE

The Stop/Start feature is enabled after every 

normal customer engine start. At that time, the 

system will go into STOP/START READY.
To Activate The Autostop Mode, The Following 

Must Occur:

The system must be in STOP/START READY 

state. A STOP/START READY message will be 

displayed in the instrument cluster display 

within the Stop/Start section  

Ú

page 81.

The vehicle must be completely stopped.

The gear selector must be in a forward gear and 

the brake pedal pressed.

The engine will shut down, the tachometer will 

move to the zero position and the Stop/Start 

telltale will illuminate indicating you are in 

Autostop. Customer settings will be maintained 

upon return to an engine running condition.

P

OSSIBLE

 R

EASONS

 T

HE

 E

NGINE

 D

OES


N

OT

 A

UTOSTOP

Prior to engine shut down, the system will check 

many safety and comfort conditions to see if they 

are fulfilled. Detailed information about the 

operation of the Stop/Start system may be viewed 

in the instrument cluster display Stop/Start 

Screen. In the following situations, the engine will 

not stop:

Driver’s seat belt is not buckled.

Driver’s door is not closed.

Battery temperature is too warm or cold.

Battery charge is low.

The vehicle is on a steep grade.

Cabin heating or cooling is in process and an 

acceptable cabin temperature has not been 

achieved.

HVAC is set to full defrost mode at a high blower 

speed.

HVAC is set to MAX A/C.

Engine has not reached normal operating 

temperature.

The transmission is not in a forward gear.

Hood is open.

Brake pedal is not pressed with sufficient pres

-

sure.

Accelerator pedal input.

Engine temp is too high.

5 mph (8 km/h) threshold has not been 

achieved from previous Autostop.

Steering angle is beyond threshold.

ACC is on and speed is set.

It may be possible for the vehicle to be driven 

several times without the Stop/Start system going 

into a STOP/START READY state under more 

extreme conditions of the items listed above.

T

O

 S

TART

 T

HE

 E

NGINE

 W

HILE

 I

N


A

UTOSTOP

 M

ODE

While in a forward gear, the engine will start when 

the brake pedal is released or the throttle pedal is 

pressed. The transmission will automatically 

re-engage upon engine restart.
Conditions That Will Cause The Engine To Start 

Automatically While In Autostop Mode: 

The transmission selector is moved out of 

DRIVE.

To maintain cabin temperature comfort.

HVAC is set to full defrost mode.

HVAC system temperature or fan speed is 

manually adjusted.

Battery voltage drops too low.

Stop/Start OFF switch is pushed.

A Stop/Start system error occurs.

Steering angle is beyond threshold.

4

116

STARTING AND OPERATING


T

O

 M

ANUALLY

 T

URN

 O

FF

 T

HE

 S

TOP

/

S

TART

 S

YSTEM

Stop/Start OFF Switch

Push the Stop/Start OFF switch (located on the 

switch bank). The light on the switch will illuminate. 

The “STOP/START OFF” message will appear in the 

instrument cluster display and the autostop mode 

will be disabled  

Ú

page 81.

NOTE:

The Stop/Start system will reset itself back to the 

ON mode every time the ignition is turned OFF and 

back ON.

T

O

 M

ANUALLY

 T

URN

 O

N

 T

HE

 S

TOP

/

S

TART

 S

YSTEM

Push the Stop/Start OFF switch (located on the 

switch bank). The light on the switch will turn off.

S

YSTEM

 M

ALFUNCTION

If there is a malfunction in the Stop/Start system, 

the system will not shut down the engine. A 

“SERVICE STOP/START SYSTEM” message and a 

yellow Stop/Start telltale will appear in the 

instrument cluster display  

Ú

page 89.

If the “SERVICE STOP/START SYSTEM” message 

appears in the instrument cluster display, have the 

system checked by an authorized dealer.

CRUISE CONTROL SYSTEMS — IF EQUIPPED 

Your vehicle may be equipped with the Cruise 

Control system, or the Adaptive Cruise Control 

(ACC) system:

Cruise Control will keep your vehicle at a 

constant preset speed.

Adaptive Cruise Control (ACC) will adjust the 

vehicle speed up to the preset speed to main

-

tain a distance with the vehicle ahead.

NOTE:

In vehicles equipped with ACC, if ACC is not 

enabled, Fixed Speed Cruise Control will not 

detect vehicles directly ahead of you. Always be 

aware of the feature selected.

Only one Cruise Control feature can operate at a 

time. For example, if Fixed Speed Cruise Control 

is enabled, Adaptive Cruise Control will be 

unavailable, and vice versa.

C

RUISE

 C

ONTROL


When engaged, the Cruise Control takes over 

accelerator operations at speeds greater than 

20 mph (32 km/h).
The Cruise Control buttons are located on the right 

side of the steering wheel.

Cruise Control Buttons

1 — On/Off
2 — CANC/Cancel
3 — SET (+)/Accel
4 — RES/Resume
5 — SET (-)/Decel

STARTING AND OPERATING

117

To Activate  

Push the on/off button to activate the Cruise 

Control. “CRUISE CONTROL READY” will appear in 

the instrument cluster display to indicate the 

Cruise Control is on. To turn the system off, push 

the on/off button a second time. “CRUISE 

CONTROL OFF” will appear in the instrument 

cluster display to indicate the Cruise Control is off. 

The system should be turned off when not in use.

To Set A Desired Speed 

Turn the Cruise Control on. When the vehicle has 

reached the desired speed, push the SET (+) or 

SET (-) button and release. Release the accelerator 

and the vehicle will operate at the selected speed. 

Once a speed has been set, a message “CRUISE 

CONTROL SET TO MPH (km/h)” will appear 

indicating what speed was set. A cruise indicator 

lamp, along with set speed will also appear and 

stay on in the instrument cluster when the speed

is set.

To Vary The Speed Setting 

To Increase Or Decrease The Set Speed
When the Cruise Control is set, you can increase 

speed by pushing the SET (+) button, or decrease 

speed by pushing the SET (-) button.
U.S. Speed (mph)

Pushing the SET (+), or SET (-) button once will 

result in a 1 mph speed adjustment. Each 

subsequent tap of the button results in an 

adjustment of 1 mph.

If the button is continually pushed, the set 

speed will continue to adjust until the button is 

released, then the new set speed will be estab

-

lished.

Metric Speed (km/h)

Pushing the SET (+), or SET (-) button once will 

result in a 1 km/h speed adjustment. Each 

subsequent tap of the button results in an 

adjustment of 1 km/h.

If the button is continually pushed, the set 

speed will continue to adjust until the button is 

released, then the new set speed will be estab

-

lished.

To Accelerate For Passing 

While the Cruise Control is set, press the 

accelerator to pass as you would normally. When 

the pedal is released, the vehicle will return to the 

set speed.

USING CRUISE CONTROL ON HILLS

The transmission may downshift on hills to 

maintain the vehicle set speed.
The Cruise Control system maintains speed up and 

down hills. A slight speed change on moderate hills 

is normal. On steep hills, a greater speed loss or 

gain may occur so it may be preferable to drive 

without Cruise Control.

WARNING!

Cruise Control can be dangerous where the 

system cannot maintain a constant speed. Your 

vehicle could go too fast for the conditions, and 

you could lose control and have an accident. 

Do not use Cruise Control in heavy traffic or on 

roads that are winding, icy, snow-covered or 

slippery.

WARNING!

Leaving the Cruise Control system on when not 

in use is dangerous. You could accidentally set 

the system or cause it to go faster than you 

want. You could lose control and have an 

accident. Always leave the system OFF when you 

are not using it.

4

118

STARTING AND OPERATING


(Continued)

To Resume Speed 

To resume a previously set speed, push the RES 

button and release. Resume can be used at any 

speed above 20 mph (32 km/h).

To Deactivate 

A tap on the brake pedal, pushing the CANC button, 

or normal brake pressure while slowing the vehicle 

will deactivate the Cruise Control system without 

erasing the set speed from memory.
The following conditions will also deactivate the 

Cruise Control without erasing the set speed from 

memory:

Vehicle parking brake is applied

Stability event occurs

Gear selector is moved out of DRIVE

Engine overspeed occurs

Pushing the on/off button or placing the ignition in 

the OFF position will erase the set speed from 

memory.

A

DAPTIVE

 C

RUISE

 C

ONTROL

 (ACC)  

Adaptive Cruise Control (ACC) increases the driving 

convenience provided by Cruise Control while 

traveling on highways and major roadways. 

However, it is not a safety system and not designed 

to prevent collisions. The Cruise Control function 

performs differently  

Ú

page 116.

ACC will allow you to keep Cruise Control engaged 

in light to moderate traffic conditions without the 

constant need to reset your Cruise Control. ACC 

utilizes a radar sensor and a forward facing 

camera designed to detect a vehicle directly ahead 

of you.
NOTE:

If the ACC sensor detects a vehicle ahead, ACC 

will apply limited braking or acceleration (not to 

exceed the original set speed) automatically to 

maintain a preset following distance, while 

matching the speed of the vehicle ahead.

Any chassis/suspension or tire size modifica

-

tions to the vehicle will affect the performance 

of the Adaptive Cruise Control and Forward Colli

-

sion Warning system.

Fixed Speed Cruise Control (ACC not enabled) 

will not detect vehicles directly ahead of you. 

Always be aware of the mode selected  

Ú

page 316.

WARNING!

Cruise Control can be dangerous where the 

system cannot maintain a constant speed. Your 

vehicle could go too fast for the conditions, and 

you could lose control and have an accident. 

Do not use Cruise Control in heavy traffic or on 

roads that are winding, icy, snow-covered or 

slippery.

WARNING!

Adaptive Cruise Control (ACC) is a conve

-

nience system. It is not a substitute for active 

driver involvement. It is always the driver’s 

responsibility to be attentive of road, traffic, 

and weather conditions, vehicle speed, 

distance to the vehicle ahead and, most 

importantly, brake operation to ensure safe 

operation of the vehicle under all road condi

-

tions. Your complete attention is always 

required while driving to maintain safe control 

of your vehicle. Failure to follow these warn

-

ings can result in a collision and death or 

serious personal injury.

The ACC system:

Does not react to pedestrians, oncoming 

vehicles, and stationary objects (e.g., a 

stopped vehicle in a traffic jam or a 

disabled vehicle).

Cannot take street, traffic, and weather 

conditions into account, and may be 

limited upon adverse sight distance 

conditions.

STARTING AND OPERATING

119

Adaptive Cruise Control (ACC) Operation

The buttons on the right side of the steering wheel 

operate the ACC system.

Adaptive Cruise Control Buttons

Adaptive Cruise Control (ACC) Menu

The instrument cluster display will show the 

current ACC system settings. The information it 

displays depends on ACC system status.
Push the Adaptive Cruise Control (ACC) on/off 

button until one of the following appears in the 

instrument cluster display:
Adaptive Cruise Control Off
When ACC is deactivated, the display will read 

“Adaptive Cruise Control Off.”
Adaptive Cruise Control Ready
When ACC is activated but the vehicle speed 

setting has not been selected, the display will read 

“Adaptive Cruise Control Ready.”
Adaptive Cruise Control Set
When the SET (+) or the SET (-) button is pushed, 

the display will read “ACC SET.”
When ACC is set, the set speed will show in the 

instrument cluster display.
The ACC screen may display once again if any of 

the following ACC activity occurs:

System Cancel

Driver Override

System Off

ACC Proximity Warning

ACC Unavailable Warning

Does not always fully recognize complex 

driving conditions, which can result in 

wrong or missing distance warnings.

Will bring the vehicle to a complete stop 

while following a target vehicle and hold 

the vehicle for two seconds in the stop 

position. If the target vehicle does not 

start moving within two seconds the ACC 

system will display a message that the 

system will release the brakes and that 

the brakes must be applied manually. An 

audible chime will sound when the brakes 

are released.

You should switch off the ACC system:

When driving in fog, heavy rain, heavy snow, 

sleet, heavy traffic, and complex driving situa

-

tions (i.e., in highway construction zones).

When entering a turn lane or highway 

off-ramp; when driving on roads that are 

winding, icy, snow-covered, slippery, or have 

steep uphill or downhill slopes.

When towing a trailer up or down steep slopes.

When circumstances do not allow safe driving 

at a constant speed.

WARNING!

1 — CANC/Cancel
2 — Fixed Speed Cruise Control On/Off
3 — Adaptive Cruise Control (ACC) On/Off
4 — Distance Decrease Button
5 — SET (+)/Accel
6 — RES/Resume
7 — SET (-)/Decel
8 — Distance Increase Button

4

120

STARTING AND OPERATING


The instrument cluster display will return to the last 

display selected after five seconds of no ACC 

display activity.

Activating Adaptive Cruise Control (ACC)

The minimum set speed for the ACC system is 

20 mph (32 km/h).
When the system is turned on and in the ready 

state, the instrument cluster display will read

“ACC Ready.”
When the system is off, the instrument cluster 

display will read “Adaptive Cruise Control (ACC) 

Off.”
NOTE:

You cannot engage ACC under the following condi

-

tions: 

When in 4WD Low

When the brakes are applied

When the parking brake is applied

When the automatic transmission is in PARK, 

REVERSE or NEUTRAL

When the vehicle speed is below the minimum 

speed range

When the brakes are overheated

When the driver’s door is open at low speeds

When the driver’s seat belt is unbuckled at low 

speeds

When there is a stationary vehicle in front of 

your vehicle in close proximity

To Activate/Deactivate

Push and release the Adaptive Cruise Control 

(ACC) on/off button. The ACC menu in the 

instrument cluster displays “ACC Ready.”
To turn the system off, push and release the Adaptive 

Cruise Control (ACC) on/off button again. At this time, 

the system will turn off and the instrument cluster 

displays “Adaptive Cruise Control (ACC) Off.”

To Set A Desired Speed

When the vehicle reaches the speed desired, push 

the SET (+) button or the SET (-) button and 

release. The instrument cluster display will show 

the set speed.

NOTE:

Fixed Speed Cruise Control can be used without 

ACC enabled. To change between the different 

modes, push the ACC on/off button which turns 

the ACC and the Fixed Speed Cruise Control off. 

Pushing the Fixed Speed Cruise Control on/off 

button will result in turning on (changing to) Fixed 

Speed Cruise Control mode.

If ACC is set when the vehicle speed is below 

20 mph (32 km/h), the set speed will default to 

20 mph (32 km/h).
NOTE:

Fixed Speed Cruise Control cannot be set below 

20 mph (32 km/h).

WARNING!

Leaving the Adaptive Cruise Control (ACC) 

system on when not in use is dangerous. You 

could accidentally set the system or cause it to 

go faster than you want. You could lose control 

and have a collision. Always leave the system off 

when you are not using it.

WARNING!

In Fixed Speed Cruise Control mode (ACC not 

enabled), the system will not react to vehicles 

ahead. In addition, the proximity warning does 

not activate and no alarm will sound even if you 

are too close to the vehicle ahead since neither 

the presence of the vehicle ahead nor the 

vehicle-to-vehicle distance is detected. Be sure 

to maintain a safe distance between your vehicle 

and the vehicle ahead. Always be aware which 

mode is selected.

STARTING AND OPERATING

121

If either system is set when the vehicle speed is 

above 20 mph (32 km/h), the set speed shall be 

the current speed of the vehicle.
NOTE:

Keeping your foot on the accelerator pedal can 

cause the vehicle to continue to accelerate 

beyond the set speed. If this occurs, the 

message “DRIVER OVERRIDE” will display in the 

instrument cluster display.

If you continue to accelerate beyond the set 

speed while ACC is enabled, the system will not 

be controlling the distance between your vehicle 

and the vehicle ahead. The vehicle speed will 

only be determined by the position of the accel

-

erator pedal.

To Cancel

The following conditions cancel the ACC or Fixed 

Speed Cruise Control systems:

The brake pedal is applied

The CANC (cancel) button is pushed

The Anti-Lock Brake System (ABS) activates

The gear selector is removed from the DRIVE 

position

The Electronic Stability Control/Traction Control 

System (ESC/TCS) activates

The vehicle parking brake is applied

The Trailer Sway Control (TSC) activates

The driver switches ESC to Full Off mode

The braking temperature exceeds normal range 

(overheated)

The following conditions will only cancel the ACC 

system:

Driver seat belt is unbuckled at low speeds

Driver door is opened at low speeds

To Turn Off

The system will turn off and erase the set speed in 

memory if:

The Adaptive Cruise Control (ACC) on/off button 

is pushed

The Fixed Speed Cruise Control on/off button is 

pushed

The ignition is placed in the OFF position

4WD Low is engaged

To Resume

If there is a set speed in memory, push the RES 

(resume) button and remove your foot from the 

accelerator pedal. The instrument cluster display 

will show the last set speed.

Resume can be used at any speed above 20 mph 

(32 km/h) when only Fixed Speed Cruise Control is 

being used.
Resume can be used at any speed above 0 mph 

(0 km/h) when ACC is active.
NOTE:

While in ACC mode, when the vehicle comes to 

a complete stop longer than two seconds, the 

system will cancel. The driver will have to apply 

the brakes to keep the vehicle at a standstill.

ACC cannot be resumed if there is a stationary 

vehicle in front of your vehicle in close proximity.

WARNING!

The Resume function should only be used if 

traffic and road conditions permit. Resuming a 

set speed that is too high or too low for 

prevailing traffic and road conditions could 

cause the vehicle to accelerate or decelerate too 

sharply for safe operation. Failure to follow these 

warnings can result in a collision and death or 

serious personal injury.

4


Content      ..     5      6      7      8     ..