Dodge Journey (2020 year). Manual in english - page 4
 

  Index      Manuals     Dodge Journey (2020 year). Manual in english


Search            copyright infringement  


Content      ..     2      3      4      5     ..


Dodge Journey (2020 year). Manual in english - page 4


56

GETTING TO KNOW YOUR VEHICLE


Icon

Description

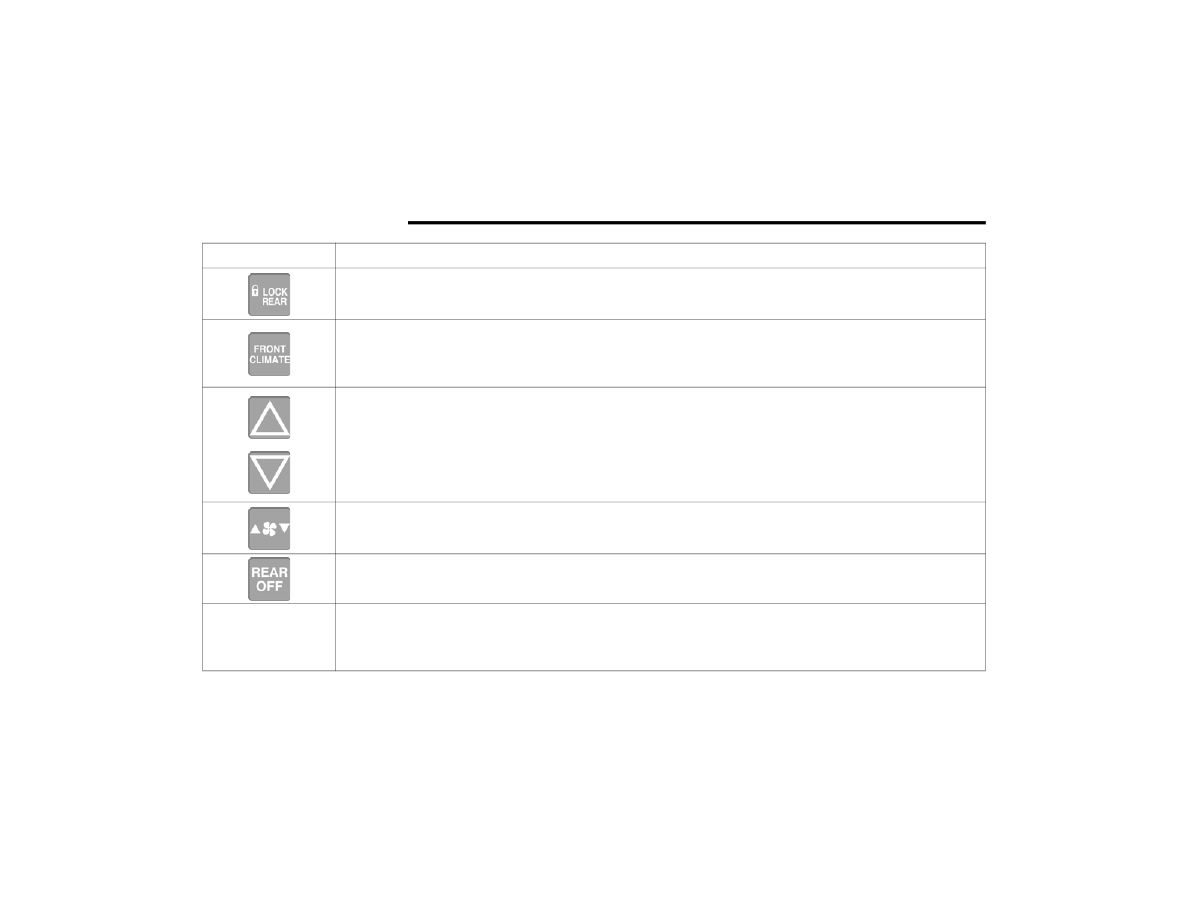
Rear Lock Button

Press and release the LOCK REAR button to lock out the rear manual temperature controls from adjusting the rear 

temperature and blower settings. The LOCK REAR indicator illuminates when LOCK REAR is on.
Done Button

For Radio 4.3: Press and release this button to complete any climate changes.

Front Climate Button

For Uconnect 3/3 NAV: Press and release the Front Climate button to return to the Front Climate Control screen.
Rear Passenger Temperature Up and Down Buttons

Provides the front occupants with the ability to control rear temperature.

For Radio 4.3: Press and hold the slide bar to increase or decrease the temperature.

For Uconnect 3/3 NAV: Press and hold the slide bar to increase or decrease the temperature or push the up arrow button 

on the touchscreen to increase the temperature and push the down arrow button on the touchscreen to decrease the 

temperature.

When the SYNC feature is active, the passenger’s temperature moves up and down with the driver’s temperature.
Rear Blower Control

Blower Control regulates the amount of air forced through the rear climate system. There are seven blower speeds 

available. The speeds can be selected using the buttons on the touchscreen.

Rear Passenger Climate Control OFF Button

Press and release this button to turn the Rear Climate Controls off.

Mode Control

Rear Mode Control

Select Mode by pressing one of the Mode buttons on the touchscreen to change the airflow distribution mode. The airflow 

distribution mode can be adjusted so air comes from the instrument panel outlets and floor outlets. The Mode settings are 

as follows:

GETTING TO KNOW YOUR VEHICLE

57

Panel Mode

Panel Mode

Press this button on the touchscreen to change the air distribution mode to Panel Mode. In Panel Mode, air comes from the 

outlets in the instrument panel. Each of these outlets can be individually adjusted to direct the flow of air. The air vanes of 

the center outlets and outboard outlets can be moved up and down or side to side to regulate airflow direction. There is a 

shut off wheel located below the air vanes to shut off or adjust the amount of airflow from these outlets.

Bi-Level Mode

Bi-Level Mode

Press this button on the touchscreen to change the air distribution mode to Bi-Level Mode. In Bi-Level Mode, air comes 

from the instrument panel outlets and floor outlets. A slight amount of air is directed through the defrost and side window 

demister outlets.

NOTE:

Bi-Level mode is designed under comfort conditions to provide cooler air out of the panel outlets and warmer air from the 

floor outlets.

Floor Mode

Floor Mode

Press this button on the touchscreen to change the air distribution mode to Floor Mode. In Floor Mode, air comes from the 

floor outlets. A slight amount of air is directed through the defrost and side window demister outlets.

SYNC Button

Press the SYNC button on the touchscreen to toggle the SYNC feature on/off. The SYNC indicator illuminates when SYNC is 

on. SYNC synchronizes the front passenger temperature and rear passenger temperature/mode/blower settings with the 

driver temperature/mode/blower settings. Changing the front passenger temperature or rear passenger temperature/

mode/blower settings while in SYNC will automatically exit this feature. Note: The SYNC button is only available on the 

touchscreen.

Icon

Description

2

58

GETTING TO KNOW YOUR VEHICLE


Rear Manual Climate Controls

Rear MTC Control Knobs

Icon

Description

Mode Knob

Rear Mode Knob

Turn the rear mode knob to adjust airflow distribution. The rear mode settings are displayed in the control head. The rear 

airflow distribution mode can be adjusted so air comes from the headliner outlets, the floor outlets or both.

Panel Mode

Panel Mode

Air comes from the outlets in the headliner. Each of these outlets can be individually adjusted to direct the flow of air. Moving 

the air vanes of the outlets to one side will shut off the airflow.

GETTING TO KNOW YOUR VEHICLE

59

Bi-Level Mode

Bi-Level Mode

Air comes from both the headliner outlets and the floor outlets.

NOTE:

In many temperature positions, the Bi-Level mode is designed to provide cooler air out of the headliner outlets and warmer 

air from the floor outlets.

Floor Mode

Floor Mode

Air comes from the floor outlets.

Rear Temperature Control Knob

Turn the rear temperature knob to adjust the temperature. Turn it to the right (clockwise) to raise the temperature. Turn it to 

the left (counterclockwise) to lower the temperature. The rear temperature setting is displayed on the control head.
Rear Blower Control Knob

Rear Blower Control regulates the amount of air forced through the rear climate system. There are seven blower speeds 

available. The blower speeds can be selected using the blower buttons on the touchscreen.

Rear Climate Control/Blower Off

To turn the Rear Climate Controls off, turn the Blower Control knob to the O (off) position.

Icon

Description

2

60

GETTING TO KNOW YOUR VEHICLE


Automatic Climate Controls Overview  

Radio 4.3 Automatic Tri-Zone Temperature Controls

GETTING TO KNOW YOUR VEHICLE

61

Uconnect 3/3 NAV Automatic Tri-Zone Temperature Controls

2

62

GETTING TO KNOW YOUR VEHICLE


Automatic Climate Controls Descriptions

Icon

Description

MAX A/C Button

Press and release the MAX A/C button on the touchscreen to change the current setting to the coldest output of air. The 

MAX A/C indicator illuminates when MAX A/C is on. Pressing the button again will cause the MAX A/C operation to exit.

NOTE:

The MAX A/C button is only available on the touchscreen.
A/C Button

Press and release this button on the touchscreen, or push the button on the faceplate to change the current setting. 

The A/C indicator illuminates when A/C is on.
Recirculation Button

Press and release this button to change the system between recirculation mode and outside air mode. The Recirculation 

indicator illuminates when Recirculation is on. Recirculation can be used when outside conditions such as smoke, odors, 

dust, or high humidity are present. Recirculation can be used in all modes. Recirculation may be unavailable (button on the 

touchscreen greyed out) if conditions exist that could create fogging on the inside of the windshield. The A/C can be 

deselected manually without disturbing the mode control selection. Continuous use of the Recirculation mode may make 

the inside air stuffy and window fogging may occur. Extended use of this mode is not recommended.
AUTO Button

Set your desired temperature and press AUTO. AUTO will achieve and maintain your desired temperature by automatically 

adjusting the blower speed and air distribution. AUTO mode is highly recommended for efficiency. You can press and 

release this button on the touchscreen, or push the button on the faceplate, to turn AUTO on. The AUTO indicator 

illuminates when AUTO is on. Toggling this function will cause the system to switch between manual mode and automatic 

modes. Refer to “Automatic Operation” within this section for more information.

GETTING TO KNOW YOUR VEHICLE

63

Front Defrost Button

Press and release the Front Defrost button on the touchscreen, or push and release the button on the faceplate, to change 

the current airflow setting to Defrost mode. The Front Defrost indicator illuminates when Front Defrost is on. Air comes from 

the windshield and side window demist outlets. When the defrost button is selected, the blower level may increase. Use 

Defrost mode with maximum temperature settings for best windshield and side window defrosting and defogging. When 

toggling the front defrost mode button, the climate system will return to the previous setting.
Rear Defrost Button

Press and release the Rear Defrost button on the touchscreen, or push and release the button on the faceplate, to turn on 

the rear window defroster and the heated outside mirrors (if equipped). The Rear Defrost indicator illuminates when the 

rear window defroster is on. The rear window defroster automatically turns off after 15 minutes.
Rear Climate Control Button

Press and release this button on the touchscreen to access the rear climate controls. The rear climate indicator illuminates 

when the rear climate controls are on.

NOTE:

The REAR CLIMATE button is only available on the touchscreen.

Driver And Passenger Temperature Up And Down Buttons

Provides the driver and passenger with independent temperature control. Push the red button on the faceplate or 

touchscreen or press and slide the temperature bar towards the red arrow button on the touchscreen for warmer 

temperature settings. Push the blue button on the faceplate or touchscreen or press and slide the temperature bar towards 

the blue arrow button on the touchscreen for cooler temperature settings.

Icon

Description

2

64

GETTING TO KNOW YOUR VEHICLE


SYNC Button

Press the SYNC button on the touchscreen to toggle the SYNC feature on/off. The SYNC indicator illuminates when SYNC is 

on. SYNC synchronizes the front passenger temperature and rear passenger temperature/mode/blower settings with the 

driver temperature/mode/blower settings. Changing the front passenger temperature or rear passenger 

temperature/mode/blower settings while in SYNC will automatically exit this feature.

NOTE:

The SYNC button is only available on the touchscreen.

Faceplate Knob

Touchscreen Buttons

Blower Control

Blower Control regulates the amount of air forced through the climate system. There are seven blower speeds available. 

The speeds can be selected using either the blower control knob on the faceplate or the buttons on the touchscreen.

Faceplate: The blower speed increases as you turn the blower control knob clockwise from the lowest blower setting. 

The blower speed decreases as you turn the blower control knob counterclockwise.

Touchscreen:

For Radio 4.3: use the circle around the blower icon by pressing on the circle spot where you want the blower setting to 

be. To increase blower, the circle bar will go clockwise. To decrease the blower, the circle bar will move counter-clockwise.

For Uconnect 3/3 NAV: Use the small blower icon to reduce the blower setting and the large blower icon to increase the 

blower setting. The blower can also be selected by pressing the blower bar area between the icons.

Mode Control

Mode Control

Select Mode by pressing one of the Mode buttons on the touchscreen to change the airflow distribution mode. The airflow 

distribution mode can be adjusted so air comes from the instrument panel outlets, floor outlets, defrost outlets and demist 

outlets. The Mode settings are as follows:

Icon

Description

GETTING TO KNOW YOUR VEHICLE

65

Panel Mode

Panel Mode

Air comes from the outlets in the instrument panel. Each of these outlets can be individually adjusted to direct the flow of 

air. The air vanes of the center outlets and outboard outlets can be moved up and down or side to side to regulate airflow 

direction. There is a shut off wheel located below the air vanes to shut off or adjust the amount of airflow from these 

outlets.

Bi-Level Mode

Bi-Level Mode

Air comes from the instrument panel outlets and floor outlets. A slight amount of air is directed through the defrost and 

side window demister outlets.

NOTE:

Bi-Level mode is designed under comfort conditions to provide cooler air out of the panel outlets and warmer air from the 

floor outlets.

Floor Mode

Floor Mode

Air comes from the floor outlets. A slight amount of air is directed through the defrost and side window demister outlets.

Mix Mode

Mix Mode

Air is directed through the floor, defrost, and side window demister outlets. This setting works best in cold or snowy 

conditions that require extra heat to the windshield. This setting is good for maintaining comfort while reducing moisture on 

the windshield.

Climate Control OFF Button

Press and release the OFF button on the touchscreen, or push the OFF button on the faceplate to turn the Climate Control 

ON/OFF.

Icon

Description

2

66

GETTING TO KNOW YOUR VEHICLE


Controlling The Rear Climate Controls From 

The Front Automatic Temperature Control 

(ATC) Panel 

The rear ATC system has floor air outlets at the 

rear right side of the third row seats and over-

head outlets at each outboard rear seating posi-

tion. The system provides heated air through 

the floor outlets or cool, dehumidified air 

through the headliner outlets. The rear system 

temperature control buttons are located in the 

Uconnect system, located on the

instrument panel.

The Three-Zone ATC system allows for adjust-

ment of the rear climate controls from the front 

ATC panel. To change the rear system settings:

Press the REAR CLIMATE button to change 

control to rear control mode, rear display will 

appear. Control functions now operate the 

rear system.

To return to Front screen, press the FRONT 

CLIMATE button.

Radio 4.3 Automatic Rear Climate Buttons On The 

Touchscreen

Uconnect 3/3 NAV Automatic Rear Climate Buttons On 

The Touchscreen

GETTING TO KNOW YOUR VEHICLE

67

Icon

Description

Rear Auto Button

Set your desired rear temperature and press REAR AUTO on the touchscreen. REAR AUTO will achieve and maintain your 

desired rear temperature by automatically adjusting the rear blower speed and rear air distribution. REAR AUTO mode is 

highly recommended for efficiency. The REAR AUTO indicator illuminates when REAR AUTO is on. Toggling this function will 

cause the system to switch between manual mode and automatic modes. Refer to "Automatic Operation" within this 

section for further information.
Rear Lock Button

Press and release the LOCK REAR button to lock out the rear manual temperature controls from adjusting the rear 

temperature and blower settings. LOCK REAR indicator illuminates when LOCK REAR is on.
Done Button

For Radio 4.3: Press and release this button to complete any climate changes.

Front Climate Button

For Uconnect 3/3 NAV: Press and release this button to change the display on the Uconnect system back to the Front 

Climate Controls.
Rear Passenger Temperature Up and Down Buttons

Provides the front occupants with the ability to control rear temperature.

For Radio 4.3: Press and hold the slide bar to increase or decrease the temperature.

For Uconnect 3/3 NAV: Press and hold the slide bar to increase or decrease the temperature or push the up arrow button 

on the touchscreen to increase the temperature and push the down arrow button on the touchscreen to decrease the 

temperature.

When the SYNC feature is active, the passenger’s temperature moves up and down with the driver’s temperature.

2

68

GETTING TO KNOW YOUR VEHICLE


SYNC Button

Press the SYNC button on the touchscreen to toggle the SYNC feature on/off. The SYNC indicator illuminates when SYNC is 

on. SYNC synchronizes the front passenger temperature and rear passenger temperature/mode/blower settings with the 

driver temperature/mode/blower settings. Changing the front passenger temperature or rear passenger temperature/

mode/blower settings while in SYNC will automatically exit this feature.

NOTE:

The SYNC button is only available on the touchscreen.
Rear Blower Control

Rear Blower Control regulates the amount of air forced through the rear climate system. There are seven blower speeds 

available. The speeds can be selected using the buttons on the touchscreen. Use the small blower icon (or blower icon with 

downward arrow) to reduce the blower setting and the large blower icon (or blower icon with upward arrow) to increase the 

blower setting. Blower can also be selected by pressing the blower bar area between the icons.

Rear Passenger Climate Control OFF Button

Press and release this button to turn the Rear Climate Controls off.

Mode Control

Rear Mode Control

Select Mode by pressing one of the Mode buttons on the touchscreen to change the airflow distribution mode. The airflow 

distribution mode can be adjusted so air comes from the instrument panel outlets, the floor outlets or both. The Mode 

settings are as follows:

Panel Mode

Panel Mode

Press this button on the touchscreen to change the air distribution mode to Panel Mode. In Panel Mode, air comes from the 

outlets in the instrument panel. Each of these outlets can be individually adjusted to direct the flow of air. The air vanes of 

the center outlets and outboard outlets can be moved up and down or side to side to regulate airflow direction. There is a 

shut off wheel located below the air vanes to shut off or adjust the amount of airflow from these outlets.

Icon

Description

GETTING TO KNOW YOUR VEHICLE

69

Rear Automatic Temperature Control (ATC)

1. Adjust the Rear Blower, Rear Temperature 

and the Rear Modes to suit your comfort 

needs.

2. ATC is selected by adjusting the knob to the 

AUTO position.

Once the desired temperature is displayed, the 

ATC System achieves and maintain that comfort 

level. When the system is set up for your 

comfort level, it is not necessary to change the 

settings. You experience the greatest efficiency 

by simply allowing the system to function

automatically.

NOTE:

It is not necessary to move the temperature 

settings. The system automatically adjusts the 

temperature, mode and fan speed to provide 

comfort as quickly as possible.

Bi-Level Mode

Bi-Level Mode

Press this button on the touchscreen to change the air distribution mode to Bi-Level Mode. In Bi-Level Mode, air comes 

from the instrument panel outlets and floor outlets. A slight amount of air is directed through the defrost and side window 

demister outlets.

NOTE:

Bi-Level mode is designed under comfort conditions to provide cooler air out of the panel outlets and warmer air from the 

floor outlets.

Floor Mode

Floor Mode

Press this button on the touchscreen to change the air distribution mode to Floor Mode. In Floor Mode, air comes from the 

floor outlets. A slight amount of air is directed through the defrost and side window demister outlets.

Icon

Description

2

70

GETTING TO KNOW YOUR VEHICLE


Icon

Description

Mode Knob

Rear Mode Knob

Turn the rear mode knob to adjust airflow distribution. The rear mode settings are displayed in the control head. The rear 

airflow distribution mode can be adjusted so air comes from the headliner outlets, the floor outlets or both.

Panel Mode

Panel Mode

Air comes from the outlets in the headliner. Each of these outlets can be individually adjusted to direct the flow of air. Moving 

the air vanes of the outlets to one side will shut off the airflow.

Bi-Level Mode

Bi-Level Mode

Air comes from both the headliner outlets and the floor outlets.

NOTE:

In many temperature positions, the Bi-Level mode is designed to provide cooler air out of the headliner outlets and warmer 

air from the floor outlets.  

Floor Mode

Floor Mode

Air comes from the floor outlets.

Rear Temperature Control Knob

Turn the rear temperature knob to adjust the temperature. Turn it to the right (clockwise) to raise the temperature. Turn it to 

the left (counterclockwise) to lower the temperature. The rear temperature setting is displayed in the control head.

GETTING TO KNOW YOUR VEHICLE

71

Climate Control Functions

A/C (Air Conditioning) 

The Air Conditioning (A/C) button allows the 

operator to manually activate or deactivate the 

air conditioning system. When the air condi-

tioning system is turned on, cool dehumidified 

air will flow through the outlets into the cabin. 

For improved fuel economy, press the A/C 

button to turn off the air conditioning and manu-

ally adjust the blower and airflow mode settings. 

Also, make sure to select only Panel, Bi-Level, or 

Floor modes.

NOTE:

For Manual Climate Controls, if the system is 

in Mix, Floor or Defrost Mode, the A/C can be 

turned off, but the A/C system shall remain 

active to prevent fogging of the windows.

If fog or mist appears on the windshield or 

side glass, select Defrost mode, and increase 

blower speed if needed.

If your air conditioning performance seems 

lower than expected, check the front of the 

A/C condenser (located in front of the radi-

ator), for an accumulation of dirt or insects. 

Clean with a gentle water spray from the front 

of the radiator and through the condenser.

Rear Blower Control Knob

The rear blower control can be manually set to off, or any fixed blower speed by rotating the Blower Control Knob in the rear 

of the vehicle. This allows the rear seat occupants to control the volume of air circulated in the rear of the vehicle.

When rear controls are locked by the front system, the Rear Lock symbol on the temperature knob is illuminated and any 

rear overhead adjustments are ignored.
Rear AUTO Setting

Turn the blower knob to the AUTO setting. The rear AUTO setting is displayed in the control head when REAR AUTO is on. This 

feature automatically controls the rear interior cabin temperature by adjusting airflow distribution and amount. Changing the 

blower knob to any other blower setting will cause the rear system to switch to manual mode. Refer to "Automatic Operation" 

within this section for more information.

Rear Climate Control/Blower Off

To turn the Rear Climate Controls off, turn the Blower Control knob to the O (off) position.

Icon

Description

2


Content      ..     2      3      4      5     ..