Lincoln MKC (2019 year). Manual - part 6
GENERAL INFORMATION
Condensation in the Exterior Front
Lamps and Rear Lamps
Exterior front lamps and rear lamps have
vents to accommodate normal changes in
air pressure.
Condensation can be a natural by-product
of this design. When moist air enters the
lamp assembly through the vents, there is a
possibility that condensation can occur when
the temperature is cold. When normal
condensation occurs, a fine mist can form on
the interior of the lens. The fine mist
eventually clears and exits through the vents
during normal operation.
Clearing time may take as long as 48 hours
under dry weather conditions.
Examples of acceptable condensation are:
•
The presence of a fine mist (no streaks,
drip marks or large droplets).
•
A fine mist covers less than 50% of the
lens.
Examples of unacceptable condensation are:
•
A water puddle inside the lamp.
•
Streaks, drip marks or large droplets
present on the interior of the lens.
If you see any unacceptable condensation,
have your vehicle checked by an authorized
dealer.
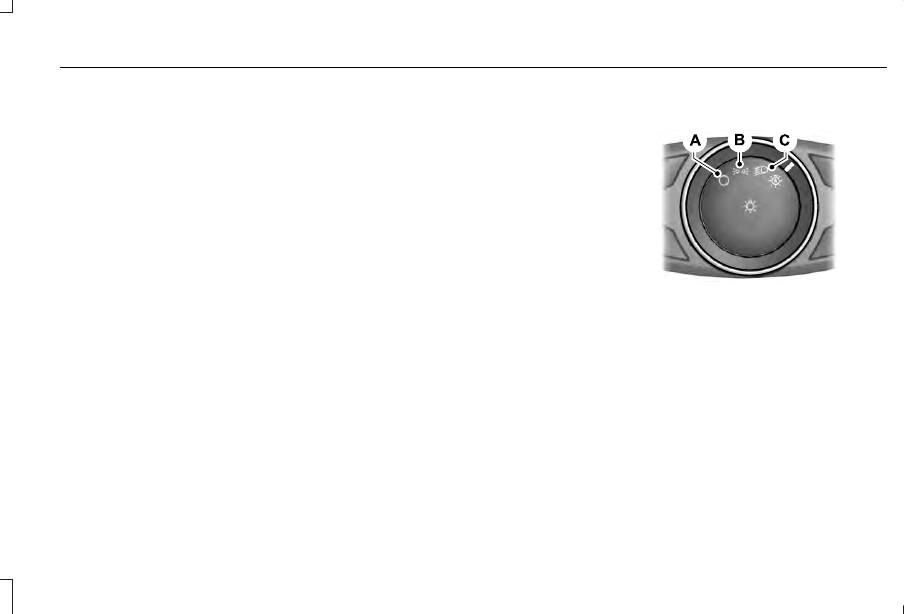
LIGHTING CONTROL
E142449
Lamps off.
A
Parking lamps, instrument panel
lamps, license plate lamps and tail
lamps.
B
Headlamps.
C
87
MKC (TME) Canada/United States of America, enUSA, Edition date: 201802, First Printing
Lighting