Dodge Viper SRT-10 (ZB). Manual - part 19
(6) Remove toe link outboard mounting bolt, nut
and shim (Fig. 43).
(7) Remove toe link inboard mounting bolt and nut
(Fig. 43).
(8) Remove toe link from vehicle by sliding it out
of its mounting bracket and
9U9 channel (Fig. 44),
then out through rear wheel opening.
INSTALLATION
(1) Install toe link into its mounting bracket and
9U9 channel on frame of vehicle (Fig. 44).
(2) Install toe link inboard mounting bolt (Fig. 43).
Do not tighten bolt at this time.
(3) Install original adjustment shim as shown (Fig.
43), then install toe link outboard mounting bolt and
nut. Make sure shim is correctly orientated or
dynamic toe will be incorrect (Fig. 43).
(4) Push downward on toe link at outer mounting
bracket and while holding toe link in this position,
tighten outboard mounting bolt nut to 75 N·m (55 ft.
lbs.) torque.
(5) Tighten toe link inboard mounting bolt to 75
N·m (55 ft. lbs.) torque.
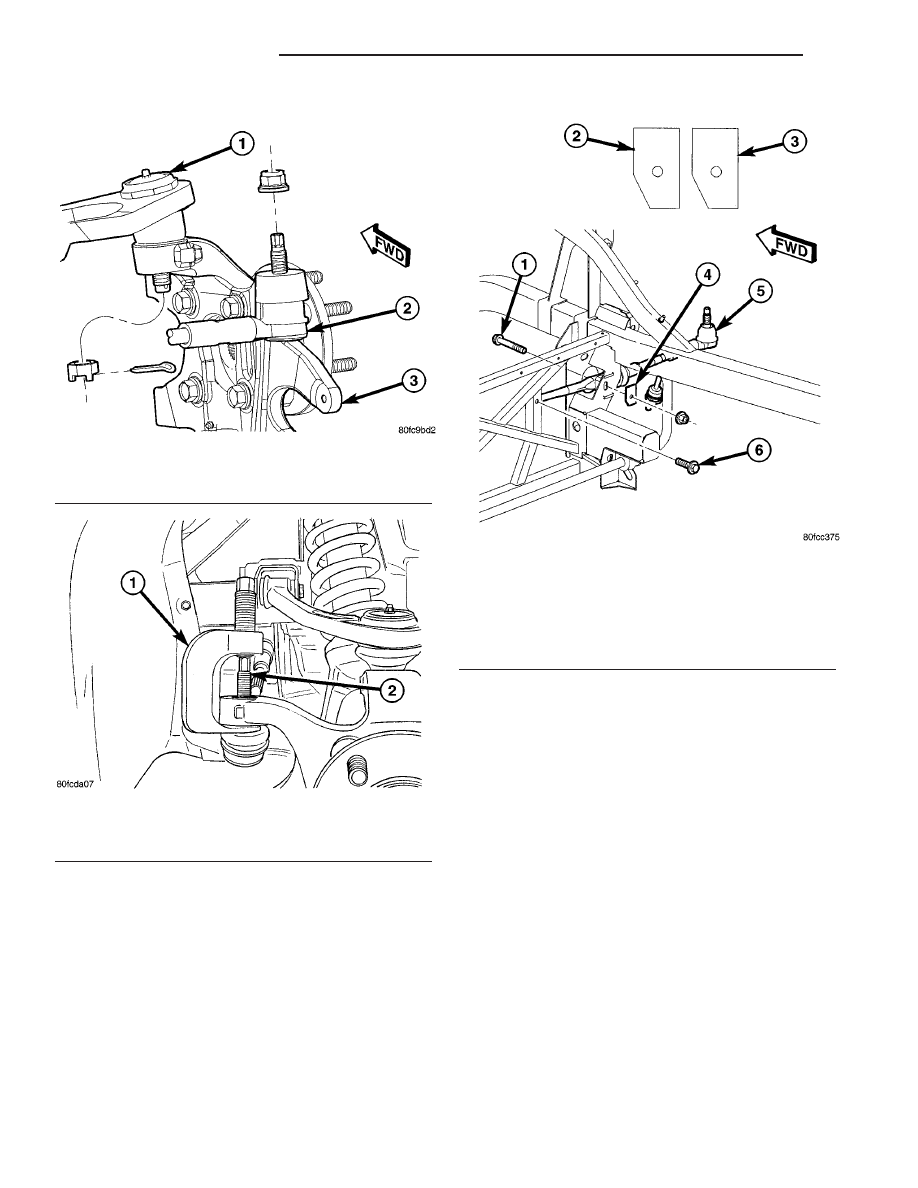
Fig. 41 Upper Ball Joint And Toe Link Mounting
1 - UPPER BALL JOINT
2 - TOE LINK
3 - KNUCKLE
Fig. 42 Puller Positioned To Release Toe Link
1 - PULLER C-4150A
2 - TOE LINK STUD
Fig. 43 Toe Link Mounting To Frame
1 - OUTBOARD MOUNTING BOLT
2 - LEFT TOE LINK SHIM ORIENTATION
3 - RIGHT TOE LINK SHIM ORIENTATION
4 - ADJUSTMENT SHIM
5 - TOE LINK
6 - INBOARD MOUNTING BOLT
2 - 50
REAR SUSPENSION
ZB
TOE LINK (Continued)