Content .. 2054 2055 2056 2057 ..
Dodge Ram Truck 1500-2500-3500. Manual - part 2056
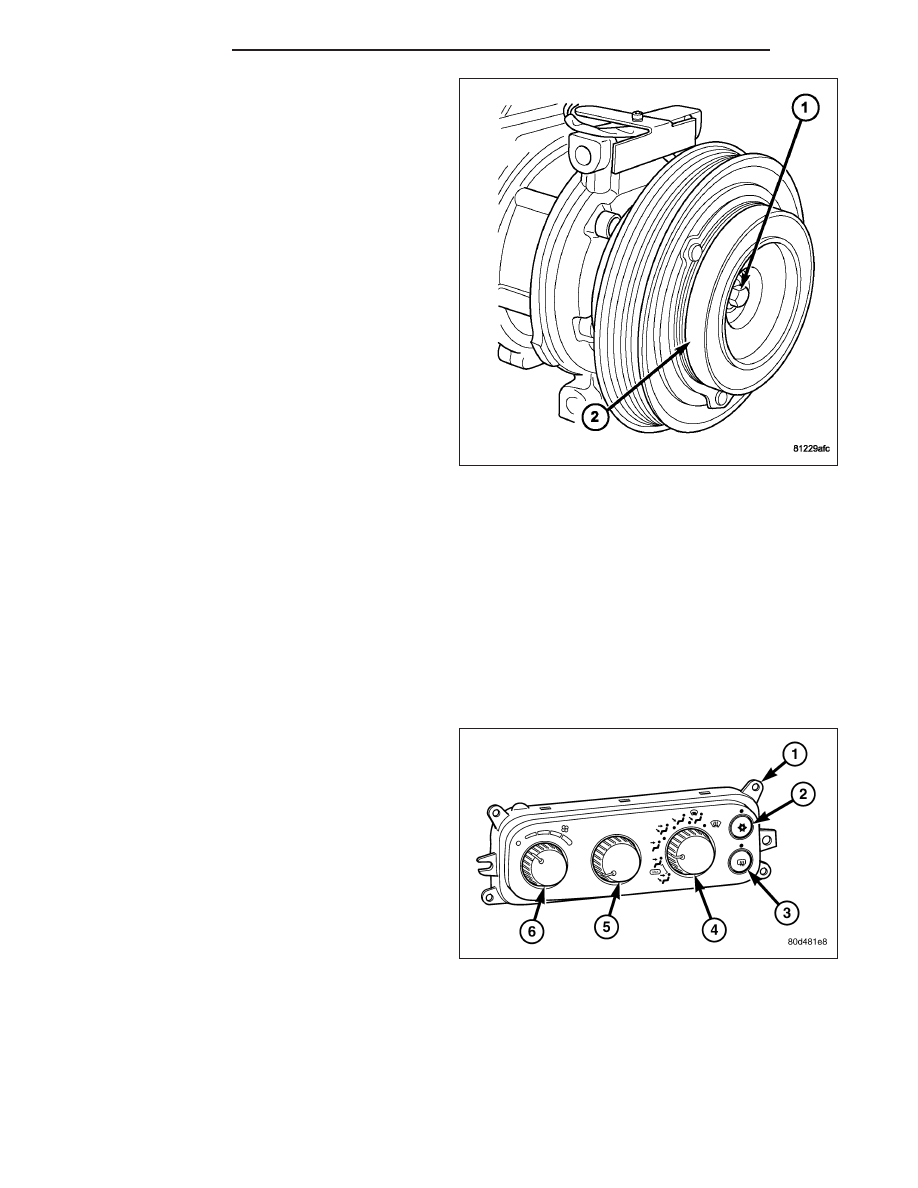
7. Install the clutch plate (2) onto the compressor
shaft.
8. Install the compressor shaft bolt (1). Tighten the
bolt to 17.5 N·m (155 in. lbs.).
NOTE: The shims may compress after tightening
the shaft bolt. Check the air gap in four or more
places to verify the air gap is correct. Spin the pul-
ley before performing a final check of the air gap.
9. With the clutch plate assembled tight against the
shim(s), measure the air gap between the clutch
plate and the pulley and bearing assembly faces
with a feeler gauge. The air gap should be between
specifications (Refer to 24 - HEATING & AIR CON-
DITIONING - SPECIFICATIONS). If the proper air
gap is not obtained, add or subtract shims as
needed until the desired air gap is obtained.
10. Install the bolts that secure the A/C compressor to
the engine (Refer to 24 - HEATING & AIR CON-
DITIONING/PLUMBING/COMPRESSOR-A/C
-
INSTALLATION).
11. Connect the engine wire harness connector to the A/C compressor clutch coil.
12. Install the accessory drive belt (Refer to 7 - COOLING/ACCESSORY DRIVE/BELTS-DRIVE - INSTALLATION).
13. Reconnect the negative battery cable.
CONTROL-A/C HEATER
DESCRIPTION
MANUAL SINGLE ZONE
The A/C-heater control (1) for the manual temperature
control (MTC) single zone heating-A/C system allows
one temperature setting for the entire vehicle. All con-
trols are identified by ISO graphic symbols.
NOTE: Manual A/C-heater control with optional A/C
shown. Manual A/C-heater control without A/C sim-
ilar.
The A/C-heater control and integral computer is
located in the instrument panel and contains:
•
a push button A/C on/off control (2). The Snow-
flake button contains an LED that illuminates
when the optional A/C system is in operation.
•
a push button rear window defogger on/off control (3). The defogger button contains an LED that illuminates
when the rear window defogger system is in operation.
•
a rotary control knob for recirculation and mode control of the discharged air (4).
•
a rotary control knob for temperature control of the discharged air (5).
•
a rotary control knob for fan speed selection and turning the heating-A/C system off (6).
Refer to 24 - HEATING & AIR CONDITIONING - DIAGNOSIS AND TESTING and to 24 - HVAC Electrical Diag-
nostics for more information.
24 - 224
CONTROLS
DR/DH