Dodge Ram Truck 1500-2500-3500. Manual - part 1400


  Index      Dodge     Dodge Ram Truck 1500-2500-3500 - service repair manual 2005 year


Search            


Content   ..  1398  1399  1400  1401   ..


Dodge Ram Truck 1500-2500-3500. Manual - part 1400
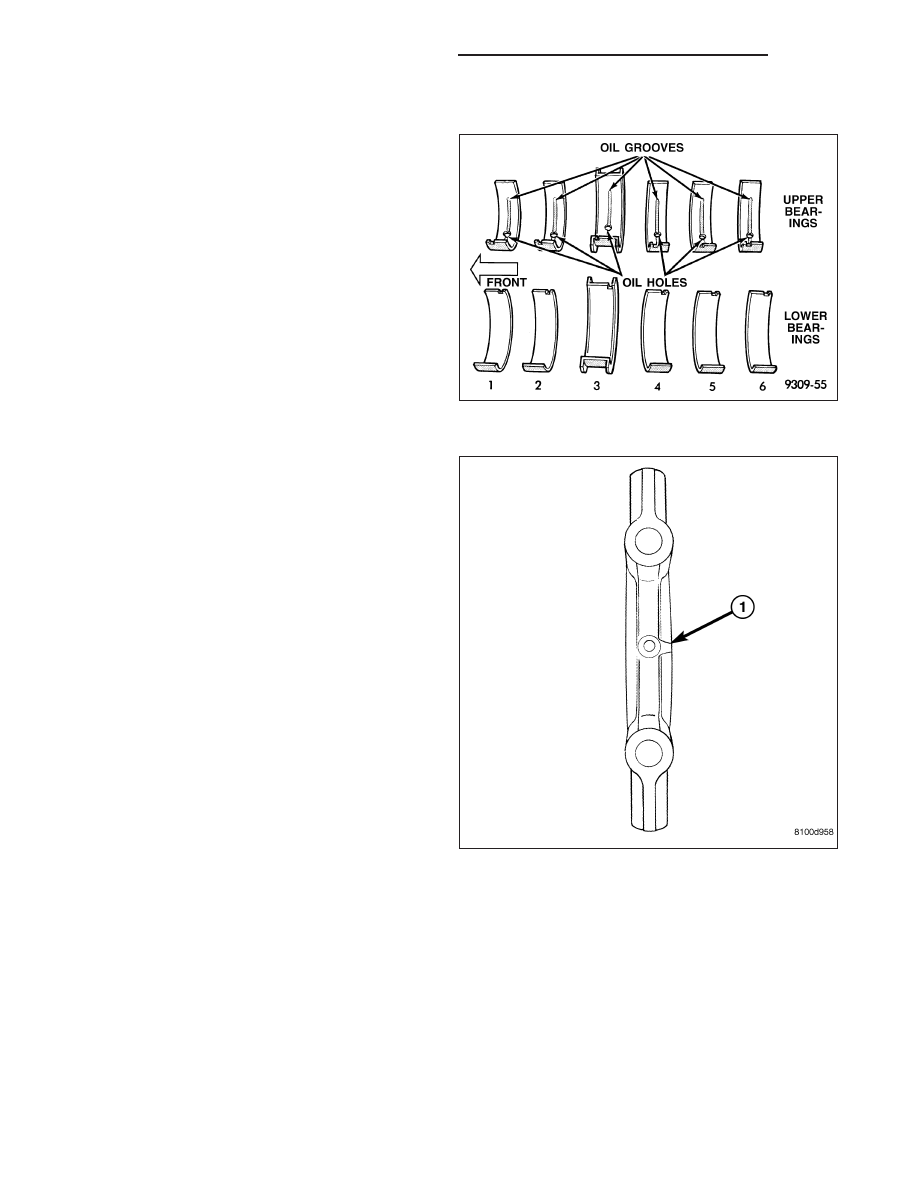


INSTALLATION

1. Install upper main bearing shells into engine block.

2. Lubricate upper main bearing shells with clean

engine oil.

3. Install the crankshaft.

4. Install lower main bearing shells into main bearing

caps.

5. Install each main bearing cap in proper sequence

and direction (1). Tighten all bolts finger tight.

9 - 2522

ENGINE - 8.3L - SERVICE INFORMATION

DR/DH

6. Tighten the main cap bolts following the illustrated tightening sequence:

Step 1 Tighten main bearing cap bolts 1-12 in the illustrated sequence to 20 N·m (15 ft. lbs.). This will seat the
bearing caps onto the engine block.

Step 2 To ensure correct thrust bearing alignment the following procedure must be follwed:

a. Move crankshaft all the way to the rear of its travel.
b. Then, move crankshaft all the way to the front of its travel.
c. Wedge an appropriate tool between the rear of the cylinder block and rear crankshaft counterweight.
This will hold the crankshaft in it’s most forward position.

Step A1–tighten the A1 bolts to 61 N·m (45 ft. lbs.) in the illustrated sequence.

Step A2–tighten the A2 bolts to 115 N·m (85 ft. lbs.) in the illustrated sequence.

Step A3–tighten the A3 Bolts to 54 N·m (40 ft. lbs.) in the illustrated sequence.

7. Remove the holding tool.

8. Install new connecting rod bearings.

9. Install rod caps. Install NEW connecting rod bolts. Bolt threads should be oiled with engine oil. Torque connecting

rod bolts to 68 N·m (50 ft. lbs.).

DR/DH

ENGINE - 8.3L - SERVICE INFORMATION

9 - 2523

10. Install the crankshaft oil scraper and tighten nuts

to 23 N·m (200 in. lbs.).

11. Install oil pump pick up tube (2) using a new

o-ring (4). Torque 1/4-20 bolt to 11 N·m (95 in.
lbs.). Torque 5/16-18 nuts to 23 N·m (200 in. lbs.).

12. Install the crankshaft rear oil seal and retainer

(Refer to 9 - ENGINE/ENGINE BLOCK/CRANK-
SHAFT REAR OIL SEAL RETAINER - INSTALLA-
TION).

13. Install lower crankshaft gear along with the timing

chain (Refer to 9 - ENGINE/VALVE TIMING/TIM-
ING CHAIN AND SPROCKETS - INSTALLA-
TION).

14. Install timing chain cover (Refer to 9 - ENGINE/

VALVE

TIMING/TIMING

CHAIN

COVER(S)

-

INSTALLATION).

15. Install oil pan (Refer to 9 - ENGINE/LUBRICA-

TION/OIL PAN - INSTALLATION).

16. Install crankshaft damper and pulley (Refer to 9 -

ENGINE/ENGINE BLOCK/VIBRATION DAMPER -
INSTALLATION).

17. Install engine assembly (Refer to 9 - ENGINE -

INSTALLATION).

9 - 2524

ENGINE - 8.3L - SERVICE INFORMATION

DR/DH

BEARING-CRANKSHAFT PILOT

REMOVAL

1. Remove transmission (Refer to 21 - TRANSMIS-

SION/TRANSAXLE/MANUAL - REMOVAL).

2. Remove clutch and flywheel (Refer to 6 - CLUTCH/

CLUTCH DISC - REMOVAL).

3. Using Special Tools 8990 (1) and C-3752 (2),

remove pilot bearing from crankshaft.

INSTALLATION

NOTE: New pilot bearing has special grease
packed into bearing. Do not wash grease from
bearing. Install bearing with part number markings
(1) facing out.

DR/DH

ENGINE - 8.3L - SERVICE INFORMATION

9 - 2525


Content   ..  1398  1399  1400  1401   ..