Content .. 1388 1389 1390 1391 ..
Dodge Ram Truck 1500-2500-3500. Manual - part 1390
INSTALLATION
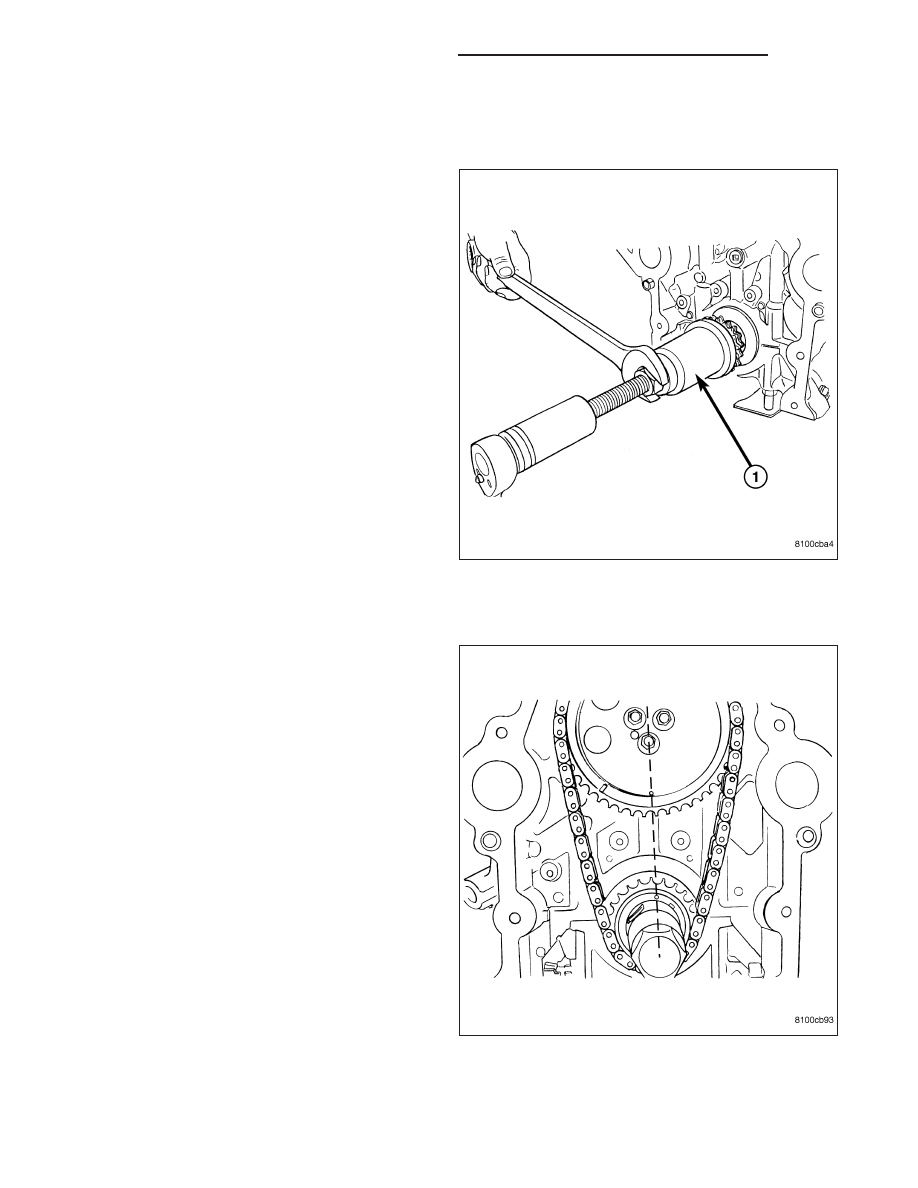
CRANKSHAFT SPROCKET INSTALLATION
1. Position a new crankshaft sprocket on the crank-
shaft with timing mark facing out. Align crankshaft
keyway with slot in crankshaft sprocket.
NOTE: Lubricate the threads of Special Tool 9055
(1) using Mopar
T
Nickel Anti-seize Compound or
equivalent, before beginning crankshaft sprocket
installation.
2. Install the crankshaft sprocket using Special Tool
9055 (1).
TIMING CHAIN AND CAMSHAFT SPROCKET INSTALLATION
1. Rotate the crankshaft sprocket so the timing mark
is at the 12 O’clock position.
2. Place
the
timing
chain
around
the
camshaft
sprocket and place the timing mark to the 6 O’clock
position.
3. Place the timing chain around crankshaft sprocket
and install the camshaft sprocket into position.
4. Using straight edge, check alignment of timing
marks.
5. Install the camshaft sprocket bolts. Tighten the
bolts to 23 N·m (200 in. lbs.).
6. Rotate crankshaft 2 revolutions. Timing marks
should line up. If timing marks do not line up,
remove cam sprocket and realign.
7. Measure camshaft end play. (Refer to 9 - ENGINE
- SPECIFICATIONS). If not within specifications,
install new thrust plate.
8. Install timing chain cover (Refer to 9 - ENGINE/
VALVE
TIMING/TIMING
CHAIN
COVER
-
INSTALLATION).
9 - 2482
ENGINE - 8.3L - SERVICE INFORMATION
DR/DH