Chrysler Stratus Convertible. Manual - part 128
(7) Remove vehicle from hoist.
ACCESSORY DRIVE BELT SPLASH SHIELD
REMOVAL
(1) Remove screw attaching accessory drive belt
splash shield to front fender (Fig. 26).
(2) Remove push-in fasteners attaching accessory
drive belt splash shield to frame rail.
(3) Remove accessory drive belt splash shield from
vehicle.
INSTALLATION
(1) Place accessory drive belt splash shield into
position.
(2) Install push-in fasteners attaching accessory
drive belt splash shield to frame rail.
(3) Install screw attaching accessory drive belt
splash shield to front fender.
RIGHT FRONT WHEELHOUSE SPLASH SHIELD
REMOVAL
(1) Hoist and support vehicle on safety stands.
(2) Remove right front wheel.
(3) Remove screws attaching wheelhouse splash
shield to front fender lip (Fig. 26).
(4) Remove screws attaching wheelhouse splash
shield to front bumper fascia.
(5) Remove push-in fastener attaching wheelhouse
splash shield to fender at rocker panel.
(6) Remove push-in fasteners attaching wheel-
house splash shield to fender support.
(7) Remove wheelhouse splash shield from vehicle.
INSTALLATION
(1) Place wheelhouse splash shield into position.
(2) Install push-in fasteners attaching wheelhouse
splash shield to fender support.
(3) Install push-in fastener attaching wheelhouse
splash shield to fender at rocker panel.
(4) Install screws attaching wheelhouse splash
shield to front bumper fascia.
(5) Install screws attaching wheelhouse splash
shield to front fender lip.
(6) Install right front wheel.
(7) Remove vehicle from Hoist.
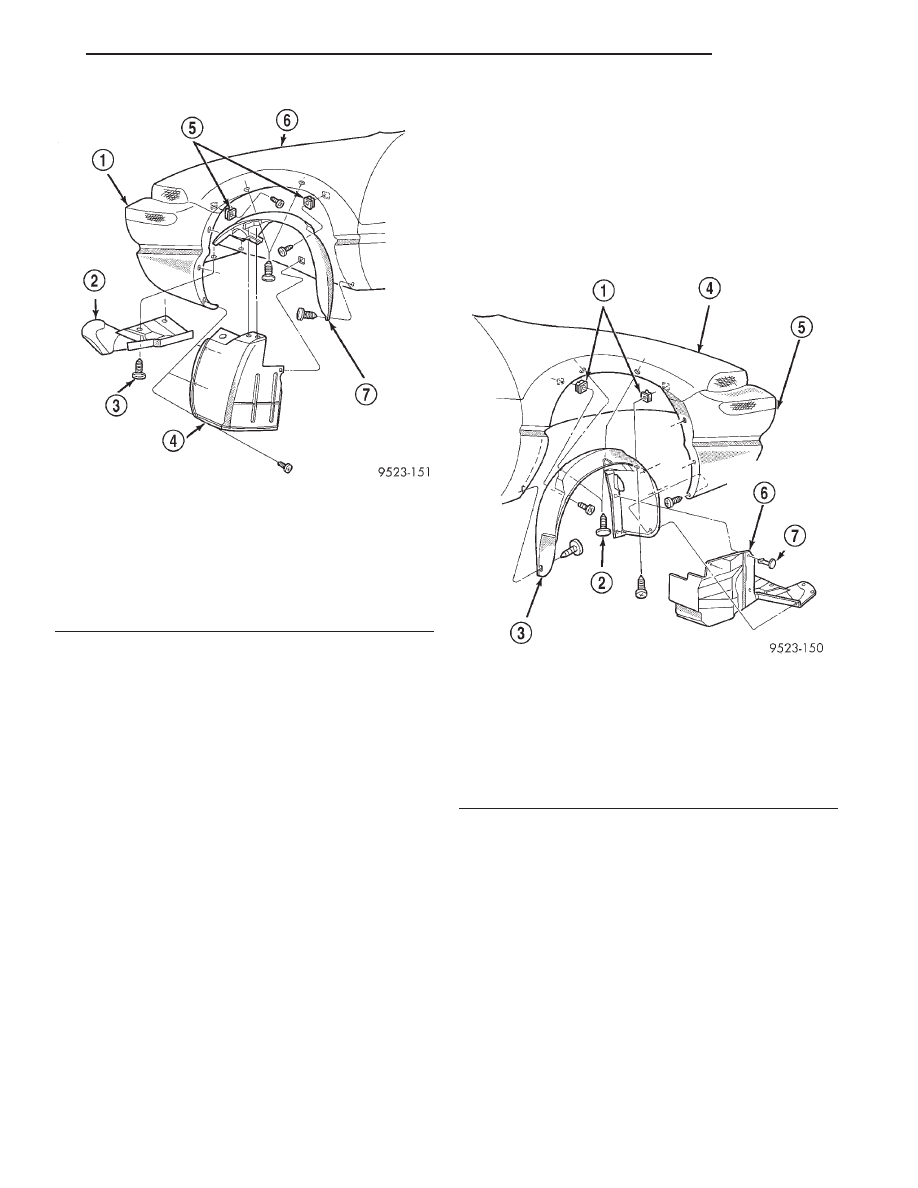
Fig. 25 Left Front Wheelhouse Splash Shield
1 – FASCIA
2 – LOWER SPLASH SHIELD
3 – PUSH-IN FASTENER
4 – BATTERY SPLASH SHIELD
5 – NUT-SNAP
6 – FENDER
7 – WHEELHOUSE SPLASH SHIELD
Fig. 26 Right Front Wheelhouse Splash Shield
1 – NUT-SNAP
2 – PUSH-IN FASTENER
3 – WHEELHOUSE SPLASH SHIELD
4 – FENDER
5 – FASCIA
6 – ACCESSORY DRIVE BELT SPLASH SHIELD
7 – PUSH-IN FASTENER
JX
BODY
23 - 45
REMOVAL AND INSTALLATION (Continued)