Chery S11 / Chery QQ. Manual - part 250
 

  Index      Chery     Chery S11 / Chery QQ - service repair manual


Search            


Content   ..  248  249  250  251   ..


Chery S11 / Chery QQ. Manual - part 250


Chery  QQ  Maintenance Manual         465 Engine Mechanical System


Chapter 12 Replacement of Rear Oil Seal of Engine Flywheel and 

Crankshaft 

1 Steps of removal 

1 Disconnect the transmission assembly,see the relevant explanation of Chapter7. 
2 Start ring gear, lock-up flywheel. 
3 Disconnect clutch,see the relevant explanation of Chapter 7 
4 Take off bolt and flywheel. 
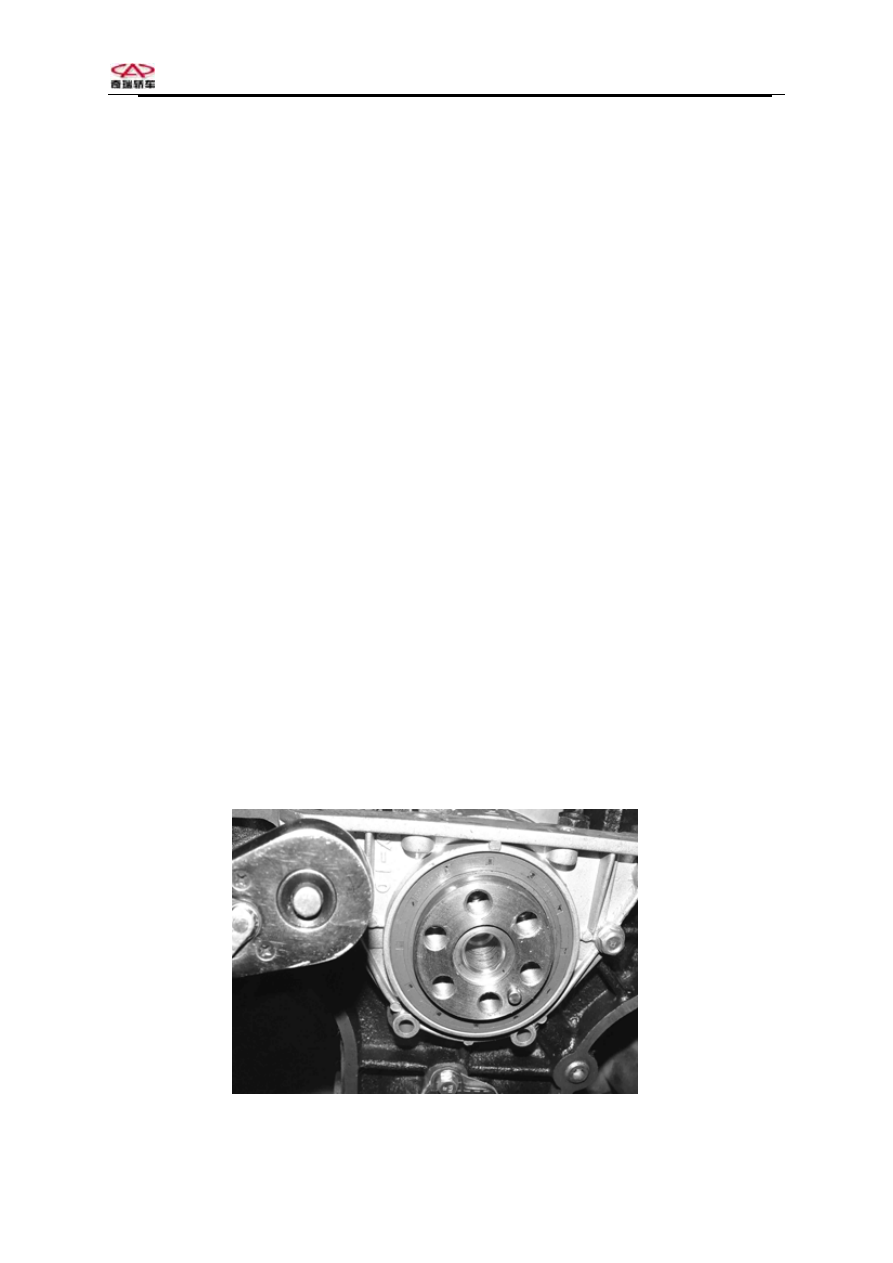
5 Remove bracket bolt of crankshaft rear oil seal. 
6 Take off oil seal, install new oil seal. 
7 Notice: Smear the oil on the mouth of oil seal lip when installing the new oil seal,be 
careful of installation. 

2 Steps of installation 

1 Install new rear oil seal of crankshaft. 
Attention: 
Smear Silicon oil on the sealing surface of new sealing washer,then fix it on the shield,in 
order to prevent the sealing surface from being damaged,you should turn the sealing washer 
into the shield,place the shield on the crankshaft jounal and press it to be flat,place the press 
cover pipe on the shield and press the sealing washer until it is aligned with the cylinder 
block side. 
2 Clean the contact surface of crankshaft and flywheel 
3 Install flywheel, tighten bolt 
4 Install the cluth,see the relevant explanation of Chapter 7 for reference. 
5 Install engine and transmission,see the relevant explanation of Chapter 7 for reference. 


- 33 – 


Chery  QQ  Maintenance Manual         465 Engine Mechanical System


Chapter 13 Replacement of Crankshaft


1 Steps of removal 

- 28 – 

Chery 

1 Remove engine and transmission 
assembly from vehicle 
2 Remove transmission from engine , put it 
on the bracket. 
3 Remove oil drainage bolt of oil pan to 
drain oil and collect the oil. 
4 Remove engine oil pan. 
5 Remove oil pump,see the accordingly 
explanations. 
6 Remove engine clutch. 
7 Remove engine flywheel. 
8 Make mark for main bearing and 
connecting rod bearing. 
9 Loosen connecting rod bolt and remove 
connecting rod bearing cover. 
10 Loosen main bearing bolt and take off 
bearing cover. 
11 Take off crankshaft. 
12 Take off upper main being halfshell. 
Attention:Don’t confuse the bearing 
halfshell. 
 
2 Clean and check
 
1 Clean the parts and dry the parts. 
2 Check to see whether or not there are 
some defects such as scoring,unevenness or 
others in the journal. 


3 Measurement 
1 Check the flatness of crankshaft according 
to the following methods. 
2 Lift the crankshaft with 1 and 5 bearing 
with halfshell of engine block. 
3 Install a dial gauge with touching pin on 
the place of 3 in the bearing,total reading is 
µm ,the maximum is 0.03 mm 
Maximum taper of observing journal can 
be:0.005 mm,Maximum roundness of 
observing jounal can be:0.004 mm 
4 Observe journal and diameter of 
crankshaft and check to see which is ok,if 
the value of diameter is not in the scope of 
the form,you should polish the crankshaft   
once more or replace the crankshaft. 
5 Please use plastic clearance torque,if you 
want to check the distance between the 
bearing and halfshell. 
6 If there is no plastic clearance gauge,take 
away the crankshaft, put on the bearing 
cover with halfshell and diameter of 
corresponding journal .Difference between 
the two values is the distance between 
journal and halfshell. 


Chery  QQ  Maintenance Manual         465 Engine Mechanical System


- 28 – 


4 Steps of installation 
1 Install upper shoe of main bearing to 
engine cylinder,lubricate the side which 
face the journal. 
2 Install crankshaft to engine body 
3 Install the main bearing cover with bottom 
shoe,lubricate the side facing the journal. 
Attention:Installation of bearing cover 
should be in accordance with the mark made 
when dismantling. 


4 Install main bearing bolt,don’t fasten it 
5 Knock the two ends of crankshaft with a 
plastic rod,mainly in order to adjust the rear 
surface of thrust bearing, then fasten the 
bolts. 
 
5 Measurement 
1 Measure axial clearance of crankshaft as 
the following method. 
2 Install a dial gauge with sensing pin and 
the sensing pin contact crankshaft end face. 
3 Move the crankshaft along its direction 
with a screwdriver,pay attention to the 
readings of dial gauge,the regulated 
clearance is :0.13-0.28mm. 
4 Install connecting rod to crank 
Notice:Use lubricant only on the side facing   
the crankshaft handle when install the 
halfshell of connecting rod bearing,push the 
connecting rod until it is in the position of 
crank. 
5 Lubricate the surface of lower halfshell of 
crank facing the crankshaft,when installing 
the connecting rod bearing cover. 
6 Install connecting rod bearing cover 
bolt,but don’t fasten it. 
7 Turn the crankshaft for several 
circles ,make alignation. 
8 Install engine flywheel and bolt,see the 
relevant Chapters. 
11 Install clutch. 
12 Install the oil pump ,see the explanation. 
13 Install the engine oil pan,see the 
explanation. 
14 Tighten oil drainage bolt,see the 
explanation. 
15 Install the transmission to the engine,see 
Chapter 7. 
16 Install engine and transmission to 
vehicle,see the explanation. 


Chery  QQ  Maintenance Manual         465 Engine Mechanical System


- 29 – 


Chapter 14 Replacement of   

1 Steps of removal 
1 Remove engine from vehicle accordingly. 
2 Fix the engine assembly on the bracket. 
3 Take off the piston and connecting rod 
assembly of engine accordingly. 
4 Take off crankshaft. 
5 Clean the engine block thoroughly. 
6 Check to see whether or not there are 
some cracks or wear in the engine block. 
 
2 Repair cylinder 
If cylinder block of engine can be still used 
while there are something wrong with the 
cylinder after inspection,so you can repair 
the cylinder by means of polishing the 
inside .After performance of polishing the 
cylinder,the cylinder shall be able to have a 
capacity of larger piston. 
Polishing of cylinder 
Notice: Some of above-mentioned 
procedures can be omitted ,judgement of 
necessity depends on result of inspection 
before repair. 
You must use fine hone stones to polish the 
cylinder after ginding,you use rough   
particles stones first,then use fine particles 
stones,it is not good to make the polishing 
too smooth,it only needs slight smoothness 
for helpful lubrication. 
Put the hone stone in the cylinder and make 
the hone stone close to the cylinder wall as 
possible as you can,you totate the hone 


Engine Block


stone around,connect a 19mm electric drill 
to the stone,make the stone rotating inside 
the cylinder,make the stone turning up and 
down slowly to the full unitl it can rotate 
freely. 
Put appropriate amount of kerosene in the   
cylinder in order to keep the hone stone and 
cylinder wall clean and lubricated,continue 
to polish it and repeat the procedures until   
you get requested diameter. 
Notice: Stop polishing frequently to put the 
piston in the cylinder to check whether or 
not the distance is appropriate,clean the 
cylinder thoroughly before putting the 
piston in. 
The engine block should be cleaned 
thoroughly after repair. 
 
3 Steps of installation 
1 Install the crankshaft accordingly. 
2 Install transmission rod of piston 
assembly accordingly. 
3 Install engine assembly to the vehicle 
accordingly. 


Content   ..  248  249  250  251   ..