Chery S11 / Chery QQ. Manual - part 217
 

  Index      Chery     Chery S11 / Chery QQ - service repair manual


Search            


Content   ..  215  216  217  218   ..


Chery S11 / Chery QQ. Manual - part 217


SQR7080  Maintenance Manual           372 Engine Mechanical System 


5 Install the timing cover cap 

Attention6±1N.m 


SST 


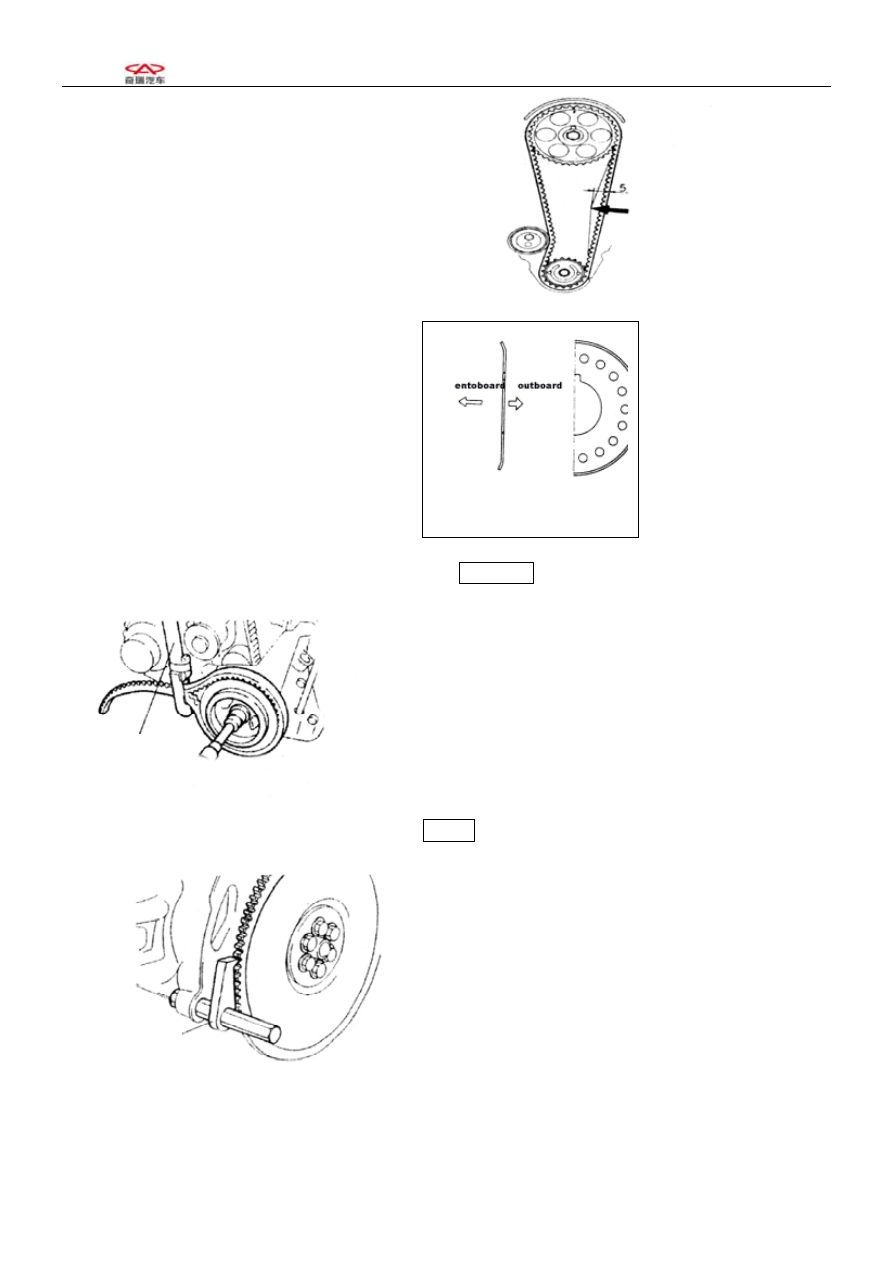
6 Install the torsional vibriation damper (use SST) 
1)

When there is no a flying wheel, 

 Use the gear belt of SST to wrap part of the 

crankshaft pulley . 
 

 Lever of SST should be pulled to be immovable 

(fixed),pay attention not to make the gear belt 
moving,tighten the bolt according to the specified 
torque of 98.0±10N.m{10±1kgm} 

torque98.0±10N.m{10±1kgm} 


SST 


4)、When there is a flying wheel, 

 Use SST to prevent the toothed ring from turning 

 Then tighten bolt of torsional vibriation damper. 

3Camshaft 
3-1 Configuration diagram (the dismounting and installation of the clockwise belt are to be carried out in 
the following procedures) 


11


SQR7080  Maintenance Manual           372 Engine Mechanical System 


Chapter 3   Camshaft  Service 

 
3-1.Diagram      ( Removal and installation order for timing belt) 


(1) Valve cage cover 
(2) Valve cage cover 

gasket 

(3) Camshaft 

timing 

pulley 

(4) Camshaft cover 
(5) Circular plug 
(6) Camshaft  bearing 

cap  

(7) Exhaust camshaft,   
(8) Intake camshaft,   
(9) Oil seal 
(10) Spring  retainer 
(11) Wave  washer 
(12) Iintake 

camshaftsub-gear 

(13) Snap  ring 
(14) Lock  nut 
(15) Flange 


Non-reusable part

 3-2 

Removal 

Remove cylinder 


head cover assembly 
Remove the valve chamber cover cap bolt 
from two sides to the centre symmetrically. 

Remove 

valve chamber cover gasket 


2 Routine check of valve 

valve clearance standard: 


IN

0.18±0.05 

Valve 

clearing   EX

0.25±0.05 


12


SQR7080  Maintenance Manual           372 Engine Mechanical System 


3 Use SST to dismount the camshaft clockwise gear 

Attention· You must use SST to prevent the camshaft 

from rotating. 


Exhaust 

Intake 

   
3 Removal of camshaft  cover cap and camshaft 
bearing cover 
  (1) Align the marks on the camshaft gears as shown in 
the right figure. 

  Set bolt 


2)Use bolt to position the master and slave gears on 

the air inlet camshaft, as shown in the right figure.   

Attention In order to eliminte the radial force, keep the 

camshaft in the leveled position before dismounting it 
(to avoid possible damages caused by excessive radial 
forces) 


3)Remove the bolts in the sequence shown in the 

right figure; 

Remove the camshaft bearing cover 


4)Remove the spark plug 

5)Remove the camshaft slave gear. Use the special 

tool as shown in the right figure. 

Clip the camshaft tightly,use pin of SSTto insert the 

two pin holes of the gear;turn the gear,to keep the bite 
state of master and slave gear;remove the fixing bolts of 
slave gear. 
 [Attention] Do not damage the surface of the camshaft.


13


SQR7080  Maintenance Manual           372 Engine Mechanical System 


14


SST 


(3) Use tensioning apparatus to remove the bearing use 
elastic snap ring,remove wave washer and teethed ring. 


3-3 Camshaft 
1 Use the caliper to measure the height of the camshaft. 
If it is below the specified limits, make proper 
replacement. 
Camshaft                      Unit:mm 

EF 


Model 

Item 

ZL

RL 

GLGS

ZS 

IN 

φ23.0

-0.02

-0.033

Standard  

EX 

φ23.0

-0.02

-0.033

IN

φ22.9 

Limit  

EX 

φ22.9 


2  Checks on camshaft axial clearance 

1)、When the axial spacing is measured with a cliper 

to be larger than the benchmark value, the camshaft is to 
be replaced. 
The air inlet camshat axial clearance is 0.1~0.170mm。
The air exhaust camshaft axial spacing is 0.1 ~
0.173mm。 
Limits for operation:0.18mm 


3-4 Cleaning 
1、Clear off the spark plug carbon accumulation with a 
metal brush. 


Content   ..  215  216  217  218   ..