Chery B11. Manual - part 132
 

  Index      Chery     Chery B11 - service repair manual


Search            


Content   ..  130  131  132  133   ..


Chery B11. Manual - part 132


Chery B11 Service Manual


Air Conditioner-51 


9. 

Pull out the harness connecting with the evaporator. 

10.  Detach the bellows assy. 

11.  Loosen  the  four  fixing  bolts  for  air  mix  damper  on  the  heater  radiator,  and  take  out  the  air 

mix damper. 

12.  Remove the heater radiator temperature sensor. 


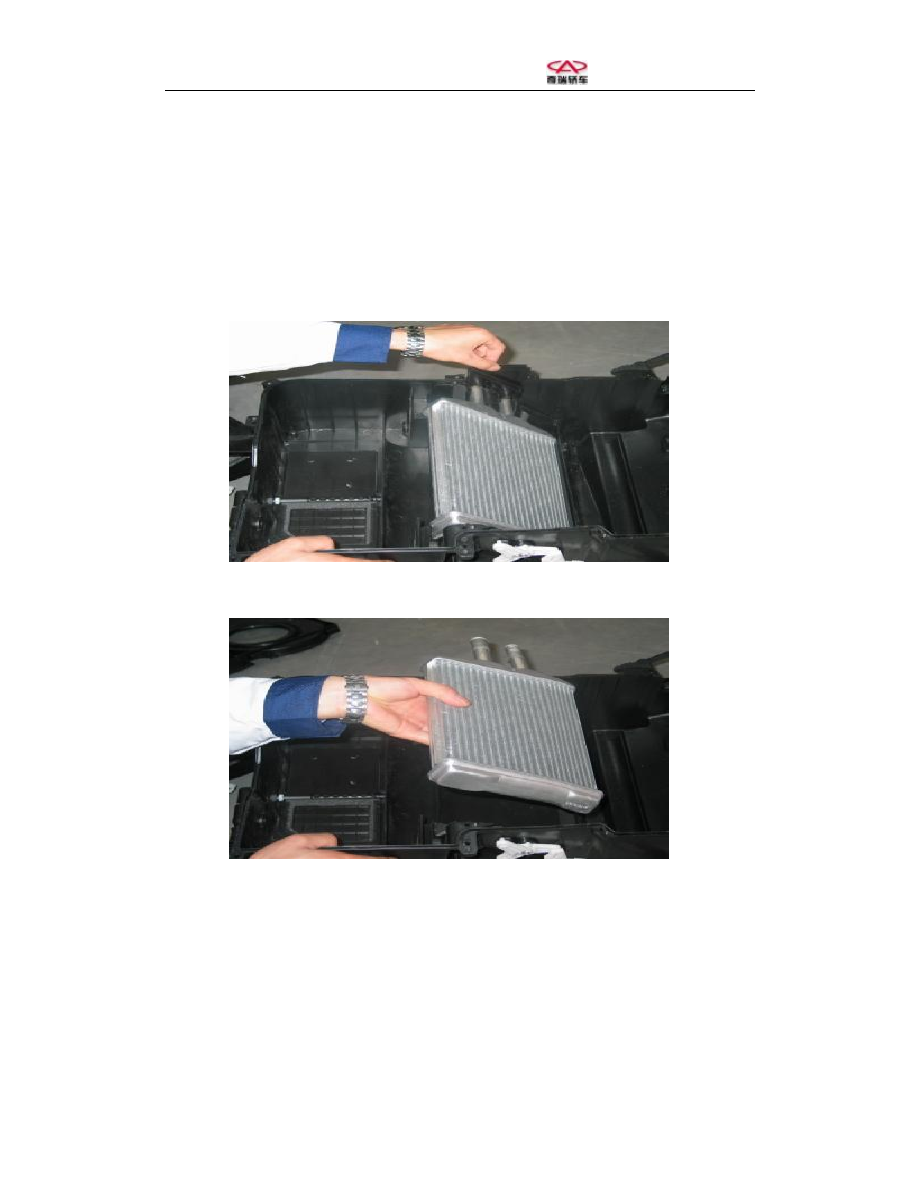
13.  Detach the heater radiator guide holder upwards. 


14. Take out the heater radiator upwards. 


Check the heater radiator 

Check whether the fins are jammed. 

If the fins are jammed, apply the compressed air to clear the jammed. 

Install the heater radiator 

Install  the  heater  radiator  in  the  reverse  order  of  removal.  And  vacuumize  the  system,  keep  the 

pressure, charge the refrigerant, and check the leakage. 


Chery B11 Service Manual


Air Conditioner-52 

Section 24 Replacement of A/C Cleaner 

Remove the A/C cleaner 

Tools required: 

Cross screwdriver and straight screwdriver. 

1. 

Gently pull out the sealing strip upwards.   


2. 

Loosen the plastic bolts on the trim panel. 


Chery B11 Service Manual


Air Conditioner-53 


3.  Move outwards the trim panel. 


4.  Take out the A/C cleaner upwards. 


Install the A/C cleaner 

Install the A/C cleaner in the reverse order of removal. 


Chery B11 Service Manual


Air Conditioner-54 


Section 25 Maintenance of Blower 


1.  Loosen the connector lugs on the blower. 

2.  Unscrew the three fixing bolts on the blower, and pull out the blower downwards. 

3.  Remove the two fixing bolts for the blower and blower base. 


4.  Conduct the corresponding checks, and, if necessary, add the lubricating oil. 


Content   ..  130  131  132  133   ..