Chery A18. Manual - part 68
 

  Index      Chery     Chery A18 - service repair manual


Search            


Content   ..  66  67  68  69   ..


Chery A18. Manual - part 68


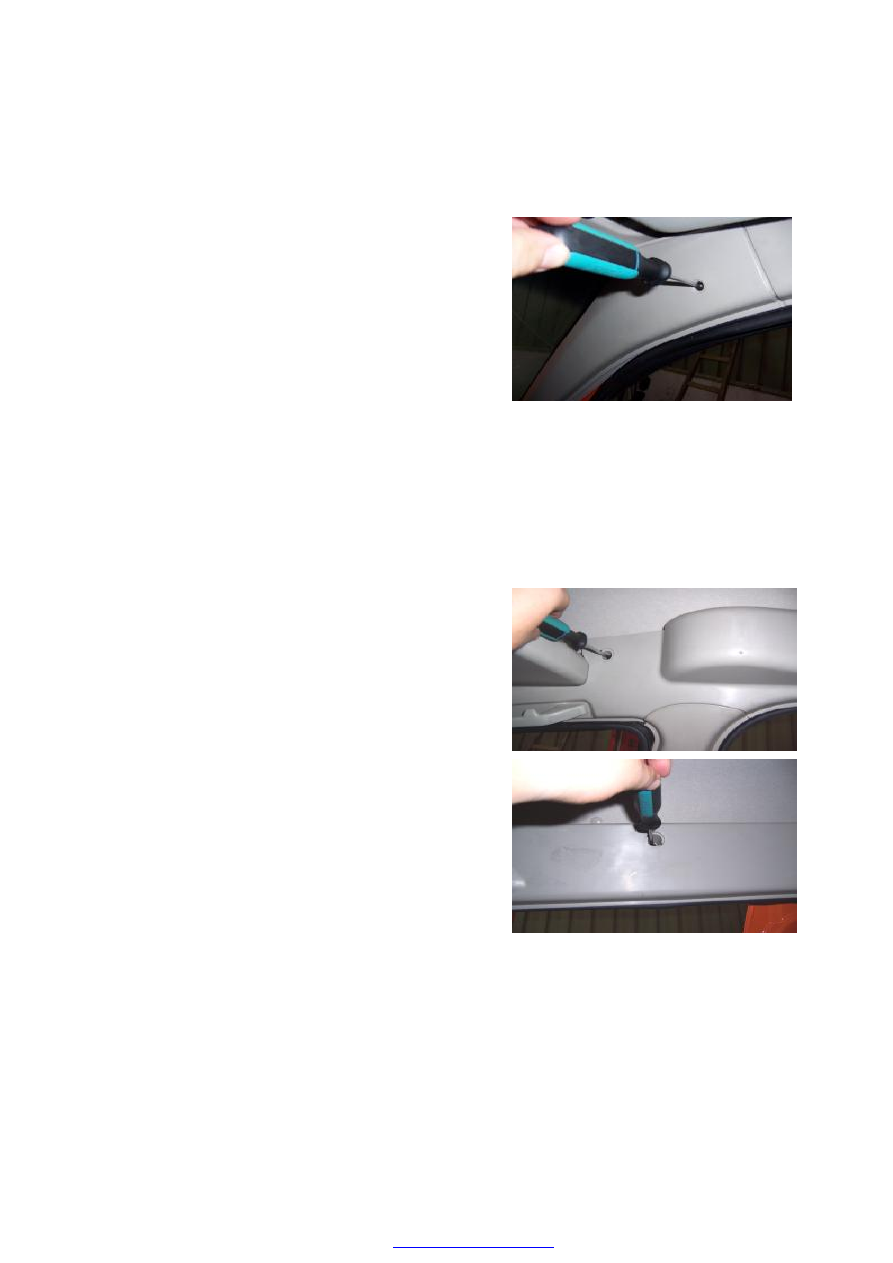
6. Disassembly & assembly of A pillar shield   

6.1. Disassembly steps 

6.1.1. Unscrew bolts with the Phillips screwdriver 

6.1.2. Then take out A pillar shield 


6.2. Assembly steps 

Assemble  according  to  the  inverted  sequence  of  the 

disassembly 


7. Disassembly & assembly of side shield of the roof 

7.1. Disassembly steps 

7.1.1.  Unscrew  2  fixing  bolts  with  the  Phillips 

screwdriver and then take out the side shield of the roof 


7.2. Assembly steps 

Assemble  according  to  the  inverted  sequence  of  the 

disassembly 


8. Disassembly & assembly of B pillar shield 

8.1. Disassembly steps 

8.1.1.  Take  out  the  upper  shield  of  B  pillar  with  the 

slotted  screwdriver  (See  the  disassembly  &  assembly 

of the safety belt). 


8.1.2.  Take  out  the  down  shield  of  B  pillar  with  the 

slotted screwdriver 

Attention: Protect trim surface not to be scratched 


8.2. Assembly steps 

Assemble according to the inverted sequence of the 

disassembly 

9. Disassembly & assembly of the bottom board front storage box   

9.1. Disassembly steps 

9.1.1.  Unscrew  two  side  fixing  bolts  of  the  front 

storage  box  with  the  Phillips  screwdriver  (There  are  6 

bolts in all and each 3 bolts at the left & right sides) 


9.1.2.  After unscrewing bolts, the  front storage bottom 

board is disassembled by hands 


9.2. Assembly steps 

Assemble according to the inverted sequence of the disassembly). 

10. Disassembly & assembly of the roof 

10.1. Disassembly steps 

10.1.1.  Disassemble  the  left  &  right  front  sunshade  plates  (See 

the disassembly & assembly of the sunshade plate) 

10.1.2. Disassemble the front ceiling lamp and then disassemble 

the  rear  ceiling  lamp  (See  the  disassembly&  assemble  of  the 

front & rear ceiling lamp.) 

10.1.3.  Disassemble  all  the  roof  handrails  inside  of  the  car.   

(See the disassembly & assembly of the car roof handrail) 

10.1.4  Disassemble  the  bottom  board  of  the  front  storage  box
(See the disassembly & assembly of the front storage boards) 

10.1.4.Disassemble  shields  of  the  A/B  pillar  shield  &  roof  side 

shield(See the disassembly & assembly of the A/B pillar & roof 

side shield) 


10.1.5. Disassemble all buckles (16) of the roof with the  slotted 

screwdriver 


10.1.6.  Open  the  rear  door,  disassemble  the  roof,  and  it  is  very 

convenient to take out the roof and not easy to spoil the roof 


10.2. Assembly steps 

Assemble according to the inverted sequence of the disassembly 


Chapter VII Disassembly & Assembly of the Instrument Panel 

  Section I Instrument panel system constitutional diagram   

.   


1  Bolt 

14 Left air outtake of the instrument frame   

27 Turning switch 

2  Left support of the instrument panel 

15 Wind frame assembly 

28 Upper shield of combined switches 

3  Bolt (with pad) 

16 Self-tapping bolt of the combined instruments 29 Combined switches 

4  Instrument panel assembly 

17 Electronic combined instruments 

30 Glove box lock assembly 

5  Clip bolt 

18 Fixing clamp of the central electric box 

31 Glove box assembly 

6  Bolt cover 

19 Relay 

32 Bolt 

7  Central panel of the instrument panel(H)  20 Fuse 

33 Glass lifting switch 

8  Assembly wrapping strip 

21 Left side jockey box assembly 

34 Accessory panel of the instrument panel 

9  Switch closure 

22 Central electric box assembly 

35 Clip 

10 Headlamp switch 

23 Self-tapping bolt 

36 Controlled module support 

11 Fog lamp switch 

24 Down shield of the combined switches 

37 Glass lifting controlled module 

12 Heating switch of the rear windshield 

25 Fixing bolts of combined switches 

38 Glass lifting main switch 

13 Instrument frame assembly 

26 Wiper switch 


Content   ..  66  67  68  69   ..