Chery A series. Manual - part 96
 

  Index      Chery     Chery A series - service repair manual


Search            copyright infringement  


Content   ..  94  95  96  97   ..


Chery A series. Manual - part 96


------If the trunk lid is to be adjusted 

horizontally, move the hinge on the side 
until the value of movement becomes 
consistent to the designed adjusting 
value. Adjustment can also be conducted 
through moving the center of the top.   


------After adjustment is finished, the 

connecting surface of rear door and the 
side shall be checked as to if it is even or 
not, if the joint with sealing rubber is 
satisfactory or not. A good joint can 
provide the trunk lid with pressure seal, 
which can prevent water, air and dust 
from admission or give out the chick 
sound.  

------Check if the transparent plastic adhesive 

tape for preventing rubber block from 
contacting the coated paint of vehicle 
body exists or not. If the tape does not 
exist or it has already aged, isopropyl 
alcohol or heptane is to be used for 
cleaning the contact surface, and new 
adhesive tape is to be pasted. 

 
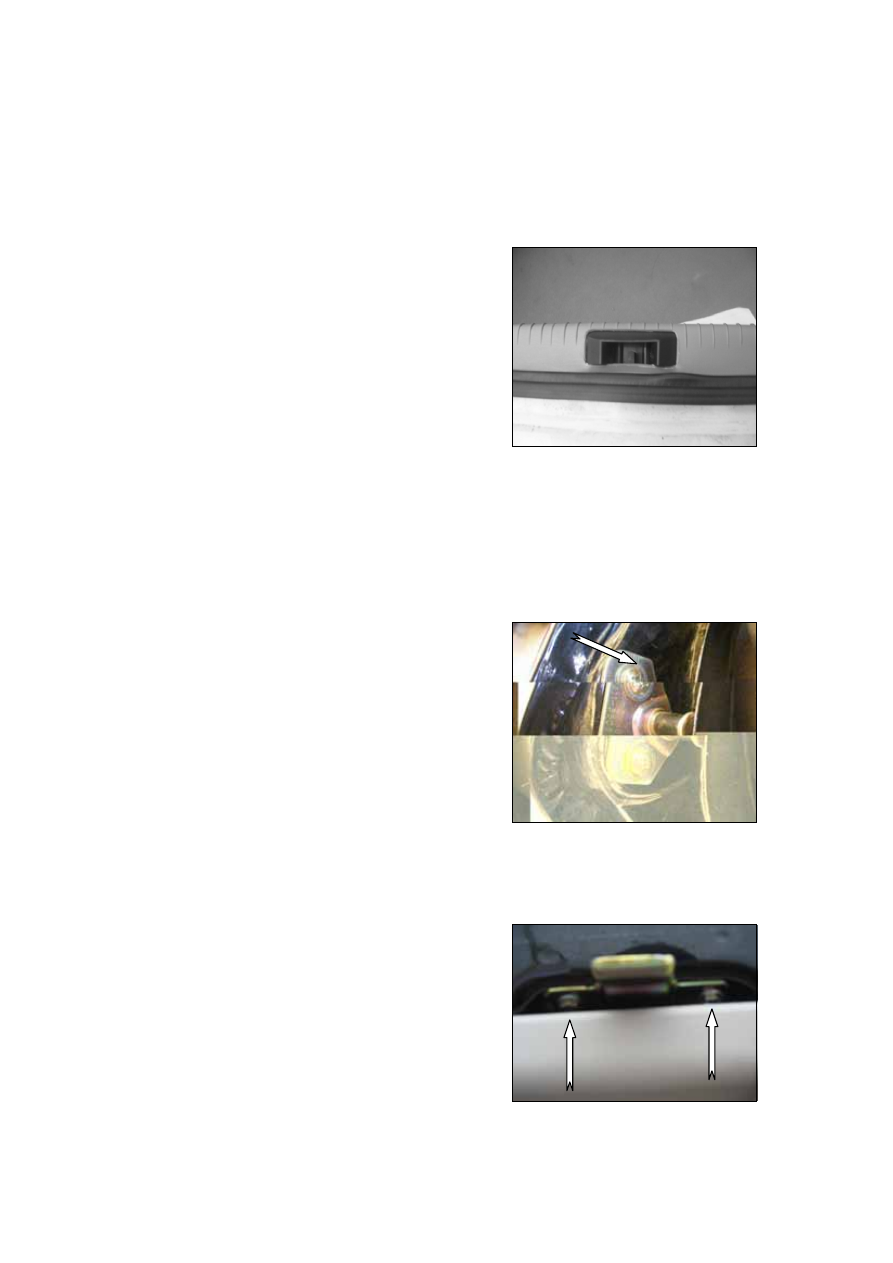
REMOVAL OF LOCK STRIKER 
------Take out the screws of two lock 

strikers, 2 for each. The screws are 
on the side of luggage boot. 


REMOVAL OF TOP PART OF 
CENTRAL LOCK 


------Remove the two screws of lower frame of 

trunk lid to remove the top of central lock.


S-35

------Remove the two screws between the 

bottom part of central lock and rear end 
panel. For CHERY model—A15RHD 
with luggage boot trim panel available, 
the trim panel shall be removed before 
removing the screws. 

------Install lock in the reverse order of its 

removal. Tightening torque for screws of 
side locks is 7.2±0.7N·m. Tightening 
torque for screw on top of lock striker is 
7.2±0.7N·m  


ADJUSTMENT OF LOCK AND TRUNK LID   
------If the trunk lid fails to be closed properly due to its wrong position, it can be adjusted 

through adjusting the position of lock striker.   

------It is possible to make horizontal adjustment of the trunk lid, for there is a slot on its 

top. Adjustment made is to assure an even clearance of 5±0.5mm between trunk lid 
and rear side panels on two sides. 


REMOVAL & INSTALLATON OF FRONT DOOR 
GLASSES


REMOVAL 


----Before removal of front door glasses, the 

trim panel and waterproof film shall be 
removed first following instructions. 

----Pull out the inner and outer door waterproof 

strips; begin the removal from the rib of the 
internal side of the central door frame.   

----Place the glass at the center of the door 

frame. Loosen the fixing slot of the 
window regulator support. 

----When removing the glass, incline the upper 

part of the glass towards outside direction 
of the door. 

 
INSTALLATION: 
Install in the reverse order of removal. 
 
NOTE 
Do not tighten the screw before until the 
glass is installed in place properly. 


S-36

REMOVAL & INSTALLATON OF REAR 
DOOR GLASSES


REMOVAL 
----Before removal of front door glasses, the 

trim panel and waterproof film shall be 
removed first following instructions. 

----Pull out the inner and outer door waterproof 

strips; begin the removal from the rib of the 
internal side of the central door frame.   

----Place the glass at the center of the door 

frame. Loosen the fixing slot of the 
window regulator support.   

----When removing the glass, incline the upper 

part of the glass towards outside direction 
of the door. 

Install in the reverse order of removal. 
 
NOTE 
Do not tighten the screw before until the 
glass is installed in place properly. 


REMOVAL & INSTALLATON OF REAR 
QUARTER GLASS   


REMOVAL 
----Before removal of quarter glass, the trim 

panel and waterproof film shall be removed 
first following instructions. 

----Take out the inner and outer pressed 

moldings of the door, and remove them 
from the rib position of the internal side of 
the central door frame. 

----Loosen the bolts between the central guide 

rail and inner panel of the door, and 
remove the central guide rail. 

----Pull the quarter glass outwards and it 

should be removed easily. 


INSTALLATION 
Install in the reverse order of removal. 


S-37

REMOVAL & INSTALLATON OF FRONT WINDOW REGULATOR 
REMOVAL


----Before removal of front window regulator, 

the trim panel and waterproof film shall be 
removed first following instructions.   

----Loosen six screws that secure window 

regulator to the inner panel of the door as 
shown in the figure.   

----Disconnect the motor connector of window 

regulator and take out the regulator. 
Removal of window regulator is performed 
separately from that of glass. 


INSTALLATION 

Install in the reverse order of removal. 


NOTE 

----Tightening torque for bolts or nuts of 

window regulator is M=9±1N.m.   

----Installation size for glass bracket is 105mm 

as shown in the figure. 

----Tighten the six screws of window regulator 

only after the glass is fully raised till the top 
and can run up and down smoothly.   

----After installation and adjustment, the glass 

should run up and down smoothly. Any 
shaking, vibration or shock is not allowed. 
The up or down movement of glass shall 
be finished within 3±1S. 


105

S-38


Content   ..  94  95  96  97   ..