Chery A series. Manual - part 94
 

  Index      Chery     Chery A series - service repair manual


Search            copyright infringement  


Content   ..  92  93  94  95   ..


Chery A series. Manual - part 94


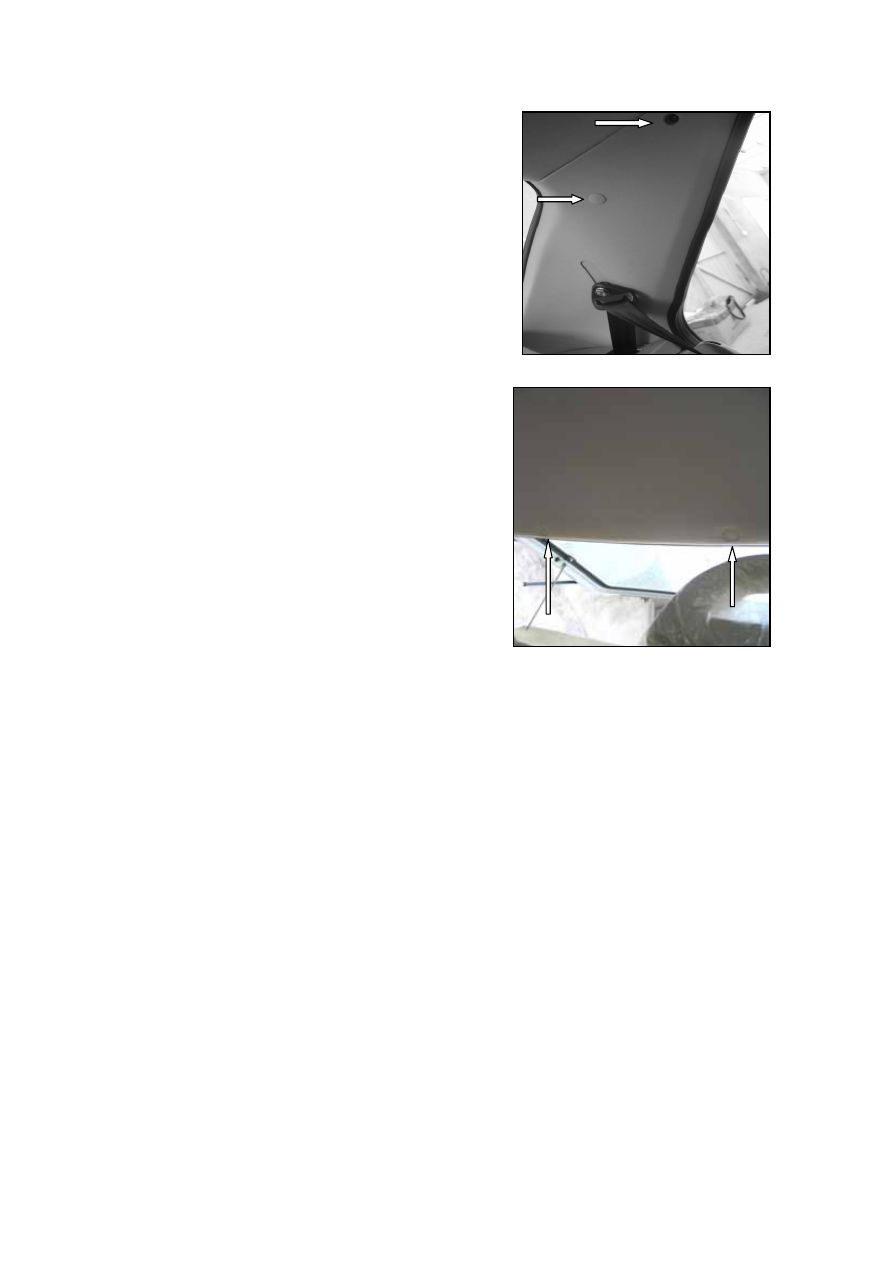
DISASSEMBLY OF COLUMN C: 

Remove the decorative cap, after that loosen 
the lock nut between the internal lining and 
column C. 


Use a plug extraction tool to remove the 
fastening plug in the headliner of the car 
ceiling. 

Other worker will remove the headliner and 
pull it out from the rear door opening. 

Assembly: 

The steps are the reverse of disassembly. The 
installing angle for the retractor assembly of 
left/right front safety belt is 0º, the tightening 
torque of the locking bolt is 50±10N·m, the 
tightening torque of the fastening bolt for 
adjusting the sliding guide rail is 24±5N·m , 
the tightening torque of the guide ring 
fastening bolt is 50±10N·m. The installing 
angle for the retractor assembly of left/right 
rear safety belt is 30º, and the tightening torque 
is 50±10N·m. 

Note: Appropriate measures should be taken to 
avoid dirtying the car during disassembly and 
assembly. 


S-27

DISASSEMBLY AND ASSEMBLY OF 
REAR DOOR TRIM PANEL 

Disassembly: 

1. Remove the armrest decorative fastening 

bolt, and dismantle the armrest cover and 
armrest base. Remove the inner door open 
handle guard frame. Remove the safety 
handle. 

2. Remove the fastening bolt between the trim 

panel and doorframe. 

Assembly: 

Assembly is the reverse of disassembly. 

The tightening torque of the screw for the inner 
handle assembly is 1.5±0.15N·m. 

Note: Appropriate measures should be taken to 
avoid dirtying the working area during 
disassembly and assembly. It is very important 
to maintain the cleanliness inside the car 
during working. 


DISASSEMBLY/ASSEMBLY OF CARPET 
FOR PASSENGER COMPARTMENT 

Disassembly: 

Remove the fixed decoration between the seal 
and the carpet. Loosen the fastening bolt 
between the floor and the safety belts of 
passenger seats. Remove the oil pan. Use a 
plug extraction tool to remove the fastening 
plug for the carpet 

Assembly: 

Assembly is the reverse of disassembly. 

Remember that the tightening torque of safety 
belt is 50±10N·m. 


S-28

DISASSEMBLY AND ASSEMBLY OF 
SEATS 

DISASSEMBLY AND ASSEMBLY OF 
FRONT SEATS.
 

Disassembly: 

1. Move the seat forward, remove the rear 

brake. Loosen the fastening bolt of the 
regulator and remove the guide rail. 


2.Loosen the nut and remove the locking bolts.

3. Loosen the adjusting level of seats, move the 

seats backward and disconnect the guide 
rail.  

4. Disconnect the power line of seat safety belt

5. Remove the guard plate of the sliding rail of 

the seat. 

Assembly: 

When installing, the steps are the reverse of 
disassembly. 

The tightening torque of the seat stopper bolts 
is 2.5±0.5N·m. The position arrangement for 
the left/right front seats should meet the 
requirement in such that the space between the 
front and rear seats is 740±20mm. 


DISASSEMBLY AND ASSEMBLY OF 
HEADREST 

Disassembly: 

Pull the headrest upwards until the contact 
point of the side level. Remove the fastening 
clamp between the headrest side rod and the 
rear slot of the seat with a screwdriver.   

Assembly: 

When installing, remember the position of the 
spring clamp, and install it before inserting the 
headrest side rod. 


S-29

DISASSEMBLY AND ASSEMBLY OF 
REAR SEATS 

Disassembly: 

1. Pull out the rear adjusting lever so as to 

disconnect the seat, and fold it forward. 

2. Remove the guard plate for the seat cushion 

and car fastening bolts.   

3. Loosen the fastening bolt between the seat 

of the rear beam and the car floor. 

Assembly: 

Assembly is the reverse of disassembly. 

The tightening torque of the specified bolt for 
the seat cushion assembly is 2.5±0.5mm. 


REMOVABLE REAR SEAT   

DISASSEMBLY AND ASSEMBLY OF THE 
ENTIRE OR THE PART OF SEAT 

Pull the adjustment lever of the rear seat 
upwards and fold it until it disconnects with 
the front-folded part of the seat.   

Remove the guard plate on the fastening bolt 
between the seat and car.   

Loosen the fastening bolt of the corresponding 
position on the rear beam of the car.   

When installing, the steps are the reverse of 
disassembly. 


DISASSEMBLY AND ASSEMBLY OF 
BUILT-IN FITTING ON THE BACK 
UPPER SIDE OF REAR SEAT   

Disassembly: 

Loosen the fastening bolt of the flexible pin of 
the built-in fitting. 

Assembly: 

Assembly is the reverse of disassembly. 


S-30


Content   ..  92  93  94  95   ..