Chery A series. Manual - part 92
 

  Index      Chery     Chery A series - service repair manual


Search            copyright infringement  


Content   ..  90  91  92  93   ..


Chery A series. Manual - part 92


B. Begin the disassembly process from the 
interior part of the car      

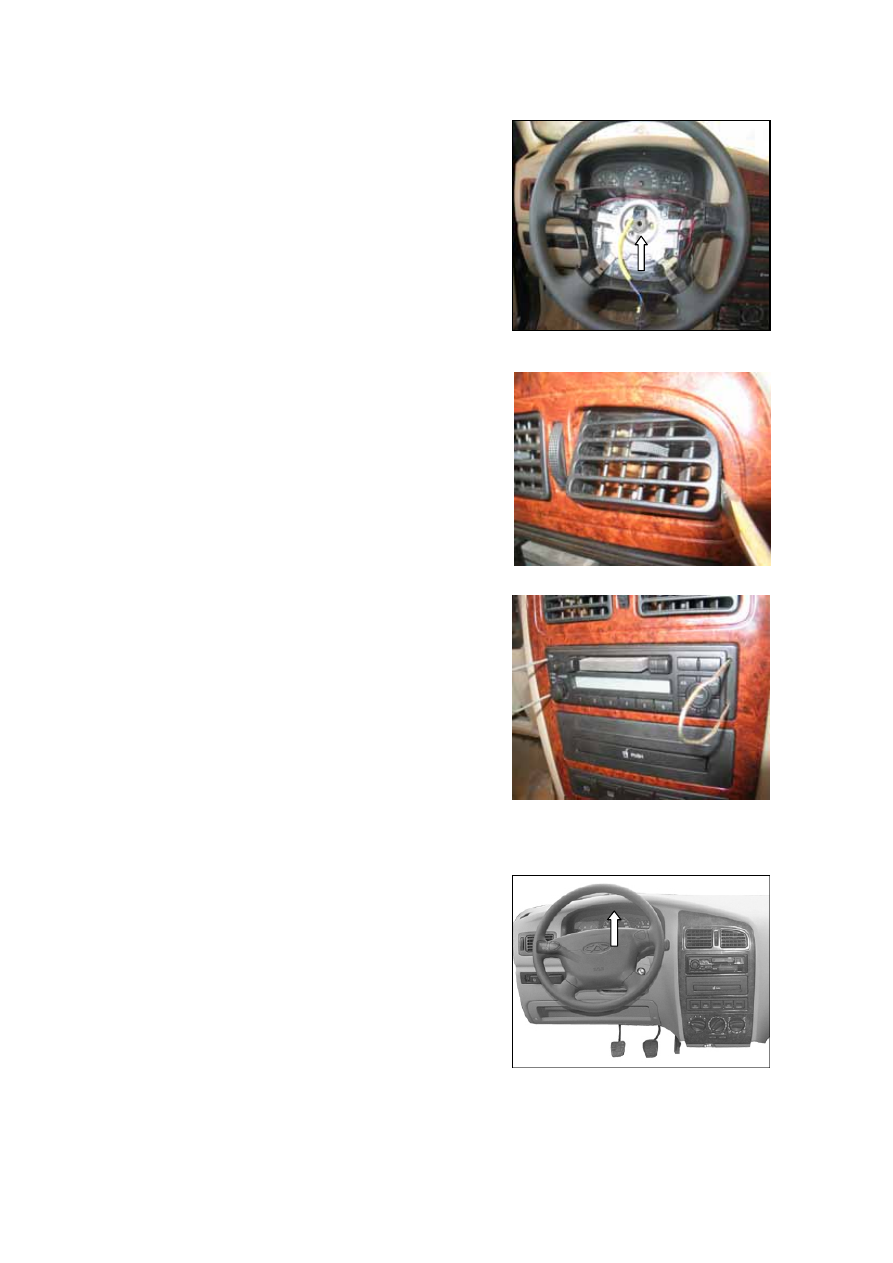
Dismantle the steering wheel, pull the airbag 
upwards and then remove it. (See disassembly 
of airbag) 
1. Loosen the lock nut between the steering 
wheel and the Steering-axis. 

2. Remove the control and protective switch 
for the steering gear lamp. 


3. Overcome the restraining force of the 
fastening clamps and remove the three vents of 
radiator. 


Remove the cover of cup bracket and then 
loosen the two fastening screws at the interior 
sides. 


Attention:  


Do not damage the clamps of the housing. 
Remove the switch and cover at the two 
sides of the instrument panel. Remove the 
radio cover and the air condition cover. 


S-19

4. Loosen two fastening screws of the cover of 

the instrument panel and remove the cover. 

5. Remove the instrument fastening screws on 

the partition in the driving compartment and 
remove the instrument panel. Dismantle the 
switch and the left bottom side cover of the 
steering wheel. Dismantle the left bottom 
side cover of the tool case. 


6. Remove the plug; loosen the right-hand-side 

fastening screws of the instrument panel and 
the screws located in the space at the left 
bottom side of the tool box. 


7. As for those cars with plastic molded 

supporting frame, you need to remove the 
anti-rust leather sheath of the shift lever, the 
instrument panel and the fastening screws of 
the car floor plates first before disassembly. 


S-20

8. Remove the plug; loosen the fastening 

screws in the left side of instrument panel 
and the screws of the left bottom side of the 
supporting frame. Loosen the fastening 
screws of the control device. 

9. Remove the instrument panel, separate the 

cable from the clamps and dismantle the 
necessary electrical components. 

Assembly 

Assembly is the reverse of disassembly. 

Remember the tightening torque of lock nut 
should be 40N.m. During disassembly and 
assembly, steps must be taken to avoid 
dirtying those places that are very difficult to 
clean. Keeping clean in the car is very 
important. 


DISASSEMBLY AND ASSEMBLY OF 

PACKAGE TRAY TRIM PANEL 

DISASSEMBLY 

Pull out the lifting stem of the rear door frame, 
after that pull out the rear chassis so as to loose 
it from the fastening position of the frame. 

Assembly:  

Assembly steps are the reverse of disassembly.


S-21

DISASSEMBLY AND ASSEMBLY OF REAR SPEAKER   

Disassembly: 

Remove the fastening screws at the top and bottom of the rear seat safety belt (applicable only 
for the car model with safety belt). Loosen the four screws of the frame and dismantle it. 

Assembly: 

The assembly steps are reverse with the above and remember that the tightening for the safety 
belt is 50±10N.m. 

DISASSEMBLY AND ASSEMBLY OF 

SHIFT LEVER 

Dismantle and replace the anti-rust corrugated 
leather sheath of the shift lever, remove the 
fastening screws between the chassis and the 
floor plate of the car, so that the corrugated 
leather sheath can pass through the hole of the 
chassis, after that dismantle the chassis. 


DISASSEMBLY AND ASSEMBLY OF 

GLOVE BOX


Disassembly: 

Dismantle the fastening screws between the 
glove box and the instrument panel and also 
dismantle the power supply wires for 
illumination lamp. Remove the glove box. 

Assembly: 

Assembly steps are the reverse of disassembly.


S-22


Content   ..  90  91  92  93   ..