BMW 325i Sedan (2006 year). Instruction - part 8
Replacing components
128
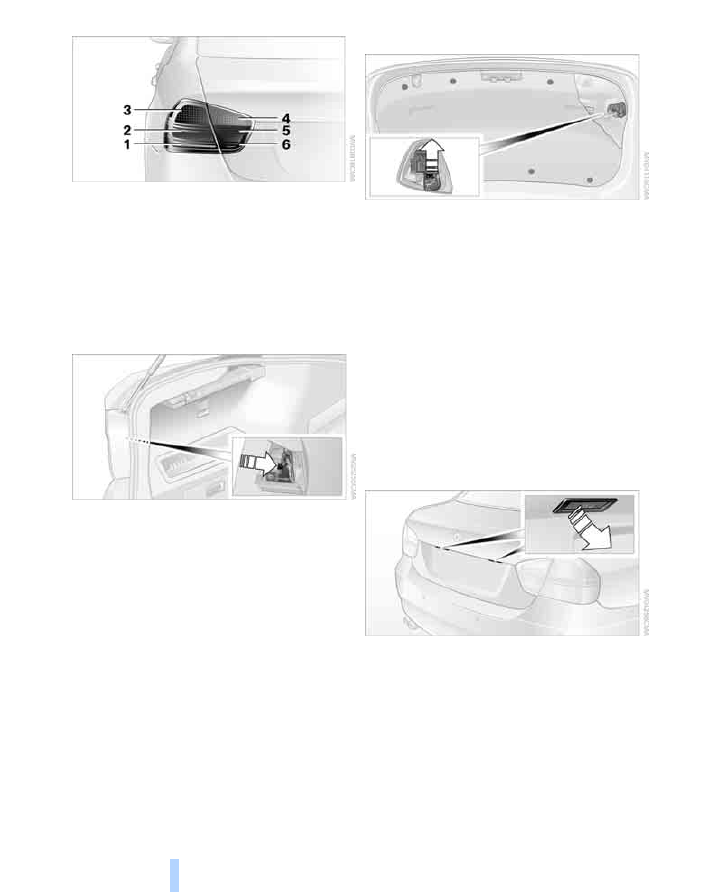
1 Brake lamp
2 Roadside parking lamp/tail lamp
3 Turn signal
4 Backup lamp
5 Tail lamp
6 Brake lamp
Fender-mounted lamps
1.
Using a screwdriver, pry off the cover in the
luggage compartment or release the turn-
lock fastener by turning it counterclockwise
and remove the cover.
2.
Unfasten the bulb holder at the clip, see
arrow, and pull out.
3.
Apply gentle pressure to the bulb while
turning it to the left for removal and replace-
ment.
4.
Re-engage the bulb holder so that it audibly
clicks into place.
5.
Reattach the cover in the luggage compart-
ment.
Lamps in the luggage compartment lid
1.
Pry out the plastic plugs in the trim of the
luggage compartment lid using a screw-
driver and remove the trim.
2.
Unfasten the bulb holder at the clip, see
arrow, and remove.
3.
Apply gentle pressure to the bulb while
turning it to the left for removal and replace-
ment.
4.
Re-engage the bulb holder so that it audibly
clicks into place.
5.
Reattach the trim of the luggage compart-
ment lid.
License plate lamp
5 watt bulb, C 5 W
1.
Using a screwdriver, push the lamp to the
right in the flap of the lamp housing.
2.
Take out the lamp towards the left and
change the bulb.
3.
Insert the lamp.
Center brake lamp
This lamp uses LED technology for operation.
In the event of a malfunction, please contact
your BMW Center or a workshop that works