BMW 325i Sedan (2006 year). Instruction - part 6


  Index      BMW     BMW 325i Sedan - instruction 2006 year in english


Search            


Content   ..  4  5  6  7   ..


BMW 325i Sedan (2006 year). Instruction - part 6


Practical interior

 accessories

92

Sockets in the rear center console*

Remove corresponding cover.

Socket in the luggage compartment*

Open the cap.

Through-loading system*

Opening

1.

Open the belt lock of the rear center safety 
belt. To do so, press the button, see arrow, 
and release the latch plate.

2.

Insert the latch plate at the end of the belt 
into the specially designated fixture on the 
rear window shelf.

3.

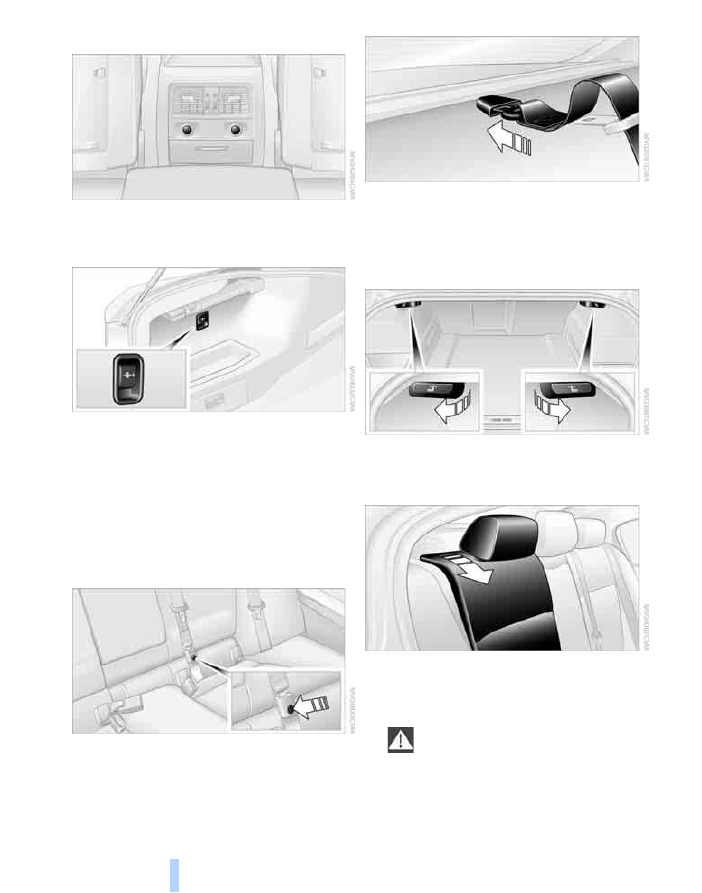
Push the corresponding head restraint 
down as far as it will go, refer to page

34

.

4.

To release the rear seat back, pull the corre-
sponding lever in the luggage compart-
ment.

5.

The unlocked rear seat back moves forward 
slightly. Fold the seat back forward by the 
head restraint.

Closing

1.

Return the rear seat back to its upright posi-
tion and engage it.

When returning the backrest into its 
seating position, make sure that the 

seat's locking mechanism engages prop-
erly. Otherwise, cargo could be thrown 
around in the event of sharp braking or 
swerving and endanger the occupants.

<

Re

fe

re

n

c

e

A

t a 

g

lanc

e

Co

n

tr

o

ls

D

riv

in

g tip

s

M

o

b

ilit

y

 93

2.

Release the latch plate from the fixture on 
the rear window shelf and insert it into the 
belt lock of the center safety belt. Make sure 
you hear the latch plate engage in the belt 
buckle.

The lashing eyes in the luggage compartment 
provide you with a way to attach luggage com-
partment nets

*

 or draw straps for securing suit-

cases and luggage, refer to page

101

.

Storage spaces in the 

luggage compartment

Left storage compartment, suitable e.g. for 
storing a box of cleaning tissues or up to 12 CD 
cases, depending on vehicle equipment ver-
sion.
Depending on your vehicle's equipment, the 
following additional storage spaces can be 
found in the luggage compartment:

>

Net

for securing smaller objects, to be 

attached to the fixtures on the floor panel

>

Hooks for hanging up, e.g., shopping bags 
or tote bags

>

Rubber strap on the left trim panel for 
securing small objects such as a folding 
umbrella

>

Net for small objects on the right trim panel

>

Retaining straps next to the rear lashing 
eyes, e.g. for securing an umbrella

>

Folding, removable box

under the floor 

panel, e.g. for wet or dirty items

>

Insertable dividers

and removable storage 

tray for the storage compartment under the 
floor panel

>

Drawer for storing small items. Pull the han-
dle firmly to release the drawer. If neces-
sary, you can pull out the drawer entirely, 
refer to the information below

Do not drive or close the luggage com-
partment lid while the drawer is pulled 

out. 
On uphill gradients, release the drawer with 
caution, otherwise it could slide out on its own 
and cause injury.
Do not exceed a maximum load of 11 lbs/5 kg 
for the drawer, otherwise damage could 
result.

<

Removing the drawer

1.

Push the drawer all the way in.

2.

Turn the catches on the left and right all the 
way out.

3.

Remove the drawer by pulling it down and 
backwards.

Reinserting the drawer

1.

Hook the guides of the drawer into the front 
of the yellow guide aids on the underside of 
the luggage compartment.

2.

Insert the catches into the mounts on the 
underside of the luggage compartment.

3.

Turn the catches on the left and right all the 
way in.

Folding up the luggage compartment 
floor panel

Press the floor panel against the top of the lug-
gage compartment; a locking device holds the 
luggage compartment floor panel in place. To 
detach the floor panel, pull it out of the locking 
device.

Practical interior

 accessories

94

Equipment version with drawer:
Take the retaining strap on the right-hand side 
of the drawer out of the bracket and use it to fix 
the cargo luggage compartment panel in place.

Do not exceed the maximum permissible 
load of 55 lbs/25 kg for the storage com-

partment under the floor panel, otherwise dam-
age could result.

<

Lashing eyes

You will find lashing eyes in the luggage com-
partment for securing luggage items with nets 
or tensioning straps, refer to page

101

.

Ski bag*

Designed for safe, clean transport of up to 
4 pairs of standard skis or up to 2 snowboards.
With the ski bag you can stow skis with a length 
of up to 6 ft 10 in/2.10 m. When skis of 6 ft 10 in/
2.10 m length are loaded, the overall capacity of 
the ski bag is reduced due to its tapered design.

Loading

1.

Fold down the center armrest.

2.

Press the button, reach into the recess and 
fold down the cover.

3.

Open the Velcro fastener, spread the ski 
bag between the front seats and insert the 
skis or snowboards. 
The zip fastener makes objects in the ski 
bag easier to reach.

4.

Insert the latch plate of the ski bag's retain-
ing strap in the center belt buckle.

Make sure to load only clean skis into the ski 
bag. Wrap sharp edges to prevent damage.

Securing cargo

After loading, secure the ski bag and its con-
tents. Tighten the retaining strap on the ten-
sioning buckle for this purpose.

Secure the ski bag in the manner 
described, otherwise it could endanger 

the car's occupants, e.g. in case of heavy brak-
ing or sudden swerving.

<

To store the ski bag, perform the steps 
described for loading in reverse order.

Removing the ski bag

The ski bag can be completely removed, e.g. for 
faster drying or to allow you to use other inserts.

Re

fe

re

n

c

e

A

t a 

g

lanc

e

Co

n

tr

o

ls

D

riv

in

g tip

s

M

o

b

ilit

y

 95

1.

Fold down the center panel in the rear seat 
backrest.

2.

Pull the handle, arrow

1.

3.

Pull out the insert, arrow 

2.

For more information on the various 
inserts available, contact your BMW Cen-

ter.

<

Things

 to re

memb

er wh

en 

drivin

g

98

Things to remember when driving

Break-in period

Moving parts need breaking-in time to adjust to 
each other. Please follow the instructions below 
in order to achieve the optimal service life and 
economy of operation for your vehicle.

Engine and differential

Always obey all official speed limits.

Up to 1,200 miles/2,000 km

Attempt to vary both engine and vehicle 
speeds, but refrain from exceeding an engine 
speed of 4,500 rpm or a driving speed of 
100 mph or  160 km/h.
Avoid full-throttle operation and use of the 
transmission's kick-down mode.

After 1,200 miles/2,000 km

Engine and vehicle speeds can be gradually 
increased.

Sequential manual gearbox SMG

Do not use the acceleration assistant during the 
break-in period, page

47

.

Tires

Due to technical factors associated with their 
manufacture, tires do not achieve their full trac-
tion potential until after an initial break-in 
period. Therefore, drive cautiously during the 
first 200 miles/300 km.

Brake system

Brakes require an initial break-in period of 
approx. 300 miles/500 km to achieve optimized 
contact and wear patterns between brake pads 
and rotors. Drive cautiously during this break-in 
period.

Clutch

The function of the clutch reaches its optimal 
level only after a distance driven of approx. 

300 miles/500 km. During this break-in period, 
engage the clutch gently.

Following part replacement

The same break-in procedures should be 
observed if any of the components mentioned 
above have to be renewed in the course of the 
vehicle's operating life.

General driving notes

Close the luggage compartment lid

Operate the vehicle only when the lug-
gage compartment lid is closed. Other-

wise, exhaust fumes could enter the interior of 
the vehicle.

<

If special circumstances make it absolutely nec-
essary to drive with the luggage compartment 
lid open:

1.

Close all windows and the glass sunroof.

2.

Increase the air flow rate of the air condi-
tioner or automatic climate control consid-
erably, refer to page

81

 or

84

Hot exhaust system

In all vehicles, extremely high tempera-
tures are generated in the exhaust sys-

tem. Do not remove the heat shields installed 
adjacent to various sections of the exhaust sys-
tem, and never apply undercoating to them. 
When driving, standing at idle and while park-
ing, take care to avoid possible contact 
between the hot exhaust system and any highly 
flammable materials such as hay, leaves, grass, 
etc. Such contact could lead to a fire, with the 
risk of serious personal injuries and property 
damage.

<

Mobile phone in the vehicle

BMW discourages the use of mobile 
communications devices, e.g. mobile 

phones, inside the vehicle without a direct con-

Re

fe

re

n

c

e

A

t a 

g

lanc

e

Co

n

tr

o

ls

D

riv

in

g tip

s

M

o

b

ilit

y

 99

nection to an outside antenna. Otherwise, the 
vehicle electronics and mobile communication 
device can influence one another. In addition, 
there is no assurance that the radiation which 
results from transmission will be dissipated 
from the vehicle interior.

<

Interior and exterior mirrors, automatic 

dimming feature*

The automatic dimming feature of the interior 
and exterior mirrors

is controlled by two photo 

cells in the interior rearview mirror. One photo 
cell is in the mirror frame, see arrow; the other is 
on the back of the mirror.
In order to ensure that the system functions 
correctly, keep the photo cells clean, do not 
cover the area between the interior rearview 
mirror and windshield, and do not affix adhesive 
labels or stickers of any kind to the windshield 
directly in front of the mirror.

Hydroplaning

When driving on wet or slushy roads, 
reduce road speed. If you do not, a wedge 

of water can form between tires and road sur-
face. This situation, known as hydroplaning, 
means that the tire can completely lose contact 
with the road surface, so that neither the car can 
be steered nor the brake be properly applied.

<

The risk of hydroplaning increases with declin-
ing tread depth on the tires, refer also to Mini-
mum tread depth on page

115

.

Driving through water

Drive through water on the road only if it is 
not deeper than 1 ft/30 cm, and then only 

at walking speed at the most. Otherwise, the 

vehicle's engine, the electrical systems and the 
transmission may be damaged.

<

Use the handbrake on inclines

On inclines, do not hold the vehicle with 
the clutch; use the handbrake. Otherwise 

greater clutch wear will result.

<

Sequential manual gearbox SMG

On uphill slopes, drive off without delay. 
Do not hold the vehicle in place by 

depressing the accelerator pedal; apply the 
handbrake instead. Otherwise, the transmis-
sion could overheat.

<

Also use the drive-off assistant, refer to 
page

71

.

Braking safely

Your BMW is equipped with ABS as a standard 
feature. Applying the brakes fully is the most 
effective way of braking in situations in which 
this is necessary. Since the vehicle maintains 
steering responsiveness, you can still avoid 
possible obstacles with a minimum of steering 
effort.
Pulsation of the brake pedal, combined with 
sounds from the hydraulic circuits, indicate that 
ABS is in its active mode.

Driving in wet conditions

When roads are wet or there is heavy rain, 
briefly exert gentle pressure on the brake pedal 
every few miles. Monitor traffic conditions to 
ensure that this maneuver does not endanger 
other road users. The heat generated in this 
process helps dry the pads and rotors to ensure 
that full braking efficiency will then be available 
when you need it.

Hills

To prevent overheating and the resulting 
reduced efficiency of the brake system, 

drive long or steep downhill gradients in the 
gear in which the least braking is required. Even 
light but consistent brake pressure can lead to 
high temperatures, brake wear and possibly 
even brake failure.

<

Things

 to re

memb

er wh

en 

drivin

g

100

You can increase the engine's braking effect by 
shifting down, all the way to first gear if neces-
sary. This strategy helps you avoid placing 
excessive loads on the brake system. Down-
shifting in manual mode of the automatic trans-
mission, refer to page

48

.

Never drive with the clutch held down, 
with the transmission in idle or with the 

engine switched off; otherwise, engine braking 
action will not be present or there will be no 
power assistance to the brakes or steering. 
Never allow floor mats, carpets or any other 
objects to protrude into the area around the 
pedals, otherwise pedal function could be 
impaired.

<

Corrosion on brake rotors

When the vehicle is driven only occasionally, 
during extended periods when the vehicle is not 
used at all, and in operating conditions where 
brake applications are less frequent, there is an 
increased tendency for corrosion to form on 
rotors, while contaminants accumulate on the 
brake pads. This occurs because the minimum 
pressure which must be exerted by the pads 
during brake applications to clean the rotors is 
not reached.
Should corrosion form on the brake rotors, the 
brakes will tend to respond with a pulsating 
effect that even extended application will fail to 
cure.

When the vehicle is parked

Condensation forms while the automatic cli-
mate control is in operation, and then exits 
under the vehicle. Traces of condensed water 
under the vehicle are therefore normal.

Before driving into a car wash

For general information about taking care of 
your BMW, refer to the Caring for your vehicle 
brochure.

With convenient access and automatic 

transmission

Insert the remote control into the ignition 
switch.

The engine can be switched off when the selec-
tor lever is in position N. Refer also to page

27

.

Cargo loading

To avoid loading the tires beyond their 
approved carrying capacity, never over-

load the vehicle. Overloading can lead to over-
heating and increases the rate at which damage 
develops inside the tires. The ultimate result 
can assume the form of a sudden blow-out.

<

Determining loading limit

1.

Locate the following statement on your 
vehicle's placard

*

:

The combined weight of occupants 
and cargo should never exceed 

XXX kg or YYY lbs. Otherwise, overloading 
can result in damage to the vehicle and 
unstable driving conditions.

<

2.

Determine the combined weight of the 
driver and passengers that will be riding in 
your vehicle.

3.

Subtract the combined weight of the driver 
and passengers from XXX kilograms or YYY 
pounds.

4.

The resulting figure equals the available 
amount of cargo and luggage load capacity. 
For example, if the YYY amount equals 
1,400 lbs. and there will be five 150 lbs. 
passengers in your vehicle, the amount of 
available cargo and luggage load capacity is 
650 lbs.: 
1,400 lbs. minus 750 lbs. = 650 lbs.

5.

Determine the combined weight of luggage 
and cargo being loaded on the vehicle. That 
weight may not safely exceed the available 

Re

fe

re

n

c

e

A

t a 

g

lanc

e

Co

n

tr

o

ls

D

riv

in

g tip

s

M

o

b

ilit

y

 101

cargo and luggage load capacity calculated 
in step 4.

6.

If your vehicle will be towing a trailer, part of 
the load from your trailer will be transferred 
to your vehicle. Consult the manual for 
transporting a trailer to determine how this 
may reduce the available cargo and luggage 
load capacity of your vehicle.

Load

The permissible load is the total of the weight of 
occupants and cargo/luggage. The greater the 
weight of the occupants, the less cargo/lug-
gage can be transported.

Stowing cargo

>

Position heavy objects as low and as far for-
ward as possible, ideally directly behind the 
respective seat backs.

>

Cover sharp edges and corners.

>

For very heavy cargo when the rear seat is 
not occupied, secure each safety belt in the 
opposite buckle.

Securing cargo

>

Smaller and relatively light items can be 
retained with tensioning straps or draw 
straps

*

.

>

Heavy-duty cargo straps

*

 for securing 

larger and heavier objects are available at 
your BMW Center. Four lashing eyes are 
provided for attaching the cargo straps. 
Two are located

 on the inside rear wall of 

the luggage compartment 

1, and two others 

are on the side walls of the luggage com-
partment 

2

Comply with the information provided with 
the cargo straps.

Always position and secure the cargo as 
described above, so that it cannot endan-

ger the car's occupants, for example if sudden 
braking or swerves are necessary. 
Never exceed either the approved gross vehicle 
weight or either of the approved axle loads, refer 
to page

150

, as excessive loads can pose a 

safety hazard, and may also place you in viola-
tion of traffic safety laws. 
Heavy or hard objects should not be carried 
loose inside the car, since they could be thrown 
around, for example as a result of heavy braking, 
sudden swerves, etc., and endanger the occu-
pants.

<

Roof-mounted luggage rack*

A special rack system is available as an option 
for your BMW. Comply with the precautions 
included with the installation instructions.

Things

 to re

memb

er wh

en 

drivin

g

102

Mounting points

Open the covers.

Loading roof-mounted luggage rack

Because roof racks raise the vehicle's center of 
gravity when loaded, they have a major effect on 
vehicle handling and steering response. 
You should therefore always remember not to 
exceed the approved roof load capacity, the 
approved gross vehicle weight or the axle loads 
when loading the rack.
You can find the specified weights on page

150

.

The roof load must be uniformly distributed and 
should not be too large in area. Heavy items 
should always be placed at the bottom. Be sure 
that adequate clearance is maintained for rais-
ing the glass sunroof, and that objects do not 
project into the opening path of the luggage 
compartment lid.
Secure roof-mounted cargo correctly and 
securely to prevent it from shifting or falling off 
during the trip.
Drive smoothly. Avoid sudden acceleration and 
braking maneuvers. Take corners gently.

Mobility

This section helps you maintain your car's

mobility by supplying important information

on vital topics including fuels and lubricants,

wheels and tires, service, maintenance and

breakdown assistance.

Mobility

R

e

fueling

106

Refueling

Always switch off the engine before refu-
eling, otherwise, fuel cannot be added to 

the tank and a message will be displayed.

<

Take all precautionary measures and 
observe all applicable regulations when 

handling fuel. Do not carry any spare fuel con-
tainers in your vehicle. They can develop a leak 
and cause an explosion or cause a fire in the 
event of an accident.

<

Gas cap

Opening

1.

Open fuel filler door. To do so, lightly press 
the rear edge.

2.

Turn the gas cap counterclockwise.

3.

Place the gas cap in the bracket attached to 
the fuel filler door.

Closing

Fit the cap and turn it clockwise until you clearly 
hear a click.

Do not jam the strap attached to the gas 
cap between the gas cap and the vehicle. 

A message will be displayed if the gas cap is 
loose or missing.

<

Manually releasing the fuel filler door

In the event of an electrical malfunction, you can 
release the fuel filler door manually:

1.

Remove the cover from the right-hand side 
panel of the luggage compartment.

2.

Pull the knob with the fuel pump symbol. 
The fuel filler door is released.

Observe the following when refueling

When handling fuels always observe any 
safety guidelines posted at the service 

station.

<

When refueling, insert the filler nozzle com-
pletely into the filler pipe. Lifting the filler nozzle 
during refueling leads to

>

premature pump shutoff

>

a reduced efficiency of the fuel-vapor 
recovery system.

The fuel tank is full when the filler nozzle clicks 
off the first time.

Fuel tank capacity

Approx. 16.1 US gallons/61 liters, including the 
reserve capacity of 2.1 US gallons/8 liters.

Refuel as soon as possible once your 
cruising range falls below 30 miles/

50 km, otherwise engine functions are not 
ensured and damage can occur.

<

Fuel specifications

Do not fill the tank with leaded fuel, as this 
would cause permanent damage to the 

catalytic converter.

<

Re

fe

re

n

c

e

A

t a 

g

lanc

e

Co

n

tr

o

ls

D

riv

in

g tip

s

M

o

b

ilit

y

 107

Required fuel

Premium Unleaded Gasoline

The minimum octane rating is 91. 
If you use gasoline with this minimum octane 
rating, the engine may produce knocking 
sounds when starting at high outside tempera-
tures. This has no affect on the engine life.
Minimum octane rating corresponds to the Anti 
Knock Index AKI and is determined according 
to the so-called (R+M)/2 method.

Do not fill the tank with leaded fuel, as this 
would cause permanent damage to the 

catalytic converter.

<

Use high-quality brands

Field experience has indicated significant dif-
ferences in fuel quality: volatility, composition, 
additives, etc., among gasolines offered for sale 
in the United States and Canada. Fuels contain-
ing up to and including 10% ethanol or other 
oxygenates with up to 2.8% oxygen by weight, 
that is, 15% MTBE or 3% methanol plus an 
equivalent amount of co-solvent, will not void 
the applicable warranties with respect to 
defects in materials or workmanship.

The use of poor-quality fuels may result in 
drivability, starting and stalling problems 

especially under certain environmental condi-
tions such as high ambient temperature and 
high altitude. 
Should you encounter drivability problems 
which you suspect could be related to the fuel 
you are using, we recommend that you respond 
by switching to a recognized high-quality 
brand. 
Failure to comply with these recommendations 
may also result in unscheduled maintenance.

<

Wh

eels

 and

 tire

s

108

Wheels and tires

Tire inflation pressures

Information for your safety

It is not merely the tires' service life, but also 
driving comfort and, to a great extent, driving 
safety that depend on the condition of the tires 
and the maintenance of the specified tire pres-
sure.

Check the tire inflation pressure regularly 
and correct it, if necessary: at least twice a 

month and before starting long trips. If you fail 
to observe this precaution you may be driving 
on tires with incorrect tire pressures, a condi-
tion that can not only compromise your vehi-
cle's driving stability, but also lead to tire dam-
age and the risk of an accident. Do not drive 
with deflated, i.e. flat tires, except when using 
Run-Flat Tires. A flat tire will seriously impair 
your vehicle's handling and braking response. 
Attempts to drive on a flat tire can lead to loss of 
control over the vehicle.

<

Checking pressure

Only check tire inflation pressure when the 
tires are cold. This means after a maximum of 
1.25 miles/2 km driving or when the vehicle has 
been parked for at least 2 hours. When tires are 
warm, the tire inflation pressure is higher.

After correcting tire inflation pressures, 
always reinitialize the Flat Tire Monitor, 

refer to page

72

.

<

Inflation pressure specifications

The tables below provide all the correct inflation 
pressures for the specified tire sizes at ambient 
temperature.

The inflation pressures apply to the tire 
sizes approved and tire brands recom-

mended by BMW; a list of these is available 
from your BMW Center.

<

For correct identification of the right tire infla-
tion pressures, observe the following:

>

Tire sizes for your vehicle

>

Load conditions

>

Maximum allowable driving speed

Tire inflation pressures for driving up to 
100 mph or 160 km/h

For normal driving up to 100 mph or 160 km/h 
and to achieve optimum driving comfort, adjust 
pressures to the respective tire inflation pres-
sures listed on the following pages in the col-
umns for traveling speeds up to a maximum of 
100 mph  or  160 km/h.
These tire inflation pressures can also be found 
on the driver's-side door post when the driver's 
door is open.

The maximum permissible speed for 
these tire pressures is 100 mph or 

160 km/h. Do not exceed this speed, otherwise 
tire damage and accidents could occur.

<

Tire inflation pressures for driving 
above 100 mph or 160 km/h

In order to drive at maximum speeds in 
excess of 100 mph or 160 km/h, adjust 

pressures to the respective tire inflation pres-
sures listed on the following pages in the col-
umns for traveling speeds including those 
exceeding 100 mph or 160 km/h. Otherwise tire 
damage and accidents could occur.

<

Observe all national and local maximum speed 
limits, otherwise violations of the laws could 
occur.

Re

fe

re

n

c

e

A

t a 

g

lanc

e

Co

n

tr

o

ls

D

riv

in

g tip

s

M

o

b

ilit

y

 109

Tire inflation pressures for the 323i, for Canada only

Tire size 

Pressure specifications in psi/kPa 

Traveling speeds

up to a max. of

100 mph / 160 km/h

Traveling speeds

including those exceeding

100 mph  /  160 km/h

All pressure specifications in 
the table are indicated in 
psi/kilopascal with cold tires. 
Cold = ambient temperature

without Sports package

225/50 R 16 92 V 
225/50 R 16 92 H M+S 
205/55 R 16 91 H M+S
225/45 R 17 91 H M+S

29/200

33/230

29/200

33/230

30/210

38/260

225/45 R 17 94 V M+S XL

29/200

35/240

29/200

35/240

32/220

39/270

Front: 225/35 R 19 88 Y XL

35/240

-

30/210

-

35/240

-

Rear: 255/30 R 19 91 Y XL

-

39/270

-

33/230

-

39/270

with Sports package

225/50 R 16 92 V 
225/50 R 16 92 H M+S 
205/55 R 16 91 H M+S
225/45 R 17 91 H M+S

29/200

33/230

29/200

35/240

35/240

42/290

225/45 R 17 94 V M+S XL

29/200

35/240

30/210

38/260

36/250

45/310

Front: 225/35 R 19 88 Y XL

35/240

-

33/230

-

38/260

-

Rear: 255/30 R 19 91 Y_XL

-

39/270

-

36/250

-

42/290

More details on the permissible load and weights can be found on page

150

.

Wh

eels

 and

 tire

s

110

Tire inflation pressures for the 325i

Tire size 

Pressure specifications in psi/kPa 

Traveling speeds

up to a max. of

100 mph  /  160 km/h

Traveling speeds

including those exceeding

100 mph / 160 km/h

All pressure specifications in 
the table are indicated in 
psi/kilopascal with cold tires. 
Cold = ambient temperature

without Sports package

225/50 R 16 92 H M+S 
205/55 R 16 91 H M+S
225/45 R 17 91 H M+S
225/45 R 17 94 V M+S XL

33/230

41/280

-

-

33/230

41/280

Front: 225/45 R 17 91 V

29/200

-

29/200

-

32/220

-

Rear: 255/40 R 17 94 V

-

32/220

-

32/220

-

35/240

Front: 225/35 R 19 88 Y XL

35/240

-

32/220

-

35/240

-

Rear: 255/30 R 19 91 Y XL

-

41/280

-

35/240

-

41/280

with Sports package

225/50 R 16 92 H M+S 
225/45 R 17 91 H M+S
205/55 R 16 91 H M+S

33/230

41/280

-

-

35/240

42/290

225/45 R 17 94 V M+S XL

33/230

41/280

-

-

38/260

45/310

Front: 225/45 R 17 91 V

29/200

-

29/200

-

35/240

-

Rear: 255/40 R 17 94 V

-

32/220

-

33/230

-

39/270

Front: 225/35 R 19 88 Y XL

35/240

-

33/230

-

38/260

-

Rear: 255/30 R 19 91 Y XL

-

41/280

-

36/250

-

42/290

More details on the permissible load and weights can be found on page

150

.

Re

fe

re

n

c

e

A

t a 

g

lanc

e

Co

n

tr

o

ls

D

riv

in

g tip

s

M

o

b

ilit

y

 111

Tire inflation pressures for the 325xi

Tire size 

Pressure specifications in psi/kPa 

Traveling speeds

up to a max. of

100 mph / 160 km/h

Traveling speeds

including those exceeding

100 mph  /  160 km/h

All pressure specifications in 
the table are indicated in 
psi/kilopascal with cold tires. 
Cold = ambient temperature

without Sports package:

205/55 R 16 91 H M+S 
225/45 R 17 91 H M+S 
225/50 R 16 92 H M+S
225/45 R 17 94 V M+S XL

30/210

36/250

30/210

33/230

35/240

41/280

Front: 225/45 R 17 91 V

30/210

-

30/210

-

35/240

-

Rear: 255/40 R 17 94 V

-

32/220

32/220

-

35/240

Front: 225/35 R 19 88 Y XL

39/270

-

35/240

-

39/270

-

Rear: 255/30 R 19 91 Y XL

-

41/280

-

35/240

-

41/280

with Sports package:

205/55 R 16 91 H M+S 
225/50 R 16 92 H M+S 
225/45 R 17 91 H M+S

30/210

36/250

30/210

33/230

35/240

41/280

225/45 R 17 94 V M+S XL

30/210

36/250

35/240

38/260

39/270

45/310

Front: 225/45 R 17 91 V

30/210

-

33/230

-

38/260

-

Rear: 255/40 R 17 94 V

-

32/220

-

33/230

-

39/270

Front: 225/35 R 19 88 Y XL

39/270

-

38/260

-

42/290

-

Rear: 255/30 R 19 91 Y XL

-

41/280

-

38/260

-

44/300

More details on the permissible load and weights can be found on page

150

.


Content   ..  4  5  6  7   ..