RAM 1500 (2022 year). Manual in english - page 9
 

  Index      Manuals     RAM 1500 (2022 year). Manual in english


Search            copyright infringement  


Content      ..     7      8      9      10     ..


RAM 1500 (2022 year). Manual in english - page 9


GETTING TO KNOW YOUR INSTRUMENT PANEL

139

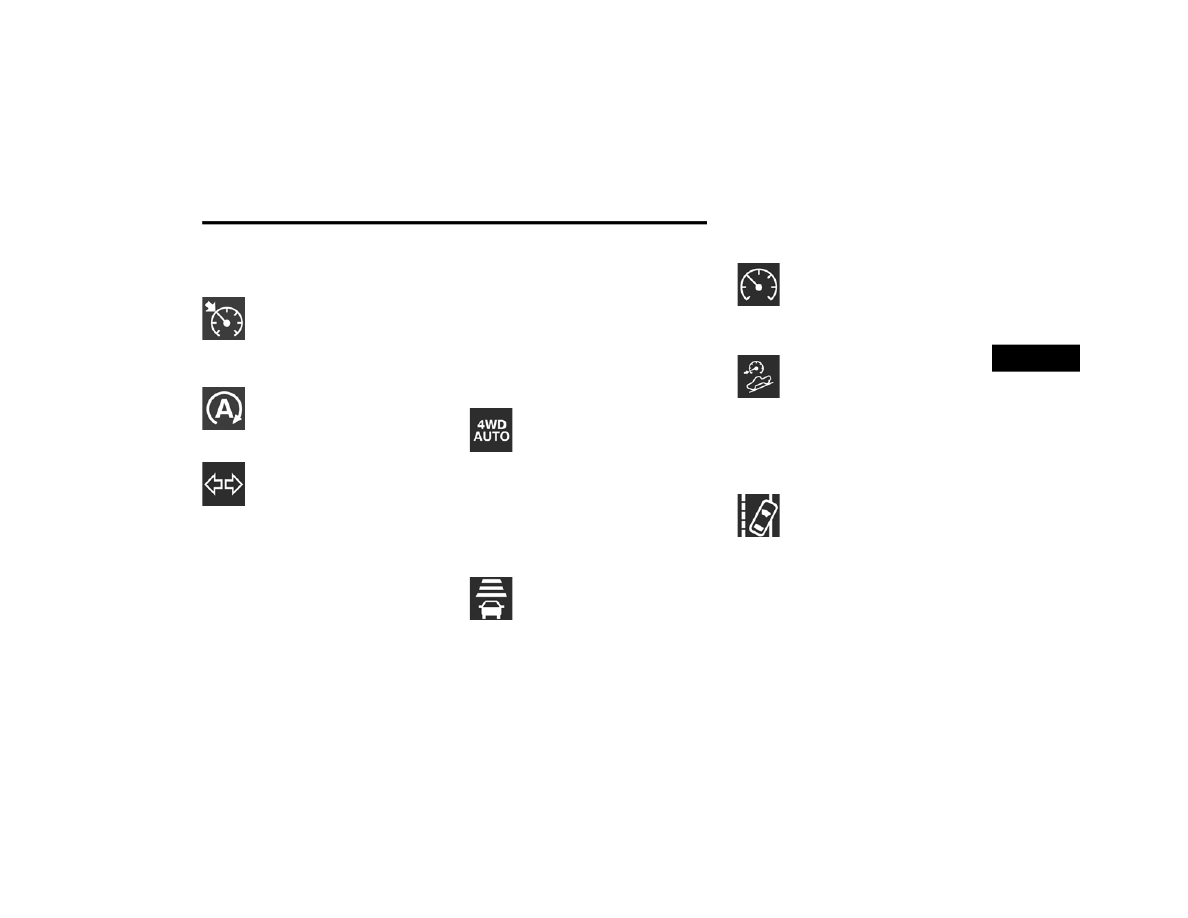
Cruise Control SET Indicator Light — 

If Equipped With Premium Instrument 

Cluster Display  

This light will turn on when the cruise 

control is set  

Ú

page 177.

Stop/Start Active Indicator Light —

If Equipped

This indicator light will illuminate when 

the Stop/Start function is in “Autostop” 

mode  

Ú

page 175.

Turn Signal Indicator Lights   

When the left or right turn signal is 

activated, the turn signal indicator will 

flash independently and the 

corresponding exterior turn signal lamps 

will flash. Turn signals can be activated when the 

multifunction lever is moved down (left) or up 

(right).

NOTE:

A continuous chime will sound if the vehicle is 

driven more than 1 mile (1.6 km) with either 

turn signal on.

Check for an inoperative outside light bulb if 

either indicator flashes at a rapid rate.

If equipped with fog lamps, the fog lamp on the 

side of the activated turn signal will also illumi

-

nate to provide additional light when turning.

4WD AUTO Indicator Light — If Equipped 

This light alerts the driver that the vehicle 

is in the four-wheel drive auto mode, and 

the front axle is engaged, but the 

vehicle's power is sent to the rear wheels. 

Four-wheel drive will be automatically engaged 

when the vehicle senses a loss of traction  

Ú

page 161.

W

HITE

 I

NDICATOR

 L

IGHTS

Adaptive Cruise Control (ACC) Ready

Light — If Equipped

This light will illuminate when the vehicle 

equipped with ACC has been turned on 

but not set  

Ú

page 179.

Cruise Control Ready Indicator 

This indicator light will illuminate when 

the cruise control is ready, but not set  

Ú

page 177.

Hill Descent Control (HDC) Indicator

Light — If Equipped 

This indicator shows when the HDC 

feature is turned on. The lamp will be on 

solid when HDC is armed. HDC can only 

be armed when the transfer case is in the 

4WD Low position and the vehicle speed is less 

then 20 mph (32 km/h). If these conditions are not 

met while attempting to use the HDC feature, the 

HDC indicator light will flash on/off.

LaneSense Indicator Light — If Equipped 

When the LaneSense system is ON, but 

not armed, the LaneSense indicator light 

illuminates solid white. This occurs when 

only left, right, or neither lane line has 

been detected. If a single lane line is detected, the 

system is ready to provide only visual warnings if 

an unintentional lane departure occurs on the 

detected lane line  

Ú

page 198.

3

-------------------------------------------------------------------------------------------------------------------------------------------------------------

140

GETTING TO KNOW YOUR INSTRUMENT PANEL


Cruise Control SET Indicator Light — 

If Equipped With Base/Midline Instrument 

Cluster Display  

This light will turn on when the cruise 

control is set  

Ú

page 177.

B

LUE

 I

NDICATOR

 L

IGHTS

High Beam Indicator Light

This indicator light will illuminate to 

indicate that the high beam headlights 

are on. With the low beams activated, 

push the multifunction lever forward 

(toward the front of the vehicle) to turn on the high 

beams. Pull the multifunction lever rearward 

(toward the rear of the vehicle) to turn off the high 

beams. If the high beams are off, pull the lever 

toward you for a temporary high beam on, “flash to 

pass” scenario.

ONBOARD DIAGNOSTIC SYSTEM — OBD II   

Your vehicle is equipped with a sophisticated 

Onboard Diagnostic system called OBD II. This 

system monitors the performance of the 

emissions, engine, and transmission control 

systems. When these systems are operating 

properly, your vehicle will provide excellent 

performance and fuel economy, as well as engine 

emissions well within current government 

regulations.
If any of these systems require service, the OBD II 

system will turn on the Malfunction Indicator Light 

(MIL). It will also store diagnostic codes and other 

information to assist your service technician in 

making repairs. Although your vehicle will usually 

be drivable and not need towing, see an authorized 

dealer for service as soon as possible.

O

NBOARD

 D

IAGNOSTIC

 S

YSTEM


(OBD II) C

YBERSECURITY

Your vehicle is required to have OBD II and a 

connection port to allow access to information 

related to the performance of your emissions 

controls. Authorized service technicians may need 

to access this information to assist with the 

diagnosis and service of your vehicle and 

emissions system  

Ú

page 236.

CAUTION!

Prolonged driving with the MIL on could cause 

further damage to the emission control 

system. It could also affect fuel economy and 

driveability. The vehicle must be serviced 

before any emissions tests can be performed.

If the MIL is flashing while the vehicle is 

running, severe catalytic converter damage 

and power loss will soon occur. Immediate 

service is required.

WARNING!

ONLY an authorized service technician should 

connect equipment to the OBD II connection 

port in order to read the VIN, diagnose, or 

service your vehicle.

If unauthorized equipment is connected to the 

OBD II connection port, such as a 

driver-behavior tracking device, it may:

Be possible that vehicle systems, 

including safety related systems, could be 

impaired or a loss of vehicle control could 

occur that may result in an accident 

involving serious injury or death.

Access, or allow others to access, infor

-

mation stored in your vehicle systems, 

including personal information.

-------------------------------------------------------------------------------------------------------------------------------------------------------------

GETTING TO KNOW YOUR INSTRUMENT PANEL

141

EMISSIONS INSPECTION AND 

MAINTENANCE PROGRAMS  

In some localities, it may be a legal requirement to 

pass an inspection of your vehicle's emissions 

control system. Failure to pass could prevent 

vehicle registration.

For states that require an Inspection and 

Maintenance (I/M), this check verifies 

the Malfunction Indicator Light (MIL) is 

functioning and is not on when the 

engine is running, and that the OBD II system is 

ready for testing.
Normally, the OBD II system will be ready. The

OBD II system may not be ready if your vehicle was 

recently serviced, recently had a depleted battery 

or a battery replacement. If the OBD II system 

should be determined not ready for the I/M test, 

your vehicle may fail the test.

Your vehicle has a simple ignition actuated test, 

which you can use prior to going to the test station. 

To check if your vehicle's OBD II system is ready, 

you must do the following:
1. Cycle the ignition switch to the ON position, 

but do not crank or start the engine.

NOTE:

If you crank or start the engine, you will have to 

start this test over.
2. As soon as you cycle the ignition switch to the 

ON position, you will see the Malfunction 

Indicator Light (MIL) symbol come on as part of 

a normal bulb check.

3. Approximately 15 seconds later, one of two 

things will happen:

The MIL will flash for about 10 seconds and 

then return to being fully illuminated until 

you turn OFF the ignition or start the engine. 

This means that your vehicle's OBD II 

system is not ready and you should not 

proceed to the I/M station.

The MIL will not flash at all and will remain 

fully illuminated until you place the ignition 

in the off position or start the engine. This 

means that your vehicle's OBD II system is 

ready and you can proceed to the I/M 

station.

If your OBD II system is not ready, you should see 

an authorized dealer or repair facility. If your 

vehicle was recently serviced or had a battery 

failure or replacement, you may need to do nothing 

more than drive your vehicle as you normally would 

in order for your OBD II system to update. A 

recheck with the above test routine may then 

indicate that the system is now ready.
Regardless of whether your vehicle's OBD II system 

is ready or not, if the MIL is illuminated during 

normal vehicle operation you should have your 

vehicle serviced before going to the I/M station. 

The I/M station can fail your vehicle because the 

MIL is on with the engine running.

3

-------------------------------------------------------------------------------------------------------------------------------------------------------------

142  

(Continued)

(Continued)

STARTING AND OPERATING

STARTING THE ENGINE 

GASOLINE ENGINE
Before starting your vehicle, adjust your seat, 

adjust both inside and outside mirrors, and fasten 

your seat belt.
The starter should not be operated for more 

than 10-second intervals. Waiting at least 10 to 

15 seconds between such intervals will protect the 

starter from overheating.

DIESEL ENGINE
Before starting your vehicle, adjust your seat, both 

inside and outside mirrors, and fasten your seat 

belts.
The starter is allowed to crank for up to 25-second 

intervals. Waiting at least two minutes between 

such intervals will protect the starter from 

overheating.

WARNING!

When leaving the vehicle, always make sure 

the keyless ignition node is in the OFF posi

-

tion, remove the key fob from the vehicle and 

lock the vehicle.

Never leave children alone in a vehicle, or with 

access to an unlocked vehicle. Allowing chil

-

dren to be in a vehicle unattended is 

dangerous for a number of reasons. A child or 

others could be seriously or fatally injured. 

Children should be warned not to touch the 

parking brake, brake pedal or the gear 

selector.

Do not leave the key fob in or near the vehicle, 

or in a location accessible to children, and do 

not leave the ignition of a vehicle equipped 

with Keyless Enter ‘n Go™ in the ACC or 

ON/RUN position. A child could operate power 

windows, other controls, or move the vehicle.

Do not leave children or animals inside parked 

vehicles in hot weather. Interior heat buildup 

may cause serious injury or death.

WARNING!

WARNING!

Before exiting a vehicle, always come to a 

complete stop, then shift the automatic trans

-

mission into PARK and apply the parking 

brake.

Always make sure the ENGINE START/STOP 

button is in the OFF position, key fob is 

removed from the vehicle and vehicle is 

locked.

Never leave children alone in a vehicle, or with 

access to an unlocked vehicle. Leaving chil

-

dren in a vehicle unattended is dangerous for 

a number of reasons. A child or others could 

be seriously or fatally injured. Children should 

be warned not to touch the parking brake, 

brake pedal or the gear selector.

-------------------------------------------------------------------------------------------------------------------------------------------------------------

STARTING AND OPERATING

143

NOTE:

Engine start-up in very low ambient temperature 

could result in evident white smoke. This condition 

will disappear as the engine warms up.

A

UTOMATIC

 T

RANSMISSION

Start the engine with the transmission in PARK 

position. Apply the brake before shifting into any 

driving range.

NOTE:

This vehicle is equipped with a transmission 

shift interlocking system. The brake pedal must 

be pressed to shift out of PARK.

If equipped with an 8-speed transmission, 

starting the vehicle in NEUTRAL is not possible 

unless the Manual Park Release has been acti

-

vated  

Ú

page 392.

T

IP

 S

TART

 F

EATURE


Do not press the accelerator. Cycle the ignition 

switch briefly to the START position and release it. 

The starter motor will continue to run and will 

automatically disengage when the engine is 

running.

K

EYLESS

 E

NTER

 ‘

N

 G

O

™ — I

GNITION

This feature allows the driver to operate the 

ignition switch with the push of a button, as long as 

the Remote Start/Keyless Enter ‘n Go™ key fob is 

in the passenger compartment.

N

ORMAL

 S

TARTING

 U

SING

 ENGINE 

START/STOP B

UTTON

 — G

ASOLINE


E

NGINE


To Turn On The Engine Using The ENGINE START/

STOP Button
1. The transmission must be in PARK.
2. Press and hold the brake pedal while pushing 

the ENGINE START/STOP button once.

3. The system starts the vehicle. If the vehicle 

fails to start, the starter will disengage 

automatically after 10 seconds.

4. If you wish to stop the cranking of the engine 

prior to the engine starting, push the button 

again.

To Turn Off The Engine Using The ENGINE START/

STOP Button
1. Place the gear selector in PARK, then push 

and release the ENGINE START/STOP button. 

The ignition will return to the OFF position.

2. If the gear selector is not in PARK, the ENGINE 

START/STOP button must be held for two 

seconds or three short pushes in a row with 

the vehicle speed above 5 mph (8 km/h) 

before the engine will shut off. The ignition will 

remain in the ACC position until the gear 

selector is in PARK and the button is pushed 

twice to the OFF position.

Do not leave the key fob in or near the vehicle, 

or in a location accessible to children, and do 

not leave the ignition of a vehicle equipped 

with Keyless Enter ‘n Go™ in the ACC or 

ON/RUN position. A child could operate power 

windows, other controls, or move the vehicle.

Do not leave children or animals inside parked 

vehicles in hot weather. Interior heat buildup 

may cause serious injury or death.

CAUTION!

The engine is allowed to crank as long as 

25 seconds. If the engine fails to start during 

this period, please wait at least two minutes 

for the starter to cool before repeating start 

procedure.

If the Water in Fuel Indicator Light remains on, 

DO NOT START engine before you drain the 

water from the fuel filter to avoid engine 

damage  

Ú

page 416.

WARNING!

4

-------------------------------------------------------------------------------------------------------------------------------------------------------------

144

STARTING AND OPERATING


3. If the gear selector is not in PARK and the 

ENGINE START/STOP button is pushed once 

with the vehicle speed above 5 mph (8 km/h), 

the instrument cluster will display a “Vehicle 

Not In Park” message and the engine will 

remain running. Never leave a vehicle out of 

the PARK position, or it could roll.

NOTE:

If the gear selector is not in PARK, and the ENGINE 

START/STOP button is pushed once with the 

vehicle speed below 5 mph (8 km/h), the engine 

will shut off and the ignition will remain in the ACC 

position. If vehicle speed drops below 1.2 mph 

(1.9 km/h), the vehicle may AutoPark  

Ú

page 144.

ENGINE START/STOP Button Functions — With 

Driver’s Foot OFF The Brake Pedal (In PARK Or 

NEUTRAL Position)
The ENGINE START/STOP button operates similar 

to an ignition switch. It has three positions: OFF, 

ACC, and ON/RUN. To change the ignition positions 

without starting the vehicle and use the 

accessories, follow these directions:
1. Start with the ignition in the OFF position.
2. Push the ENGINE START/STOP button once to 

place the ignition to the ACC position.

3. Push the ENGINE START/STOP button a 

second time to place the ignition to the 

ON/RUN position.

4. Push the ENGINE START/STOP button a third 

time to return the ignition to the OFF position.

A

UTO

P

ARK

AutoPark is a supplemental feature to assist in 

placing the vehicle in PARK should the situations 

on the following pages occur. It is a back-up system 

and should not be relied upon as the primary 

method by which the driver shifts the vehicle into 

PARK.
The conditions under which AutoPark will engage 

are outlined on the following pages.

If the vehicle is not in PARK and the driver turns off 

the engine, the vehicle may AutoPark.
AutoPark will engage when all of these conditions 

are met:

Vehicle is equipped with a rotary shifter and an 

8-speed transmission

Vehicle is not in PARK

Vehicle speed is 1.2 mph (1.9 km/h) or less

Ignition is switched from ON/RUN to ACC

NOTE:

For Keyless Enter ‘n Go™ equipped vehicles, the 

engine will turn off and the ignition switch will 

change to ACC position. After 30 minutes the 

ignition switches to OFF automatically, unless the 

driver turns the ignition switch OFF.
If the vehicle is not in PARK and the driver exits the 

vehicle with the engine running, the vehicle may 

AutoPark.
AutoPark will engage when all of these conditions 

are met:

Vehicle is equipped with a rotary shifter and an 

8-speed transmission

Vehicle is not in PARK

Vehicle speed is 1.2 mph (1.9 km/h) or less

Driver’s seat belt is unbuckled

Driver’s door is ajar

Brake pedal is not pressed

WARNING!

Driver inattention could lead to failure to place 

the vehicle in PARK. ALWAYS DO A VISUAL 

CHECK that your vehicle is in PARK by verifying 

that a solid (not blinking) “P” is indicated in 

the instrument cluster display and near the 

gear selector. If the “P” indicator is blinking, 

your vehicle is not in PARK. As an added 

precaution, always apply the parking brake 

when exiting the vehicle.

AutoPark is a supplemental feature. It is not 

designed to replace the need to shift your 

vehicle into PARK. It is a back up system and 

should not be relied upon as the primary 

method by which the driver shifts the vehicle 

into PARK.

-------------------------------------------------------------------------------------------------------------------------------------------------------------

STARTING AND OPERATING

145

The message “AutoPark Engaged Shift to P then 

Shift to Gear” will display in the instrument cluster.

NOTE:

In some cases the ParkSense graphic will be 

displayed in the instrument cluster, causing the 

“AutoPark Engaged Shift to P then Shift to Gear” 

message to not be seen. In these cases, the gear 

selector must be returned to “P” to select desired 

gear.
If the driver shifts into PARK while moving, the 

vehicle may AutoPark.
AutoPark will engage ONLY when vehicle speed is 

1.2 mph (1.9 km/h) or less.
The message “Vehicle Speed is Too High to Shift to 

P” will be displayed in the instrument cluster if 

vehicle speed is above 1.2 mph (1.9 km/h).

4WD LOW — If Equipped
AutoPark will be disabled when operating the 

vehicle in 4WD LOW.
The message “AutoPark Disabled” will be 

displayed in the instrument cluster.
Additional customer warnings will be given when 

all of these conditions are met:

Vehicle is not in PARK

Driver’s door is ajar

Vehicle is in 4WD LOW

The message “AutoPark Not Engaged” will be 

displayed in the instrument cluster. A warning 

chime will continue until you shift the vehicle into 

PARK or the driver’s door is closed.
ALWAYS DO A VISUAL CHECK that your vehicle is in 

PARK by looking for the "P" in the instrument 

cluster display and near the gear selector. As an 

added precaution, always apply the parking brake 

when exiting the vehicle.

I

F

 E

NGINE

 F

AILS

 T

O

 S

TART


If the engine fails to start after you have followed 

the “Normal Starting” procedure, it may be 

flooded. Push the accelerator pedal all the way to 

the floor and hold it there while the engine is 

cranking. This should clear any excess fuel in case 

the engine is flooded.

The starter motor will engage automatically, run for 

10 seconds, and then disengage. Once this occurs, 

release the accelerator pedal and the brake pedal, 

wait 10 to 15 seconds, then repeat the “Normal 

Starting” procedure.

WARNING!

If vehicle speed is above 1.2 mph (1.9 km/h), 

the transmission will default to NEUTRAL until 

the vehicle speed drops below 1.2 mph 

(1.9 km/h). A vehicle left in the NEUTRAL 

position can roll. As an added precaution, always 

apply the parking brake when exiting the vehicle.

WARNING!

Never pour fuel or other flammable liquid into 

the throttle body air inlet opening in an 

attempt to start the vehicle. This could result 

in flash fire causing serious personal injury.

Do not attempt to push or tow your vehicle to 

get it started. Vehicles equipped with an auto

-

matic transmission cannot be started this 

way. Unburned fuel could enter the catalytic 

converter and once the engine has started, 

ignite and damage the converter and vehicle.

If the vehicle has a discharged battery, 

booster cables may be used to obtain a start 

from a booster battery or the battery in 

another vehicle. This type of start can be 

dangerous if done improperly  

Ú

page 388.

CAUTION!

To prevent damage to the starter, do not crank 

the engine for more than 10 seconds at a time. 

Wait 10 to 15 seconds before trying again.

4

-------------------------------------------------------------------------------------------------------------------------------------------------------------

146

STARTING AND OPERATING


If the engine has been flooded, it may start to run, 

but not have enough power to continue running 

when the ignition button/key is released. If this 

occurs, continue cranking with the accelerator 

pedal pushed all the way to the floor. Release the 

accelerator pedal and the ignition button/key once 

the engine is running smoothly.
If the engine shows no sign of starting after a 

10 second period of engine cranking with the 

accelerator pedal held to the floor, wait 10 to

15 seconds, then repeat the “Normal Starting” 

procedure.

N

ORMAL

 S

TARTING

 U

SING

 ENGINE 

START/STOP B

UTTON

 — D

IESEL


E

NGINE


Observe the instrument panel telltales when 

starting the engine.

NOTE:

Normal starting of either a cold or a warm engine is 

obtained without pumping or pressing the accel

-

erator pedal.
To Turn On The Engine Using The ENGINE START/

STOP Button
1. The transmission must be in PARK (P).
2. Press and hold the brake pedal while pushing 

the ENGINE START/STOP button once.

NOTE:

A delay of the start, up to five seconds is possible 

under very cold conditions. The Wait to Start 

telltale will be illuminated during the pre-heat 

process. When the engine Wait To Start light goes 

off the engine will automatically crank.

3. The system starts the vehicle. If the vehicle 

fails to start, the starter will disengage 

automatically after 25 seconds.

4. If you wish to stop the cranking of the engine 

prior to the engine starting, push the button 

again.

NOTE:

Normal starting of either a cold or a warm engine is 

obtained without pumping or pressing the accel

-

erator pedal.

To Turn Off The Engine Using The ENGINE START/

STOP Button
1. Place the gear selector in PARK, then push 

and release the ENGINE START/STOP button. 

The ignition will return to the OFF position.

2. If the gear selector is not in PARK, the ENGINE 

START/STOP button must be held for two 

seconds or three short pushes in a row with 

the vehicle speed above 5 mph (8 km/h) 

before the engine will shut off. The ignition will 

remain in the ACC position until the gear 

selector is in PARK and the button is pushed 

twice to the OFF position.

3. If the gear selector is not in PARK and the 

ENGINE START/STOP button is pushed once 

with the vehicle speed above 5 mph (8 km/h), 

the instrument cluster will display a “Vehicle 

Not In Park” message and the engine will 

remain running. Never leave a vehicle out of 

the PARK position, or it could roll.

NOTE:

If the gear selector is not in PARK, and the ENGINE 

START/STOP button is pushed once with the 

vehicle speed below 5 mph (8 km/h), the engine 

will shut off and the ignition will remain in the ACC 

position. If vehicle speed drops below 1.2 mph 

(1.9 km/h), the vehicle may AutoPark  

Ú

page 144.

CAUTION!

If the Water in Fuel Indicator Light remains on, 

DO NOT START the engine before you drain the 

water from the fuel filter to avoid engine damage  

Ú

page 416.

-------------------------------------------------------------------------------------------------------------------------------------------------------------

STARTING AND OPERATING

147

(Continued)

ENGINE START/STOP Button Functions — With 

Driver’s Foot OFF The Brake Pedal (In PARK Or 

NEUTRAL Position)
The ENGINE START/STOP button operates similar 

to an ignition switch. It has three positions: OFF, 

ACC, and ON/RUN. To change the ignition modes 

without starting the vehicle and use the 

accessories, follow these directions:
1. Start with the ignition in the OFF position.
2. Push the ENGINE START/STOP button once to 

place the ignition to the ACC position.

3. Push the ENGINE START/STOP button a 

second time to place the ignition to the 

ON/RUN position.

4. Push the ENGINE START/STOP button a third 

time to return the ignition to the OFF position.

C

OLD

 W

EATHER

 O

PERATION

(B

ELOW

 –22°F O

R

 −30°C) 

To ensure reliable starting at these temperatures, 

use of an externally powered electric engine block 

heater (available from an authorized dealer) is 

recommended.

A

FTER

 S

TARTING

The idle speed is controlled automatically, and it 

will decrease as the engine warms up.

S

TARTING

 F

LUIDS

 — D

IESEL

 E

NGINE


O

NLY

The engine is equipped with a glow plug preheating 

system. If the instructions in this manual are 

followed, the engine should start in all conditions 

and no type of starting fluid should be used.

NORMAL OPERATION — DIESEL ENGINE

Observe the following when the diesel engine is 

operating.

All message center lights are off.

Malfunction Indicator Light (MIL) is off.

Engine Oil Pressure telltale is not illuminated.

Voltmeter operation:

The voltmeter may show a gauge fluctuation at 

various engine temperatures. This is caused by the 

glow plug heating system. The number of cycles 

and the length of the cycling operation is controlled 

by the engine control module. Glow plug heater 

operation can run for several minutes, once the 

heater operation is complete the voltmeter needle 

will stabilize.

WARNING!

Do not leave children or animals inside parked 

vehicles in hot weather. Interior heat build up 

may cause serious injury or death.

When leaving the vehicle, always make sure 

the wireless ignition node is in the OFF posi

-

tion, remove the key fob from the vehicle and 

lock the vehicle.

Never leave children alone in a vehicle, or with 

access to an unlocked vehicle. Allowing chil

-

dren to be in a vehicle unattended is 

dangerous for a number of reasons. A child or 

others could be seriously or fatally injured. 

Children should be warned not to touch the 

parking brake, brake pedal or the gear 

selector.

Do not leave the key fob in or near the vehicle, 

or in a location accessible to children, and do 

not leave the ignition of a vehicle equipped 

with Keyless Enter ‘n Go™ in the ACC or ON/

RUN position. A child could operate power 

windows, other controls, or move the vehicle.

WARNING!

4

-------------------------------------------------------------------------------------------------------------------------------------------------------------

148

STARTING AND OPERATING


C

OLD

 W

EATHER

 P

RECAUTIONS

Operation in ambient temperature below 32°F 

(0°C) may require special considerations. The 

following charts suggest these options:

Fuel Operating Range

NOTE:

Use Ultra Low Sulfur Diesel (ULSD) Fuels ONLY.

Fuel Operating Range Chart

*Number 1 ULSD Fuel should only be used where 

extended arctic conditions below (0°F/-18°C) 

exist.

NOTE:

Use of Climatized ULSD Fuel or Number 1 ULSD 

Fuel results in a noticeable decrease in fuel 

economy.

Climatized ULSD Fuel is a blend of Number 2 

ULSD and Number 1 ULSD Fuels which reduces 

the temperature at which wax crystals form in 

fuel.

The fuel grade should be clearly marked on the 

pump at the fuel station.

The engine requires the use of ULSD Fuel. Use 

of incorrect fuel could result in engine and 

exhaust system damage  

Ú

page 474.

If Climatized or diesel Number 1 ULSD Fuel is 

not available, and you are operating below 

(20°F/-6°C), in sustained arctic conditions, 

Mopar® Premium Diesel Fuel Treatment (or 

equivalent) is recommended to avoid gelling 

(see Fuel Operating Range Chart).

Engine Oil Usage

For the correct engine oil viscosity  

Ú

page 478.

Winter Front Cover

Winter Front Cover

A Winter front or cold weather cover can be used in 

ambient temperatures below 32°F (0°C), 

especially during extended idle conditions. This 

cover is equipped with four flaps for managing 

total grille opening in varying ambient 

temperatures. If a Winter front or cold weather 

cover is to be used the flaps should be in the full 

open position to allow air flow to the cooling 

module and automatic transmission oil cooler. 

When ambient temperatures drop below 0°F 

(-17°C) the four flaps need to be closed. A suitable 

cold weather cover is available from a Mopar® 

dealer.

-------------------------------------------------------------------------------------------------------------------------------------------------------------

STARTING AND OPERATING

149

Engine Warm-Up

Avoid full throttle operation when the engine is 

cold. When starting a cold engine, bring the engine 

up to operating speed slowly to allow the oil 

pressure to stabilize as the engine warms up.
If temperatures are below 32°F (0°C), operate the 

engine at moderate speeds for five minutes before 

full loads are applied.

E

NGINE

 I

DLING

Avoid prolonged idling. Long periods of idling may 

be harmful to your engine because combustion 

chamber temperatures can drop so low that the 

fuel may not burn completely. Incomplete 

combustion allows carbon and varnish to form on 

piston rings, cylinder head valves, turbochargers, 

and injector nozzles.

Also, the unburned fuel can enter the crankcase, 

diluting the oil and causing rapid wear to the 

engine.

S

TOPPING

 T

HE

 E

NGINE

After full load operation, idle the engine for a few 

minutes before shutting it down. This idle period 

will allow the lubricating oil and coolant to carry 

excess heat away from the turbocharger. Refer to 

the following chart for proper engine shutdown.

NOTE:

Under certain conditions the engine Stop/Start functionality may be temporarily disabled and the engine fan will run after the engine is turned off to protect the 

engine. These conditions are under high load and high temperature conditions.

 Driving Condition

 Load

 Turbocharger Temperature

 Idle Time (min.) Before Engine 

Shutdown

Stop and Go

Empty

Cool

None

Stop and Go

Medium

0.5

Highway Speeds

Medium

Warm

1.0

City Traffic

Maximum GCWR

1.5

Highway Speeds

Maximum GCWR

2.0

Uphill Grade

Maximum GCWR

Hot

2.5

4

-------------------------------------------------------------------------------------------------------------------------------------------------------------

150

STARTING AND OPERATING


Do Not Operate The Engine With Low Oil 

Pressure

If the Low Oil Pressure Warning Light turns on while 

driving, stop the vehicle and shut down the engine 

as soon as possible. After the vehicle is safely 

stopped, restart the engine and monitor the lamp. 

If the lamp is still illuminated, shut the engine off, 

contact an authorized dealer, and do not operate 

the vehicle until the cause is corrected. If the lamp 

is no longer illuminated, the engine can be 

operated, but should be taken to an authorized 

dealer as soon as possible for further inspection.

NOTE:

Do not operate the vehicle until the cause is 

corrected. This light does not show how much oil is 

in the engine. The engine oil level must be checked 

under the hood.

Do Not Operate The Engine With Failed 

Parts

All engine failures give some warning before the 

parts fail. Some important observations are:

Engine misfiring or vibrating severely

Sudden loss of power

Unusual engine noises

Fuel, oil or coolant leaks

Sudden change, outside the normal operating 

range, in the engine operating temperature

Excessive smoke

Oil pressure drop

ENGINE BLOCK HEATER — IF EQUIPPED

Engine Block Heater Cord Location

The engine block heater warms engine coolant and 

permits quicker starts in cold weather. Connect the 

heater cord to a ground-fault interrupter protected 

110–115 Volt AC electrical outlet with a grounded, 

three-wire extension cord.
For diesel engines, its use is recommended for 

environments that routinely fall below -10°F 

(-23°C). It should be used when the vehicle has not 

been running for long periods of time and should 

be plugged in two hours prior to start. Its use is 

required for cold starts with temperatures under 

-20°F (-28°C).
To ensure reliable starting at these temperatures, 

use of an externally powered electric engine block 

heater (available from an authorized dealer) is 

recommended.
The engine block heater cord is routed under the 

hood on the passenger side of the vehicle next to 

the engine coolant reservoir.

CAUTION!

If oil pressure falls to less than normal readings, 

shut the engine off immediately. Failure to do so 

could result in immediate and severe engine 

damage.

WARNING!

Remember to disconnect the engine block 

heater cord before driving. Damage to the 

110-115 Volt electrical cord could cause 

electrocution.

-------------------------------------------------------------------------------------------------------------------------------------------------------------

STARTING AND OPERATING

151

ENGINE BREAK-IN RECOMMENDATIONS — 

GASOLINE ENGINE 

A long break-in period is not required for the engine 

and drivetrain (transmission and axle) in your 

vehicle.
Drive moderately during the first 300 miles 

(500 km). After the initial 60 miles (100 km), 

speeds up to 50 or 55 mph (80 or 90 km/h) are 

desirable.
While cruising, brief full-throttle acceleration within 

the limits of local traffic laws contributes to a good 

break-in. Wide-open throttle acceleration in low 

gear can be detrimental and should be avoided.
The engine oil installed in the engine at the factory 

is a high-quality energy conserving type lubricant. 

Oil changes should be consistent with anticipated 

climate conditions under which vehicle operations 

will occur. For the recommended viscosity and 

quality grades  

Ú

page 478.

NOTE:

A new engine may consume some oil during its first 

few thousand miles (kilometers) of operation. This 

should be considered a normal part of the break-in 

and not interpreted as a problem. Please check 

your oil level with the engine oil indicator often 

during the break-in period. Add oil as required.

ENGINE BREAK-IN RECOMMENDATIONS — 

DIESEL ENGINE

The diesel engine does not require a break-in 

period due to its construction. Normal operation is 

allowed, providing the following recommendations 

are followed:

Warm up the engine before placing it under 

load.

Do not operate the engine at idle for prolonged 

periods.

Observe vehicle oil pressure and temperature 

indicators.

Check the coolant and oil levels frequently.

Vary throttle position at highway speeds when 

carrying or towing significant weight.

NOTE:

Light duty operation such as light trailer towing or 

no load operation will extend the time before the 

engine is at full efficiency. Reduced fuel economy 

and power may be seen at this time.

The engine oil installed in the engine at the factory 

is a high-quality energy conserving type lubricant. 

Oil changes should be consistent with anticipated 

climate conditions under which vehicle operations 

will occur. For the recommended viscosity and 

quality grades  

Ú

page 478.

NOTE:

NON-DETERGENT OR STRAIGHT MINERAL OILS 

MUST NEVER BE USED.

PARKING BRAKE  

E

LECTRIC

 P

ARK

 B

RAKE

 (EPB)  

Your vehicle is equipped with an EPB that offers 

simple operation, and some additional features 

that make the parking brake more convenient and 

useful.
The parking brake is primarily intended to prevent 

the vehicle from rolling while parked. Before 

leaving the vehicle, make sure that the parking 

brake is applied. Also, be certain to leave the 

transmission in PARK.
You can engage the parking brake in two ways:

Manually, by applying the parking brake switch.

Automatically, by enabling the Auto Park Brake 

feature in the Customer Programmable 

Features section of the Uconnect settings.

CAUTION!

Never use Non-Detergent Oil or Straight Mineral 

Oil in the engine or damage may result.

4

-------------------------------------------------------------------------------------------------------------------------------------------------------------

152

STARTING AND OPERATING


(Continued)

The parking brake switch is located on the 

instrument panel to the left of the steering wheel 

(below the headlamp switch).

Electric Park Brake Switch

To apply the parking brake manually, pull up on the 

switch momentarily. You may hear a slight sound 

from the back of the vehicle while the parking 

brake engages. Once the park brake is fully 

engaged, the BRAKE telltale light in the instrument 

cluster and an indicator on the switch will 

illuminate. If your foot is on the brake pedal while 

you apply the parking brake, you may notice a 

small amount of brake pedal movement. The 

parking brake can be applied even when the 

ignition switch is OFF but the BRAKE telltale light 

will not illuminate, however, it can only be released 

when the ignition is in the ON/RUN position.

NOTE:

The EPB fault light will illuminate if the EPB switch 

is held for longer than 20 seconds in either the 

released or applied position. The light will extin

-

guish upon releasing the switch.
If the Auto Park Brake feature is enabled, the 

parking brake will automatically engage whenever 

the transmission is placed into PARK. If your foot is 

on the brake pedal, you may notice a small amount 

of brake pedal movement while the parking brake 

is engaging.
The parking brake will release automatically when 

the ignition is ON, the transmission is in DRIVE or 

REVERSE, the driver seat belt is buckled, and an 

attempt is made to drive away.
To release the parking brake manually, the ignition 

switch must be in the ON/RUN position. Put your 

foot on the brake pedal, then push the parking 

brake switch down momentarily. You may hear a 

slight whirring sound from the back of the vehicle 

while the parking brake disengages. You may also 

notice a small amount of movement in the brake 

pedal. Once the parking brake is fully disengaged, 

the BRAKE telltale light in the instrument cluster 

and the LED indicator on the switch will extinguish.

NOTE:

When parking on a hill, it is important to turn the 

front wheels toward the curb on a downhill grade 

and away from the curb on an uphill grade. Apply 

the parking brake before placing the gear selector 

in PARK, otherwise the load on the transmission 

locking mechanism may make it difficult to move 

the gear selector out of PARK.

WARNING!

Never use the PARK position as a substitute 

for the parking brake. Always apply the 

parking brake fully when parked to guard 

against vehicle movement and possible injury 

or damage.

When exiting the vehicle, always remove the 

key fob from the ignition and lock your vehicle.

Never leave children alone in a vehicle, or with 

access to an unlocked vehicle. Allowing chil

-

dren to be in a vehicle unattended is 

dangerous for a number of reasons. A child or 

others could be seriously or fatally injured. 

Children should be warned not to touch the 

parking brake, brake pedal or the gear 

selector.

-------------------------------------------------------------------------------------------------------------------------------------------------------------

STARTING AND OPERATING

153

If exceptional circumstances should make it 

necessary to engage the parking brake while the 

vehicle is in motion, maintain upward pressure on 

the EPB switch for as long as engagement is 

desired. The BRAKE telltale light will illuminate, 

and a continuous chime will sound. The rear stop 

lamps will also be illuminated automatically while 

the vehicle remains in motion.
To disengage the parking brake while the vehicle is 

in motion, release the switch. If the vehicle is 

brought to a complete stop using the parking 

brake, when the vehicle reaches approximately 

3 mph, (5 km/h) the parking brake will remain 

engaged.

In the unlikely event of a malfunction of the EPB 

system, a yellow EPB fault light will illuminate. This 

may be accompanied by the BRAKE telltale light 

flashing. In this event, urgent service of the EPB 

system is required. Do not rely on the parking 

brake to hold the vehicle stationary.

Auto Park Brake

The Electric Park Brake (EPB) can be programmed 

to be applied automatically whenever the vehicle is 

at a standstill and the automatic transmission is 

placed in PARK. Auto Park Brake is enabled and 

disabled by customer selection through the 

Customer Programmable Features section of the 

Uconnect Settings  

Ú

page 252.

Any single Auto Park Brake application can be 

bypassed by pushing the EPB switch to the release 

position while the transmission is placed in PARK.

SafeHold

SafeHold is a safety feature of the Electric Park 

Brake (EPB) system that will engage the parking 

brake automatically if the vehicle is left unsecured 

while the ignition is in ON/RUN.
The parking brake will automatically engage if all of 

the following conditions are met:

The vehicle is at a standstill.

There is no attempt to press the brake pedal 

and accelerator pedal.

The seat belt is unbuckled.

The driver door is open.

Do not leave the key fob in or near the vehicle, 

or in a location accessible to children, and do 

not leave a vehicle equipped with Keyless 

Enter ‘n Go™ in the ACC or ON/RUN position. 

A child could operate power windows, other 

controls, or move the vehicle.

Be sure the parking brake is fully disengaged 

before driving; failure to do so can lead to 

brake failure and a collision.

Always fully apply the parking brake when 

leaving your vehicle, or it may roll and cause 

damage or injury. Also be certain to leave the 

transmission in PARK. Failure to do so may 

allow the vehicle to roll and cause damage or 

injury.

CAUTION!

If the Brake System Warning Light remains on 

with the parking brake released, a brake system 

malfunction is indicated. Have the brake system 

serviced by an authorized dealer immediately.

WARNING!

WARNING!

Driving the vehicle with the parking brake 

engaged, or repeated use of the parking brake 

to slow the vehicle, may cause serious damage 

to the brake system. Be sure the parking brake 

is fully disengaged before driving; failure to do 

so can lead to brake failure and a collision.

4

-------------------------------------------------------------------------------------------------------------------------------------------------------------

154

STARTING AND OPERATING


(Continued)

SafeHold can be temporarily bypassed by pushing 

the EPB switch while the driver door is open. Once 

manually bypassed, SafeHold will be enabled 

again once the vehicle reaches 12 mph (20 km/h) 

or the ignition is turned to the OFF position and 

back to ON again.

Brake Service Mode

We recommend having your brakes serviced by an 

authorized dealer. You should only make repairs 

for which you have the knowledge and the right 

equipment. You should only enter Brake Service 

Mode during brake service.
When servicing your rear brakes, it may be 

necessary for you or your technician to push the 

rear piston into the rear caliper bore. With the 

Electric Park Brake (EPB) system, this can only be 

done after retracting the EPB actuator. 

Fortunately, actuator retraction can be done easily 

by entering the Brake Service Mode through the 

Uconnect Settings in your vehicle. This 

menu-based system will guide you through the 

steps necessary to retract the EPB actuator in 

order to perform rear brake service.

Service Mode has requirements that must be met 

in order to be activated:

The vehicle must be at a standstill.

The parking brake must be unapplied.

The transmission must be in PARK or NEUTRAL.

While in Service Mode, the EPB fault lamp will flash 

continuously while the ignition is in ON/RUN.
When brake service work is complete, the following 

steps must be followed to reset the park brake 

system to normal operation:

Ensure the vehicle is at a standstill.

Press the brake pedal with moderate force.

Apply the EPB Switch.

AUTOMATIC TRANSMISSION 

You must press and hold the brake pedal while 

shifting out of PARK.

WARNING!

You can be badly injured working on or around a 

motor vehicle. Do only that service work for 

which you have the knowledge and the right 

equipment. If you have any doubt about your 

ability to perform a service job, take your vehicle 

to a competent mechanic.

WARNING!

Never use the PARK position as a substitute 

for the parking brake. Always apply the 

parking brake fully when exiting the vehicle to 

guard against vehicle movement and possible 

injury or damage.

Your vehicle could move and injure you and 

others if it is not in PARK. Check by trying to 

move the transmission gear selector out of 

PARK with the brake pedal released. Make 

sure the transmission is in PARK before 

exiting the vehicle.

The transmission may not engage PARK if the 

vehicle is moving. Always bring the vehicle to a 

complete stop before shifting to PARK, and 

verify that the transmission gear position indi

-

cator solidly indicates PARK (P) without 

blinking. Ensure that the vehicle is completely 

stopped, and the PARK position is properly 

indicated, before exiting the vehicle.

-------------------------------------------------------------------------------------------------------------------------------------------------------------


Content      ..     7      8      9      10     ..