Acura RSX Honda Integra. Manual - part 312
04
05
10
04
14-374
Shafts and Clutches
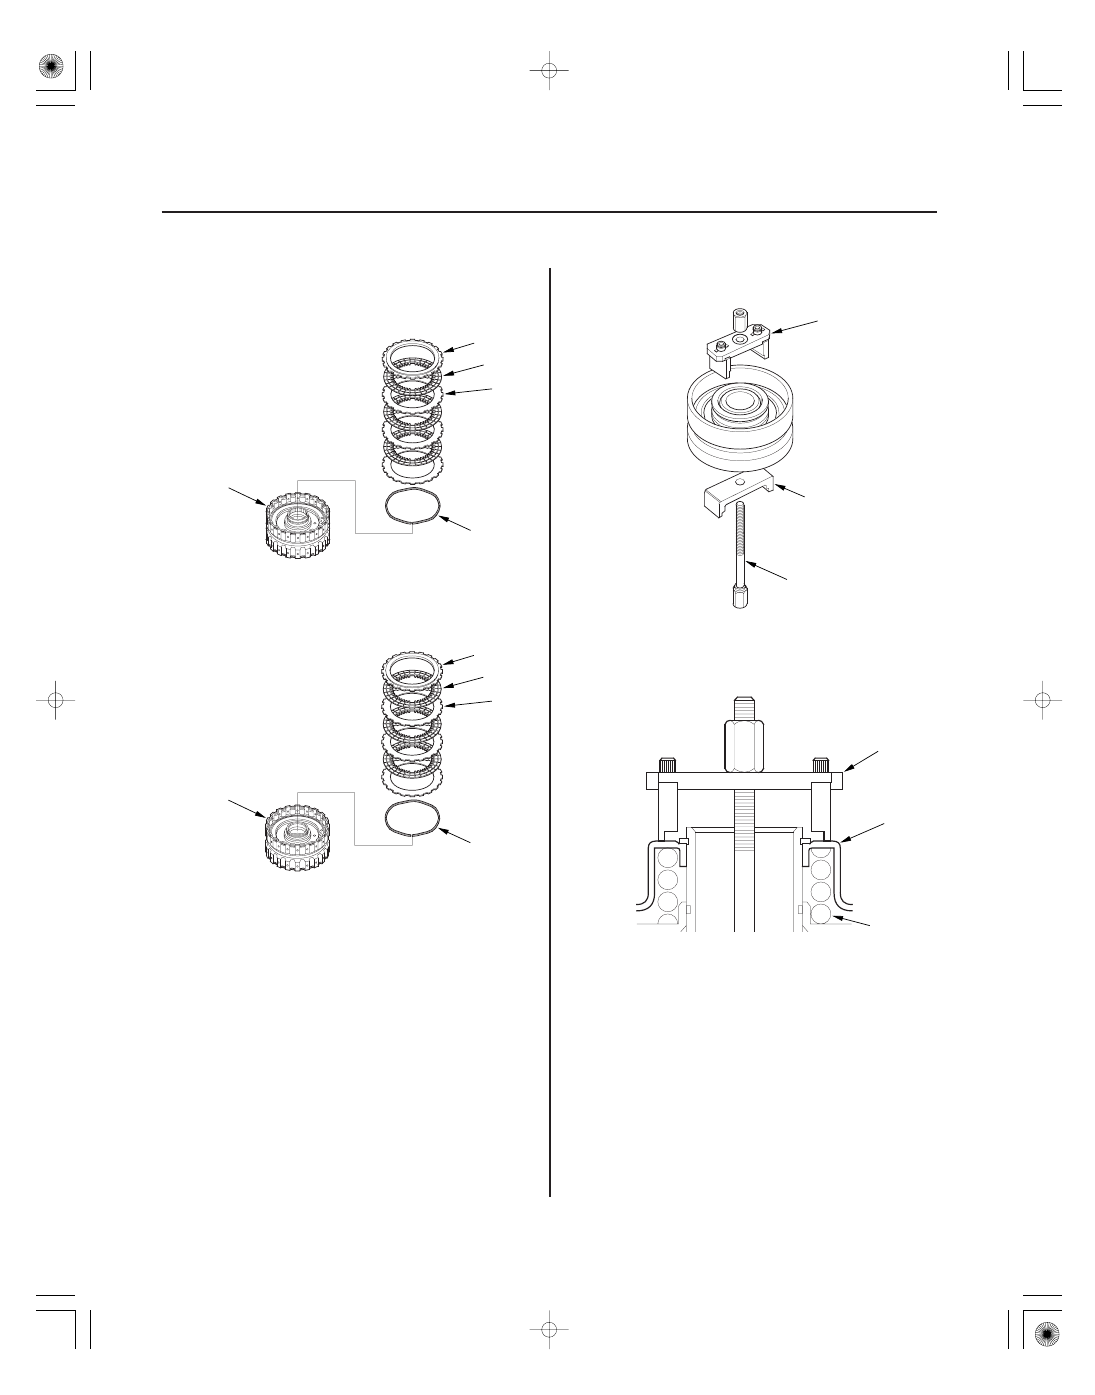
Clutch Disassembly (cont’d)
A
B
C
D
E
A
B
C
D
E
07LAE-PX40100
07LAE-PX40100 or
07HAE-PL50101
07GAE-PG40200 or
07GAE-PG4020A
A
B
C
7. Remove the clutch end plate (A), clutch discs (B) (3),
clutch waved-plates (C) (3), and waved spring (D)
from the 4th clutch drum (E).
8. Remove the clutch end plate (A), clutch discs (B) (3),
clutch waved-plates (C) (3), and waved spring (D)
from the 5th clutch drum (E).
9. Install the special tools.
10. Set the special tool (A) on the spring retainer (B) of
the 1st, 2nd, and 3rd clutches so the special tool
works on the clutch return spring (C).
05/06/27 17:59:33 61S6M040_140_0375