Acura RL (1996-2004 year). Manual - part 625


  Index      Acura     Acura RL 1996-2004 year - service repair manual


Search            


Content   ..  623  624  625  626   ..


Acura RL (1996-2004 year). Manual - part 625


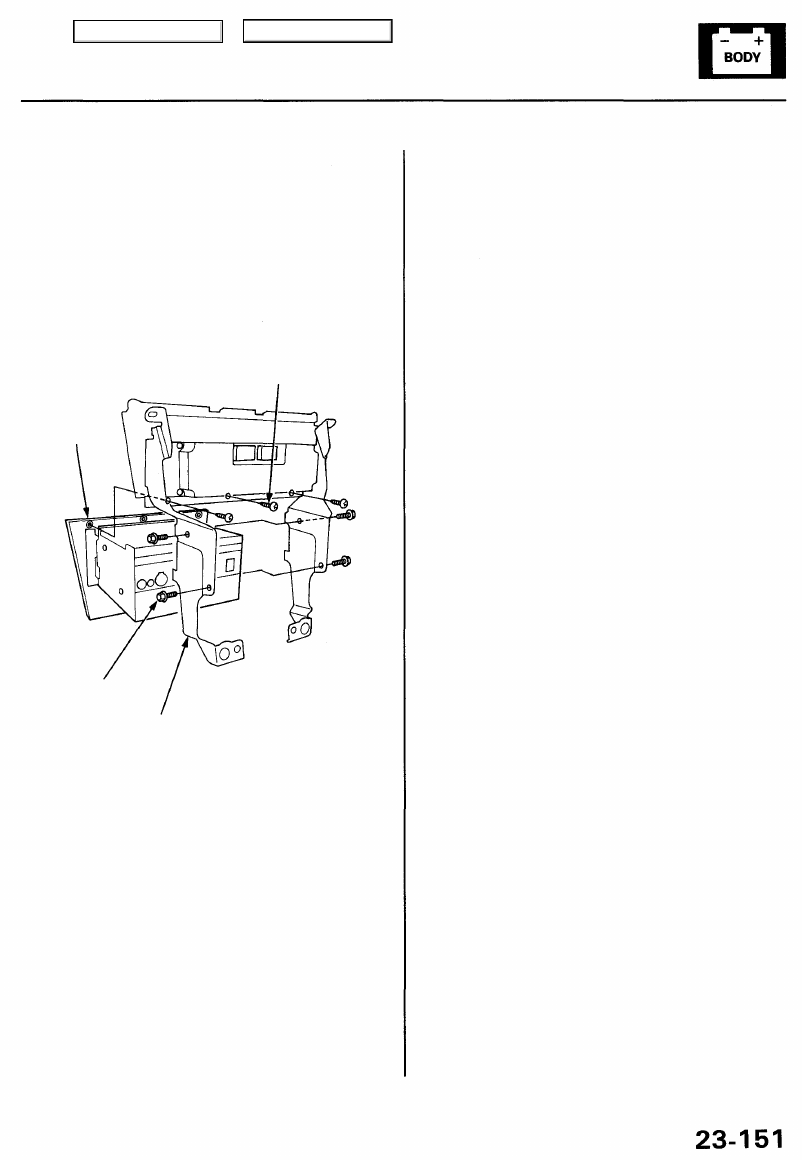
3. Remove the seven (or eight) mounting screws, then

remove the audio unit.

4. Install in the reverse order of removal.

5. After installing the audio unit, enter the anti-theft

code for the radio, then enter the customer's radio
station presets.

Without navigation system:

1. Make sure you have the anti-theft code for the

radio, then write down the frequencies for the
radio's preset buttons.

2. Remove the automatic climate control panel and

audio panel assembly (see 

section 20

).

SCREW

AUDIO

UNIT

BRACKET

BOLT

Main Menu

Table of Contents

3. Remove the CD changer bracket mounting bolts,

then remove the CD changer and bracket.

4. Remove the DIN cord from the CD changer.

5. Remove the eight mounting screws, then remove

the CD changer from the bracket.

Stereo Sound System

CD Changer Removal

1. Open the trunk lid.

2. Remove the CD changer cover.

Stereo Amplifier Removal

1. Remove the rear seat (see 

section 20

).

2. Loosen the three amplifier mounting bolts.

COVER

CD CHANGER

CD CHANGER

BRACKET

STEREO
AMPLIFIER

MOUNTING
BOLTS

CONNECTORS

3. Slide the amplifier out of its three mounting slots,

disconnect the 12P and 18P connectors, then
remove the amplifier.

Main Menu

Table of Contents

Speaker Replacement

Front Door Speaker:

1. Remove the front door panel (see 

section 20

).

2. Remove the four screws, then disconnect the 2P

connector from the speaker.

1. Remove the front door panel (see 

section 20

).

2. Remove the speaker cover.

3. Remove the two screws and tweeter.

TWEETER

SPEAKER
COVER

2P CONNECTOR

SPEAKER

SCREW

Rear Speaker:

1. Remove the rear seat back (see 

section 20

).

2. Remove the rear shelf (see 

section 20

).

3. Remove the four screws, then disconnect the 2P

connector from the speaker.

4. Remove the speaker from the speaker adapter.

Rear Door Speaker:

1. Remove the rear door panel (see 

section 20

).

2. Remove the four screws, then disconnect the 2P

connector from the speaker.

2P CONNECTOR

SCREW

SPEAKER

Main Menu

Table of Contents

Stereo Sound System

Radio Remote Switch Test

SRS components are located in this area. Review the
SRS component locations, precautions, and procedures
in the SRS (

section 24

) before performing repairs or

service.

1. Remove the switch cover from the radio remote

switch.

RADIO REMOTE SWITCH

SWITCH COVER

2P CONNECTOR

2. Remove the radio remote switch from the steering

wheel by removing the two screws, and disconnect
the 2P connector.

3. Remove the remote switch from the steering wheel

(see

 section 17

).

4. Measure resistance between the No. 1 and No. 2

terminals in each switch position according to the
table.

Position

Resistance

Approx. 100

Approx. 350

Approx. 770

Approx. 3.6

OFF

AUDIO/CH

(SEEK)

(VOL. UP)

(VOL. DOWN)

Main Menu

Table of Contents


Content   ..  623  624  625  626   ..