Acura RL (1996-2004 year). Manual - part 623
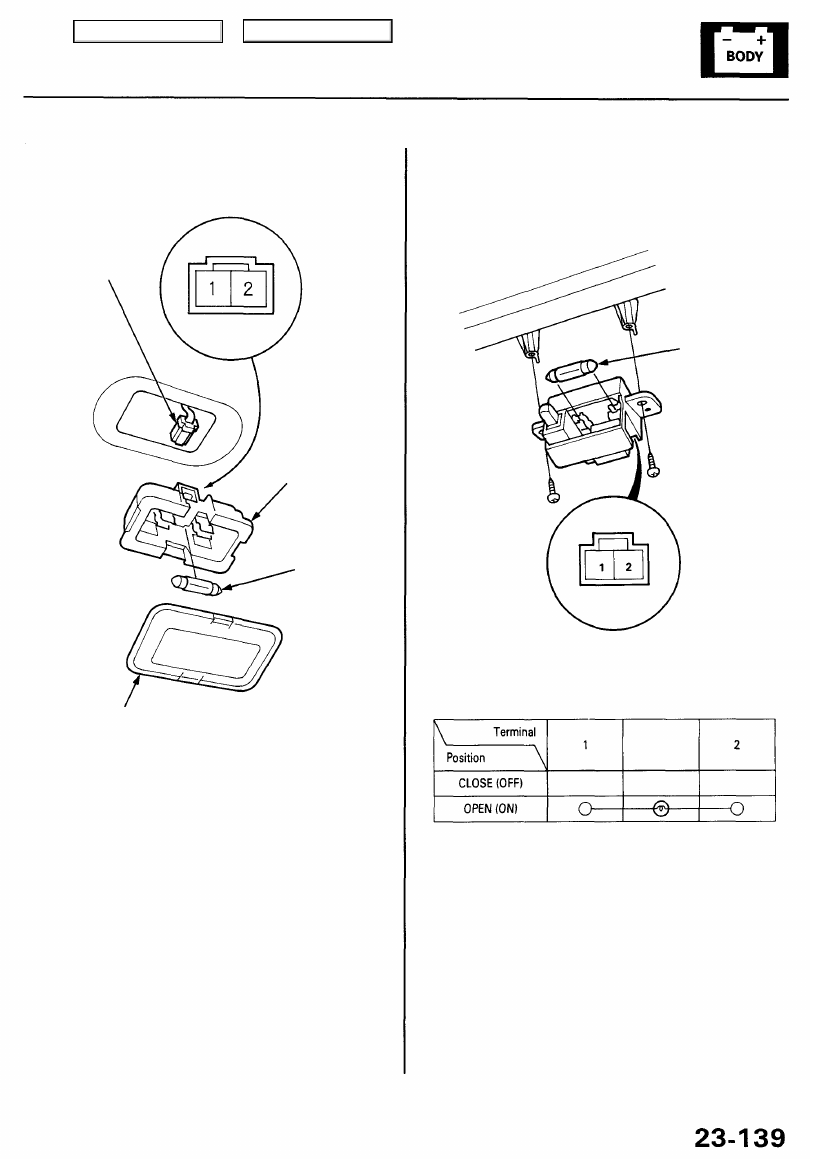
Trunk Light Test
1. Pry the trunk light lens off from the housing.
Glove Box Light Test
1. Open the glove box, and disconnect the 2P
connector.
NOTE: If necessary, remove the glove box.
BULB (3.4 W)
2. Check for continuity between the terminals in each
switch position according to the table.
2. Pry out the light assembly.
3. Disconnect the 2P connector from the housing.
4. Make sure the bulb, and check for continuity
between the No. 1 and No. 2 terminals.
LENS
BULB
(5 W)
HOUSING
2P CONNECTOR
Main Menu
Table of Contents