Acura RL. Manual - part 316
 

  Index      Acura     Acura RL - service repair manual 2005-2008 year


Search            


Content   ..  314  315  316  317   ..


Acura RL. Manual - part 316


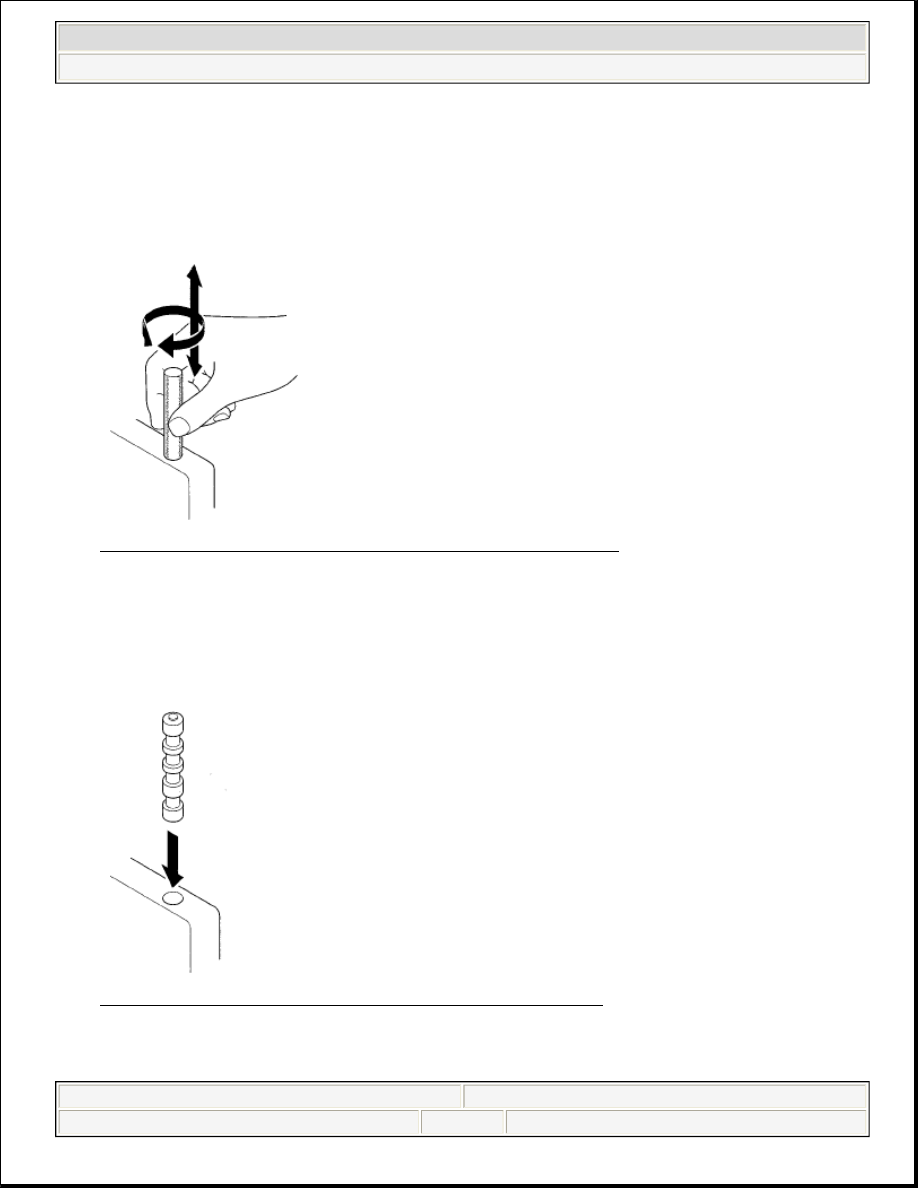
paper slightly, so that it unrolls and fits the bore tightly, then polish the bore by twisting the paper as you 
push it in and out. 

Fig. 459: Polishing Valve Body Bore Using ATF-Soaked #600 Paper 
Courtesy of AMERICAN HONDA MOTOR CO., INC. 

5. Remove the #600 paper. Thoroughly wash the entire valve body in solvent, then dry it with compressed 

air.  

6. Coat the valve with ATF, then drop it into its bore. It should drop to the bottom of the bore under its own 

weight. If not, repeat steps 4 and 5, then retest. If the valve still sticks, replace the valve body. 

Fig. 460: Dropping Valve Into Valve Body Bore (Coat With ATF) 
Courtesy of AMERICAN HONDA MOTOR CO., INC. 

7. Remove the valve, and thoroughly clean it and the valve body with solvent. Dry all parts with compressed 

NOTE:

The valve body is aluminum and doesn't require much polishing to remove 
any burrs.


2007 Acura RL 

2005-08 TRANSMISSION Automatic Transmission - RL


me 


Friday, June 05, 2009 1:18:16 PM

Page 435 

© 2005 Mitchell Repair Information Company, LLC. 

air, then reassemble using ATF as a lubricant. 

VALVE BODY VALVE INSTALLATION 

1. Coat all parts with ATF before assembly.  

2. Install the valves and springs in the sequence shown for the main valve body (see MAIN VALVE BODY 

DISASSEMBLY, INSPECTION, AND REASSEMBLY ), secondary valve body (see SECONDARY 
VALVE BODY DISASSEMBLY, INSPECTION, AND REASSEMBLY
 ), regulator valve body (see 
REGULATOR VALVE BODY DISASSEMBLY, INSPECTION, AND REASSEMBLY ), and 
accumulator body (see ACCUMULATOR BODY DISASSEMBLY, INSPECTION, AND 
REASSEMBLY
 ). Refer to the following valve cap illustrations, and install each valve cap so the end 
shown facing up will be facing the outside of the valve body, then secure the valve cap with the valve cap 
clip. 

Fig. 461: Identifying Valve Cap 
Courtesy of AMERICAN HONDA MOTOR CO., INC. 

3. Install the valve (A) and valve spring (B) in the valve body. Push the valve spring in with a screwdriver, 

then install the spring seat (C). 

Fig. 462: Installing Valve And Valve Spring Into Valve Body With Screwdriver 
Courtesy of AMERICAN HONDA MOTOR CO., INC.


2007 Acura RL 

2005-08 TRANSMISSION Automatic Transmission - RL


me 


Friday, June 05, 2009 1:18:16 PM

Page 436 

© 2005 Mitchell Repair Information Company, LLC. 

MAIN VALVE BODY DISASSEMBLY, INSPECTION, AND REASSEMBLY 

'05 Model 

1. Clean all parts thoroughly in solvent, and dry them with compressed air. Blow out all passages.  

2. Do not use a magnet to remove the cooler check valve, it may magnetize the check valve (ball).  

3. Inspect the main valve body for scoring and damage.  

4. Check all valves for free movement. If any fail to slide freely, refer to the valve body repair (see VALVE 

BODY ).  

5. Coat all parts with ATF during assembly.  

6. Replace the filter with a new one, and install it and the lubrication check valve in the direction shown. 

Fig. 463: Disassembling Main Valve Body (05 Model) 
Courtesy of AMERICAN HONDA MOTOR CO., INC. 

VALVE SPRING SPECIFICATIONS  

VALVE SPRING SPECIFICATIONS 

Valve Springs

Standard (New)-Unit: mm (in.)

Wire Diameter

O.D.

Free Length

No. of Coils

A

Cooler check 
valve spring

0.6 (0.024)

5.8 (0.228)

14.5 (0.571)

6.8

B

Torque converter 
check valve 
spring

1.1 (0.043)

8.6 (0.339)

35.0 (1.378)

12.6


2007 Acura RL 

2005-08 TRANSMISSION Automatic Transmission - RL


me 


Friday, June 05, 2009 1:18:16 PM

Page 437 

© 2005 Mitchell Repair Information Company, LLC. 

'06-08 Models 

1. Clean all parts thoroughly in solvent, and dry them with compressed air. Blow out all passages.  

2. Inspect the main valve body for scoring and damage.  

3. Check all valves for free movement. If any fail to slide freely, refer to the valve body repair (see VALVE 

BODY ).  

4. Coat all parts with ATF during assembly.  

5. Replace the filter with new one, and install it and the lubrication check valve in the direction shown. 

C

Lock-up shift 
valve spring

1.0 (0.039)

6.6 (0.260)

35.5 (1.398)

18.2

D

Shift valve E 
spring

0.7 (0.28)

6.6 (0.260)

42.4 (1.669)

17.6

E

Shift valve A 
spring

0.9 (0.035)

6.6 (0.260)

50.5 (1.988)

23.3

F

Shift valve B 
spring

0.8 (0.031)

6.6 (0.260)

49.1 (1.933)

21.7

G

Modulator valve 
spring

1.6 (0.063)

10.4 (0.409)

33.5 (1.319)

9.8

H

CPC valve A 
spring

0.7 (0.028)

6.1 (0.240)

17.8 (0.701)

7.9

I

Servo control 
valve spring

0.9 (0.035)

9.6 (0.378)

30.2 (1.189)

8.4

J

Lubrication 
control valve 
spring

0.9 (0.035)

8.7 (0.343)

25.0 (0.984)

7.2

K

Lock-up timing 
valve spring

0.65 (0.026)

6.6 (0.260)

34.8 (1.370)

15.6

L

Relief valve 
spring

1.0 (0.039)

9.6 (0.378)

28.1 (1.106)

7.7


2007 Acura RL 

2005-08 TRANSMISSION Automatic Transmission - RL


me 


Friday, June 05, 2009 1:18:16 PM

Page 438 

© 2005 Mitchell Repair Information Company, LLC. 


Content   ..  314  315  316  317   ..