BAIC BJ40 (2023 year). Manual in english - page 3
180 Fuel System
interior Maintenance
Cleaning & Maintenance of
Caution
Caution
Instruments and Plastic Parts
●Subjects with sharp edges on clothes (such
Use a dry, clean and soft cloth and water to
● Be sure NOT use a solvent-containing
as zippers or rivets) may leave permanent
clean the surfaces of instruments and plastic
cleaning agent to clean the surface of the
scratches or marks on the surface of leather.
parts.
dashboard or the airbag module.
When cleaning the seat belts, do NOT
If the surfaces cannot be cleaned, use
remove the belts.
● Solvent-containing cleaning agents can
solvent-free plastic cleaning agents to clean
4
●Do NOT use chemical cleaning agents to
penetrate the surface of the part being
them.
cleaned, boring fine holes in the surface and
clean the seat belts because chemical cleaning
making the part loose. When an airbag is
agents will damage fabric.
Warning
released, such loose plastic parts will
●The seat belt must be kept away from
Cabin spray agents or solvent-containing
markedly increase the risk of injury!
corrosive liquids.
cleaning agents must not be used to clean the
● Be sure NOT use any solvent (such as
●Regularly check the state of the seat belt. If
surfaces of the dashboard and the airbag
gasoline or turpentine), floor wax, shoe polish
damage is found in the seat belt fabric, seat
module. They may loosen the surface, trigger
or similar liquids to treat leather.
belt connection, automatic retracting device
the airbags, and cause serious injury to
● Avoid exposing your vehicle to strong
or the seat belt lock, be sure to go to an
passengers.
sunlight for a long period of time so as to
authorized BAIC dealership to get it
prevent the leather or similar items of the
repaired.
vehicle from fading. If you have to park your
vehicle outdoors for a long period of time,
please cover the leather of the vehicle so as to
prevent it from coming into direct contact
with sunlight.。
Fuel System
181
Cleaning and Maintenance of
Cleaning & Maintenance of Leather
Cleaning and Maintenance of Seat
Carpet
1. Use a vacuum cleaner to suck dust.
Belts
Frequently use a vacuum cleaner to suck dust up
2. Use a clean and soft cloth and water to clean
1. Slowly pull a seat belt out and keep it in a
leather.
from the carpet.
pulled state.
3. Use another dry and soft cloth to wipe it dry.
Regularly wash with detergents and keep the
2. Use a soft brush and neutral soap water to
carpet clean.
4. If all the above cleaning is not enough to
remove dirt from the seat belt.
remove stains, you can also clean with washing
3. Wait for the seat belt to dry completely and
Caution
soap or detergent.
4
then retract it.
●Subjects with sharp edges on clothes (such
Caution
as zippers or rivets) may leave permanent
After cleaning leather using a leather
scratches or marks on the surface of leather.
detergent, use a soft and dry cloth to wipe it
When cleaning the seat belts, do NOT
dry.
remove the belts.
Do NOT put any soft cloth soaked with
●Do NOT use chemical cleaning agents to
detergent on any interior part for a long
clean the seat belts because chemical cleaning
period of time so as to prevent the fading or
agents will damage fabric.
breakage of the resins or fibers of the interior
●The seat belt must be kept away from
fabric.
corrosive liquids.
●Regularly check the state of the seat belt. If
damage is found in the seat belt fabric, seat
belt connection, automatic retracting device
or the seat belt lock, be sure to go to an
authorized BAIC dealership to get it
repaired.
182 Fuel System
Warning
Caution
●Chemical cleaning agents must not be used
● Be sure to wait for the seat belts to
to clean seat belts, so as to prevent damage
completely dry before retracting them, or
and affect their functioning.
else it may damage the seat belt retractor.
●When replacing a seat belt, be sure to use a
●Regularly check all seat belts of the vehicle
new seat belt of the same model and
to ensure that they are clean and work
4
structure to make the replacement.
normally.
● Keep foreign matter or liquids from
entering the seat belt the lock catch, or else
the lock catch and seat belts may not work
normally.
●Do not remove or modify the seat belts
without permission.
●Be sure to regularly check the status of all
seat belts of the vehicle. In the event of
damage to the backing tapes, connection
devices, retracting mechanisms or the lock
catches of the seat belts, be sure to go to an
authorized BAIC dealership to have them
repaired or replaced.
Exterior Maintenance
183
Exterior Maintenance
Washing vehicle
Caution
Frequent vehicle washing helps maintain the
●It is suggested that new vehicles can only
appearance of the vehicle.
Caution
be waxed after six months of use.
The vehicle should be washed in a cool place.
●When the brake is wet or icy, it may affect
●Do NOT wax vehicle windows.
Do NOT wash the vehicle in direct sunlight. If
the functioning of the brake.
●Do NOT use any sharp object to clean the
the vehicle has been placed in sun light for a
●When you clean the bottom of the vehicle,
headlight surface. This will damage the
long period of time, be sure to wait for the
the lower side of the fender (wheel cover) and
protective paint surface and leave cracks on
surface of the vehicle body to cool down before
4
the wheel covering board, please operate with
the headlights.
washing it.
care so as to prevent sharp metal edges from
● Pay attention to the following when
When washing the vehicle using an automatic
hurting your hands.
cleaning wheels: moisture, ice or sprayed salt
washing machine, please be sure to follow the
● While the vehicle is being cleaned, the
will affect the functioning of the brake.
instructions of the machine operator
ignition switch must be turned off.
●Do NOT install protective boards or coat
Caution
● Please do not use a coarse sponge or
anti-corrosive materials around the exhaust
corrosive cleaning product to clean the
muffler, exhaust pipes, the catalytic purifier
●The body paint of the vehicle is strong
vehicle. These might damage the paint
or other hot parts. When the vehicle is
enough to endure the washing of an
surface!
running, these substances may cause fire.
automatic vehicle
washing machine.
●Do NOT use concentrated beam washing
However, attention should be paid to the
impact on the paint surface. When the
nozzle to clean tires! Even spraying from far
structure, cleaning agent used, the filtering
distance will still cause damage
state of water or type of wax solvent of the
vehicle washing machine does not meet the
relevant requirement, it may cause damage
to the paint surface.
●Before washing the vehicle, the ignition
switch must be turned off.
184 Exterior Maintenance
The Automatic Vehicle Washing Device
Manual Washing of Vehicle
Caution
The vehicle paint possesses certain durability.
1. Use water to wash the vehicle to clear
Usually, washing the vehicle inside an
floating dust from it.
When there is asphalt or dirt on the vehicle
automatic washing device will not affect the
2. Prepare a bucket of water, add some cleaning
body, be sure to use a special cleaning agent
state of the vehicle paint. The impact on the
agent, and mix them.
to clean it and then wash it with water so as
body paint depends to a great extent on the
3. Use a soft cloth, sponge or soft brush to
to prevent damage to the finish of the vehicle
structure of the vehicle washing equipment, the
lightly wash the vehicle, then rinse the vehicle
body. While wiping dry the vehicle body, be
water filter used for vehicle washing and the
from top to bottom several times.
sure to check whether there is chipped paint
4
type of cleaning agent and maintenance agent
4. Wheels and the footstep should be washed
or scratches on the vehicle body. If there are,
used. If the body paint has no gloss or has
last. During the cleaning, be sure to change the
be sure to go to an authorized BAIC
scratches after the vehicle is washed, be sure to
sponge or soft cloth.
dealership to have it repaired.
immediately point it out to the washing
5. After you finish washing and wiping, use
Extra care is needed when washing the vehicle
equipment operator.
water to thoroughly rinse the vehicle.
with a high pressure washer. Be sure to operate
it in accordance with the usage instructions and
requirements. Special attention should be paid
to the working pressure and the spraying
distance.
Exterior Maintenance
185
Waxing
Warning
Warning
Regularly waxing can protect the body paint and
●If there is water, ice or anti-skid salt inside
●Before use, be sure that you have carefully
keep the vehicle body clean.
the braking system, it will make the brake
read and followed the relevant information
Only after the whole vehicle is wiped dry can
slow to react and increase braking distance,
and warning instructions.
the waxing operation start.
thus increasing risk of traffic accidents.
●When washing the vehicle, be sure to pay
A superior quality paint protection wax should
●Before driving, lightly depress the brake
attention to personal safety. Special attention
be selected.
pedal and test the brake.
needs to be paid to the vehicle bottom and the
To effectively protect the body paint, it is
4
●Before removing the ice or anti-skid salt
inner side of the wheel cover so as to prevent
suggested that a superior quality hard wax
attached to the brake, be sure to avoid
sharp parts from injuring the hands and
should be applied once a year so as to protect
emergency braking. When braking, special
arms.
the paint surface from erosion by adverse
attention should be paid to avoid accidents.
●When washing the vehicle, do NOT flush
external environment and protect it from light
water into the engine compartment.
mechanical scratches.
Types of Superior Quality Waxes
Otherwise it will affect the service life of the
Body wax: Wax which is used to protect the
parts of the engine compartment.
paint surface from sunlight, air pollution and
other adverse external environments. It is
usually used on new vehicles.
Polish wax: It can restore gloss to those paint
surfaces which have been oxidized or have lost
gloss. Mainly used to restore the gloss of the
paint surface.
Caution
Do NOT wax in a dusty environment.
186 Exterior Maintenance
Polishing
Body Paint Damage
Maintenance of Chromium-Plated
Polishing is needed only when the body paint
Slight body paint damage (such as scratches,
Parts
color fading and even waxing materials cannot
scrapes or stone striking marks) should be
Chrome plated parts can be cleaned with a wet
deliver good gloss. If the polishing agent does
covered with body paint before steel rusting.
cloth and then wiped with a soft dry cloth. If the
not contain anti-corrosive ingredient, waxing is
If rusted, the rust must be thoroughly removed.
effect is not good enough, can use chromium
necessary after polishing.
In addition, the rusted portion must have an
maintenance agent..
anti-corrosive base paint and a covering paint
Stains and the dirt layer on chromium-plated
Caution
4
spread over it. All such work must be done at an
parts can be cleaned using a chrome
Lusterless parts and plastics cannot be
authorized BAIC dealership.
maintenance agent. Regularly using a chrome
treated with polishing agents or hard wax.
Cleaning and Maintenance of
maintenance agent can prevent the formation of
Exterior Plastic Parts
a dirt layer on the surface. When a chrome
Usually, exterior plastic parts can be cleaned
maintenance agent is used, be sure to cover
evenly the entire surface.
using water, a soft cloth or soft brush.
Otherwise use cleaning agent without solvent
for plastic parts.
Caution
Do not use solvent containing cleaning
materials when cleaning plastic parts, or it
will easily cause damage to plastic parts.
Exterior Maintenance
187
Cleaning of Window Glass and
After the body surface has been maintained, the
Cleaning of Front Windshield
wax that remains on the glass should be cleaned
Rearview Mirror
Wiper Blade
off using a special cleaning agent and a cleaning
Clean window glass and rearview mirror with
cloth so as to prevent scratching the wiper
alcohol-based glass cleaner, then dry the glass
blade.
surfaces with a clean soft cloth or fur.
A small brush may be used to clear the snow
Caution
that has accumulated on the windows and the
rearview mirror of the vehicle.
Do not use the fur that brushed over the
4
An ice-removing spray agent or an ice scraper
paint to clean window glass or external
may be used to clear accumulated ice, the
rearview mirror, because the wax remained
scraper should wipe in the same direction, be
in the fur will make the glass surface blurred.
cautious so as to prevent damaging the parts.
If rubber, grease or silicone substances
remain on the glass, a special window
Caution
cleaning agent or silicone cleaning agent
●Do not use the fur that brushed over the
must be used to clean them.
paint to clean window glass or external
rearview mirror, because the wax remained
The Cleaning Operations:
in the fur will make the glass surface blurred.
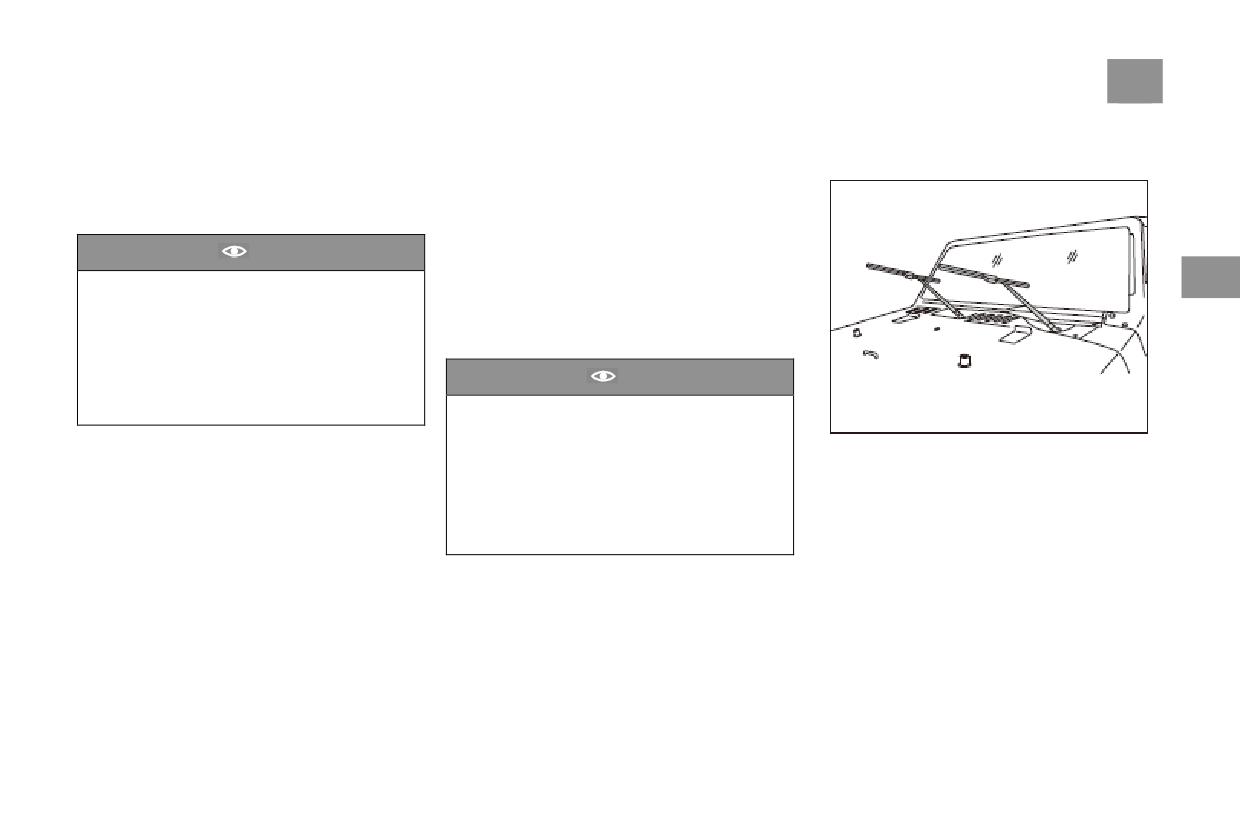
1 .Lift the wiper arm off the windshield glass.
● If rubber, grease or silicone substances
2. During the operation, only the wiper blade
remain on the glass, a special window
bracket should be held.
cleaning agent or silicone cleaning agent
3. Use soft cloth to carefully wipe the dust and
must be used to clean them.
dirt from the wiper blade.
4. After cleaning is completed, lightly put the
wiper arm in its original position.
188 Exterior Maintenance
Maintenance of Sealing Strip
Cleaning and Maintenance of
Caution
Frequent maintenance to these doors’ or
Wheels
● Replace the damaged wiper blade
windows’ rubber sealing strip can keep its in
Regular maintenance will keep the wheels
promptly.
good flexibility, good sealing and also can
pleasing to the eye. It is also necessary to
●A layer of graphite is coated on the surface
prolong its lifetime, make the door easy to open,
regularly clear anti-skid salt and braking scraps
of a new wiper blade. This layer makes
reduce the door slamming sound, and it is not
from the wheels so as to keep the polish on the
wiping smooth and produces no wiping noise.
easy to be frozen in winter.
surfaces of the wheels and prolong their service
4
Damage to the graphite layer will increase
The Maintenance Operation:
life.
wiping noise. The wiper blade should
1. Use a soft cloth to clear dust and dirt from the
Regular Operations:
therefore be promptly replaced if this occurs.
surfaces of the sealing strips.
Every two weeks
●Before using the wiper in winter or cold
2. Regularly use a special protective agent to
Clear anti-skid salt and braking scraps from the
conditions, be sure to check that the wiper
coat the sealing strips.
wheels.
blade is not frozen to the windshield. If it is,
Use an acid-free cleaning agent to clean the
Caution
clear the ice first. Otherwise, it will damage
wheels.
the wiper blade and the wiper motor.
The two sides of the front roof cover are
Every three months
designed as drainage outlets, and there will
Apply quality hard wax on the alloy wheels.
deposit a small amount of water after rain,
the rain water may fall into the car when the
front door being opened.
Exterior Maintenance
189
Chassis protection:
Explanatory Notes on the Catalytic
Warning
The bottom of the vehicle has undergone
Exhaust Purifier
●Be sure to use an acid-free cleaning agent
protective treatment which can reduce the
Since exhaust emissions will generate high
to clean the alloy wheels.
degree of chemical and mechanical damage.
temperature after burning, additional insulation
●Do NOT use a polishing agent or other
However, while the vehicle is running, it is
panel is installed in the catalytic exhaust purifier
abrasive material to treat the surfaces of the
inevitable that protective layer will be damaged.
area.
wheels surface.
It is suggested that check the protective layers
Do NOT use any other protection layer onto the
● Any wheel with damaged surface
of the vehicle bottom and the chassis before
insulation panel, the catalyst or the exhaust
4
winter or spring. Reparation should be done if
protective layer must be remedied in a timely
pipes. Do NOT remove the insulation panel.
necessary. Authorized BAIC dealerships can
manner.
Anti-Corrosive
Treatment
of
provide suitable repair services.
● Using a pressure washer may cause
Cavities
permanent or invisible damage to wheels,
Warning
All vehicle cavities vulnerable to corrosion have
thus causing fatal accidents.
undergone durability protection by BAIC.
If the bottom of vehicle accidentally impacted
●Do NOT use concentrated beam washing
Anti-corrosive treatment needs neither checks
the road during the process of use, please
nozzle to clean tires! Even spraying from far
nor follow-up treatment. If hard wax falls off
immediately go to the nearby BAIC
distance or in a short time, it will still cause
from a cavity due to high temperature outside, it
authorized service station for maintenance
damage, it will still cause damage to the tires
can be cleared by using a scraper or cleaning
and cause traffic accidents.
agent.
190 Engine Compartment
Engine Compartment
Warning
Warning
Safety Instructions of work at
● If any observable steam or coolant
● If any observable steam or coolant
overflowing from the engine compartment,
overflowing from the engine compartment,
Engine Compartment
be sure to NOT open the engine hood.
be sure to NOT open the engine hood.
When working on the engine or the engine
compartment, such as checking or adding
Otherwise, there is a danger of scalding! The
Otherwise, there is a danger of scalding! The
engine fluids, scalding or other injuries may
engine hood can only be opened when no
engine hood can only be opened when no
4
steam or coolant overflows and the engine
steam or coolant overflows and the engine
occur. There is also a risk of accident and fire!
has cooled down.
has cooled down.
Therefore, it is necessary to pay attention to the
following warning instructions and basic safety
●Do NOT make any work fluid onto the hot
●Do NOT make any work fluid onto the hot
rules.
engine or exhaust device. Otherwise, there is
engine or exhaust device. Otherwise, there is
When adding the engine fluids, do not mix the
a danger of fire!
a danger of fire!
working fluids. Otherwise, serious functional
●Do NOT touch the cooling fan. Since the
●Do NOT touch the cooling fan. Since the
faults will be caused.
cooling fan is temperature-controlled, it can
cooling fan is temperature-controlled, it can
start work even when vehicle is power off.
start work even when vehicle is power off.
●For safety, the engine hood must be tightly
For safety, the engine hood must be tightly
locked while driving. Therefore, after the
locked while driving. Therefore, after the
engine hood is closed, it is necessary to check
engine hood is closed, it is necessary to check
whether the locking device has been engaged.
whether the locking device has been engaged.
The engine hood should be aligned with the
The engine hood should be aligned with the
around parts if the engine hood been well
around parts if the engine hood been well
locked.
locked.
Engine Compartment
191
Opening/Closing of the Engine
Hood
4
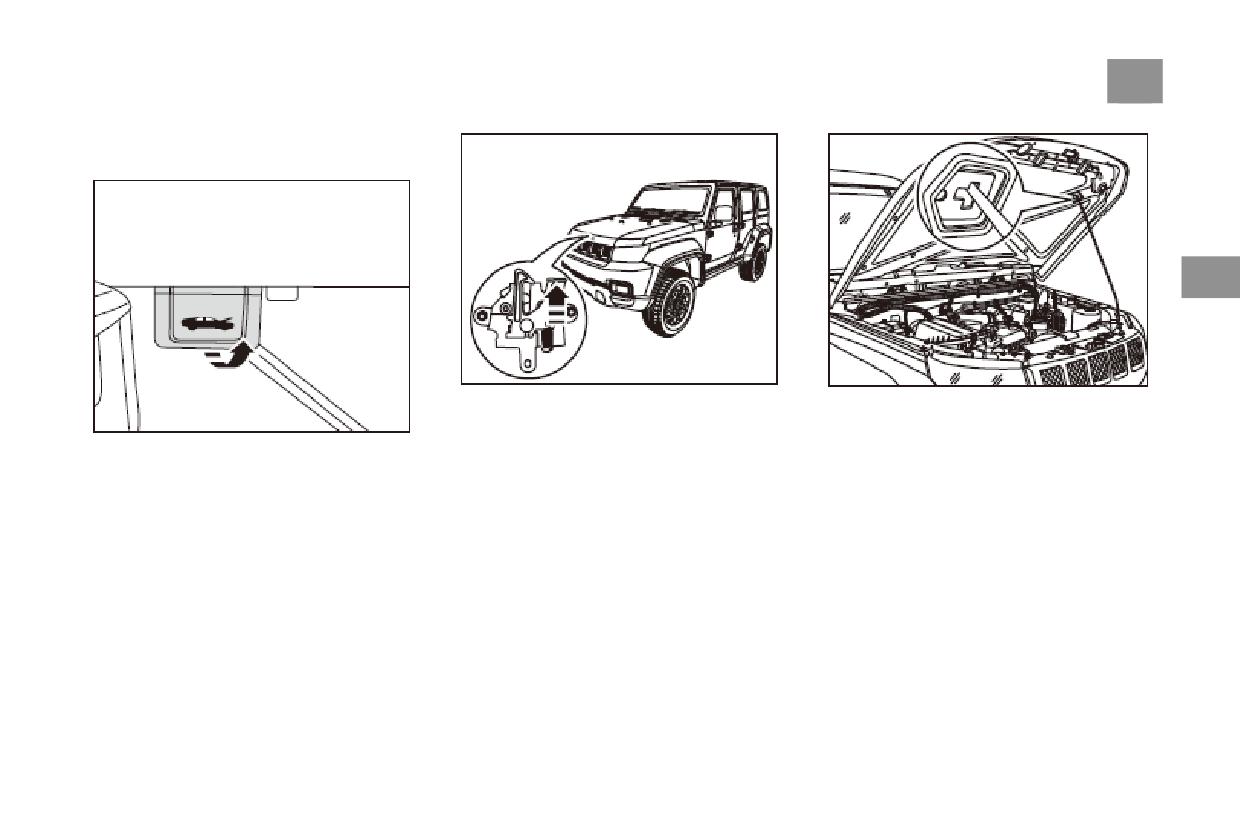
Lightly lift the engine hood, press the Level-2
Prop up the support rod of the engine hood
unlocking handle upwards with your fingers,
which is located in the front part of the hood,
and raise the engine hood.
and insert its upper end into the designated
Park the vehicle properly, apply the parking
position of the compartment hood to ensure that
brake, and pull up the engine hood unlock
the engine hood is fixed to the limiting position
handle from inside. Then the main lock of the
engine hood will be unlocked and the engine
hood will slightly open upwards.
192 Engine Compartment
Warning
It’s not allowed to drive if the engine hood is
not tightly closed
4
To close the engine hood, remove the support
rod and put it back to the bracket in the front
part of the engine compartment. Lower the
engine hood to a position close to the fender and
then release the engine hood. After the engine
hood is closed, be sure to check that the lock
catch has been firmly locked.
Engine Compartment
193
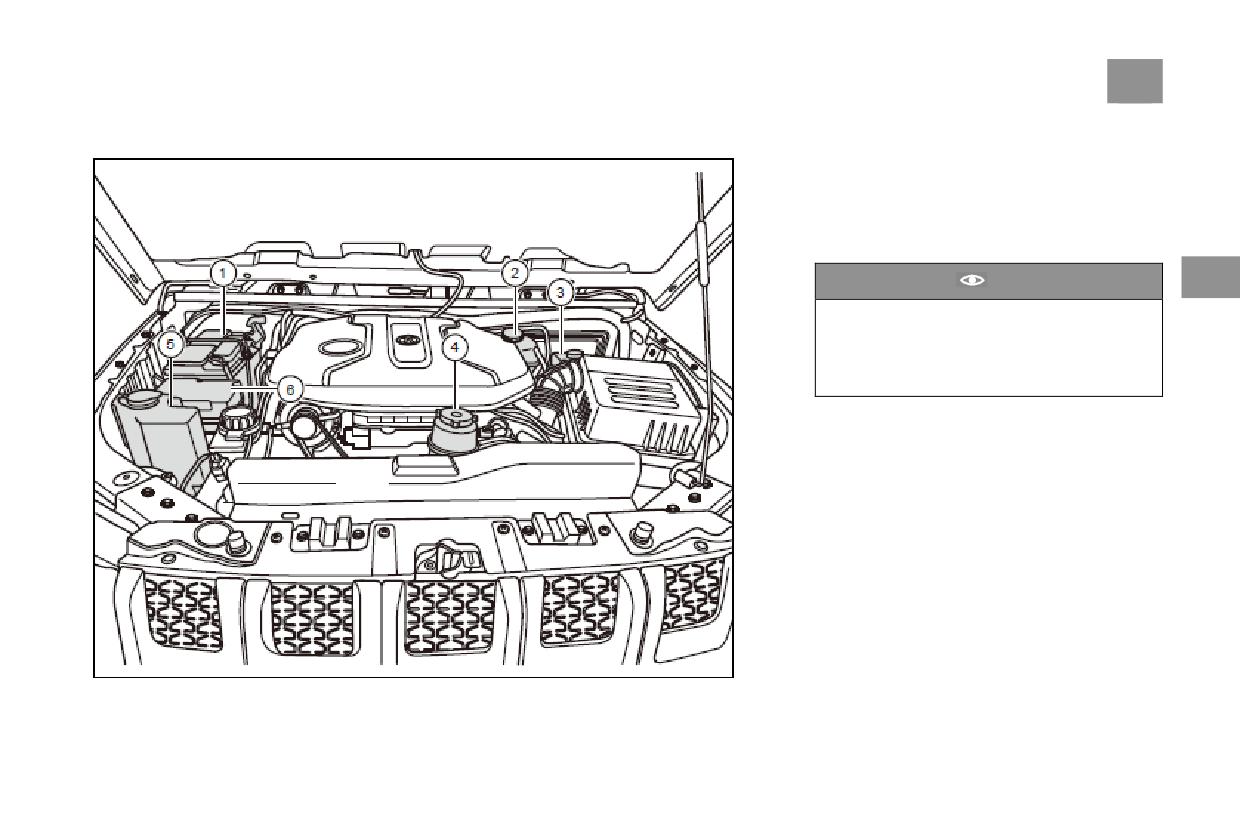
Engine compartment layout
1. Battery
2. Coolant reservoir
3. Brake fluid reservoir
4. Power steering fluid reservoir
5. Windshield washing liquid reservoir
6. Fuse box (under the covering panel)
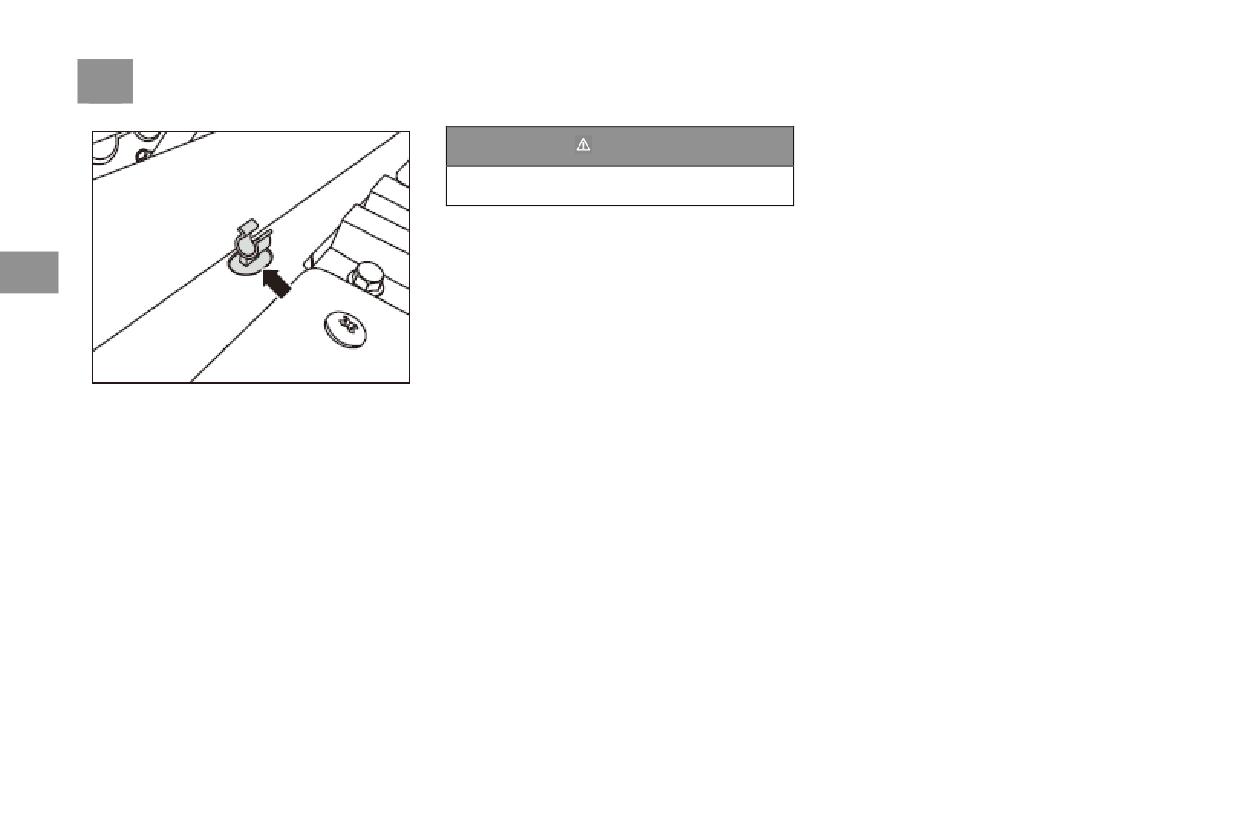
Caution
4
Before the engine hood is opened to the full
extent, make sure to remove the washer
pipeline from the clip to prevent the pipeline
from being broken. Before closing the engine
hood, re-install the washer pipeline.
194 Engine Oil
Engine Oil Pressure Alarming
Checking Engine Oil Level
Engine Oil
The engine oil pressure warning light is located
If the warning light on the display screen of the
on the display screen of the information center.
information center is on, Please immediately
Check the engine oil level each week, . If it is
When the ignition key is in the ON position (the
check the engine oil level and add engine oil as
below the lower limit mark, then you need to
engine has not been started), the vehicle will
needed.
promptly park the vehicle on flat ground. When
perform self-checking and the engine oil
Using a dipstick to check the engine oil level.
the engine is in a cold state, it is the ideal time
pressure warning light will be lit. After the
● Lacking of engine oil may damage the
for checking the engine oil level. If the engine is
4
engine has started, the warning light will go out.
engine;
running or has already warmed up, then please
If the warning light
flashes while
●Excess engine oil may damage the catalyst.
turn off the engine and wait for at least5 minutes
driving, be sure to immediately turn off the
before checking the engine oil level.
engine and check the engine oil level. When
Warning
necessary, add engine oil.
If need to check engine oil level when the
If the engine oil level is normal but the warning
engine in hot condition, please turn off the
light still flashes, be sure NOT to continue
engine and wait for at least5 minutes until all
driving, even running at idle speed. Should
the engine oil flow back to oil pan.
contact the authorized BAIC dealership as soon
If it is in a cold state, engine oil level can be
as possible to have the system checked and
checked directly.
repaired.
Warning
Ignoring the warning light or the relevant
warning instructions may cause serious
accidents.
Engine Oil
195
A certain amount of engine oil will be normally
consumed during drive, the amount of engine
oil consumed will depend on driving habit and
vehicle running condition. Therefore, it is
necessary to regularly check the engine oil level.
It is recommended to check the engine oil level
before each time charging fuel or before a long
journey.
4
When the vehicle is driven for a long distance
on a high-way in the summer, or when towing a
trailer, or climbing a mountainous road, the
engine is ran under harsh conditions and the
engine oil level should not exceed the upper
limit mark -F-.
The specific steps are as follows:
4. Pull out the dipstick.
1. Park the vehicle on level ground.
5. Wipe the oil from the dipstick with clean
2. Open the engine hood and remove the engine
cloth and insert the dipstick into the engine oil
trim cover. Engine trim cover removal method:
dipstick port to the full extent.
pull the engine trim cover upwards with both
6. Pull out the dip stick again, check the engine
hands holding both sides in the front.
oil level, and add engine oil according to the oil
3. Rotate counterclockwise and pull out the oil
level.
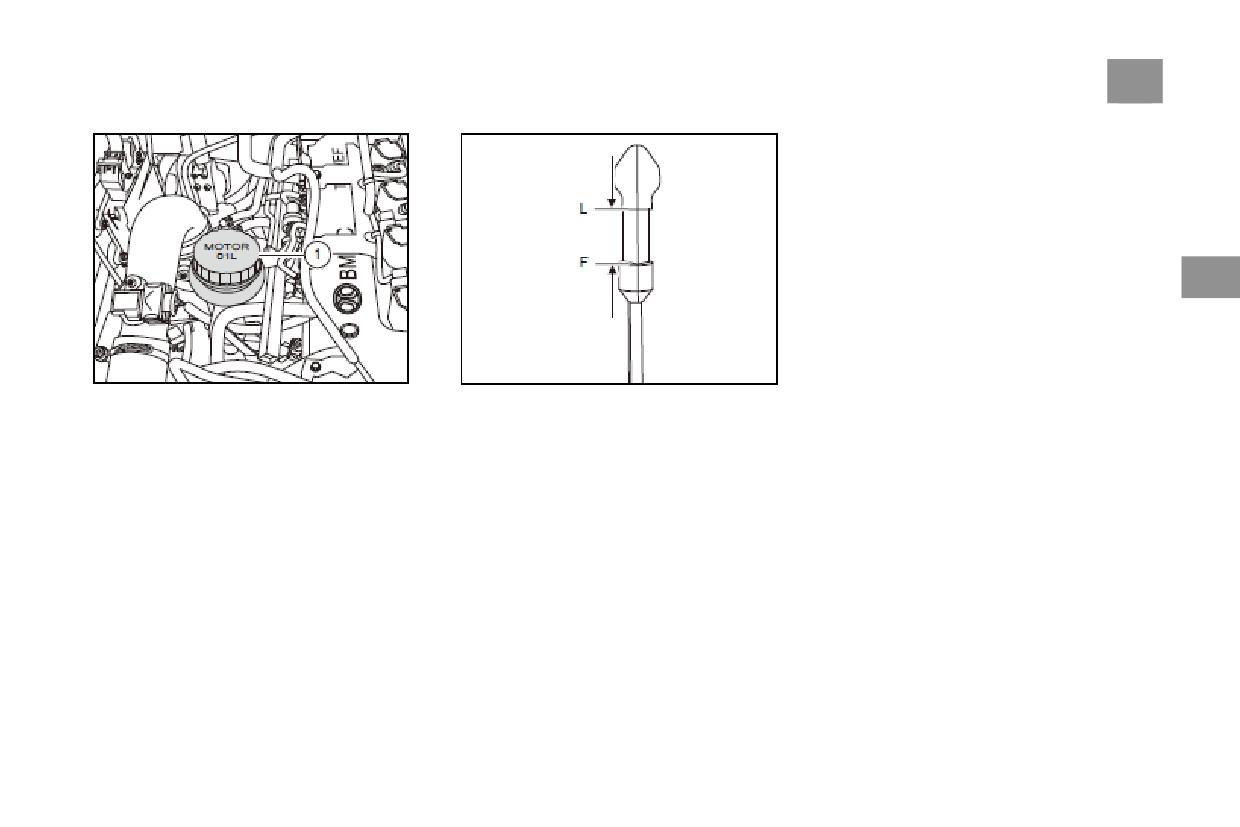
dipstick as indicated on figure -1-.
●F-Upper limit mark for engine oil.
●L - Lower limit mark for engine oil.
●The oil level should be between the upper
limit mark and the lower limit mark.
196 Engine Oil
Adding Engine Oil
5. Once the oil level approaches the upper limit
Caution
Engine oil should be added by a small amount
mark, please immediately stop fueling and put
on and tighten the engine oil filler cover.
If the engine oil level exceeds the upper limit
over several times.
mark, do not start the engine. Otherwise, it
Warning
may damage the catalytic converter and the
●Before starting the maintenance, be sure to
engine
carefully read and follow the relevant
4
warning instructions.
Caution
● Engine oil is a highly inflammable
●Be sure to add an engine oil which is of an
substance. While adding engine oil, be sure to
SN grade or higher of the API grade system.
exercise care. Be careful to NOT spray
engine oil onto any engine part or the exhaust
●When the vehicle left the factory, superior
system.
quality engine oil was already added to the
●The engine oil filler cover must remain in a
engine. Except in extremely cold weather,
this engine oil can be used for the whole year.
tightened state, so as to prevent engine oil
from splashing out and causing fire when the
●Engine oils of different trademarks should
1. Park the vehicle on flat pavement.
engine runs.
not be mixed and used
2. Open the engine hood.
●Be sure to use a type of engine oil that suits
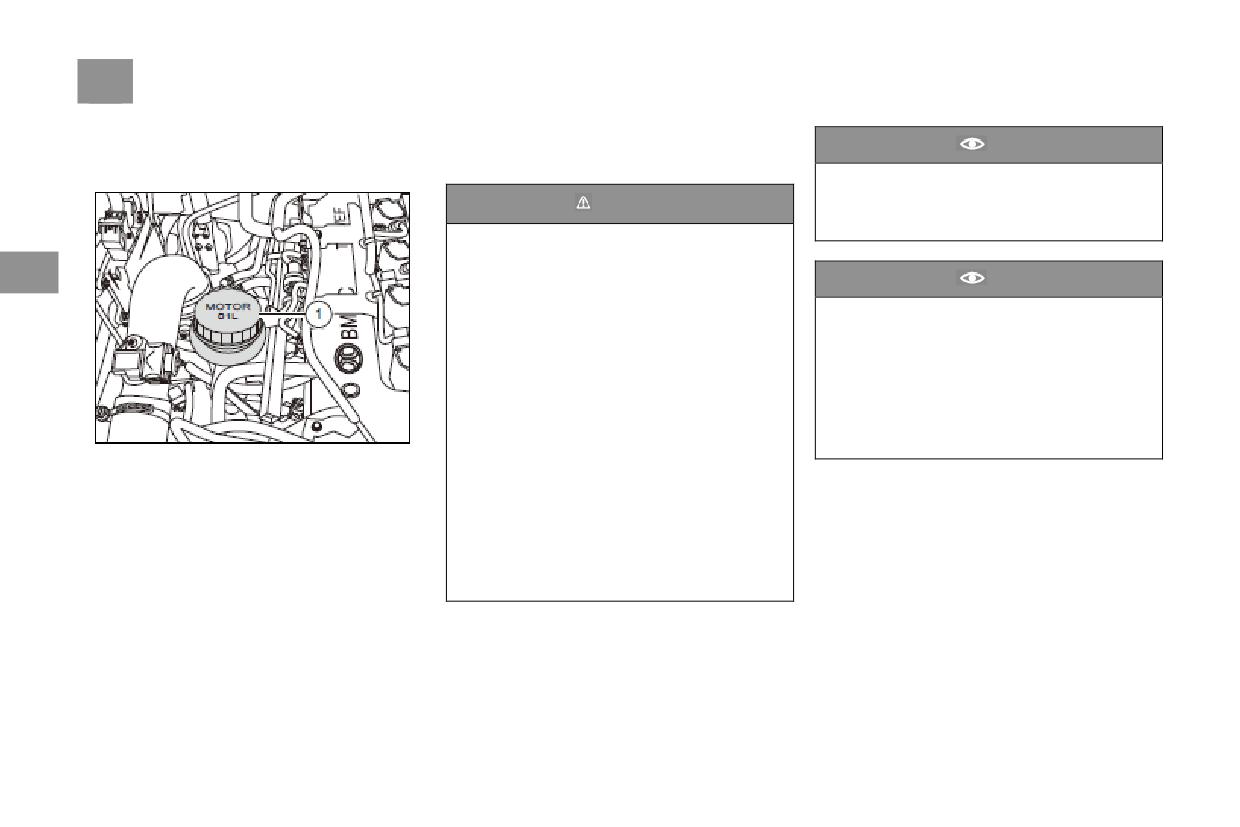
3. Press the engine oil filler cover, by turning it
the engine of the vehicle which you have
counterclockwise
purchased.
4. To avoid adding excessive engine oil, a small
● If an engine oil of a specification not
amount of engine oil should be added each time,
suitable for the engine of this vehicle is used,
check the engine oil level and add oil again
it may damage the engine and thus cause
depending on the oil level.
accidents.
Engine Oil
197
Replacing Engine Oil
Warning
Caution
Replace the engine oil by the cycle which is
Do NOT add any additives into the engine oil.
specified in BAIC’s Warranty Manual. The
● If you have no relevant professional
service life of the engine can only be guaranteed
knowledge, do NOT replace the engine oil on
This may damage the engine. Problems
if it is maintained and the engine oil is replaced
your own.
resulting from the addition of lubricants are
not within the scope of the warranty.
in accordance with the provisions.
●Be sure to perform maintenance after the
If the vehicle is parked at temperature lower
Engine oil replacement must be made by an
engine has cooled down so as to prevent
authorized BAIC dealership.
scalding by hot engine oil.
than-35 ℃ for extended period of time or
4
If the vehicle needs to run under harsh
frequently travels in such regions, it is
●When untightening the engine oil drain
conditions, or use fuels with a high sulfur
recommended that the oil must be changed to
bolt, be sure to put the arm in a horizontal
content, or often drive short distances, or run at
a grade more suitable for such regions
position so as to avoid the engine oil flowing
idle speed over long periods of time (such as a
(remember to clean the oil pipeline while
along the arm.
taxi), or run in dusty regions, or frequently tows
changing the oil) in order to reduce cold-start
●Wash thoroughly if engine oil is splashed
trailers, or run in high and cold regions, then it
difficulties of the vehicle and damage to the
onto your skin.
will be necessary to increase the frequency of
engine.
●The discharged waste engine oil should be
some maintenance items or shorten the regular
stored in a special container and the
maintenance
container must be big enough to contain all
Tips
The additives in the engine oil may soon make
the waste engine oil.
the color of a new engine oil fade soon. This is a
● Handling waste engine oil is a type of
● Do NOT store waste engine oil in a
normal occurrence. There is no need to replace
highly specialized work, requiring the
container which has been used to hold foods
the engine oil ahead.
corresponding professional knowledge and
or in a container rather than the original one,
necessary, specialized tools. It is therefore
so as to prevent confusion and poisoning due
suggested that waste engine oil should be
to ingestion by mistake.
handled by an authorized BAIC dealership.
●Engine oil is a toxic substance. Before
●Waste engine oil is extremely harmful to
handling waste engine oil, be sure to store it
the environment and water sources.
in a safe place and keep it out of children’s
Therefore, do NOT dump waste engine oil
reach.
into the water pipes or onto the ground. In
addition, it is extremely expensive to treat
oils which have absorbed waste engine oil.
198 Coolant
Coolant
Warning
Caution
Role of Coolant
Correctly using coolant can play the role of
●The coolant must be stored in a closed
Do NOT add into the coolant the coolant of
protection against corrosion, cavitations leakage,
container. Do NOT let children come into
another manufacturer.
radiator boiling, water scale and freezing. It can
contact with it.
● Do NOT mix the coolant with another
keep the cooling system constantly it’s best
●Do NOT store the coolant in a container
coolant which is not recognized by this
4
working state and ensure the normal working
which has been used to hold foods or in a
Company. This may seriously damage the
temperature of the engine.
container which is not the original, so as to
engine and the cooling system.
When this vehicle left the factory,
prevent confusion and poisoning due to
●If the coolant in the coolant expansion tank
Glycol-based antifreeze have been added into
ingestion by mistake. The discharged waste
has faded in color and there is no coolant of
the cooling system
coolant should be treated accordingly.
another color mixed with it, simply replace
● To ensure the anti-freeze ability of the
the coolant according to the required cycle.
Tips
coolant in cold weather conditions, be sureto
Regardless of whether anti-freeze is needed
use a suitable anti-freeze liquid based on the
or not, a coolant that meets the specifications
Tips
ambient temperature. Otherwise, the coolant
should be used throughout the year.
Waste brake fluid must be collected and
may freeze, causing vehicle damage. This will
To improve the anti-freeze ability of the coolant
cause the heating system to not work, and the
disposed of in accordance with the
in cold seasons, please change to a coolant
environmental
protection
laws
and
driver and passengers may be exposed to
which suits use in the lowest local air
regulations.
extreme cold, with danger of
temperature.
Coolant
199
Coolant Temperature
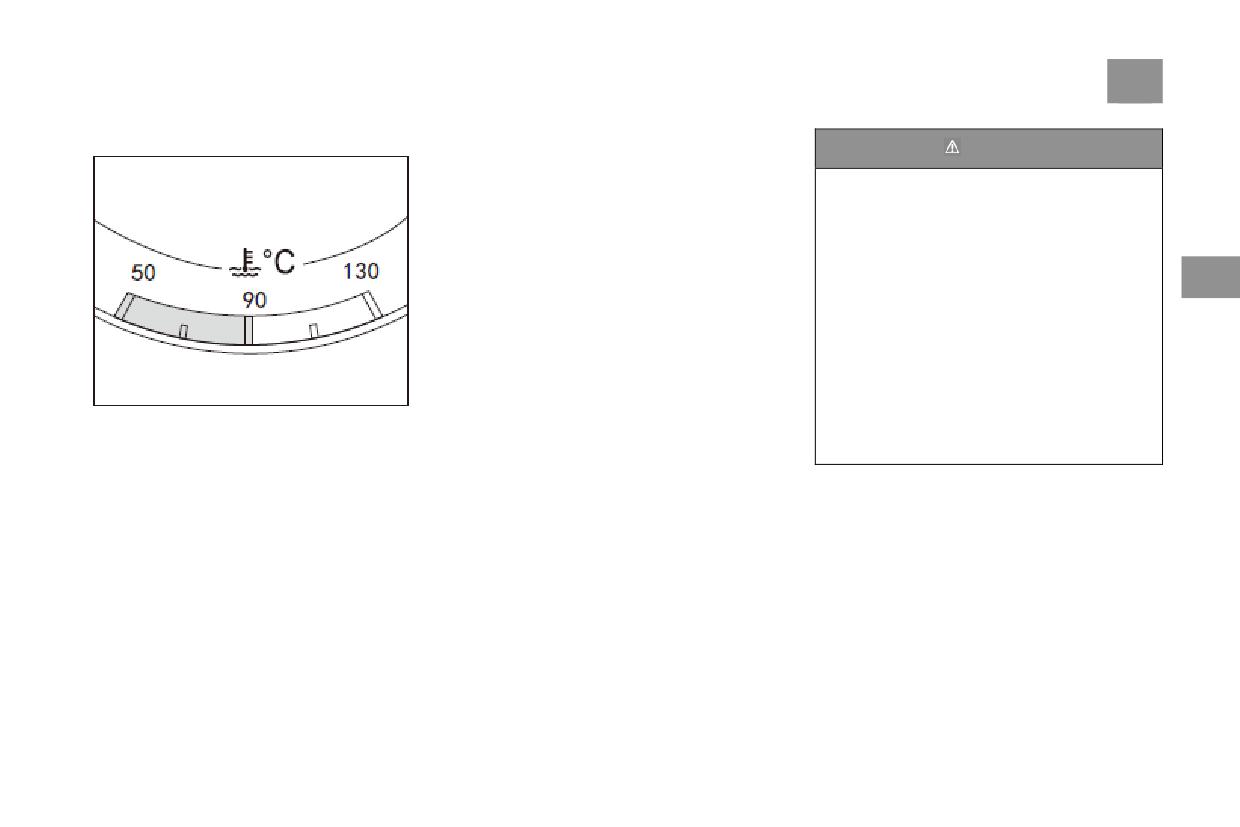
red area and the warning light will be lit,
Warning
reminding the driver that the vehicle has a fault.
At this time, be sure to immediately stop the
When performing maintenance on the engine
vehicle if it is safe to do so, turn off the engine,
compartment, be sure to exercise extra care
wait for the coolant to cool down and then
●Before starting the maintenance, be sure to
check the coolant level.
carefully read and follow the relevant
If the coolant level is normal, it may be that a
warning instructions.
radiator fan fault has caused the system to
●The engine compartment is a high-hazard
4
overheat. Check to see whether the radiator fan
area. Before opening the engine hood, be
fuse has smelt and make replacement if
sure to carefully read and follow the
necessary.
relevant warning instructions.
After the coolant temperature warning light is lit
●If you can see the overflowing of steam or
again after driving over a short distance, you
coolant from the engine compartment, then
must immediately stop the vehicle in a safe
do NOT open the engine hood so as to
place, turn off the engine and contact an
When the ignition key is turned to the “ON”
prevent scalding. Wait until no steam or
authorized BAIC dealership as soon as possible
coolant overflows and then open the engine
position, the coolant thermometer will display
to have the system checked
hood.
engine coolant temperature. If the engine
coolant temperature is too low, the thermometer
pointer will remain at the “L” (low) position
until the engine warms up, In normal driving
conditions, the instrument scale should be in the
middle about -90°- position. When the engine
runs under a high
load and the ambient temperature is very high,
the coolant temperature will rise and the
corresponding scale reading will also increase.
When the coolant temperature is too high, the
pointer will point to the
200 Coolant
Checking Coolant Level and Adding
Checking Coolant Level
Opening Coolant Expansion Tank
Coolant
Cover
A normal coolant level is vitally important for
the engine cooling system to work normally.
Before opening the engine hood, be sure to park
the vehicle on a flat road. Also be sure to
carefully read and follow the relevant warning
4
instructions
Tips
Coolant Specification: G l y col- based
antifreeze
When the engine is in a cold state is the best
time to check whether the coolant level is within
The engine must not be running.
the marked range on the side of the expansion
To avoid scalding, wrap the coolant recovery
tank.
reservoir cover with a piece of large and thick
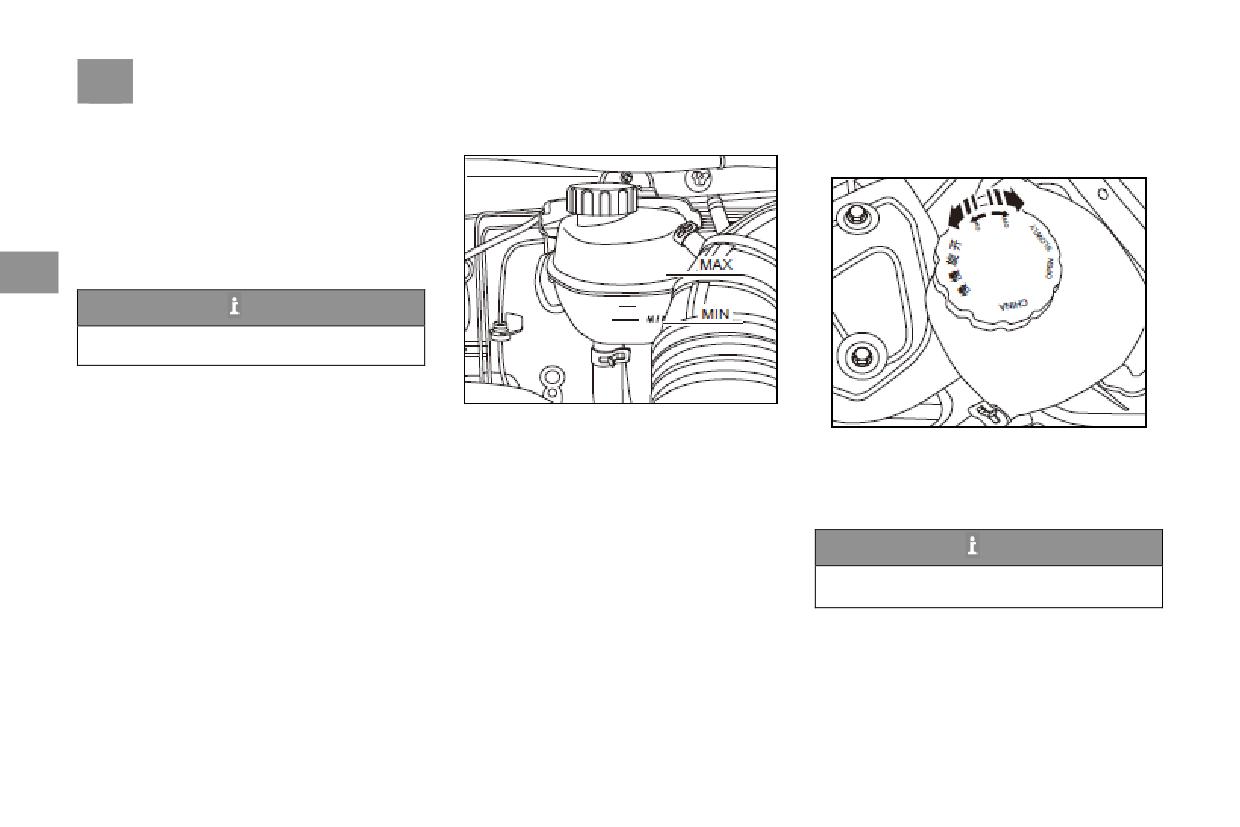
●“MAX” for upper limit of coolant.
cloth, nd uncover it counterclockwise as
●“MIN” for lower limit of coolant.
indicated by the Arrow。
● The coolant level should be between the
Tips
upper limit mark and the lower limit mark.
If the level is below the “LOW” mark, then
The coolant expansion tank cover should be
coolant must be added.
opened when the engine is in a cold state。
Coolant
201
Adding Coolant
Caution
Only new coolant can be added.
It is suggested that coolant should be
After filling, the coolant level must be located
added when the engine is in the cold state,
between “MIN” line and “MAX” line。
but
Caution
the coolant level must not exceed the upper
limit mark. Otherwise, when the engine
The level must not be above the “MAX”
reaches a hot state, the excessive coolant will
marker line
4
overflow.
Closing the Coolant Expansion
Only new coolant can be added. The
coolant must comply with the provisions of
Tank Cover
this
Mount and tighten the expansion tank cover.
Manual. If no suitable coolant can be bought,
Tips
do NOT add another type of coolant. If
necessary, pure water may be temporarily
When the engine is in a hot state, the coolant
added.
level may be slightly higher than the upper
However, coolant must be added as soon as
limit mark.
possible in accordance with the provisions.
If too much coolant has been consumed,
then be sure to add cold coolant after the
engine
has cooled down. Otherwise, it may damage
the
engine. If a lot of coolant is consumed, it
indicates that the cooling system has a leak.
At this time, you should go to an authorized
BAIC
dealership to have the cooling system
checked to prevent it from damaging the
engine.
202 Brake Fluid
Brake Fluid
dealership. If the brake fluid level is below the
Brake Fluid Level
minimum mark of the storage tank, do NOT
The brake fluid level must be checked according
The Function of Brake Fluid
drive the vehicle.
to the cycle as specified in the Warranty Manual
The brake fluid is used to transmit power in the
Caution
hydraulic braking system of the vehicle
Brake fluid must be completely replaced
Warning
every two years.
4
The brake fluid is corrosive - please keep the
container sealed and put it in a place out of
Warning
reach of children. If accidental swallowing of
brake fluid occurs, please immediately see a
Failure to replace the brake fluid by the
doctor.
specified time may cause the braking system
Keep your skin and eyes from coming into
to malfunction, resulting in serious accidents
contact with the brake fluid. If such contact
and personal injuries
is made, please immediately use a large
amount of clear water to wash the skin or the
eye.
When the engine is in the cold state is the best
Do NOT to splash any brake fluid on the hot
time to check whether the brake fluid level is
engine. This may cause a fire
within the marked range on the side of the
When in use, the liquid level of the brake liquid
storage tank.
tank may slightly drop due to the wear of the
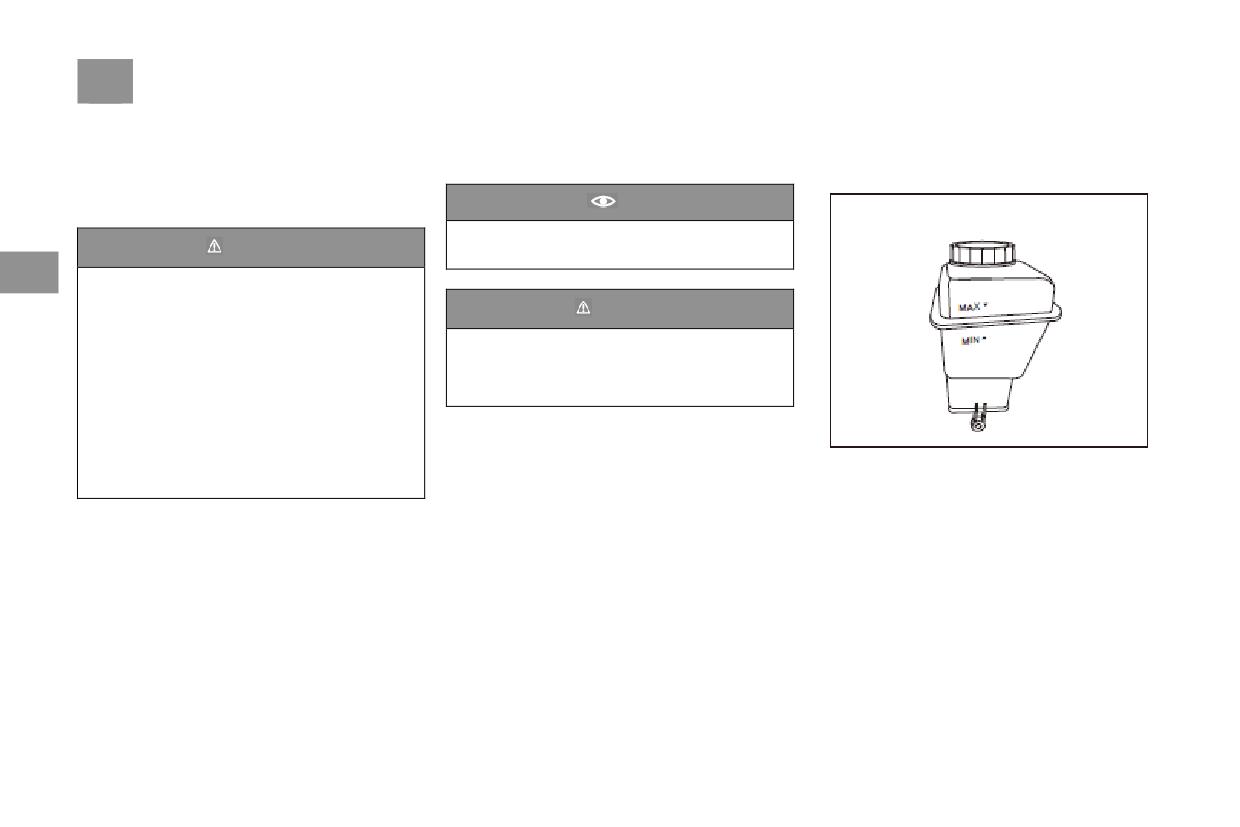
●“MAX” is the upper limit mark for the brake
brake pad. If this does occur, you may decide
fluid.
whether to immediately add any brake fluid
●“MIN” is the lower limit mark for the brake
based on the brake fluid level. If the brake pedal
depression accidentally becomes longer or the
fluid.
brake fluid level falls markedly, please
●The brake fluid level should be between the
immediately contact an authorized BAIC
upper limit mark and the lower limit mark
Brake Fluid
203
If the brake fluid is below the “MIN” mark, then
Replacing Brake Fluid
Warning
it is necessary to add brake fluid.
The brake fluid is absorbent and can absorb the
Before opening the engine hood, be sure to
●Before opening the engine hood, be sure to
moisture in the surrounding air. . If the brake
carefully read and follow the relevant warning
carefully read and follow the relevant
fluid contains too much moisture, it will corrode
instructions.
warning instructions.
the braking system. This will lower the boiling
The brake fluid storage tank of the vehicle is
●If the braking system warning light does
point of the brake fluid and result in a reduction
located inside the engine compartment. The
not go out, or lights up while driving, it is
of braking effect
brake fluid storage tank cover is yellow.
likely that the brake fluid level of the brake
The brake fluid used in this vehicle is specially
4
Due to the wear of the brake pad, the braking
fluid storage tank is too low. in order to
developed by BAIC for the braking system of
system of the vehicle will automatically adjust
this vehicle. To ensure that the braking system
prevent accidents, in such a situation, you
the braking pads. As a result, the brake fluid
must immediately stop the vehicle. Do NOT
can work normally, it is suggested that an
level will slightly drop. This is a normal
continue driving. You should contact an
authorized BAIC dealership should be asked to
occurrence. There is no need to worry about it.
authorized BAIC dealership as soon as
replace brake liquid with one that meets the
If the brake fluid level falls markedly over a
possible to have the system checked
relevant standard.
short period of time, then it indicates that the
braking system may have a leak. In such a
Tips
situation, you must immediately stop the vehicle.
Brake fluid type:DOT4.
Do NOT continue driving. You should contact
an authorized BAIC dealership as soon as
possible so as to have the braking system
thoroughly checked.
204 Brake Fluid
Warning
Warning
Caution
● Incorrect maintenance will result in
Use of waste brake fluid or a brake fluid
The brake fluid has a corrosive effect on the
braking failure and cause injury.
which is not suitable for this vehicle will
paint surface of the vehicle body. Be sure to
greatly reduce the braking effect, or even
promptly clean brake fluid which has been
●Before adding brake fluid, be sure to clear
make the braking system lose effect.
splashed onto the paint surface
oil dirt and dust from the storage tank.
Contaminated brake fluid may cause braking
●The brake fluid type is marked on the
4
failure and thus serious accidents.
brake fluid packaging container. Only a
Tips
●Only use the specified brake fluids. Brake
brake fluid which meets the correct
specification should be used.
Waste brake fluid must be collected and
fluids of different brands contain different
disposed of in accordance with the
additives, which may have chemical reactions
●Brake fluid is a toxic substance.
environmental
protection
laws
and
between them. Don’t mix brakefluids of
● Do NOT store the brake fluid in a
regulations.
different brands.
container which has been used to hold food
●The container used to store brake fluid
or in a container which is not the original, so
must be clean. Any mixture of even a minor
as to prevent confusion and poisoning due to
Warning
amount of other liquids or impurities may
accidental ingestion. The brake fluid must be
The brake fluid must be replaced
cause braking failure.
stored in the original sealed the container
according to the cycle as specified in the
● After normal maintenance checks, the
and the container should be put in a safe
Warranty Manual. If the brake fluid stays in
brake fluid level should not fall fast. If it
place. Be careful to prevent children from
the system for too long, air resistance will be
does, immediately go to an authorized BAIC
touching it. Otherwise, they may be poisoned
caused inside the pipeline of the system when
dealership to have the vehicle checked.
the brake is applied. This will reduce the
braking effect and driving safety, or even
cause the braking system to be completely
ineffective, thus resulting in accidents.
Power Steering Fluid
205
Power Steering Fluid
Checking the Power Steering Fluid
Adding Power Steering Fluid
Level
Slowly add power steering fluid with care and
The power steering fluid transmits power in the
do NOT exceed the upper limit mark so as to
hydraulic power steering system and thus assists
prevent an impact on the braking effect.
in steering
Meanwhile, prevent the power steering fluid
from overflowing.
Warning
It is suggested that an authorized BAIC
●Power steering fluid is corrosive. Please
dealership should be asked to add power
4
keep the container sealed and put the
steering fluid
container out of reach of children. If it is
found that someone has swallowed the power
Tips
steering liquid by accident, immediately see a
Power steering fluid will damage the
doctor.
paint surface. Be sure to immediately use an
●If power steering fluid comes into contact
absorbent cloth to absorb the power steering
with the skin or the eye, immediately use a
liquid which has been splashed onto any
large amount of clear water to wash it
vehicle part and use a vehicle cleaning agent
To prevent dust from entering the storage tank,
mixed with clear water to wash it.
wipe the filler cover and unscrew the filler
cover as shown in the picture before checking
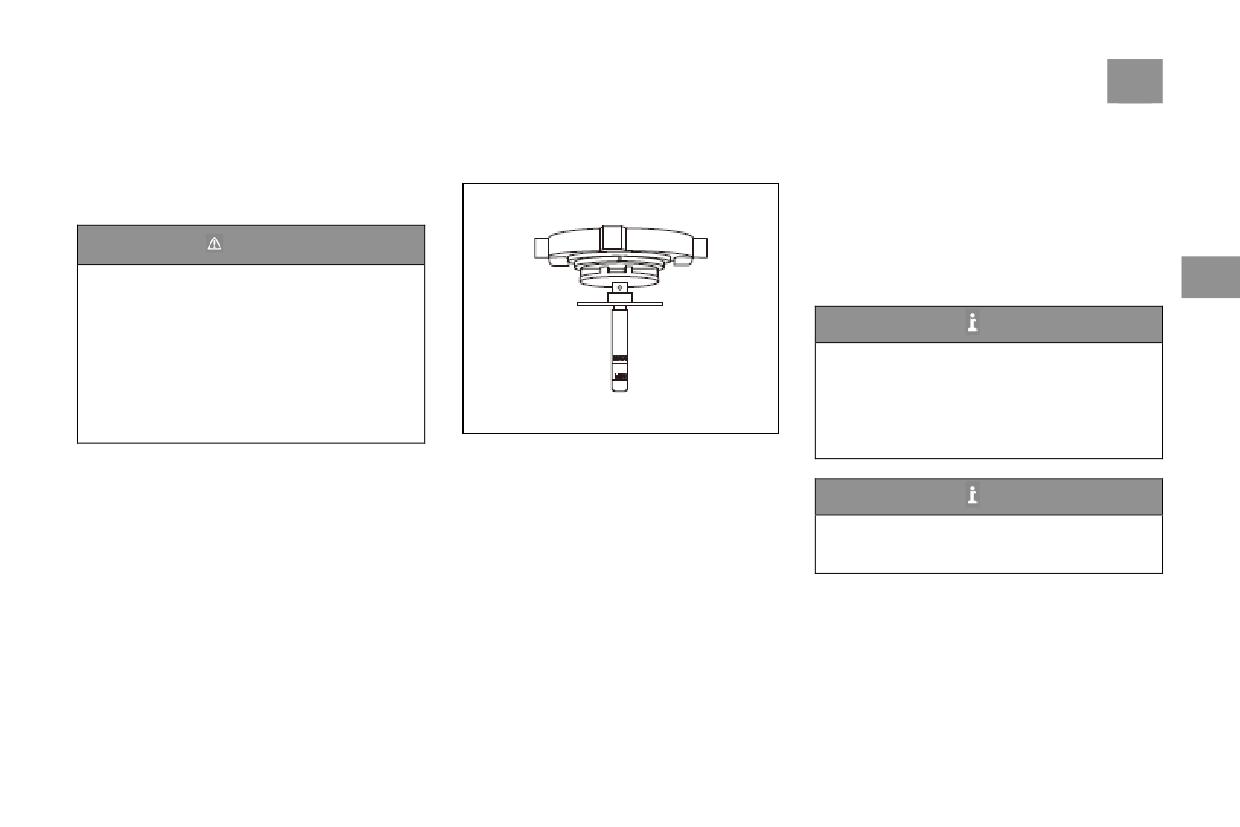
the fluid level:
Tips
●“MAX” is the upper limit mark for the power
Power steering fluid which meets the ATF
steering fluid.
III H specifications and is recognized by
●“MIN” is the lower limit mark for the power
BAIC may be used
steering fluid.
● The power steering fluid level should be
between the upper limit mark and the lower
limit mark.
If the fluid level is below the “MIN” mark, be
sure to add power steering fluid
206 Power Steering Fluid
Emergency Operation
Caution
In the event of regular loss of the power steering
●The color of a commercial power steering
fluid, ask an authorized BAIC dealership to
fluid which can be used may be different
inspect your vehicle.
from the color of the power steering fluid
In all circumstances, when the power steering
injected into the system in the manufacturing
fluid level is below the “MIN” mark or a fast
process. This is no cause for concern.
and noticeable loss of the power steering fluid is
4
●If an unspecified power steering fluid is
detected, be sure NOT to drive the vehicle. If it
used or two kinds of fluid are mixed, it may
is confirmed that the power steering fluid is
cause sealing failure and then power steering
slowly leaking, you may add more power
failure, parts damage or other faults
steering fluid to the “MAX” mark to ensure that
you can drive your vehicle for a short distance
to an authorized BAIC dealership to have it
checked.
If the power steering fluid level is below the
MIN mark, you must add steering liquid before
starting the engine. Otherwise, it will damage
the steering pump
Battery
207
Battery
Warning
Warning
Battery
Operation
Warning
There is a danger of injury, corrosion,
● Open fire, sparks, string lights and
Symbols and Their Explanations
accident or fire in the maintenance of vehicle
smoking are prohibited. When handling
1.Be sure to wear goggles during
batteries and electrical parts!
power cables and electrical equipment and
maintenance!
● Do NOT let acidic or lead-containing
removing static loads, it is necessary to
2.The battery electrolyte is a highly
particles fall into your eyes, or onto your skin
prevent sparks from being generated. Do
4
corrosive substance. When operating
or clothes.
NOT make the battery terminals
it, you must wear protective gloves
●The acid in batteries is highly corrosive. Be
short-circuit. Otherwise, the high-energy
and goggles!
sure to wear protective gloves and goggles
sparks generated in the short-circuit may
3.The work place must be free of
when maintaining them. Do NOT turn
harm the maintenance personnel.
open fire, sparks, cover-free lights
batteries. Otherwise, the acid inside will flow
●When dismantling a battery, remove the
and smoking!
out from their exhaust hole. If battery acid is
negative cable first and then the positive
4.When charged, batteries will
splashed into your eye, be sure to
cable.
generate explosive mixed gases!
immediately use clear water to wash it out
●Children should be kept far away from
.5.Children must be kept far away
and then go to see a doctor right away. If
acids and batteries.Before connecting the
from the electrolyte and vehicle
battery acid is splashed onto the skin or
battery again, be sure to turn off all electrical
batteries!
clothes, be sure to immediately use a dense
equipment. Connect the positive cable first
soap liquid to neutralize it and then use a
and then the negative cable. Do NOT connect
If you are unfamiliar with the repair processes
large amount of water to wash it. If the acid
the power cables in the wrong way. This may
or have no required tools, be sure to NOT
is swallowed by mistake, be sure to
cause fire! Do NOT remove or place batteries
perform any maintenance on the electrical
immediately go to see a doctor.
on your own, because in some situations, such
system of the vehicle. If not absolutely sure, ask
● When charged, batteries will generate
an operation will cause serious damage to the
an authorized BAIC dealership to carry out the
explosive mixed gases. Therefore, batteries
batteries and the fuse box. If such
relevant maintenance.
should be charged in a well-ventilated space.
maintenance is indeed needed, please contact
an authorized BAIC dealership.
208 Battery
Checking Battery Power
Tips
Warning
If the vehicle needs to be driven over a long
If the monitoring indicator window is
distance or in a hot region or the battery is used
●Before starting battery maintenance, be
for too long, be sure to regularly check battery
colorless, you may use a screwdriver to
sure to carefully read and follow the safety
power
lightly tap the monitoring indicator window
warning
instructions
for
battery
to drain air bubbles. If the color inside the
maintenance.
monitoring indicator window does not
●Be sure NOT open the battery so as to
change, the battery must be replaced.
4
prevent chemical scalding and battery
In the event of the following usage conditions or
explosions.
situations, be sure to regularly check battery
●Do NOT connect a damaged or leaking
power:
battery. Damaged or leaking batteries must
●Vehicle with a long driven mileage.
be recycled and disposed of in accordance
●Driving in hot countries or regions.
with environmental protection laws and
●Battery is too old.
regulations.
●Driving in cold countries and regions.
●The work place must be free of open fire,
sparks, cover-free lights and smoking. When
opening power cables and electrical
equipment, attention must be paid to
preventing electric sparks or static from
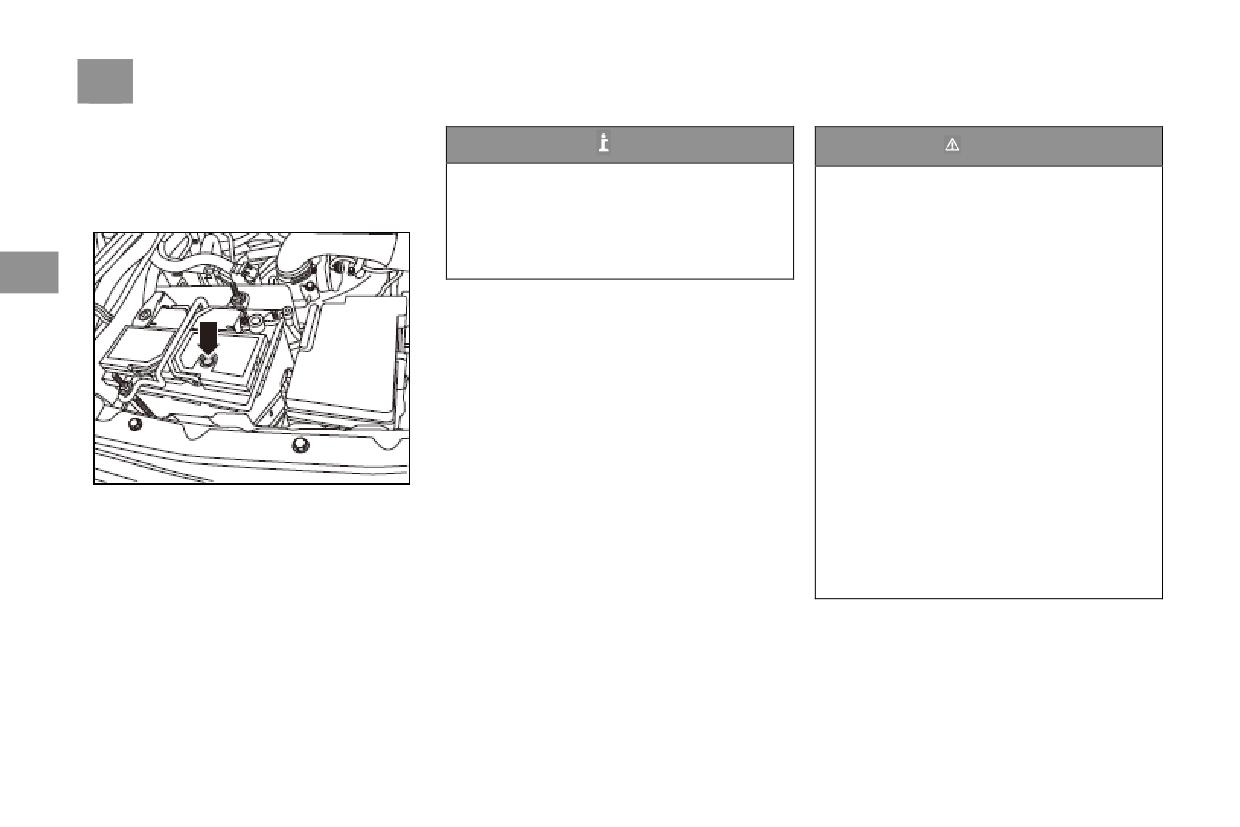
● If the color inside the monitoring
being generated, Do NOT make the battery
indicatorwindow is green, it indicates that the
terminals short-circuit. Otherwise, the high
battery power is excellent.
energy electric sparks generated during the
●If the color inside the monitoring indicator
short circuit may injure the operating
window is black, it indicates that the battery
personnel
liquid volume is insufficient.
● If the monitoring indicator window is
colorless, it indicates that the battery needs to be
replaced
Battery
209
Working in winter
Charging and Replacing Battery
Charging Battery
There are especially strict requirements for
Only when you possess the essential
If the battery has been used for a rather long
batteries in winter, because the starting power
professional knowledge should you perform
time, it may not maintain charging efficiency
which they can provide at low temperatures is
maintenance on the battery.
when it is completely new. If the vehicle is used
only part of the starting power in room
If the vehicle is frequently driven over short
too infrequently, or the vehicle makes too many
temperature. We therefore suggest that before
distances or is parked and not used for a long
short starts, or runs in a cold environment, then
the cold season starts you should check your
time, be sure to increase the frequency of
its battery needs to be charged regularly.
vehicle’s battery with an authorized BAIC
battery
checks between the specified
Before charging, be sure to check the state of
4
dealership. Charging should be performed if
maintenance cycles.
the battery
necessary.
In the event of battery damage, the battery
Warning
If your vehicle is not driven for several weeks
power will be insufficient, making it difficult to
under an extremely cold situation, you should
start the vehicle. In such a situation, it is
● Do NOT charge the battery when it is
remove the battery and keep it indoors so as to
suggested that you go to an authorized BAIC
connected with the vehicle, this may seriously
protect it from damage.
dealership to have the battery charged or
damage the electrical system of the vehicle.
replaced
●If the display of the battery monitoring
Caution
indicator window is colorless, do NOT
attempt to charge the battery.
Only electrical equipment which meets the
●If the battery is frozen, do NOT attempt to
national specification on electromagnetic
charge it.
compatibility and is recognized by BAIC can
be used.
210 Battery
While being charged, the battery will generate
the battery charger before disconnecting the
Replacing Battery
corrosive acidic volatile gases, as well as an
wires from the battery terminals.
Only use a battery of the same model and
electric current that can cause serious damage.
After the engine is turned off, if the ignition
the same specification as that of the battery to
When charging a battery, always pay attention
switch remains in the ON mode for a long time
be replaced. Otherwise, there may be situations
to the following precautions:
or the headlights or the lighting equipment is
of inconsistent dimensions or different terminal
● Before charging, disconnect the battery
still in the ON mode, the battery may discharge
positions, thus likely to cause battery damage,
terminals from the vehicle and remove the
quickly, resulting in power deficiency
leakage or fire.
4
battery. Charging a battery whose wires have
When replacing a battery, ensure that it is
Caution
been connected will damage the electrical
correctly installed. Be sure that the battery tray
system of the vehicle.
In a cold environment, it may take a long
and the pressing board are correctly fixed so as
●Before turning on the charger switch, confirm
time to charge the battery. Before installing
to prevent the battery from moving in the event
the battery onto the vehicle after charging, it
that the wires of the battery charger are safely
of an accident or emergency braking.
is necessary to put the battery to one side for
clipped to the terminals of the battery. Once the
BAIC’s original batteries can meet the vehicle
one hour so as to dispel inflammable gases
charger is turned on, no wire can be moved
maintenance, performance and safety
● While charging the battery, be careful to
and minimize the danger of fire or explosion
requirements
protect your eyes.
Caution
● Make sure the top and vicinity of the battery
is properly ventilated, and avoid strong light
Before starting battery maintenance, be
sure to carefully read and follow the safety
near the battery (before and after the battery is
warning
instructions
for
battery
charged, it will generate flammable hydrogen).
maintenance.
When the color display in the battery
monitoring indicator window is green, stop
charging. Otherwise, this will lead to excessive
battery charging.
●When charging finishes, you need to turn off
Windshield Washing Liquid and Wiper Blade
211
Windshield Washing Liquid and
Replacing Windshield Wiper Blades
Warning
Wiper Blade
Caution
When performing maintenance on the engine
compartment, be sure to exercise extra care.
●The wiper blade must be kept in good
Windshield Washing Liquid and
●Before starting the maintenance, be sure to
state. This is essential for maintaining clear
Wiper Blade
carefully read and follow the relevant
vision.
warning instructions.
●To prevent the formation of streams, the
●Do NOT add any coolant or any other
wiper blade should be regularly cleaned
4
additives into the windshield washing liquid.
using a windshield cleaning agent. If the
They will leave oil stains when the windshield
windshield glass is very dirty, such as with
is cleaned, thus seriously affecting the front
insect remains, you cause a sponge and cloth
vision and resulting in accidents.
to clean and wipe the wiper blade.
● If the weather is cold, before the
windshield washer is opened each time, check
whether the wiper blades are frozen. Only
when the front and rear wiper blades are free
of interference and obstruction can the
windshield washer be operated
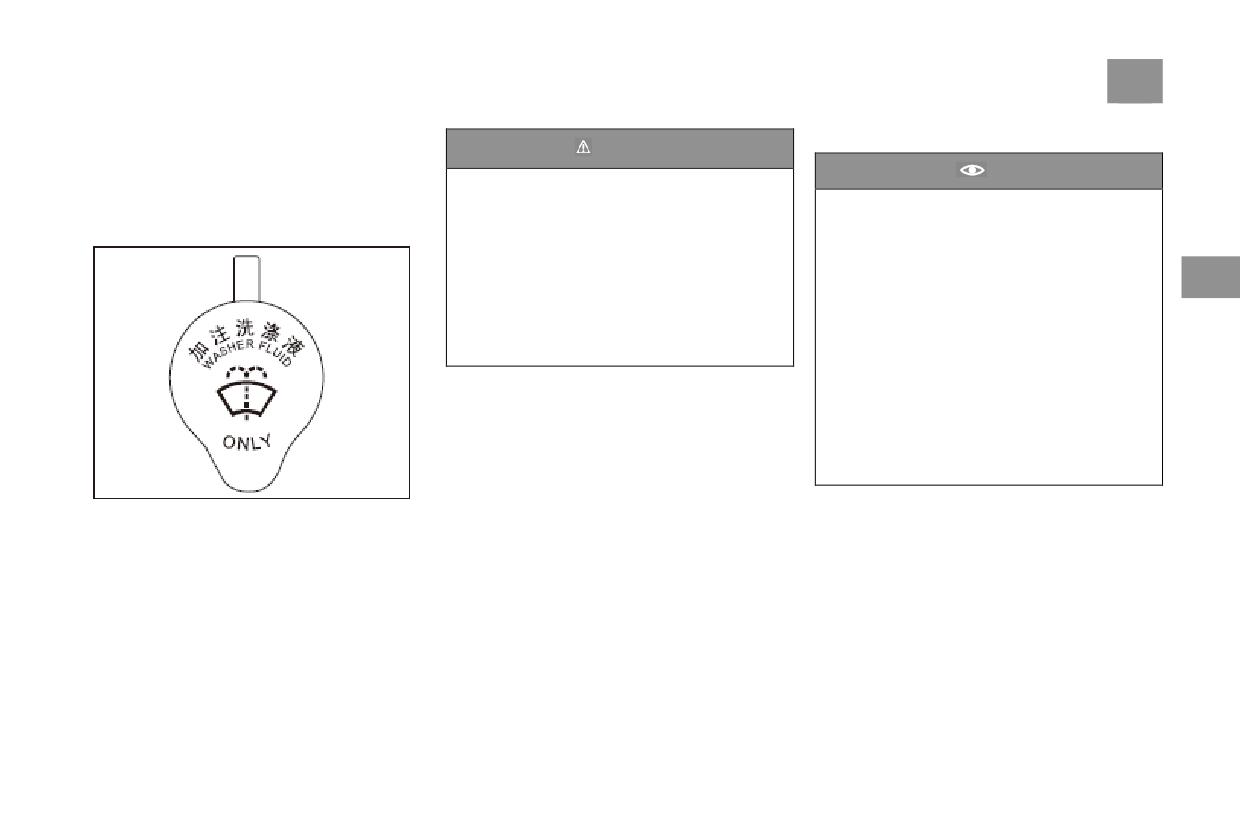
The washing liquid of both the front and rear
windshield is supplied from the washing liquid
storage tank inside the engine compartment. If it
is found the washing liquid level is too low, be
sure to promptly add washing liquid into the
storage tank.
It is difficult to use pure water to thoroughly
clean the front and rear windshields. In a cold
environment, pure water may also freeze.
Therefore, please use a windshield washing
liquid
212 Windshield Washing Liquid and Wiper Blade
If there is a frictional sound in the wiper blade,
Replacing Front Wiper Blade
it may be caused by the following factors:
●When the vehicle is washed inside an
automatic washing device, hard wax residues
are fixed to the windshield glass. Such hard wax
residues can only be cleared using a special
cleaning agent. Add a windshield cleaning agent
4
that can dissolve paraffin, and this frictional
sound can be eliminated. Ordinary washing
liquids which can only dissolve grease cannot
clear such deposits.
●If the wiper blade is damaged, it may also
generate a frictional sound. At this time, the
wiper blade should be replaced.
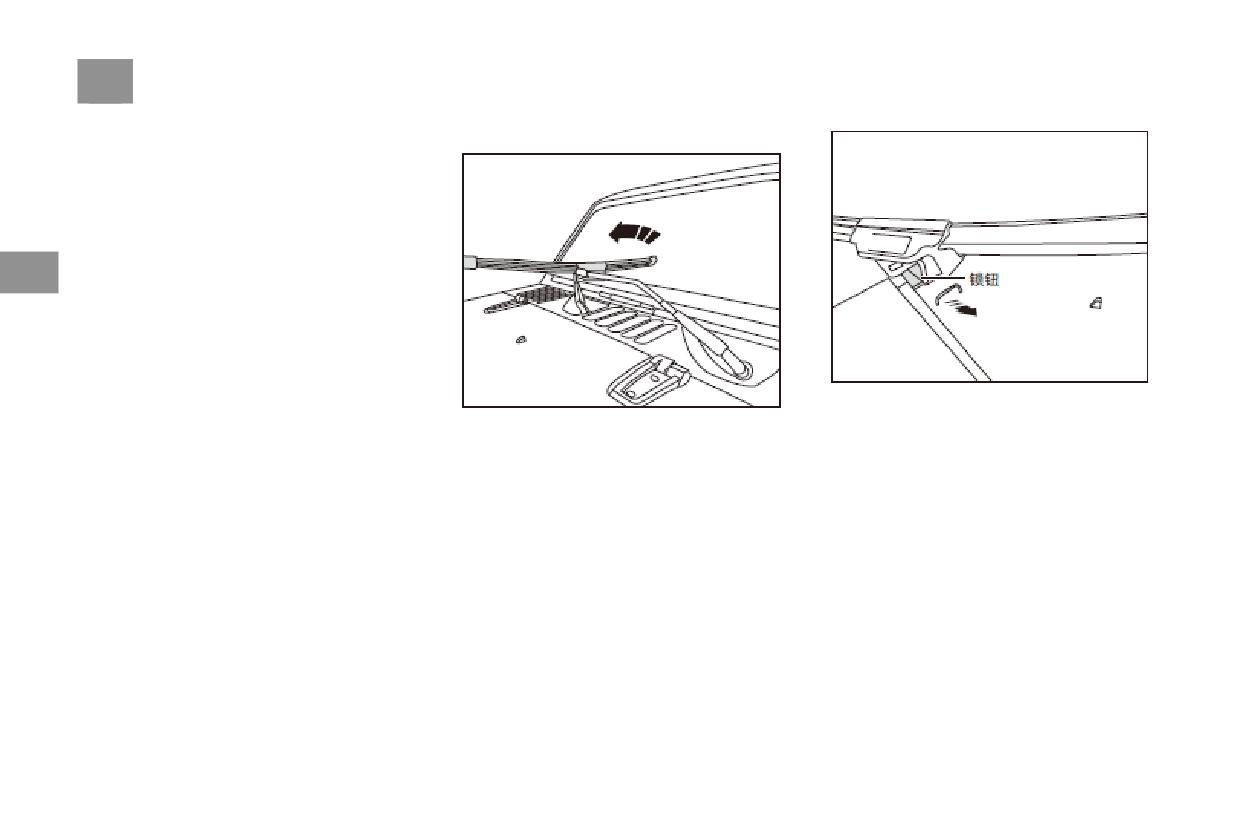
Press the key to unlock the wiper, and then pull
●The positioning angle of the wiper arm is
Pull up the wiper arm, follow the direction of -
the wiper along the -Arrow- direction
incorrect. Please to go to an authorized BAIC
Arrow A- and turn the wiper blade to the
dealership to have the positioning angle checked
position as shown in the figure
and adjusted.
It is necessary to regularly check the wiper
blade and replace the wiper blade as required.
Otherwise, it will damage the front and rear
windshield.
Windshield Washing Liquid and Wiper Blade
213
Replacing Rear Wiper Blade
Warning
While driving, be sure to clean all vehicle
window glass to maintain good vision!
●Regularly clean the wiper blade and all
vehicle window glass.
●The wiper blade should be replaced once
or twice a year.
4
● Avoid wiping the windshield with dry
wiper blades so as to prevent the rubber
strips from aging and wear and the vehicle
windows from fluffing, which would
otherwise affect driving safety.
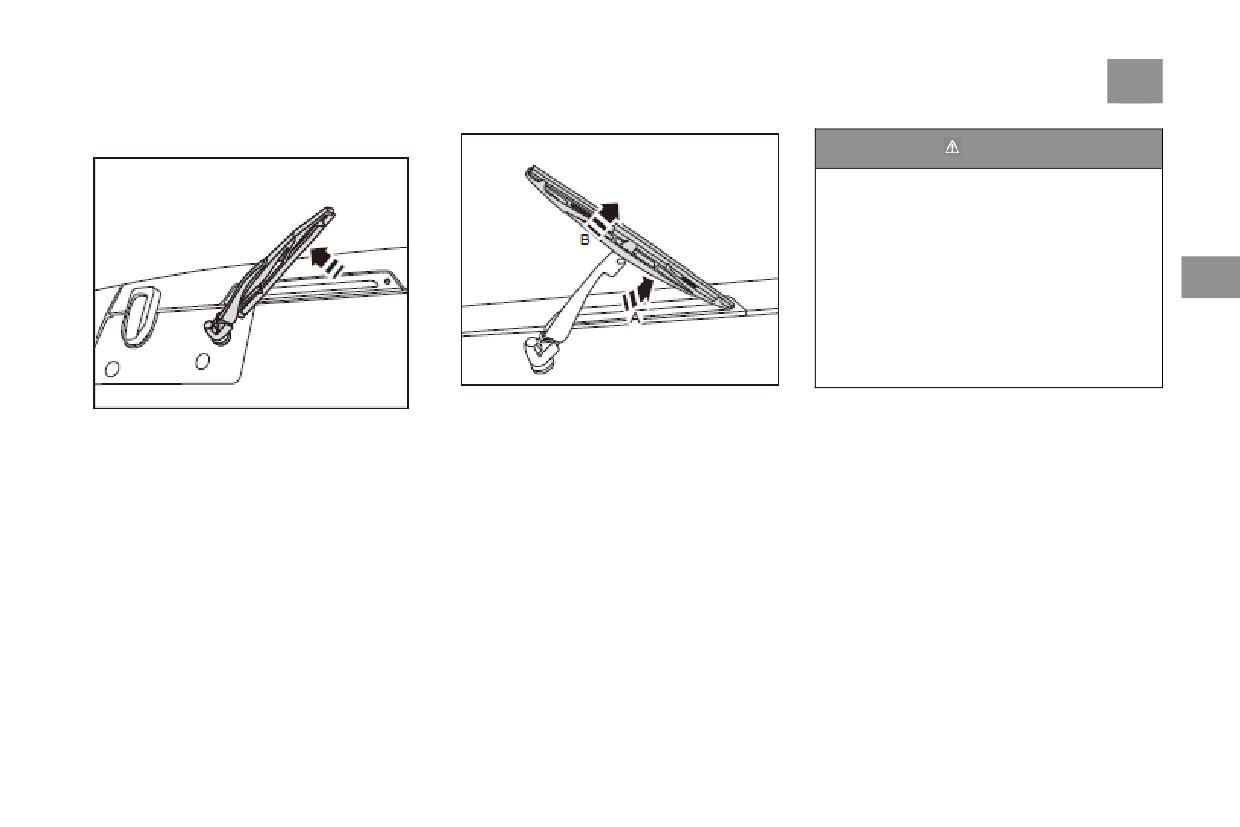
In the direction of -Arrow A-, turn the wiper
Pull up the rear wiper arm -Arrow-
blade to the position as shown in the figure to
separate it from the fixing groove on the rear
wiper arm and then remove the blade in the
direction of -Arrow B-.
Rear wiper blade can be installed following
the sequence opposite that of removing the rear
wiper blade.
214 Tires
Tires
Storage Instructions for Tires
Tire Pressure
Before removing tires, be sure to mark them
The correct tire pressure can prolong the service
Defective tires are very dangerous! If tires are
indicating their turning direction. When
life of tires. It can also ensure the best
damaged, excessively worn, or have improper
installing the tires, follow the marks to
combination of driving comfort, fuel economy
pressure, do NOT continue the driving.
reposition them. This can ensure that the turning
and drivability.
While driving, pay close attention to the state of
direction and dynamic balancing state of the
When the tire pressure is too low, it will
tires and regularly check for deformations
wheels will be kept unchanged.
intensify tire wear, greatly affect the drivability
4
(bulging) in the treads and tire sides. Also check
The removed wheels and tires should be stored
and fuel economy of the vehicle and increase
for scratches, abnormal wear, cracks, nails, etc.
in a cool and dry place, ideally in shade, away
the danger of lost tire effectiveness. If the tire
The most common causes of tire
from sunlight.
pressure is too high, it will cause driving
ineffectiveness:
Tires which are not yet installed on the vehicle
unstable and
●Impacting or friction with curbs
should be stored vertically
uneven tire wear, thus reducing the service life
●Driving over deep pits on the road
of the tires.Check tire pressure (including spare
●Tire pressure being too low or too high
tires) at a frequency of at least once a week.
Tires must be
Caution
checked when they are in a state of room
Be careful to prevent tire wear from the
temperature - as long as the vehicle has been
erosion of engine oil, grease, gasoline and
driven for 1.6km, it is enough to make tires fully
other vehicle liquids.
heat up, thus affecting tire pressure.
Tires
215
The pressure of hot tires is bound to increase. If
How to Check Tire Pressure?
Tire Puncturing
tire pressure has to be checked when the tires
Besides the tire pressure monitoring system, tire
Your vehicle is equipped with treadless tires.
are hot (after the vehicle has been driven for a
pressure can also be checked with high-quality
When the tires are punctured by a sharp object,
period of time), the pressure should have risen
pocket-type tire pressure gauge. It is not
there may not be apparent air leakage in the tires.
by approximately by 0.2~0.5bar. In such a
possible to determine whether the tire pressure
If you spot such a situation, immediately slow
situation, lease do NOT deflate the tires for the
is normal by visual checks alone. Even if not
down and drive carefully. Replace the punctured
purpose of making the tire pressure up to the
adequately inflated, radial tires still look very
tire with a spare tire or repair it.
standard.
normal. check inflated tire pressure when they
This type of puncturing will cause reduced tire
4
For details about cold tire pressure criteria, refer
are cold. “Cold state”
pressure. It is therefore very important to
to “Wheel” on page 250.
means tires that have not been driven for more
regularly check tire pressure. Punctured or
When to Check Tire Pressure?
than three hours or have been driven not over
damaged tires must be immediately repaired or
Tires should be checked at least once a week.
1.6km.
replaced as soon as possible
Do NOT forget to the pressure of spare tires.
Remove the valve cap from the valve core of the
Their pressure should be 220kPa.
tire, press the tire pressure gauge to the valve
with force, and then the tire pressure will be
displayed. No adjustment will be needed if the
inflated pressure of the tire in a cold state meets
the recommended pressure value on the tire and
loading information label. If the pressure is too
low, then it is necessary to inflate the tire to the
recommended value. If the pressure is too high,
it is possible to press the air gate element to
discharge air until the pressure reaches the
recommended value.
After the check is completed, be sure to
screw the valve cap back on the valve core. The
valve cap can prevent dust and moisture from
entering the tire
216 Tires
Hidden Damage
●Do NOT use used wheels or used tires of an
Warning
Damage to the tires and rims is
unknown origin, because such wheels and
often difficult to be noted. While the vehicle is
In the initial 500km, it is unlikely that new
tires
may have been damaged,
running, if the vehicle vibrates abnormally or
tires will not reach a state of their best road
although they bear no visible damage. While
deviates, it is likely that one tire has a fault. In
adhesion. Therefore, you should carefully
driving, they may cause the vehicle to go out
such a situation, you should go to an authorized
drive the vehicle at a medium speed so as to
of control and result in traffic accidents.
BAIC dealership to have the tire checked as
prevent accidents.
● While driving, if you spot any
4
soon as possible.
● Tires that have not undergone a
abnormal vibration or deviation of the
wear-in period or tires that have
vehicle, be sure to immediately stop and
been over-worn will have insufficient road
check to see if the tires are damaged.
adhesion. This will directly affect the braking
effect.
●If the tires are damaged, do NOT continue
to drive, because damaged tires may get
punctured while driving, thus resulting in
traffic accidents and personal injuries.
●The tire pressure must meet the provisions.
Otherwise, it may cause accidents. If the
vehicle is still driven at a high speed when
tire pressure is insufficient, it will make the
tires bend, thus extremely easy to cause tire
overheating. Tire bursting may result.
●Do NOT use damaged wires or wires which
have been worn to their pattern wear mark.
Such tires should be promptly replaced.
●Avoid using tires which are over six years
old as much as possible. If such tires have to
be used, be sure to exercise extra care while
driving and drive slowly.
Tires
217
Valve Hole
Tire Check and Rotation
Keep the valve hole cap tightly screwed to
It is suggested that tires should be rotated every
prevent dust from entering the valve hole. While
12,000km driven, or more frequently based on
checking tire pressure, check whether the valve
needs.
Front of
hole leaks (ideally use a soap liquid to see if air
Whenever abnormal wear is found, you should
vehicle
bubbles emerge).
rotate the tires as soon as possible and check the
wheel alignment. It is also necessary to check to
Tips
see whether the tires or wheels are damaged.
4
A suitable amount of home-use washing
In addition, it is also necessary to regularly
liquid may be added to clear water, and
check the tightening torque of the wheel nuts.
spread in the valve hole to see whether air
The corrected torque is required to reach
bubbles are generated. If bubbles are
(140±10) Nm. It is suggested that the tightening
produced, it indicates that there is gas
torque of each wheel nut should be checked
leakage.
after the vehicle has been driven for 1500km,
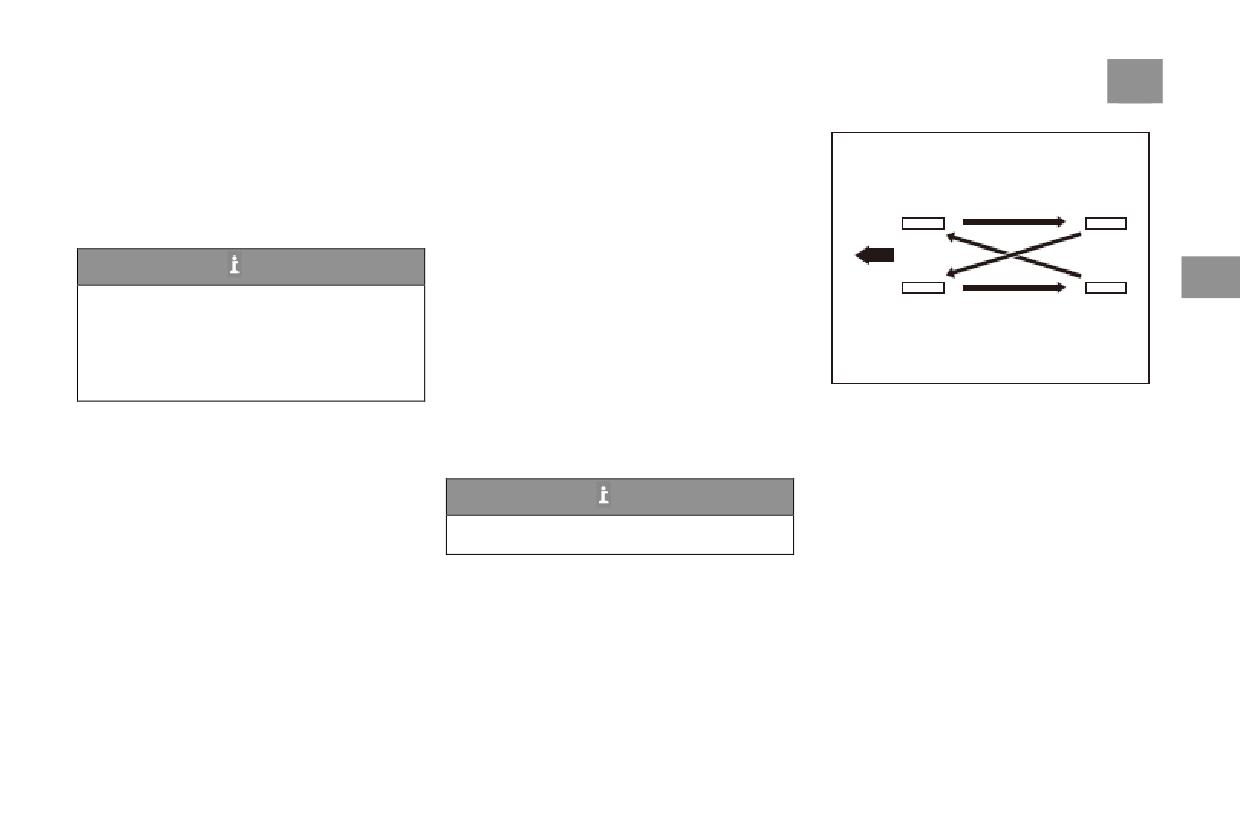
When rotating tires, be sure to follow the correct
5000km and 8000km. Every time the wheel
rotation mode as shown in the figure.
assembly is dismantled, tightening must be
After the tires are rotated, adjust the inflation
made in strict accordance with the torque
pressures of the front and rear tires according to
requirements.
the tire and loading information label. Ensure
that all wheel nuts have been correctly fastened.
Tips
The purpose of regularly rotating tires is to
make all tires wear evenly.
218 Tires
When To Replace Tires?
Warning
Tips
Rusting or dirt on the wheels or wheel
If the tires are worn unevenly (only on one
connectors will cause the loosening of the
side) or excessively, ask an authorized BAIC
wheel nuts after a certain period of time,
dealership to align the wheels.
thus resulting in the falling-off of wheels and
If any of the following situations occurs, tires
traffic accidents. Therefore when replacing
need to be replaced:
4
wheels, it is necessary to clear any rust or
● The tire wear indication mark has shown
dirt on the wheels
signs of wear.
4 and their connectors. In emergency
●Cord threads or fabric in the tire
situations, cloth or tissues may be used to
rubber is visible.
clean. If necessary, a scraper or a wire
●Treads or tire walls crack to a depth that
brush may be used to clear all rust or dirt.
makes cord threads or fabric visible.
Meanwhile, regularly check the tightening
●Tires bulge, warp or stratify.
torque of the wheel nuts and the corrected
●Tires are punctured, scratched or bear other
torque is required to reach (140±10)Nm. It is
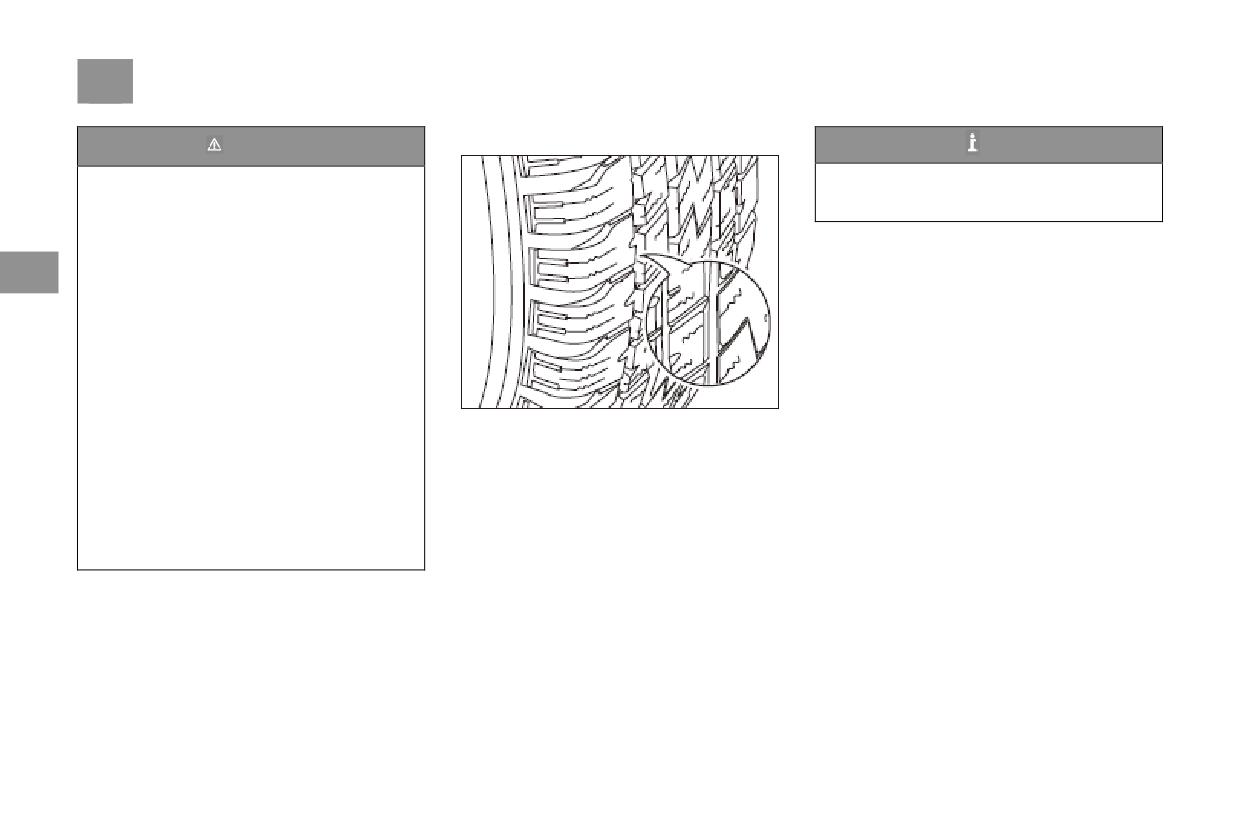
All original tires bear wear indication marks.
damage, and the size and position of the damage
suggested that the tightening torque of each
These marks are located on the narrow strips
can hardly be repaired.
wheel nut should be checked after the vehicle
inside the tread patterns and distributed in the
has been driven for
tire periphery. On the road side of the tires,
1500km, 5000km and 8000km. Every time
there are small triangle signs indicating the
the wheel assembly is dismantled, tightening
position of the marks. When the tread pattern
must be made in strict accordance with the
has been worn to the indication mark, the tires
torque requirements.
should be promptly replaced.
Tires
219
Tire Information
Buy New Tires
Warning
Mixed use of tires will make the vehicle run
out of control while driving. If you mix tires
of different dimensions or models (radial
tires and bias-belted tires), it will not be
possible to steer the vehicle normally, thus
causing accidents. Use of tires of different
4
dimensions may damage the vehicle.
Therefore, all wheels
must have the same dimension and model.
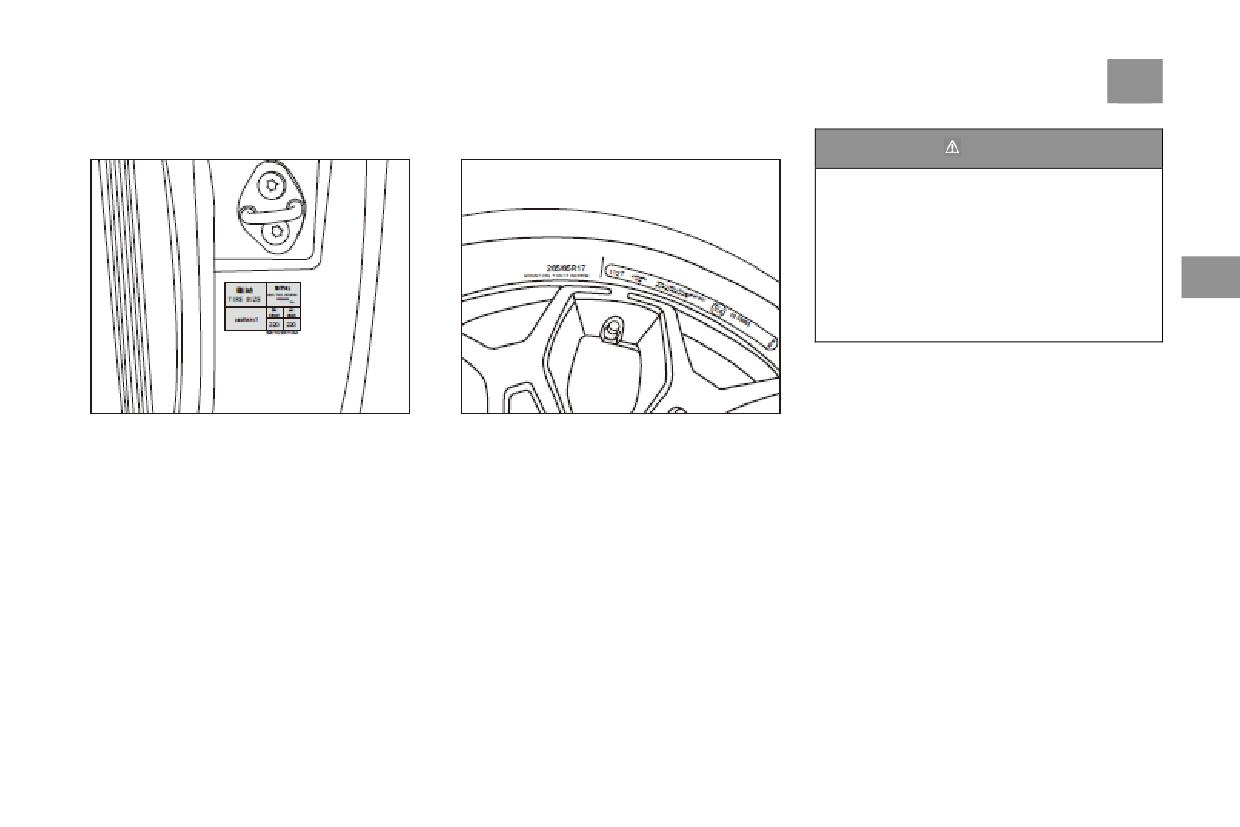
A tire information label is pasted to the B-pillar
View the tire and loading information label on
on the driver’s side. Be sure to inflate tires
the vehicle to get information on the model and
according to the tire pressure specified on the
dimension of the tires needed.
label.
220 Tires
Wheel Balance
Replacement of the Rim
Warning
Before the vehicle left the factory, the wheels
Bent, cracked or seriously rusting or corroded
already underwent dynamic balance treatment.
rims should be replaced. If the wheel nuts often
Use of an unsuitable rim will be dangerous.
However, many factors in the vehicle use
become loose, the wheels and wheel nuts should
It will affect the braking and steering
process will affect wheel balance,
thus
be replaced. Wheels that leak should be
performance of the vehicle, resulting in tire
resulting in wheel imbalance.
replaced (except for some repairable aluminum
leakage and making the vehicle run out of
Be sure to promptly perform dynamic
wheels). If the above situations occur, be sure to
control. It may cause accidents, injuring you
4
Balance treatment on imbalanced wheels.
go an authorized BAIC dealership to have
or others.
4 Otherwise, it will cause excessive wear to the
repairs made.
Use of the wrong rim will also cause
steering system, the suspension system and
The authorized BAIC dealership knows which
problems to the life of the bearing, the
tires.
type of rim should be used. The new rim should
cooling of the brake, the calibration of the
After tires are replaced, the wheels must be
have the same load capacity, diameter, width
speedometer or odometer, the focusing of the
dynamically balanced again.
and alignment as those of the original wheels.
headlights, the height of the bumper, the
Dynamic balance standard for wheels:
The new rim should also be installed identically
ground clearance of the vehicle, and the
cumulative≤10g.
as the original wheels.
clearance between the tires or tire snow chain
Rims can only be replaced using BAIC’s new
and the vehicle body and chassis, etc.
Inaccurate Wheel Alignment
original parts. This will ensure that the new rims
Use of a used rim on the vehicle can be very
Inaccurate wheel alignment will result in
match with your vehicle.
dangerous. There is no way for you to know
uneven wear to the tires, thus lowering driving
how the used rim has been used or how many
safety. If excessive uneven tire wear is found,
miles it has been driven. Such rims may
be sure to go to an authorized BAIC dealership
suddenly break down and cause an accident.
to have the wheels aligned.
If you need to replace rims, be sure to use
BAIC’s new and original rims.
Tires
221
When
Encountering
Tire
Snow chains
Puncturing
Do NOT install any snow chain which is not
Tire puncturing is not often seen while driving.
consented by BAIC. Otherwise, it may damage
the brake parts.
This is particularly true when the tires are
Unsuitable snow chains will damage the tires,
properly maintained. If a tire leaks, it could be
very slow. However, once tire puncturing is
rims, suspension, brake, and body of the vehicle.
encountered, the phenomena that occur and the
Only snow chains recommended by an
suggested measures for coping with them are as
authorized BAIC dealership and tested by BAIC
4
can be used. In the use of snow chains, pay 4
follows:
attention to the following requirements:
If a front tire is punctured, the drag effect of the
flat tire will make the vehicle deviate to its side.
1. The snow chain can be installed only on the
At this time, you should immediately lift off the
driving wheel;
accelerator pedal and tightly hold the steering
2. Follow the tightening instructions for the
installing of snow chains and the vehicle speed
wheel. Steer the vehicle to keep it in the original
limits under various road conditions;
lane and lightly depress the brake to stop the
vehicle in the emergency lane or a safe place.
3. Don’t drive at speed>50km/h.
If a rear tire is punctured, you should release the
4. To avoid damage to tires and the excessive
accelerator pedal. Turn the steering wheel to
wear of snow chain, when driving on snow-free
road, be sure to remove the snow chain.
your desired driving direction so as to keep
control over the vehicle. It could be very bumpy
and noisy, but you can still control the vehicle.
Lightly depress the brake to stop the vehicle in
the emergency lane or a safe place.
5 Handling of Accidents
Warning Triangles and Fire Extinguisher
223
Spare Tires and Tools
224
Replacement of fuse
232
Replacement of bulb
242
Emergency start
242
Emergency traction
244
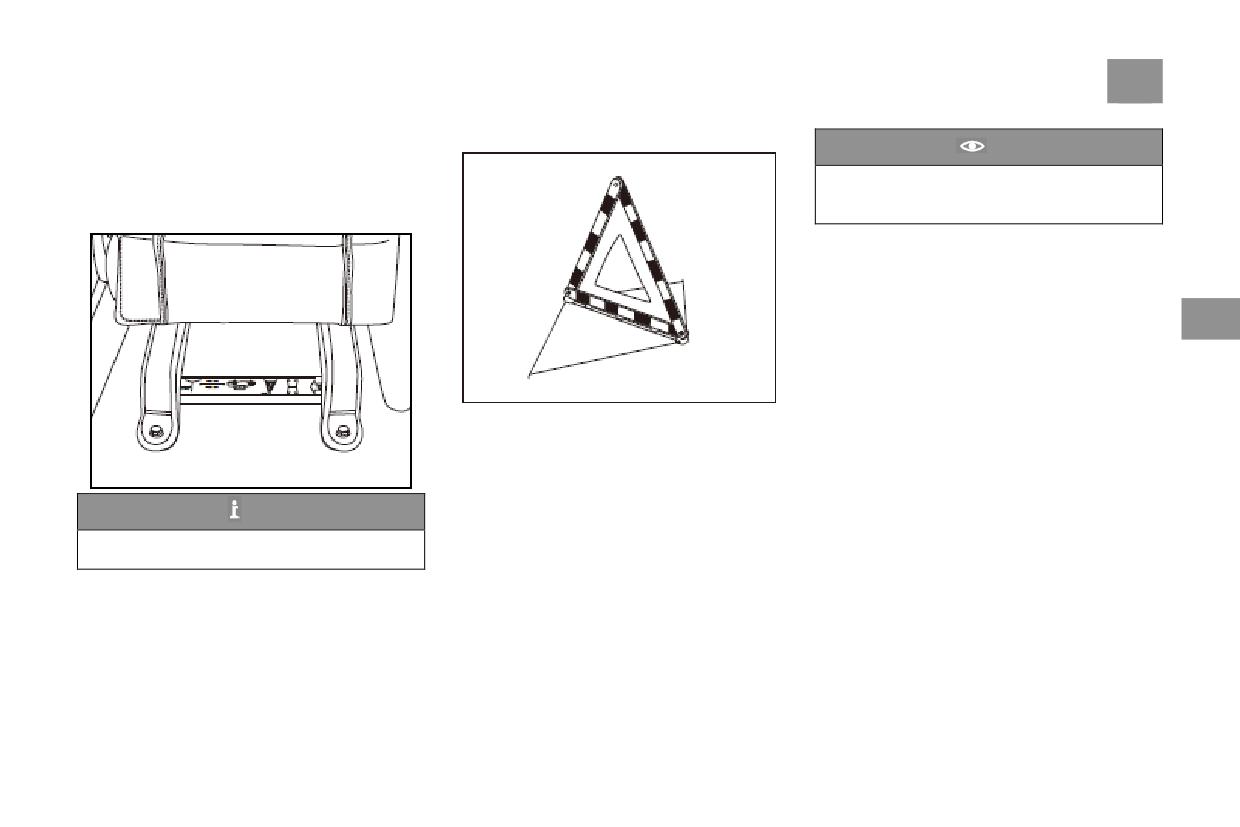
Warning Triangles and Extinguisher
223
Caution
Warning Triangles and
Please according to the national relevant laws
Extinguisher
and regulations, correct use warning
Triangle.
Warning Triangles
5
The warning triangles should be placed behind
the vehicle driving direction in accordance with
the relevant State regulations. When placing a
warning triangle on an ordinary highway in day
time, put it in a place which is about 50-100m
away in the direction of coming vehicles. In
Tips
expressways, the warning triangle should be put
The warning triangles are located under the
in a place which is at least 150m away in the
driver’s seat.
direction of coming vehicles. In the event of
If the vehicle breaks down on the road, park it
night, the distance should be increased based on
on the emergency lane or in a safe place, turn on
the specific situation.
the danger warning light, get warning triangle
from the driver’s seat, fold them out, and put
them in the designated positions so that
drivers of other vehicles can spot the danger,
slow down and pass by.
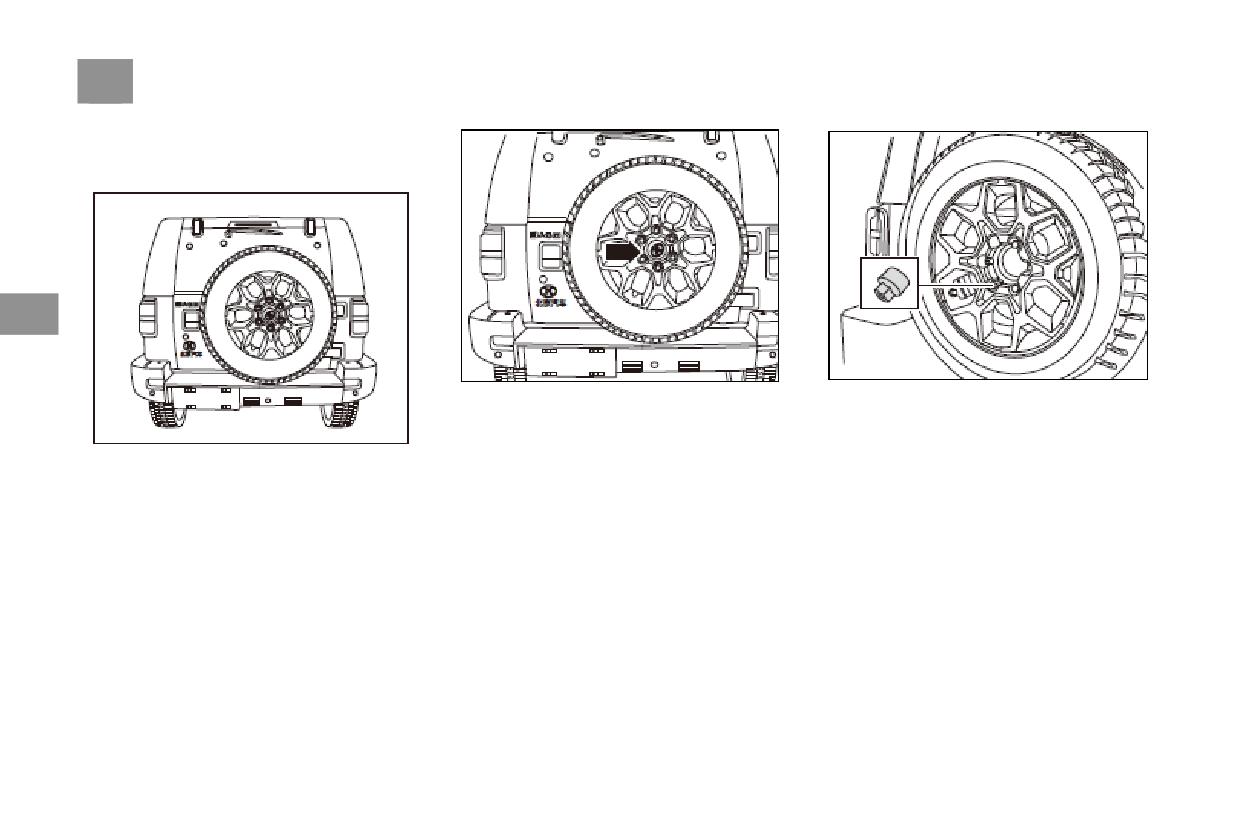
224 Spare Tires and Tools
Spare Tires and Tools
Spare Tire
5
2. Pull out the hub cap of the spare wheel in the
3. Follow the right angle to insert the wheel lock
axial direction.
key into the wheel lock nut and turn the wheel
lock key to remove the nut; then, sequentially
remove the other three ordinary wheel nuts.
The spare tire is located under the spare tire rack
of the tailgate. To use it, please take it out
according to the following steps:
1. Take the wheel lock key and the wheel nut
wrench out from the accompanying tool box.
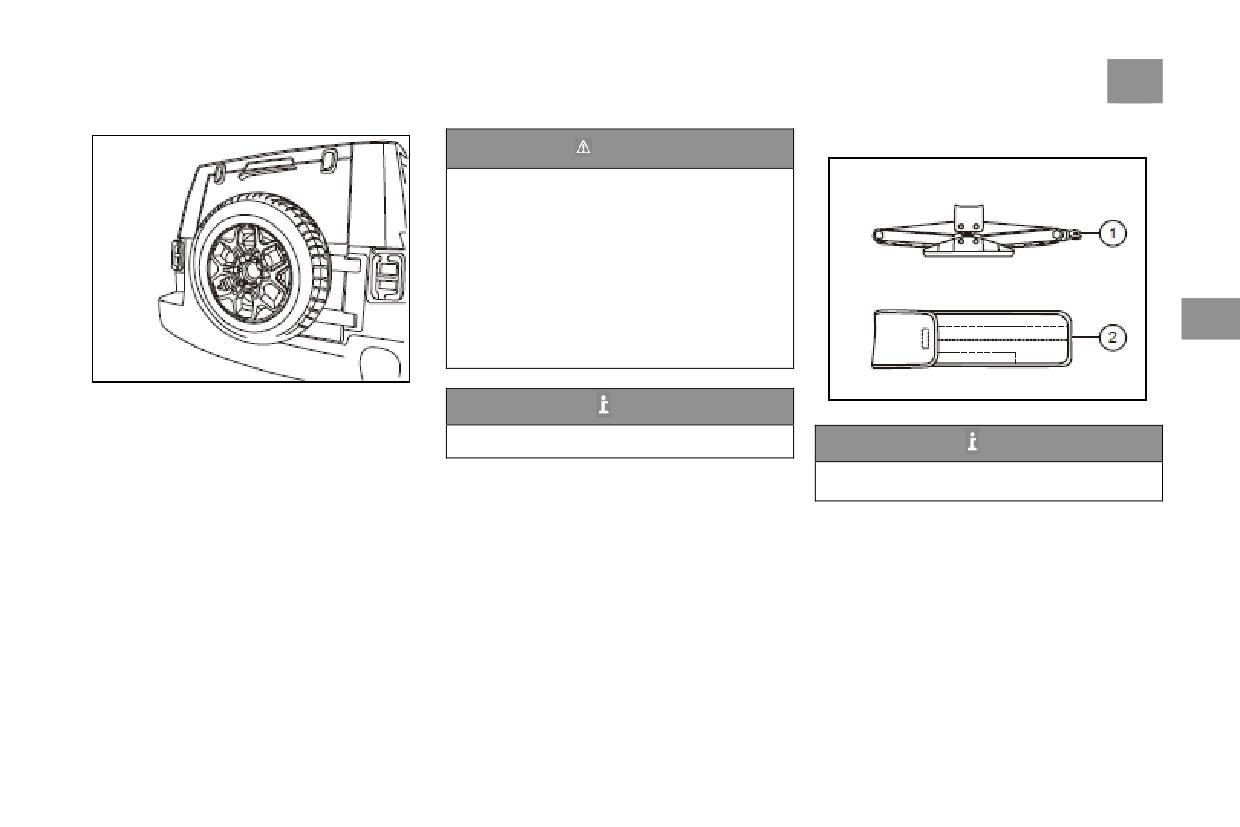
Spare Tires and Tools
225
Tools
Warning
● Do NOT use damaged spare wheels or
spare wheels which have been worn to the
maximum limit.
●Spare tires which are more than six years
old can only be used under emergency
situations, and the vehicle must be driven
carefully.
●After the spare tire is installed, be sure to
5
check tire pressure as soon as possible and
ensure that it is within the specified range.
4. Align the center hole of the replaced wheel to
the stud in the spare wheel pit.
Tips
5. Use your hand to pre-tighten 4 nuts and then
The air pressure of the spare tires is 220kPa.
the
Tips
3 ordinary wheel nuts with a tightening torque
The accompanying tools of the care are
should be (110±5) Nm. Finally, follow the right
located under the rear seats.
angle to insert the wheel lock key into the wheel
Vehicle tools include:
lock nut, and tighten the lock nut with a
1. Jack
tightening torque of (50±5) Nm.
2. Tool kit
6. Align the spare wheel clamp with the
The jack is fixed to the vehicle floor using
aluminum wheel clamp and press it with force
locking bolts, and the accompany toolkit is
in the axial direction. Press all the six clamps in,
located behind the jack.
complete the assembly.
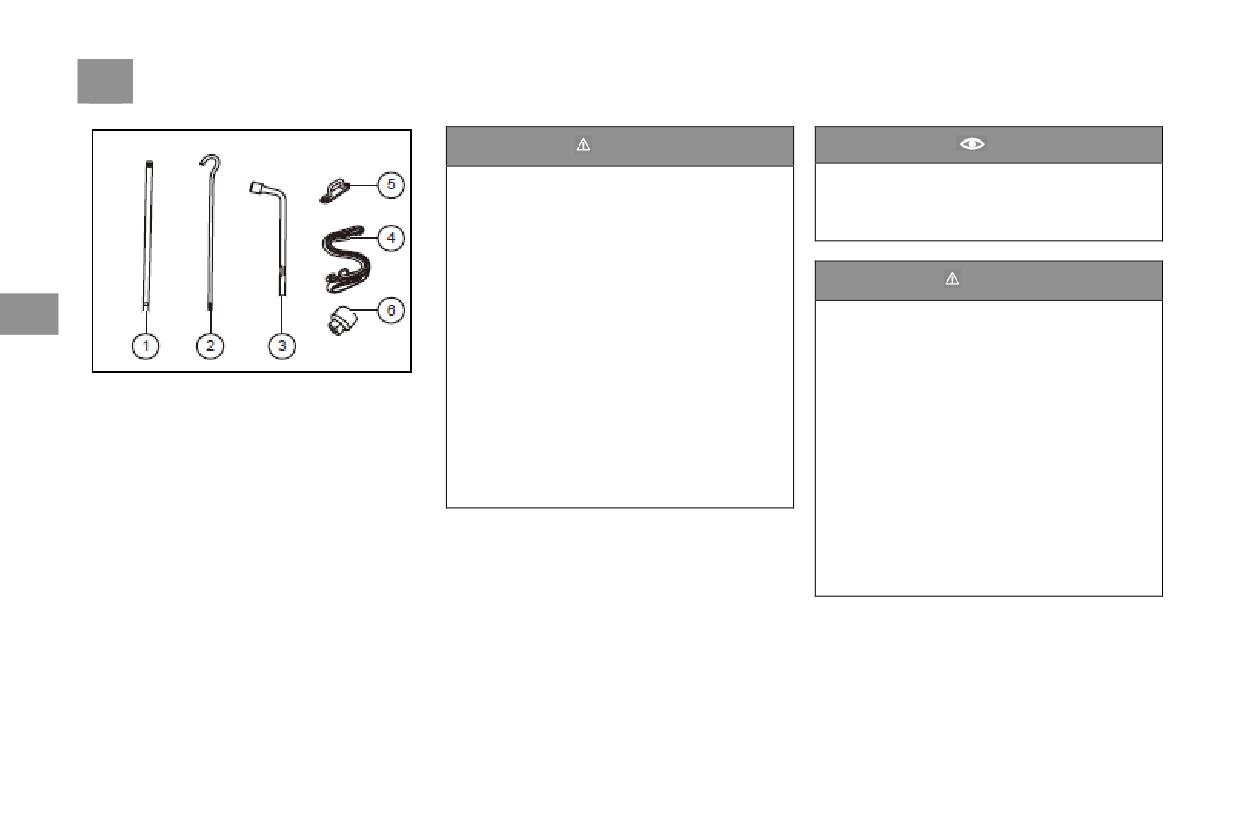
226 Spare Tires and Tools
Warning
Caution
After use, the jack must be put back to its
●Improper use of the jack may cause serious
injuries.
original place. Also pay attention to the
supporting angle of the jack and ensure that
●The jack can only be used on a hard and
the jack can be put into the installation box.
flat surface.
●The jack can only be used for replacing the
wheels of this vehicle. It cannot be used to lift
Warning
other heavy objects or vehicles.
5
● Follow the specified
tightening
●When the jack is used, be sure to NOT
torque to correctly tighten the wheel nuts.
start the engine. Otherwise, it will
Otherwise, when the vehicle is driven, the
cause accidents.
nuts may become loose, thus increasing the
●When using the jack to lift the vehicle, be
The vehicle tool kit includes:
chance of traffic accidents.
sure to remember that you must not put any
1. Jack-use wrench
● When the wheel assembly dismantling
part of your body under the vehicle(to
2. Jack-use wrench extension rod
wrench provided along with the vehicle is
prevent accidents).
3. Wheel assembly dismantling wrench
used to fasten the wheel nuts but it is not
4. Front windshield fixing strap
●If it is indeed needed to operate under the
possible to guarantee the torque value,
5. Front windshield fixing strap’s fixing ring
vehicle, a suitable protective support must be
rationally control vehicle speed when driving,
6. Key to wheel lock
placed under the vehicle.
avoid sudden acceleration and emergency
braking and go to a specialized place to
calibrate and ensure that the wheel nuts
reach the required tightening torque.
The wheel nut toque is: 130±5Nm。
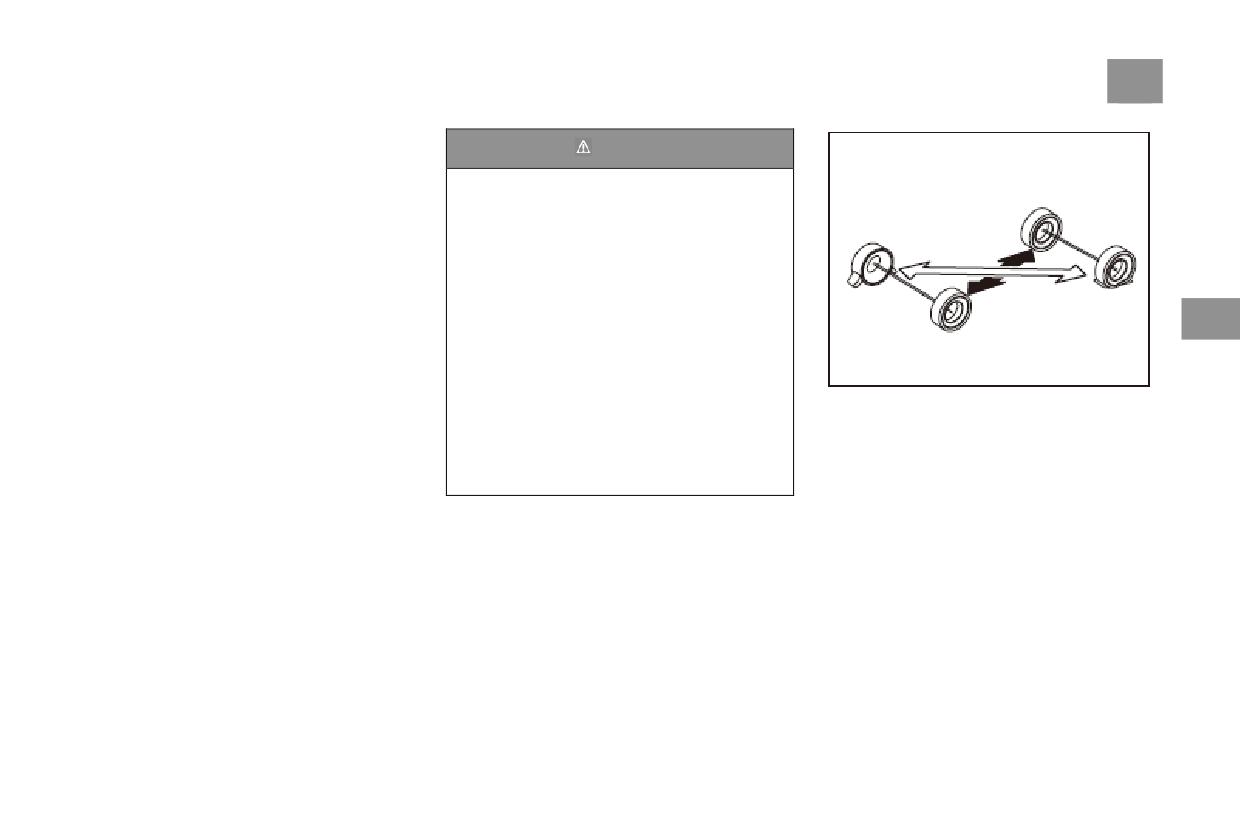
Spare Tires and Tools
227
Replacement of Flat Tires
Warning
The dimensions of the emergency spare tires
and their rims of this vehicle are the same as
There are risks when tires are replaced. The
those of the damaged wheels.
vehicle may slide off the jack, tip over or fall
After an emergency spare tire is installed, the
upon you or others, thus causing serious
steering performance of the vehicle will change.
injury.
Please rationally control vehicle speed, and
Please find a flat and safe place to replace
avoid abrupt acceleration and emergency
tires. The relevant laws and regulations must
braking.
be strictly complied with. All passengers
Emergency spare tires can only be used for a
must leave the vehicle and wait in a safe
5
short period of time.
place.
The maximum vehicle speed should not exceed
To prevent the vehicle from moving, the
70km/h.
following measures should be taken:
While driving, do NOT use more than one
1. Apply the parking brake.
To further ensure that the vehicle will not move,
emergency spare tire.
2. Set the shift lever to the Neutral Gear “N”.
you may place a stopper in front of and behind
3. Turn off the engine. When the vehicle is
Preparatory Work
the tire which is farthest away from the tire to
being lifted, do NOT start the engine again.
If you find that a tire is flat, you should slowly
be replaced (e.g. the tire which is diagonal to the
4. Do NOT let passengers stay inside the
drive the vehicle to a flat place where safe
tire to be replaced).
vehicle.
maintenance can be performed so as to prevent
further damage to the tire and the rim. Also, put
a warning triangle in a suitable place behind the
vehicle, and turn on the emergency warning
light.
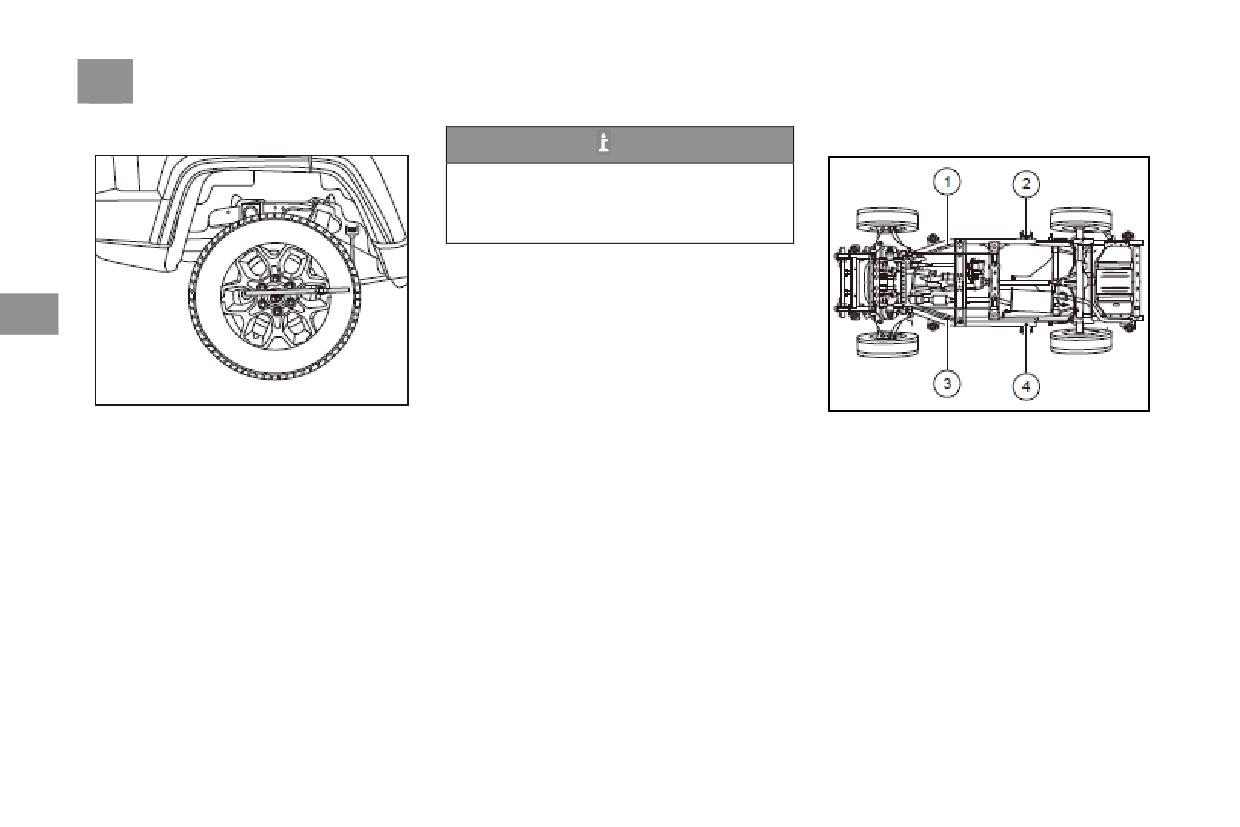
228 Spare Tires and Tools
Loosening Wheel Nuts
Lifting Vehicle
Tips
Before lifting the vehicle using the
jack, only loosen the wheel nuts by one turn.
●The wheel assembly wrench provided with
the vehicle may be used to do the loosening.
5
Before jacking the vehicle, be sure to loosen the
Put the jack at the right lifting point. Be sure
wheel nuts first.
that the jack is placed on flat, solid ground.
Turn the wheel nuts counter-clockwise to loosen
them.
To get maximum torque, be sure to put the nut
into the wrench as shown in the figure above,
hold the end part of the wrench handle and pull
it upwards. But, be sure to NOT let the wrench
go off the nut.
Do NOT remove the nut. Instead, just loosen it
by approximately one turn.
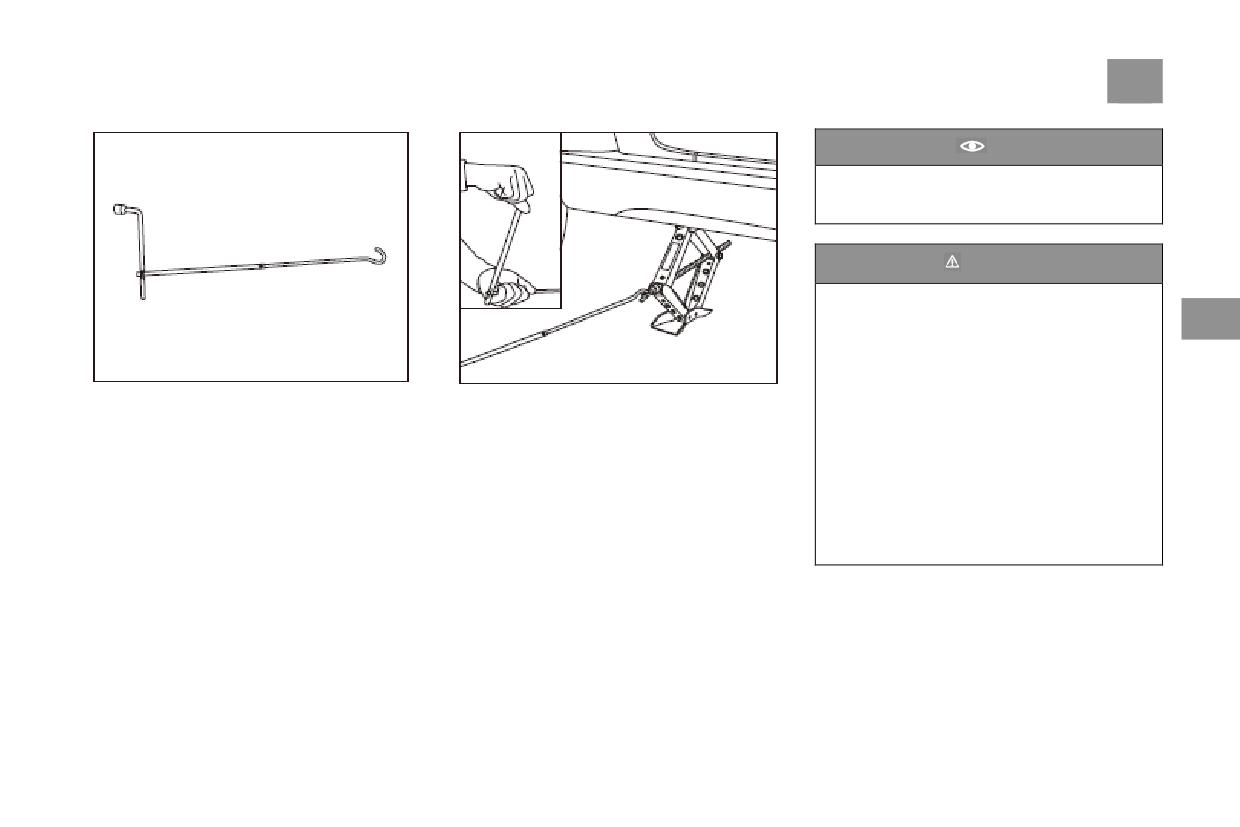
Spare Tires and Tools
229
Caution
The lifting and follow-up replacement
procedures could only be performed after the
nuts of the wheel have been loosened.
Warning
●The jack must be used on a hard and flat
surface.
5
●The jack must be put at a suitable lifting
point. 5
●Strictly follow the operational precautions
As shown in the figure, first assemble the
Use the assembled tool to turn the jack
of the jack.
jack-use wrench, the jack-use wrench extension
clockwise and lift the vehicle until the leaking
●When a trailer is towed, the trailer must be
rod and the wheel assembly wrench as shown.
tires off the ground.
separated from the main vehicle.
Remove the wheel nuts first and then the
● While lifting, you should continuously
leaking tire. Be sure to exercise care when
watch the vehicle condition. If you feel that
touching the wheel nuts, because these nuts
the vehicle body is apparently tilting, you
could have become very hot due to vehicle
should stop lifting, find out what the problem
driving. Put the leaking tire on the ground, with
is and only resume lifting after the problem
its outer surface facing upwards.
has been fixed.
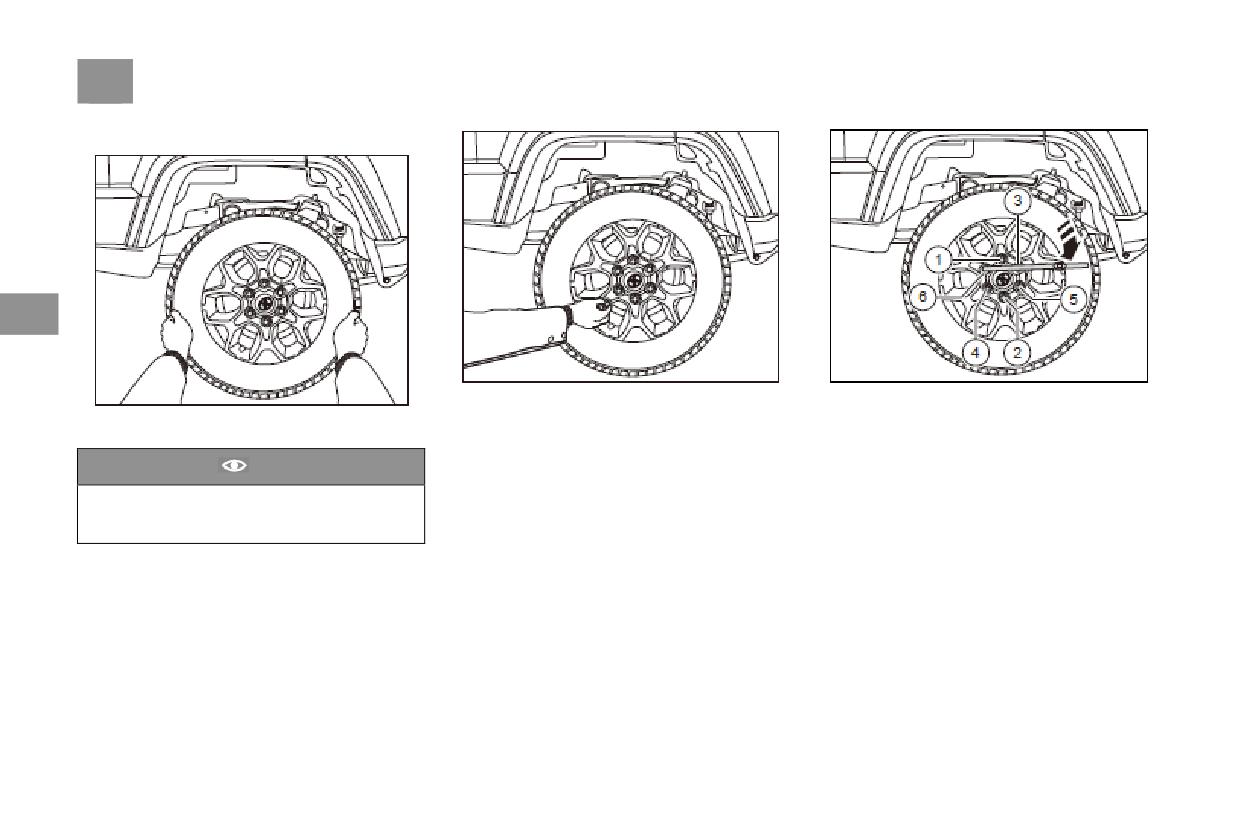
230 Spare Tires and Tools
Mount Spare Tire
5
When installing the wheel nuts, use your hand
Turn the jack handle clockwise to lower the
Align the installing hole of the spare wheel with
to tighten them first. Then, push the wheel
vehicle.
the installing hole in the brake disc.
backwards to see if it can be tightened a bit
Use the wheel assembly wrench to tighten the
more.
wheel nuts. Aside from your hand, do NOT use
Caution
other tools or leverage tools like a hammer, a
Before installing the tire, be sure to use a
pipe or a foot, and be sure that the wrench is
wire brush (or similar tool) to remove all
tight on the nut.
corrosive items from the installing surface.
Following the sequence as shown in the figure
and evenly tighten the wheel nuts.
Spare Tires and Tools
231
Instructions for Replacement of
Caution
Warning
Wheel
●The wheel nuts should be evenly tightened
●Spare tires which are more than six years
● The replaced wheel should promptly and
following the sequence as shown in the figure.
old can only be used under emergency
correctly installed into the spare tire storage
● After the wheel is installed, go to an
situations, and the vehicle must be driven
place.
authorized BAIC dealership as soon as
carefully.
●After use, the accompanying tools should be
possible to have the wheel nut tightening
●After a spare wheel is installed, be sure to
promptly cleaned and put back to their original
torque checked.
check the tire pressure as soon as possible so
place.
●If a nut is rusted or difficult to turn when
that it is within the specified range.
● Check the wheel nut tightening torque as
the wheel is replaced, the nut must be
●When a spare tire is used, the vehicle speed
5
soon as possible.
replaced when checking the wheel nut
must not exceed
70km/h. Avoid abrupt
●Damaged wheels must be repaired as soon as
tightening
torque,
and the
bolt
acceleration and emergency braking as much
possible.
thread should be cleaned.
as possible.
Caution
Warning
The emergency spare tire or the replaced
wheel must be reliably fixed to the spare tire
The threads on the wheel nuts and the hub
rack.
must be kept clean and free of grease and
other attached items.
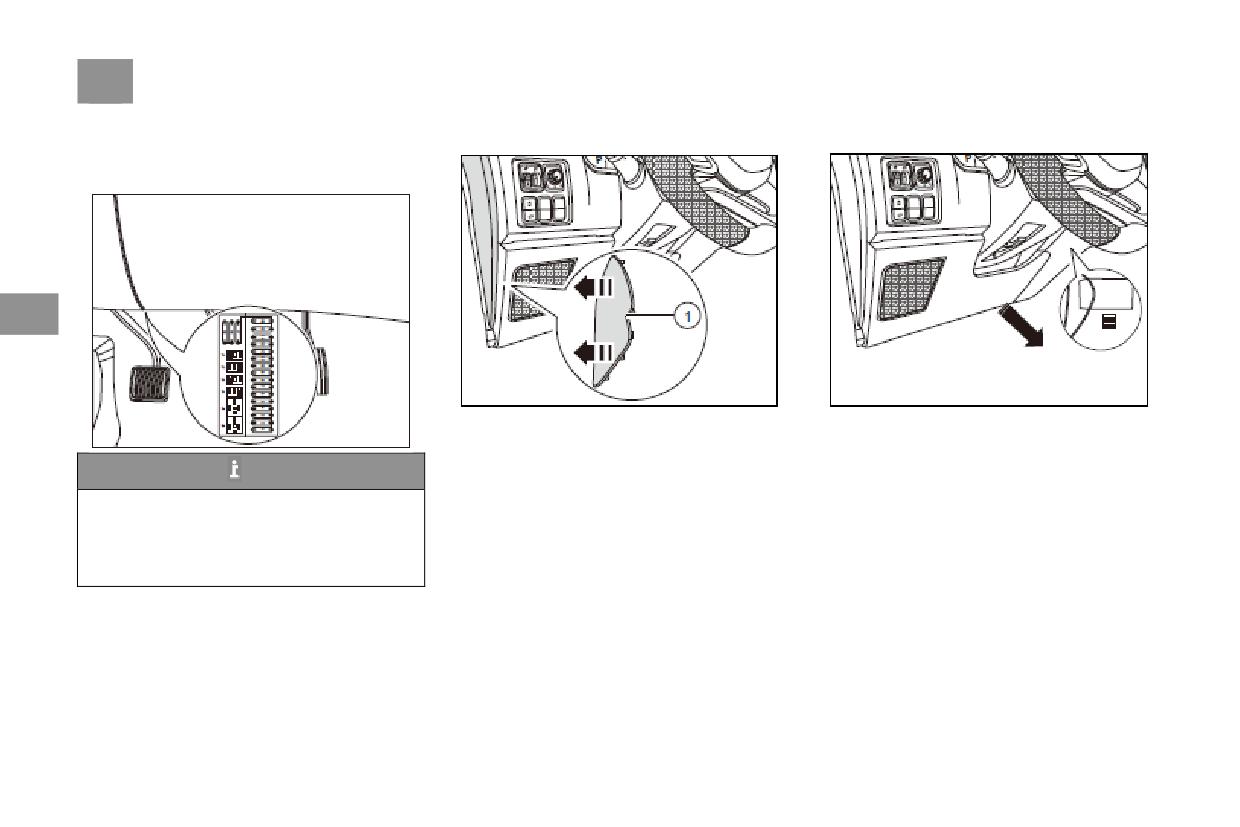
232 Replacement of Fuse
Replacement of Fuse
Remove the knee protective panel
With knee protective panel
Fuse Box
5
1. Adjust the steering column to the bottom
1. Check to ensure the steering column is
position;
adjusted to the bottom position, and the knee
2. Attach a piece of 50 ×100mm protective strip
protective panel is attached with a protective
Tips
(made of non-woven fabrics or similar materials)
strip.
The fuse box is located on the left side of the
on the knee protective panel close to the ignition
2. Force forward on both the left and the right
lower steering column of the instrument
lock to protect the knee protective panel against
from bottom to top to install the knee protective
panel, at the back of knee board. To facilitate
scratching during the removal and installation;
panel;
viewing during inspections or repair, the
3. Force backward on both the left and the right
3. Remove the protective non-woven fabrics;
lower knee board needs to be removed.
from bottom to top to remove the knee
protective panel;
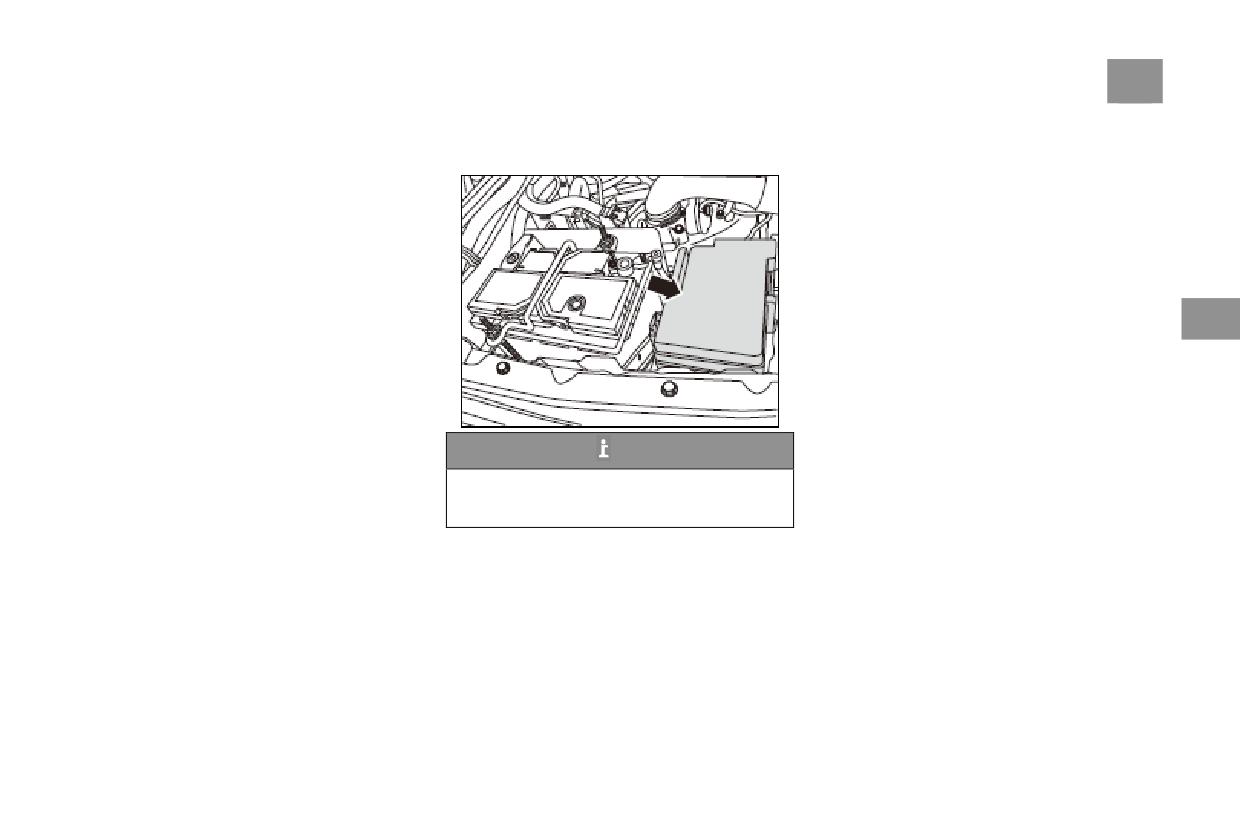
Replacement of Fuse
233
Install Fuse Box
Engine Compartment Power
Check and Replace Fuse
1 Check and ensure the steering column had
Distribution Center
If a certain electrical device stops working, you
adjusted the lowest position. The knee
should check whether it is caused by fuse
protection cover is with a protection cover
damage. You may follow the graphs of Engine
2 Install knee protection cover plate, from
Compartment Power Distribution Center the
bottom to top, to forward force by left and right
position map on the fuse box cover and tables to
sides at the same time.
determine the one or several fuses that control
3 Rip cover nonwovens.
the component. Before you are able to
determine whether the fault is caused by fuse
damage, you may replace all damaged fuses and
5
check if electrical devices can work normally. If
the fault still exists, please contact an authorized
BAIC dealership.
Pull out the fuse of the electrical device which
has stopped working, and check it out.
Find the melted metal wire in the fuse. If the
fuse has melted (the fuse in the place of the
Tips
arrow in the figure has been disconnected), be
The engine compartment power distribution
sure to use a spare fuse of the same or lower
center is located at the front end of the
amperage to replace it.
battery.
If no spare fuse can be used and the vehicle
cannot be moved as a result, a fuse of the same
or lower amperage may be removed from
another circuit to make
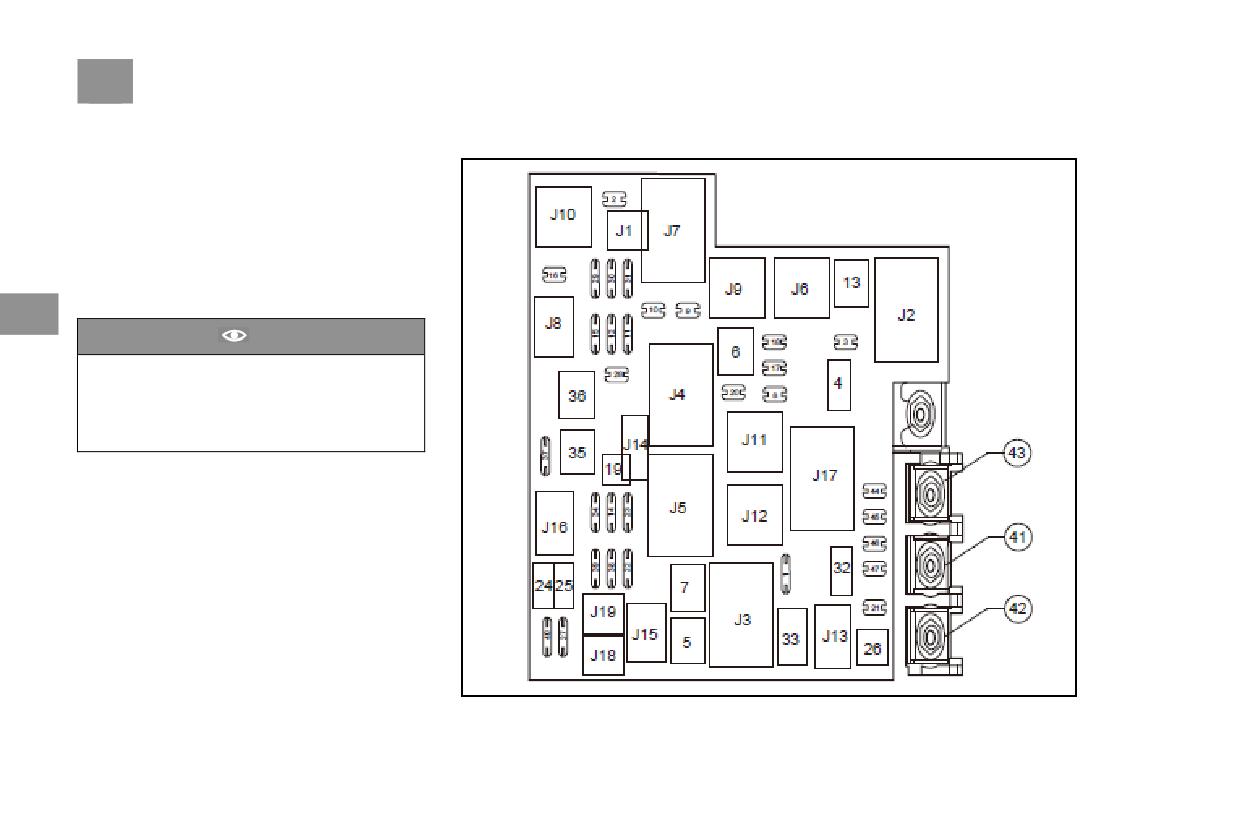
234 Replacement of Fuse
the replacement. However, you must be sure
Engine Compartment Power Distribution Center Layout
that even if this circuit, such as the circuit of the
cigarette lighter or the radio, is temporarily not
used, and that it will not affect you to drive.
If the alternative fuse of the same rated value
melts again within a short time, it then indicates
that the vehicle may have a serious electrical
fault. At this time, you should leave the melted
fuse in the circuit and contact an authorized
BAIC dealership.
5
Caution
If you use a spare fuse of a rather low
amperage to replace the melted fuse, it may
melt again. If the fault is fixed, you should
also use a fuse of the correct rated value to
replace it as soon as possible.
Replacement of Fuse
235
Specifications and Functions of
23
15A
Horn
J1
HFKA
Compressor relay
24
--
Reserved
J2
V4
Starter relay
Engine
Compartment
Power
25
30A
BCM
J3
V7
Reserved
Distribution Center
26
30A
BCM
J4
V7
Low-speed fan 1
Position
Specification
Function
27
25A
BCM
J5
V7
Low-speed Fan 2
1
10A
EMS
28
25A
BCM
J6
V9
Fuel pump relay
2
15A
A/C compressor
29
20A
Ignition switch IG
J7
V4
Main relay
3
5A
PEPS BCM ST
30
15A
TCU IG
J8
V11
Vacuum pump relay
4
30A
Starter excitation
EMS/ABS steering angle, yaw
J9
V9
Low beam light relay
5
--
Reserved
31
10A
angle sensor IG
J10
V9
Reserved
5
6
40A
Low-speed fan 1
32
20A
220V Power
J11
V9-Z
Front wiper low-speed relay
7
40A
Low-speed Fan 2
33
40A
Blower
J12
V9-Z
Front wiper high-speed relay
8
15A
Fuel pump
34
5A
TCU B+ (AT specified)
Left front fog light relay(The
9
10A
Main relay 2
J13
V11
35
40A
ABS/ESP B+
light bulb fog lamps specified)
10
10A
Blower relay coil
J14
HFKA
Horn relay
36
--
Reserved
Injection
nozzle,
Right front fog light relay(The
37
--
Reserved
11
15A
sensor
J15
V11
light bulb fog lamps specified)
Ignition coil, brake
38
--
Reserved
J16
HFKA
Reserved
12
15A
switch
39
--
Reserved
J17
V4
Blower relay
13
30A
Main relay
40
--
Reserved
J18
HFKA
Reserved
14
25A
ABS/ESP B+
41
80A
Cab fuse box power supply
J19
HFKA
Reserved
15
--
Reserved
42
175A
Alternator
16
15A
Vacuum pump
43
80A
High -speed fun-speed fan 1
17
15A
Left front headlight
44
5A
Spare fuse
Right
front
45
10A
Spare fuse
18
15A
headlight
46
15A
Spare fuse
19
--
Reserved
47
20A
Spare fuse
20
20A
Front wiper
21
15A
lef front foglight
22
15A
Right front foglight
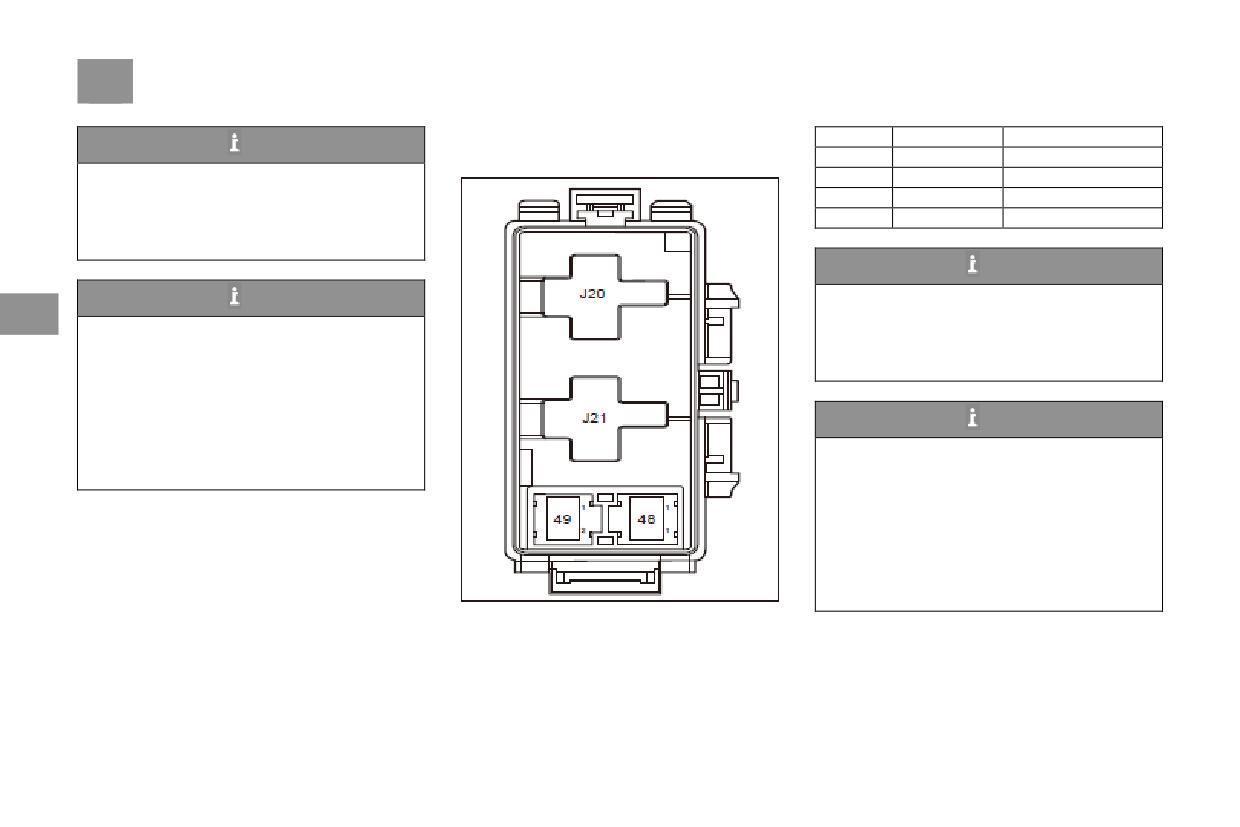
236 Replacement of Fuse
Engine
Compartment
Power
Position
Specification
Function
Tips
48
50A
High-speed Fan 1
Distribution Center Layout
As shown in the figure, there is a spare fuse
49
50A
High-speed Fan 2
inside the engine compartment power
J20
V7
High-speed Fan 1
distribution center. If a fuse of your vehicle is
J21
V7
High-speed Fan 2
damaged, you may use the spare fuse to
replace it.
Tips
As shown in the figure, there is a spare fuse
Tips
5
inside the engine compartment power
It is not guaranteed that the fuse specifics
distribution center. If a fuse of your vehicle is
described above apply to all vehicle models.
damaged, you may use the spare fuse to
For detailed information about the use of
replace it.
fuses, please refer to the specific vehicle.
Different vehicle models may have slightly
different fuses.
Tips
Some electrical devices may be equipped with
It is not guaranteed that the fuse specifics
several fuses. It may also be possible that
described above apply to all vehicle models.
several electrical devices share one fuse.
For detailed information about the use of
fuses, please refer to the specific vehicle.
Different vehicle models may have slightly
different fuses.
Some electrical devices may be equipped with
several fuses. It may also be possible that
several electrical devices share one fuse.
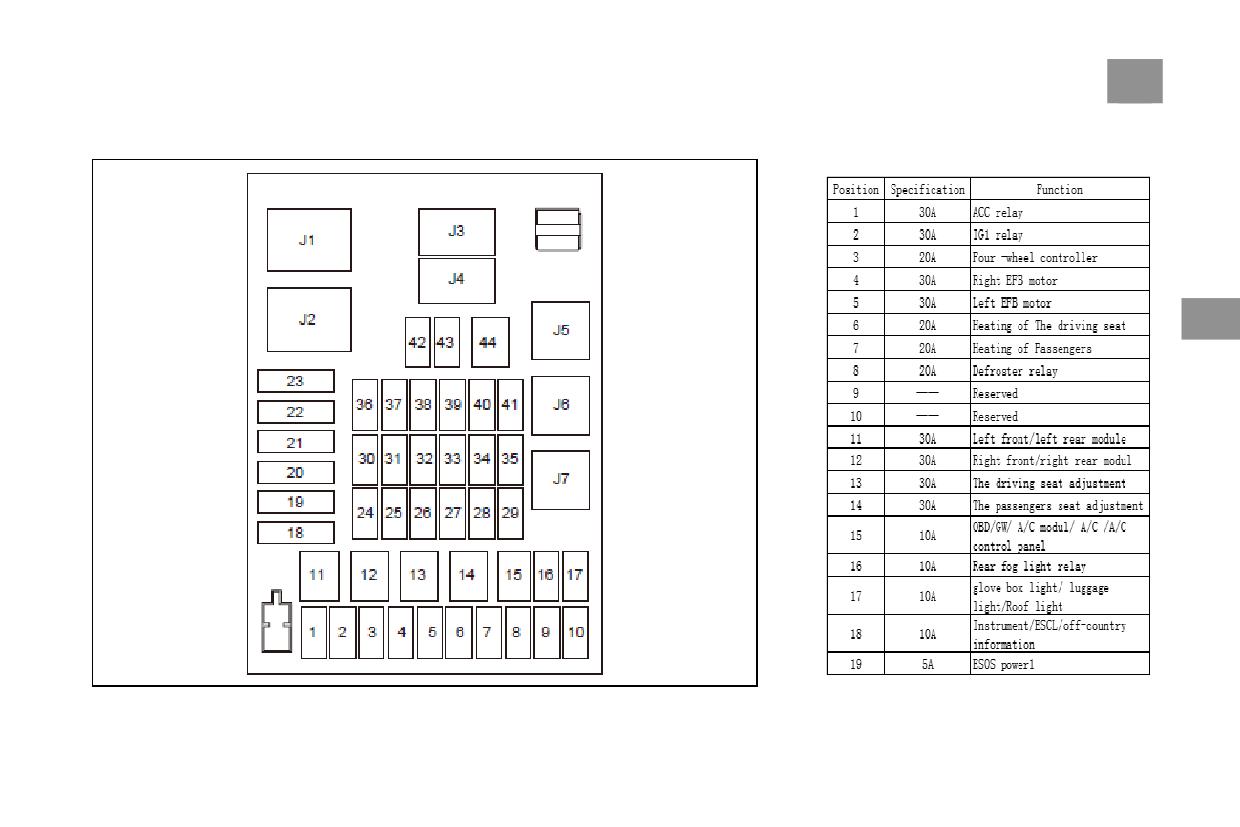
Replacement of Fuse
237
Cabin fuse box Layout
Specifications and Function of fuse
box in cabin
5
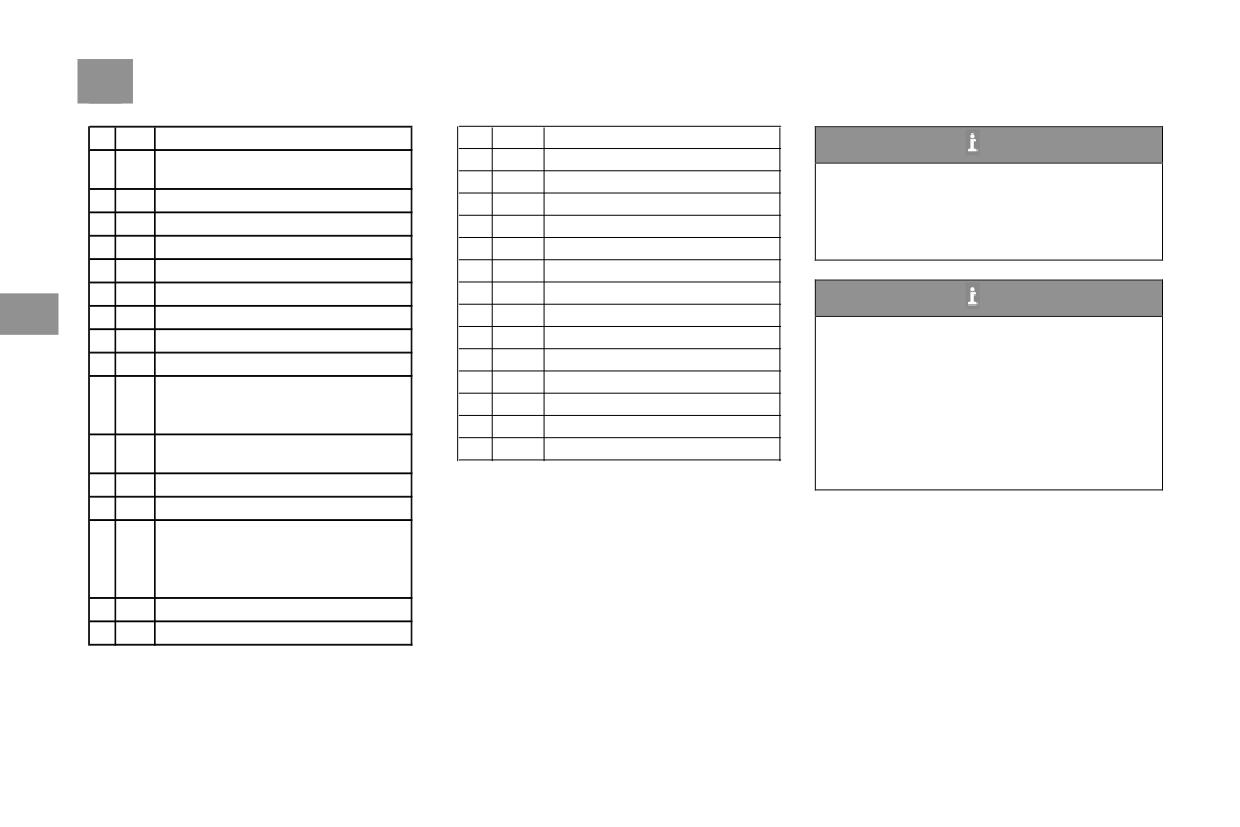
238 Replacement of Fuse
20
5A
PEPS power 2
37
10A
USB/EHC/220V/EHC swtich
Tips
Electronic mirror/Defroster relay/EPB
38
15A
Cigarette lighter,
21
10A
As shown in the figure, there is a spare fuse
switch/USB charge plug
39
--
Reserved
inside the engine compartment power
22
10A
Brake switch
40
--
Reserved
distribution center. If a fuse of your vehicle is
23
5A
automobile data recorder
41
--
Reserved
damaged, you may use the spare fuse to
24
--
Reserved
42
--
Reserved
replace it.
25
--
Reserved
43
--
Reserved
26
--
Reserved
44
--
Reserved
Tips
5
27
--
Reserved
J1
V4
Reserved
It is not guaranteed that the fuse specifics
28
--
Reserved
J2
V4
Defroster relay
described above apply to all vehicle models.
29
--
Reserved
J3
V6
Rear fog light relay
For detailed information about the use of
Four doors modul/Four-wheel drive
J4
--
Reserved
fuses, please refer to the specific vehicle.
30
10A
controller/BCM/Reversing Radar/Rear
J5
V4
ACC relay
Different vehicle models may have slightly
Cameras
J6
V4
IG1 relay
different fuses.
off-road information/EPB
Some electrical devices may be equipped with
31
10A
J7
V4
Reserved
controller/PEPS/Instrument
several fuses. It may also be possible that
several electrical devices share one fuse.
32
10A
Air bag
33
10A
GW/TPMS/ A/C /panel/Gearshift
driving and Passenger seat/Electronic
mirror/EPB switch/Interior Rearview
34
10A
Mirror/Headlight height/backlight
adjustment
35
5A
rain sensor
36
10A
PEPS/BCM
Replacement of Bulbs
239
Replacement of Bulbs
Warning
Emergency Startup
Usually, it is not possible to replace a bulb
Absolutely do NOT charge frozen batteries.
If discharging makes it impossible to start the
without removing other parts of the vehicle.
This may cause explosions! Even if unfrozen,
engine, you may start it by using the battery of
This is particularly true for those bulbs which
acids may overflow when the battery is
another vehicle via a jumper cable. The
can only be operated from inside the engine
charged, thus causing corrosive damage.
following points should also be observed:
compartment. Such work requires professional
Frozen batteries must be replaced.
skills.
● The rated voltage of the power-supplying
batteries should be 12V and their capacity (Ah)
Warning
should not below that of the vehicle battery
Caution
5
Particular care should be exercised when
which has discharged.
When starting the engine via jumper cables,
working on the engine compartment!
●Only jumper cables with a sufficient cross
do NOT allow the two vehicles to come into
There is pressure in bulbs. During the
section can be used. Attention should be paid to
contact. Otherwise, once the positive poles of
replacement, explosion may occur.-be
the instructions provided by the power cable
the two batteries are connected, the current
aware of injury!
manufacturer.
is immediately connected, and danger may
● Only jumper cables with an insulated
occur.
electrode holder should be used.
Tips
The capacity of the battery equipped for this
vehicle is 60Ah.
The capacity of the battery equipped for this
vehicle is 60Ah.
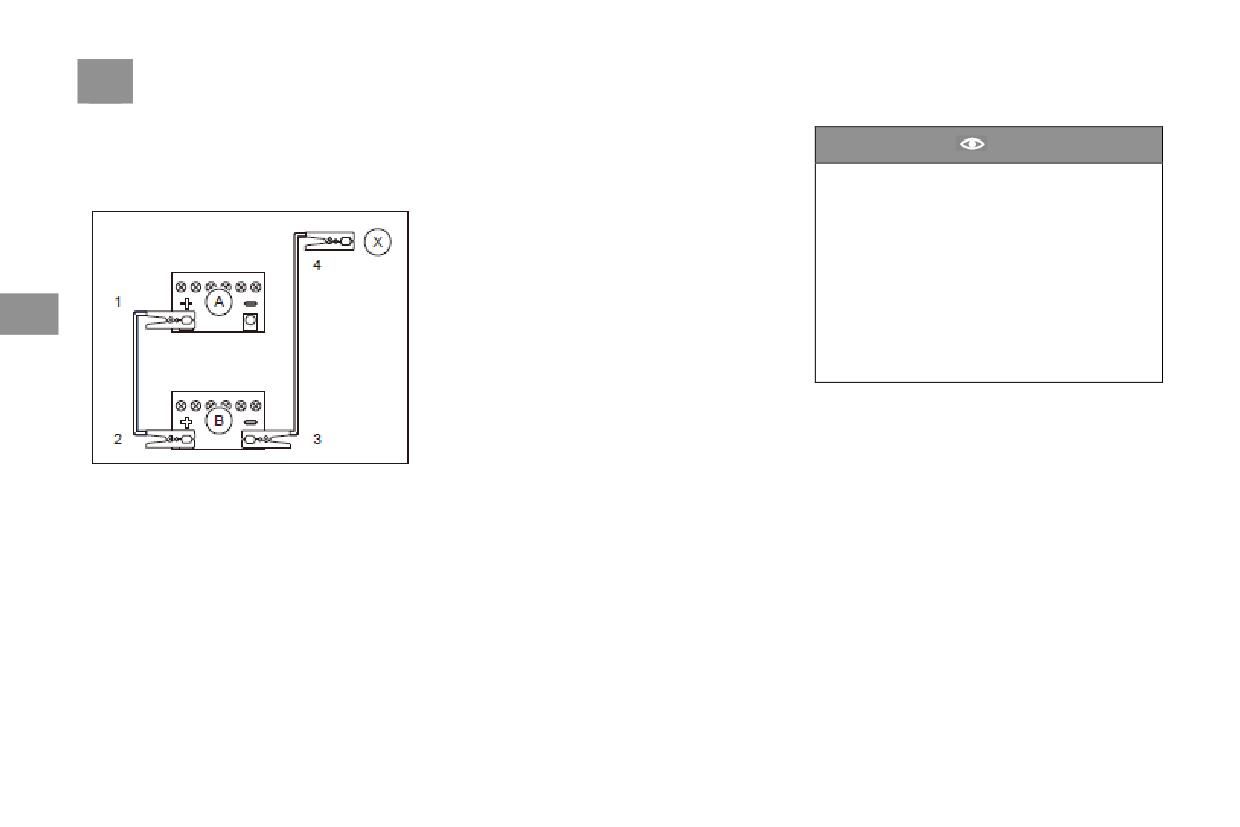
240 Emergency Startup
Jumper Cables
5.Connect the end -3- of the black cable with
Caution
To connect batteries via jumper cables, it is
the
negative
electrode
(-)
of
the
necessary to connect the positive terminals first
power-supplying battery “B” and the other end
● Properly arrange the jumper cables to
and then the negative terminals.
-.4-
with the engine cylinder of the
prevent contact between the cable and
power-receiving battery “A” or the metal
moving parts of the engine.
component which is reliably connected with the
●When dismantling the jumper cable, open
engine cylinder.
the blower or rear window heater of the
6. Start the vehicle with the power-supplying
vehicle with battery low in order to reduce
battery and let it run in idle speed, and then start
the peak voltage while the cable is being
the engine of the vehicle with the
dismantled.
5
power-receiving battery and let run for a period
●To ensure successful jumper connection,
of time so that the motor charges the
the engine must be running idle when the
power-receiving battery.
cables are removed.
7. Remove the power cable in a sequence
opposite to the steps above. During removal, be
careful not to be injured by the revolving leather
belt or fan.
1. Wear protective goggles properly, and
remove watches, bracelets and other metal
ornaments to prevent electric shock;
2. Put the ignition key to the “LOCK” position.
3. Connect the end -1- of the red power cable
with the anode (+) of the power-receiving
battery “A”.
4.
Connect the other end
-2- to the
power-supplying battery “B”.
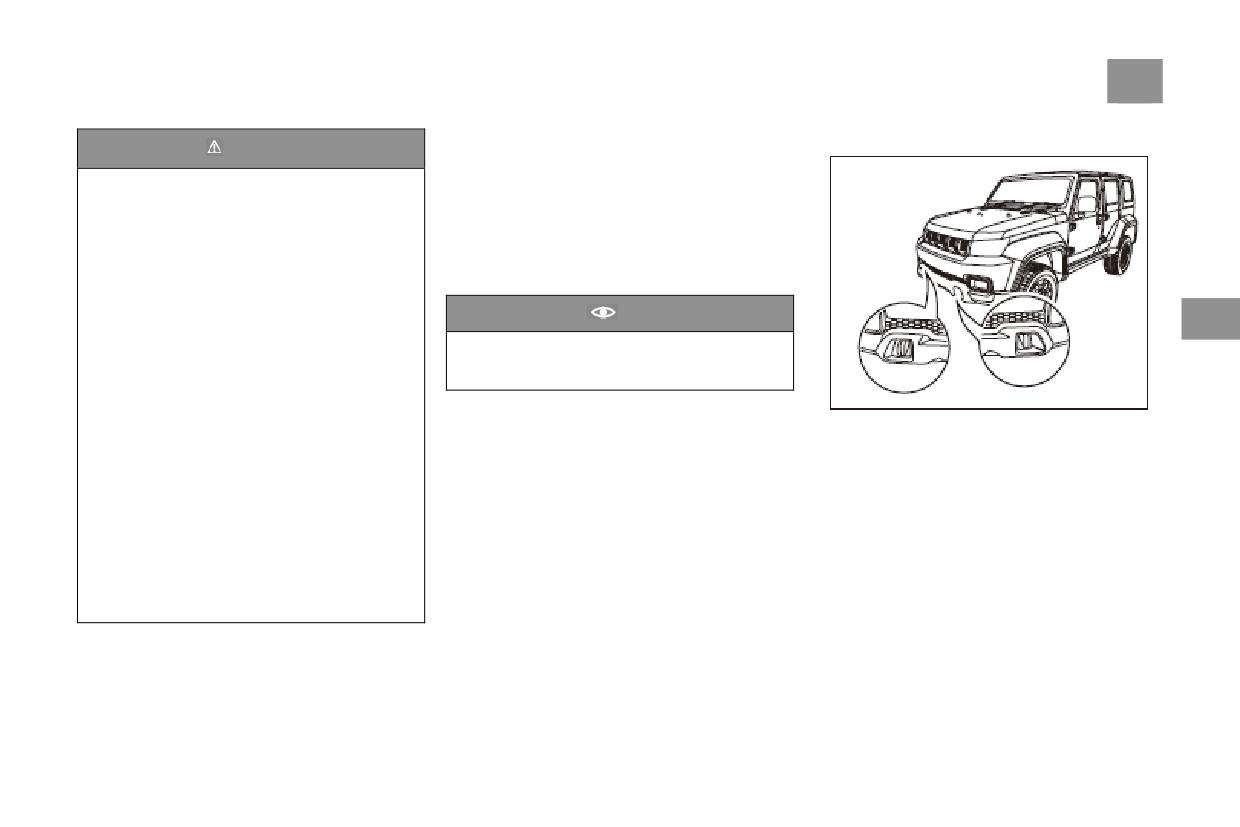
Emergency Towing
241
Towing from the Front
Warning
Emergency Towing
Improper use of the jumper cable may result
The front and rear parts of the vehicle are both
in battery explosion and thus bring serious
equipped with a towing hook which can be used
personal injury.
for towing things. When your vehicle breaks
●The engine compartment is a high-risk
down or has an accident, the front or rear
area. Improper maintenance could cause
towing hook can be used as a traction point to
fatal accidents extremely easily.
tow your vehicle.
●Absolutely do NOT directly connect the
negative power cable to the negative pole of
Caution
5
the power-receiving battery. Otherwise,
The towing hook must not be used to tow
sparks will be generated the moment when
other vehicles. It cannot be used to tow
the power cables are connected. The
trailers.
inflammable gases generated by the battery
The best towing method is to use a special
may be ignited by the sparks, thus causing
towing vehicle. If hoisting towing (with the
This vehicle has two front towing hooks,
explosive accidents.
front wheels lifted) is needed or the vehicle
symmetrically distributed on the left and right
●Absolutely do NOT connect the negative
must be towed with all four wheels on the
sides of the front bumper of the vehicle, as
power cable with any part of the fuel system
ground, attention should be paid to:
shown in the figure.
or the brake pipeline. Doing so may cause
When the ignition key is located “ON” position,
fire.
turn on the hazard warning light.
●While performing maintenance, be sure to
The shift lever of the transmission needs to be
NOT bend down and face the battery so as to
put to the neutral and N position, while the
protect against scalding by acids.
transfer case shift lever must be put to the 2H
●Do NOT touch open flames. Doing so may
position.
cause explosions.
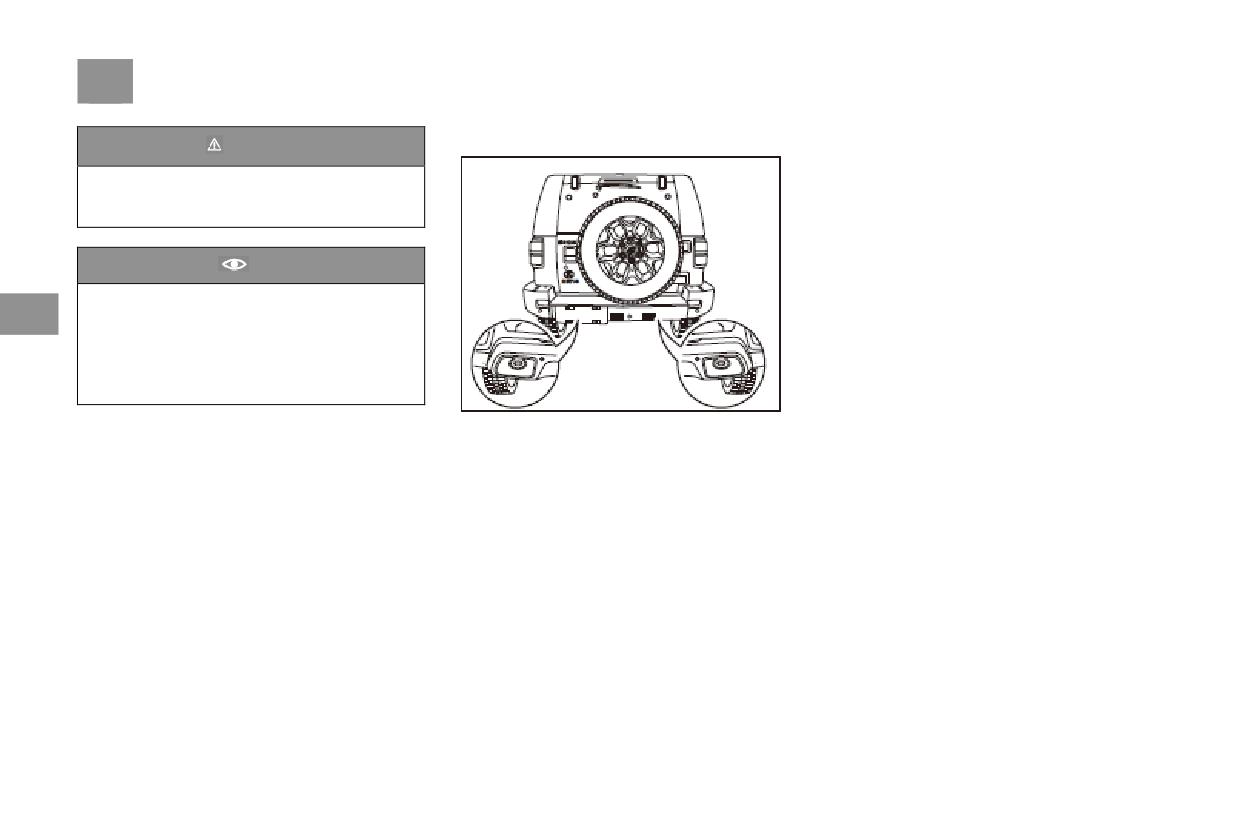
242 Emergency Towing
Towing from the Rear
Towing the Vehicle Warning
Warning
If the vehicle needs to be dragged, we suggest
●Inexperienced drivers must NOT attempt
that you entrust an authorized BAIC dealership
to tow other vehicles so as to prevent
or a commercial towing company to do it for
accidents.
you. When you contact them, you must tell
them how the vehicle needs to be dragged.
To drag the vehicle, a suitable towing device
Caution
may be used to ensure that the vehicle is
●The driver of the towed vehicle must turn
dragged without damage. Personnel from
5
on their emergency warning light. They
commercial towing companies are familiar with
should also comply with the relevant laws
the national/provincial/municipal and local
and regulations.
towing laws. You may seek help from them.
●Ensure the traction rope is always in the
tension state.
The rear traction ring (as indicated with the
Arrow) is installed on the welded plate in the
rear of the vehicle.
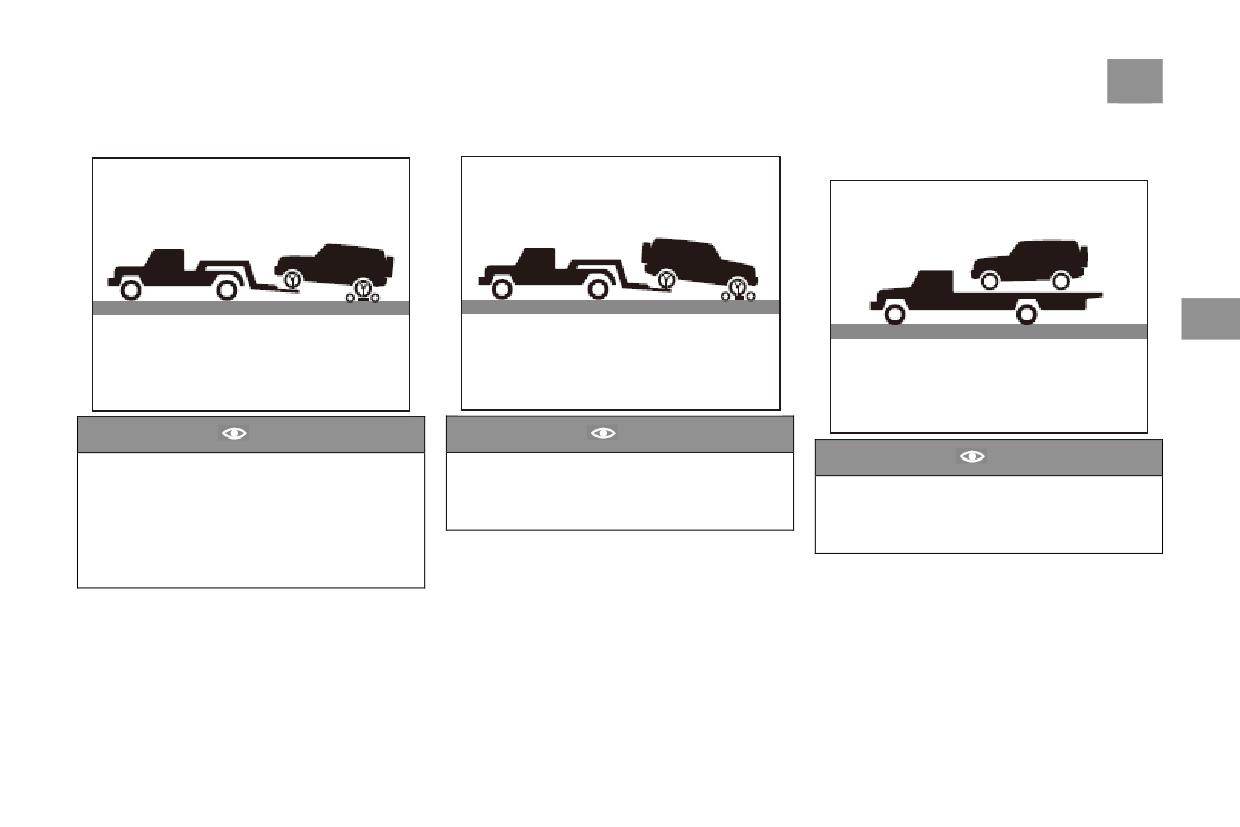
Emergency Towing
243
Towing from front\
Towing from rear
Using a Flatbed Truck to Drag the
Vehicle
5
Caution
Caution
Do NOT tow the vehicle from the front when
Do NOT tow the vehicle from the rear when
Caution
its rear wheels are on the ground. When the
the front wheels are on the ground. This will
Be sure to apply the parking brake and fix all
wheels are lifted, be sure to confirm that the
seriously damage the transmission of the
four wheels properly to prevent the vehicle
opposite end of the lifted side keeps a suitable
vehicle.
from moving in the event of emergency
clearance off the ground. Otherwise, during
braking.
the towing the bumper or body of the towed
vehicle might be damaged.
6. Vehicle specifications
Identification code
245
Vehicle parameter
248
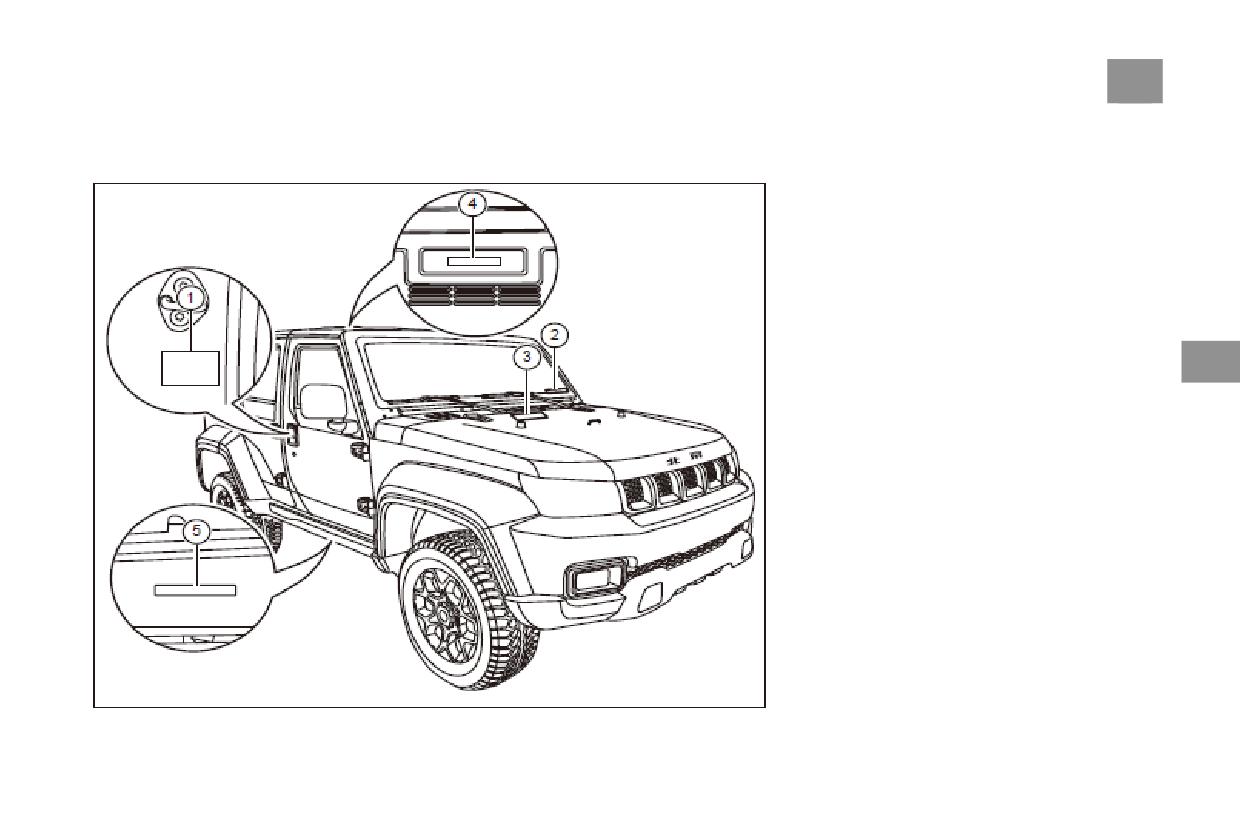
Identification Number
245
Identification Number
On this vehicle, the vehicle identification
number (VIN) is indicated in
5 positions,
namely on the vehicle data plate -1-*, on the
bottom of the left windshield glass -2-, on the
body between the two hinges of the engine hood
-3- (only visible when the engine hood is fully
opened), on the inside of the tailgate) -4-, and
on the beam of the right vehicle -5-.
The vehicle data plate is pasted to the middle
and lower part of the B-pillar on the right side*.
6
For some models, the data plate is riveted to the
facade of the right side of the engine
compartment.
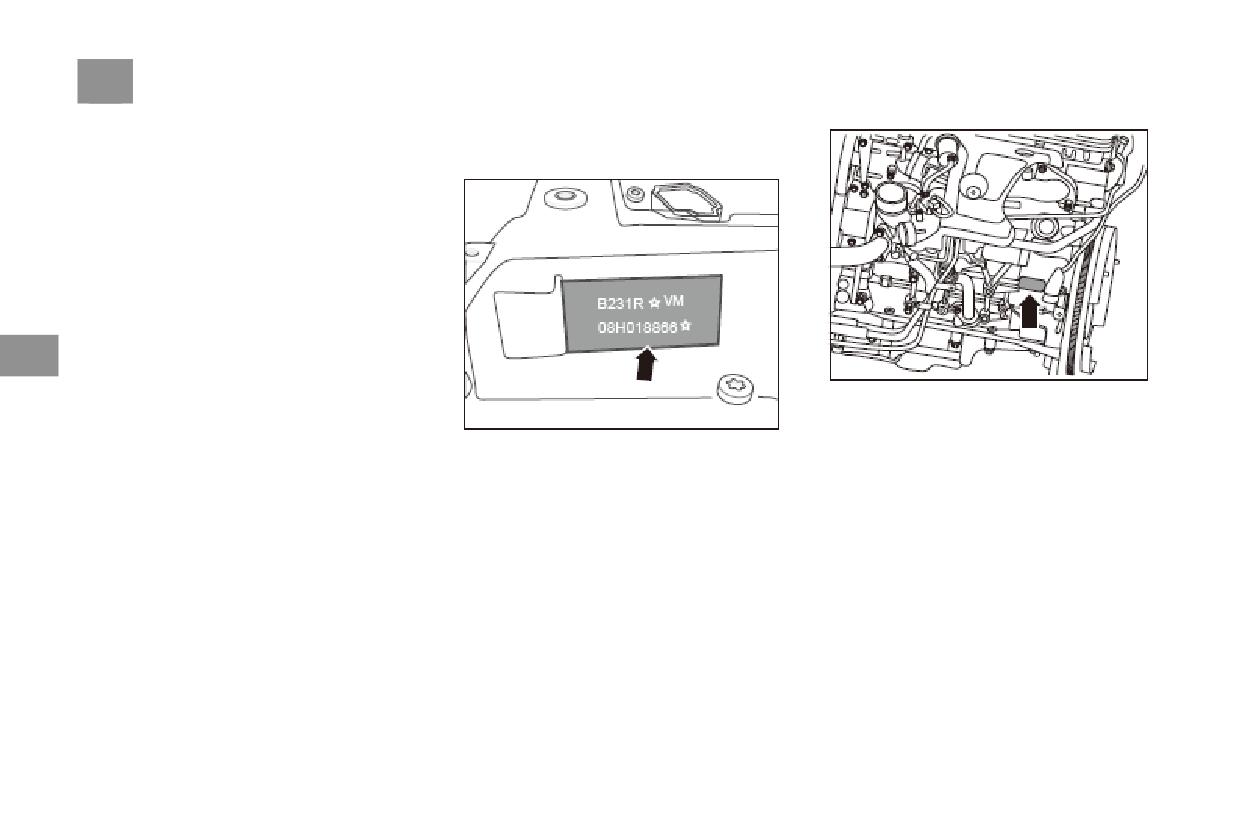
246 Identification Number
Diagnostic tester
Engine Transmission & Transfer
Part code:T11200001
case Codes
Part name: BAIC Diagnostic system
Part code: T19900010
Part name: PAD Diagnostic tester
6
The engine code is imprinted on the engine
body.
The engine code is pasted on the engine cover.
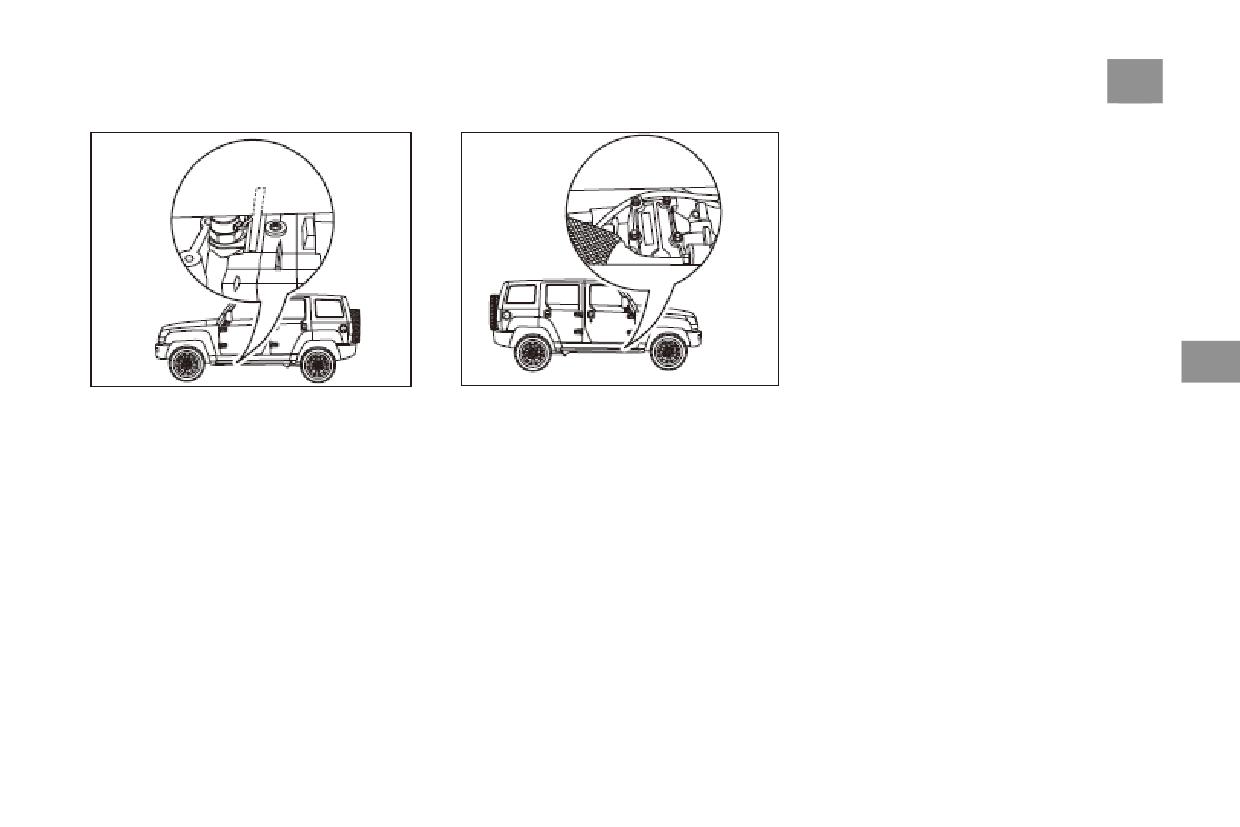
Identification Number
247
Vehicle Data Nameplate
The product label is in the middle and lower
part of the B-pillar on the front passenger’s
side*. The following information can be read
from the product label:
1. Vehicle identification number
2. Brand & vehicle model
3. Engine model & maximum engine net power
4. Engine displacement & maximum
permissible total mass
5. Number of passengers & date of
manufacturer
6
※Note: For some models, the data plate is
The transmission code is imprinted on the
The transfer case code is imprinted on the
riveted to the facade of the right side of the
transfer case casing.
engine compartment.
transmission casing.
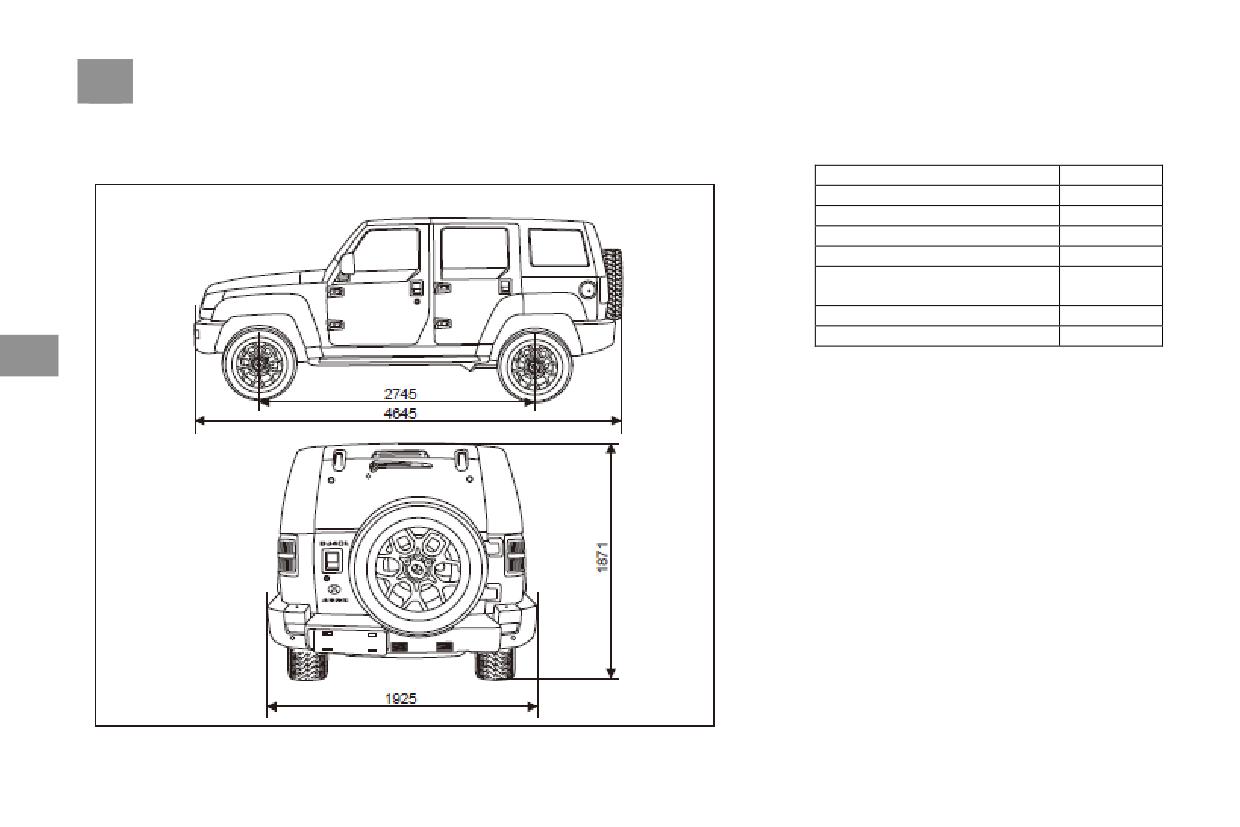
248 Vehicle Parameters
Vehicle Parameters
Item
Dimension
Length (mm)
4645
Width (mm)
1925
Height(mm)
1871
Wheelbase (mm)
2745
Minimum ground clearance (full
≥210
load (mm)
Front wheel track (mm)
1610
Rear wheel track (mm)
1610
6
The outside rearview mirrors is not included in
the vehicle outside profile size.
The outside rearview mirrors is located at the
middle of left & right front door,
Vehicle Parameters
249
Main type and parameters
Vehicle type
BJ2021F7VA3B
BJ2022F7VM3B
Engine type
B231R
B201R
driving type
4WD
4WD
The vehicle production emission
EuroⅤ
EuroⅤ
Length (mm)
4645
4645
Width (mm)
1925
1925
Height (mm)
1871
1871
Wheelbase (mm)
2745
2745
Front wheel thread (mm)
1610
1610
Rear wheel thread (mm)
1610
1610
Minimum ground clearance (full load (mm)
≥210
≥210
6
Maximum passenger
5
5
Min. turning diameter
12.5
12.5
Approach angle (°)
37
37
Departure angle (°)
31
31
curb weight
2095
2055
axle load front/rear (stut of curb)
1099/996
1078/977
Total mass(kg)
2520
2480
axle load front/rear (stut of full load)
1184/1336
1166/1314
100Km/h time of continuous shift start acceleration(s)
≤13
≤15
maximum vehicle speed(km/h)
≥160
≥160
Max. grade ability (%) on dry and hard cement pavement
≥60
≥60
Fuel consumption under comprehensive working conditions (L/100km)
10
9.4
Fuel consumption at equal speed of 90Km/h (L/100km)
11
10.5
250 Vehicle Parameters
Structural Parameters
The Braking System
Minimum turning diameter(m)
12.5
Brake pedal’s free stroke (mm)
10~20
Approach angle(°)
≥37
Clutch pedal’s free stroke (mm)
10~20
limit of front brake pad (not
Departure angle(°)
≥31
including backboard thickness)
2
Seat number
5
(mm)
Front Wheel Alignment Parameters
limit of rear brake pad (not
Front wheel camber
0°±30′
including backboard thickness)
2
Caster angle
5°30′±30′
(mm)
Kingpin inclination
13°24′±20′
Electrical Equipment
Front toe-in (one side)
0°9′±3′
Type of battery
Free of maintenance
6
Wheel parameter
20h rate capacity
70AH
Voltage & electrode
12V, negative pole (-) grounding
Item
Front wheel
Rear wheel
Spare tire
Rated output value of AC motor
13.5V/140A
Tire pressure
220
220
220
Power of starter motor
1.4kW
(Cold sate)(kPa)
Rim dimension
17X8J
Tire Dimension
265/65R17
Wheel nut torque
140±10
140±10
110±5
(N•m)
dynamic balancing
Unilateral residual unbalance≤10g
Vehicle Parameters
251
Engine Parameters
Consumption and filling amount
Model
B201R(2.0T)
B231R(2.3T)
reference quantity(L)
Type
Inline four-cylinder,
Inline four-cylinder,
More than 92#
Type and category
turbocharger, DOHC
turbocharger, DOHC
gasoline (2.0Tengine);
Emission standard
Euro V
EuroV
Fuel tank capacity
75
More than 95#
92# or higher
92# or higher
gasoline or higher
Fuel type
Unleaded gasoline
Unleaded gasoline
(2.3T engine)
Cylinder bore X
Brand: FUCHS
stroke, Displacement
90X78
90X90
TITAN EM5C
mm
530SAAB;
grade:ACEA A3/B3;
Compression ratio
1.985
2.29
Engine Oil
5.5
viscosity: 5W-30;
Cylinder bore X
6
(0W-30 or 0W-40 at
stroke, Displacement
8.8:1
9.3:1
ambient temperature
mm
below -35℃)
Max. net power
150/5500
184/5300
Max. net power(speed)
MT transmission oil
2.6
GL-4 75W/90
145/5500
170/5300
AT transmission oil
Free of maintenance
kW(r/min)
BW47-45 Electronic
Max. net
1.5
Dexron Ⅲ
transfer
torque(speed)
280/1900-4500
350/1900-4300
Coolant
7.66
-35
N m(r/min)
Windshield washing
Idle speed (A/C not
2.3
-
liquid
working)(The Engine
750±50
750±50
Power Steering Fluid
1
ATF Ⅲ H
is hot)
Idling (A/C working)
Brake Fluid
0.6
HZY4(DOT4)
750±50
750±50
(The engine is hot)
Front axle gear oil
1
GL-5 SAE80W-90
Rear axle gear oil
2
GL-5 SAE80W-90
252 Vehicle Parameters
Light Bulbs
Name
Model
Specification
Front combination lights(Low and high
LED
-
light、Position light、Turn signal light)
Rear combination lights(Position lighti、
Brake light、Reverse light、Turn signal
LED
-
light)
High brake light
LED
-
Daytime running light(high- level
LED
-
configuration)
6
Trunk Light
LED
-
Foot space light
LED
-
Ambient light
LED
-
Front fog light(low-level configuration)
H8
12V35W
Rear fog light
P21W
12V21W
Roof light
C10W
12V10W
Glove box light
C5W
12V5W