BAIC BJ40 (2023 year). Manual in english - page 1
Foreword
Thank you for choose BJ40.
Before using this vehicle for the first time, please read this manual carefully. This manual is applicable to BJ2021, BJ2022 series light off-road vehicle and its
derivative models. This manual is helpful for you to get familiar with the structure, functions, usage and related regulations of the company. Any loss caused
by failure to follow the instructions of this manual or modification without the approval of the company, the user will lose the right to claim, and any warranty
claim will be denied by the authorized service provider of the company. The contents contained in the manual will help you master the correct methods of
driving and maintenance of the vehicle, so that you can enjoy driving fully.
This manual aims to provide users with instructions on the use and maintenance of BJ2021, BJ2022 series light off-road vehicles and their derivative models.
Please check the purchase contract for the specific configuration of the vehicles you purchase. If you have any questions about this car and this manual, please
contact BAIC authorised dealership in your territory.
The equipment and performance of subsequent models will be subject to change without prior notice, as the company will continue to modify and improve the
vehicles. . Please note that this manual applies to all models and explains all equipment, including options. Therefore, you may find some explanations for
equipment not installed on your vehicle.If you have any questions about the vehicle and this manual, please contact BAIC authorised dealership in your
territory.
Drivers must strictly abide by all car-related laws and regulations. At the time of writing this manual, the relevant effective laws and regulations have been
fully considered and complied with, but some of the items may not meet the latest revised laws and regulations at the time of purchase.
When you resell the vehicle, please attach this manual to the new user so that the new user can obtain the relevant information in the manual.
Catalogue
1.Safety operation instruction
3
3. Driving Guide
134
Safety Driving
4
Start and driving
135
Seat Belt
10
Drivetrian system
145
Airbag system
21
Brake system
146
Children safety
33
Parking assistant system
160
Safety label
39
Driving skills
164
2. Operation of each component
40
4. Maintenance
173
Driving cabin
41
Safety Maintenance
174
Start and stop
74
Fuel System
177
A/C system
098
Internal maintenance
180
Headlight and view
108
External maintenance
183
Seats and storage
119
Engine compartment
190
Accessories and refitting
132
Engine oil
194
Catalogue
Coolant
198
6. Technical data
134
Brake fluid
202
Identification code
135
Power Steering fluid
205
Vehicle parameters
145
Battery
207
Windshield washer fluid and wiper blade
211
Tyre
214
5. When trouble arise
222
Warning triangle
223
Spare tire and tools
224
Fuse replacement
232
Bulb replacement
239
Emergency Start
239
Emergency to be towed
241
1. Safe operation instruction
Safe Driving
4
Seat Belt
10
Airbag system
21
Vehicle safety for Children
33
Safety Label
39
4
Safe Driving
Safe Driving
Correctly adjust the seat
Be aware of the dangers of air bags
1
Before drive the vehicle, all passengers should
Airbags provide protection, but they can also
General Instructions
make the seat back upright, adjust the seat back
cause serious or even fatal injuries to passengers
This chapter mainly introduces important
and fasten the seat belt correctly.
who are too close or not properly protected.
information, operating methods,
Always fasten the seat belt
Especially for babies, young children and short
recommendations and safety precautions for
Seat belts provide the best protection in all types
stature adults. Be sure to follow all the
safe driving. For the safety of you and the
of crashes. Although the airbag can assist the
instructions in this manual
occupants, please read and abide by relevant
seat belt to protect it, the airbag is designed to
Do not drive after drinking
regulations.
inflate only when it hits the medium to severe
You can't drive after drinking. After drinking,
Cautions
front (within 30 degrees to the left and right). In
your ability to respond to changes in the
addition, if the seat belt is not fasten before the
environment will be reduced. The more you
● The user should correctly identify the
crash, the airbag will even hurt the passengers.
drink, the slower the reaction. So don’t drink
names of the various parts of the car before
So even if your vehicle is equipped with airbags,
and drive, don’t let your friends drink and drive.
driving to understand the correct use of each
make sure that you and all the passengers fasten
switch.
the seat belts correctly.
● Learn about the proper use of the
All children are properly
accelerator pedal, brake pedal, steering
accommodated
wheel, transmission, ABS system, and more.
Children should be properly placed in the rear
seats instead of the front seats, which is the
Warning
safest. When a child is too small to fasten a seat
belt, it must be properly placed in the child
Please be sure to bring this manual with you.
protection device.
If you borrow or resell the vehicle, please be
sure to hand this manual to the new owner.
5
Safe Driving
Control the speed
The properly sitting posture
Warning
1
Overspeed is the main cause of crash accidents.
Correct Sitting Posture of Driver
The faster the speed, the greater the risk. Do not
● Do not distract yourself from outside
The sitting posture of the driver relates directly
overspeed the specified maximum speed limit
factors while driving, such as talking to the
to driving safety and the degree of driver
and safety conditions beyond driving.
passengers or making a phone call.
fatigue.
Keep the vehicle in safe driving
● Do not drive a car when the reaction
Tire bursting or mechanical failure is extremely
capacity is declining. Drugs, alcohol and
dangerous. To reduce the possibility of such
drugs can weaken people's responsiveness.
problems, the tires and condition should be
●Strictly abide by traffic regulations and
checked frequently and the regular maintenance
speed limits.
as specified in the maintenance schedule should
●Always pay attention to reduce the speed
be completed.
of the car and always adapt the speed to the
current road conditions, traffic flow and
weather conditions.
6
Safe Driving
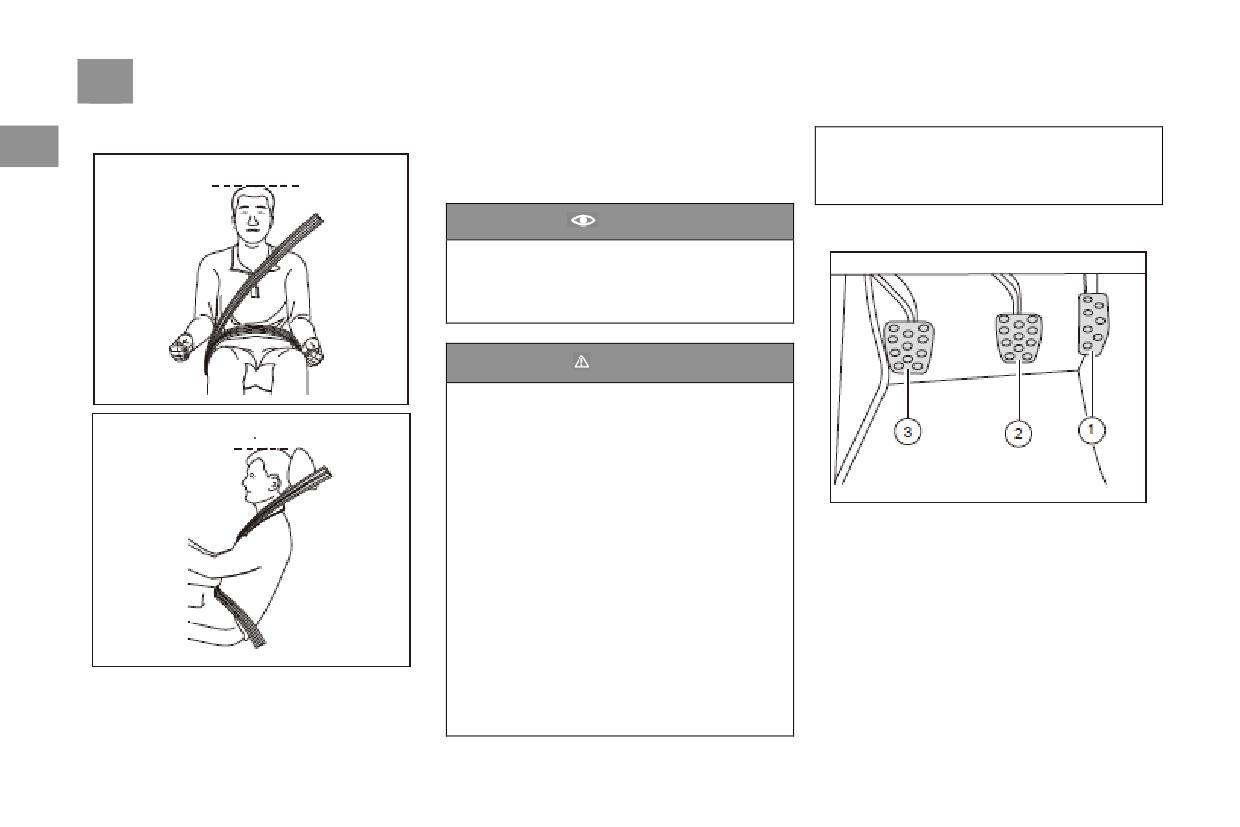
●Adjust the headrest so that its upper edge is
1
Warning
level with the top of your head, and keep the
back of your head as close to the headrest as
To reduce the risk of injury during an
possible.
accident, please make sure that passengers
●Adjust the backrest to a suitable angle so that
strictly follow the following instructions:
your back fully fits against the backrest.
●Do NOT allow your chest to get too close to
●Correctly faster the Seat Belt
the steering wheel. Otherwise, the airbag
system cannot provide effective protection
and may even cause serious harm to you.
● Hold both hands on the outer ring of the
steering wheel (positioned between point 9-10
at left hand and point 3-4 at right hand) to
ensure that you can see all the instruments
For his/her safety and the safety of passengers
and indicator lights on the combination
and to reduce the risk of personal injury and
instrument.
death during an accident, the driver should
●Adjust the steering wheel so that it faces
perform the following operations:
your chest and confirm that the adjustment
mechanism has been firmly locked. This can
●Adjust the steering wheel so that a distance of
effectively reduce any harm which may be
at least 25cm is maintained between the chest
caused if the airbag is triggered.
and the steering wheel.
● When driving, do NOT tilt the seat
●Move the seat back and forth to a suitable
backrest too far. Make sure you wear your
position, so that the accelerator pedal and the
seat belt correctly and maintain the correct
brake pedal can be fully depressed when you
sitting position so as to
slightly bend your knees.
● Ensure that you can hold the highest point of
the steering wheel by slightly bending your
elbow.
Safe Driving
7
Correct Sitting Posture of Front Passenger
Correct Sitting Posture for Rear Passengers
Warning
1
To ensure his/her safety and to reduce the risk
To ensure safety and reduce the risk of injuries
of injury, the front passenger should perform the
To reduce the risk of injury during an
during accidents, rear passengers must comply
following operations:
accident, please make sure that passengers
with the following instructions:
●Adjust his/her seat so that there is a suitable
strictly follow the following instructions:
●Adjust the headrest so that its upper edge is
distance between the front passenger and the
●The front passenger must not be too close
level with the top of your head, and keep the
dashboard. This will ensure that when the airbag
to the dashboard. Otherwise, the airbag
back of your head as close to the headrest as
is triggered, it provides the most effective
system cannot provide effective protection
possible.
degree of safety protection.
and may even cause serious injuries to the
●Maintain an upright sitting posture and keep
●Adjust the headrest so that its upper edge is
front passenger.
the back as close to the seat backrest as
level with the top of your head, and keep the
●When driving, do NOT put feet on the
possible.
back of your head as close to the headrest as
dashboard, extend legs out of the window, or
●Put both feet in the foot well in front of the
possible.
sit cross-legged on the seat. Be sure to put
rear seat and keep the feet close to the floor.
● Adjust the back rest so that his/her back fits
both feet inside the foot well. Otherwise, the
●Correctly Fasten the Seat Belt
the contours of the back rest.
front passenger could very easily be injured
When carrying children, make sure to adopt
● Correctly Wear a Seat Belt
during emergency braking or in the event of
proper measures in accordance with the relevant
●Put both feet in the foot well in front of the
an accident.
provisions.
●When driving, do NOT tilt the seat too
front seat.
much. Be sure to wear the seat belt correctly
and maintain the correct sitting posture, so
as to prevent injuries during emergency
braking.
8
Safe Driving
Correctly Adjust Headrest
Adjust the headrest so that its upper edge is
been started, be sure to immediately stop the
1
level with the top of your head, and keep the
vehicle and only start driving again after you
back of your head as close to the headrest as
have adjusted the headrest to the correct
possible.
position.
Cautions
The Pedal Area
(Only for models with manual transmission)
The lowest position of BJ40L rear seat
headrest is not the service position, so before
using it, the user must adjust it to the
effective lock position to avoid hazard.
Warning
If the headrest is removed or is improperly
adjusted, passengers could easily be injured
or even be killed during emergency braking
or accidents! To reduce the risk of accident
injuries, be absolutely sure to strictly follow
the following instructions:
●The headrest must always remain in the
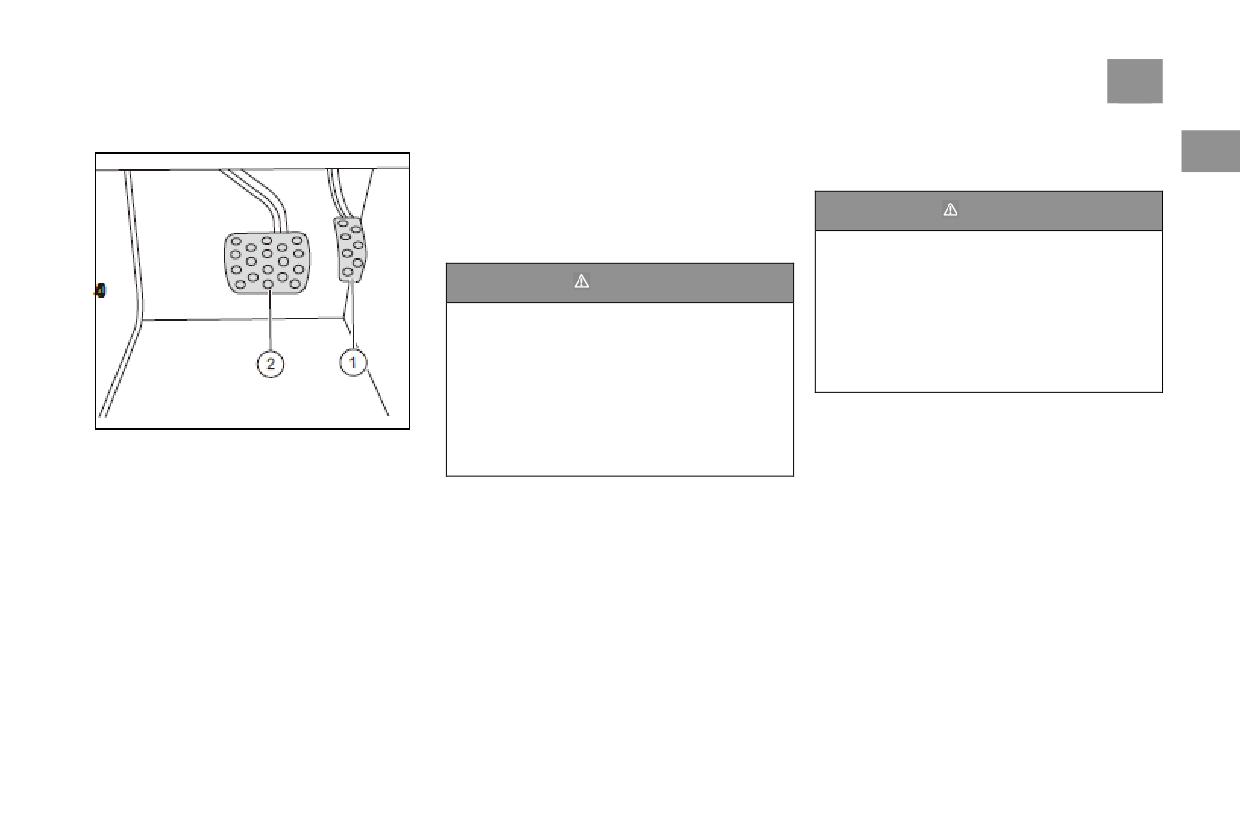
1. Accelerator pedal
correct position, and be correctly adjusted.
2. Brake pedal
● The driver and all passengers must adjust
3. Clutch pedal
their headrest to the right position based on
their body characteristics. The upper edge of
the headrest must be level with the top of the
head as much as possible, and the back of the
head should be as close to the headrest as
possible.
● While the vehicle is running, do NOT
adjust the headrest. If you feel that you have
to adjust your headrest after the vehicle has
Safe Driving
9
(Only for model with automatic transmission)
When driving the vehicle, ensure that all the
Driver Side Foot Mat
pedals can be fully pressed to their limit and
1
The foot mat should be fixed inside the foot
come back to their original positions, with no
well and should not obstruct pedal movement
obstruction in the whole process.
When the braking system has a fault, the brake
Warning
pedal may require a longer pedal stroke and
● Ensure that the foot mat is firmly fixed
force to stop the vehicle.
inside the driver side foot well.
Warning
● Do NOT lay other foot mats or covers
over the foot mat. This may reduce the pedal
Pedal obstructions can easily cause serious
stroke and obstruct pedal movement.
accidents, leading to serious injuries.
● If the foot mats removed from the vehicle
Do NOT put any subjects inside the driver’s
for cleaning it must be properly fixed again
foot well. Otherwise, such subjects may slip
when re-installed.
into the pedal area and obstruct the driver’s
pedal operations. In the event of emergency
braking or other emergency situations, if the
1. Accelerator pedal
driver cannot operate the brake pedal, it
2. Brake pedal
could easily cause an accident.
10
Seat Belt
Seat Belt
1
Warning
Warning
1. General Instructions
To reduce the risk of accident injuries, make
●Pregnant women and the disabled must
Your life is precious. Please make sure that
sure that you strictly follow these
also wear seat belts. Otherwise, these drivers
you wear a seat belt!
instructions:
or passengers may also be seriously injured.
●This Section conveys the message that correct
●Failure to correctly wear a seat belt or
The best way to protect unborn babies is to
use of seat belts can markedly reduce the risk of
failure to wear a seat belt at all will increase
properly protect the mother during her
injury!
your risk of serious injury.
entire term of pregnancy.
●Wear a seat belt as required by this Manual.
●Correctly wearing a seat belt can reduce
●Seat belts can only play a protective role
Ensure that the seat belt is available for use at
serious injuries in the event of emergency
when used correctly. Failure to wear a seat
any time and free of damage.
braking and accidents. For safety reasons,
belt or failure to wear a seat belt correctly
whenever you drive your vehicle, you and
increases the risk of injury and death.
passengers should wear seat belts
●Before driving off, make sure your seat
throughout.
belt is properly configured. Even if you are
only driving in urban traffic, your front and
rear passengers should also wear their seat
belts to ensure their safety.
●Do NOT share a seat belt between two
people (even if they are children). If your
child sits on your knees, wearing a seat belt
in this way can be dangerous to your child.
Seat Belt
11
Warning
Warning
Warning
1
●When driving, do NOT loosen a fastened
●Even pregnant women should wear seat
●If the seat belt is disjointed or broken, or
seat belt.
belts. The seat belt should be close to the hip
there is damage to the seat belt joint, the
●The seat belt must not be in contact with
as much as possible, so as to prevent it from
automatic retracting device or the locking
fragile subjects (such as glasses, ball pen,
exerting pressure on the lower abdomen.
element, serious injury may be caused in the
etc.), because this may lead to injury.
●Pregnant women should sit in the back seat
event of an accident. Therefore, be sure to
●The latch of the seat belt must be correctly
and remain upright as much as possible.
regularly check all seat belt components.
inserted into the buckle. Wearing the seat
They should stay clear of the steering wheel
● Do NOT attempt to repair, adjust, install
belt in the wrong way will affect the
and dashboard. This can reduce injury to the
or remove the pyrotechnic pre-tensioner or
protective function of the seat belt.
mother and baby in the event of a vehicle
the other components of the seat belt. Do
●Before wearing the seat belt, be sure to
collision, or when the airbag is triggered.
NOT attempt to make changes to the seat
●If passengers do not wear their seat belts
belt in any way. The components of the seat
remove loose clothing (such as overcoats), so
as to prevent them from affecting the fit
correctly, the seat belts cannot play their
belt can only be installed, altered or removed
between the seat belt and the body and
corresponding protective role.
by an authorized BAIC dealership.
affecting the protective function of the seat
●The latch socket must not be blocked with
●After an accident has occurred, be sure to
belt.
paper or similar objects, or it will not be
have any damaged or deformed seat belts
●The seat belt must be kept clean at all
possible to insert the latch into the buckle.
replaced at an authorized BAIC dealership.
times. A very dirty seat belt may not retract
Even if there is no apparent deformation in
properly into the automatic retractor
the seat belts’ appearance, they must still be
housing.
replaced. In addition, also be sure to check
the fastening device of the seat belt.
12
Seat Belt
The other sections of this Chapter will explain
Physical Principles of Frontal
1
in greater detail how to ensure your safety to the
Collisions
maximum extent.
However, please note that even when a seat belt
is used correctly and the airbag has been
inflated, it is still not possible to completely rule
out the risk of death in accidents involving
violent vehicle collisions.
Why should seat belt be used?
When a vehicle is in a frontal collision, the seat
belt can reduce the forward inertia of the driver
and passengers and minimize impact injuries on
the vehicle passengers.
Passengers who do not fasten their seat belts are
not “combined” with the vehicle into one body.
Consequently, during a frontal collision, these
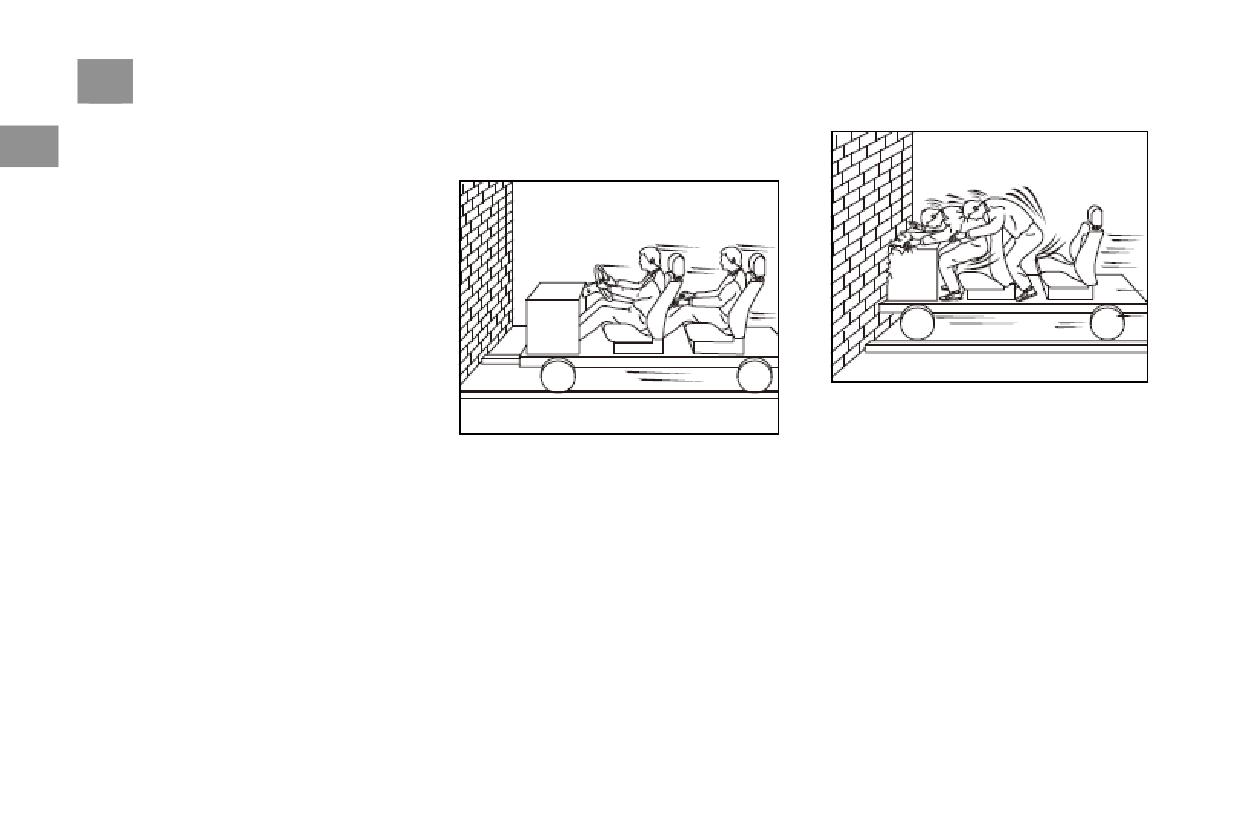
When driving, the vehicle and passengers all
vehicle occupants will continue to move
have energy (kinetic energy). The intensity of
forward at the pre-collision speed. The physical
this energy depends on the vehicle speed and
principle of collision introduced in this example
the mass of the passengers on board. The greater
applies to both frontal vehicle collisions and all
the speed and the mass, the greater the energy
other types of vehicle collision.
released during a collision. Among these factors,
the vehicle’s speed plays a decisive role. For
example, when the vehicle’s speed increases
from 25 Km/h to 50 Km/h, the kinetic energy
released will increase four times.
Seat Belt
13
Consequences of Not Wearing a
1
Seat Belt
Many people think that during a light vehicle
collision, they can use their hands to protect
their body and thus prevent injury. This is a
misunderstanding!
During a vehicle collision, inertia will continue
to propel all vehicle occupants not using seat
belts, forward at the pre-collision speed.
However, at this time, the vehicle will not
continue to move with these occupants.
Therefore, any unsecured, unbelted occupants
may be seriously injured.
Even if the vehicle’s speed is very low, the
Rear passengers must also wear seat belts
force acting on the human body is still very
correctly. Otherwise, they will be thrown
large during a collision. There is absolutely no
violently forward during a collision. Those rear
way for vehicle occupants to use their hands to
passengers who are not wearing seat belts will
protect themselves. Any vehicle occupants who
not only be injured, but also endanger other
do not fasten their seat belts will be thrown
occupants inside the vehicle.
forward. Once they bump into any object inside
the vehicle, serious injury may result.
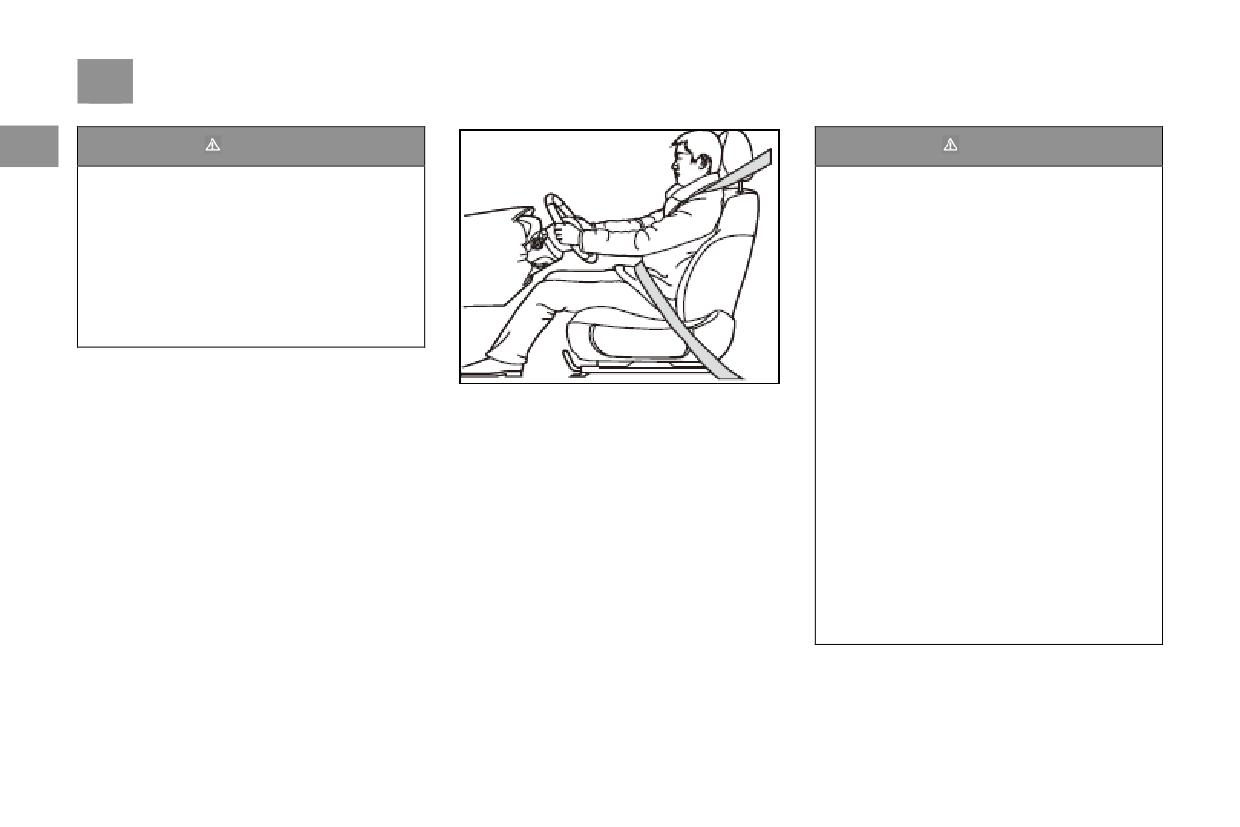
14
Seat Belt
1
Warning
Warning
●Do NOT use your hands to try to protect
●The seat belt must be worn in the correct
your body during a collision. It may cause
position.
serious injury to you.
●Sharing one seat belt between two people is
●There is no way for the airbag to replace
prohibited, even if they are children.
the function of the seat belt. Regardless of
● When driving, be sure to constantly
whether an airbag is equipped, it is always
maintain the correct sitting posture, and
necessary to wear a seatbelt correctly.
wear a seat belt throughout your journey. Do
●Rear passengers must also wear seat belts
NOT unfasten your seat belt during your
correctly.
journey. This can lead to accidents and
injury.
●Do NOT damage or clamp the seat belt or
Wearing seat belts correctly can keep the driver
allow it come into contact with sharp edges
and passengers in proper position and from
which may cause friction.
injury. Correctly wearing a seat belt can prevent
●When wearing a seat belt, try to avoid
the driver and passengers from moving in an
wearing loose clothing (remove it if you have
uncontrolled way and being placed in danger.
already put it on) so as to prevent it from
A seat belt can absorb most of the kinetic
affecting the fit between the belt and the
energy generated during a collision. In addition,
body.
the crumple zone and other passive safety
●Be sure to always keep the seat belt system
systems of the vehicle will concurrently absorb
clean and in good condition. Do NOT let alien
the energy generated in a collision and work in
matter or liquid enter the buckle of the seat
synergy with the seat belt to further reduce
belt.
possible injury to the driver and passengers.
●Unauthorized seat belt removal or repair is
strictly prohibited.
Seat Belt
15
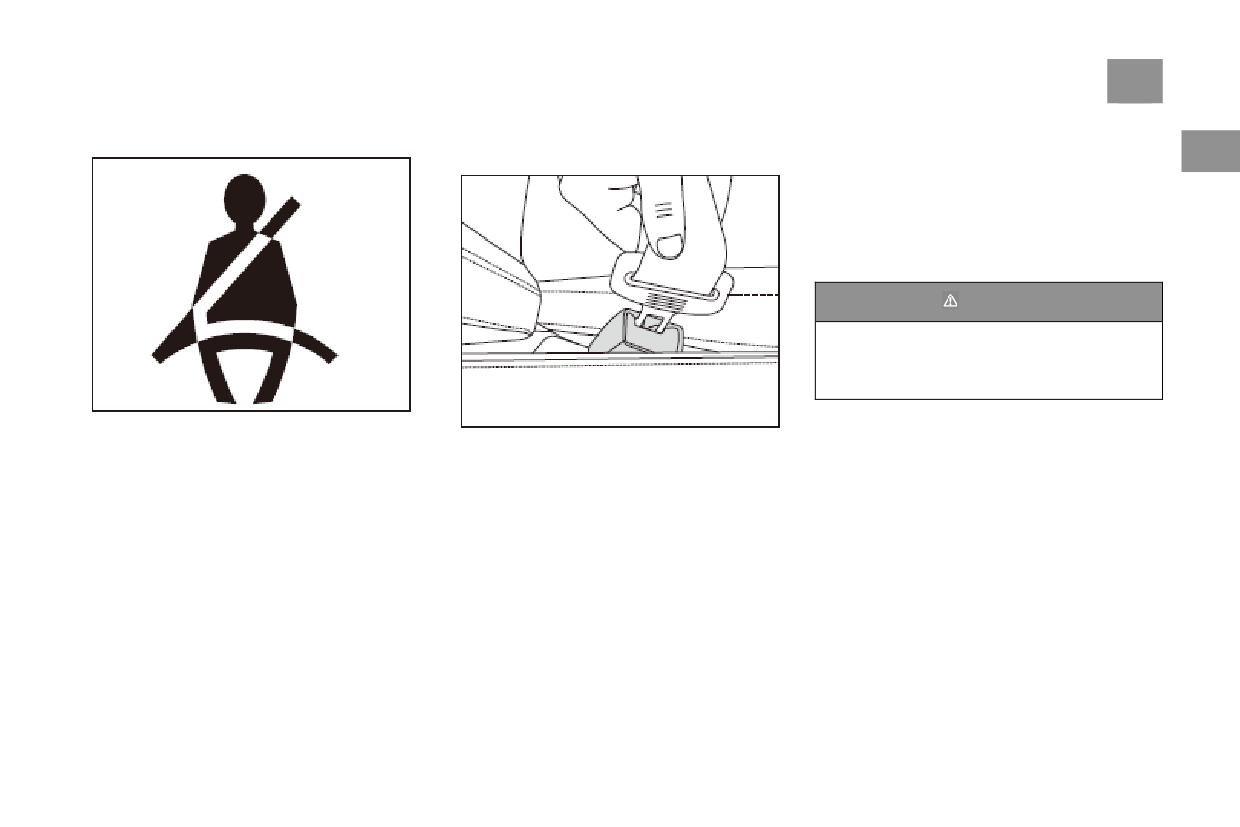
Seat Belt Unfastened Warning Light
Correctly Wear a Seat Belt
Slowly and smoothly moving the expendable
seat belt will allow you to move freely.
1
Wear a Front Seat Belt
Be sure to pull out the seat belt after it has fully
retracted. If the seat belt cannot be pulled out of
the tensioner, you may first have to pull the seat
belt with force and then release it. After this,
you will be able to smoothly pull the seat belt
out of the tensioner.
Warning
If the seat belt cannot be pulled out, you
should pay attention to driving safety and go
to an authorized BAIC dealership to have the
seat belt checked.
If the ignition switch has been turned on but the
driver does not fasten the seat belt, the seat belt
Correctly adjust the front seat and its headrest,
indicator light on the display screen of the
pull out the seat belt from the retractor, insert
instrument information center will be lit. If the
the latch of the seat belt into the buckle, and
driver does not fasten the seat belt and the
tighten the seat belt. When the latch is locked
vehicle speed exceeds 25km/h, or when the
inside the buckle, a clicking sound will be
vehicle moves forward of a distance of 500m or
heard.
for more than
60s at a speed of under
The seat belt length will automatically be
25km/hither warning light will immediately be
adjusted according to your body size and seat
lit, accompanying an audible alarm.
position. In the event of emergency braking or
Front passenger seat is also provided with seat
collision, the tensioner will tighten the seat belt.
belt unlock alarm to warn the passengers of
If you lean forwards too fast, the tensioner will
correct use of the seat belt.
also tighten.
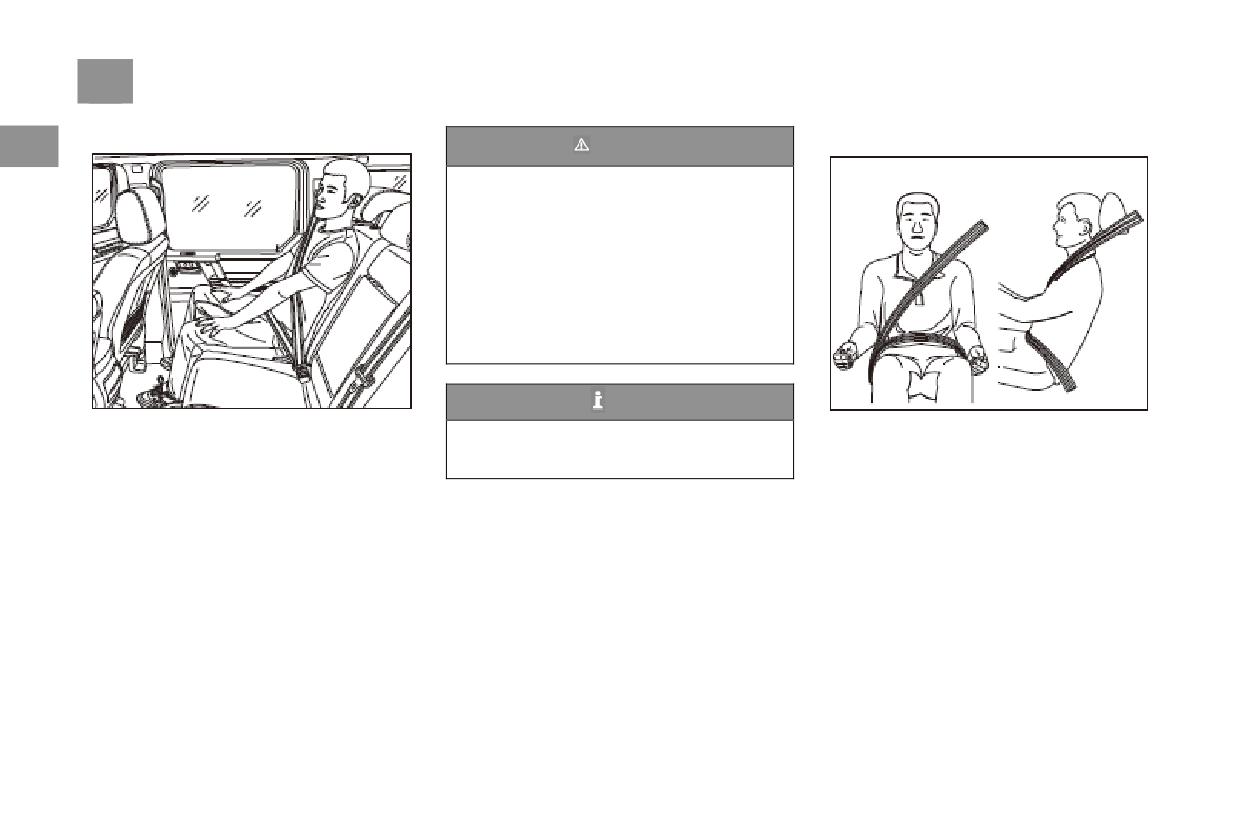
16
Seat Belt
Wear a Rear Seat Belt
Seat belt Wearing Position
1
Warning
In the event of an accident, failure to
correctly wear the seat belt will make it
impossible for the seat belt to play its
protective role, thus causing serious personal
injury.
●Only when the passenger is in the correct
sitting position and is wearing the seat belt
correctly can the seat belt fully play its role.
●The latch of the seat belt must correspond
with the buckle and be correctly inserted.
Tips
Adjust the headrest of the rear seat if needed, sit
Seat belt design has fully taken into account the
The other points of attention concerning the
upright in the rear seat and make your back fit
bone structure of the human body (such as
wearing of rear seat belts are the same as
the seat backrest as much as possible. Pull the
pelvis, sternum and shoulders).
those of the front seat belts.
seat belt out of the tensioner in the upper part of
the nearer side, insert the latch of the seat belt
The protective role of the seat belt can only
into the buckle, and tighten the seat belt. When
come into full play when it is correctly worn. A
the latch is locked inside the buckle, a clicking
non-upright sitting posture will also reduce the
sound will be heard.
protective role of the seat belt and could easily
cause serious injuries. If the airbag is triggered
during an accident, the impact of the airbag may
cause serious injury to any occupant not in an
upright sitting posture.
Seat Belt
17
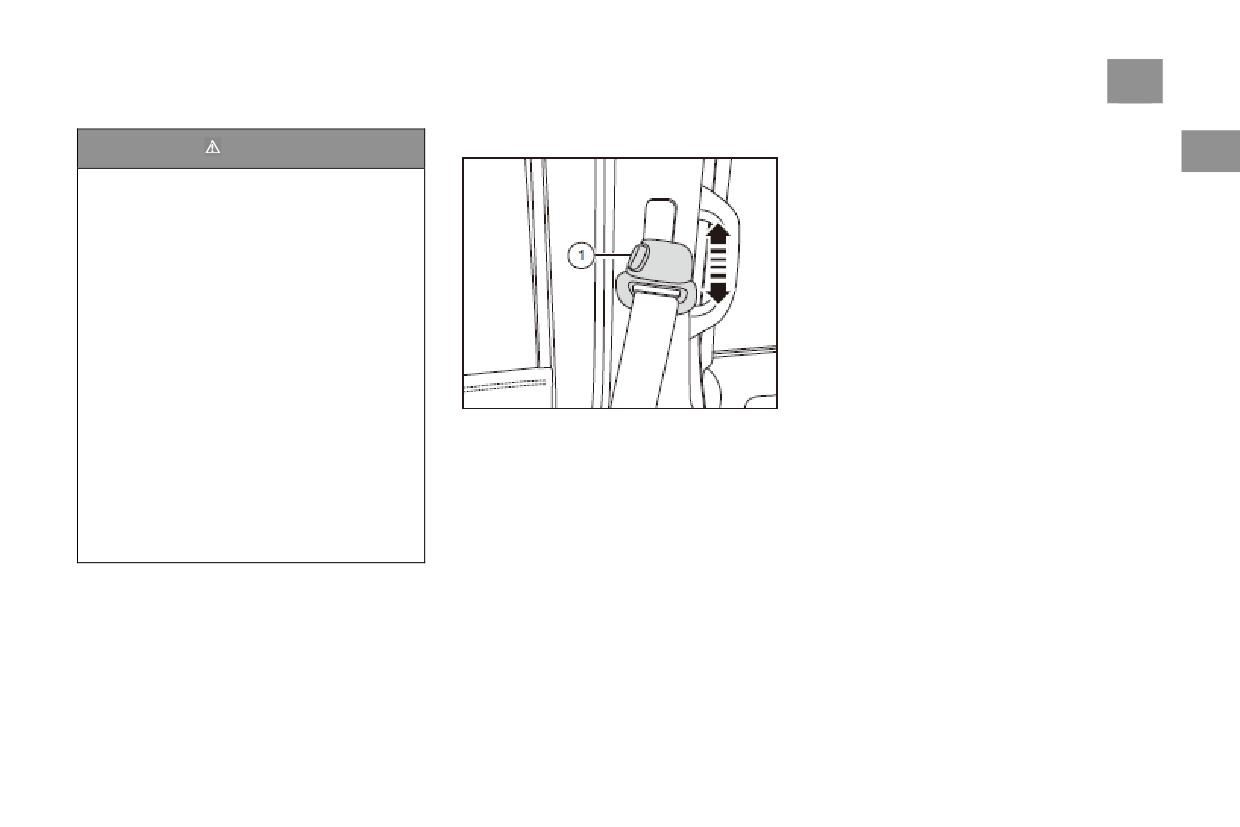
Adjust seat belt height
To adjust the seat belt upwards, directly raise
Warning
1
the seat belt height adjustment device until it
The protective role of the seat belt can only
reaches the proper position. The methods to
come into full play when the back rest is in
adjust the seat belt downwards areas follows:
an upright position and the seat belt is
1. Hold the guiding element of the seat belt -1-.
correctly fastened. In the event of an
2. Move the guiding element downwards and
accident, wearing a seat belt incorrectly may
adjust the seat belt to a position which suits your
cause serious injury to passengers!
body.
●The seat belt must pass over the mid-part
3. Release the guiding element of the seat belt.
of the shoulders of the passenger. Do NOT tie
4. After adjusting the seat belt height, tug the
seat belt and check whether the guiding element
it round the neck.
is firmly locked.
●The seat belt must remain flat and lay
close to the chest of the user.
●The seat belt must pass over the pelvic
area of the user. Do NOT press it against the
Use the seat belt height adjustment device to
stomach. The seat belt must lay flat, be close
move the seat belt up and down so that it can fit
to the pelvic area, and be tightened as
the body snugly.
needed.
● If the seat belt is not fastened tightly
enough and slides towards the stomach or
neck, it may cause serious injury to
passengers.
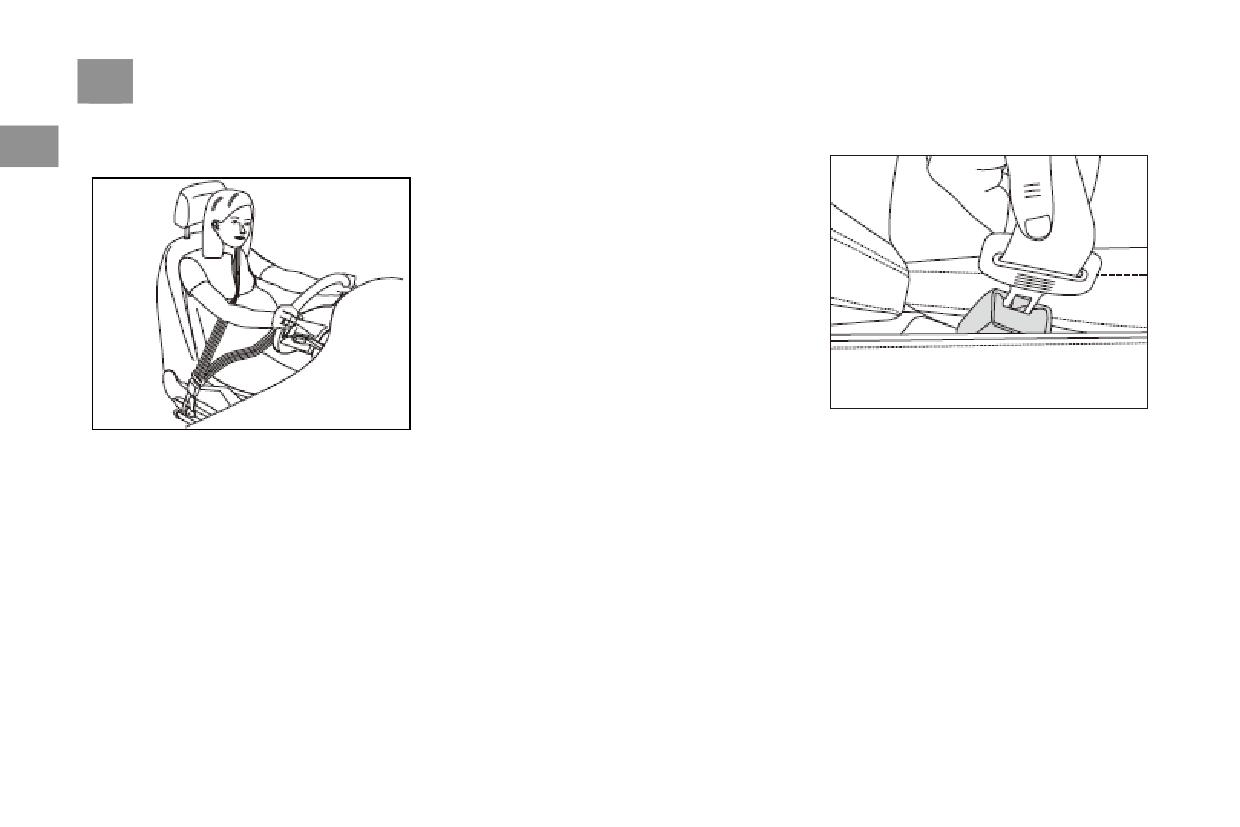
18
Seat Belt
How Should Pregnant Women
When driving, you should keep an upright
Unfastening Seat Belt
1
sitting posture and move the driver’s seat
Wear a Seat Belt?
backwards to a proper position to ensure that
you can freely operate the vehicle. If you are
sitting in front seat, make sure you move the
seat backwards as much as possible, this will
reduce the risk of injury to both mother and
fetus during a collision when the front airbag
inflates.
During each pre-natal check, be sure to ask the
doctor whether it is still wise for you to drive.
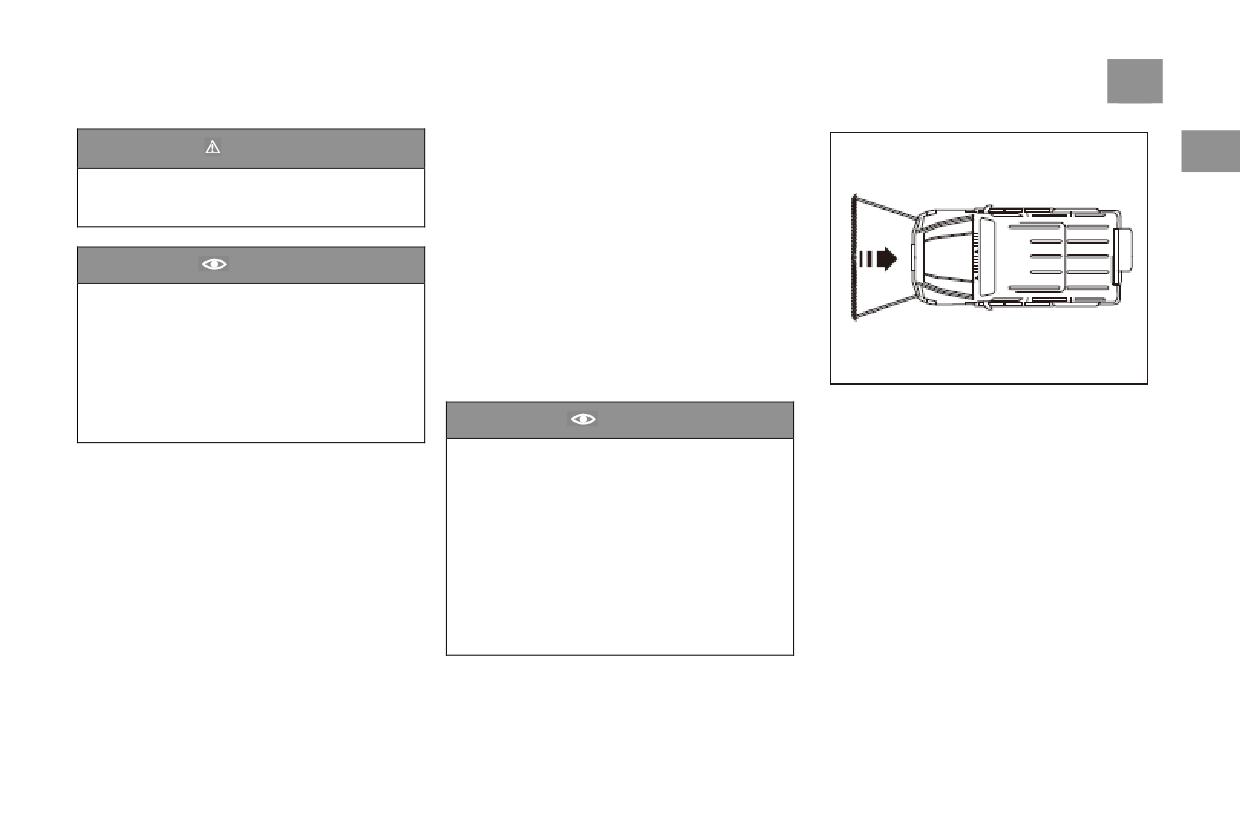
1. Press the red button beside the buckle of the
If you are a pregnant woman, the best way to
seat belt, and the latch will automatically eject.
protect yourself and your fetuses to always wear
2. Hold the latch and move it back, and the
your seat belt correctly when driving or sitting
tensioner will automatically retract the seat belt.
in the passenger seat, and letting the waist part
of the seat belt run across your hips as low as
possible.
Seat Belt
19
Seat Belt Retractor
Warning
1
All the front seats of this vehicle are equipped
When driving, unfastening the seat belt is
with seat belt retractors. When serious frontal or
strictly prohibited, in order to prevent
tail collisions happen, the sensor will trigger the
serious injury in the event of an accident.
seat belt retractor, and the retractor will tighten
the seat belt in the direction of retraction and
restrict the forward movement of the
Cautions
passengers.
● Before the vehicle fully stops, it is
The explosive pre-tensioner device of the seat
prohibited to unfasten the seat belt.
belt can only be used once. In the event of a
●When unfastening the seat belt, after the
minor frontal collision, side collision or rear
latch is released, it is necessary to retract the
collision, side tipping or an accident without
seat belt with the help of your hand to
notable frontal action force, the seat belt
prevent the metal latch of the belt from
retractor will not work.
If any of the following situations arise, please
injuring passengers when the seat belt is
contact an authorized BAIC dealership as soon
Cautions
retracting quickly.
as possible:
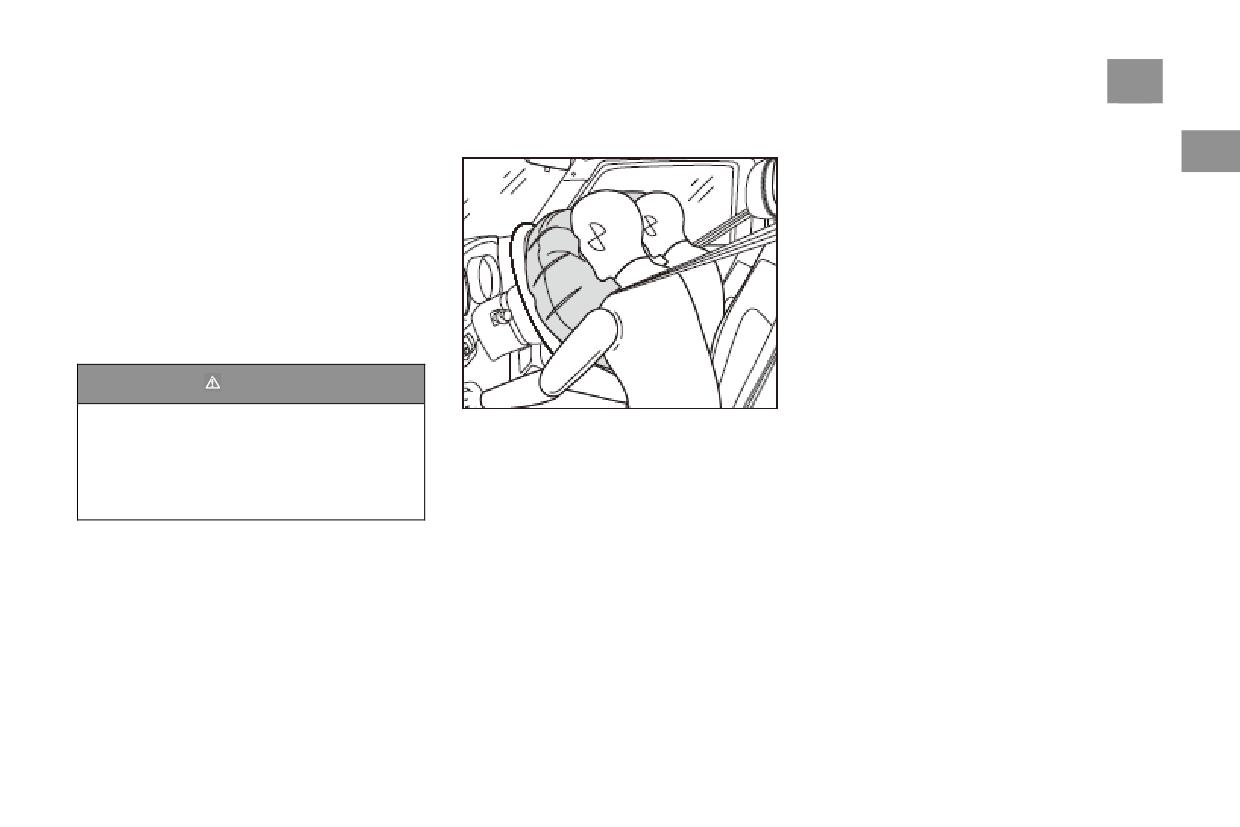
●When the seat belt retractor is triggered, a
●The front part (marked in the figure) has been
small amount of smoke will be emitted. This
damaged, and the seat belt retractor does not
is a normal occurrence and does not indicate
work.
that the vehicle has caught fire. There is no
●The seat belt retractor or its surrounding parts
need to worry about it.
are scratched, broken or have other damage.
●When the seat belt retractor is discarded,
the relevant safety regulations must be
complied with. Authorized BAIC dealerships
which are familiar with the relevant safety
regulations may provide you with an enquiry
service
20
Seat Belt
Seat Belt Retractor Recycling and
1
Warning
Disposal
Failure to get seat belt retractors renewed
The seat belt retractor is part of the seat belt
and checked by a BAIC authorized repair
system. All operations on the seat belt retractor
shop or professional personnel, or failure to
or the removal of the seat belt retractor, as
correctly use the seat belt retractors in
required for the repair of other vehicle parts,
accordance with these provisions is bound to
must be carried out by an authorized BAIC
increase the risk of accident injuries.
dealership. Otherwise, damage may be caused
● Unauthorized repair, removal or
to the seat belt, and the seat belt retractor may
installation of seat belts or seat belt retractor
not work normally during an accident.
To prevent personal injury or environmental
components is prohibited.
pollution, all dismantled seat belt retractors
●All operations on the seat belt retractors
must be disposed of in accordance with the
and seat belts, including those to remove
relevant laws and regulations. Authorized BAIC
system components to allow the repair of
dealerships which are familiar with the relevant
other vehicle parts must be carried out by an
safety regulations may provide you with an
authorized BAIC dealership.
enquiry service.
● Each seat belt retractor can only be
triggered once. All triggered seat belt
retractors must be replaced.
Airbag System
21
Airbag System
The Role of the Airbag
deployment area of the airbag. The
fast-deploying airbag may cause injury or death
1
General Instructions
of these passengers. This is particularly true in
the case of children.
Correctly using seat belts can effectively reduce
The driver and passengers must keep as far
the risk of accident injuries. To enable the
away from the front airbag as possible. This will
triggered airbag system to fully play its
protective role, the driver and passengers must
effectively protect them because the airbag
wear their seat belts correctly before the vehicle
canfully inflate after triggering.
is started. The driver must correctly adjust the
The factors that determine whether the airbags
will trigger are the angle of collision and the
driver’s seat and steering wheel, correctly adjust
magnitude of collision energy when an accident
the headrest position and use a suitable child
occurs. If the angle of collision and the
seat to protect any children in the vehicle.
magnitude of collision energy measured by the
Warning
control unit at the time of the collision are
below the ignition threshold of the control unit,
The powder emitted when the airbag deploys
When a vehicle is involved in a serious collision
the system will not trigger the air bag. Therefore,
may irritate the eyes and skin. It may also
with an obstacle, the airbag will quickly open
even if there is serious vehicle damage, it does
trigger asthma in susceptible people. After
out into a fully-inflated air cushion to prevent
not mean that the airbag will always be
the airbag has deployed during an accident,
collision injuries to the driver and passengers as
triggered.
use warm water and mild soap to thoroughly
a result of inertia.
clean all exposed skin.
In the event of serious vehicle collisions, the
airbag will fast deploy within an extremely short
period of time. Therefore, the driver and
passengers must maintain the correct sitting
posture and wear their seat belts correctly to
prevent serious injuries. In the event of a violent
collision, any passengers who is not wearing
his/her seat belt may be thrown forward into the
22
Airbag System
Why Wearing Seat Belts and
1
Warning
Warning
Adopting the Correct Sitting
The factors that determine whether the
The release of the airbag happens very
Posture Are Important
airbag is triggered or not at the time of
quickly. If you are not in the correct sitting
To enable the airbag to play its best protective
collision are related to the magnitude of
position when it triggers, you may be fatally
role when triggered, it is necessary for the
collision energy, the type of accident, collision
injured. It is therefore necessary to ensure
vehicle occupants to wear their seat belts
angle, and obstacle and vehicle speed.
that all passengers maintain the correct
correctly and assume the correct sitting posture.
sitting posture during all journeys.
For your own safety and the safety of
In the event of emergency braking or
Cautions
passengers, please pay attention to the following
collision, any passengers not wearing seat
matters before driving:
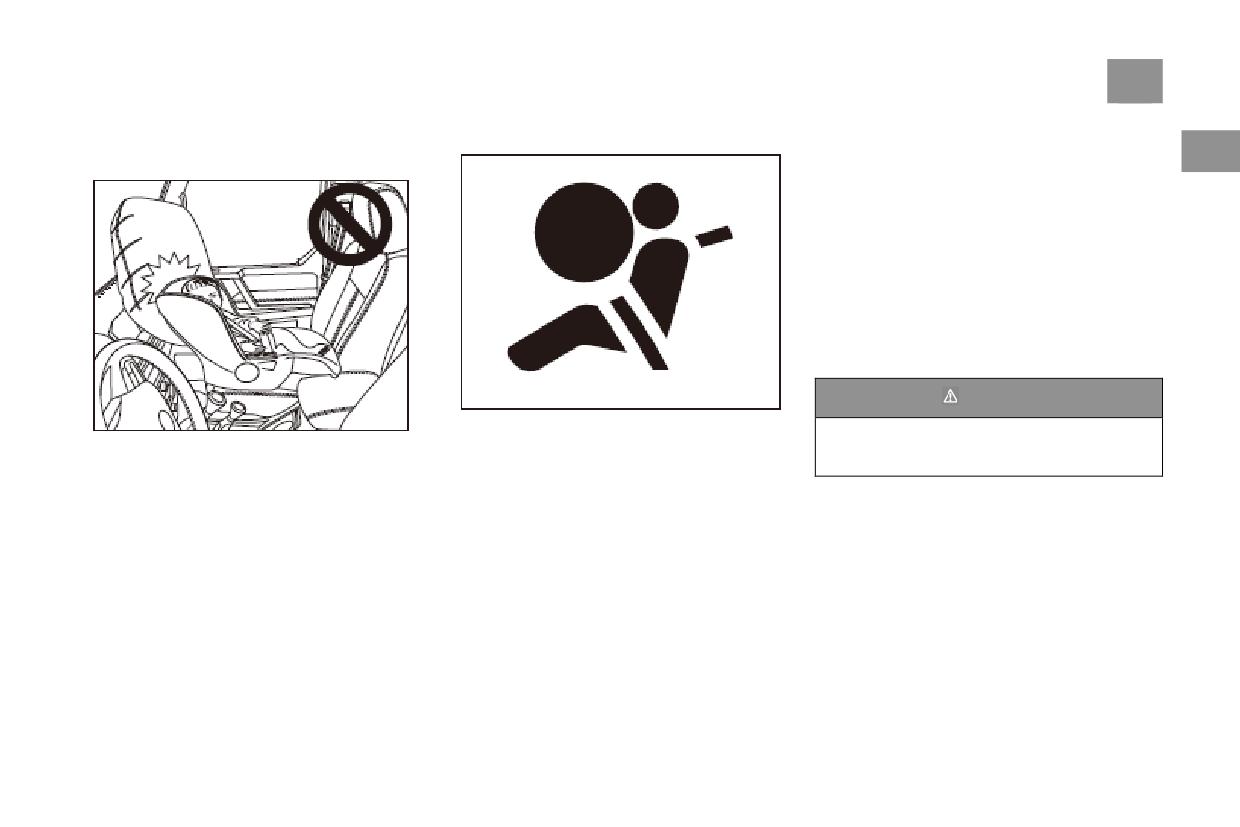
If the chassis undergoes severe shock during
belts may be thrown into the release space of
●Always wear a seat belt in the correct way.
driving of the vehicle, the airbag may be
the airbag. As the airbag is triggered, this
opened. As a result, to avoid unexpected
●Correctly adjust the position of the driver’s
may lead to fatal injuries to the passengers.
opening of the airbag, take care when driving
seat and the steering wheel.
This is particularly true for children.
on grounds without manual treatment or not
●Correctly adjust the position of the front
Keep as far away from the front airbags as
designed for driving of the vehicle.
passenger’s seat.
possible. There is only one way for the front
●Correctly adjust headrest.
airbags to deploy completely and play their
●Use suitable child seats to ensure the safety of
protective role during an accident.
children travelling in the vehicle.
Airbag System
23
Danger of Installing a Child Seat on
The airbag fault warning light
If the following symptoms occur, it shows that
the system is faulty and the airbag and seat belt
1
the Front Passenger Seat
pre-tensioner may not work normally in a
collision. In such a case, you must go to an
authorized BAIC dealership to arrange a check:
1. When the ignition switch is in the “ON”
position, the airbag fault warning light does not
light up or flash.
2. When the ignition switch is in the “ON”
position, the airbag fault warning light is lit for
several seconds but does not go out.
3. While the vehicle is running, the airbag fault
warning light is lit.
Warning
The airbag fault warning light on the display
If the system is faulty, the airbag will not be
Installing a child seat facing backwards on the
screen of the combination instrument will alert
able to execute their protective functions
front passenger seat is prohibited. In the event
you to any faults with the airbag and the seat
normally.
of an accident, the triggered front passenger
belt pre-tensioner.
airbag will exert a great impact on the child seat
When the ignition switch is in the “ON”
and may cause fatal injury to the child.
position, the warning light will be lit up and
flash for 6-8s before going out, indicating that
the system is working normally. When the
ignition switch is in the “ACC” or “OFF”
position, the airbag will not work.
24
Airbag System
Airbag Repair, Maintenance and
1
Warning
Warning
Scrapping
If repairs are not carried out by specialized
When cleaning the steer ing wheel or the
Components of the airbag system are installed
technicians at an authorized BAIC
dashboard, only use a dry or damp cloth. Do
in different positions around the vehicle. All
dealership, the potential risk of injuries is
NOT use a solvent-containing cleaning agent
operations of the airbag system or operations
increased. This is because the system may not
to clean the surface of the dashboard or the
that require the removal of airbag system
trigger the airbag or trigger it when it is not
airbag assembly. This is because solvents can
components to allow the repair of other vehicle
needed in the event of an accident, thus
cause the loosening of these components.
components must be performed by an
serious injury or even death may be caused
When the airbag is triggered, broken plastic
authorized BAIC dealership. Otherwise, the
to passengers.
may cause serious injuries.
airbag system may be damaged. As a result, in
● Do NOT paste anything or cover the
●The airbag system can only be triggered
the event of an accident, the system may
abnormally trigger the airbag or fail to trigger
steering wheel or the soft plastic surface of
once, and all triggered airbags must be
the airbag at all.
the dashboard of the frontal passenger-side
replaced.
When scrapping the entire vehicle or airbag
airbag assembly, or attempt to make any
●Do NOT try to repair, remove or install
components, be absolutely sure to follow the
refitting to any of the above positions.
any of the airbag system components on your
relevant safety regulations. Authorized BAIC
● Do NOT install devices such as a cup
own.
dealerships which are familiar with the relevant
holder or telephone bracket on the airbag
● All operations on the airbag or all
safety regulations may provide you with an
assembly casing.
operations to remove the airbag required for
enquiry service.
● Do NOT fix items such as notepads or
the repair of other vehicle components (such
telephone brackets on the windscreen above
as the steering wheel) must be performed by
the front passenger-side airbag. Otherwise, if
an authorized BAIC dealership. This is
the front passenger-side airbag is triggered,
because authorized BAIC dealerships are
these items may fall and cause injuries to
equipped with special tools, repair
driver and passengers.
documents
and
qualified
specialist
technicians.
Airbag System
25
Front Airbags
Warning
1
●Make sure to go to an authorized BAIC
dealership to have the airbag system checked
and repaired.
●Do NOT try to refit the front bumper or
any of the vehicle body structures on your
own.
If you want to sell the vehicle, please tell the
new owner that the vehicle is equipped with an
airbag system and let him/her know the date of
replacements of the airbag and its components.
If the vehicle is scrapped, the undeployed airbag
will pose potential risks. Therefore, before
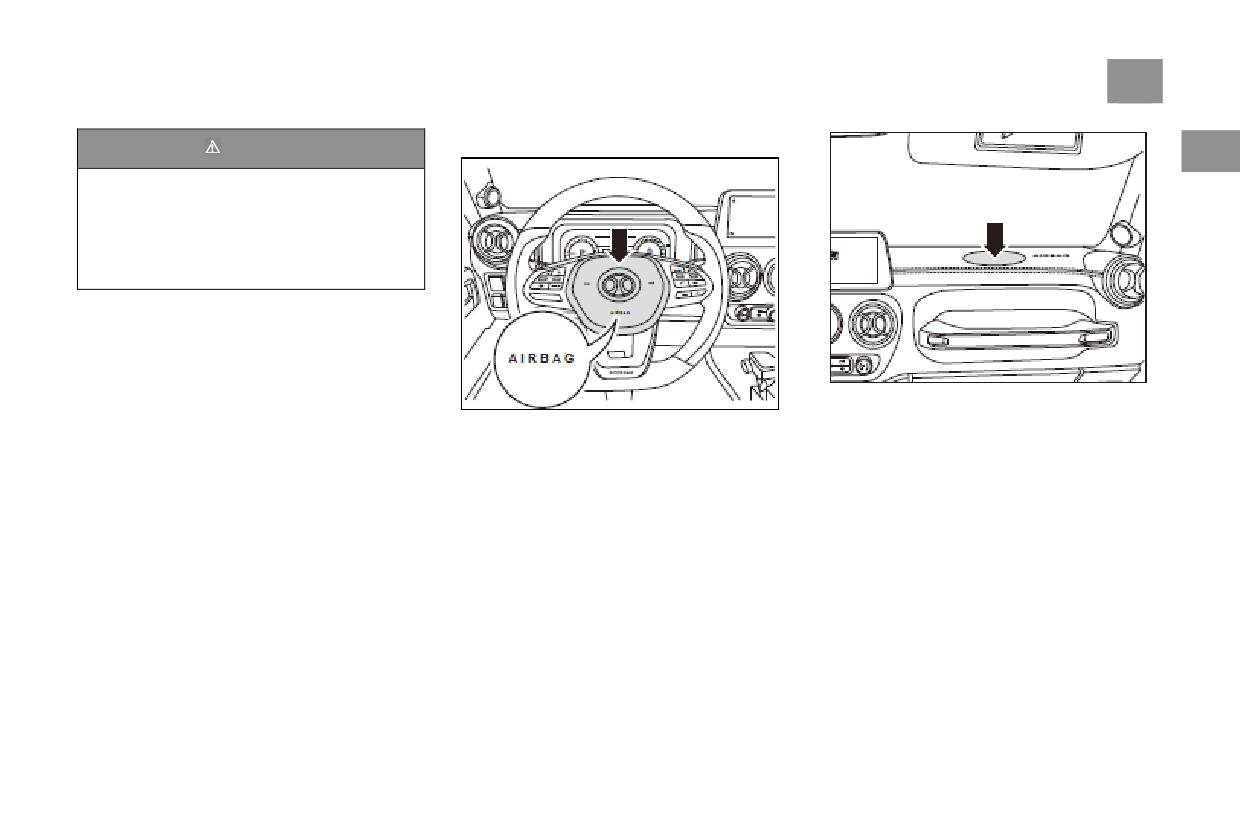
The airbag for the front passenger is installed
scrapping the vehicle, be sure to ask specialized
inside the dashboard above the glove box and its
The airbag for the driver is situated inside the
personnel to safely deploy the airbag under
position is marked with the word “AIRBAG”.
steering wheel. Its position is marked with the
special safe conditions.
If the front passenger assumes the correct sitting
word “AIRBAG”.
posture and correctly fastens his/her seat belt,
when the vehicle suffers a severe impact, the
front airbag will provide additional protection to
his/her chest and face.
26
Airbag System
The front airbag mainly consists of three parts:
In the event of a serious frontal collision, the
1
Caution
●Electronic control and monitoring device.
front airbags will act as a supplement to the
three-point seat belt and protect the head and
The deployment or shrinkage of the frontal
●Two front airbags with gas generators.
chest of the driver and the front passenger.
airbag is completed within a very short
●The airbag fault warning light is located on
The airbag system cannot replace the seat belt.
period of time. The airbag cannot play a
the display screen of the information center of
It is only one part of the passive safety system
protective role against secondary impacts
the combination instrument.
of the vehicle. Please note: The airbag system
that may subsequently happen.
The airbags are monitored by the electronic
can play its protective role to the greatest extent
To ensure that the frontal airbag can correctly
monitoring system of the airbag control unit.
when the seat belt is correctly fastened and the
deploy and unfold, there should be no blocking
When the ignition switch is in the “ON”
headrest is correctly adjusted. Therefore, it is
objects between the frontal airbag and the
position, the airbag fault warning light will be lit
necessary to always wear a seat belt, not only to
passenger.
for several seconds and then go out after
comply with regulations, but also to serve safety
self-detection is completed.
Caution
needs.
Placing any subjects near or over the steering
Warning
wheel, the dashboard and the airbag
●Make sure to go to an authorized BAIC
assembly, inside the dashboard, or above the
passenger-side glove box is prohibited. This is
dealership to have the airbag system checked
because, when the vehicle is involved in a
and repaired.
collision serious enough to deploy the airbag,
●Do NOT try to refit the front bumper or
these subjects will fly out and cause injuries.
any of the vehicle body structures on your
own.
Airbag System
27
How Do the Front Airbags Work?
The event of serious frontal collision, the two
Warning
1
front airbags and the seat belt will work and
provide protection.
If the driver or passengers are not wearing
their seat belts correctly or have failed to
Caution
adopt the correct sitting posture, serious
The front airbags are not intended for
injury or even death may be caused in the
protection against rear impacts, minor
event of an accident.
frontal impacts or side impacts. Nor are they
●The driver and passengers must make sure
intended to deploy during vehicle tipping.
to correctly wear their seat belts and adjust
The front bags do not play a role when the
their sitting posture before beginning a
vehicle is engaged in emergency braking or is
journey.
running along a bumpy road surface or
● When driving, do NOT let other
low-lying land.
passengers (children), pets or objects occupy
the space between the front passenger and
the airbag. Do NOT cover or paste anything
In the event of a collision, the airbag control
to the surface of the steering wheel or the
unit will monitor the deceleration or
dashboard.
acceleration caused by the collision and
● On triggering, the airbags will contract
determine whether the front airbags should be
quickly and will not block the driver’s vision.
deployed.
●Do Not try to repair, adjust or refit any
Whether the frontal airbags work is determined
part of the front airbags.
not by the vehicle’s speed but by the collision
●Airbags can only be triggered once. If an
object, direction of the collision, and the rate of
vehicle deceleration. Therefore, some minor
airbag has been triggered accidentally, you
collisions may cause injuries because the frontal
must go to an authorized BAIC dealership to
airbags do not deploy. By contrast, some
have it replaced.
relatively small structural damage may result in
the deployment of the front airbags.
28
Airbag System
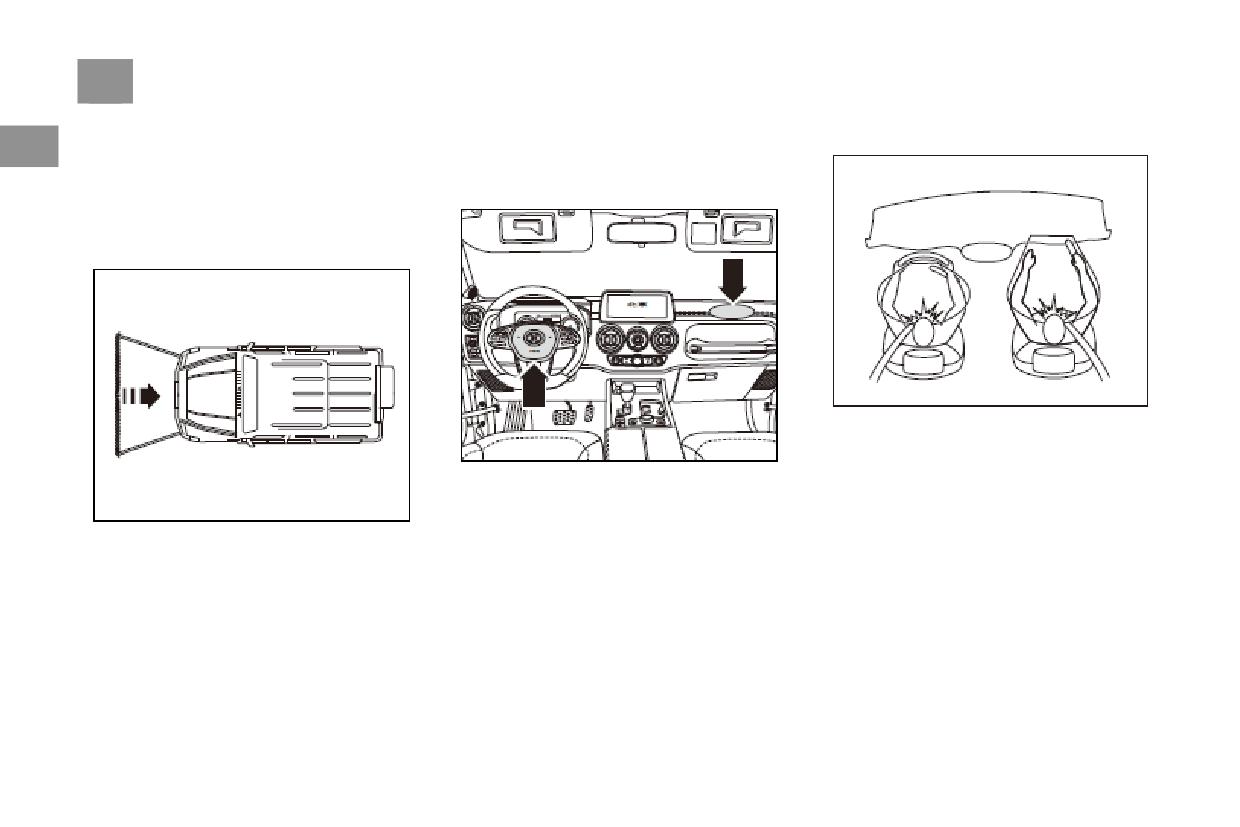
If any of the following situations arises, please
●The pad part of the steering wheel or the
Deployment of the airbag
1
contact an authorized BAIC dealership as soon
cover of the front passenger airbag (area shown
as possible:
by the arrow in the figure) is scratched or
●A frontal airbag has been inflated.
broken or has sustained other damage.
●The front of the vehicle (shaded part in the
figure) encounters an accident, but the front
airbag is not inflated.
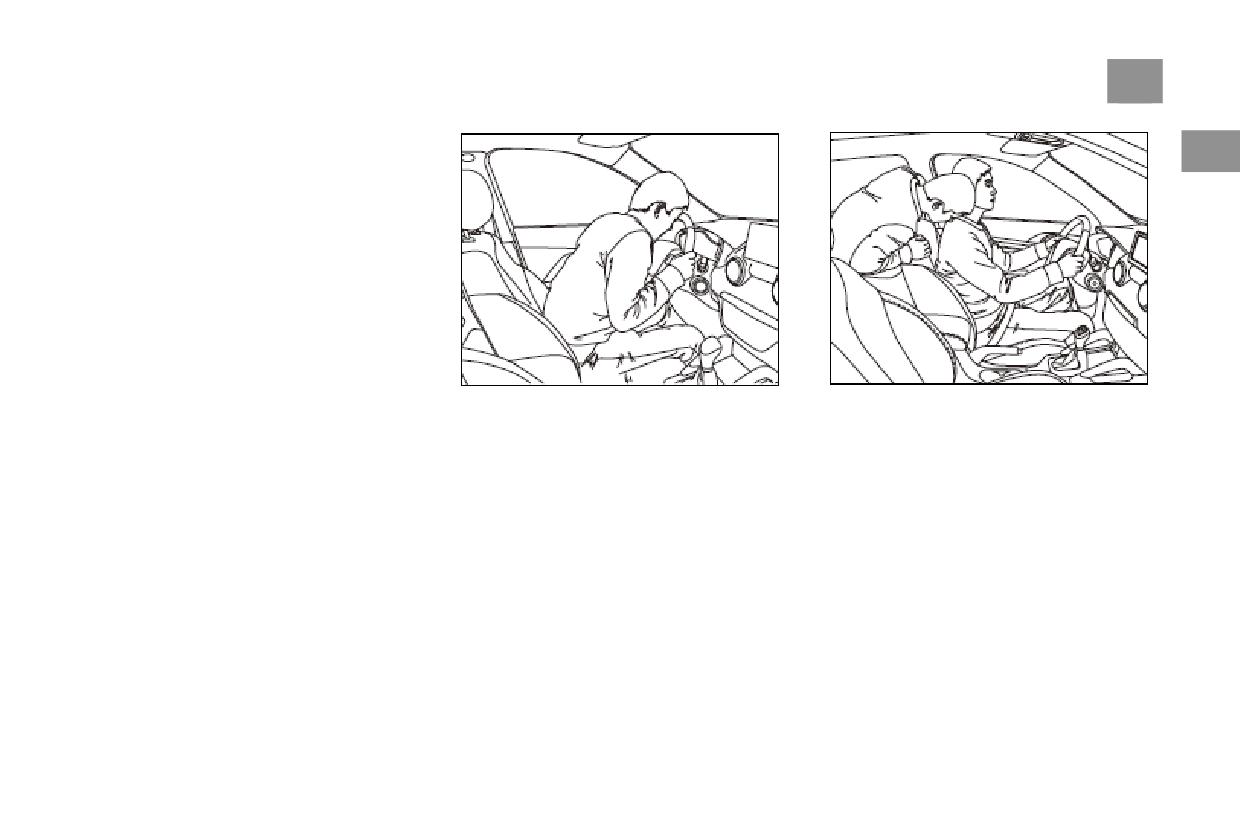
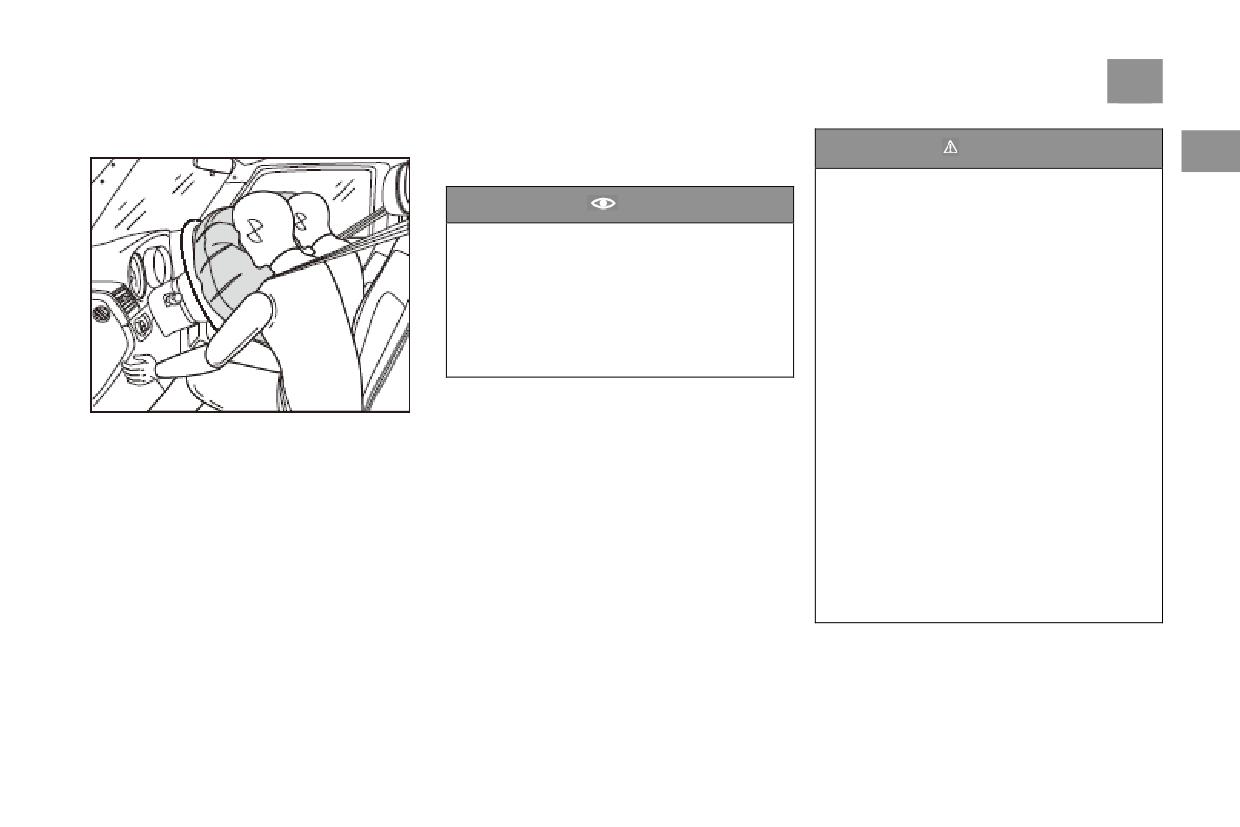
The front airbags deploy momentarily and apply
a very large force, accompanied by a very loud
sound. The deployed front airbag, together with
the seat belt limiting system, restricts the
distance of movement of the front passenger,
thus reducing the risk of injury to the head and
the trunk.
Airbag System
29
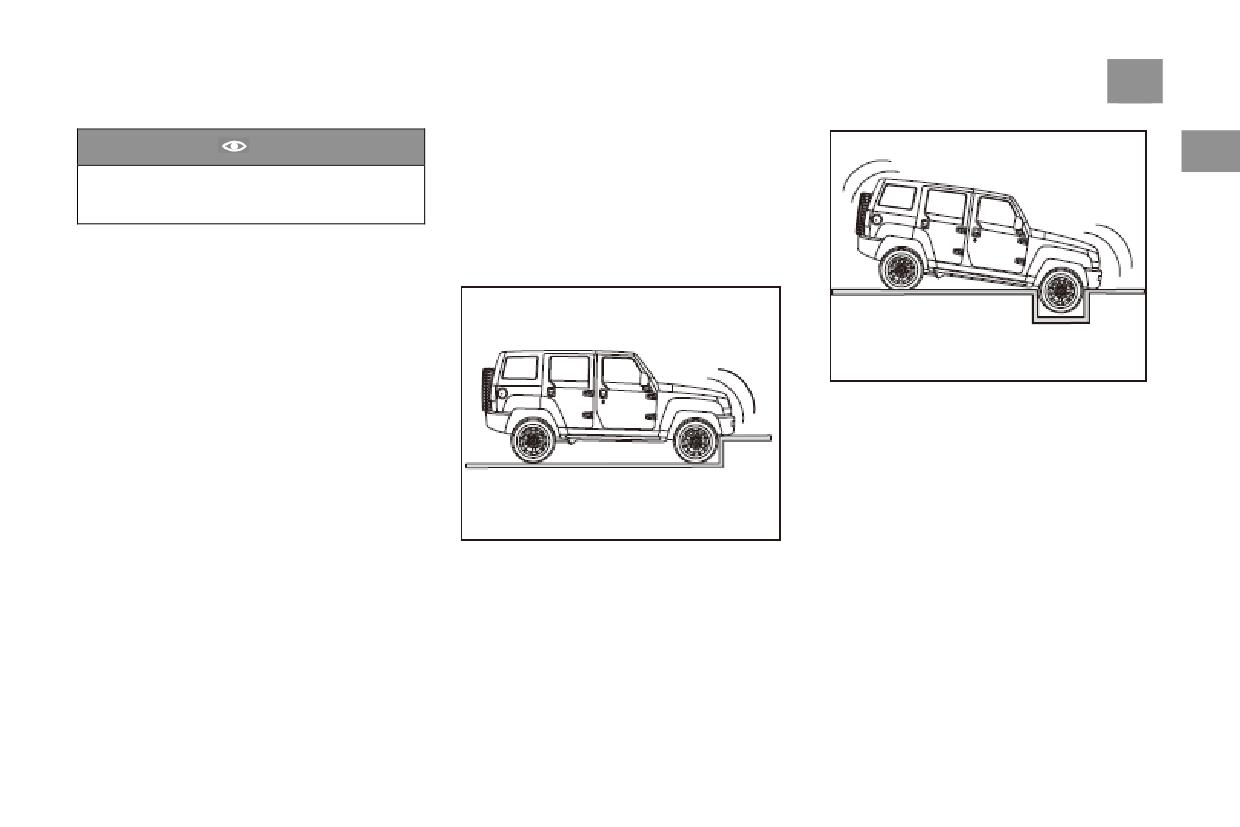
If the vehicle is subjected to severe impact from
Caution
the bottom, such as flying over a step, striking a
1
After the front airbag has deployed, some of
step or hard object, crossing a deep pit or
its components will be hot. Do not touch it
scraping the chassis, even if the deformation of
before it cools down.
the vehicle is slight, but because the rigid parts
Airbags are designed especially to discharge gas
of the vehicle are affected, the airbag may also
in a controlled way under the pressure of the
expand when the detected deceleration exceeds
vehicle occupant’s body and softly support the
the set threshold value.
head and upper part of the body. During an
accident, the airbag will continue to discharge
gas to allow normal vision through the
windscreen to be restored.
To promptly provide a protective cushion when
an accident occurs, the airbag will quickly
Vehicles Crossing Deep Pits
deploy at very high speed. When the airbag
deploys, a small amount of smoke will be
generated. This is completely normal. Do NOT
mistake it for fire inside the vehicle.
Hit a roadside step or hard object
30
Airbag System
Seating Position
Conditions Under Which Airbag
1
To ensure the best protective function, during
Does Not Deploy
serious impacts, the front airbags must unfold
In many types of accident, such as when the rear
within a certain period of time.
part of the vehicle is in a collision or a second or
If the vehicle passengers are too close to the
third time collision during a chain of collisions,
front airbag, the deploying and deploying front
or a low-speed collision, even if the airbags
airbag may bruise the face or injure other parts
deploy, they may still not provide additional
of the body.
protection.
Warning
To reduce injuries caused when the front
airbag deploys, be sure to keep your seat belt
fastened all times. In addition, the driver and
Vehicles falling or leaping steps
front passenger must adjust their seat
positions, and leave sufficient distance
between them and the front airbags.
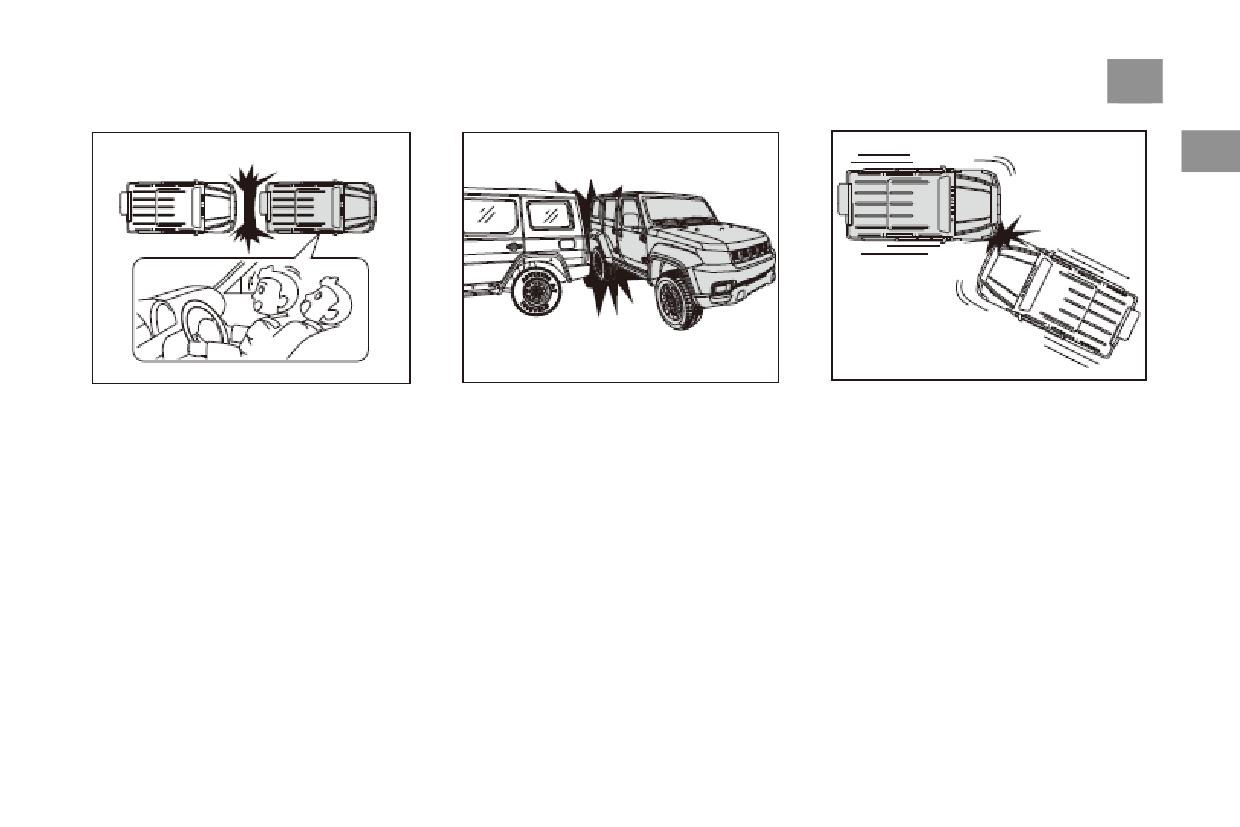
Airbag System
31
1
Rear-End Collision
Side Collision
Slanted Collision (oblique collision)
When the front airbag is triggered, it is ejected
In the event of a side collision, passengers move
In the event of a slanted collision, the collision
from the driver’s side or passenger's side and
towards the point of impact. Therefore, an
force will move the passengers in a direction in
deploys. In the event of rear-end collision, under
airbag which deploys in front of them cannot
which the front airbag cannot provide additional
the action of inertia, passengers will move
protect the passengers. In these circumstances,
protection. At this time, the front airbags will
towards the back rest, and the airbag cannot
the front airbags will not deploy.
not deploy.
protect them. In these circumstances, the airbag
will not work.
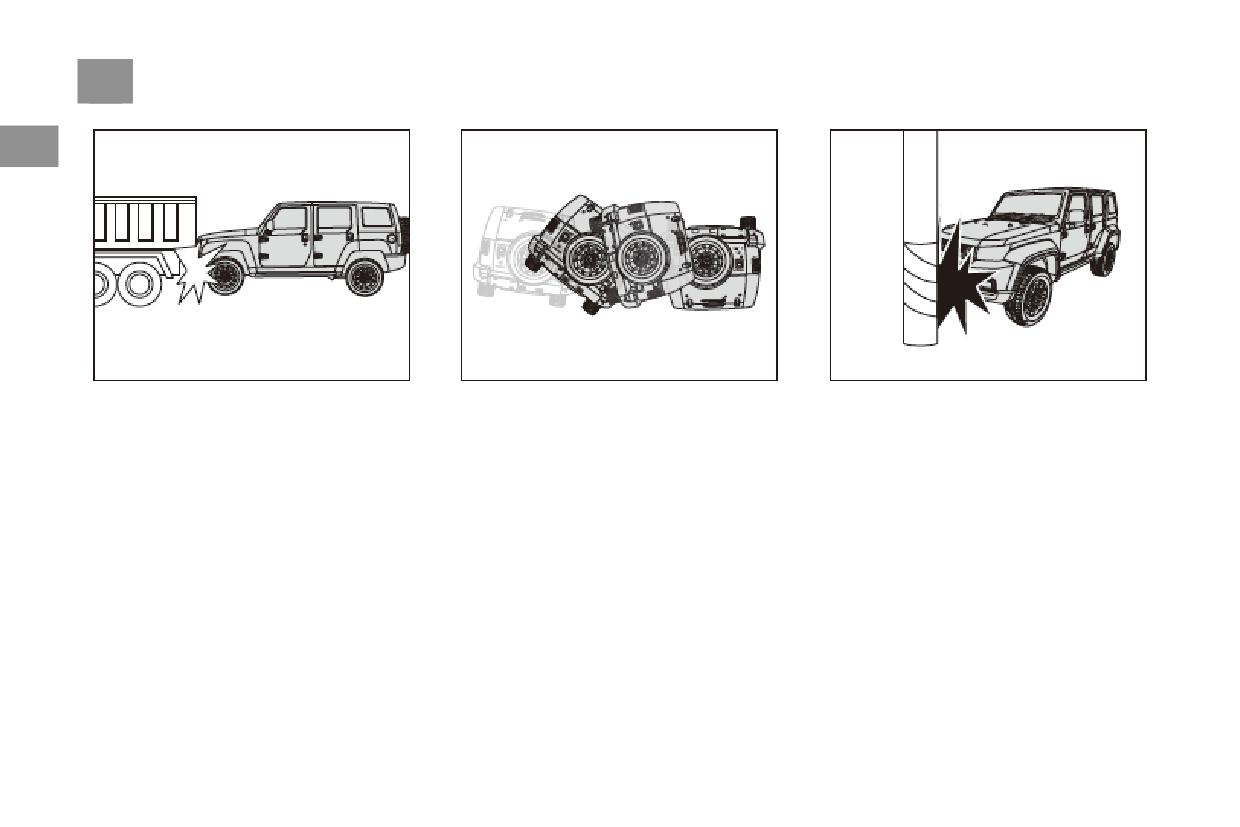
32
Airbag System
1
Rear collision
Tipping Accident
Special Collisions
In the event of a rear collision, the driver will by
In a tipping accident, the front airbag will not
If the vehicle collides with certain objects, such
instinct engage in emergency braking. At this
deploy, because even if it deploys, it still could
as electricity poles or trees, the collision point is
time, the front of the vehicle will tend to dive
not provide proper protection to the vehicle
concentrated in one place and the whole of the
towards the ground. In the event of this kind of
passengers.
collision force is not transmitted to the sensor.
collision or a rear-end collision, the front part of
In these circumstances the front airbags will not
the vehicle will tend to dive into the other
deploy.
vehicle and the impact energy received by the
collision sensor will not be large. In this
situation, the front airbag will not work.
Car Safety for Children
33
Car Safety for Children
When Several Child Passengers
Safety Instructions for Child Seats
1
Have To Be Carried
General Instructions
There are three rear seats in your vehicle and
Accident statistics verify that it is safer for
you can use them to properly place child
children to sit in the rear rather than the front
passengers.
seats of a vehicle.
When you need to carry more than three child
It is recommended that children younger than 12
passengers in your vehicle:
or no taller than 1.5m shall seat in the rear seats.
●For the child who has grown up to be suitable
Based on the child’s age, height and weight, use
for wearing the seat belt, he/she can sit on the
a child seat or the seat belt to ensure the safety
front seat (observe related national traffic laws
of children in the rear seats. For safety reasons,
to ensure safety).
a child seat should be installed on the rear seat
●Move the vehicle seats backwards as much as
behind the front passenger seat.
possible.
Child seats should be installed and used in
●Encourage the children to sit close to the
accordance with the relevant regulations and the
backrest and sit upright.
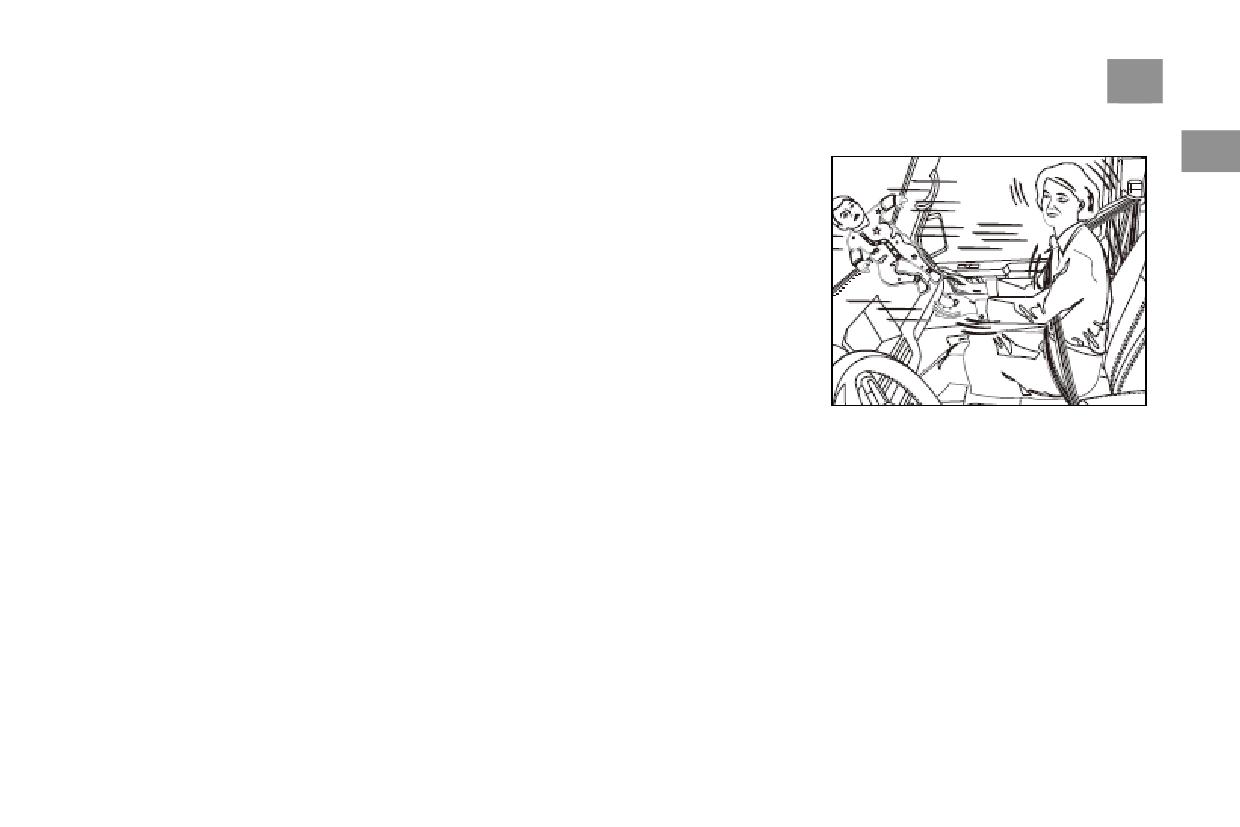
When driving, NEVER hold a baby to your
child seat manufacturer’s instructions.
chest. The baby will be at serious risk of death if
●Check whether they have correctly put on and
We suggest that you put the child seat
you ignore this instruction.
instructions and this Manual together and keep
fastened their seat belts.
Using a child seat correctly can significantly
them in your vehicle.
reduce the risk of injury! As the driver, you
should be responsible for the children in your
vehicle:
● Choose a suitable child seat and use it
correctly.
●Pay attention to the rules of the child seat
manufacturer and ensure that the children wear
their seat belts correctly
34
Car Safety for Children
●When driving, do NOT become distracted by
●event of emergency braking or accident,
1
the children in your vehicle.
their abdomen or neck may be injured.
●When driving over a long period of time, be
●One child seat can only be used by one
sure to have a rest midway through your trip
child.
every two hours at least.
●Make sure to carefully read and follow the
use instructions and precautions provided by
Warning
the child seat manufacturer.
●The protective role of seat belts can only
●Child seats should be installed and used in
work to the maximum extent when they are
accordance with relevant regulations and
worn correctly.
provisions, with the relevant state laws and
●When driving, do NOT hold children or
local regulations prevailing.
babies to your chest. Otherwise, in the event
of an accident, injury or even death may be
caused to children.
Do NOT install a child protection device facing
●Only a suitable child seat can effectively
backwards in the front seat of the vehicle. If you
protect children.
do this, when the airbag deploys, it will impact
●Do NOT leave children inside the vehicle
the back of the child protection device with a
tremendous force, causing serious injury and
alone. Due to significant regional weather
even death to the child within it.
variations, the internal temperature may
become extremely high or low. If children are
left inside the vehicle alone, fatal injuries
may result.
● If there is no child protection system
available, children under 1.5m in height must
not use the conventional seat belt fitted inside
the vehicle, If they do, in the
Car Safety for Children
35
Child Seat
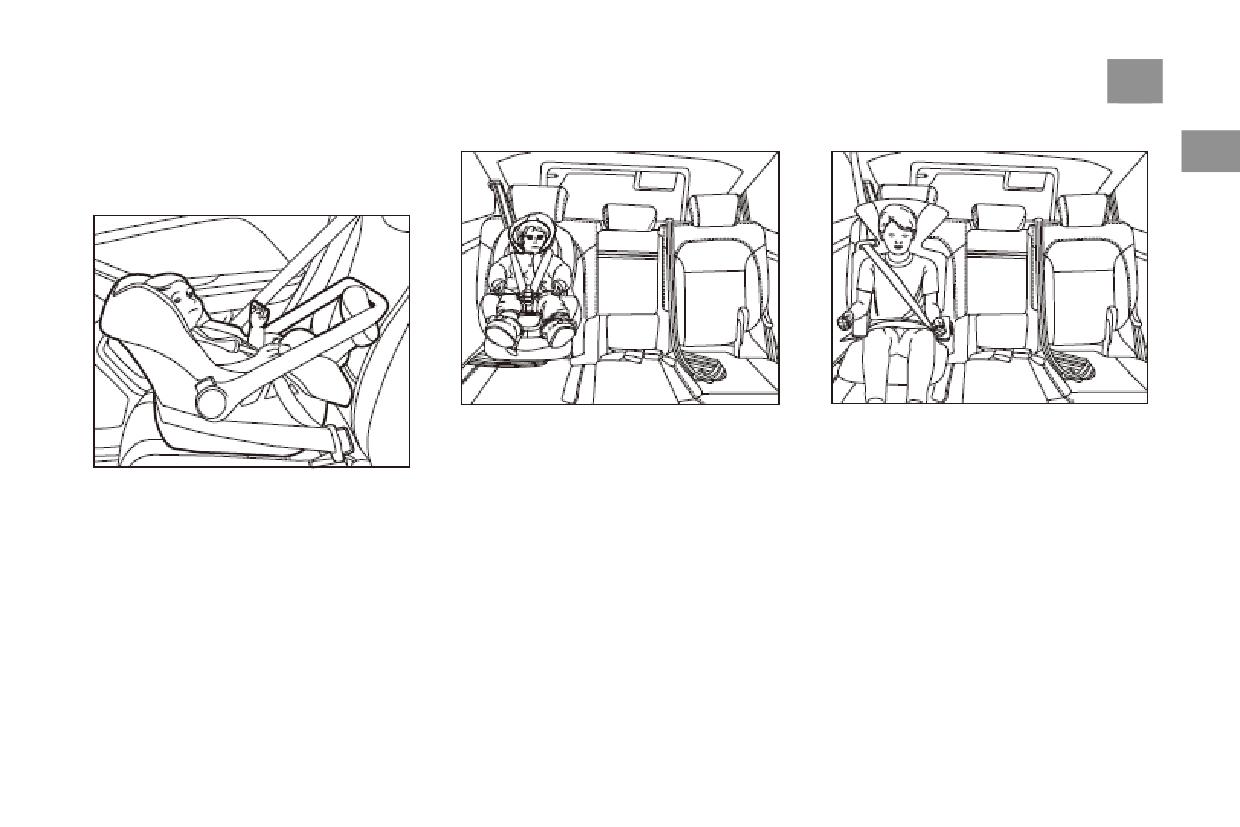
Class 1 child seats
Class 2 child seats
1
Child Seat Grade Classification (for
reference use only):
Class 0/0+ child seats
Babies or infants who are under 4 years old and
Children who are under seven years old and
have a body weight of 9-18Kg should use a
have a body weight of 15-25Kg should use a
Class 1 child seat with a safety belt.
three-point seat belt along with a Class 2 child
Babies who are under nine months old and have
seat.
a body weight of under 10Kg, and babies who
are under 18 months old and have a body weight
of under 13Kg should use a class 0/0+ child seat
which can be adjusted into a lying down
position.
36
Car Safety for Children
Class 3 child seats
1
Warning
Warning
●The upper part of the seat belt must run
●The upper part of the seat belt must run
over the mid-point of the shoulder. In no
over the mid-point of the shoulder. In no
circumstances should it run across the neck.
circumstances should it run across the neck.
The seat belt should also firmly fit the body.
The seat belt should also firmly fit the body.
●The lower part of the seat belt must run
●The lower part of the seat belt must run
over the hips but not round the abdomen,
over the hips but not round the abdomen,
and should always closely fit the body. If
and should always closely fit the body. If
necessary, the seat belt may be adjusted.
necessary, the seat belt may be adjusted.
Tips
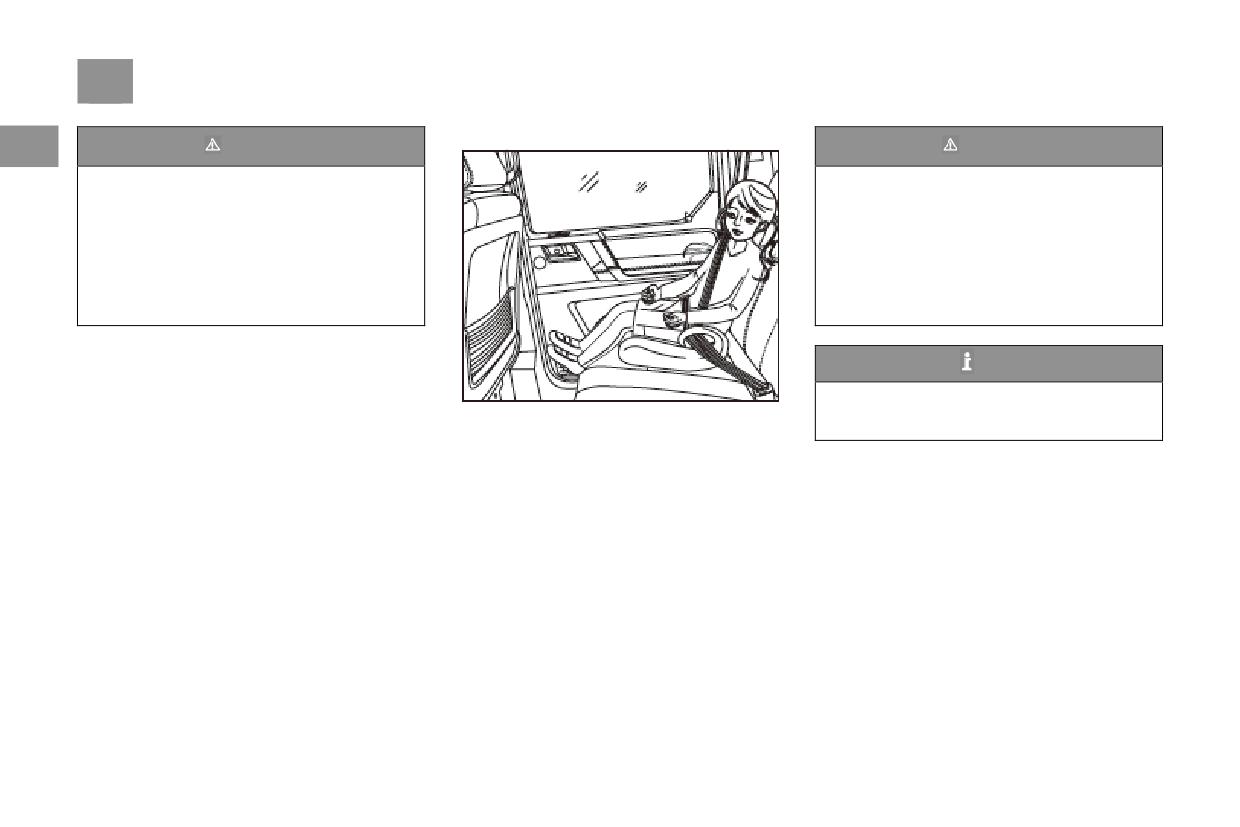
Children who are over 1.5m tall may use the
Children who are more than seven years old,
vehicle’s existing seat belt without a child
and have a body weight of 22-36Kg and a
seat.
height under 1.5m should use a three-point seat
belt along with a Class 3 child seat.
Car Safety for Children
37
Installing a Child Seat Equipped
Correctly install the Child Seat
1
Before installing a child seat on the rear seat,
with an ISOFIX System and Top
make sure you adjust the front seat to a suitable
Fastening Cord
position according to the dimensions of the
Be absolutely sure to install and remove the
child seat and the body size of the child. In the
child seat in strict accordance with the use
event of a collision or during emergency
instructions of the child seat manufacturer.
braking, a child sitting in the rear seat is less
likely to be injured if coming into contact with
hard objects inside the vehicle. Moreover, the
child will also be protected against injury
caused by airbag inflation. Absolutely do NOT
carry babies on your knees.
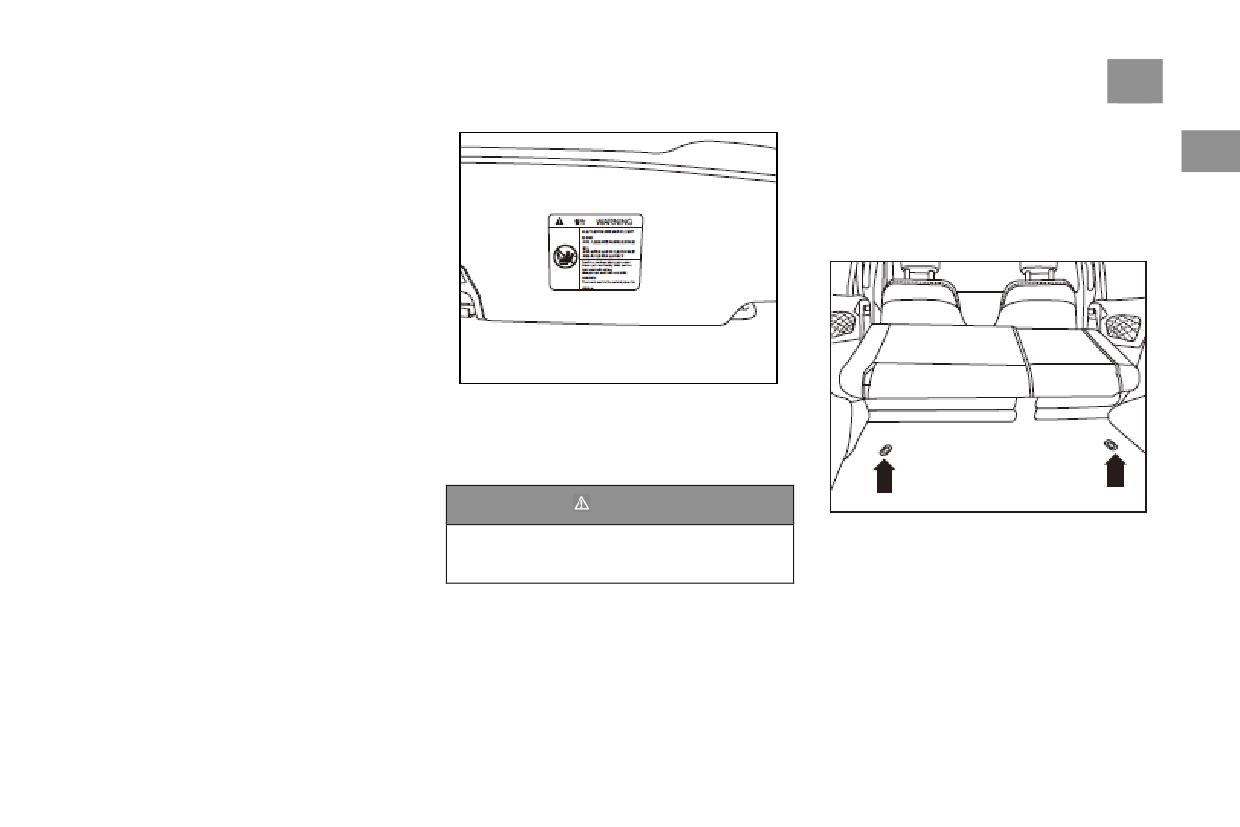
There is a warning label pasted onto the vehicle
visor on the front passenger side, reminding you
and the front passenger of the dangers posed by
the front airbag. Be absolutely sure to read and
follow the instructions on this label.
Warning
The seat belts of this vehicle do not provide a
child seat strapping function. Do NOT use
the seat belt to secure the child seat.
38
Car Safety for Children
Installing
1
Warning
1. Slightly push up the headrest behind the child
seat.
●The ISOFIX fixing ring on the back of the
2. Run the top fastening cord through the
rear seats can only be used for the ISOFIX
headrest or, depending on the child seat
system.
construction, put the top fastening cord on both
● Do NOT connect fastening belts,
side of the headrest, and then pull the top
non-ISOFIX child seats or any other items to
fastening cord backwards towards the back of
the fixing ring.
the rear seat.
● Only one top fastening cord can be
3. Press the ISOFIX child seat into the fixing
connected to the rear fixing ring on the back
ring in the front part of the seat until a
of the rear seat. No other cords (such as
distinctive engagement sound is heard from the
luggage fastening cords) are to occupy this
child seat.
fixing ring.
4. Pull the two sides of the child seat and check
whether it is firmly engaged.
5. Engage the ISOFIC fastening ring (in the
position indicated by the arrow in the figure) of
the top fastening cord and the top fastening cord
hook of the rear seats.
6. Tighten the top fastening cord so that the
child seat closely fits the back rest of the rear
seat.
Safety label
39
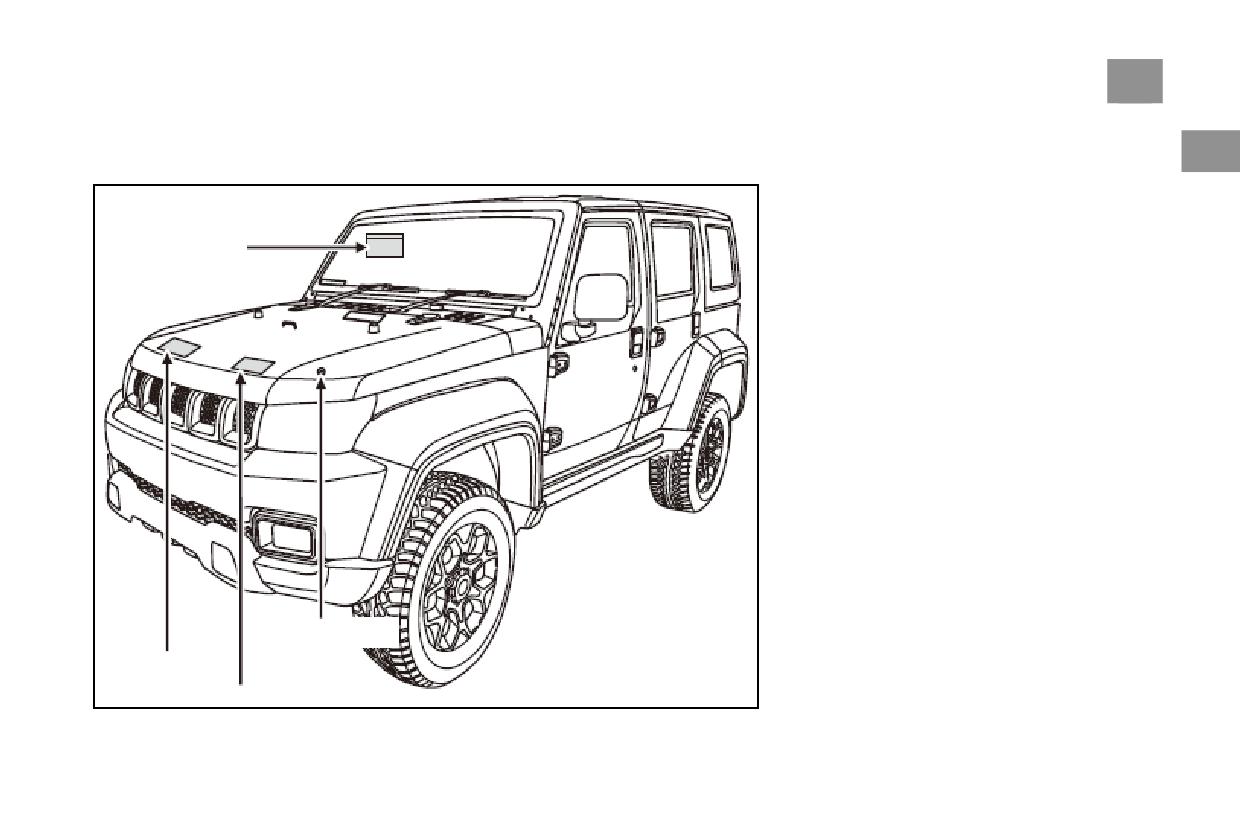
The positions of the safety labels of the vehicle
Safety label
are as shown in the figure. The airbag label is
1
pasted to the outer side of the sun visor (in a
closed state) on the front passenger’s side, while
the A/C refrigerant label, the fan & radiator
label and the radiator cover danger warning
Airbag lable
label can only be seen after the engine hood is
opened.
These labels are used to remind you to pay
attention to those potential dangers which may
cause serious injury. Please carefully read these
labels. If a label falls off or becomes unclear,
please promptly contact an authorized
BAICdealership to obtain a replacement.
Waring of radiator cap
Label of A/C
refrigerant
Warning label for fan and radiator
2. Operation and Equipment
Cab
41
Locking and unlocking the vehicle
74
A/C system
98
Light and vision field
108
Seat and storage facilities
119
Accessories and Refitting
132
※Note: Numbers in all pictures of this chapter are for illustrative purpose only and do not necessarily reflect the real situation of the vehicle.
Cab
41
Cab
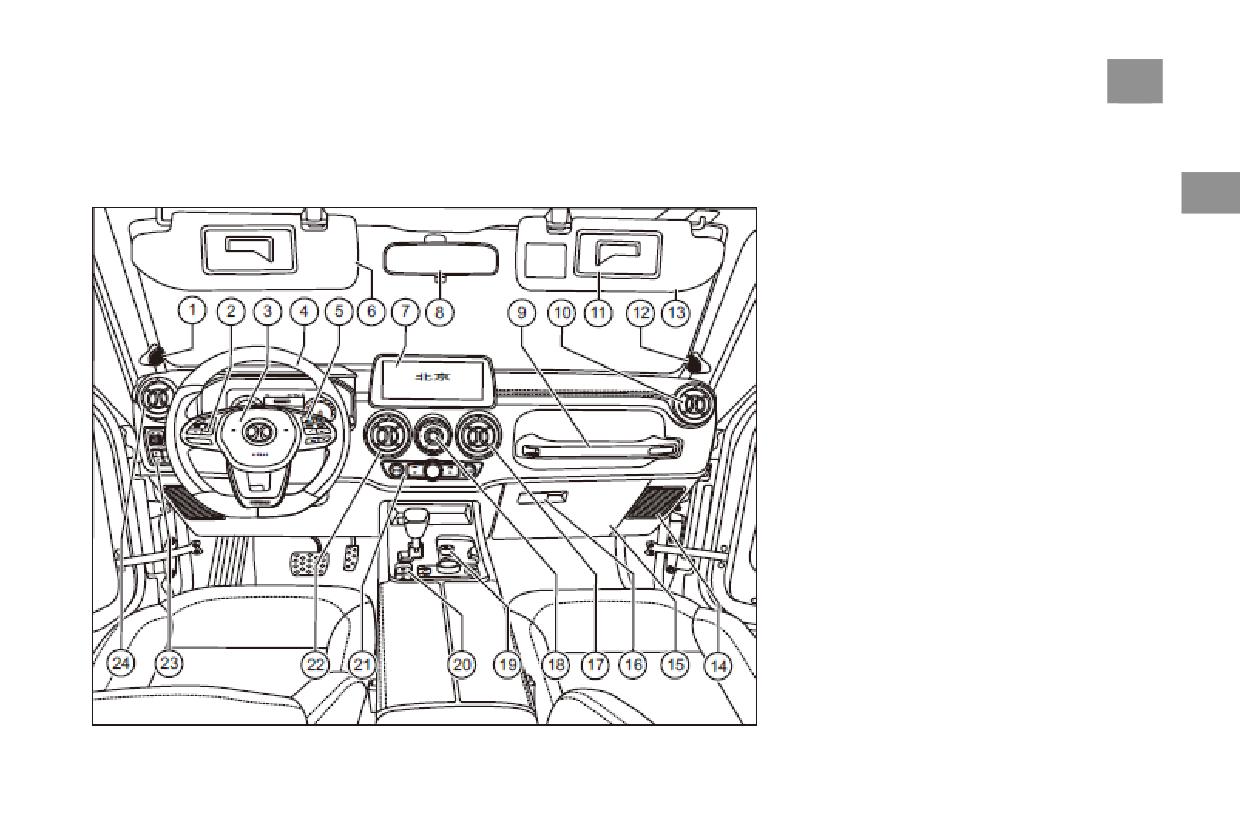
General Layout of Instruments and Operating Mechanisms
2
1. Left loudspeaker
2. Steering wheel left button group
3. Horn
4. Steering wheel
5. Steering wheel right button group
6. Driver's visor
7. Central display screen
8. Vehicle Rearview Mirror
9. Passenger handrail
10. Right air conditioning outlet
11. Sunshade makeup mirror (co-pilot side)
12. Right loudspeaker
13. Visor (passenger side)
14. Speaker
15. Glove box
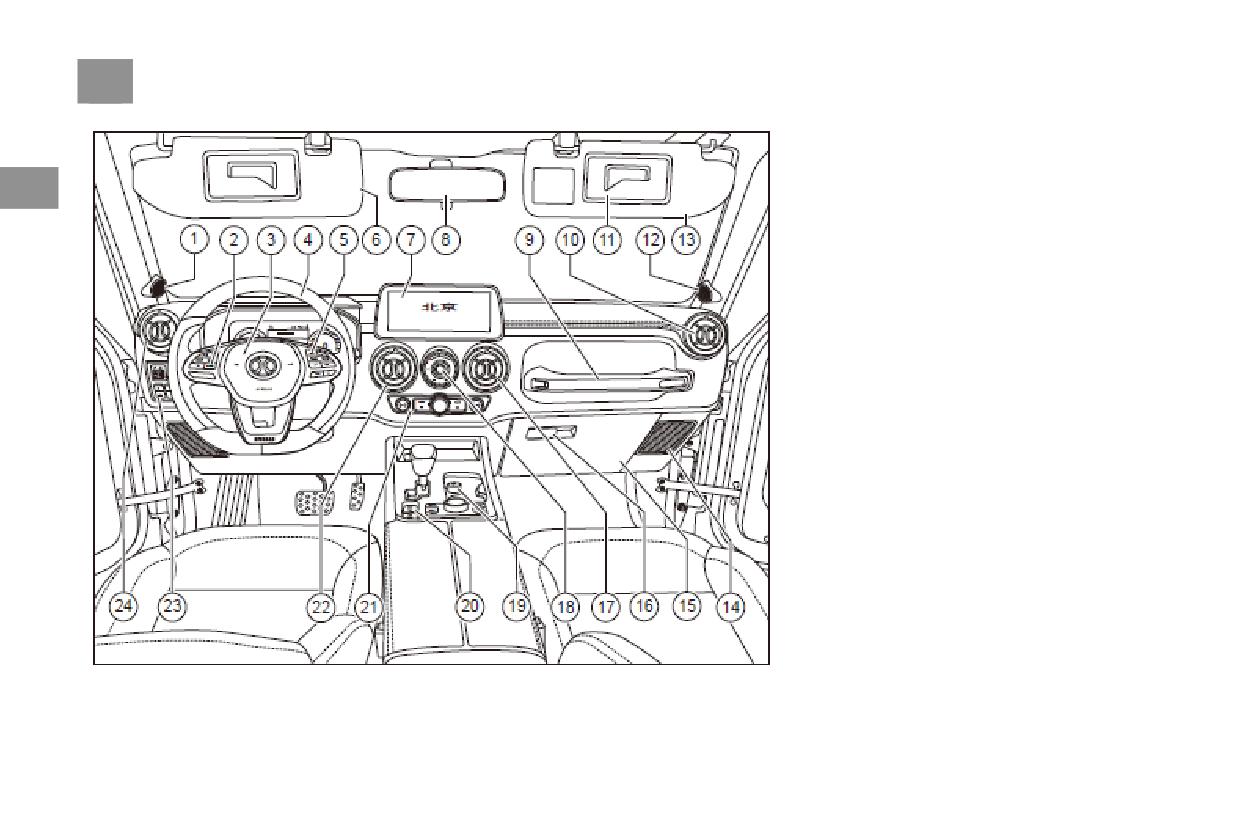
42
Cab
16. Glove box handle
17. Right air conditioning central outlet
18. Start/stop buttons, 4WD switches
2
19. The cigarette lighter
20. Electrical switch
21. Air conditioning control panel
22. Left air conditioning central outlet
23. Multifunctional Switch Set
24. Left air conditioning outlet
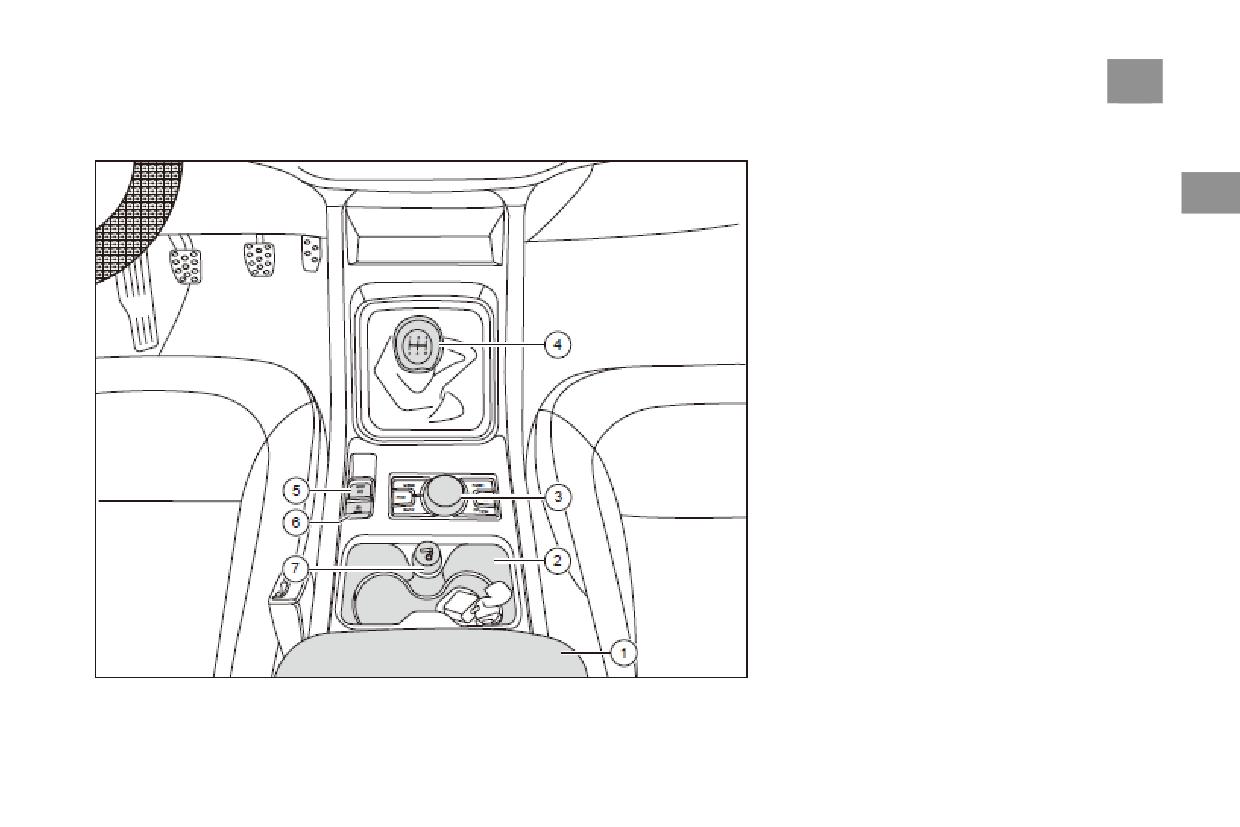
Cab
43
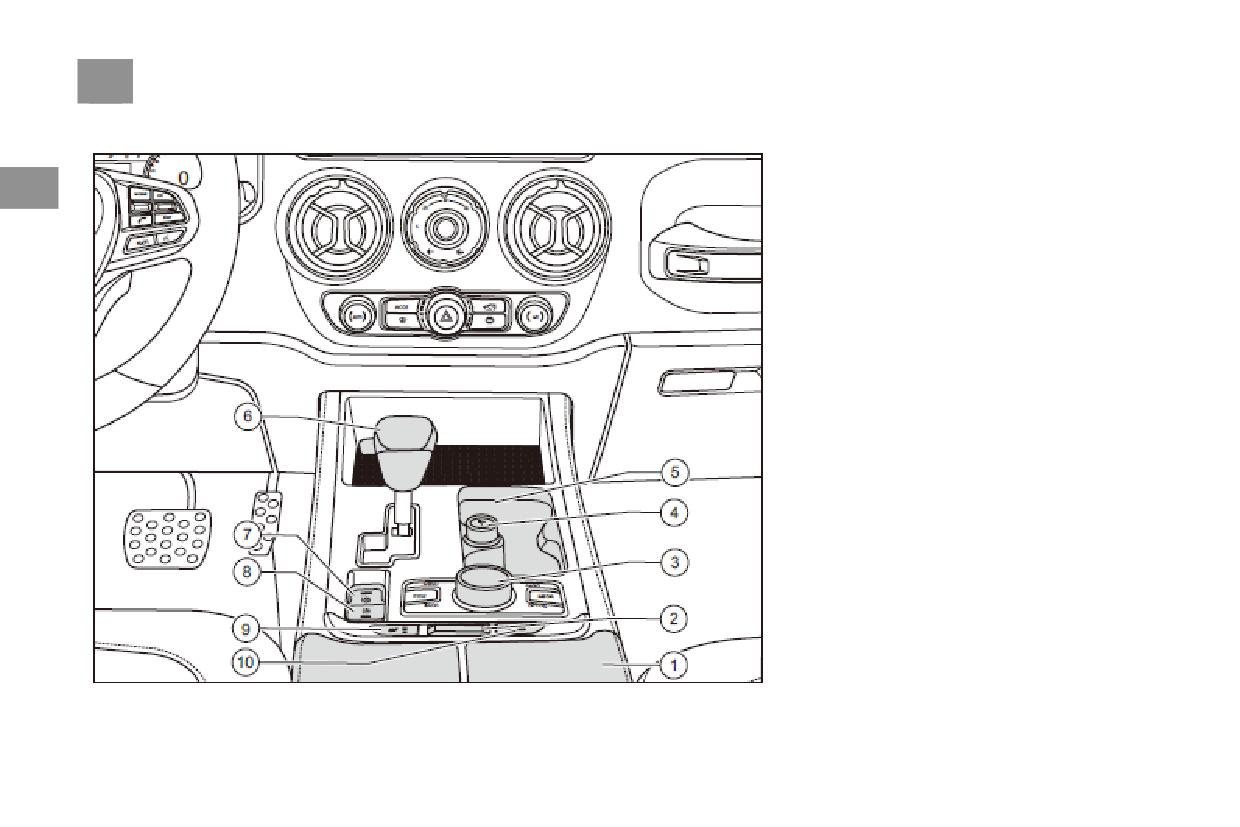
Central passageway layout (for vehicles equipped with manual gearbox)
1. Front row central armrest
2. Cup holder
2
3. Multifunctional keys
4. Gearbox shift lever
5. Electronic Parking Brake Key
6. AUTOHOLD Key *
7. The cigarette lighter
44
Cab
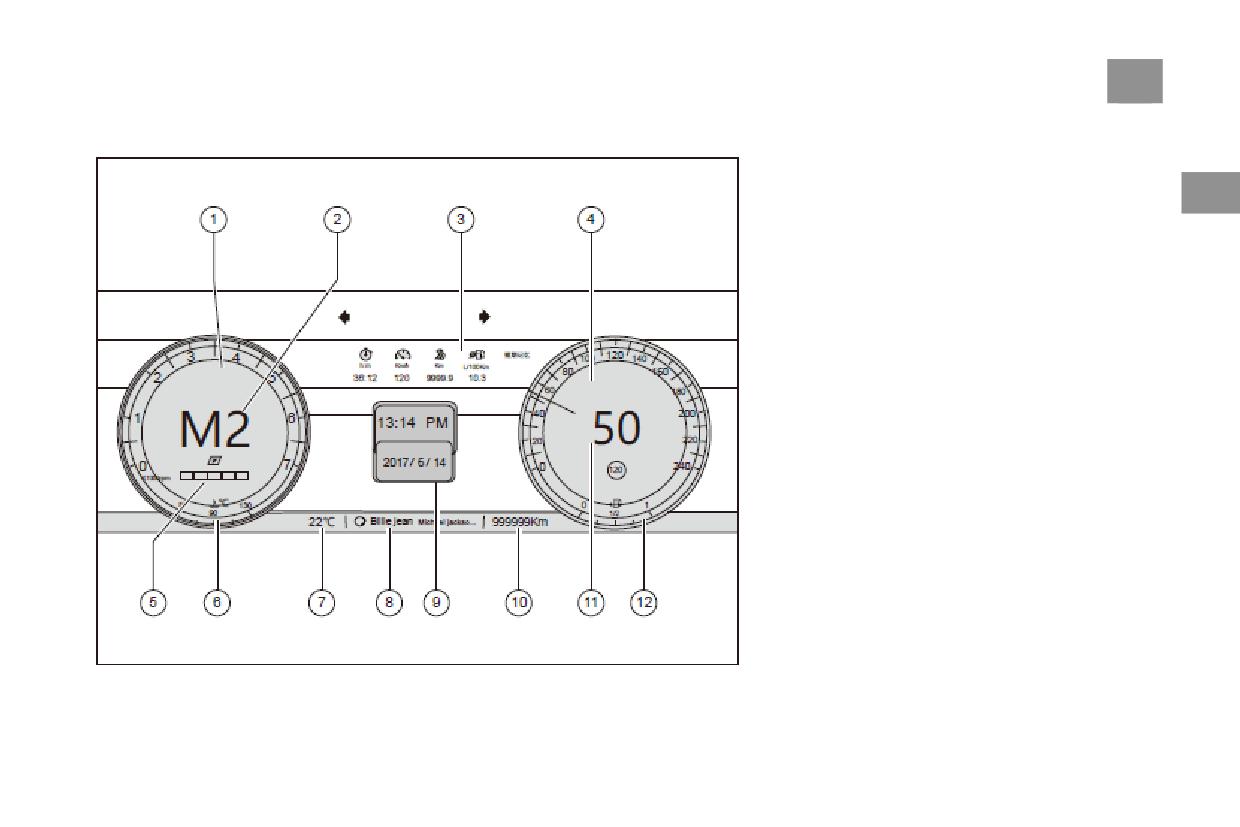
Central passageway layout (for vehicles equipped with automatic gearbox)
1. Front row central armrest/storage box
2. Central Storage Box Switch
2
3. Multifunctional keys
4. The cigarette lighter
5. Cup holder
6. Gearbox shift lever
7. Electronic Parking Brake Key
8. AUTOHOLD Key
9. Driver seat heating button
10. Passenger seat heating button
Cab
45
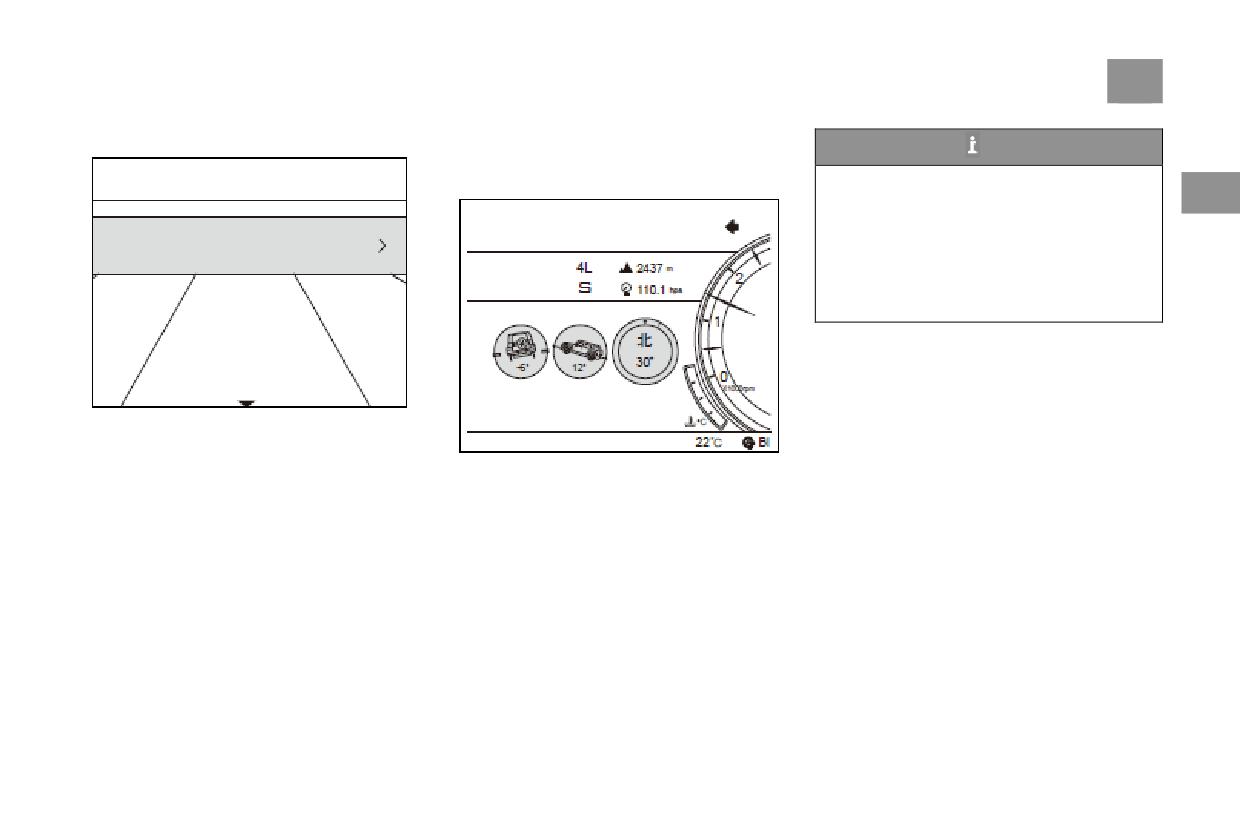
Instrument Cluster (Mode 1)
1. Tachometer
2. Gear Display
3. Trip computer: Short-term Memory,
2
Long-term Memory, Fuel Consumption
Information, Other Information and System
Failure Information
4. Speedometer
5. Turbine pressure
6. Engine coolant temperature gauge
7. Outdoor temperature
8. Multimedia Information
9. Information display center: calendar/time,
navigation (if equipped), tire pressure system (if
equipped), front wheel steering (if equipped),
off-road information, system Settings, alarm and
prompt information
10. Odometer
11. Digital speedmeter
12. Fuel gauge
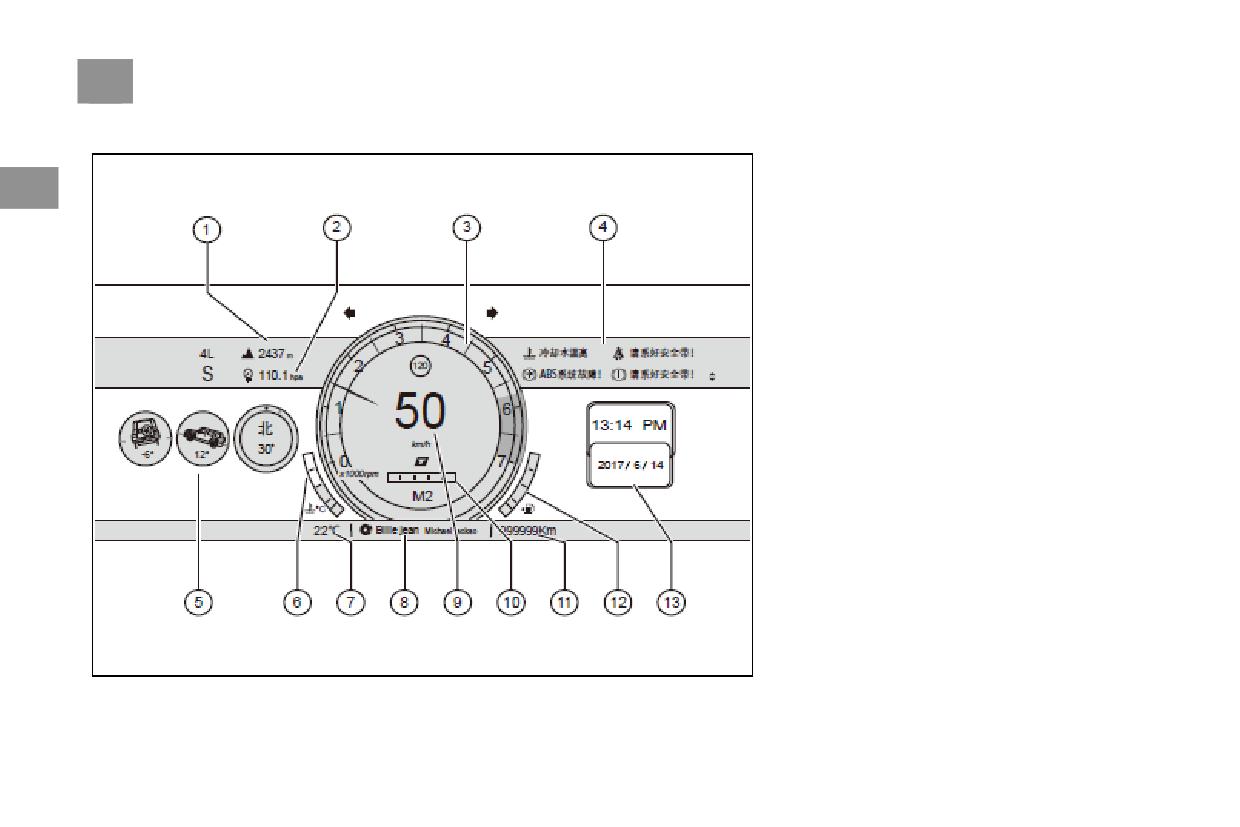
46
Cab
Instrument Cluster (mode 2)
1. Relative height
2. The atmospheric pressure
2
3. Tachometer
4.
Trip Computer: Short-term Memory,
Long-term Memory, Fuel Consumption
Information, Other Information and System
Failure Information
5. Off-road Information
6. Engine coolant temperature gauge
7. Outdoor temperature
8. Multimedia Information
9. Digital Speedmeter
10. Turbine pressure
11. Odometer
12. Fuel Meter
13. Information Display Center: Navigation (if
equipped), tire pressure system (if equipped),
front wheel steering (if equipped), system
settings, alarm and prompt information.
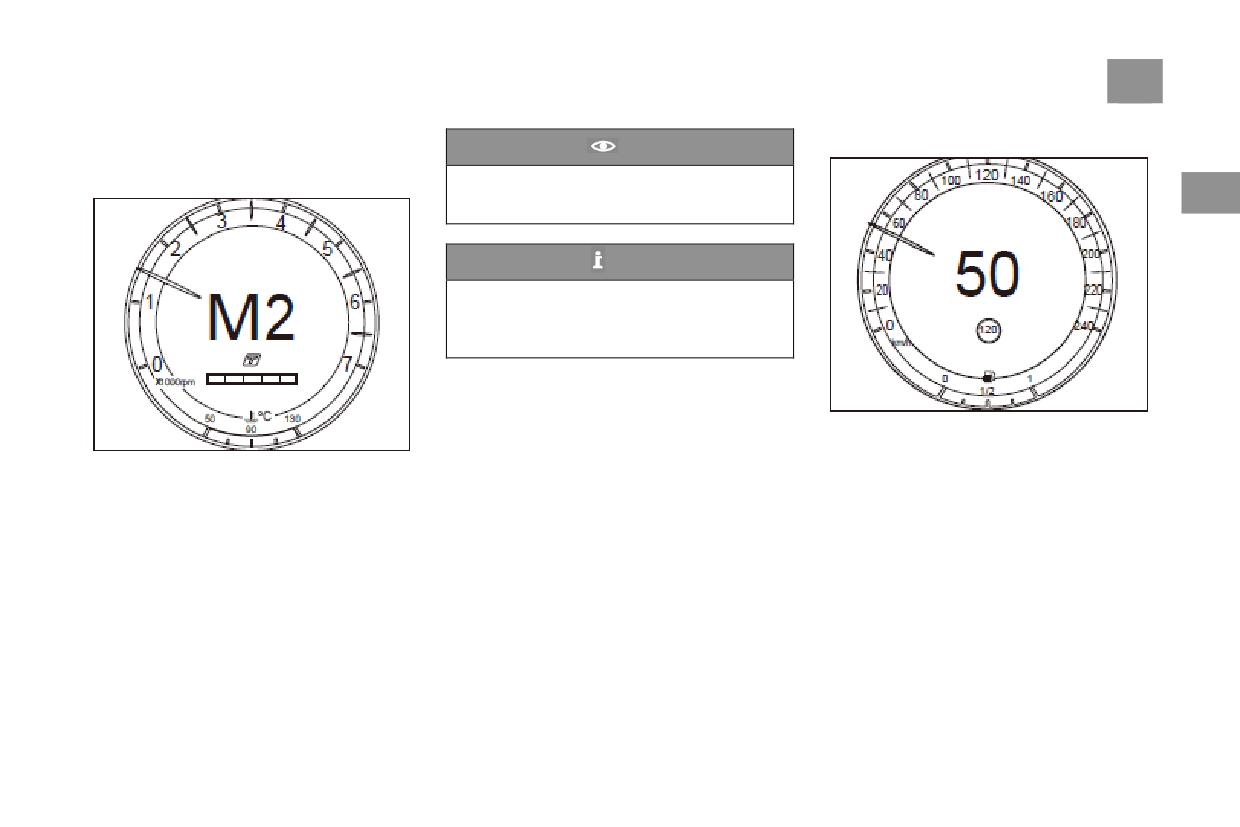
Cab
47
Engine tachometer
Speedometer
Caution
The engine tachometer represents the engine's
Engine tachometer should not be kept in red
speed per minute. (rpm)
area, otherwise the engine will be easily
2
damaged.
Tips
Promptly shift up helps to save fuel and
reduce engine noise.
The recommended RPM for manual gearing
is
1900-2500.
Speedometer represents the real-time speed of a
vehicle in km/h.
The starting point of the red area in the dial
indicates the maximum allowable speed of the
engine. When the engine has to undergo normal
grinding and merging to normal working
temperature, it can run at this maximum speed
for a short time.
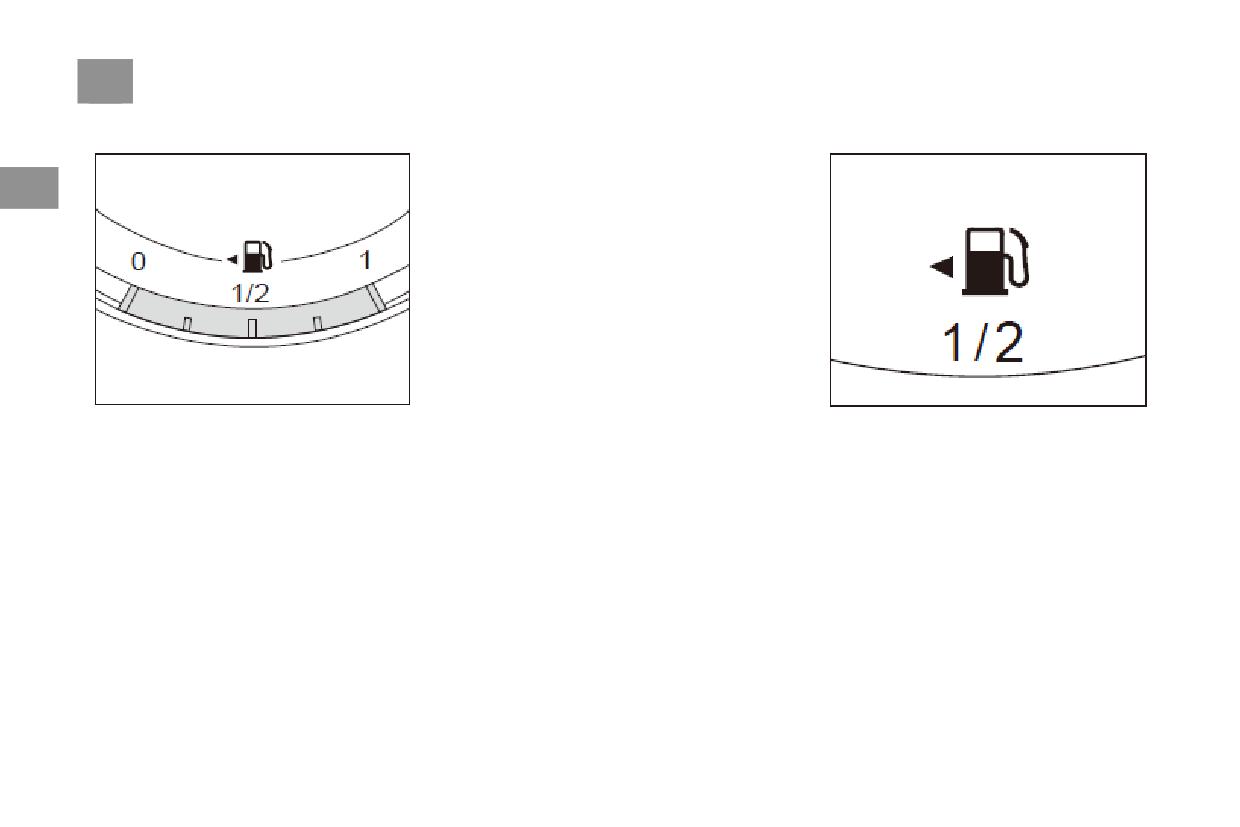
48
Cab
Fuel Gauge
When braking, accelerating, turning or ramping,
Fuel alarm lamp
the fuel in the fuel tank will shake, which will
affect the accuracy of fuel gauge display. The
2
vehicle should be placed on a flat road to check
the fuel volume.
After filling the fuel, it will take some time for
the fuel level to stabilize before the fuel gauge
can reflect the real fuel volume.
The fuel gauge is located at the lower part of the
The fuel alarm lamp is located in the
speedometer. When the start/stop button is
speedometer. When the remaining fuel in the
located in the "RUN" position, the fuel gauge
fuel tank is too low, the alarm lamp lights up,
shows the remaining fuel in the fuel tank. The
prompting the driver to fill the fuel immediately.
fuel tank is empty to full from "0" to "1". When
In addition, alarm information will appear in the
the start/stop button is in the "OFF" position, the
display screen of information center.
current remaining fuel cannot be displayed.
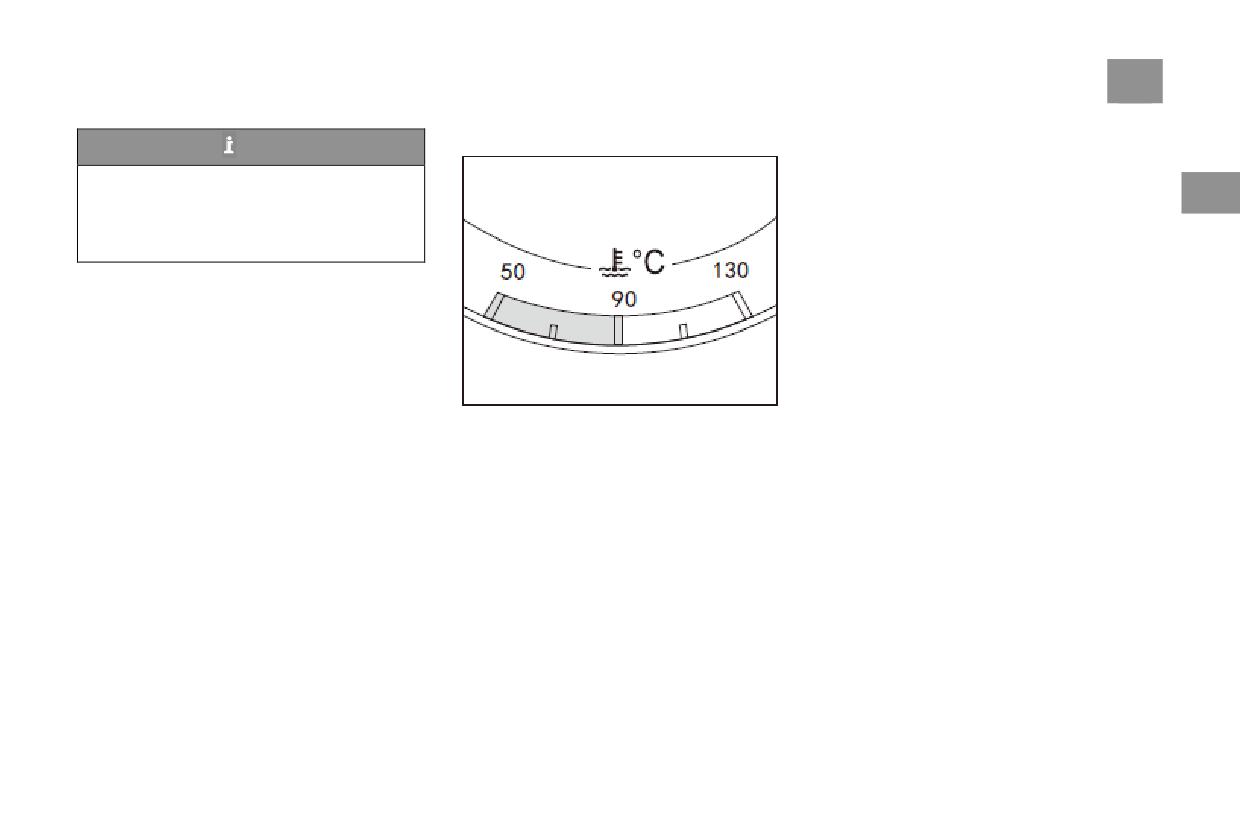
Cab
49
Engine coolant temperature gauge
If the scale bar is biased or stays in the high
Tips
temperature range of the water thermometer for
Vehicles driving on uphill and downhill or
many times, and the coolant alarm lamp in the
bumpy road will cause fuel level instability,
tachometer is lit, the engine should be stopped
2
which will cause fuel alarm lamp alarm,
and extinguished as soon as possible in an
please take the fuel level display in stable
appropriate position to check whether the
state as the standard.
coolant level and the coolant pipeline are
If the following situation occurs, please
leaking.
immediately send the car to BAICdealerships
for inspection:
●The fuel alarm lights continued to flash.
●When the vehicle is full of fuel, the fuel
meter shows that the fuel is insufficient, and the
fuel alarm lamp lights up and flash.
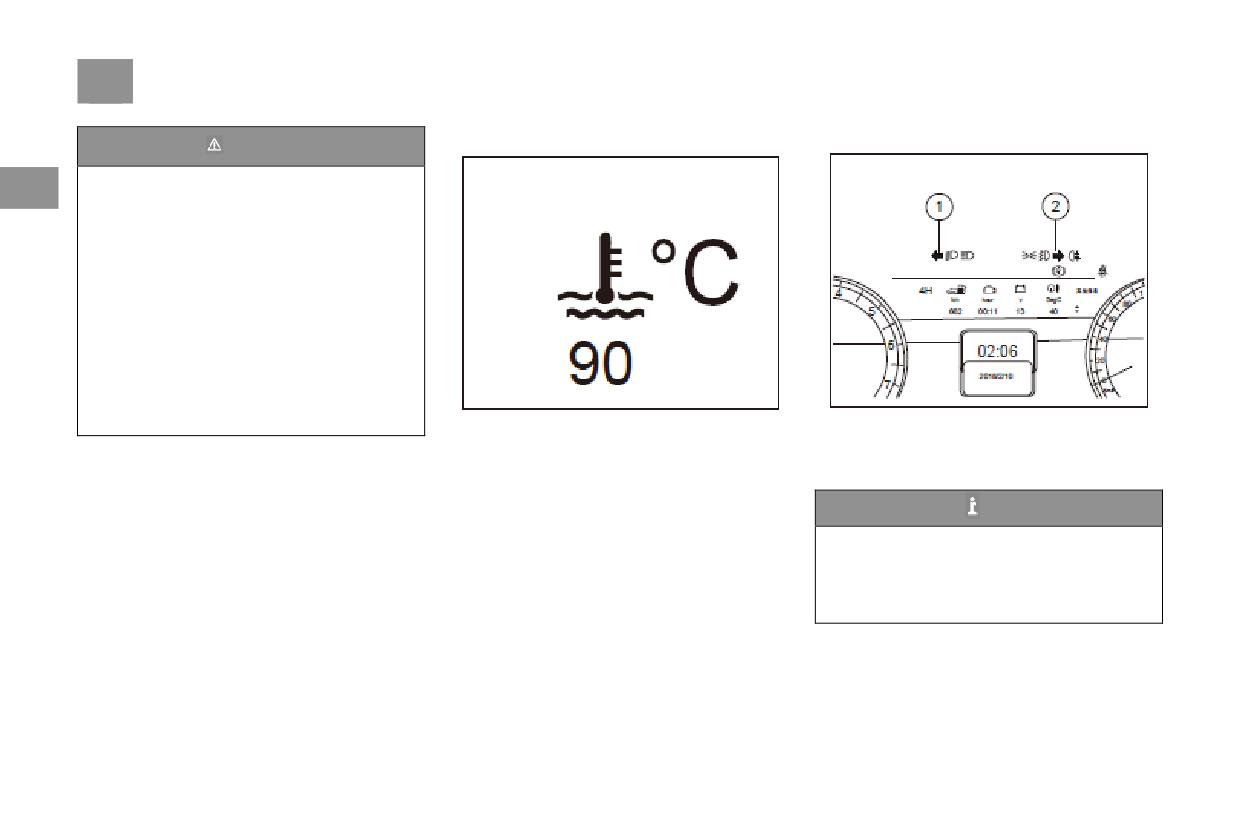
The meter is located at the lower side of the
engine tachometer. When the start/stop button is
in the "RUN" position, the engine coolant
thermometer shows the coolant temperature.
In normal driving, the scale indicates that the
temperature is generally near the middle
position.
The needle of the engine coolant temperature
gauge enters the high temperature zone,
indicating that the coolant temperature is too
high, which may cause serious damage to the
engine, stop immediately to check or seek help
if safety conditions permit.
50
Cab
Engine coolant alarm lamp
Left and Right Turn Indicators
Warning
When the engine is running, it is strictly
2
forbidden to open the coolant expansion tank
cover. Because it's hot and cold under high
pressure.
But the liquid and steam will be ejected,
causing burns. Make sure that the engine is
completely cooled before opening the coolant
expansion tank. When operating, cover the
coolant expansion tank with a large and thick
cloth to prevent steam scalding of operators.
When filling with oil and coolant, do not
sprinkle oil on engine parts or exhaust
system, because there may be fire, engine
coolant can be ignited in certain condition
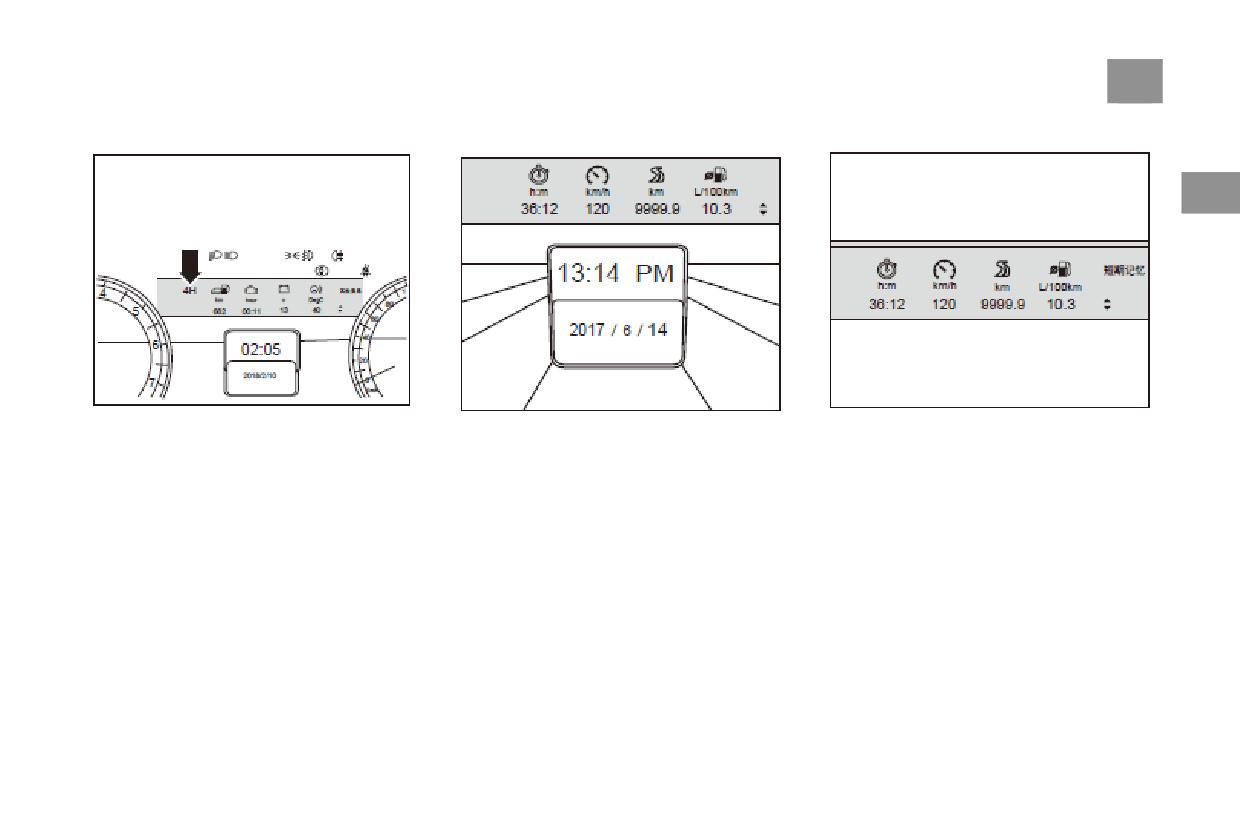
The engine coolant alarm lamp (red) is located
When the steering light is turned on by the light
in the engine tachometer. When the engine
control lever, the indicator light on the
coolant temperature is too high, the alarm lamp
corresponding side of the instrument - 1 - or - 2
lights up and the alarm interface pops up. At the
- flashes and emits a rhythmic prompt sound.
same time, the buzz is 5. At this time, the engine
should be stopped and extinguished as soon as
Tips
possible in the right place, and the level of
If the indicator lights flicker faster than
coolant and the leakage of coolant pipeline
normal frequency or are always on and not
should be checked.
flickering, please check whether the bulb of
the relevant side steering light or its circuit is
out of order.
Cab
51
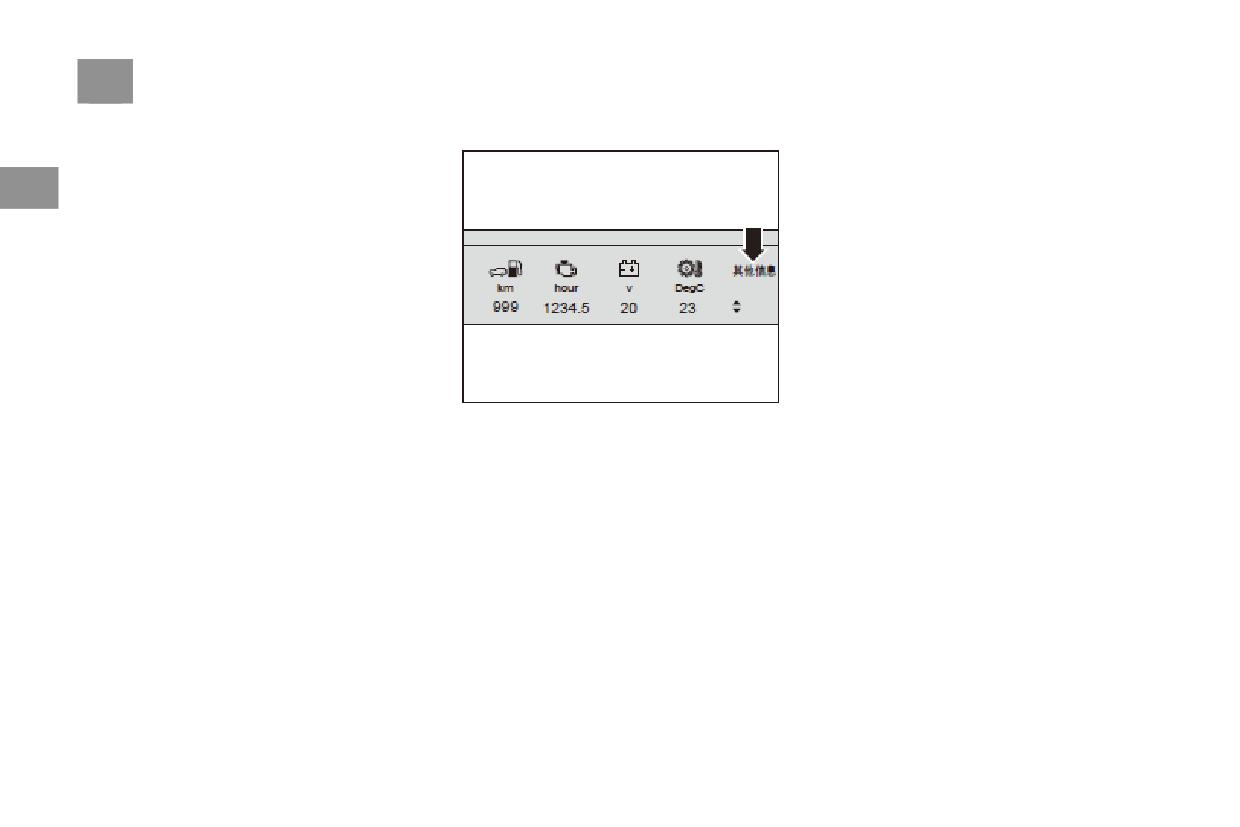
Four-drive status indicator
Trip Computer
Information Center Display Screen
2
1. Four-wheel-drive high-grade status indicator
Short-term memory, long-term memory, other
Short-term memory and long-term memory
"4H": When this light is on, it indicates that the
information and fuel consumption display are
information from left to right are driving time,
vehicle is in the high-grade status of
selected by pressing "UP" / "DOWN" button.
average speed, subOdometer and average fuel
four-wheel-drive.
consumption. Short-term memory automatically
2. Four-wheel-drive low-grade status indicator
resets and resets to zero after more than 2 hours
light "4L": When this light is on, it indicates that
of car stalling.
the vehicle is in a four-wheel-drive low-grade
After the last short-term/long-term memory zero,
condition.
the cumulative average speed of the vehicle
File usage status.
starts from the time the vehicle is powered on
and calculates from the last
short-term/long-term memory zero; the
subOdometer is from the last short-term.
52
Cab
Accumulated driving kilometres after long-term
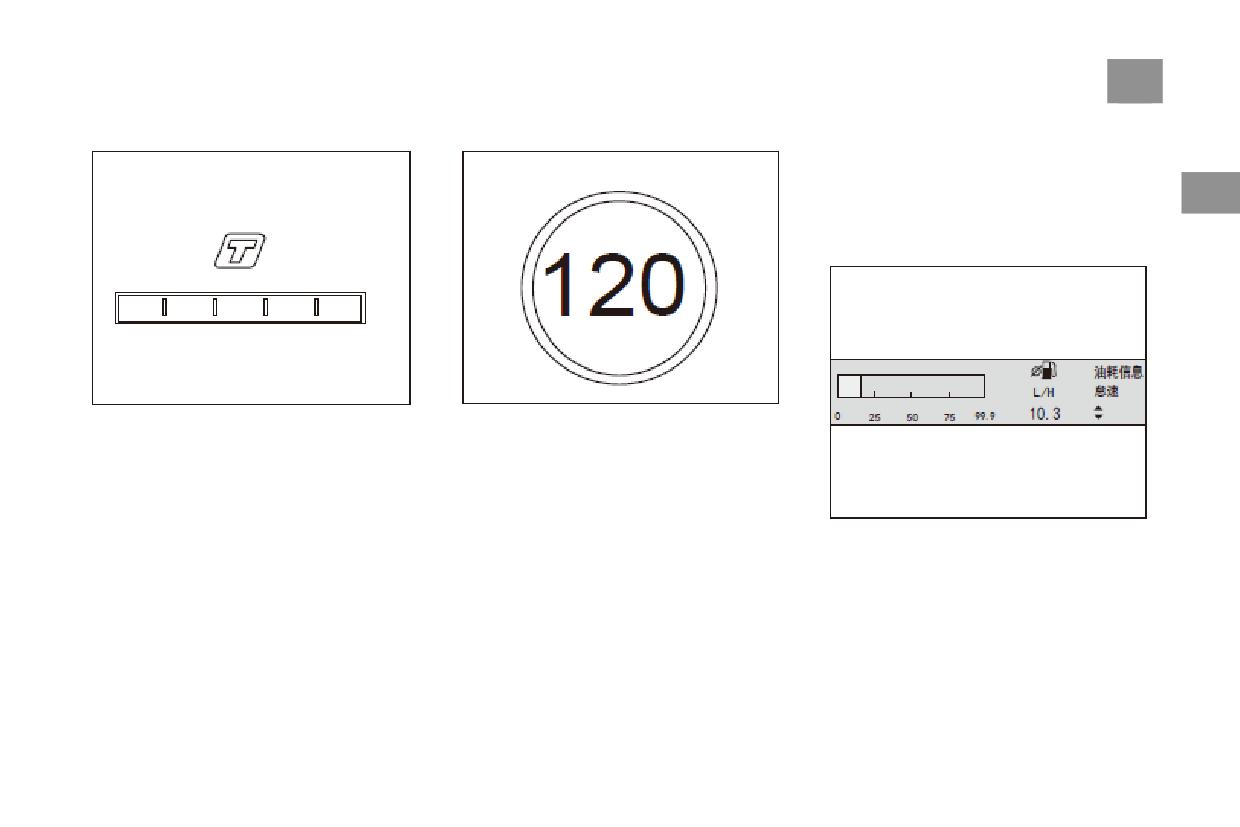
Other information
Engine working time: The accumulated time
memory zero;
after the start of the automobile engine can be
Average fuel consumption since the last
cleared in the following two ways: under the
2
short-term/long-term memory zero shows the
engine working time interface, by pressing the
average fuel consumption during vehicle
BACK button for 5 seconds for a long time, and
driving.
by disconnecting the battery.;
Oil Temperature of Gearbox (if equipped):
Display Oil Temperature of Gearbox, Celsius
Display Range
Oil Temperature of Gearbox (if equipped):
Display Oil Temperature of Gearbox, Celsius
Display Range:40℃~ 214℃;
Vehicle Voltage: Display Vehicle Voltage,
Display Range 0 ~ 20V(For reference only)
Other information from left to right are range,
engine working time display, oil temperature
display of gearbox (if equipped), and vehicle
voltage display.
Running mileage: Display the mileage (km) that
the vehicle can continue with the current fuel
consumption. This data is updated in real time
according to the average fuel consumption. In
the course of driving, if the average fuel
consumption is reduced, the remaining mileage
will increase.
Cab
53
Turbine Pressure Display
Overspeed Alarm
Fuel consumption display
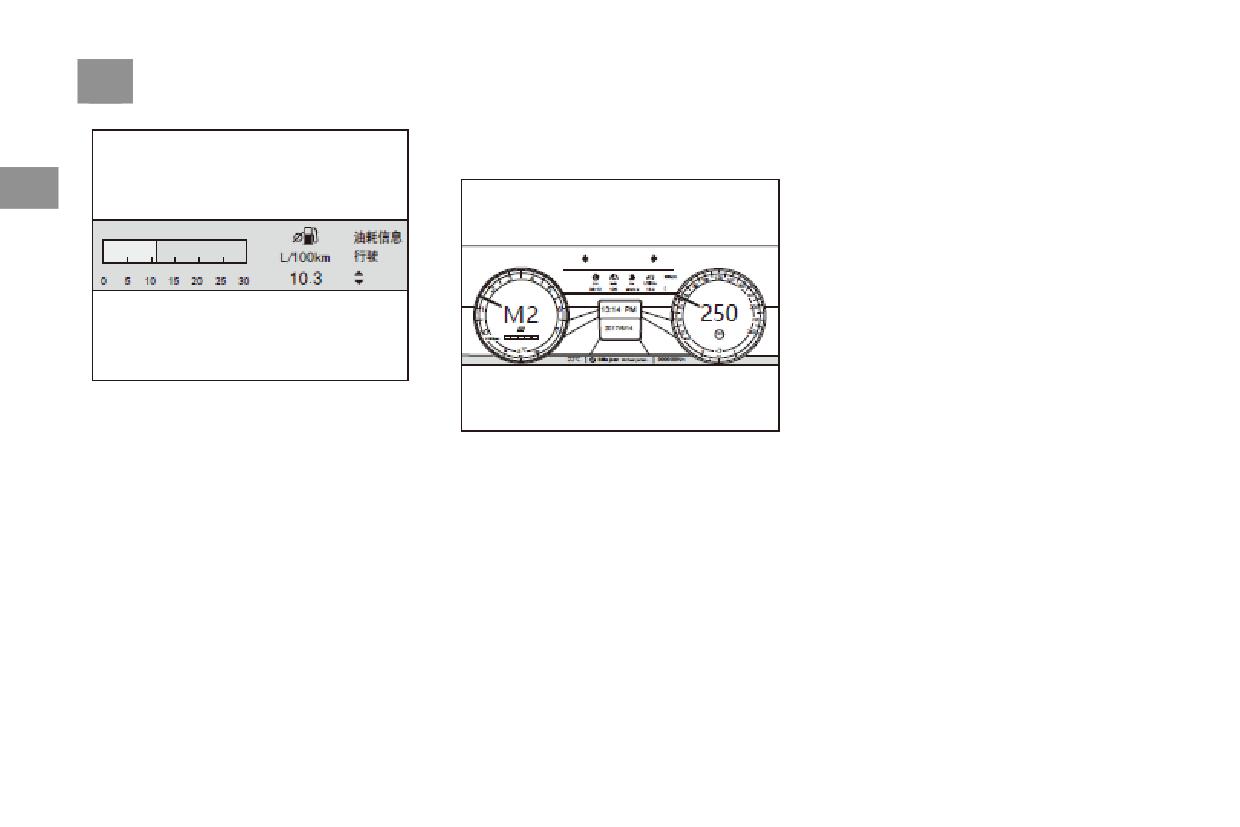
Fuel consumption information includes idling
instantaneous fuel consumption and driving
instantaneous fuel consumption. Instantaneous
2
fuel consumption display "-. -L/h" when engine
is not starting (RUN gear) and no fuel injection
output.
The degree of turbocharger operation is
Users set alarm speed by themselves in menu,
indicated by the progress bar. The driver can
and display alarm when the speed exceeds the
understand the current working pressure of
set alarm speed.
turbocharger under this interface.
Idle Instantaneous Fuel Consumption
The demonstration range of instantaneous fuel
consumption in idling process is as follows:
0.0 ~ 99.9L/h;
54
Cab
Computer information for driving
Date/time display:
Display format YYYY/MM/DD HH/MM/SS,
below
default display 24-hour system;
2
Odometer display:
Displays the total distance the vehicle has been
driven. This mileage cannot be cleared.
Instantaneous fuel consumption:
The demonstration range of instantaneous fuel
consumption during driving is as follows: 0 ~
From left to right, the order is outside
30.0L/100km
temperature
display
date/time
display,
cumulative mileage、
Outdoor temperature display:
When the vehicle is in normal condition, the
area shows the current temperature outside the
vehicle. This data comes from the temperature
sensor outside the vehicle. It shows that the
temperature is the ambient temperature of the
temperature sensor, not the human body
temperature.;
Cab
55
Information Display Center
●Front wheel steering interface* (if equipped)
Tips
●System Setup Interface
Navigation
Geomagnetic principle the compass is greatly
Information Display Center
affected by the magnetic field. If it passes
2
through areas with complex magnetic field or
areas
with
large
electromagnetic
Tyre pressure system
interference, the direction indicated by the
compass will be inaccurate. After the
magnetic field is stabilized, the compass
Environmenta
needs to be calibrated again.。
lnformation
2. Compass
Display the direction of the front. The electronic
Front wheel steering
compass function used in this vehicle is based
on the principle of geomagnetic positioning,
which can indicate eight directions vaguely. The
The information display center displays the time
display direction includes: north, northeast, east,
and calendar after ignition, enters the menu bar
southeast, south, southwest, West and northwest,
by pressing "OK" key, chooses by pressing
1. Clinometer
and the direction angle ranges from 0 to 359°.
"UP"/DOWN key, enters the corresponding Trip
Display range: longitudinal inclination angle 40
Computer interface by pressing "OK" key, and
degrees, lateral inclination angle 60°.
then clicks "OK" key again, and calls out the
"menu bar" as follows:/
●Navigation interface* (if equipped)
●Tire Pressure System Interface* (if equipped)
●Environmental Information Interface
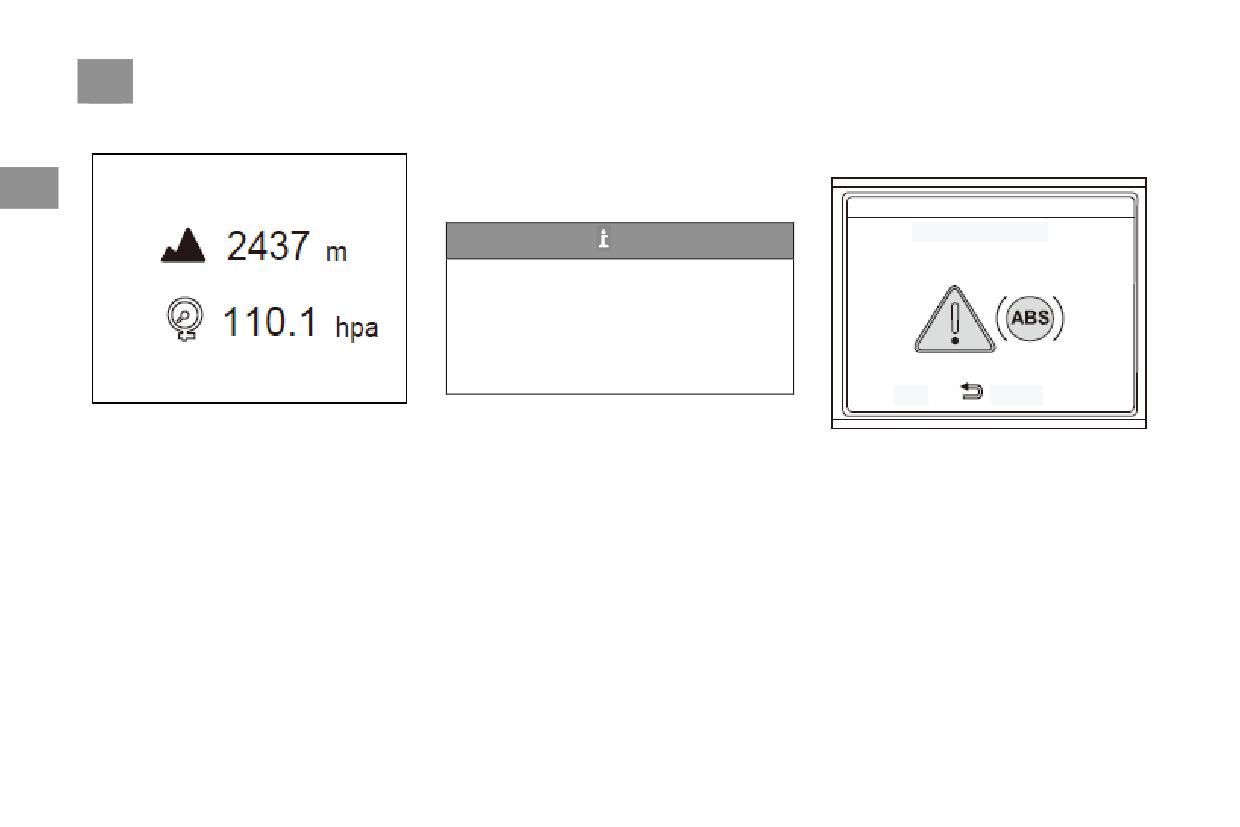
56
Cab
Environment Information Interface
2. Relative height
Vehicle
Alarm
Information
The height reference value obtained from the
Interface
difference between the atmospheric pressure
2
detected by the vehicle instrument and the
standard atmospheric pressure.
ABS System Failure
Tips
The relative height value is not recommended
for height measurement because the
atmospheric pressure is related to the change
of air temperature, wind speed and other
environmental factors. It is only used to
display real-time height relative change when
the vehicle is in motion.
Press
can quit
1. Atmospheric Pressure
Environment information interface, showing the
The figure shows an example of ABS system
current vehicle position of the atmospheric
fault alarm interface. In addition to the interface,
pressure.
the following faults will be warned:
●Left turn signal failure
●Right turn signal failure
●Left low beam lights failure
●Right low beam lights failure
●Fuel sensor failure
●Airbag failure
Cab
57
●Brake fluid level is low
●SD card is out of order. Please replace it
●Please step on the clutch to start
●Low oil pressure
●SD card is not formatted, please format SD
●Please switch to P stop
●High engine temperature
card
●Forgotten keys in the car
2
●The oil problem caused the engine to knock
●Please check the parking monitor video
●Key out
●Gearbox failure
●Photo storage folder full, please delete photos
●Low key battery
●Limited function of gearbox
● Emergency video recording space of Car
●Immobilizer failed
●ABS system failure
DVR is full, please clean up!
●The electron steering column is not unlocked
●Brake failure
●The tire deflates quickly
●Steering malfunction, please stop
●ESP system failure
●The tire high temperature
●Steering column malfunction, please repair
●Tire pressure
●Downhill auxiliary system failure
●Please turn the steering wheel
●Auto hold system failure
●Tire low pressure
●Parking assist system malfunction
●Please fasten the driver's safety belt to release
●Missing tire pressure sensor
the electronic handbrake
●Low battery in tire pressure sensor
●Depress the brake pedal while release the
●Tire pressure sensor malfunction
electronic handbrake
●Tire pressure system malfunction
●EPB system failure
●System failure with one key startup
●Car DVR fault
●No intelligent key found
● The SD card of Car DVR has not been
●Please apply the brake to start
inserted, please insert the SD card
●Please switch to P/N to start
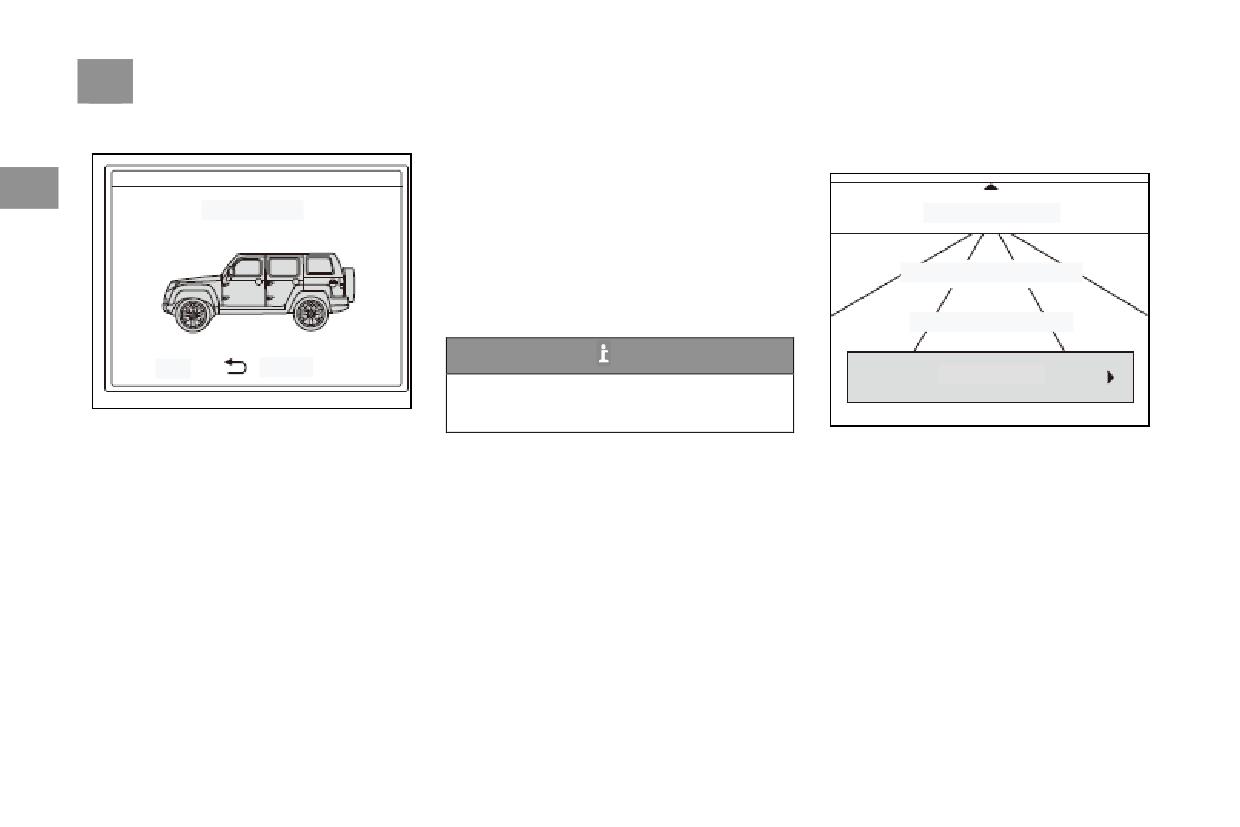
58
Cab
Prompt Message Interface
From next maintenance (500/200/100km)
Information Center System Settings
Please maintain immediately
System Setting Interface
Please turn off the light
2
The vehicle speed has exceeded XXXKM /h
Sport mode On
The vehicle speed exceeded 120km/h
Tire pressure system
Vehicle stability system shutdown/vehicle
stability and traction torque control system
shutdown/vehicle stability and traction control
Environmental information
system shutdown
4 h / 4 l interface
Snow mode/sport mode
The front wheel steering
Tips
Press
can quit
System Settings
After the failure prompt interface, it is
suggested to immediately go to the nearest
The figure above shows an example of the
authorised dealership for maintenance.
prompt interface in motion mode. In addition to
Enter the system Settings page through the
the prompt interface, the following information
menu.
will be prompted:
Press "OK" to enter the system setting interface.
Door opening status display (left front door,
Press "UP"/" DOWN "to select the
right front door, left back door, right back door,
corresponding setting item. Press" OK "to enter
tail door)
the corresponding setting item.
Seat belt status (Driver and passenger)
System Settings include the following Settings:
Backlight brightness adjustment tips
Please fill it up with fuel
Cab
59
Overspeed Alarm
Alarm Volume
Overspeed Alarm
2
Overspeed Alarm
Overspeed Alarm Setting
Alarm Volume
Open 120 km/h
Alarm Volume
Shut Down
Maintenance Information
Maintenance Information
Compass Calibration
Compass Calibration
2. The default value of overspeed alarm setting
is 30km/h, setting range: 30-200km/h;
Enter the alarm volume setting page through the
1. Enter the overspeed alarm setting interface
3. Short press "UP" and "DOWN" keys to
menu.
through the menu, and press "OK" to enter the
increase or decrease the step speed according to
setting of the speed value. Press "OK" or
the step value of 5.
"BACK" to return to the parent menu
Yes, then the interface will return to the parent
menu;
60
Cab
Maintenance Information
2
Overspeed Alarm
High
Maintenance interval: 5000km
Middle
Alarm Volume
Maintenance Information
Low
Compass Calibration
Enter the alarm volume setting interface through
After entering the maintenance information
the menu, press "UP"/" DOWN "to select, and
Enter the maintenance information inquiry page
inquiry interface through the menu, press
press" OK "to confirm.
through the menu.
"BACK" button to return to the superior menu.
Cab
61
Compass Calibration
Overspeed Alarm
2
Being Calibration
Alarm Volume
Calibration completed
End calibration
Maintenance Information
Compass Calibration
1. After entering the compass calibration page
2. The driver needs to slowly start the car to
Enter the compass calibration page through the
from the menu, the user shall immediately start
drive the "circle" route on the flat ground, either
menu;
calibration. If the user needs to cancel the
clockwise or counterclockwise. When the
calibration of the compass or has not completed
calibration of the compass is completed, the
the calibration of the compass during the
instrument will be displayed
calibration process, the user can actively end the
That is, the "calibration completed" interface is
calibration of the compass by pressing
displayed.
"OK/BACK".
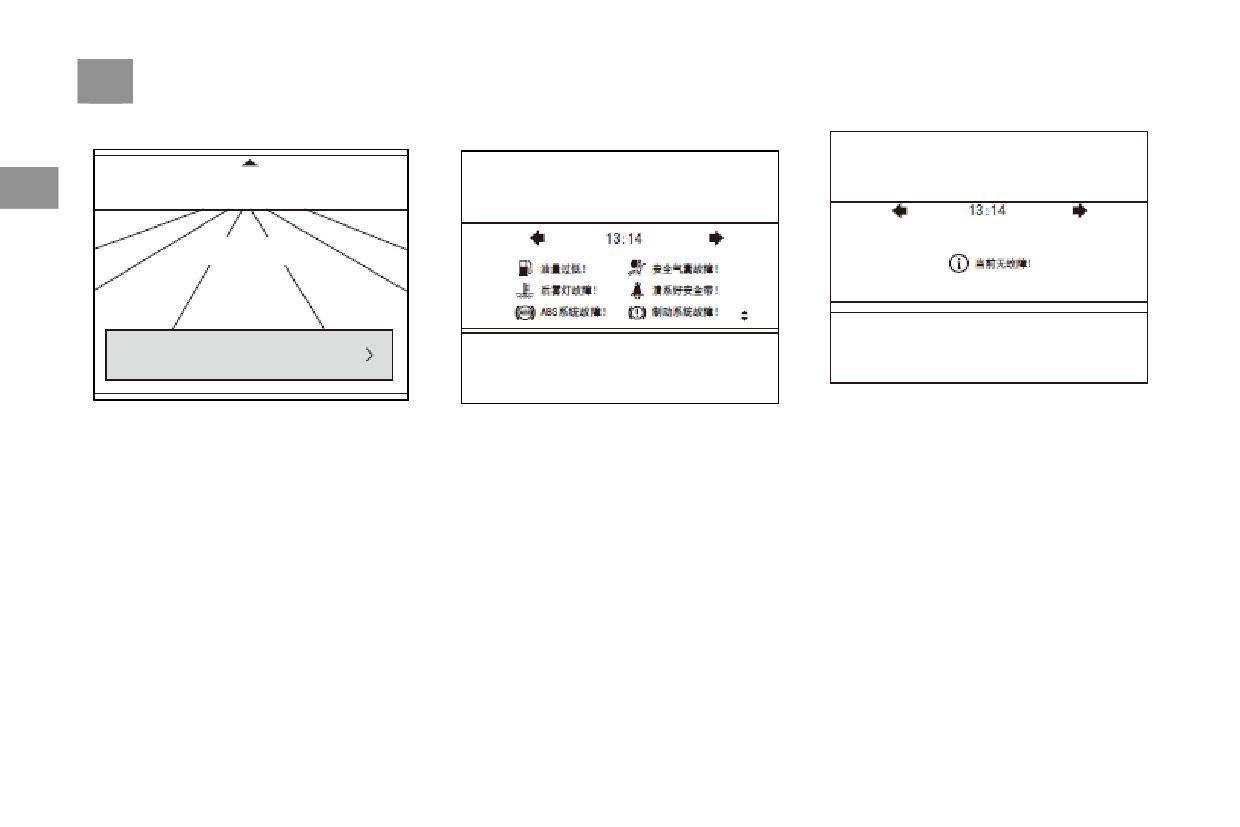
62
Cab
Mode Switch
Current Fault Query
2
Alarm Volume
Maintenance Information
Compass Calibration
To Off-Road Mode
1. After entering the current fault inquiry
Press "OK" to switch between "city mode" and
Long press "DOWN" 5s in the first level
interface, the current existing faults of the
"off-road mode", and press "BACK" to return to
interface to pull DOWN "current fault inquiry
vehicle will be displayed in the form of a list.
the superior menu.
interface".
2. When there are many faults, press "UP"/"
DOWN "to switch UP and DOWN;
3. When the vehicle is trouble-free, the "current
trouble-free" information will be displayed.
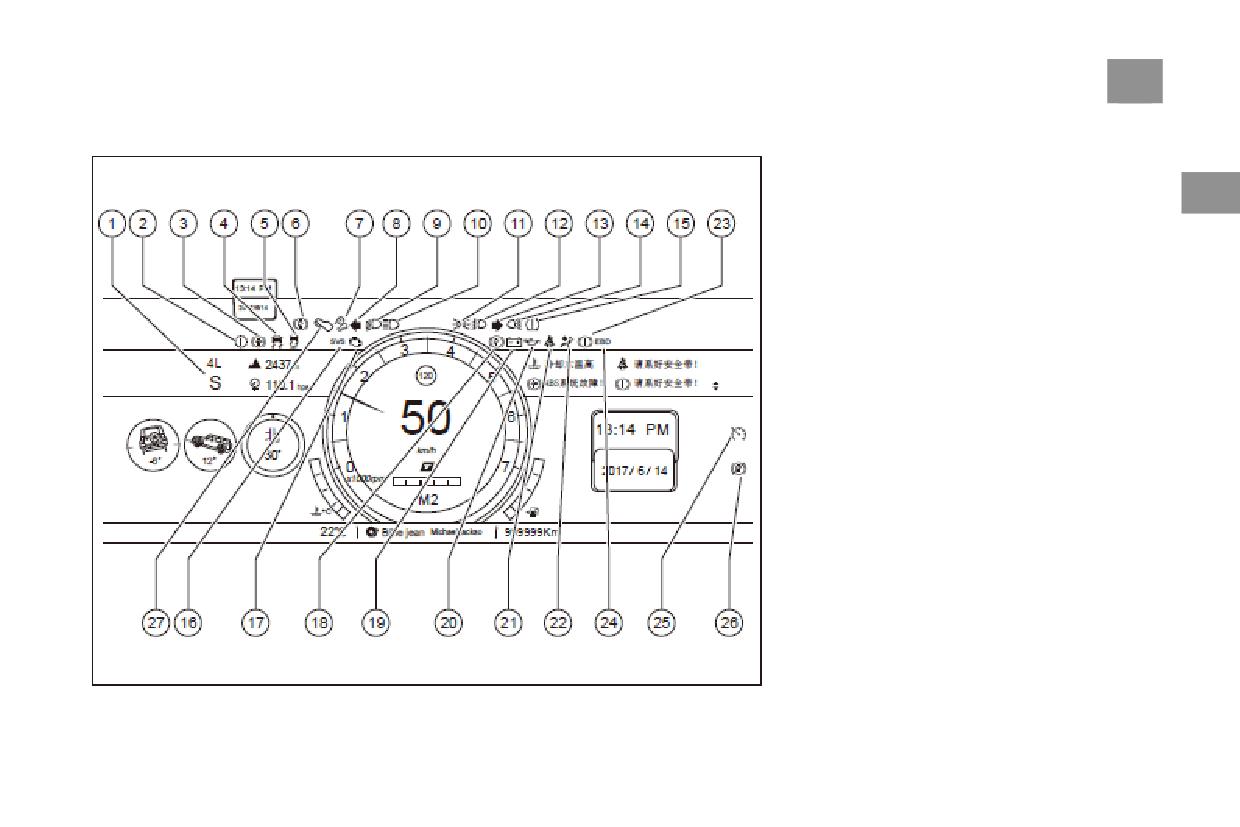
Cab
63
Warning Light
1. 4H (four-wheel drive high-grade)
/ 4L
(four-wheel drive low-gear), indicator light for
snow mode/sports mode
2
2. Gearbox failure indicator
3. ABS failure indicator
4. ESP indicator
5. ESP turn off indicator
6. Autohold system indicator
7. Downhill auxiliary work/fault indicator
8. Turn left indicator
9. Low beam indicator
10. High beam indicator
11. Position light indicator
12. Front fog indicator
13. Turn right indicator
14. Rear fog indicator
15. Tire pressure indicator
16. Engine electronic trouble light
64
Cab
17. Engine discharge indicator
1. 4H (four-wheel drive high-grade)
/ 4L
When the start/stop button is in the "RUN"
18. EPB indicator
(four-wheel drive low-gear), indicator light for
position (the engine is not started), the vehicle
19. Battery indicator
snow mode/sports mode
self-check, the light will be on for a few seconds,
2
20. Oil pressure indicator
When the four-wheel drive high-grade state
and then off.
21. Safety belt indicator
indicator is on for 4H, it indicates that the
Make sure the lights go out before the vehicle
22. Airbag malfunction indicator
vehicle is in the four-wheel drive high-grade use
moves.
23. Brake low level indicator
state.
Warning
24. Brake system fault indicator
When the four-wheel drive low-gear indicator
25. Cruise control indicator
light 4L is on, it indicates that the vehicle is in
If the warning light is on during driving, you
26. EPB failure indicator
low-gear four-wheel drive.
can drive to the destination under the
27. Press the brake pedal to release the EPB
When the motion mode indicator S is on, the
condition of ensuring safety, but you should
light
vehicle is in motion mode.
send the vehicle to authorised dealership for
When the snow mode indicator light is on, the
inspection as soon as possible.
vehicle is in snow mode.
If the brake fault light is on at the same time,
2. Gearbox failure indicator
(Yellow)
stop immediately and contact the authorised
When the automatic transmission fault indicator
dealership.
is on, it indicates that there is a fault in the
4. ESP indicator (Yellow)
automatic transmission system. Please park your
When the ESP work indicator flashes rapidly,
car in a safe place and contact the authorised
indicating that the motor is not started when the
dealership immediately.
start/stop button of the ESP is located in the
3. ABS failure indicator
(Yellow)
"RUN" position. When the ESP light continues
The lamp is on when the ABS system fails.
to be on
Cab
65
it indicates a failure of the system and must be
When the HDC switch is pressed, the HDC
12. Front fog indicator
(Green)
checked at a nearby 4S store as soon as
lamp will continue to be on; When the HDC
When the front fog light is on, the indicator
possible.
indicator flashes quickly, it indicates that the
light is on.
5. ESP turn off indicator
HDC function of the vehicle is in working state;
2
(Yellow)
13. Turn right indicator
(Green)
When the HDC switch is pressed, the HDC
When the start/stop button is in the "RUN"
When the right turn signal is turned on by the
lamp does not work, indicating that the system
position (the engine is not started), the indicator
light control joystick, the indicator light on the
will be on for a few seconds and then off.
has a fault. Please go to the authorised
corresponding side of the meter will flash and
dealership nearby for maintenance as soon as
Transfer 2 hours: the indicator light will be on
give out a rhythmic prompt sound.。
possible.
when the ESP function is off; Transfer box
14. Rear fog indicator
(Yellow)
4H/4L: to be opened by itself;
8. Turn left indicator
(Green)
When the rear fog light is on, the indicator light
6. Autohold system indicator
(Green)
When the left turn signal is turned on by the
is on.
light control joystick, the indicator light on the
When the auto parking function is turned on to
corresponding side of the meter will flash and
15. Tire pressure indicator
(Yellow)*
stop the car in motion (for example, at a red
give out a rhythmic prompt sound.
When the tire pressure alarm light is on, it
light), AUTOHOLD will automatically brake
the car and release the brake when the
9. Low beam indicator
(Green)
indicates that there is a fault in the tire pressure
accelerator is pressed at the start.
When the headlight is turned on, the indicator
system of the vehicle. When the start/stop
light is on.
button is in the "RUN" position, the light will go
7. Downhill auxiliary work/fault indicator
on for a few seconds and then go off. If the
10. High beam indicator
(Blue)
(Green)
warning light does not go out or is on during
When the headlight is on, the indicator is on.
When the start/stop button is in the "RUN"
driving, please park your car in a safe place and
position (the engine is not started), the light will
11. Position light indicator
(Green)
contact authorised dealership immediately.
be on for a few seconds and then off;
When the light knob is rotated to the width
6. Engine electronic trouble light
(Yellow)
indicator, the indicator light is on.
When the engine is started or the light
66
Cab
remains on for several seconds, it indicates that
If the warning light does not go out, please go to
Warning
there is a fault in the system, but the vehicle can
the
authorised
dealership
nearby for
still run normally. Please go to authorised
If there is any engine related problem, please
maintenance as soon as possible.
2
dealership for testing and troubleshooting as
stop the car as soon as possible and contact
20. Oil pressure indicator
(Red)
soon as possible.
authorised dealership.
This warning light is on when the engine oil
Failure to take action can lead to serious
pressure is below normal and the start/stop
Warning
performance problems.
button is in the "RUN" position. The engine
If there is any engine related problem, please
8. EPB indicator
(Red)
should be extinguished after starting. If the
stop the car as soon as possible and contact
When the electronic parking brake button is
warning light does not go out after the engine is
authorised dealership.
pressed, the indicator light will be on.
started or is lit while the vehicle is moving,
Failure to take action can lead to serious
If the indicator light is still on after pressing the
please park the vehicle in a safe place and
performance problems.
electronic parking brake button, it may be a
extinguish the engine immediately. Do not start
17. Engine discharge indicator
(Yellow)
fault of the braking system. You must go to the
the engine until the oil pressure is restored.
The light is on when the engine emission
authorised dealership nearby for maintenance as
control system is not running steadily and the
soon as possible.
start/stop button is in the "RUN" position (the
9. Battery indicator
(Red)
engine is not started).The lamp should be
When there is a problem with the battery system
extinguished after the engine is started. If the
and the start/stop button is in the "RUN"
warning light is still on after starting the engine,
position (the engine is not started), the battery
or if it is on or flashing during driving, it
charging warning light will be on, and the
indicates that the relevant parts of the engine
engine should be extinguished after starting.
control system have failed. At this time, the
vehicle can still run, but must go to the nearby
authorised dealership for maintenance as soon
as possible.
Cab
67
23. Brake low level indicator
(Red)
Warning
Tips
The lamp is lit when the parking brake is
If the safety belt has been properly worn, but
If the warning light is on during driving, stop
applied or the brake fluid level is lower than the
immediately and contact the authorised
the warning light is on during driving,
2
prescribed level. Before driving the vehicle
dealership while ensuring safety.
contact the authorised dealership in case of
should fully release the standing brake, and
Failure to take action can lead to serious
ensuring safety.
ensure that the brake system status and fault
performance problems.
22. Airbag malfunction indicator
(Red)
warning lights go out.
21. Safety belt indicator
(Red)
If the light is on while the vehicle is in motion,
When the start/stop button is in the "RUN"
When the start/stop button is located in the
position (the engine is not started), the warning
it means less effective braking. At this point
"RUN" position, if the safety belt is not worn,
light flashes for several seconds and then goes
should be parked in a safe place as soon as
the warning light will be on, and the alarm
out. If it keeps flashing or does not go out after
possible, and authorised dealership contact.
sound will be triggered after driving for a period
several seconds, it indicates that there is a fault
Warning
of time. The warning light goes out when you
in the airbag system. At this time, please go to
put on your seat belt.
the 4S store for inspection as soon as possible.
If the warning light is on during driving, stop
immediately and contact the authorised
Warning
dealership while ensuring safety.
If this fault warning light is on, the airbag
Failure to take action can lead to serious
system cannot be guaranteed to be in normal
performance problems and even the risk of
state. It should be sent to authorised
accidents.
dealership immediately for inspection and
maintenance.
68
Cab
26. EPB failure indicator
(Yellow)
Tips
Warning
When the start/stop button is in "RUN" mode,
When the brake system status and fault
the light will be on for about 3 seconds for
●If the warning light is on during driving,
2
warning light is on, please park the vehicle to
self-check, and then go out after self-check.
stop immediately and contact the authorised
a safe place according to the following steps:
This indicator indicates the status of the EPB
dealership while ensuring safety.
●If the braking effect is not obvious when
system. When the EPB system fails, the light is
●Failure to take action can lead to serious
stepping on the brake pedal, apply more
on. The alarm popup displays "EPB system
performance problems.
force to continue.
failure" and has five prompts. If the alarm light
27. Press the brake pedal to release the EPB
●If the braking effect is still not obvious,
is on during driving, please contact authorised
light
(Green)
should reduce the transmission gear, and
dealership for maintenance.
When the indicator light is on, it indicates that
then remove the parking brake, while
the driver needs to press the brake pedal to
stepping on the brake pedal.
release the electronic handbrake. When this
4. Brake system fault indicator
(Red)
light is on, the alarm popup displays "please
If the lights of ABS and EBD are on at the same
press the brake pedal to release the electronic
time, it indicates that the ABS and EBD systems
handbrake.
in the vehicle are out of order. At this time, the
vehicle can still be stopped by conventional
braking methods, but the ABS and EBD
systems do not work. Please contact the
authorised dealership for maintenance as soon
as possible.
25. Cruise control indicator
(Green)
When the light is on, it indicates that the vehicle
is cruising at a constant speed.
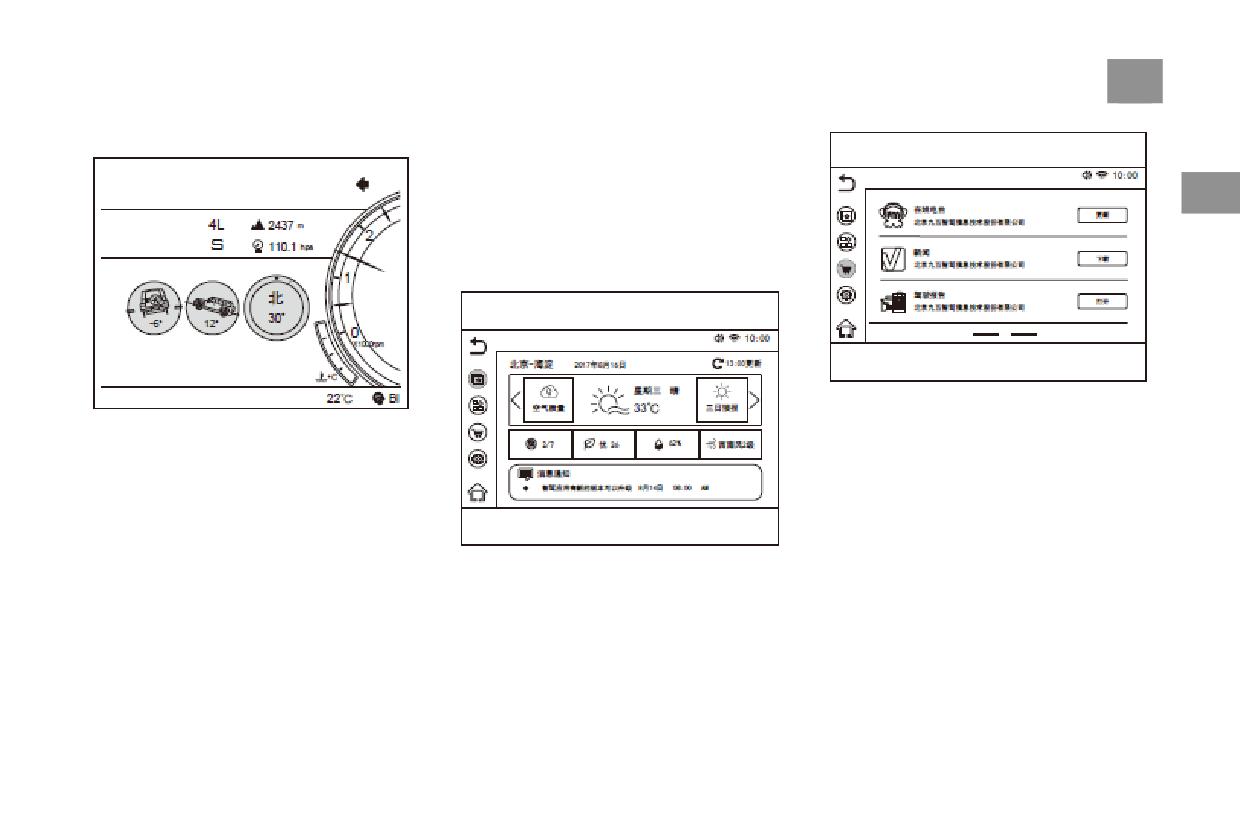
Cab
69
Cross-country information
Intelligent car service *
Intelligent development of intelligent car
machine cloud platform, system hardware using
4G communication module, realize online voice
2
recognition, online navigation, online music,
driving behavior analysis, news and information
and other functions;
The function interface
Above is the application mall interface
The horizontal and vertical angles of the vehicle
There are four level functions on the left side of
the interface from top to bottom: Home page,
can be read from the meter, which allows you to
Application management, Application mall,
know the current position status of the vehicle
relative to the horizontal plane.
Settings.
Each of these primary functions contains several
secondary functions.
Application management interface includes:
application delete.
The interface is the home page of the
Application store interface includes: download
application, which includes the following
applications, update applications.
functions:
Weather Air quality News
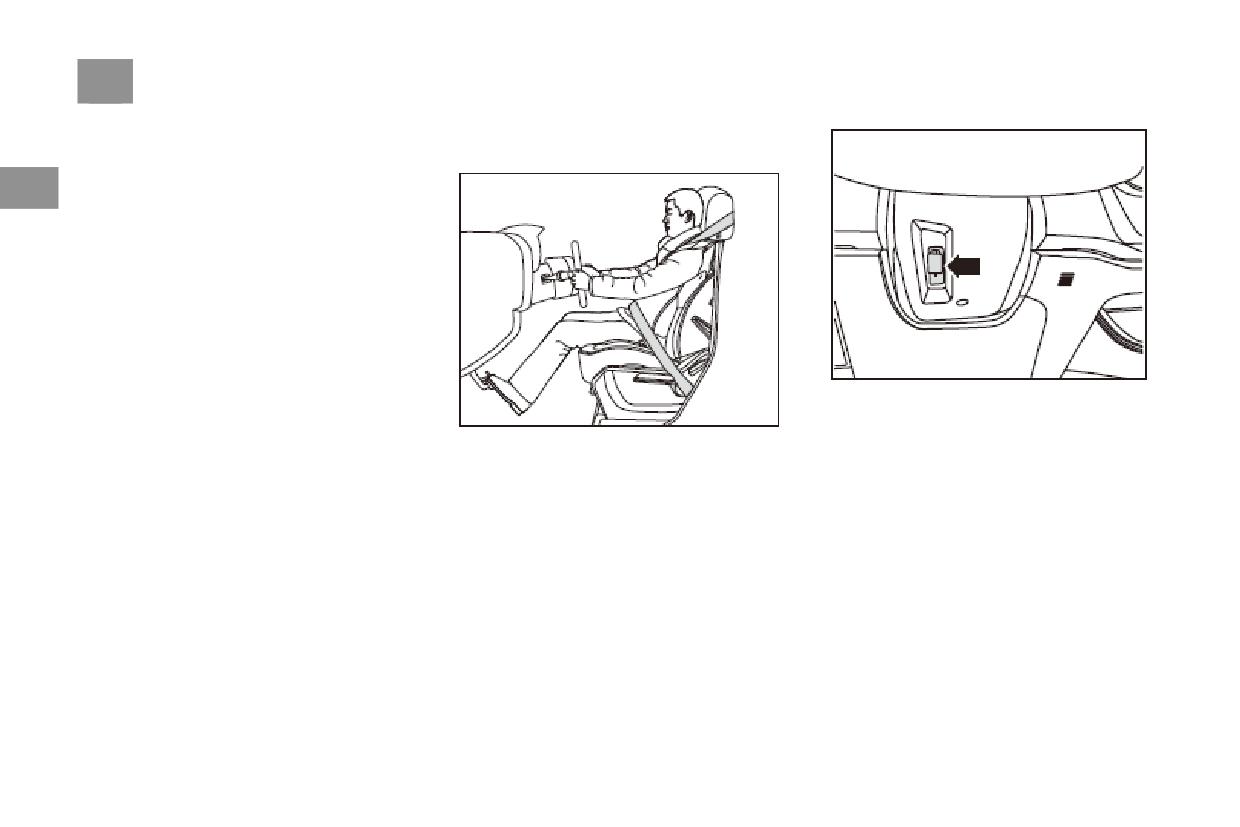
70
Cab
Service renewal, order inquiry, order deletion
Steering Wheel
information, SIM card status inquiry, SIM card
Adjust steering wheel position
replacement, user agreement inquiry, user
2
information modification, user logout, OTA
update.
1. Adjust the driver's seat to the correct position,
then push down the lock handle to unlock the
steering wheel.
The driver can adjust the height of the steering
2. Position the steering wheel up and down so
wheel according to his body shape.
that it is facing the driver's chest, ensuring that
the driver can see all the instruments and
indicators on the dashboard.
3. Then push up the locking handle to lock it.
4. Move the steering wheel up, down, front and
back to confirm that the steering wheel is firmly
locked.
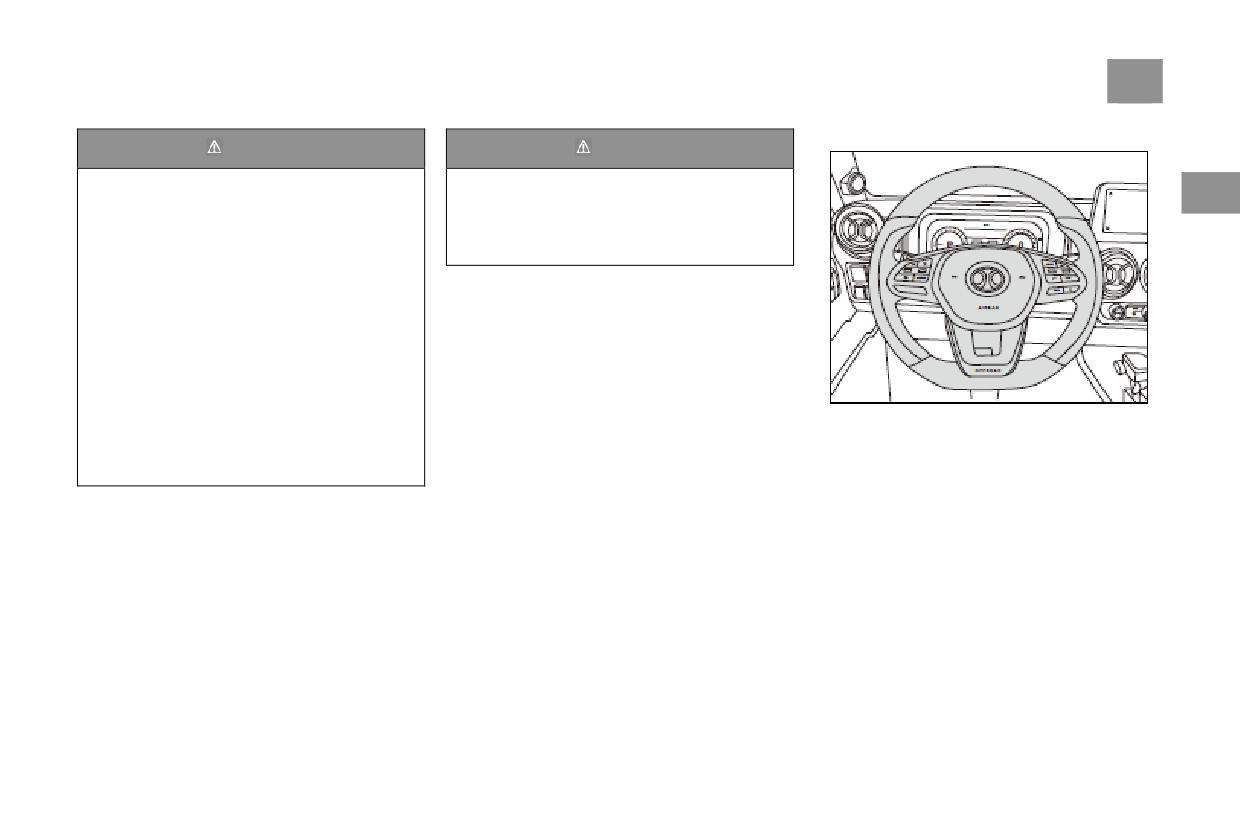
Cab
71
Multi-function steering wheel
Warning
Warning
●Improper use of steering wheel position
Do not direct the steering wheel to your face.
adjustment devices and incorrect posture can
Otherwise, the driver's front airbag will not
2
result in serious injuries.
provide effective protection when an accident
●To avoid dangerous driving conditions and
occurs. The steering wheel should be facing
accidents, only adjust the steering wheel
the driver's chest.
when the vehicle is stationary!
●Note when adjusting the driver's seat or
steering wheel: the distance between the
steering wheel and the chest should not be
less than
25 cm. If it's less than
25
centimeters, the airbag system won't protect
you.
●The lock handle must be tightly pressed to
This car is equipped with multi-function
prevent the position of the steering column
steering wheel, equipped with operation, switch,
from changing during the driving of the
adjustment and other function keys in the
vehicle.
steering wheel, the details are as follows:
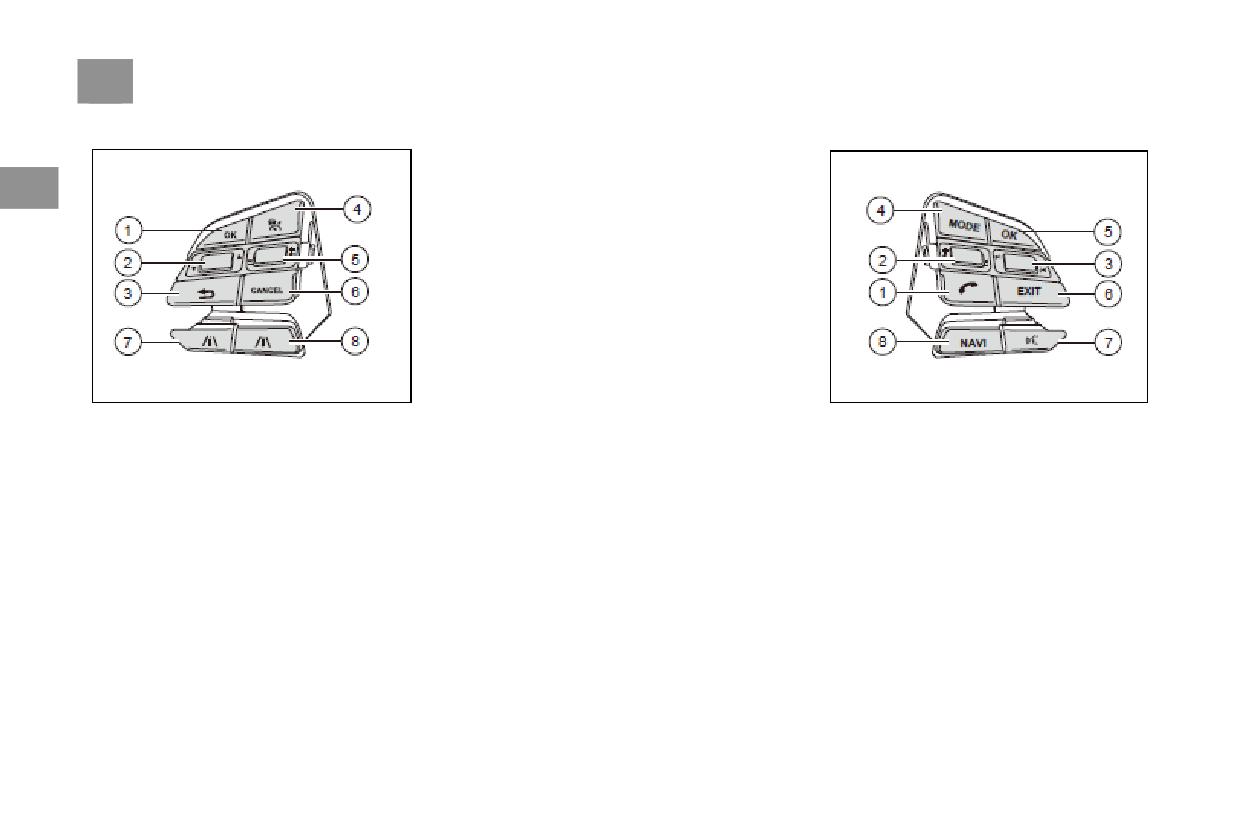
72
Cab
Left Key Group
5. Move up and down the left side of the
Right Key Group *
steering wheel to right dial
-5-, cruise
recovery/speed
plus
(RES
+),
cruise
2
Settings/speed minus (SET -).
6. Press "CANCEL" on the left side of the side
panel -6- to CANCEL the constant speed cruise.
7. Press the button to decrease the left distance
of the steering wheel -7- to shorten the distance
between cruise and car.
8. Press the button to increase the distance from
the left side of the steering wheel -8- to increase
the distance from the cruise to the car.
1. Press the OK button on the left side of the
1. Click the bluetooth phone button on the right
steering wheel
-1- , enter the instrument
side of the steering wheel
-1- to receive
information function setting and confirmation.
incoming calls. Long press 3s right and left
2. Up and down move the left side of the
bluetooth phone button on the right side of the
steering wheel to dial button -2- to realize up
steering wheel -1- to hang up the phone.
and down selection of instrument information.
2. Up and down move the right side of the
3. Press the return button -3- on the left side of
steering wheel to turn the left button -2- to
the steering wheel to exit the setting of
increase or decrease the sound volume.
instrument information function.
3. Up and down turn the right side of the
4. Press the cruise button on the left side of the
steering wheel to press button 3- to change
steering wheel -4-, cruise function on/off.
tracks or radio channels.
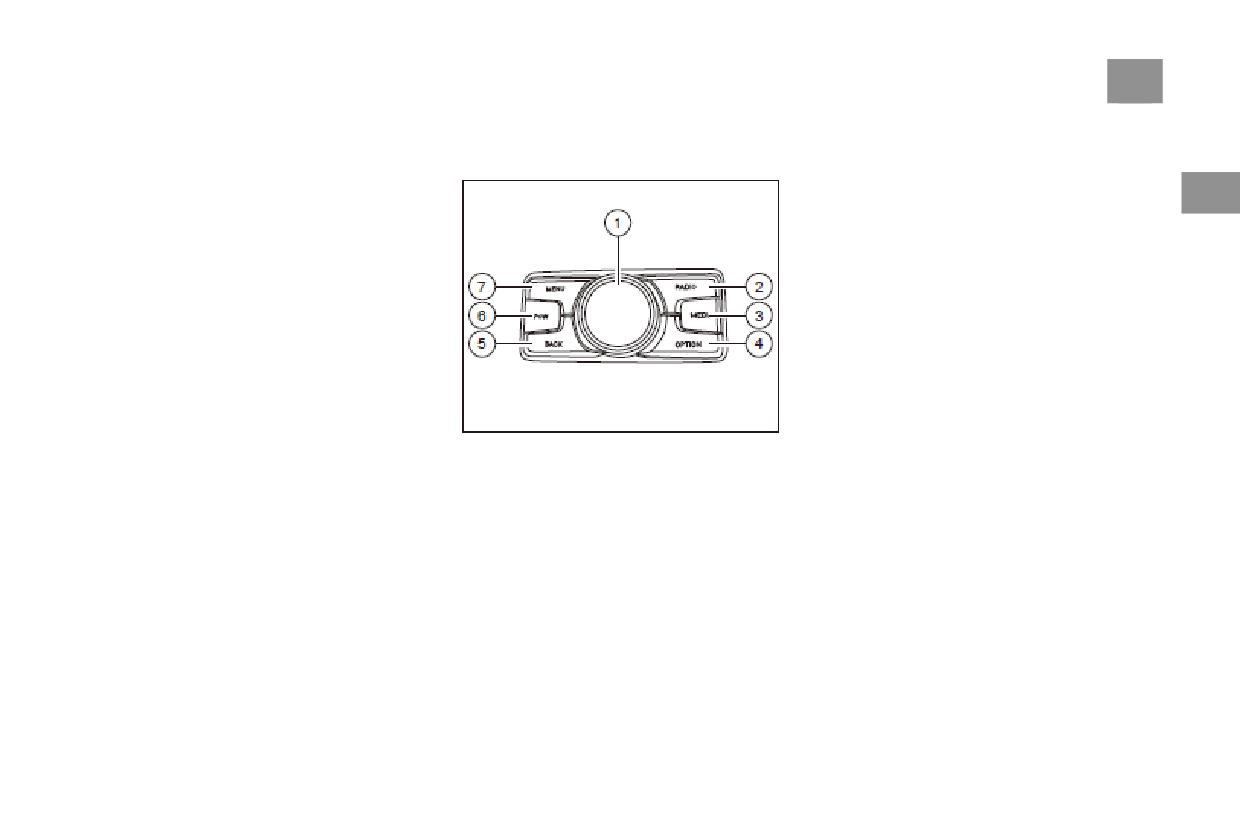
Cab
73
4. Press MODE button -4- on the right side of
Middle Channel Multi-function
2. RADIO button: RADIO select button;
the steering wheel to switch the MODE
3. MEDIA button: multimedia button;
Button
interface in the large audio screen.
4. OPTION key: menu shortcut OPTION;
5. Press the OK button on the right side of the
5. BACK button: BACK to the previous button;
2
steering wheel -5- to confirm the host function.
6. POW button: in the power-on state, short
6. Press EXIT button -6- on the right side of the
press is silent; long press is power off; in the
steering wheel to EXIT the host function.
power-off state, short press is power on;
7. Press the language control button on the right
7. MENU button: home button.
side of the steering wheel -7- to realize voice
control.
8. Press NAVI button -8- on the right side of the
steering wheel to enter the navigation function.
1. Middle knob: rotate to select the current entry
of the host, move up and down in the left and
right directions to select the menu of the host's
upper and lower levels and switch operation
areas. Press to select and confirm;
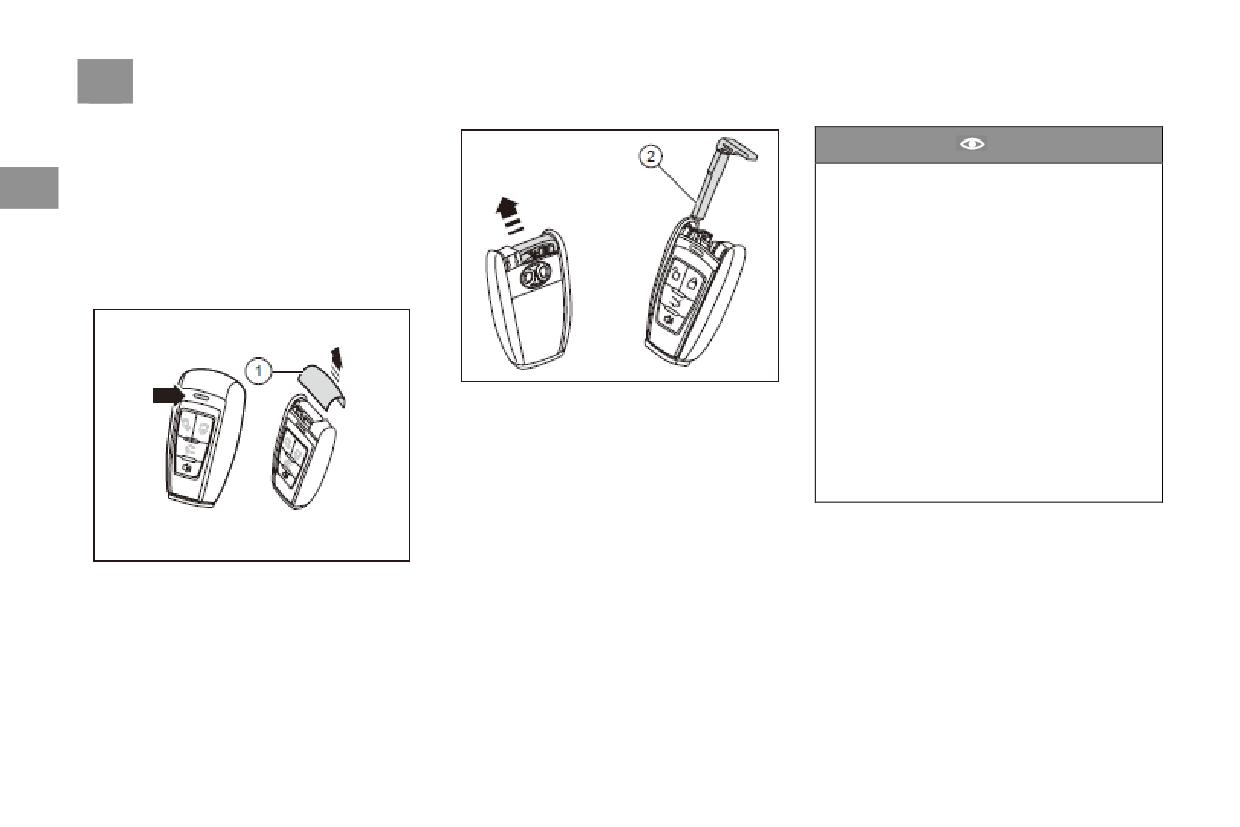
74
Open and Close Doors
Open and Close Doors
Caution
When using intelligent remote control keys
Intelligent Cemote Control Key
2
with transceiver chips, please follow the
This car is equipped with 2 intelligent remote
following instructions:
control keys, the intelligent remote control key
contains the mechanical key, the mechanical
● Do not attach smart remote keys to
key is used in an emergency. If the smart remote
anything that cuts off electromagnetic waves
key doesn't work, the mechanical key can be
(e.g. metal seals).
used to open the door.
●Don't hit other objects with smart remote
keys.
●Do not expose smart remote keys to high
temperatures for long periods of time, such
as in direct sunlight on the dashboard or
3. Pull out the mechanical key -2- along the -
bonnet.
arrow - direction.
●Do not immerse the smart remote key in
Intelligent remote control key: the wireless
water or wash it in an ultrasonic scrubber.
remote control function can be used to lock or
● Do not place smart remote keys with
unlock all the doors, open the trunk and realize
devices that emit electromagnetic waves, such
the function of finding the car.
as mobile phones.
Mechanical key: in the normal power supply of
the vehicle, the mechanical key can lock and
unlock all doors.
When bringing a key with wireless remote
1. Press the release button - arrow -.
control function onto an aircraft, make sure you
2. Remove mechanical key cover -1- along -
do not press any buttons on the key while inside
arrow - direction.
the aircraft cabin.. Pressing the button could
cause an intelligent remote key to emit radio
waves, which could interfere with aircraft flight.
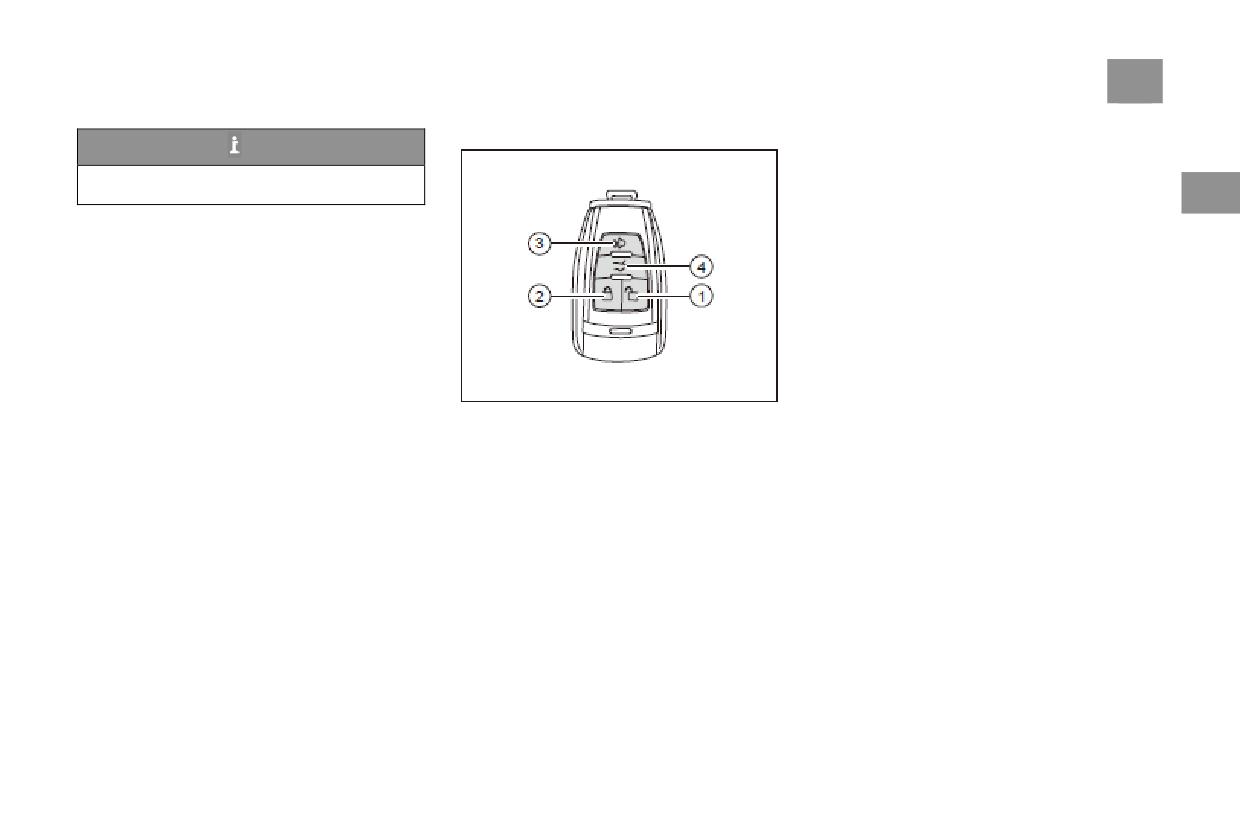
Open and Close Doors
75
Intelligent Remote Control Key
The effective range of the remote key is about
Tips
25 meters, but in some special circumstances,
After using the mechanical key, be sure to
such as electromagnetic interference nearby or
put it back.
in the blind spot area of the signal, the range
2
will be reduced. For details, please contact
authorised dealership. If the key cannot operate
the door or operate within the normal distance:
Check the vicinity for radio transmitters that
interfere with the proper operation of keys and
the surrounding environment, such as radio
stations or airports.
The battery may have run out. Check the battery
in the key. To replace batteries, see "replace
batteries."
If the key is lost, please contact authorised
The intelligent remote control key has four keys,
dealership as soon as possible, so as not to steal
which are:
the car.
1. Unlock key: unlock the door lock;
2. Lock key: lock the car door lock;
3. Car search button: press this button in the
state of defense, and the vehicle will emit lights
and sounds to remind you;
4. Tail door unlock key: unlock tail door (long
press).
76
Open and Close Doors
Key Battery Replacement
Caution
Caution
When the power is insufficient, the display
When
unlocking/locking
is
pressed
screen of driving computer will display "low
●Ensure that the positive and negative poles
2
continuously, the door lock protection
power of smart keys" to remind the replacement
of Remote control key batteries are installed
function will be triggered, and the unlocking
of battery.
correctly.
function will be temporarily disabled.
When changing battery, open the battery cover
●Do not replace the battery with wet hands.
on the key. If it is not operated properly, it is
Water will cause corrosion of the batteries.
easy to caused damage. Therefore, it is
●Do not touch or move any parts in the
Caution
suggested that authorised dealership to replace
remote control key, otherwise it will affect
When operating the Remote control key, do
battery
the function of the remote control key.
not need to align the Remote control key with
Warning
●Do not bend the electrodes when inserting
the car, but the remote can be work within a
Remote control key batteries, and no dust or
certain range.
●Touch circuit boards can generate static
oil is allowed in the battery box.
Please note that the working range of the
electricity. Causing damage to remote control
Remote control key is affected by the battery
keys
power level, and sometimes by physical and
●Not to lose any parts when replacing the
geographical factors.
key battery.
For safety reasons, do remote control when
● Only the same model or the battery
near the door.
recommended by BAIC can be used for
replacement.
● Waste batteries must be disposed of in
accordance with local laws.
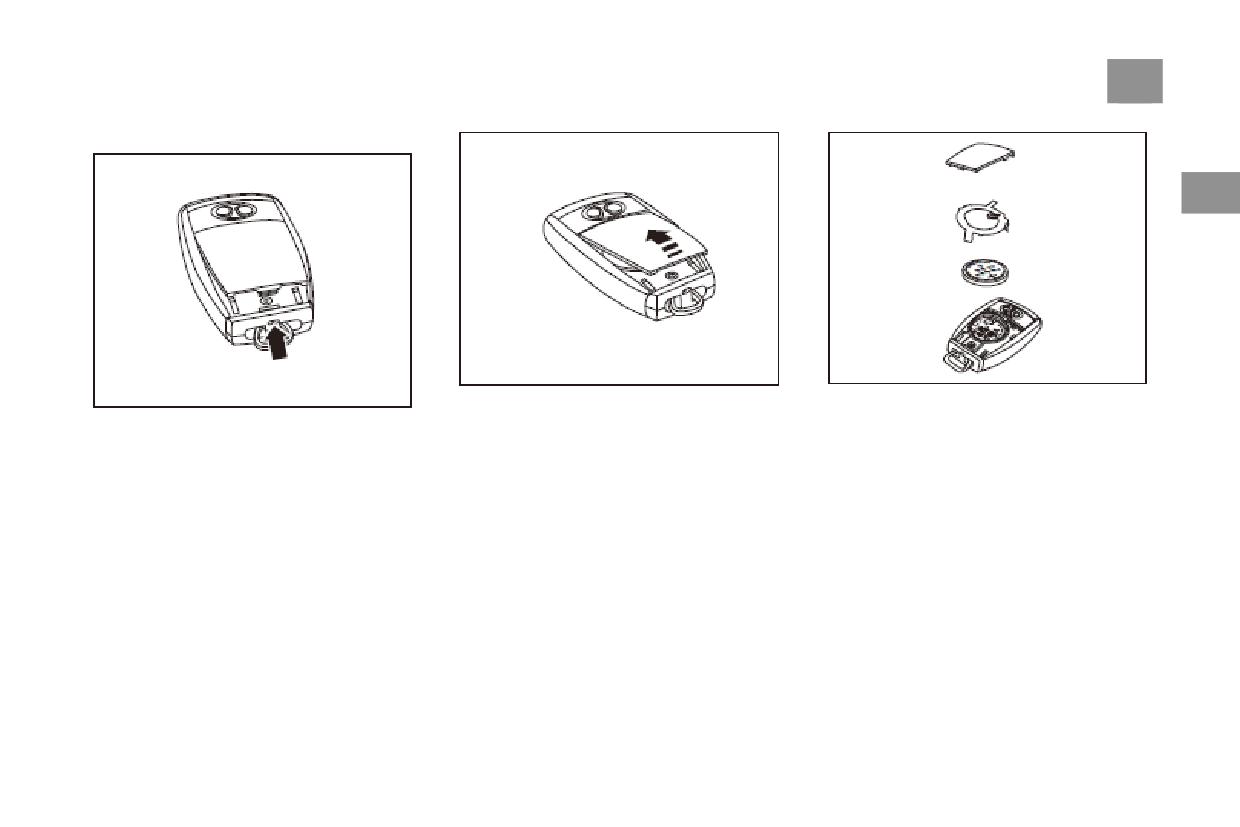
Open and Close Doors
77
Replace the key battery by following steps:
2
2. Unlock the key battery lock, up open the
3. Remove batteries to avoid contact with circuit
1. Insert sharp tools into the hole at the bottom
battery cover
boards and battery clamps
of the Remote control key.
4. Avoid touching the surface of battery and
wipe them clean before installation when
installing battery.
5. Installation should ensure that the battery
cover meshes well and avoid dust and water
vapor entering.
6. After replaced, it is necessary to test whether
the function of the Remote control key is
normal. If the Remote control key still does not
work properly, please contact authorised
dealership.
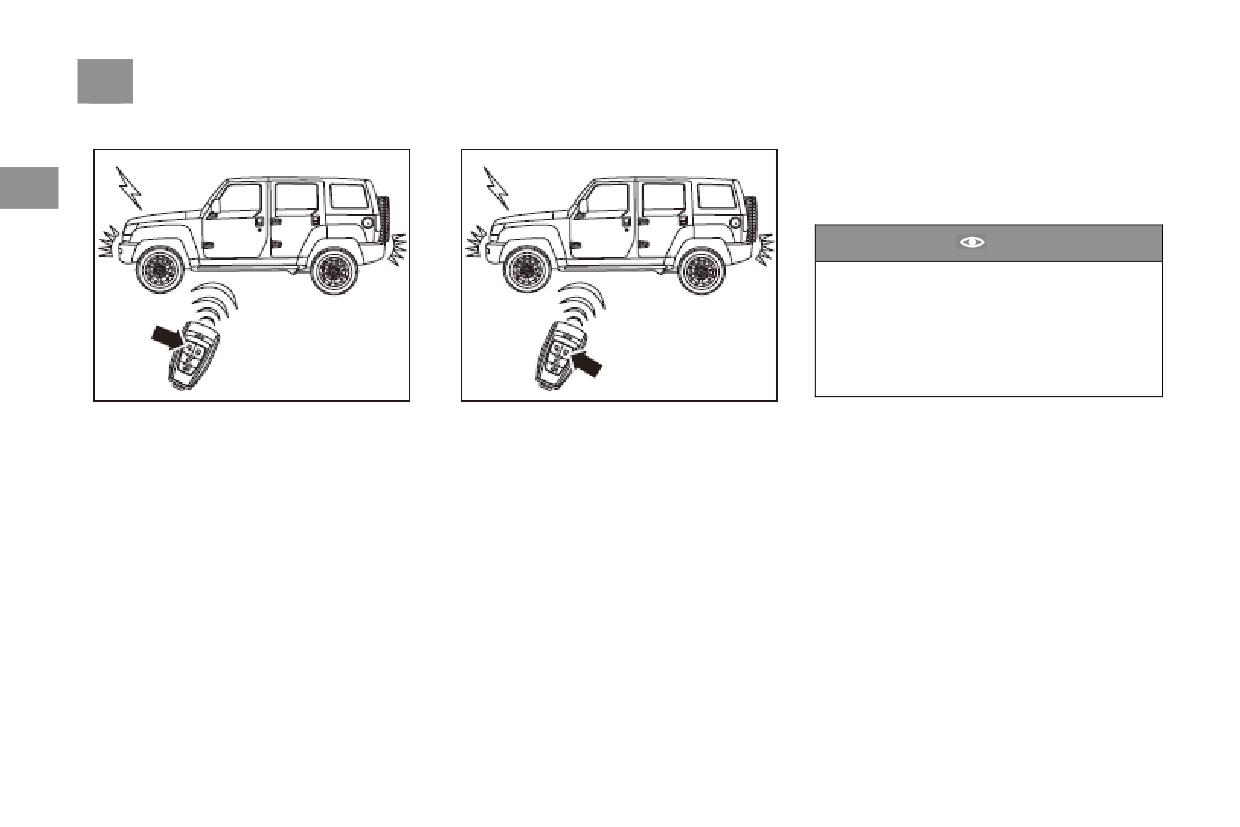
78
Open and Close Doors
Unlock the door
Lock the door
Remote control key matching
If loss of remote control key ,needs to be
matched
, please go to BAIC's service Store,
2
and the relevant operation is carried out by
professional staff through special equipment.
Caution
After the Remote control keys are
re-matched, the used -loss Remote control
keys that matched before will no longer be
used.
So,all Remote control keys that need to be
used should be matched when matching
again.
When the unlock key is pressed, all doors are
The remote control key is outside the car, the
unlocked at the same time. The turn signal
ignition switch is in "OFF" mode, the engine
flashes twice at this time.
cover and all the doors are closed, press the lock
key to lock the door.
After pressing the Remote control key
unlocking function, should be open any door
within about 30 seconds, otherwise all doors
will automatically lock.
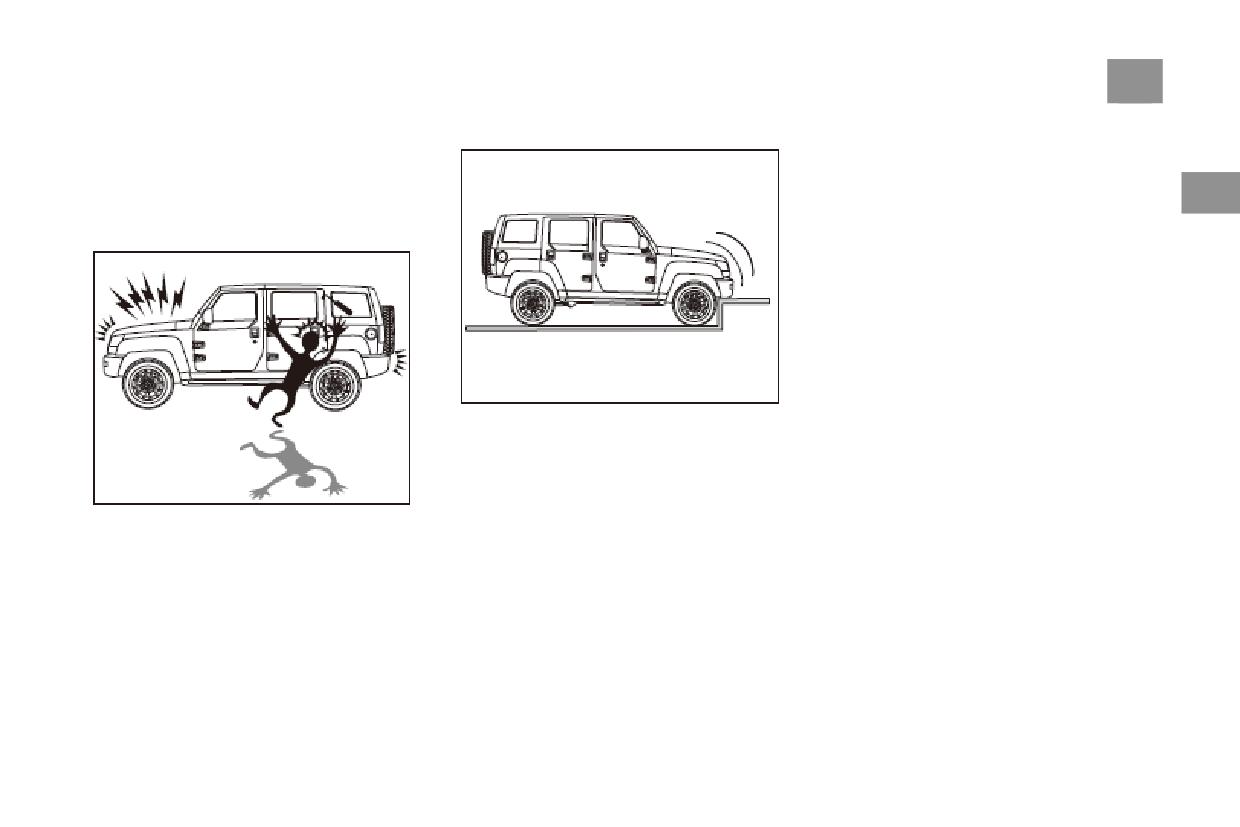
Open and Close Doors
79
Anti-theft alarm system
Anti-theft remote control key setting
If the vehicle does not satisfy the locking
The anti-theft alarm system is installed on the
condition, that is, any door is not closed or the
vehicle. In order to ensure safety and operation
ignition switch key is located in the "RUN"
convenience, we strongly recommend that you
position, so the vehicle will not respond when
2
read this chapter carefully in order to fully
pressing the locking key, and the vehicle can not
be locked and fortified at this time.
understand its characteristics and use methods.
Vehicle locking conditions:
●The door lock and trunk door lock are normal,
and the door and trunk door are normal closed.
●One key start switch is closed and the ignition
switch is in the "OFF" position.
Press the lock key, and if each door and trunk
door are closed, the turn light flashes once,
while the door and trunk door are closed. The
anti-theft status indicator of the instrument
information center starts to flicker, indicating
that the system has entered a state of anti-theft
alert.
In this state, the anti-theft system will monitor
the door, rear door, one-button start switch and
start/stop button in the "RUN" position. If the
lock key is pressed again at this time, the
turning light flashes once, and the system
performs lock action once.
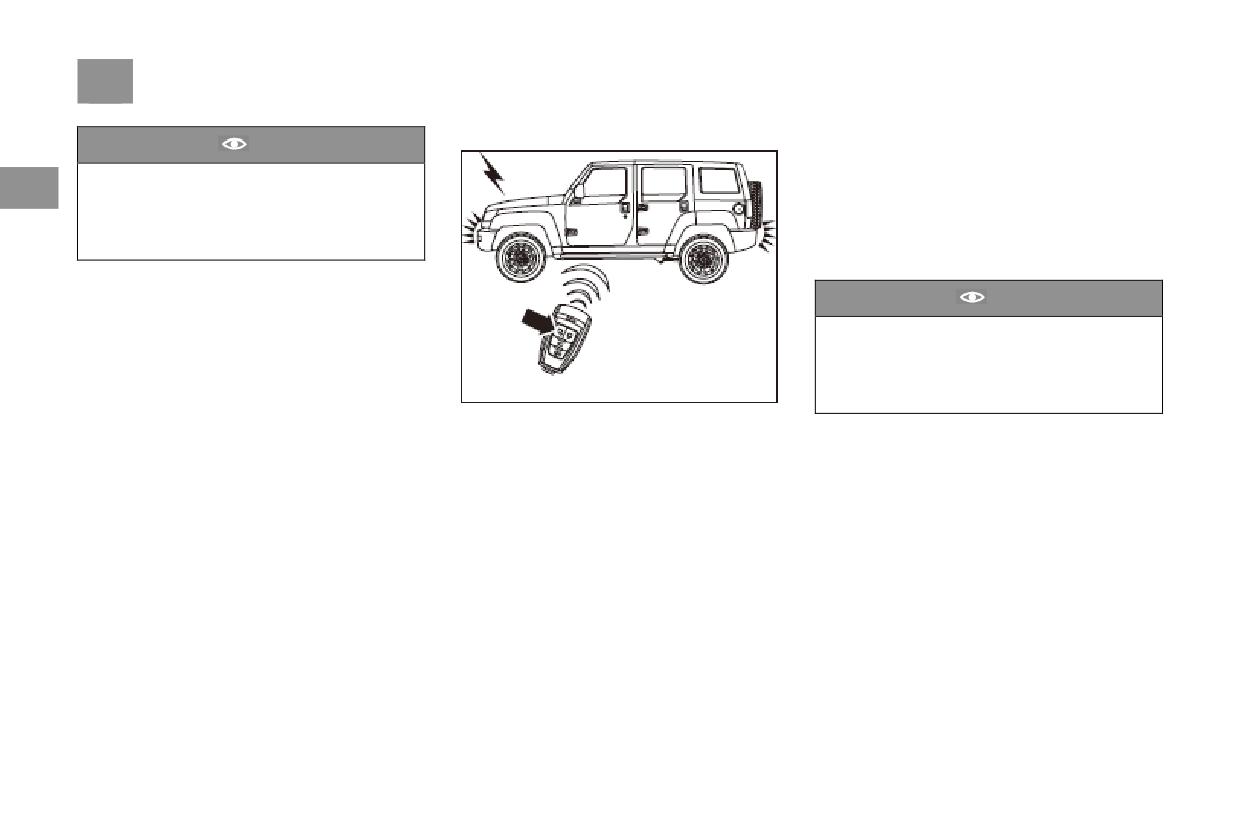
80
Open and Close Doors
Remove theft by remote control key
Whether the trigger signal is removed or not, the
Caution
system will stop alarming after one cycle of
After setting the anti-theft state, the engine
alarming.
2
also enters the anti-theft state. At this
When there is a new trigger, the alarm will be
time,insert the original matched mechanical
sent again. When the alarm is triggered, the
key to entry the car and start the engine
anti-theft status indicator of the instrument
within 15 seconds, the anti-theft can be lifted.
indicator center flashes at a certain frequency
for a certain time.
Caution
After setting the anti-theft state, the engine
also enters the anti-theft state. At this
time,insert the original matched mechanical
key to entry the car and start the engine
within 15 seconds, the anti-theft can be lifted.
When the alarm is not triggered, pressing the
This system only monitors the door status signal,
unlock key, all doors are unlocked at the same
trunk door status signal and ignition switch
time,and the turn signal flashes twice at this
signal. Alarm only when the above signal is
time.
triggered illegally.
After using the remote control unlocking
function. After a period of time, all doors will
automatically lock again and re-enter the
anti-theft alert state after a while if the door is
not opened.
Trigger alert
When the anti-theft system is triggered, the
turning light starts to flicker and the horn gives
out an alarm at the same time.
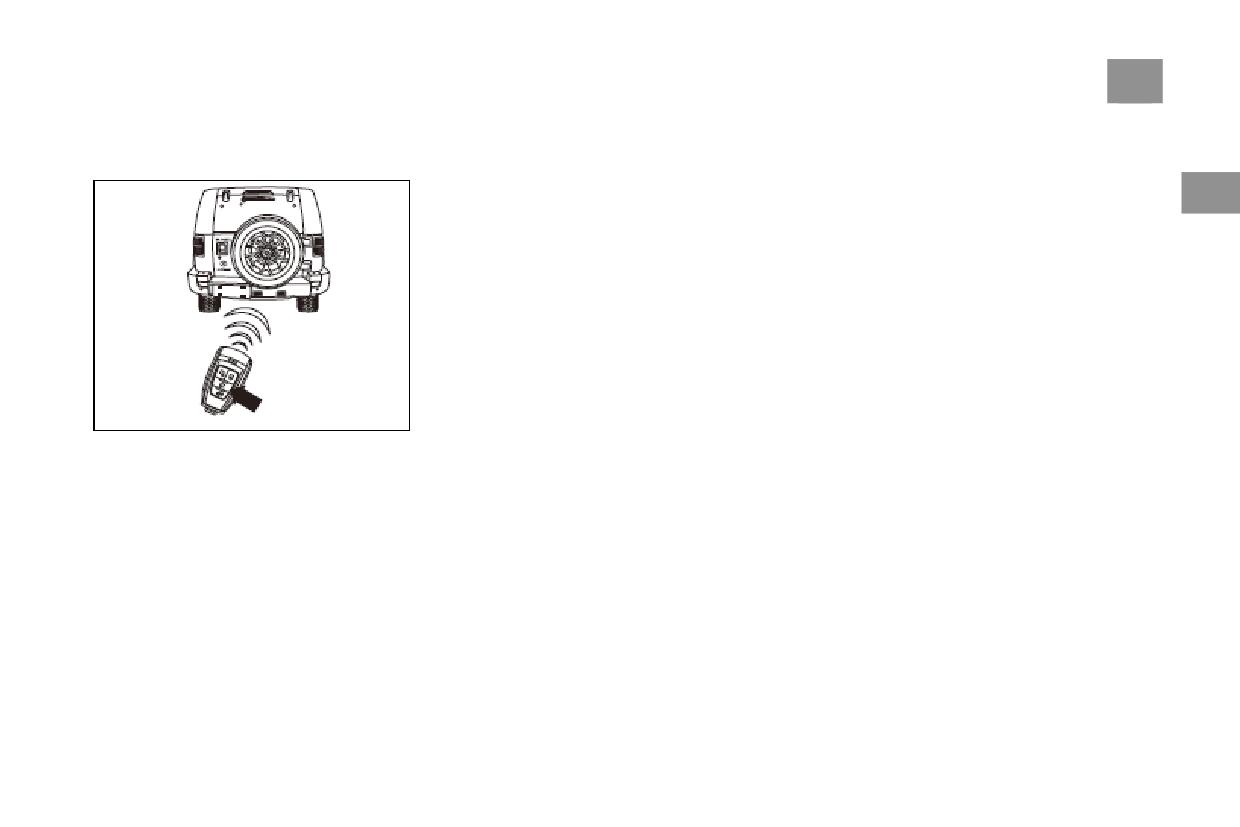
Open and Close Doors
81
Unlocked trunk door by Remote
Secondary fortification
Central Lock System
controlled key
When the vehicle alarm is triggered, when
Operating Instructions of Central Lock
pressing the unlock key, the state is released. If
System
the state of key and door has not changed in a
The central lock system can lock and unlock all
2
certain period of time, the system will re-enter
doors of car:
the theft-proof alert state automatically. If the
1. Manipulating Central Lock System with
unlock key is pressed again within this specified
Remote Control Key
time, the timing is restarted.
2. Manipulating Central Lock System with
Mechanical Key
3. Manipulating the Central Lock System with
the Lock Switch on the Driver's Side Door.
In the locked state, press the trunk door key for
a long time, and the trunk door will be unlocked.
After opening the trunk door, the trunk door will
be closed. After a period of time, the trunk door
will be automatically locked.
Pressing the trunk door key, but the trunk door
is not opened. After a period of time, the trunk
door is locked automatically and enters the
defensive state immediately .
When opening the trunk door and closing the
trunk door, please do not put the key in the car,
so as not to be automatically locked in the car.
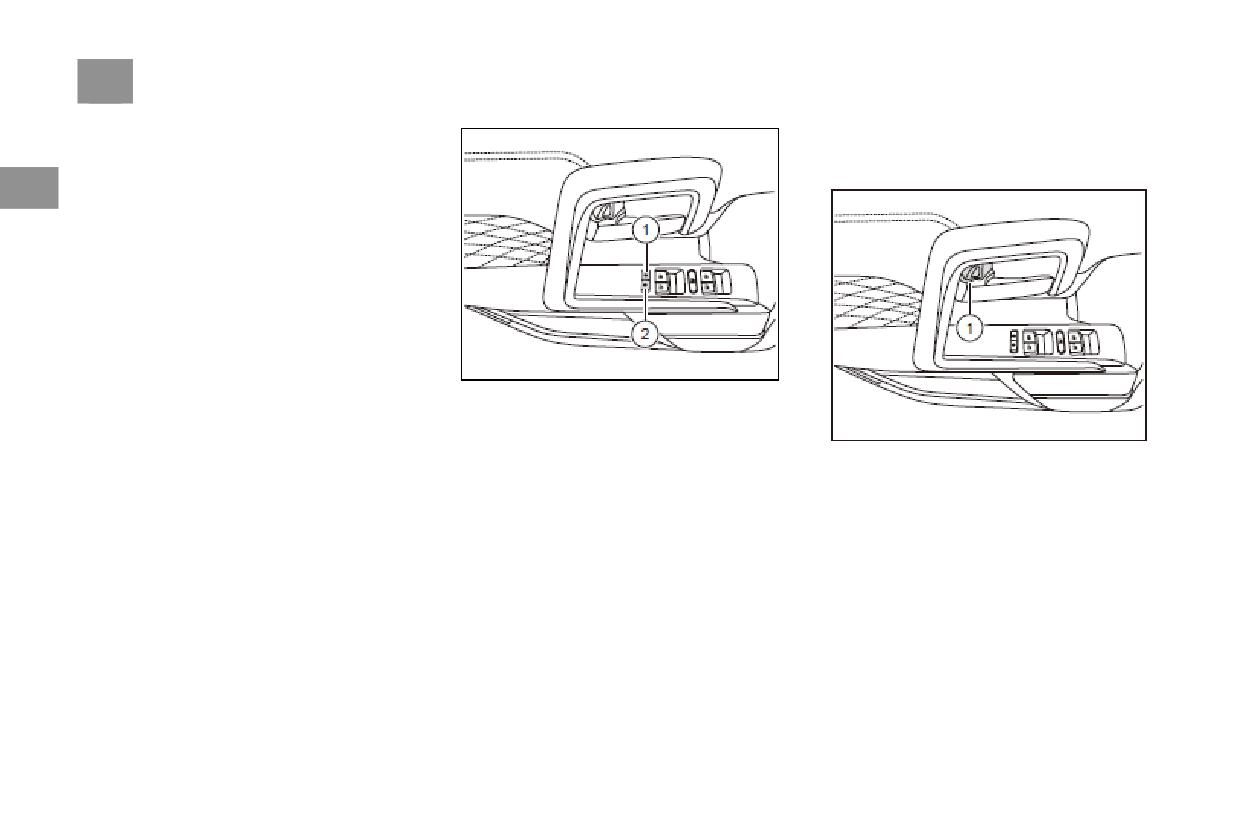
82
Open and Close Doors
Manipulating central door lock with remote
Manipulating the central door lock with the
control key
switch on the driver's side door
Press the lock key of the remote control key. If
(Equipped vehicles only)
2
the vehicle meets the lock condition, the central
door lock system will be locked, the whole
vehicle‘s door will locked.
Press the unlock key of the remote control key.
If the vehicle meets the unlock condition, the
central door lock system will be unlocked, the
whole vehicle‘s door will unlocked.
Manipulating central door lock with
Mechanical key
When the vehicle meets the lock condition,
insert the key into the driver's side door lock
The central door lock button is located on the
hole and Rotate back to the vehicle(Clockwise),
driver's side door as shown in the figure.
the central door lock system is unlocked; Rotate
Press the button-1-, the central door lock system
the key in the front (counterclockwise) direction
is unlocked, press the button-2-is locked. The
The switch is located on the driver's side door.
of the car,doors are locked.
behavior of unlocking/lock the door by
Pull the central door lock switch - 1 -, the
mechanical key only applies to the
central door lock system will be unlocked, and
corresponding door lock, and can not control all
press back inwards will be locked.
the doors at the same time.
Open and Close Doors
83
Automatic locking function
Car Door
Warning
When the vehicle is running at a speed greater
Do not leave children or disabled persons
than 20 km/h, the central door lock system will
alone in the car! Because once the doors are
automatically lock.
2
locked, it is difficult for children or disabled
When the speed is between 5 km/h and 20 km/h
people to leave the car by themselves in an
and lasts about 30 seconds, the central door lock
emergency, and it will be more difficult for
system will automatically lock.
them to rescue if the doors are locked in an
Thermal Protection Function of
accident.
Door Lock Motor
Automatic unlocking function
The door lock motor has thermal protection
1. In the course of driving, if there is a collision
function. If the door lock is opened and closed
and the airbag has been detonated, the door lock
many times in a short time, it may trigger the
will be automatically unlocked.
thermal protection function of the door lock
2. Vehicles go from running to stopping,the
motor, which will lead to the failure of the door
central door lock system will be unlocked
lock function in a short time.
When the door is unlocked, the door can be
automatically when the engine is out of
opened by pulling the handle-1-.
operation and the ignition switch is placed in the
"OFF"/ "ACC" position.
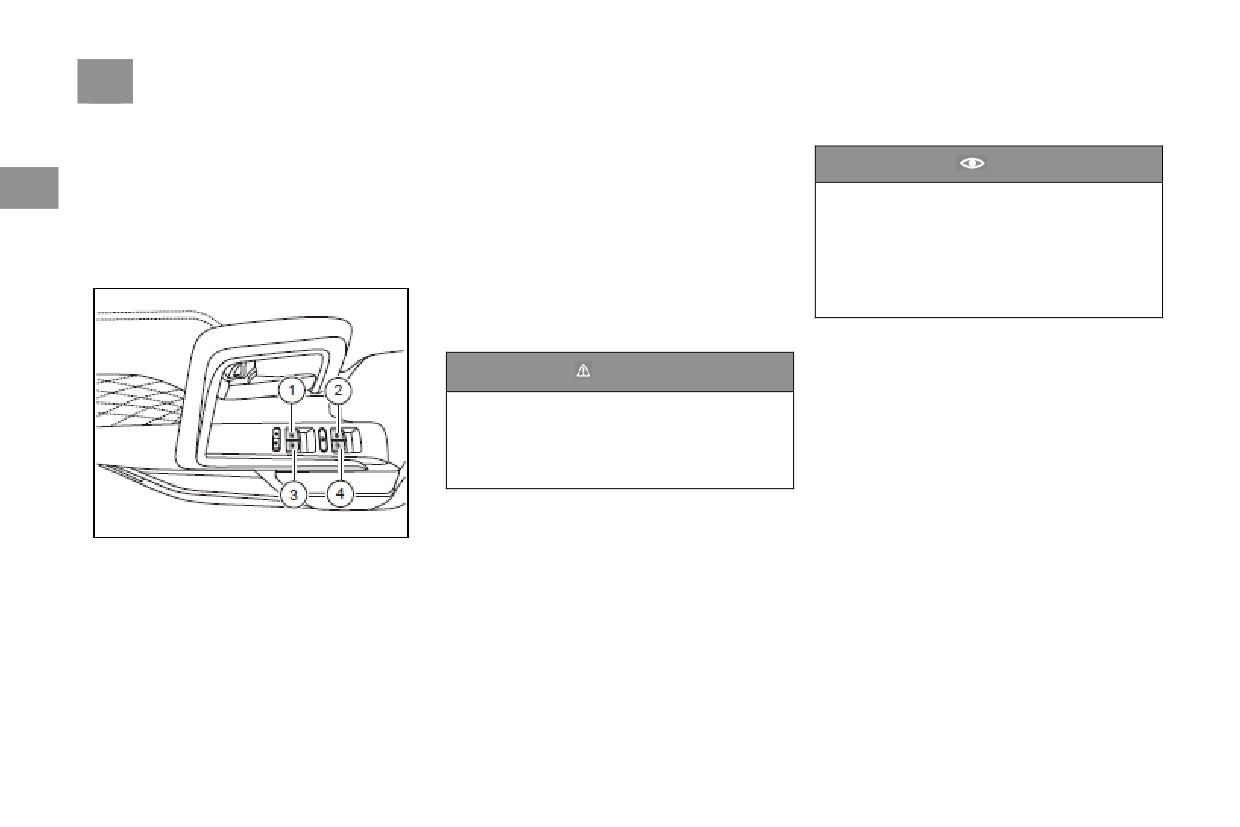
84
Open and Close Doors
Car windows
1 Control the lift of left rear door and window
Electric window
Caution
The car is equipped with electric windows on
2 Controlling the lift of driver's side door and
2
In order to avoid damaging the electric
the left and right doors, which can be controlled
window
by the buttons of the electric windows in the
window motor, the protective device will
3 Control right rear door and window lifting
start after the windows are switched on and
driver's side door switch group.
off repeatedly, and the electric window can
Manipulate windows by buttons on electric
4
Control of door and window lift of
not be operated. After waiting for a period of
windows
passenger side car
time, the electric window can resume normal
Continuously press or dial up the control switch,
operation.
the window stops rising and falling when the
switch is loosening.
Warning
The car lifts are not equipped with anti-pinch
function. Make sure that any part of the body
is not above the glass trajectory during the
glass lifting process, so as to avoid pinch
injury.
As shown in the figure, the electric window
button is located on the driver's side door.
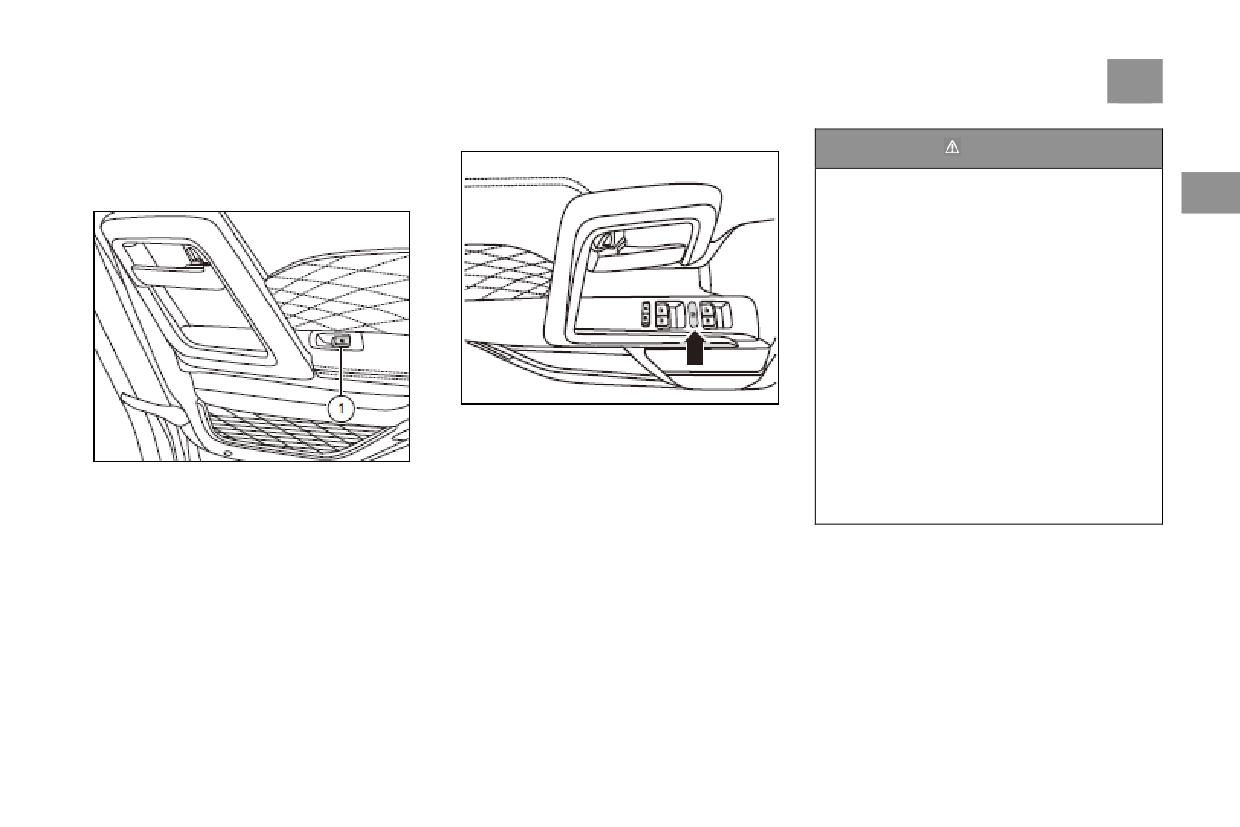
Open and Close Doors
85
Passenger and rear window
Safety lock switch
Warning
(The car is equipped with electric windows on
the back door side of the car)
Be cautious when using electric doors and
The steps are as follows
windows, improper use may cause accidents
2
or injuries!
●Make sure that no one is in the lifting
range of doors and windows when working
doors and windows
●Do not leave children or disabled persons
alone in the car when the car is locked,
because it is impossible to open doors and
windows in case of emergency.
●Keep your car keys with you when you
leave the car, because you will not be able to
As shown in the figure: Located on the driver's
lift doors and windows after closing a key to
side door, press the switch in the direction of the
start the switch.
arrow, which will lock the lifting function of the
●Must be use safety lock switch to close the
Press the motor window lifting switch - 1-,
rear window.
rear window lifting function when children
which can control the up and down of the
sitting in the rear seat , so that it can not be
window.
works.
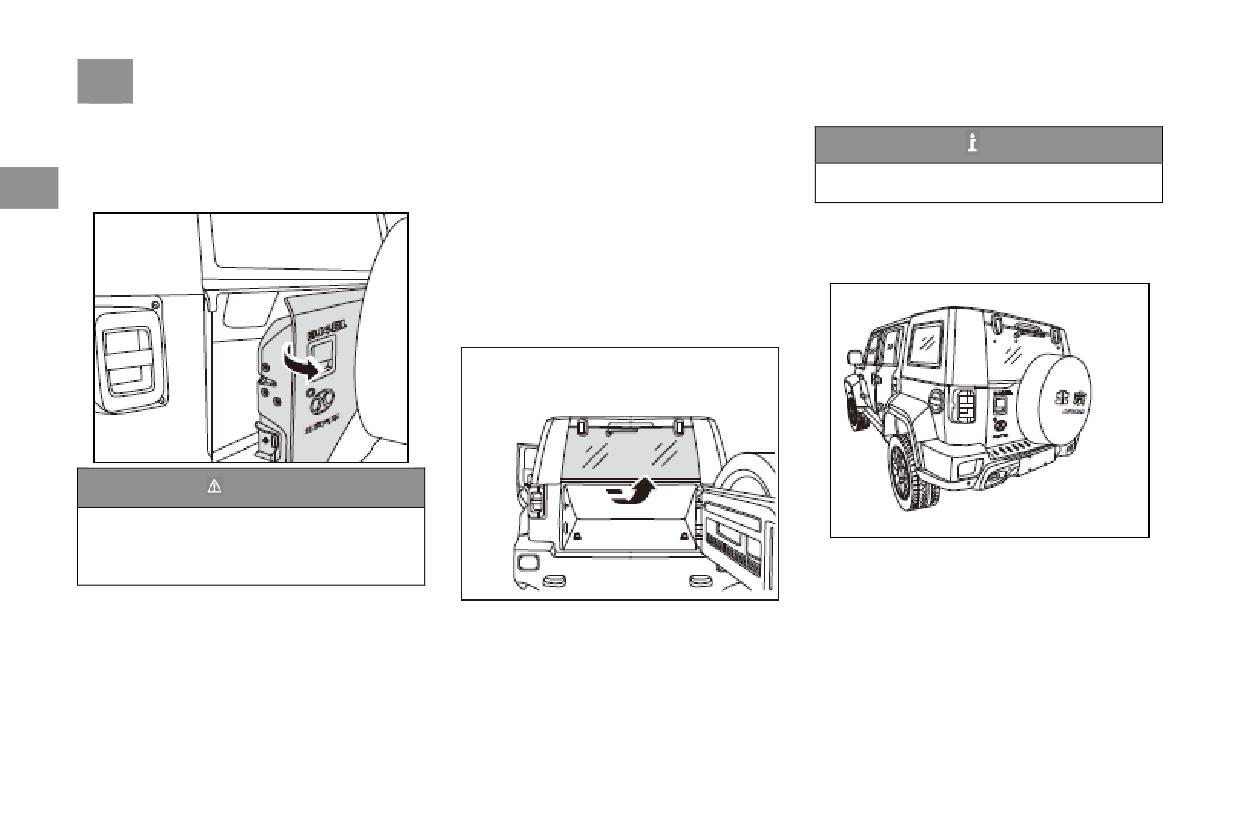
86
Open and Close Doors
Trunk door
Rear windshield
Tips
During the trunk door on unlocked satuation,
Before open the rear windshield, the trunk door
Must keep the rear windshield closed during
the trunk door can be opened by pulling the
should be opened to the maximum position,
2
driving.
external handle of the trunk door.
then the lower and middle part of the rear
windshield should be held by hand, and the rear
Points for attention
Taken to avoid clipping fingers and other body
window should be rotated upward forcefully.
parts when closing the trunk door and rear
The rear windshield will stop at the maximum
position with the support of the air spring.
window
Closing is the opposite of opening. When the
rear windshield is closed, the trunk door must
also be opened to the maximum position.
Warning
Do not let the child open or close the trunk
door, otherwise it may cause the child's hand,
head or neck to be pinched by the closing
door.
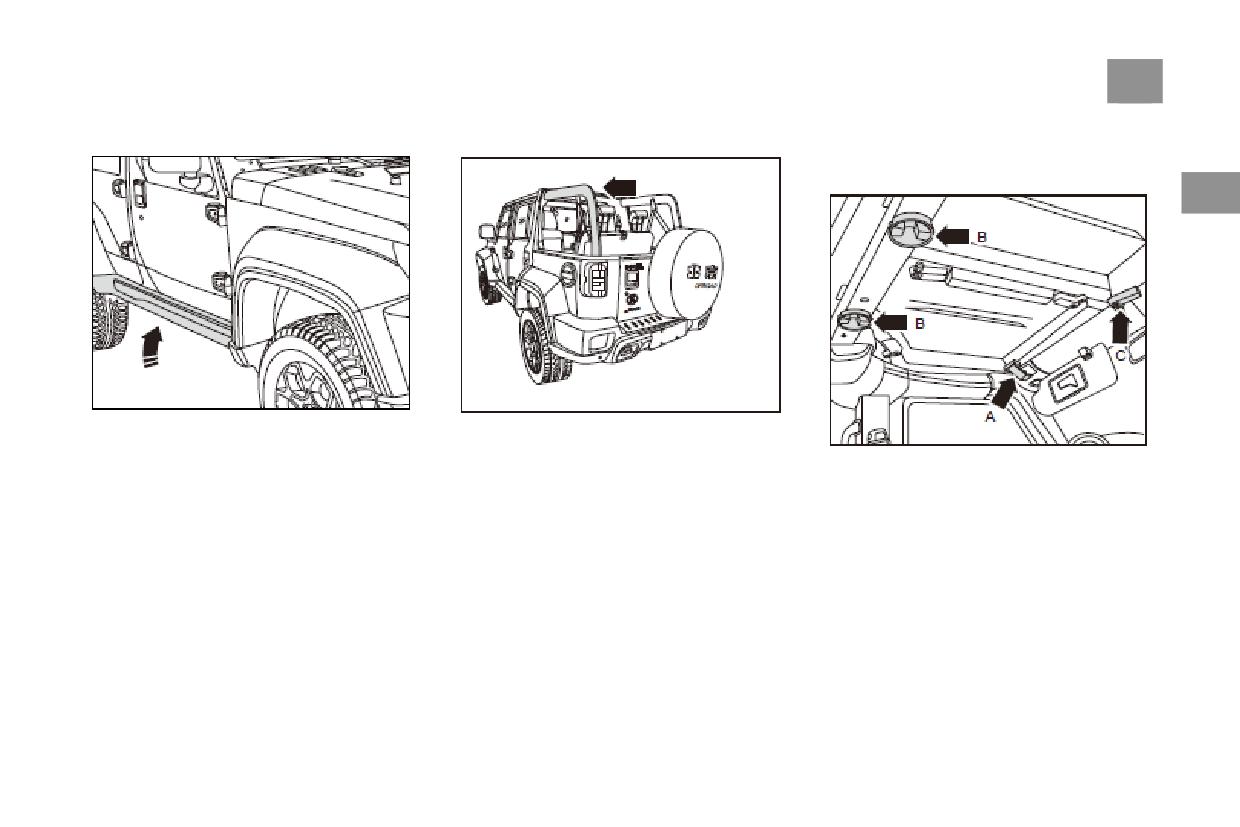
Open and Close Doors
87
Sidebar
Anti-roll Bar
Roof cover
The roof cover of the car can be disassembled.
The specific steps are as follows.
2
Passengers and drivers can step on the sidebar
When the vehicle overturns unexpectedly, the
when get on the car.
anti-roll bar can support the vehicle body.
1. Rotating graphics Fixed handle - arrow C - (5
Driver's head will not be squeezed while the
places), pull back with your hand - A - clasp (2
vehicle overturns if the driver wears the seat
places in total). Remove the two installation
belt correctly. Thus effectively protecting the
knobs - B - in the middle of the body counter
driver and passenger.
clock wise, and place them properly in a safe
place to prevent loss or damage.
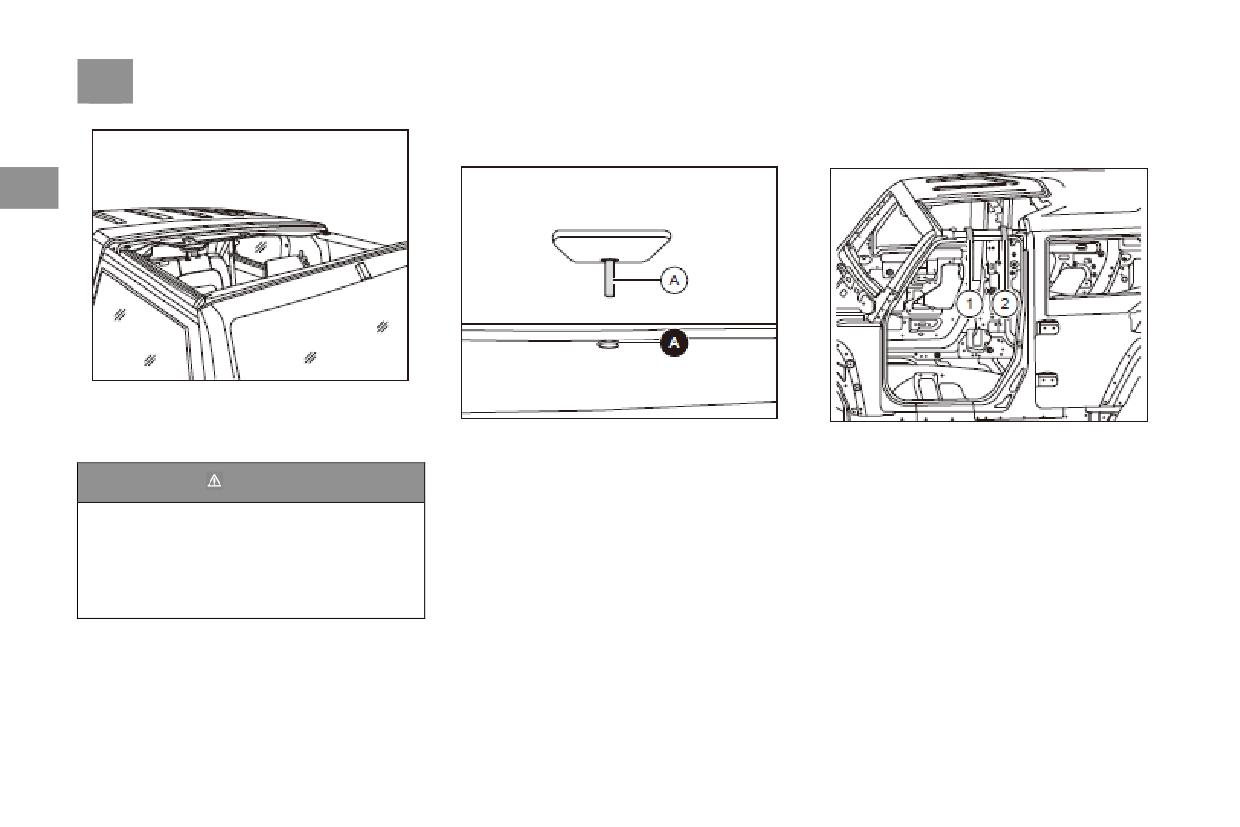
88
Open and Close Doors
Installation steps are contrary to disassembly
Bandage Binding Front Door Hole with
steps
Sealing Strip
2
2. Push up and remove the roof cover (first
move the left cover and then move the right
cover). Place the removed cover piece on a soft
As shown in the figure, when placing the roof
After removing the front top cover, the upper
object to prevent to damage.
cover, attention should be paid to the alignment
part of the door seal strip is suspended in the air.
of the positioning pin-A-on both sides of the
It is necessary to remove the door seal strip
Warning
cover with the positioning hole-A-on the roll bar
binding (self-adhesive) from the toolbox and fix
The installation position of the roof cover
on both sides of the body.
the sealing strip-1-, -2-on the front roll bar as
must be correct, and the installation of
In addition, before tightening the bolts again,
shown in the figure.
relevant parts must be reliable to ensure
make sure that the outer surface of the top cover
sealing performance and avoid leakage, air
is level with the car body.
leakage and dust caused by improper
installation.
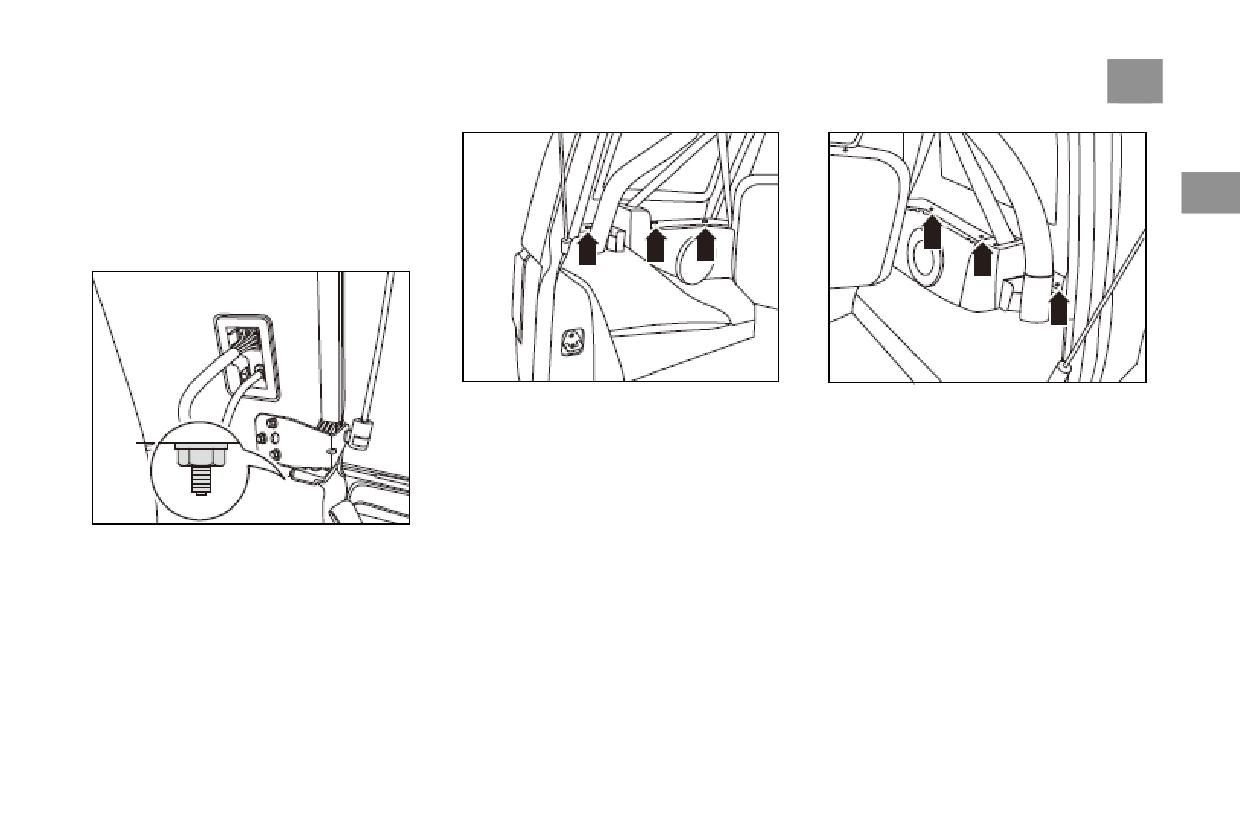
Open and Close Doors
89
Rear top cover
The rear roof cover of the car can be
disassembled, but it can only be achieved by
special tools. If encounter problems in operation,
2
consult the professional staff of the authorised
dealership.
Detailed disassembly steps are as follows:
2. Remove the bolts (3 bolts) on the left rear
3. Remove the bolts (3 bolts) on the right rear
circumference as shown in the figure-arrow.
circumference as shown in the figure-arrow.
1. Pull the interior parts in the rear area of the
vehicle and unscrew the nuts as shown in the
figure (1 left and 1 righ).