Cisco Industrial Ethernet 4000, 4010 and 5000 Switch Software. Configuration Guide (2022) - page 25
Configuring QoS
Configuring QoS
Command
Purpose
1.
configure terminal
Enter global configuration mode.
2.
class-map [match-all | match-any]
Create a class map, and enter class-map configuration mode. By default,
child-class-map-name
no class maps are defined.
(Optional) Use the match-all keyword to perform a logical-AND of
all matching statements under this class map. All match criteria in
the class map must be matched.
(Optional) Use the match-any keyword to perform a logical-OR of
all matching statements under this class map. One or more match
criteria must be matched.
For class-map-name, specify the name of the class map.
If no matching statements are specified, the default is match-all.
Note: A match-all class map cannot have more than one classification
criterion (match statement).
3.
match {access-group
Define the match criterion to classify traffic. By default, no match
acl-index-or-name | cos cos-list | ip
criterion is defined.
dscp dscp-list | ip precedence
ip-precedence-list | qos-group value |
Only one match type per class map is supported, and only one ACL per
vlan vlan-list}
class map is supported.
For access-group acl-index-or-name, specify the number or name
of an ACL. Matching access groups is supported only in input policy
maps.
For cos cos-list, enter a list of up to four CoS values in a single line
to match against incoming packets. Separate each value with a
space. You can enter multiple cos-list lines to match more than four
CoS values. The range is 0 to 7.
For ip dscp dscp-list, enter a list of up to eight IPv4 DSCP values to
match against incoming packets. Separate each value with a space.
You can enter multiple dscp-list lines to match more than eight DSCP
values. The numerical range is 0 to 63. You can also configure DSCP
values in other forms. See Classification Based on IP DSCP,
page 620.
For ip precedence ip-precedence-list, enter a list of up to four IPv4
precedence values to match against incoming packets. Separate
each value with a space. You can enter multiple ip-precedence-list
lines to match more than four precedence values. The range is 0 to
7.
For qos-group value, specify the QoS group number. The range is 0
to99. Matching of QoS groups is supported only in output policy
maps.
For vlan vlan-list, specify a VLAN ID or a range of VLANs to be used
in a parent policy map for per-port, per-VLAN QoS on a trunk port.
The VLAN ID range is 1 to 4094.
667

Configuring QoS
Configuring QoS
Command
Purpose
4.
end
Return to privileged EXEC mode.
5.
show class-map
Verify your entries.
6.
copy running-config startup-config
(Optional) Save your entries in the configuration file.
Creating Parent-Policy Class Maps
Beginning in privileged EXEC mode, follow these steps to create one or more parent-policy class maps:
Command
Purpose
1.
configure terminal
Enter global configuration mode.
2.
class-map match-any
Create a match-any class map for the parent policy, and enter
parent-class-map-name
class-map configuration mode.
Note: You can enter match-all or not enter either match-any or
match-all (to default to match-all) if you are going to match only one
VLAN ID.
3.
match vlan vlan-id
Define the VLAN or VLANs on which to classify traffic.
For vlan-id, specify a VLAN ID, a series of VLAN IDs separated by a
space, or a range of VLANs separated by a hyphen to be used in a parent
policy map for per-port, per-VLAN QoS on a trunk port. The VLAN ID
range is 1 to 4094.
You can also enter the match vlan command multiple times to match
multiple VLANs.
4.
end
Return to privileged EXEC mode.
5.
show class-map
Verify your entries.
6.
copy running-config startup-config
(Optional) Save your entries in the configuration file.
Creating Child Policy Maps
Beginning in privileged EXEC mode, follow these steps to create one or more child policy maps:
Command
Purpose
1.
configure terminal
Enter global configuration mode.
2.
policy-map child-policy-map-name
Create a child policy map by entering the policy map name, and enter
policy-map configuration mode.
3.
class {child-class-map-name |
Enter a child class-map name or class-default to match all unclassified
class-default}
packets, and enter policy-map class configuration mode.
4.
Use the police policy-map class configuration command to configure policers and the action to take for a class of
traffic, or use the set policy-map class configuration command to mark traffic belonging to the class.
5.
end
Return to privileged EXEC mode.
6.
show policy-map [child-
Verify your entries.
policy-map-name [class
class-map-name]]
7.
copy running-config startup-config
(Optional) Save your entries in the configuration file.
668

Configuring QoS
Configuring QoS
Creating a Parent Policy Map
Beginning in privileged EXEC mode, follow these steps to create a parent policy map and attach it to an interface:
Command
Purpose
1.
configure terminal
Enter global configuration mode.
2.
policy-map parent-policy-map-name
Create a parent policy map by entering the policy map name, and enter
policy-map configuration mode.
3.
class parent-class-map-name
Enter the parent class-map name, and enter policy-map class
configuration mode.
4.
service policy child-policy-map-name
Associate the child policy map with the parent policy map
5.
end
Return to privileged EXEC mode.
6.
show policy-map
Verify your entries.
[parent-policy-map-name [class
class-map-name]]
7.
copy running-config startup-config
(Optional) Save your entries in the configuration file.
Attaching a Parent Policy Map to an Interface
Beginning in privileged EXEC mode, follow these steps to create attach the parent policy map to an interface:
Command
Purpose
1.
configure terminal
Enter global configuration mode.
2.
interface interface-id
Enter interface configuration mode for the interface to which you want to
attach the policy.
3.
switchport mode trunk
Configure the port as a trunk port.
4.
switchport trunk allowed vlan vlan-list
(Recommended) Restrict VLAN membership for trunk ports to avoid
overlapping VLAN membership if the per-port, per-VLAN policy includes
Layer 3 classification.
5.
service-policy input parent-
Attach the parent policy map (created in the previous section) to the
policy-map-name
ingress interface.
6.
end
Return to privileged EXEC mode.
7.
show policy-map interface
Verify your entries.
[interface-id]
8.
copy running-config startup-config
(Optional) Save your entries in the configuration file.
This is an example of using multiple parent classes to classify matching criteria for voice and video on customer VLANs.
Switch(config)# class-map match-any video
Switch(config-cmap)# match ip dscp af41
Switch(config-cmap)# exit
Switch(config)# class-map match-any voice
Switch(config-cmap)# match ip dscp ef
Switch(config-cmap)# exit
Switch(config)# class-map match-any customer1-vlan
Switch(config-cmap)# match vlan 100-105
Switch(config-cmap)# exit
Switch(config)# class-map match-any customer2-vlan
Switch(config-cmap)# match vlan 110-120
669
Configuring QoS
Configuring QoS
Switch(config-cmap)# exit
Switch(config)# policy-map child-policy-1
Switch(config-pmap)# class voice
Switch(config-pmap-c)# police cir 10000000 bc 50000
Switch(config-pmap-c-police)# conform-action set-cos-transmit 5
Switch(config-pmap-c-police)# exceed-action drop
Switch(config-pmap-c-police)# exit
Switch(config-pmap-c)# exit
Switch(config-pmap)# class video
Switch(config-pmap-c)# set cos 4
Switch(config-pmap-c)# exit
Switch(config-pmap)# class class-default
Switch(config-pmap-c)# set cos 0
Switch(config-pmap-c)# exit
Switch(config)# policy-map child-policy-2
Switch(config-pmap)# class voice
Switch(config-pmap-c)# police cir 5000000
Switch(config-pmap-c-police)# conform-action set-cos-transmit 5
Switch(config-pmap-c-police)# exceed-action drop
Switch(config-pmap-c-police)# exit
Switch(config-pmap-c)# exit
Switch(config-pmap)# class video
Switch(config-pmap-c)# police cir 40000000
Switch(config-pmap-c-police)# conform-action set-cos-transmit 4
Switch(config-pmap-c-police)# exceed-action set-cos-transmit 1
Switch(config-pmap-c-police)# exit
Switch(config-pmap-c)# exit
Switch(config-pmap)# class class-default
Switch(config-pmap-c)# set cos 0
Switch(config-pmap-c)# exit
Switch(config)# policy-map uni-parent
Switch(config-pmap)# class customer1-vlan
Switch(config-pmap-c)# service-policy child-policy-1
Switch(config-pmap-c)# exit
Switch(config-pmap)# class customer2-vlan
Switch(config-pmap-c)# service-policy child-policy-2
Switch(config-pmap-c)# exit
Switch(config)# interface fastethernet0/1
Switch(config-if)# switchport mode trunk
Switch(config-if)# switchport trunk allowed vlan 100-105, 110-120
Switch(config-if)# service-policy input uni-parent
Switch(config-pmap-c)# exit
Configuring Output Policy Maps
You use output policy maps to manage congestion avoidance, queuing, and scheduling of packets leaving the switch.
The switch has four egress queues, and you use output policy maps to control the queue traffic. You configure shaping,
queue-limit, and bandwidth on these queues. You can use high priority (class-based priority queuing). Policing is not
supported on output policy maps, except when configuring priority with police for class-based priority queuing. Output
policy map classification criteria are matching a CoS, DSCP, or IP precedence value or a QoS group.
Follow these guidelines when configuring output policy maps on physical ports:
You can configure and attach as many output policy maps as there are ports on the switch. Multiple output policy
maps can use the same queue-limit configuration. However, these policy maps can have only three unique
queue-limit configurations.
Output policy maps can have a maximum of four classes, including the class class-default.
670
Configuring QoS
Configuring QoS
All output policy maps must have the same number of defined class-maps defined, either 1, 2, or 3.
All output policy maps must use the same set of classes, although the actions for each class can differ for each
output policy map.
In a child policy map, the class-default supports all output policy map actions except priority and police. Action
restrictions for class-default are the same as for other classes except that a queue limit configuration for
class-default does not require a scheduling action.
To classify based on criteria at the output, the criteria must be established at the input. You can establish criteria at
the input through classification only when you configure only policing and not marking, or through explicit marking
when you configure any marking (policing with conform or exceed marking or unconditional set marking).
You cannot configure class-based priority queuing under the class class-default in an output policy map
In an output policy map, unless priority queuing is configured, the class default receives a minimum bandwidth
guarantee equal to the unconfigured bandwidth on the port.
After you have attached an output policy map to an interface by using the service-policy interface configuration
command, you can change only the parameters of the configured actions (rates, percentages, and so on) or add or
delete classification criteria of the class map while the policy map is attached to the interface. To add or delete a
class or action, you must detach the policy map from all interfaces, modify it, and then reattach it to interfaces.
If you anticipate that you might need three classes in a policy map, you should define three classes when you
create the policy map, even if you are not ready to use all three at that time. You cannot add a class to a policy
map after it has been attached to an interface.
When at least one output policy map is attached to a active port, other active ports without output policy maps
attached might incorrectly schedule and incorrectly order traffic that uses the same classes as the attached output
policy maps. We recommend attaching output policy maps to all ports that are in use. We also recommend putting
any unused ports in the shutdown state by entering the shutdown interface configuration command. For example,
if you attach an output policy map that shapes DSCP 23 traffic to a port, DSCP traffic that is sent out of any other
port without a policy map attached could be incorrectly scheduled or ordered incorrectly with respect to other traffic
sent out of the same port.
We strongly recommended that you disable port speed autonegotiation when you attach an output policy map to a
port to prevent the port from autonegotiating to a rate that would make the output policy map invalid. You can
configure a static port speed by using the speed interface configuration command. If an output policy-map is
configured on a port that is set for autonegotiation and the speed autonegotiates to a value that invalidates the policy,
the port is put in the error-disabled state.
You can attach only one output policy map per port.
The maximum number of policy maps configured on the switch is 256.
These sections describe how to configure different types of output policy maps:
Configuring Output Policy Maps with Class-Based-Weighted-Queuing, page 672
Configuring Output Policy Maps with Class-Based Shaping, page 673
Configuring Output Policy Maps with Port Shaping, page 674
Configuring Output Policy Maps with Class-Based Priority Queuing, page 675
Configuring Output Policy Maps with Weighted Tail Drop, page 679
671

Configuring QoS
Configuring QoS
Configuring Output Policy Maps with Class-Based-Weighted-Queuing
You use the bandwidth policy-map class configuration command to configure class-based weighted fair queuing
(CBWFQ). CBWFQ sets the relative precedence of a queue by allocating a portion of the total bandwidth that is available
for the port.
Follow these guidelines when configuring CBWFQ:
When configuring bandwidth in a policy map, all rate configurations must be in the same format, either a configured
rate or a percentage.
The total rate of the minimum bandwidth guarantees for each queue of the policy cannot exceed the total speed for
the interface.
You cannot configure CBWFQ (bandwidth) and traffic (shape average) or priority queuing (priority) for the same
class in an output policy map.
You cannot configure bandwidth as an absolute rate or a percentage of total bandwidth when strict priority (priority
without police) is configured for another class map.
You can configure bandwidth as a percentage of remaining bandwidth only when strict priority (priority without
police) is configured for another class in the output policy map.
When you configure CIR bandwidth for a class as an absolute rate or a percentage of total bandwidth, any excess
bandwidth that remains after servicing the CIR of all classes in the policy map is divided among the classes the same
proportion as the CIR rates. If you configure the CIR rate of a class to be 0, that class is not eligible for any excess
bandwidth and will receive no bandwidth.
Beginning in privileged EXEC mode, follow these steps to use CBWFQ to control bandwidth allocated to a traffic class
by specifying a minimum bandwidth as a bit rate or a percentage:
Command
Purpose
1.
configure terminal
Enter global configuration mode.
2.
policy-map policy-map-name
Create a policy map by entering the policy map name, and enter
policy-map configuration mode.
3.
class {class-map-name | class-default}
Enter a child class-map name or class-default to match all
unclassified packets, and enter policy-map class configuration
mode.
4.
bandwidth {rate | percent value | remaining
Set output bandwidth limits for the policy-map class.
percent value}
Enter a rate to set bandwidth in kilobits per second. The
range is from 64 to 1000000.
Enter percent value to set bandwidth as a percentage of the
total bandwidth. The range is 1 to 100 percent.
Enter remaining percent value to set bandwidth as a
percentage of the remaining bandwidth. The range is 1 to
100 percent. This keyword is valid only when strict priority
(priority without police) is configured for another class in the
output policy map.
You must specify the same units in each bandwidth configuration
in an output policy (absolute rates or percentages). The total
guaranteed bandwidth cannot exceed the total available rate.
5.
exit
Return to policy-map configuration mode.
6.
exit
Return to global configuration mode.
672
Configuring QoS
Configuring QoS
Command
Purpose
7.
interface interface-id
Enter interface configuration mode for the interface to which you
want to attach the policy.
8.
service-policy output policy-map-name
Attach the policy map (created in Step 2) to the egress interface.
9.
end
Return to privileged EXEC mode.
10.
show policy-map [policy-map-name [class
Verify your entries.
class-map-name]]
11.
copy running-config startup-config
(Optional) Save your entries in the configuration file.
After you have created an output policy map, you attach it to an egress port. See Attaching a Traffic Policy to an Interface,
page 651.
Use the no form of the appropriate command to delete an existing policy map, class map, or bandwidth configuration.
This example shows how to set the precedence of a queue by allocating 25 percent of the total available bandwidth to
the traffic class defined by the class map:
Switch(config)# policy-map gold_policy
Switch(config-pmap)# class out_class-1
Switch(config-pmap-c)# bandwidth percent 25
Switch(config-pmap-c)# exit
Switch(config-pmap)# exit
Switch(config)# interface GigabitEthernet1/17
Switch(config-if)# service-policy output gold_policy
Switch(config-if)# exit
Configuring Output Policy Maps with Class-Based Shaping
You use the shape average policy-map class configuration command to configure traffic shaping. Class-based shaping
is a control mechanism that is applied to classes of traffic leaving an interface and uses the shape average command to
limit the rate of data transmission used for the committed information rate (CIR) for the class.
Follow these guidelines when configuring class-based shaping:
Configuring a queue for traffic shaping sets the maximum bandwidth or peak information rate (PIR) of the queue.
Configuring traffic shaping automatically also sets the minimum bandwidth guarantee or CIR of the queue to the
same value as the PIR.
You cannot configure CBWFQ (bandwidth) or priority queuing (priority) and traffic (shape average) for the same
class in an output policy map.
You cannot configure traffic shaping for a traffic class when strict priority (priority without police) is configured for
another class within the output policy-map.
Beginning in privileged EXEC mode, follow these steps to use class-based shaping to configure the maximum permitted
average rate for a class of traffic:
673

Configuring QoS
Configuring QoS
Command
Purpose
1.
configure terminal
Enter global configuration mode.
2.
policy-map policy-map-name
Create a policy map by entering the policy map name, and enter
policy-map configuration mode.
3.
class {class-map-name | class-default}
Enter a child class-map name or class-default to match all
unclassified packets, and enter policy-map class configuration
mode.
4.
shape average target bps
Specify the average class-based shaping rate.
For target bps, specify the average bit rate in bits per second. The
range is from 64000 to 1000000000.
5.
exit
Return to policy-map configuration mode.
6.
exit
Return to global configuration mode.
7.
interface interface-id
Enter interface configuration mode for the interface to which you
want to attach the policy.
8.
service-policy output policy-map-name
Attach the policy map (created in Step 2) to the egress interface.
9.
end
Return to privileged EXEC mode.
10.
show policy-map [policy-map-name [class
Verify your entries.
class-map-name]]
11.
copy running-config startup-config
(Optional) Save your entries in the configuration file.
After you have created an output policy map, you attach it to an egress port. See Attaching a Traffic Policy to an Interface,
page 651.
Use the no form of the appropriate command to delete an existing policy map or class map or to delete a class-based
shaping configuration.
Configuring Output Policy Maps with Port Shaping
Port shaping is applied to all traffic leaving an interface. It uses a policy map with only class default when the maximum
bandwidth for the port is specified by using the shape average command. A child policy can be attached to the
class-default in a hierarchical policy map format to specify class-based actions for the queues on the shaped port.
The total of the minimum bandwidth guarantees (CIR) for each queue of the child policy cannot exceed the total port
shape rate.
Beginning in privileged EXEC mode, follow these steps to use port shaping to configure the maximum permitted average
rate for a class of traffic:
Command
Purpose
1.
configure terminal
Enter global configuration mode.
2.
policy-map policy-map-name
Create a hierarchical policy map by entering the hierarchical
policy map name, and enter policy-map configuration mode for
the parent policy.
3.
class class-default
Enter a policy-map class configuration mode for the default class.
4.
shape average target bps
Specify the average class-based shaping rate.
For target bps, specify the average bit rate in bits per second. The
range is from 4000000 to 1000000000.
674

Configuring QoS
Configuring QoS
Command
Purpose
5.
service-policy policy-map-name
Specify the child policy-map to be used in the hierarchical policy
map if required.
6.
exit
Return to policy-map configuration mode.
7.
exit
Return to global configuration mode.
8.
interface interface-id
Enter interface configuration mode for the interface to which you
want to attach the policy.
9.
service-policy output policy-map-name
Attach the parent policy map (created in Step 2) to the egress
interface.
10.
end
Return to privileged EXEC mode.
11.
show policy-map [policy-map-name [class
Verify your entries.
class-map-name]]
12.
copy running-config startup-config
(Optional) Save your entries in the configuration file.
After you have created the hierarchical output policy map, you attach it to an egress port. See Attaching a Traffic Policy
to an Interface, page 651.
Use the no form of the appropriate command to delete an existing hierarchical policy map, to delete a port shaping
configuration, or to remove the policy map from the hierarchical policy map.
This example shows how to configure port shaping by configuring a hierarchical policy map that shapes a port to 90
Mbps, allocated according to the out-policy policy map configured in the previous example.
Switch(config)# policy-map out-policy-parent
Switch(config-pmap)# class class-default
Switch(config-pmap-c)# shape average 90000000
Switch(config-pmap-c)# service-policy out-policy
Switch(config-pmap-c)# exit
Switch(config-pmap)# exit
Switch(config)# interface fastethernet0/1
Switch(config-if)# service-policy output out-policy-parent
Switch(config-if)# exit
Configuring Output Policy Maps with Class-Based Priority Queuing
You can use the priority policy-map class configuration command to ensure that a particular class of traffic is given
preferential treatment. With strict priority queuing, the priority queue is constantly serviced; all packets in the queue are
scheduled and sent until the queue is empty. Excessive use of the priority queues can possibly delay packets in other
queues and create unnecessary congestion.
You can configure strict priority queuing (priority without police), or you can configure an unconditional priority policer
(priority with police). Follow these guidelines when configuring priority queuing:
You can associate the priority command with a single unique class for all attached output policies on the switch.
When you configure a traffic class as a priority queue, you can configure only police and queue-limit as other
queuing actions for the same class. You cannot configure bandwidth or shape average with priority queues in the
same class.
You cannot associate the priority command with the class-default of the output policy map.
Configuring Priority Without Police
Follow these guidelines when configuring strict priority queuing (priority without police):
675

Configuring QoS
Configuring QoS
You cannot configure priority queuing without policing for a traffic class when class-based shaping (shape average)
or CBWFQ (bandwidth) is configured for another class within the output policy-map.
When you configure priority queuing without policing for a traffic class, you can only configure the other queues for
sharing by using the bandwidth remaining percent policy-map class configuration command to allocate excess
bandwidth. This command does not guarantee the allocated bandwidth, but does ensure the rate of distribution.
Beginning in privileged EXEC mode, follow these steps to configure a strict priority queue:
Command
Purpose
1.
configure terminal
Enter global configuration mode.
2.
class-map class-map-name
Create classes for three egress queues. Enter match conditions
classification for each class.
3.
policy-map policy-map-name
Create a policy map by entering the policy map name, and enter
policy-map configuration mode.
4.
class class-map-name
Enter the name of the priority class (created by using the class-map
global configuration command), and enter policy-map class
configuration mode for the priority class.
5.
priority
Set the strict scheduling priority for this class.
Note: Only one unique class map on the switch can be associated with a
priority command. You cannot configure priority along with any other
queuing action (bandwidth or shape average).
6.
exit
Exit policy-map class configuration mode for the priority class.
7.
class class-map-name
Enter the name of a nonpriority class, and enter policy-map class
configuration mode for that class.
8.
bandwidth remaining percent value
Set output bandwidth limits for the policy-map class as a percentage of
the remaining bandwidth. The range is 1 to 100 percent.
9.
exit
Exit policy-map class configuration mode for the class
10.
exit
Return to global configuration mode.
11.
interface interface-id
Enter interface configuration mode for the interface to which you want to
attach the policy.
12.
service-policy output
Attach the policy map (created in Step 3) to the egress interface.
policy-map-name
13.
end
Return to privileged EXEC mode.
14.
show policy-map
Verify your entries.
15.
copy running-config startup-config
(Optional) Save your entries in the configuration file.
After you have created an output policy map, you attach it to an egress port. See Attaching a Traffic Policy to an Interface,
page 651.
Use the no form of the appropriate command to delete an existing policy map or class map or to cancel strict priority
queuing for the priority class or the bandwidth setting for the other classes.
This example shows how to configure the class out-class1 as a strict priority queue so that all packets in that class are
sent before any other class of traffic. Other traffic queues are configured so that out-class-2 gets 50 percent of the
remaining bandwidth and out-class3 gets 20 percent of the remaining bandwidth. The class class-default receives the
remaining 30 percent with no guarantees.
Switch(config)# policy-map policy1
Switch(config-pmap)# class out-class1
Switch(config-pmap-c)# priority
676

Configuring QoS
Configuring QoS
Switch(config-pmap-c)# exit
Switch(config-pmap)# class out-class2
Switch(config-pmap-c)# bandwidth remaining percent 50
Switch(config-pmap-c)# exit
Switch(config-pmap)# class out-class3
Switch(config-pmap-c)# bandwidth remaining percent 20
Switch(config-pmap-c)# exit
Switch(config-pmap)# exit
Switch(config)# interface GigabitEthernet1/17
Switch(config-if)# service-policy output policy1
Switch(config-if)# exit
Configuring Priority With Police
You can use the priority with police feature and configure an unconditional priority policer to limit the bandwidth used by
the priority queue and allocate bandwidth or shape other queues. Follow these guidelines when configuring priority with
police:
You cannot configure a policer committed burst size for an unconditional priority policer even though the keyword is
visible in the CLI help. Any configured burst size is ignored when you try to attach the output service policy.
The allowed police rate range is 64000 to 1000000000 bps, even though the range that appears in the CLI help is
8000 to 1000000000. You cannot attach an output service policy with an out-of-range rate.
You cannot configure priority with policing for a traffic class when bandwidth remaining percent is configured for
another class in the same output policy map.
You can configure 1-rate, 2-color policers for output policies with priority. You cannot configure 2-rate, 3-color
policers for output policies.
Beginning in privileged EXEC mode, follow these steps to configure priority with police:
Command
Purpose
1.
configure terminal
Enter global configuration mode.
2.
class-map class-map-name
Create classes for three egress queues. Enter match conditions
classification for each class.
3.
policy-map policy-map-name
Create a policy map by entering the policy map name, and enter
policy-map configuration mode.
4.
class class-map-name
Enter the name of the priority class (created by using the
class-map global configuration command), and enter
policy-map class configuration mode for the priority class.
5.
priority
Configure this class as the priority class.
Note: Only one unique class map on the switch can be associated
with a priority command.
677

Configuring QoS
Configuring QoS
Command
Purpose
6.
police {rate-bps | cir cir-bps}
Define a policer for the priority class of traffic.
For rate-bps, specify average traffic rate in bits per second
(bps). The range is 64000 to 1000000000.
Note: When you use the police command with the priority
command in an output policy, the police rate range and the CIR
range is 64000 to 1000000000 bps, even though the range that
appears in the CLI help is 8000 to 1000000000. You cannot
attach an output service policy with an out-of-range rate.
For cir cir-bps, specify a committed information rate (CIR) in
bits per second (bps). The range is 64000 to 1000000000.
Note: Although visible in the command-line help string, the
burst-size option is not supported in output policy maps. You
cannot attach an output service policy map that has a configured
burst size.
7.
conform-action [transmit]
(Optional) Enter the action to be taken on packets that conform to
the CIR. If no action is entered, the default action is to send the
packet.
Note: You can enter a single conform-action as part of the
command string following the police command. You can also
enter a carriage return after the police command and enter
policy-map class police configuration mode to enter the
conform-action. When the police command is configured with
priority in an output policy map, only the default conform-action
of transmit is supported. Although visible in the command-line
help string, the other police conform actions are not supported in
output policy maps.
8.
exceed-action [drop]
(Optional) Enter the action to be taken for packets that do not
conform to the CIR. If no action is entered, the default action is to
drop the packet.
Note: You can enter a single exceed-action as part of the
command string following the police command. You can also
enter a carriage return after the police command and enter
policy-map class police configuration mode to enter the
exceed-action. When the police command is configured with
priority in an output policy map, only the default exceed-action of
drop is supported. Although visible in the command-line help
string, the other police exceed actions are not supported in
output policy maps.
9.
exit
Exit policy-map class configuration mode for the priority class.
10.
class class-map-name
Enter the name of the first nonpriority class, and enter policy-map
class configuration mode for that class.
11.
bandwidth {rate | percent value}
Set output bandwidth limits for the policy-map class in kilobits
per second (the range is 64 to 1000000) or a percentage of the
total bandwidth (the range is 1 to 100 percent) or specify the
average class-based shaping rate in bits per second (the range
or
is 64000 to 1000000000).
shape average target bps
12.
exit
Return to policy-map configuration mode.
678
Configuring QoS
Configuring QoS
Command
Purpose
13.
exit
Return to global configuration mode.
14.
interface interface-id
Enter interface configuration mode for the interface to which you
want to attach the policy.
15.
service-policy output policy-map-name
Attach the policy map (created in Step 3) to the egress interface.
16.
end
Return to privileged EXEC mode.
17.
show policy-map
Verify your entries.
18.
copy running-config startup-config
(Optional) Save your entries in the configuration file.
After you have created an output policy map, you attach it to an egress port. See Attaching a Traffic Policy to an Interface,
page 651.
Use the no form of the appropriate command to delete an existing policy map or class map or to cancel the priority
queuing or policing for the priority class or the bandwidth setting for the other classes.
This example shows how to use the priority with police commands to configure out-class1 as the priority queue, with
traffic going to the queue limited to 20000000 bps so that the priority queue never uses more than that. Traffic above
that rate is dropped. The other traffic queues are configured as in the previous example.
Switch(config)# policy-map policy1
Switch(config-pmap)# class out-class1
Switch(config-pmap-c)# priority
Switch(config-pmap-c)# police 200000000
Switch(config-pmap-c)# exit
Switch(config-pmap)# class out-class2
Switch(config-pmap-c)# bandwidth percent 50
Switch(config-pmap-c)# exit
Switch(config-pmap)# class out-class3
Switch(config-pmap-c)# bandwidth percent 20
Switch(config-pmap-c)# exit
Switch(config-pmap)# exit
Switch(config)# interface GigabitEthernet1/17
Switch(config-if)# service-policy output policy1
Switch(config-if)# exit
Configuring Output Policy Maps with Weighted Tail Drop
Weighted tail drop (WTD) adjusts the queue size (buffer size) associated with a traffic class. You configure WTD by using
the queue-limit policy-map class configuration command.
Follow these guidelines when configuring WTD:
Configuring WTD with the queue-limit command is supported only when you first configure a scheduling action,
such as bandwidth, shape average, or priority. The exception to this is when you are configuring queue-limit in
the class-default.
You can configure and attach as many output policy maps as there are ports. Multiple output policy maps can use
the same queue-limit configuration. However, these policy maps can have only three unique queue-limit
configurations.
You can use the queue-limit command to configure the queue-limit for CPU-generated traffic.
When you use the queue-limit command to configure queue thresholds for a class, the WTD thresholds must be
less than or equal to the queue maximum threshold. A queue size configured with no qualifier must be larger than
any queue sizes configured with qualifiers.
679

Configuring QoS
Configuring QoS
You cannot configure more than two unique threshold values for the WTD qualifiers (cos, dscp, precedence, or
qos-group) in the queue-limit command. However, there is no limit to the number of qualifiers that you can map to
those thresholds. You can configure a third unique threshold value to set the maximum queue, using the queue-limit
command with no qualifiers.
A WTD qualifier in the queue-limit command must be the same as at least one match qualifier in the associated
class map.
In an output policy map, when you configure a queue-limit for a unique class, all other output policy maps must use
the same format of qualifier type and qualifier value. Only queue-limit threshold values can be different. For example,
when you configure class A queue-limit thresholds for dscp 30 and dscp 50 in policy-map1, and you configure class
A queue-limits in policy-map 2, you must use dscp 30 and dscp 50 as qualifiers. You cannot use dscp 20 and dscp
40. The threshold values can be different, but different threshold values would create a new unique queue-limit
configuration.
Beginning in privileged EXEC mode, follow these steps to use WTD to adjust the queue size for a traffic class:
Command
Purpose
1.
configure terminal
Enter global configuration mode.
2.
policy-map policy-map-name
Create a policy map by entering the policy map name, and enter
policy-map configuration mode.
3.
class {class-map-name | class-default}
Enter a child class-map name, or class-default to match all
unclassified packets, and enter policy-map class configuration
mode.
If you enter a class-map name, you must perform Step 4 to
configure a scheduling action (bandwidth, shape average,
or priority) before you go to Step 5 to configure queue-limit.
If you enter class-default, you can skip Step 4.
4.
bandwidth {rate | percent value | remaining
Configure a scheduling action for the traffic class. For more
percent value}
information, see Configuring Output Policy Maps with
or
Class-Based-Weighted-Queuing, page 672, Configuring Output
shape average target bps
Policy Maps with Class-Based Shaping, page 673, Configuring
or
Output Policy Maps with Port Shaping, page 674, or Configuring
priority
Output Policy Maps with Class-Based Priority Queuing,
page 675.
680

Configuring QoS
Configuring QoS
Command
Purpose
5.
queue-limit [cos value | dscp value |
Specify the queue size for the traffic class.
precedence value | qos-group value]
number-of-packets [packets]}
(Optional) For cos value, specify a CoS value. The range is
from 0 to 7.
(Optional) For dscp value, specify a DSCP value. The range
is from 0 to 63.
(Optional) For precedence value, specify an IP precedence
value. The range is from 0 to 7.
(Optional) For qos-group value, enter a QoS group value.
The range is from 0 to 99.
For number-of-packets, set the minimum threshold for WTD.
The range is from 16 to 544, in multiples of 16, where each
packet is a fixed unit of 256 bytes.
Note: For optimal performance, we strongly recommend that you
configure the queue-limit to 272 or less.
The value is specified in packets by default, but the packets
keyword is optional.
Note: Multiple output policy maps can use the same queue-limit
configuration. However these policy maps can have only three
unique queue-limit configurations.
6.
exit
Return to policy-map configuration mode.
7.
exit
Return to global configuration mode.
8.
interface interface-id
Enter interface configuration mode for the interface to which you
want to attach the policy.
9.
service-policy output policy-map-name
Attach the policy map (created in Step 2) to the egress interface.
Note: If you try to attach an output policy map that contains a
fourth queue-limit configuration, you see an error message, and
the attachment is not allowed.
10.
end
Return to privileged EXEC mode.
11.
show policy-map [policy-map-name [class
Verify your entries.
class-map-name]]
12.
copy running-config startup-config
(Optional) Save your entries in the configuration file.
After you have created an output policy map, you attach it to an egress port. See Configuring Output Policy Maps,
page 670.
Use the no form of the appropriate command to delete an existing policy map or class map or to delete a WTD
configuration.
This example shows a policy map with a specified bandwidth and queue size. Traffic that is not DSCP 30 or 10 is
assigned a queue limit of 112 packets. Traffic with a DSCP value of 30 is assigned a queue-limit of 48 packets, and traffic
with a DSCP value of 10 is assigned a queue limit of 32 packets. All traffic not belonging to the class traffic is classified
into class-default, which is configured with 10 percent of the total available bandwidth and a large queue size of 256
packets.
Switch(config)# policy-map gold-policy
681

Configuring QoS
Configuring QoS
Switch(config-pmap)# class traffic
Switch(config-pmap-c)# bandwidth percent 50
Switch(config-pmap-c)# queue-limit 112
Switch(config-pmap-c)# queue-limit dscp 30 48
Switch(config-pmap-c)# queue-limit dscp 10 32
Switch(config-pmap-c)# exit
Switch(config-pmap)# exit
Switch(config-pmap)# class class-default
Switch(config-pmap-c)# bandwidth percent 10
Switch(config-pmap-c)# queue-limit 256
Switch(config-pmap-c)# exit
Switch(config-pmap)# exit
Switch(config)# interface GigabitEthernet1/17
Switch(config-if)# service-policy output gold-policy
Switch(config-if)# exit
Configuring QoS Marking and Queuing for CPU-Generated Traffic
Beginning in privileged EXEC mode, follow these steps to configure marking and queuing of CPU-generated traffic. This
procedure is optional.
Command
Purpose
1.
configure terminal
Enter global configuration mode.
2.
Configure global table maps
Refer to the Configuring Table Maps, page 650.
3.
cpu traffic qos cos {cos-value | cos
Mark traffic by setting a new CoS value or by specifying a table map.
[table-map table-map-name] | dscp
[table-map table-map-name] | prec
For cos-value, enter a new CoS value. The range is from 0 to 7.
[table-map table-map-name]}
You can also mark CoS based on the CoS, DSCP, or IP-precedence
value. You can optionally use a table map to configure CoS. If you do
not enter table-map table-map-name, the table map default
behavior is copy. See Table Maps, page 625.
When you complete this step, go to Step 7. on page 683.
4.
cpu traffic qos dscp {dscp_value | cos
Mark traffic by setting a new DsCP value or by specifying a table map.
[table-map table-map-name] | dscp
[table-map table-map-name] | prec
For dscp new-dscp, enter a new DSCP value for the classified traffic.
[table-map table-map-name]}
The range is 0 to 63.
You can also configure a table map to mark DSCP based on the CoS,
DSCP, or IP-precedence value. You can optionally enter the table
name. If you do not enter table-map table-map-map name, the
table map default behavior is copy. See Table Maps, page 625.
For additional DSCP classification options, see Classification Based
on IP DSCP, page 620.
When you complete this step, go to Step 7. on page 683.
682

Configuring QoS
Configuring QoS
Command
Purpose
5.
cpu traffic qos precedence
Mark traffic by setting a new precedence value or by specifying a table
{precedence_value | cos [table-map
map.
table-map-name] | dscp [table-map
table-map-name] | prec [table-map
For precedence new-precedence, enter a new IP-precedence
table-map-name]}
value as a number from 0 to 7 or by name: routine (0), priority (1),
immediate (2), flash (3), flash-override (4), critical (5), internet (6),
network (7).
You can also configure a table map to mark precedence based on the
CoS, DSCP, or IP-precedence value. You can optionally enter the
table name. If you do not enter table-map table-map-map name,
the table map default behavior is copy. See Table Maps, page 625.
When you complete this step, go to Step 7. on page 683.
6.
cpu traffic qos qos-group
Mark traffic by using a QoS group.
qos-group-value
For qos-group-value, identify a QoS group to use at egress. The range is
0 to 99.
When you complete this step, go to Step 7. on page 683.
7.
end
Return to privileged EXEC mode.
8.
Configure output policy maps to map
Refer to the Configuring Output Policy Maps, page 670.
QoS markings like COS, IP DSCP, IP
precedence and QoS group to class
queues, configure queuing and
scheduling
9.
copy running-config startup-config
(Optional) Save your entries in the configuration file.
10.
show running-config
Display the configured class maps, policy maps, table maps, and CPU
traffic QoS settings.
11.
show cpu traffic qos
Display the QoS marking values for CPU-generated traffic.
12.
show table-map [table-map-name]
Display information for all table maps or the specified table map.
13.
show policy-map [policy-map-name |
Display QoS policy map information for the specified policy map name,
interface [interface-id] [output] [class
interface, input or output policy maps, or policy-map class.
class-name]]
To disable any command, use the no form of the command.
Example 1
This example shows how to configure egress queuing based on the DSCP value of CPU-generated IP packets.
All CPU-generated IP traffic queues on the egress port, based on its IP DSCP value, and the configured output policy
map output-policy.
All IP SLA or TWAMP probes with the DSCP value ef to simulate voice traffic are assigned to the voice class.
All IP SLA or TWAMP probes with the DSCP values af41, af42 and af43 to simulate video traffic are assigned to the
video class.
All IP control protocol traffic with the DSCP values 48 and 56 are assigned to the network-internetwork-control class.
The rest of the IP traffic is assigned to the default class.
All CPU-generated non-IP traffic is statically mapped to a fixed queue on the egress port.
683
Configuring QoS
Configuring QoS
All CFM traffic is queued to the default class because there is no class based on CoS.
Switch(config)# cpu traffic qos dscp dscp
Class:
Switch(config)# class-map match-any video
Switch(config-cmap)# match ip dscp af41 af42 af43
Switch(config-cmap)# exit
Switch(config)# class-map match-any voice
Switch(config-cmap)# match ip dscp ef
Switch(config-cmap)# exit
Switch(config)# class-map match-any network-internetwork-control
Switch(config-cmap)# match ip dscp 48 56
Switch(config-cmap)# exit
Policy:
Switch(config)# policy-map output-policy
Switch(config-pmap)# class voice
Switch(config-pmap-c)# priority
Switch(config-pmap-c)# police cir 10000000
Switch(config-pmap-c)# exit
Switch(config-pmap)# class video
Switch(config-pmap-c)# bandwidth percent 40
Switch(config-pmap-c)# exit
Switch(config-pmap)# class network-internetwork-control
Switch(config-pmap-c)# bandwidth percent 10
Switch(config-pmap-c)# exit
Switch(config-pmap)# class class-default
Switch(config-pmap-c)# bandwidth percent 30
Switch(config-pmap-c)# exit
Interface
Switch(config)# interface fastethernet0/1
Switch(config-if)# service-policy output output-policy
Switch(config-pmap-c)# exit
Example 2
This example shows how to mark the CoS of CPU-generated IP traffic (including IP-SLA and TWAMP) based on the
DSCP value in the packet and to configure egress queuing based on the CoS value.
All CPU-generated IP traffic queues on the egress port, based on the IP DSCP value and the configured output policy
map called output-policy.
All IP SLA or TWAMP probes with the DSCP value ef to simulate voice traffic are assigned to the voice class.
All IP SLA or TWAMP probes with the DSCP values af41, af42 and af43 to simulate video traffic are assigned to the
video class.
All IP control protocol traffic with the DSCP values 48 and 56 are assigned to the network-internetwork-control class.
The rest of the IP traffic is assigned to the default class.
All CPU-generated non-IP traffic with CoS 5 is assigned to the voice class.
All CPU-generated non-IP traffic with CoS 3 is assigned to the video class.
684
Configuring QoS
Configuring QoS
All CPU-generated non-IP traffic with CoS 6 and 7 is assigned to the network-internetwork-control class.
All CFM traffic with CoS 5 is assigned to the voice class.
All CFM traffic with CoS 3 is assigned to the video class.
All CFM traffic with CoS 6 and 7 is assigned to the network-internetwork-control class.
Table Map:
Switch(config)# table-map dscp-to-cos
Switch(config-tablemap)# map from 46 to 5
Switch(config-tablemap)# map from 48 to 6
Switch(config-tablemap)# map from 56 to 7
Switch(config-tablemap)# map from af41 to 3
Switch(config-tablemap)# map from af42 to 3
Switch(config-tablemap)# map from af43 to 3
Switch(config-tablemap)# default 0
Switch(config-tablemap)# end
CPU QoS:
Switch(config)# cpu traffic qos cos dscp table-map dscp-to-cos
Switch(config)# cpu traffic qos cos cos
Class:
Switch(config)# class-map match-any video
Switch(config-cmap)# match cos 3
Switch(config-cmap)# exit
Switch(config)# class-map match-any voice
Switch(config-cmap)# match cos 5
Switch(config-cmap)# exit
Switch(config)# class-map match-any network-internetwork-control
Switch(config-cmap)# match cos 6 7
Switch(config-cmap)# exit
Policy:
Switch(config)# policy-map output-policy
Switch(config-pmap)# class voice
Switch(config-pmap-c)# priority
Switch(config-pmap-c)# police cir 10000000
Switch(config-pmap-c)# exit
Switch(config-pmap)# class video
Switch(config-pmap-c)# bandwidth percent 40
Switch(config-pmap-c)# exit
Switch(config-pmap)# class network-internetwork-control
Switch(config-pmap-c)# bandwidth percent 10
Switch(config-pmap-c)# exit
Switch(config-pmap)# class class-default
Switch(config-pmap-c)# bandwidth percent 30
Switch(config-pmap-c)# exit
Interface
685
Configuring QoS
Configuring QoS
Switch(config)# interface fastethernet0/1
Switch(config-if)# service-policy output output-policy
Switch(config-pmap-c)# exit
Example 3
This example shows how to:
Mark the DSCP value of CPU-generated IP traffic (including IP-SLA and TWAMP) based on the DSCP value in the
packet.
Mark the CoS of CPU-generated IP traffic (including IP-SLA and TWAMP) based on the DSCP value in the packet.
Mark the CoS of CPU-generated non-IP traffic based on the CoS value in the packet.
Mark all CPU-generated traffic with the QoS group.
Configure egress queuing based on the QoS group.
The example has these results:
All CPU-generated IP traffic with DSCP values 46, 48, and 56 retains the existing markings.
For all other CPU-generated IP packets, the DSCP value is reset to 0.
All CPU-generated IP traffic with DSCP values 46, 48, and 56 is mapped to the corresponding CoS values of 5, 6,
and 7 respectively.
For all other CPU-generated IP packets, the CoS value resets to 0.
All CPU-generated non-IP traffic with the CoS values of 5, 6, and 7 retain the existing markings.
For all other CPU-generated non-IP packets, the CoS value resets to 0.
All CPU-generated traffic goes through a single class called cpu-traffic. The user-voice classes user-voice and
user-video are reserved for user traffic. As a result, CPU traffic and user traffic are separated into different queues
on the egress port.
Table Map
Switch(config)# table-map dscp-to-cos
Switch(config-tablemap)# map from 46 to 5
Switch(config-tablemap)# map from 48 to 6
Switch(config-tablemap)# map from 56 to 7
Switch(config-tablemap)# default 0
Switch(config-tablemap)# end
Switch(config)# table-map dscp-to-dscp
Switch(config-tablemap)# map from 46 to 46
Switch(config-tablemap)# map from 48 to 48
Switch(config-tablemap)# map from 56 to 56
Switch(config-tablemap)# default 0
Switch(config-tablemap)# end
Switch(config)# table-map cos-to-cos
Switch(config-tablemap)# map from 5 to 5
Switch(config-tablemap)# map from 6 to 6
Switch(config-tablemap)# map from 7 to 7
Switch(config-tablemap)# default 0
Switch(config-tablemap)# end
CPU QoS:
686
Configuring QoS
Displaying QoS Information
Switch(config)# cpu traffic qos dscp dscp table-map dscp-to-dscp
Switch(config)# cpu traffic qos cos dscp table dscp-to-cos
Switch(config)# cpu traffic qos cos cos table cos-to-cos
Switch(config)# cpu traffic qos qos-group 50
Class:
Switch(config)# class-map match-any cpu-traffic
Switch(config-cmap)# match qos-group 50
Switch(config-cmap)# exit
Switch(config)# class-map match-any user-video
Switch(config-cmap)# match cos 3
Switch(config-cmap)# exit
Switch(config)# class-map match-any user-voice
Switch(config-cmap)# match cos 5
Switch(config-cmap)# exit
Policy:
Switch(config)# policy-map output-policy
Switch(config-pmap)# class user-voice
Switch(config-pmap-c)# priority
Switch(config-pmap-c)# police cir 10000000
Switch(config-pmap-c)# exit
Switch(config-pmap)# class user-video
Switch(config-pmap-c)# bandwidth percent 40
Switch(config-pmap-c)# exit
Switch(config-pmap)# class cpu-traffic
Switch(config-pmap-c)# bandwidth percent 10
Switch(config-pmap-c)# exit
Switch(config-pmap)# class class-default
Switch(config-pmap-c)# bandwidth percent 30
Switch(config-pmap-c)# exit
Interface:
Switch(config)# interface fastethernet0/1
Switch(config-if)# service-policy output output-policy
Switch(config-pmap-c)# exit
Displaying QoS Information
To display QoS information, use one or more of the privileged EXEC commands in Table 58 on page 687.
Table 58
Commands for Displaying Standard QoS Information
Command
Purpose
show class-map [class-map-name]
Display QoS class-map information for all class maps or the
specified class map.
show policer aggregate [aggregate-policer-name]
Display information about all aggregate policers or the specified
aggregate policer.
show policy-map [policy-map-name | interface
Display QoS policy map information for the specified policy map
[interface-id] [input | output] [class class-name]]
name, interface, input or output policy maps, or policy-map
class.
687
Configuring QoS
Configuration Examples for Policy Maps
Table 58
Commands for Displaying Standard QoS Information (continued)
Command
Purpose
show cpu traffic qos
Display the QoS marking values for CPU-generated traffic.
show running-config
Display the configured class maps, policy maps, table maps,
and aggregate policers.
show table-map [table-map-name]
Display information for all configured table maps or the specified
table map.
To test full-path QoS in both directions on an interface, you can configure Ethernet terminal loopback by entering the
ethernet loopback facility interface configuration command. In terminal loopback mode, the port appears to be up but
the link is actually down and no packets are sent out. Configuration changes on the port immediately affect the traffic
being looped back.
QoS Statistics
There are several ways to display QoS input and output policy-map statistics.
For input policy maps, you can use the show policy-map interface [interface-id] privileged EXEC command to display
per-class per-policer conform and exceed statistics. Policer conform statistics are the number of packets that conform
to the configured policer profile; policer exceed statistics are the number of packets that exceed the configured policer
profile. The switch does not support per-class classification statistics, but you can determine these statistics by
configuring policing at line rate for the class. In this case, no packets exceed the configured policer profile, and the
policer conform statistics would equal the class classification statistics.
This output also includes byte-level statistics for conform, exceed, and violate classes.
Another way to view input QoS statistics is in the output of the show platform qos statistics interface [interface-id]
privileged EXEC command. The per-port frame statistics are sorted by the DSCP and CoS values of the incoming frames
on the port. These statistics do not provide any information about the MQC input policy map configured on the interface.
For output policy maps, you can use the show policy-map interface [interface-id] command to display per-class
classification statistics that show the total number of packets that match the specified class. This count includes the total
number of packets that are sent and dropped for that class. You can use the same command to view the per-class tail
drop statistics.
Configuration Examples for Policy Maps
This section includes configuration examples for configuring QoS policies on the Cisco IE switch, including configuration
limitations and restrictions. The sections are broken into different configurations actions that a customer might do. Each
section provides the exact sequence of steps that you must follow for successful configuration or modification.
QoS Configuration for Customer A, page 689
QoS Configuration for Customer B, page 690
Modifying Output Policies and Adding or Deleting Classification Criteria, page 691
Modifying Output Policies and Changing Queuing or Scheduling Parameters, page 691
Modifying Output Policies and Adding or Deleting Configured Actions, page 692
Modifying Output Policies and Adding or Deleting a Class, page 693
688
Configuring QoS
Configuration Examples for Policy Maps
QoS Configuration for Customer A
This section provides examples of the initial configuration and activation of QoS policies for a customer switch. Input and
output QoS service policies are configured based on the requirements and attached to relevant ports.
In the initial configuration for Customer A, Gigabit Ethernet ports 1 and 2 are network node interfaces (NNIs) and are
enabled by default.
This is the overall sequence for initial configuration:
Configure classes and policies.
Shut down all active ports.
Attach policies to ports to be activated.
Take the ports out of the shut-down state.
Leave unused ports shut down.
Note these restrictions for configuring output policies:
You can define up to three classes in the output policy map.
The defined classes must be the same as other output policy maps.
The number of defined classes in each output policy map must be same.
You must assign an action to each class; that is, there can be no empty class.
Each class configuration must be based on the classification/marking done in the input policy-map.
This example configures classes for input service policies and defines three classes of service: gold, silver, and bronze.
Because a match-all classification (the default) can have only single classification criterion, the match-any classification
is used so that you can add classification criteria in the future.
Switch# config terminal
Switch(config)# class-map match-any gold-in
Switch(config-cmap)# match ip dscp af11
Switch(config-cmap)# exit
Switch(config)# class-map match-any silver-in
Switch(config-cmap)# match ip dscp af21
Switch(config-cmap)# exit
Switch(config)# class-map match-any bronze-in
Switch(config-cmap)# match ip dscp af31
Switch(config-cmap)# exit
This example shows how to configure an input policy map that marks the gold class and polices the silver class to
50 Mb/s and the bronze class to 20 Mb/s.
Switch(config)# policy-map input-all
Switch(config-pmap)# class gold-in
Switch(config-pmap-c)# set ip dscp af43
Switch(config-pmap-c)# exit
Switch(config-pmap)# class silver-in
Switch(config-pmap-c)# police 50000000
Switch(config-pmap)# class bronze-in
Switch(config-pmap-c)# police 20000000
Switch(config-pmap-c)# exit
689
Configuring QoS
Configuration Examples for Policy Maps
This example configures classes for output service policies with three classes of service: gold, silver, and bronze. The
gold class is configured to match the marked value in the input service policy. Because a match-all classification (the
default) can have only single classification criterion, the match-any classification is used so that you can add
classification criteria in the future.
Switch# config terminal
Switch(config)# class-map match-any gold-out
Switch(config-cmap)# match ip dscp af43
Switch(config-cmap)# exit
Switch(config)# class-map match-any silver-out
Switch(config-cmap)# match ip dscp af21
Switch(config-cmap)# exit
Switch(config)# class-map match-any bronze-out
Switch(config-cmap)# match ip dscp af31
Switch(config-cmap)# exit
This example configures one output service policy to be applied to both Gigabit Ethernet NNIs, providing priority with
rate-limiting to the gold class, class-based shaping for the silver class, and a minimum bandwidth guarantee of 10
percent to the bronze class.
Switch(config)# policy-map output-g1-2
Switch(config-pmap)# class gold-out
Switch(config-pmap-c)# priority
Switch(config-pmap-c)# police 50000000
Switch(config-pmap-c)# exit
Switch(config-pmap)# class silver-out
Switch(config-pmap-c)# shape average 200000
Switch(config-pmap-c)# exit
Switch(config-pmap)# class bronze-out
Switch(config-pmap-c)# bandwidth percent 10
Switch(config-pmap-c)# exit
This example attaches the input and output service policies to the Gigabit Ethernet ports and activates them.
Switch(config)# interface range GigabitEthernet1/17-18
Switch(config-if-range)# service-policy input input-all
Switch(config-if-range)# service-policy output output-g1-2
Switch(config-if-range)# no shutdown
Switch(config-if-range)# exit
QoS Configuration for Customer B
This section provides examples for configuring and activating QoS policies on the switch for a new set of customers
without affecting the current customers. Input and output QoS service policies are configured based on the requirements
and attached to relevant ports. The example uses an existing input policy-map and configures a new output policy map
for the new customers.
In the initial configuration for Customer B, Gigabit Ethernet ports 1 and 2 are NNIs and are enabled by default.
This is the overall sequence of initial configuration:
Define any new required output policies.
Attach input and output policies to ports to be activated.
Take the ports out of the shut-down state.
Note these restrictions when configuring output policies:
You can define up to three classes in the output policy map.
The defined classes must be the same as other output policy maps.
690
Configuring QoS
Configuration Examples for Policy Maps
The number of defined classes in each output policy map must be same.
You must assign an action to each class; that is, there can be no empty class.
Each class configuration must be based on the classification/marking done in the input policy-map.
Modifying Output Policies and Adding or Deleting Classification Criteria
This section provides examples of updating an existing set of output policy maps to add or delete classification criteria.
The modification might be required due to a change in the service provisioning requirements or a change in the input
service policy map. You can make the change without shutting down any port.
In the initial configuration, Gigabit Ethernet ports 1 and 2 are NNIs and are enabled by default.
This is the overall sequence of initial configuration:
Change the configured class map for an input service policy.
Change the configured class map for an output service policy.
This example modifies classes for an input service policy by adding classification criteria to the silver-in class to also
match dscp cs5. This is required for the output policy-map to match to dscp cs5.
Switch(config)# class-map match-any silver-in
Switch(config-cmap)# match ip dscp af21
Switch(config-cmap)# match ip dscp cs5
Switch(config-cmap)# exit
This example modifies classes for an output service policy, adding classification criteria to the silver-out class to also
match dscp cs5. This adds dscp cs5 to the silver-out class on all configured and attached output service policies. The
dscp cs5 flow now receives the same queuing and scheduling treatment as the silver-out class.
Switch# config terminal
Switch(config)# class-map match-any silver-out
Switch(config-cmap)# match ip dscp af21
Switch(config-cmap)# match ip dscp cs5
Switch(config-cmap)# exit
You should use the same procedure when deleting a match statement associated with a configured class.
Modifying Output Policies and Changing Queuing or Scheduling Parameters
This section provides examples of updating an existing set of output policy maps to modify the parameters of the
configured queuing and scheduling actions. The modification in the output policy map might be required due to a change
in the service provisioning requirements. You can make the change without shutting down any port.
In the initial configuration, Gigabit Ethernet ports 1 and 2 are NNIs and are enabled by default.
The requirement is to change the action parameters.
Note these restrictions when configuring output policies:
You can define up to three classes in the output policy map.
The defined classes must be the same as other output policy maps.
The number of defined classes in each output policy map must be same.
You must assign an action to each class; that is, there can be no empty class.
691
Configuring QoS
Configuration Examples for Policy Maps
Each class configuration must be based on the classification or marking done in the input policy-map.
Modifying Output Policies and Adding or Deleting Configured Actions
This section provides examples of updating an existing set of output policy maps to add or delete queuing and
scheduling actions. The modification in the output policy map might be required due to a change in the service
provisioning requirements. You can make the change without shutting down ports that are not configured with the output
policy map to be modified. But you must shut down the ports that are configured with that output policy map. Customers
not using this output policy map are not affected.
In the initial configuration, Gigabit Ethernet ports 1 and 2 are NNIs and are enabled by default.
This is the overall sequence of configuration:
Shut down all active ports carrying the policy to be modified.
Detach the output policy from all ports to which it is attached.
Make modifications to the output policy.
Reattach the output policy to the appropriate ports.
Take the ports out of the shutdown state.
Note these restrictions for configuring output policies:
You can define up to three classes in the output policy map.
The defined classes must be the same as other output policy maps.
The number of defined classes in each output policy map must be same.
You must assign an action to each class; that is, there can be no empty class.
Each class configuration must be based on the classification/marking done in the input policy-map.
These steps shut down all ports carrying the output policy, in this case only the Gigabit Ethernet ports.
Switch(config)# interface range GigabitEthernet1/17-18
Switch(config-if-range)# shutdown
Switch(config-if-range)# exit
These steps detach the output policy to be modified, in this case the one configured on the Gigabit Ethernet ports:
Switch(config)# interface range GigabitEthernet1/17-18
Switch(config-if-range)# no service-policy output output-g1-2
Switch(config-if-range)# exit
These steps modify the output service policy servicing the Gigabit Ethernet NNIs. Instead of providing a minimum
bandwidth guarantee of 10 percent to the bronze class, the policy is modified to provide class-based shaping to 100000
bps.
Switch(config)# policy-map output-g1-2
Switch(config-pmap)# class bronze-out
Switch(config-pmap-c)# no bandwidth percent 10
Switch(config-pmap-c)# shape average 100000
Switch(config-pmap-c)# exit
These steps reattach the output policy to the Gigabit Ethernet ports:
Switch(config)# interface range GigabitEthernet1/17-18
Switch(config-if-range)# service-policy output output9-12
Switch(config-if-range)# exit
692
Configuring QoS
Configuration Examples for Policy Maps
These steps activate all Gigabit Ethernet ports:
Switch(config)# interface range GigabitEthernet1/17-18
Switch(config-if-range)# no shutdown
Switch(config-if-range)# exit
Modifying Output Policies and Adding or Deleting a Class
This section provides examples of updating an existing set of output policy maps to add or delete entire classes. The
modification in the output policy map might be required due to a change in the service provisioning requirements or a
change in the input service policy. To make this change, you must shut down all active ports on the switch. For this kind
of update to any output policy map, all customers could potentially be affected. To avoid this, we recommend that you
consider possible future upgrades when you configure classes in output service policies.
In the initial configuration, Gigabit Ethernet ports 1 and 2 are NNIs and are enabled by default.
This is the overall sequence of configuration:
Shut down all active ports.
Detach the output policies from all Ethernet ports.
Delete the class.
Reattach the output policies to the Ethernet ports.
Take the Ethernet ports out of the shutdown state.
These steps shut down all active and applicable Ethernet ports:
Switch(config)# interface range GigabitEthernet1/17-18
Switch(config-if-range)# shutdown
Switch(config-if-range)# exit
These steps detach all output policies from the affected Ethernet ports:
Switch(config)# interface range GigabitEthernet1/17-18
Switch(config-if-range)# no service-policy output output-g1-2
Switch(config-if-range)# exit
These steps delete a class from all output policy maps and input policy maps; the input policy can be left attached or
can be detached:
Switch(config)# policy-map output1-8
Switch(config-pmap)# no class bronze-out
Switch(config-pmap-c)# exit
Switch(config)# policy-map output9-12
Switch(config-pmap)# no class bronze-out
Switch(config-pmap-c)# exit
Switch(config)# policy-map output-g1-2
Switch(config-pmap)# no class bronze-out
Switch(config-pmap-c)# exit
Switch(config)# policy-map input-all
Switch(config-pmap)# no class bronze-in
Switch(config-pmap-c)# exit
These steps reattach all policies to the Ethernet ports:
Switch(config)# interface range GigabitEthernet1/17-18
Switch(config-if-range)# service-policy output output9-12
693
Configuring QoS
Configuration Examples for Policy Maps
Switch(config-if-range)# exit
These steps activate all applicable Ethernet ports:
Switch(config)# interface range GigabitEthernet1/17-18
Switch(config-if-range)# no shutdown
Switch(config-if-range)# exit
You should use the same procedure when adding a class to an attached output service policy.
Note: Problems can occur if you do not follow the previous sequence.
When a policy map is attached to an interface, all traffic that does not explicitly match the configured class maps within
the policy map should go through the default queue (class class-default). However, in some cases, traffic that does not
explicitly match the output policy-map classes could go through more than one queue. This queuing problem can occur
when you do not follow the previous procedure and do not attach an output policy to all active ports.
694
Configuring Static IP Unicast Routing
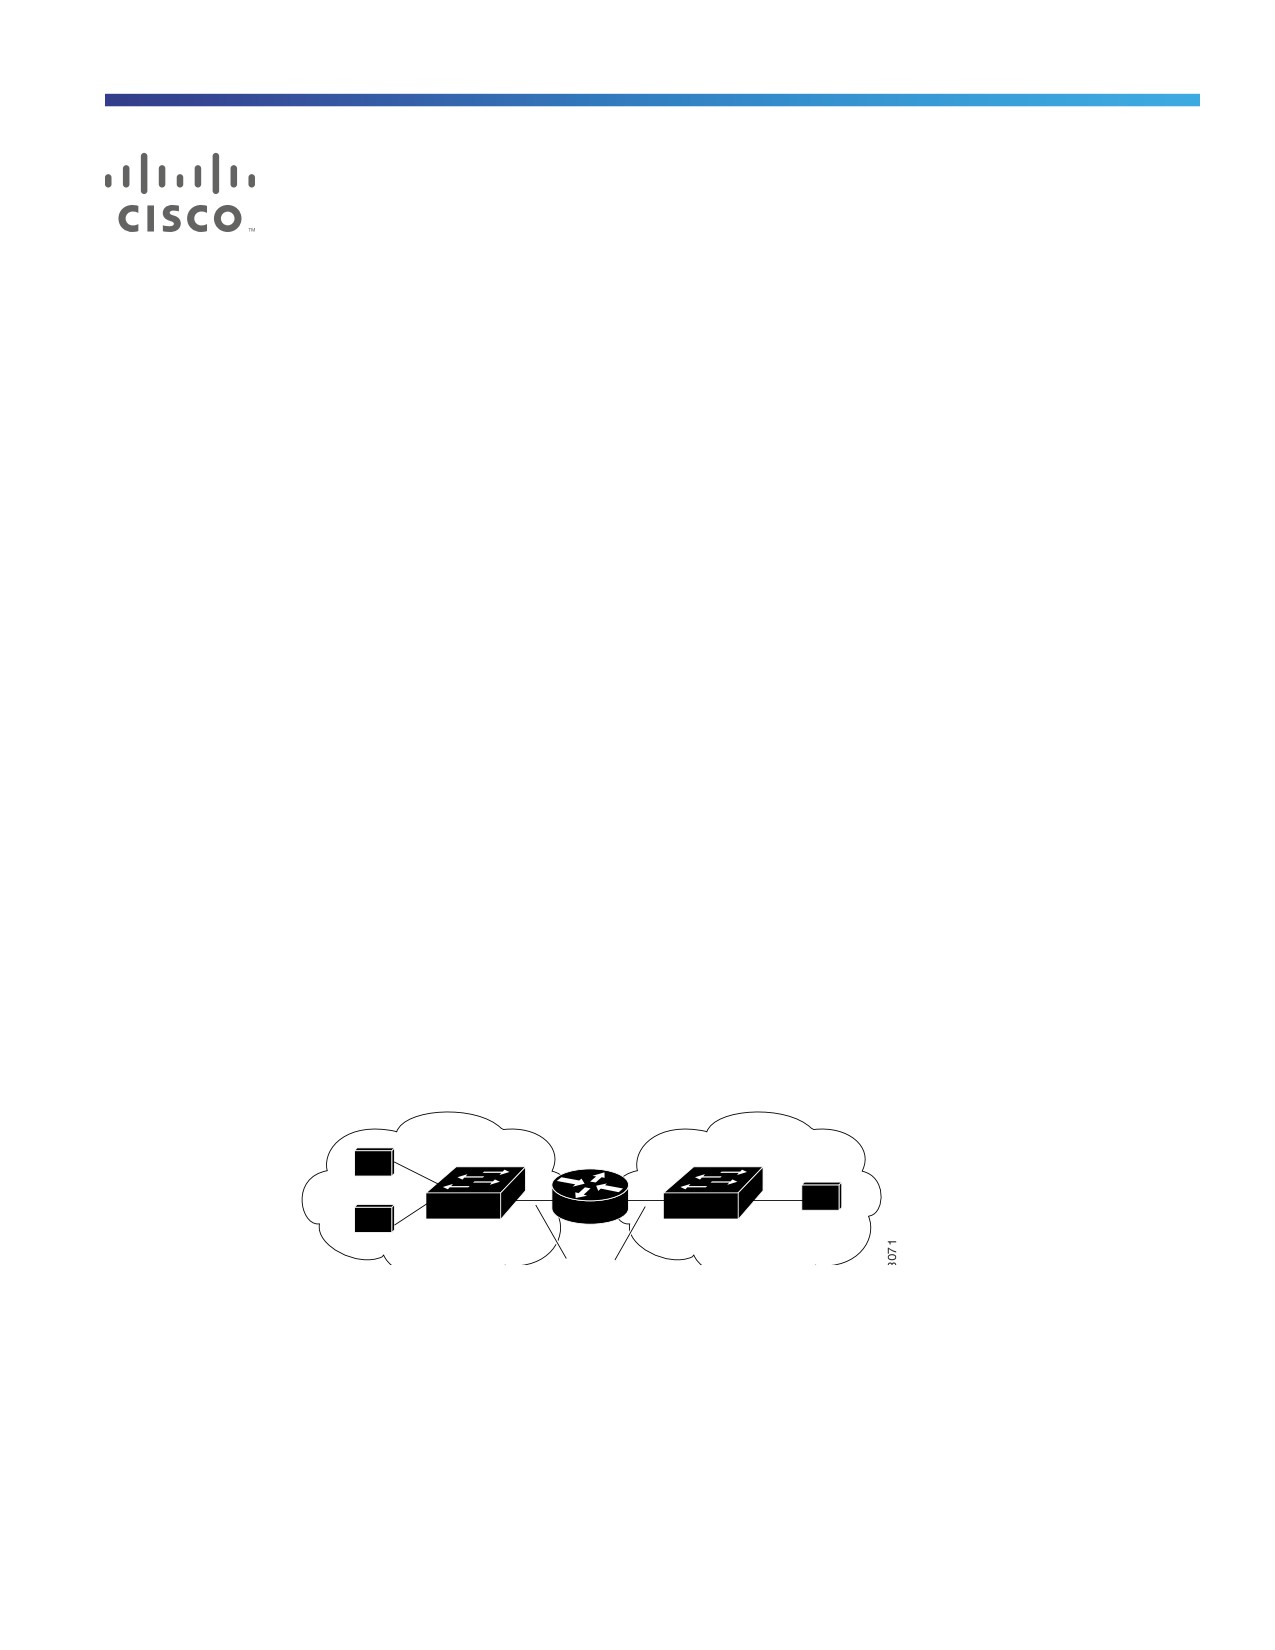
This chapter describes how to configure IP Version 4 (IPv4) static IP unicast routing on the switch. Static routing is
supported only on switched virtual interfaces (SVIs) and not on physical interfaces. The switch does not support routing
protocols.
Restrictions for Static IP Unicast Routing
By default, static IP routing is disabled on the switch.
Information About Configuring Static IP Unicast Routing
Note: When configuring routing parameters on the switch and to allocate system resources to maximize the number of
unicast routes allowed, use the sdm prefer lanbase-routing global configuration command to set the Switch Database
Management (SDM) feature to the routing template.
IP Routing
In some network environments, VLANs are associated with individual networks or subnetworks. In an IP network, each
subnetwork is mapped to an individual VLAN. Configuring VLANs helps control the size of the broadcast domain and
keeps local traffic local. However, network devices in different VLANs cannot communicate with one another without a
Layer 3 device to route traffic between the VLANs, referred to as inter-VLAN routing. You configure one or more routers
to route traffic to the appropriate destination VLAN.
Figure 85 on page 695 shows a basic routing topology. Switch A is in VLAN 10, and Switch B is in VLAN 20. The router
has an interface in each VLAN.
Figure 85
Routing Topology Example
VLAN 10
VLAN 20
Switch A
Switch B
A
Host
C
B
Host
Host
When Host A in VLAN 10 needs to communicate with Host B in VLAN 10, it sends a packet addressed to that host.
Switch A forwards the packet directly to Host B, without sending it to the router.
When Host A sends a packet to Host C in VLAN 20, Switch A forwards the packet to the router, which receives the traffic
on the VLAN 10 interface. The router uses the routing table to finds the correct outgoing interface, and forwards the
packet on the VLAN 20 interface to Switch B. Switch B receives the packet and forwards it to Host C.
When static routing is enabled on Switch A and B, the router device is no longer needed to route packets.
695
Configuring Static IP Unicast Routing
How to Configure Static IP Unicast Routing
Types of Routing
Routers and Layer 3 switches can route packets in these ways:
Using default routing to send traffic with a destination unknown to the router to a default outlet or destination
Using static routes to forward packets from predetermined ports through a single path into and out of a network
Dynamically calculating routes by using a routing protocol
The switch supports static routes and default routes. It does not support routing protocols.
How to Configure Static IP Unicast Routing
Steps for Configuring Routing
In these procedures, the specified interface must be a switch virtual interface (SVI)—a VLAN interface created by using
the interface vlan vlan_id global configuration command and by default a Layer 3 interface. All Layer 3 interfaces on
which routing will occur must have IP addresses assigned to them. See Assigning IP Addresses to SVIs, page 696.
Note: The switch supports 16 static routes (including user-configured routes and the default route) and any directly
connected routes and default routes for the management interface. The switch can have an IP address assigned to each
SVI. Before enabling routing, enter the sdm prefer lanbase-routing global configuration command and reload the
switch.
Procedures for configuring routing:
To support VLAN interfaces, create and configure VLANs on the switch, and assign VLAN membership to Layer 2
interfaces.
Configure Layer 3 interfaces (SVIs) and physical routed port (no switchport).
Assign IP addresses to the Layer 3 interfaces.
Configure static routes
Enabling IP Unicast Routing
By default, the switch is in Layer 2 switching mode, and IP routing is disabled. To use the Layer 3 capabilities of the
switch, enable IP routing.
Command
Purpose
1.
configure terminal
Enters global configuration mode.
2.
ip routing
Enables IP routing.
3.
end
Returns to privileged EXEC mode.
Assigning IP Addresses to SVIs
To configure IP routing, you need to assign IP addresses to Layer 3 network interfaces. This enables communication with
the hosts on those interfaces that use IP. IP routing is disabled by default, and no IP addresses are assigned to SVIs.
696