Sun Microsystems System Administration Guide, Volume 1 (2000) - page 9
Example—Displaying Detailed Information About a Package
$ pkginfo -l SUNWcar
PKGINST: SUNWcar
NAME: Core Architecture, (Root)
CATEGORY: system
ARCH: sparc.sun4u
VERSION:
11.8.0,REV=1999.09.18.11.52
BASEDIR:
/
VENDOR: Sun Microsystems, Inc.
DESC: core software for a specific hardware platform group
PSTAMP: humbolt19990821191439
INSTDATE: Sep 18 1999 11:53
HOTLINE: Please contact your local service provider
STATUS: completely installed
FILES:
95 installed pathnames
31 shared pathnames
35 directories
49 executables
11307 blocks used (approx)
Removing Packages From Servers and
Standalone Systems
Caution - Always use the pkgrm command to remove installed packages. Do not
use the rm command, which will corrupt the system’s record-keeping of installed
packages.
How to Remove a Package
1. Log in to the system as superuser.
2. Remove an installed package.
# pkgrm pkgid ...
pkgid
(Optional) Is the name of one or more packages (separated
by spaces). If omitted, pkgrm removes all available packages.
266
How to Remove a Spooled Package
1. Log in as superuser.
2. Remove a package from a spool directory with the pkgrm -s command.
# pkgrm -s spooldir pkgid ...
Specifies the name of the spool directory where the
−s spooldir
package was spooled.
(Optional) Is the name of one or more packages
pkgid
(separated by spaces). If no pkgid is supplied, pkgrm
prompts the user to remove each package listed in the
spool directory. If omitted, pkgrm removes all available
packages.
Adding and Removing Packages Using
Admintool
The Solaris operating environment includes Admintool, which is a graphical user
interface for performing several administration tasks, including adding and
removing software packages. Specifically, you can use Admintool to:
Add software packages to a local system
Remove software packages from a local system
View software already installed on the local system
Customize software packages to be installed
Specify an alternate installation directory for a software package
How to Add Packages With Admintool
1. Log in to the installed system and become superuser.
At the shell prompt, type:
$ su
Software Administration (Tasks)
267
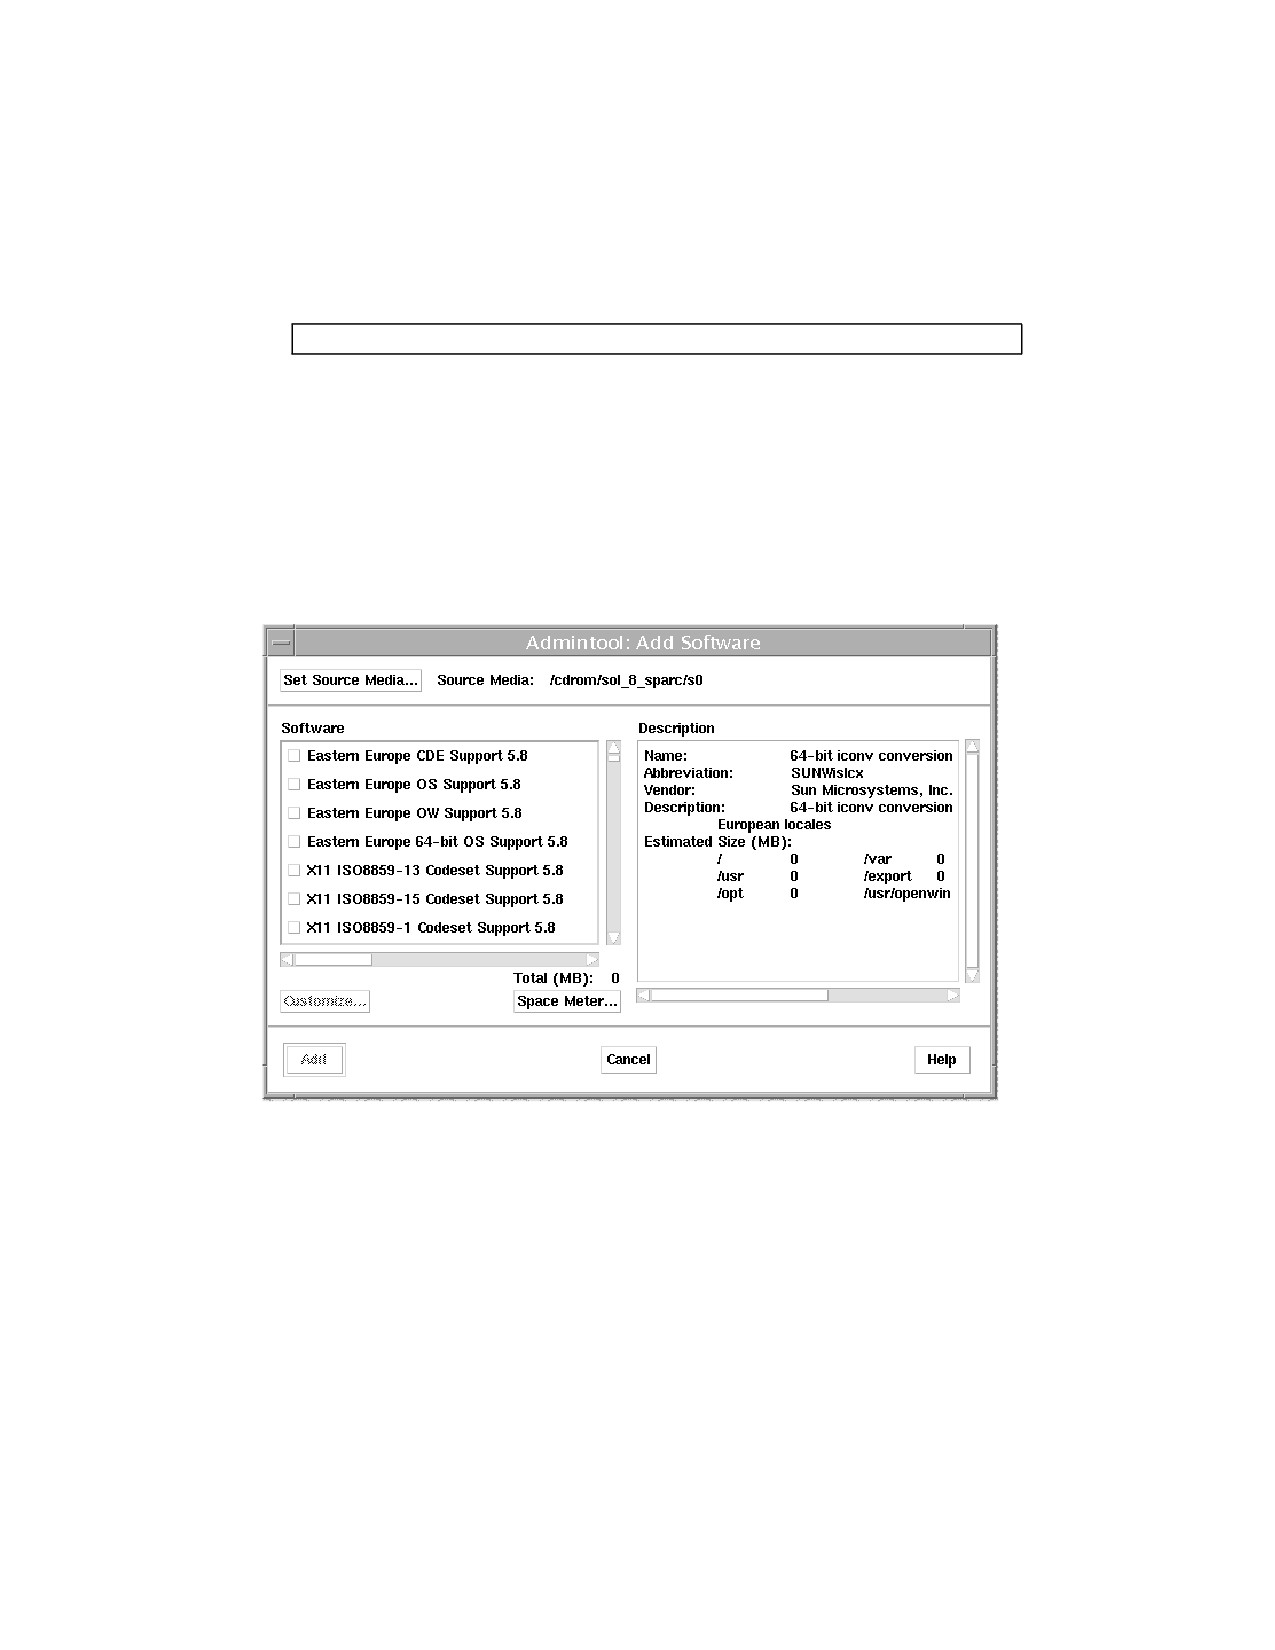
Unless you are a member of the UNIX sysadmin group (group 14), you must
become superuser on your system to add or remove software packages with
Admintool.
2. Load a CD into the CD-ROM drive.
Volume Manager will automatically mount the CD.
3. Start Admintool.
# admintool &
The Users window is displayed.
4. Choose Software from the Browse menu.
The Software window is displayed.
5. Choose Add from the Edit menu.
The Set Source Media window might appear. If so, specify the path to the
installation media and click OK. The default path is a mounted SPARC Solaris CD.
The Add Software window is displayed.
6. Select the software you want to install on the local system.
In the Software portion of the window, click the check boxes corresponding to the
software you want to install.
268
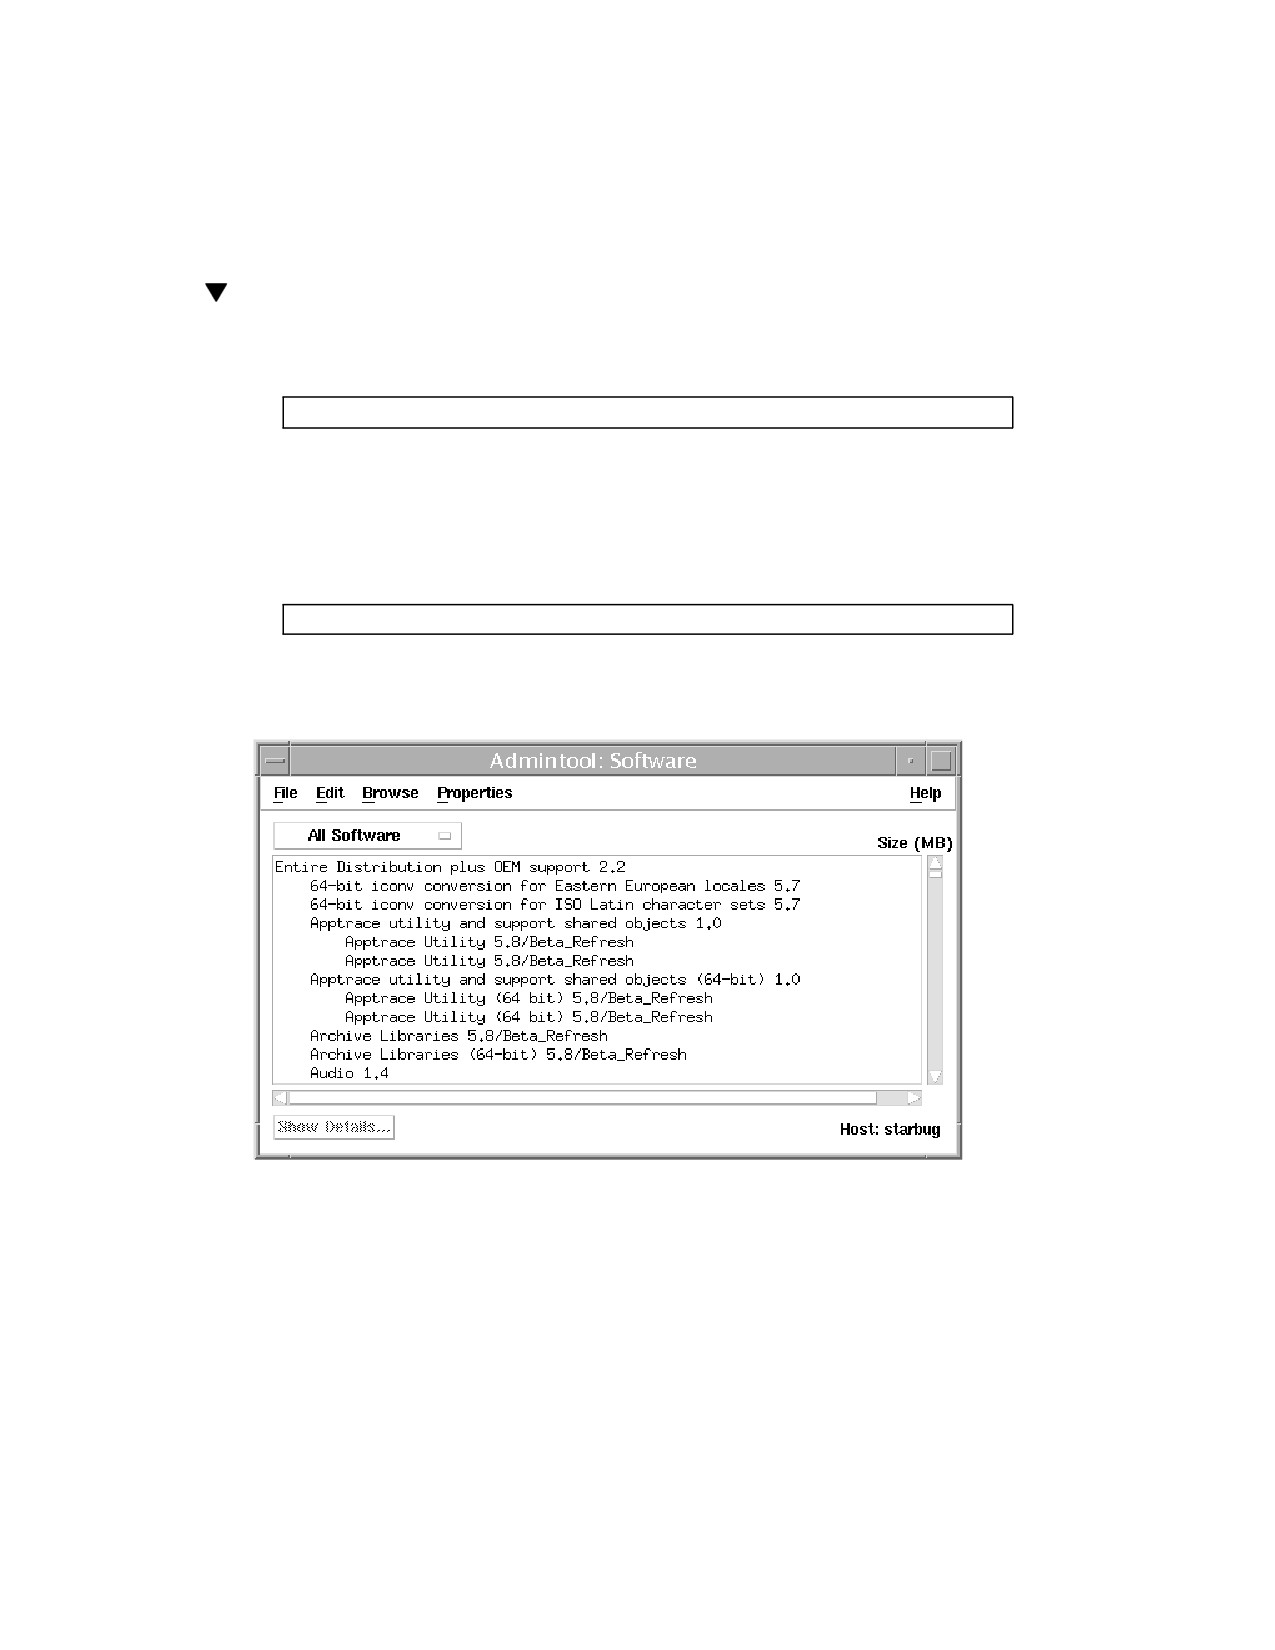
7. Click Add.
A Command Tool window appears for each package being installed, displaying
the installation output.
The Software window refreshes to display the packages just added.
How to Remove Packages With Admintool
1. Log in to the installed system and become superuser.
At the shell prompt, type:
$ su
Unless you are a member of the UNIX sysadmin group (group 14), you must
become superuser on your system to add or remove software packages with
Admintool.
2. Start Admintool.
# admintool &
3. Choose Software from the Browse menu.
The Software window is displayed.
Software Administration (Tasks)
269
4. Select the software you want to remove from the local system.
5. Choose Delete from the Edit menu.
A warning pop-up window is displayed to confirm whether you really want to
delete the software.
6. Click Delete to confirm that you want to remove the software.
For each package that is being deleted, a Command Tool window is displayed that
asks for confirmation, again, before deleting the software. Type y, n, or q. If you
choose to delete the software, the output from the removal process is displayed.
270
CHAPTER
22
Patch Administration (Overview)
For the purpose of this discussion, patch administration involves installing or
removing Solaris patches from a running Solaris system. It might also involve
removing (called backing out) unwanted or faulty patches.
This is a list of the overview information in this chapter.
“What Is a Patch?” on page 271
“Tools For Managing Patches” on page 272
“Patch Distribution” on page 272
“Patch Numbering” on page 274
“What Happens When You Install a Patch” on page 274
“What Happens When You Remove a Patch” on page 275
What Is a Patch?
In its simplest form, you can think of a patch as a collection of files and directories
that replace or update existing files and directories that are preventing proper
execution of the software. The existing software is derived from a specified package
format, which conforms to the Application Binary Interface. (For details about
packages, see Chapter 20.)
271
Tools For Managing Patches
There are two utilities for managing patches:
patchadd - use to install directory-format patches to a Solaris system.
patchrm - use to remove patches installed on a Solaris system. This command
restores the file system to its state before a patch was applied.
Detailed information about how to install and back out a patch is provided in
patchadd(1M) and patchrm(1M). Each patch also contains a README file that
contains specific information about the patch.
Before installing patches, you might want to know more about patches that have
previously been installed. The table below describes commands that provide useful
information about patches already installed on a system.
TABLE 22-1
Helpful Commands for Patch Administration
Command
Function
showrev -p
Shows all patches applied to a system.
Shows all patches applied to the package identified by
pkgparam pkgid PATCHLIST
pkgid.
pkgparam pkgid PATCH_INFO_patch-number
Shows the installation date and name of the host from
which the patch was applied. pkgid is the name of the
package: for example, SUNWadmap.
Shows all patches applied to a client, from the server’s
patchadd -R client_root_path −p
console.
Shows all patches applied to a system.
patchadd −p
Patch Distribution
All Sun customers can access security patches and other recommended patches via
the World Wide Web or anonymous ftp. Sun customers who have purchased a
service contract can access an extended set of patches and a complete database of
272
patch information. This information is available via the World Wide Web,
anonymous ftp, and it is regularly distributed on a CD-ROM (See the table below).
TABLE 22-2
Customer Patch Access Information
If You Are ...
Then ...
A Sun Service customer
You have access to the SunSolve database of patches and
patch information. These are available via the World Wide
Web or anonymous ftp, as described in “Patch Access Via
the World Wide Web” on page 273 and “Patch Access Via
ftp” on page 274.
These patches are updated nightly. You also receive a patch
CD-ROM every 6 to 8 weeks.
Not a Sun Service customer
You have access to a general set of security patches and
other recommended patches. These are available via the
World Wide Web or anonymous ftp, as described in “Patch
Access Via the World Wide Web” on page 273 and “Patch
Access Via ftp” on page 274.
What You Need to Access Sun Patches
You can access Sun patches via the World Wide Web or anonymous ftp. If you have
purchased a Sun service contract, you will also be able to get patches from the patch
CD-ROM that is regularly distributed.
To access patches on the World Wide Web, you need a machine that is:
Connected to the Internet
Capable of running Web browsing software such as Netscape
To access patches via anonymous ftp, you need a machine that is:
Connected to the Internet
Capable of running the ftp program
Patch Access Via the World Wide Web
To access patches via the World Wide Web, use this uniform resource locator (URL):
After reaching the Sun home page, click on the Sales and Service button and
navigate your way to the SunSolve patch database.
Patch Administration (Overview)
273
The patch database for publicly available patches are labeled “Public patch access.”
The patch database for the comprehensive set of patches and patch information
available to contract customers is labeled “Contract customer patch access.” You will
be prompted for a password to access this contract customer database.
You can also access publicly available patches using this URL:
Scroll to the bottom of this list to display the Solaris patch reports at this site.
Patch Access Via ftp
To access patches via ftp, you can use the ftp command to connect to either the
sunsolve1.sun.com (provided by Sun Service) or sunsite.unc.edu (maintained
by the University of North Carolina). When ftp prompts you for a login, enter
anonymous as the login name. Use your complete email address when prompted for
a password. After the connection is complete, you can find publicly available patches
in the /pubs/patches directory.
Note - To transfer patches, you will need to change the ftp transfer mode to binary.
To do this, enter bin at the ftp prompt.
Patch Numbering
Patches are identified by unique alphanumeric strings, with the patch base code first,
a hyphen, and a number that represents the patch revision number. For example,
patch 106925-02 is a SunOS 5.7 patch for the glm device driver.
What Happens When You Install a Patch
When you install a patch, the patchadd command calls the pkgadd command to
install the patch packages from the patch directory to a local system’s disk. More
specifically, patchadd:
Determines the Solaris version number of the managing host and the target host
Updates the patch package’s pkginfo file with information about patches
obsoleted by the patch being installed, other patches required by this patch, and
patches incompatible with this patch
274
During the patch installation, patchadd keeps a log of the patch installation in
/var/sadm/patch/patch-number/log for the Solaris 2.4 release and compatible
versions.
The patchadd command will not install a patch under the following conditions:
The package is not fully installed on the host
The patch packages architecture differs from the system’s architecture
The patch packages version does not match the installed package’s version
There is already an installed patch with the same base code and a higher version
number
The patch is incompatible with another, already installed patch. (Each installed
patch keeps this information in its pkginfo file)
The patch being installed requires another patch that is not installed
What Happens When You Remove a
Patch
When you back out a patch, the patchrm command restores all files modified by
that patch, unless:
The patch was installed with patchadd -d (which instructs patchadd not to
save copies of files being updated or replaced)
The patch has been obsoleted by a later patch
The patch is required by another patch
The patchrm command calls pkgadd to restore packages that were saved from the
initial patch installation.
During the patch removal process, patchrm keeps a log of the back out process in
/tmp/backoutlog.process_id. This log file is removed if the patch backs out
successfully.
Patch Administration (Overview)
275
276
CHAPTER
23
Managing Devices Topics
This section provides instructions for managing devices in the Solaris environment.
This section contains these chapters.
Provides a high-level overview of device configuration.
Chapter 24
Provides step-by-step instructions for configuring devices.
Chapter 25
Provides an overview of device naming conventions and
Chapter 26
instructions for accessing devices.
277
278
CHAPTER
24
Device Management (Overview)
The chapter provides overview information about managing peripheral devices in
the Solaris environment.
This is a list of overview information in this chapter.
“Where to Find Device Management Tasks” on page 281
“About Device Drivers” on page 281
“Automatic Configuration of Devices” on page 282
“Displaying Device Configuration Information” on page 283
For information about accessing devices, see Chapter 26.
Device management in the Solaris environment usually includes adding and
removing peripheral devices from systems, possibly adding a third-party device
driver to support a device, and displaying system configuration information.
What’s New in Device Management?
This section provides information about new Solaris 8 features related to device
management.
SCSI and PCI Hot-Plugging
The cfgadm command is updated in this release to provide SCSI and PCI
hot-plugging for supported SCSI and PCI controllers on SPARC based and IA based
systems.
279
Hot plugging is the ability to physically add, remove, or replace system components
while the system is running. Dynamic reconfiguration, available on certain SPARC
servers, allows a service provider to remove and replace hot-pluggable system I/O
boards in a running system, eliminating the time lost in rebooting. Also, if a
replacement board is not immediately available, the system administrator can use
dynamic reconfiguration to shut down a failing board while allowing the system to
continue operation.
See your SPARC hardware manufacturer’s documentation for information about
whether dynamic reconfiguration is supported on your system. See the Solaris 8
(Intel Platform Edition) Hardware Compatibility List to verify whether your PCI
controller supports hot-plugging.
Chapter 25 describes how to use the cfgadm command to hot-plug SCSI or PCI
controllers.
Improved Device Configuration (devfsadm)
The devfsadm command manages the special device files in the /dev and
/devices directories. By default, devfsadm attempts to load every driver in the
system and attach to all possible device instances. Then it creates the device files in
the /devices directory and the logical links in the /dev directory. In addition to
managing the /dev and /devices directories, devfsadm also maintains the
path_to_inst(4) instance database.
In previous Solaris releases, device configuration was handled by drvconfig, which
managed the physical device entries in the /devices directory, and five link
generators, devlinks, disks, tapes, ports, and audlinks, which managed the
logical device entries in the /dev directory.
These utilities were not aware of hot-pluggable devices nor were they flexible
enough for devices with multiple instances. For compatibility purposes, drvconfig
and the other link generators are symbolic links to the devfsadm utility. See Chapter
25 for information about hot-pluggable devices.
Both reconfiguration boot processing and updating the /dev and /devices
directories in response to dynamic reconfiguration events is handled by devfsadmd,
the daemon version of the devfsadm command. This daemon is started from the
/etc/rc* scripts when a system is booted.
Since devfsadmd automatically detects device configuration changes generated by
any reconfiguration event, there is no need to run this command interactively.
See devfsadm(1M) for more information.
280
Where to Find Device Management
Tasks
The following table describes where to find step-by-step procedures for adding serial
devices, such as printers and modems, and peripheral devices, such as a disk,
CD-ROM, or tape drive, to your system.
TABLE 24-1
Where to Find Instructions for Adding a Device
For Information On ...
See the Following
Adding a disk
Chapter 30 or Chapter 31
Adding a CD-ROM or tape device
“How to Add a Peripheral Device” on page 290
Adding a modem
“Managing Terminals and Modems (Overview)” in
System Administration Guide, Volume
2
Adding a printer
“Print Management (Overview)” in System
Administration Guide, Volume
2
About Device Drivers
A computer typically uses a wide range of peripheral and mass-storage devices. Your
system, for example, probably has a SCSI disk drive, a keyboard and a mouse, and
some kind of magnetic backup medium. Other commonly used devices include
CD-ROM drives, printers and plotters, light pens, touch-sensitive screens, digitizers,
and tablet-and-stylus pairs.
The Solaris software does not directly communicate with all these devices. Each type
of device requires different data formats, protocols, and transmission rates.
A device driver is a low-level program that allows the operating system to
communicate with a specific piece of hardware. The driver serves as the operating
system’s “interpreter” for that piece of hardware.
Device Management (Overview)
281
Automatic Configuration of Devices
The kernel, consisting of a small generic core with a platform-specific component
and a set of modules, is configured automatically in the Solaris environment.
A kernel module is a hardware or software component that is used to perform a
specific task on the system. An example of a loadable kernel module is a device driver
that is loaded when the device is accessed.
The platform-independent kernel is /kernel/genunix. The platform-specific
component is /platform/‘uname -m‘/kernel/unix.
The kernel modules are described in the following table.
TABLE 24-2
Description of Kernel Modules
Location
This Directory Contains ...
Platform-specific kernel components
/platform/‘uname -m‘ /kernel
/kernel
Kernel components common to all platforms
that are needed for booting the system
/usr/kernel
Kernel components common to all platforms
within a particular instruction set
The system determines what devices are attached to it at boot time. Then the kernel
configures itself dynamically, loading needed modules into memory. At this time,
device drivers are loaded when devices, such as disk and tape devices, are accessed
for the first time. This process is called autoconfiguration because all kernel modules
are loaded automatically when needed.
You can customize the way in which kernel modules are loaded by modifying the
/etc/system file. See system(4) for instructions on modifying this file.
Features and Benefits
The benefits of autoconfiguration are:
Main memory is used more efficiently because modules are loaded when needed.
There is no need to reconfigure the kernel when new devices are added to the
system.
282
Drivers can be loaded and tested without having to rebuild the kernel and reboot
the system.
The autoconfiguration process is used by a system administrator when adding a new
device (and driver) to the system. At this time, the administrator performs a
reconfiguration boot so the system will recognize the new device.
What You Need for Unsupported Devices
Device drivers needed to support a wide range of standard devices are included in
the Solaris environment. These drivers can be found in the /kernel/drv and
/platform/‘uname -m‘/kernel/drv directories.
However, if you’ve purchased an unsupported device, the manufacturer should
provide the software needed for the device to be properly installed, maintained, and
administered.
At a minimum, this software includes a device driver and its associated
configuration (.conf) file. The .conf files reside in the drv directories. In addition,
the device might be incompatible with Solaris utilities, and might require custom
maintenance and administrative utilities.
Contact your device manufacturer for more information.
Displaying Device Configuration
Information
Three commands are used to display system and device configuration information:
Displays system configuration information, including total
prtconf(1M)
amount of memory and the device configuration as described
by the system’s device hierarchy. The output displayed by this
command depends upon the type of system.
Displays device configuration information including system
sysdef(1M)
hardware, pseudo devices, loadable modules, and selected
kernel parameters.
Displays system diagnostic messages as well as a list of devices
dmesg(1M)
attached to the system since the last reboot.
See “Device Naming Conventions” on page 312 for information on the device names
used to identify devices on the system.
Device Management (Overview)
283
driver not attached Message
The following driver-related message might be displayed by the prtconf and
sysdef commands:
device, instance #number (driver not attached)
This message does not always mean that a driver is unavailable for this device. It
means that no driver is currently attached to the device instance because there is no
device at this node or the device is not in use. Drivers are loaded automatically
when the device is accessed and unloaded when the device is not in use.
Identifying a System’s Devices
Use the output of prtconf and sysdef commands to identify which disk, tape, and
CD-ROM devices are connected to the system. The output of these commands
display the driver not attached messages next to the device instances. Since
these devices are always being monitored by some system process, the driver not
attached message is usually a good indication that there is no device at that device
instance.
For example, the following prtconf output identifies a device at instance #3 and
instance #6, which is probably a disk device at target 3 and a CD-ROM device at
target 6 of the first SCSI host adapter (esp, instance #0).
$ /usr/sbin/prtconf
esp, instance #0
sd (driver not attached)
st (driver not attached)
sd, instance #0 (driver not attached)
sd, instance #1 (driver not attached)
sd, instance #2 (driver not attached)
sd, instance #3
sd, instance #4 (driver not attached)
sd, instance #5 (driver not attached)
sd, instance #6
The same device information can be gleaned from the sysdef output.
284
How to Display System Configuration Information
Use the prtconf command to display system configuration information.
# /usr/sbin/prtconf
Use the sysdef command to display system configuration information including
pseudo devices, loadable modules, and selected kernel parameters.
# /usr/sbin/sysdef
Examples—Displaying System Configuration Information
The following prtconf output is displayed on a SPARC based system.
# prtconf
System Configuration: Sun Microsystems sun4u
Memory size: 128 Megabytes
System Peripherals (Software Nodes):
SUNW,Ultra-5_10
packages (driver not attached)
terminal-emulator (driver not attached)
deblocker (driver not attached)
obp-tftp (driver not attached)
disk-label (driver not attached)
SUNW,builtin-drivers (driver not attached)
sun-keyboard (driver not attached)
ufs-file-system (driver not attached)
chosen (driver not attached)
openprom (driver not attached)
client-services (driver not attached)
options, instance #0
aliases (driver not attached)
memory (driver not attached)
virtual-memory (driver not attached)
pci, instance #0
pci, instance #0
ebus, instance #0
auxio (driver not attached)
power, instance #0
SUNW,pll (driver not attached)
se, instance #0
su, instance #0
su, instance #1
ecpp (driver not attached)
fdthree, instance #0
The following sysdef output is displayed from an IA based system.
Device Management (Overview)
285

# sysdef
* Hostid
29f10b4d
* i86pc Configuration
* Devices
+boot (driver not attached)
memory (driver not attached)
aliases (driver not attached)
chosen (driver not attached)
i86pc-memory (driver not attached)
i86pc-mmu (driver not attached)
openprom (driver not attached)
options, instance #0
packages (driver not attached)
delayed-writes (driver not attached)
itu-props (driver not attached)
isa, instance #0
motherboard (driver not attached)
pnpADP,1542, instance #0
asy, instance #0
asy, instance #1
lp, instance #0 (driver not attached)
fdc, instance #0
fd, instance #0
fd, instance #1 (driver not attached)
kd (driver not attached)
kdmouse (driver not attached)
How to Display Device Information
Display device information with the dmesg command.
# /usr/sbin/dmesg
The dmesg output is displayed as messages on the system console and identifies
which devices are connected to the system since the last reboot.
Examples—Displaying Device Information
The following dmesg output is displayed from a SPARC based system.
286
# dmesg
date starbug genunix: [ID 540533 kern.notice] SunOS Release
5.8 Generic 64-bit
date starbug genunix: [ID 223299 kern.notice] Copyright
(c) 1983-2000 by S
un Microsystems, Inc.
date starbug genunix: [ID 678236 kern.info] Ethernet address
= 8:0:20:a6:d
4:5b
date starbug genunix: [ID 897550 kern.info] Using default
device instance
data
date starbug unix: [ID 389951 kern.info] mem = 131072K
(0x8000000)
date starbug unix: [ID 930857 kern.info] avail mem = 121724928
date starbug rootnex: [ID 466748 kern.info] root nexus
= Sun Ultra 5/10 UP
A/PCI (UltraSPARC-IIi 333MHz)
#
The following dmesg output is displayed from an IA based system.
# dmesg
date naboo genunix: [ID 540533 kern.notice] SunOS Release
5.8 Version Generic 32-bit
date naboo genunix: [ID 223299 kern.notice] Copyright (c)
1983-2000 by Sun Microsystems, Inc.
date naboo genunix: [ID 897550 kern.info] Using default
device instance data
date naboo unix: [ID 168242 kern.info] mem = 32380K (0x1f9f000)
date naboo unix: [ID 930857 kern.info] avail mem = 19390464
date naboo rootnex: [ID 466748 kern.info] root nexus =
i86pc
date naboo rootnex: [ID 349649 kern.info] pci0 at root:
space 0 offset 0
date naboo genunix: [ID 936769 kern.info] pci0 is /pci@0,0
date naboo genunix: [ID 678236 kern.info] Ethernet address
= 00:a0:24:89:b0:72
date naboo gld: [ID 944156 kern.info] elx0: 3COM EtherLink
III:
type "ether" mac address 00:a0:24:89:b0:72
date naboo pci: [ID 370704 kern.info] PCI-device: pci10b7,5950@c,
elx0
date naboo genunix: [ID 936769 kern.info] elx0 is /pci@0,0/pci10b7,5950@c
Device Management (Overview)
287
288
CHAPTER
25
Configuring Devices
The chapter provides instructions for configuration devices in the Solaris
environment.
This is a list of step-by-step instructions in this chapter.
“How to Add a Peripheral Device” on page 290
“How to Add a Device Driver” on page 291
“How to Display Configuration Information for all Devices” on page 296
“How to Unconfigure a SCSI Controller” on page 297
“How to Configure a SCSI Controller” on page 298
“How to Configure a SCSI Device” on page 298
“How to Disconnect a SCSI Controller” on page 299
“SPARC: How to Add a SCSI Device to a SCSI Bus” on page 301
“SPARC: How to Replace an Identical Device on a SCSI Controller” on page 303
“SPARC: How to Remove a SCSI Device” on page 304
“IA: How to Display PCI Slot Configuration Information” on page 306
“IA: How to Remove a PCI Adapter Card” on page 307
“IA: How to Add a PCI Adapter Card” on page 308
For information about accessing devices, see Chapter 26.
Adding, removing, or replacing devices in the Solaris environment can be done
while the system is still running, if the system components support hot plugging, or
the system must be rebooted to reconfigure devices if the system components do not
support hot plugging.
289
Adding a Peripheral Device to a System
Adding a new peripheral device usually involves:
Shutting down the system
Connecting the device to the system
Rebooting the system
Use the procedure below to add the following devices to a system:
CD-ROM
Secondary disk drive
Tape drive
SBUS card
In some cases, you might have to add a third-party device driver to support the new
device.
How to Add a Peripheral Device
1. Become superuser.
2. Follow steps 2 and 3 of “How to Add a Device Driver” on page 291 if you need
to add a device driver to support the device.
3. Create the /reconfigure file.
# touch /reconfigure
The /reconfigure file will cause the Solaris software to check for the presence
of any newly installed devices the next time you turn on or boot your system.
4. Shut down the system.
# shutdown -i0 -g30 -y
290
-i0
Brings the system to the 0 init state, which is the appropriate
state for turning the system power off for adding and
removing devices.
-g30
Shuts the system down in 30 seconds. The default is 60
seconds.
-y
Continues the system shutdown without user intervention;
otherwise, you are prompted to continue the shutdown
process.
5. Turn off power to the system after it is shut down.
On SPARC based Platforms ...
On Intel based Platforms ...
It is safe to turn off power if the ok or >
It is safe to turn off power if the type any
prompt is displayed.
key to continue prompt is displayed.
Refer to the hardware installation guide that accompanies your system for the
location of the power switch.
6. Turn off power to all external devices.
For location of power switches on any peripheral devices, refer to the hardware
installation guides that accompany your peripheral devices.
7. Install the peripheral device, making sure the device you are adding has a
different target number than the other devices on the system.
You often will find a small switch located at the back of the disk for this purpose.
Refer to the hardware installation guide that accompanies the peripheral device
for information on installing and connecting the device.
8. Turn on the power to the system.
The system will boot to multiuser mode and the login prompt will be displayed.
9. Verify that the peripheral device has been added by attempting to access the
device. See Chapter 26 for information on accessing the device.
How to Add a Device Driver
This procedure assumes that the device has already been added to the system. If not,
see “Adding a Peripheral Device to a System” on page 290.
Configuring Devices
291
1. Become superuser.
2. Place the tape, diskette, or CD-ROM into the drive.
3. Install the driver.
# pkgadd -d device package-name
Identifies the device path name.
−d device
Identifies the package name that contains the device
package-name
driver.
4. Verify that the package has been added correctly by using the pkgchk
command. The system prompt returns with no response if the package is
installed correctly.
# pkgchk packagename
#
Example—Adding a Device Driver
The following example installs and verifies a package called XYZdrv.
# pkgadd XYZdrv
(licensing messages displayed)
Installing XYZ Company driver as <XYZdrv>
Installation of <XYZdrv> was successful.
# pkgchk XYZdrv
#
292
Dynamic Reconfiguration and
Hot-Plugging
Hot-plugging is the ability to physically add, remove, or replace system components
while the system is running. Dynamic reconfiguration refers to the ability to hot-plug
system components and also the general ability to move system resources—both
hardware and software—around in the system or disable them in some way without
physically removing them from the system.
In this Solaris release, you can hot-plug SCSI devices on SPARC and IA based
platforms and PCI adapter cards on IA based systems with the cfgadm command.
Features of the cfgadm command include:
Displaying system component status
Testing system components
Changing component configurations
Displaying configuration help messages
The benefit of using the cfgadm command to reconfigure systems components is
that you can add, remove, or replace components while the system is running. An
added benefit is that the cfgadm command guides you through the steps needed to
add, remove, or replace system components. See cfgadm(1M) and “SCSI Hot
Plugging With the cfgadm Command” on page 296 for step-by-step instructions on
hot-plugging SCSI components. See “IA: PCI Hot-Plugging With the cfgadm
Command” on page 306 for step-by-step instructions on hot-plugging PCI adapter
cards on IA based systems.
Note - Not all SCSI and PCI controllers support hot-plugging with the cfgadm
command. For a list of PCI hardware that supports hot-plugging, please refer to the
Solaris
8
(Intel Platform Edition) Hardware Compatibility List.
As part of Sun’s high availability strategy, this feature is expected to be used in
conjunction with additional layered products, such as alternate pathing or fail-over
software, which provide fault tolerance in the event of a device failure.
Without any high availability software, you can replace a failed device by manually
stopping the appropriate applications, unmounting non-critical file systems, and then
proceeding with the add or remove operations.
Attachment Points
The cfgadm displays information about attachment points, which are locations in the
system where dynamic reconfiguration operations can occur.
Configuring Devices
293
An attachment point consists of:
An occupant, which represents a hardware resource that may be configured into
the system, and
A receptacle, which is the location that accepts the occupant.
Attachment points are represented by logical and physical attachment point IDs
(ap_ids). The physical ap_id is the physical pathname of the attachment point. The
logical ap_id is a user-friendly alternative for the physical ap_id. Refer to
cfgadm(1M) for more information on ap_ids.
The logical ap_id for a SCSI Host Bus Adapter (HBA), or SCSI controller, is usually
represented by the controller number, such as c0.
In cases where no controller number has been assigned to a SCSI HBA, then an
internally-generated unique identifier is provided. An example of a unique identifier
for a SCSI controller is:
fas1:scsi
The logical ap_id for a SCSI device usually looks like this:
HBA-logical-apid::device-identifier
In the example below, c0 is the logical ap_id for the SCSI HBA:
c0::dsk/c0t3d0
The device identifier is typically derived from the logical device name for the device
in the /dev directory. For example, a tape device with logical device name,
/dev/rmt/1, has the following logical ap_id:
c0::rmt/1
If a logical ap_id of a SCSI device cannot be derived from the logical name in the
/dev directory, then an internally-generated unique identifier is provided. An
example of an identifier for the tape device listed above is:
c0::st4
Refer to cfgadm_scsi(1M) for more information on SCSI ap_ids.
The cfgadm command represents all resources and dynamic reconfiguration
operations in terms of a common set of states (such as configured, unconfigured) and
set of operations (connect, configure, unconfigure, and so on). Refer to cfgadm(1M)
for more information on these generic states and operations.
The receptacle and occupant states for the SCSI HBA attachment points are:
294

Receptacle State
Description
Occupant State
Description
empty
N/A to SCSI HBA
configured
One or more devices
configured on the
bus
Bus quiesced
No devices
disconnected
unconfigured
configured
connected
Bus active
Receptacle and occupant state mappings for SCSI device attachment points are:
Receptacle State
Description
Occupant State
Description
empty
N/A to SCSI devices
configured
Device is configured
disconnected
Bus quiesced
unconfigured
Device is not
configured
connected
Bus active
The condition of SCSI attachment points are unknown unless there is special
hardware to indicate otherwise. See the instructions below on displaying SCSI
component configuration information.
IA: Detaching PCI Adapter Cards
A PCI adapter card hosting non-vital system resources can be removed if the device
driver supports hot-plugging. A PCI adapter card is not detachable if it is a vital
system resource. For a PCI adapter card to be detachable:
The device driver must support hot-plugging.
Critical resources must be accessible through an alternate pathway.
For example, if a system has only one ethernet card installed in it, the ethernet card
cannot be detached without losing network connection. This replacement requires
additional layered software support to keep the network connection active.
IA: Attaching PCI Adapter Cards
A PCI adapter card can be added to the system as long as:
There are slots available.
Configuring Devices
295
The device driver supports hot-plugging for this adapter card.
See “IA: PCI Hot-Plugging With the cfgadm Command” on page 306 for
step-by-step instructions on adding or removing a PCI adapter card.
SCSI Hot Plugging With the cfgadm
Command
The following section describes various SCSI hot plugging tasks with the cfgadm
command.
The procedures in this section use specific devices as examples to illustrate how to
use the cfgadm command to hot plug SCSI components. The device information that
you supply, and is displayed with the cfgadm command, depends on your system
configuration.
How to Display Configuration Information for all
Devices
SCSI controllers c0 and c1 and the devices attached to them provide examples of the
type of device configuration information that can be displayed with the cfgadm
command.
Note - If the SCSI device is not supported by the cfgadm command, it does not
display in the cfgadm command output.
1. Become superuser.
2. Display information about attachment points on the system.
# cfgadm -l
Ap_Id
Type
Receptacle
Occupant
Condition
c0
scsi-bus
connected
configured
unknown
c1
scsi-bus
connected
configured
unknown
In this example, c0 and c1 represent two SCSI controllers.
3. Display information about a system’s SCSI controllers and their attached
devices.
296
# cfgadm -al
Ap_Id
Type
Receptacle
Occupant
Condition
c0
scsi-bus
connected
configured
unknown
c0::dsk/c0t0d0
disk
connected
configured
unknown
c0::rmt/0
tape
connected
configured
unknown
c1
scsi-bus
connected
configured
unknown
c1::dsk/c1t3d0
disk
connected
configured
unknown
c1::dsk/c1t4d0
unavailable
connected
unconfigured unknown
Note - The cfgadm -l commands displays info about SCSI HBAs but not SCSI
devices. Use the cfgadm -al command to display information about SCSI
devices such as disk and tapes.
In the following examples, only SCSI attachment points are listed. The attachment
points displayed on your system will depend on your system configuration.
How to Unconfigure a SCSI Controller
SCSI controller c1 provides an example of unconfiguring a SCSI controller.
1. Become superuser.
2. Unconfigure a SCSI controller.
# cfgadm -c unconfigure c1
3. Verify the SCSI controller is unconfigured.
# cfgadm -al
Ap_Id
Type
Receptacle
Occupant
Condition
c0
scsi-bus
connected
configured
unknown
c0::dsk/c0t0d0
disk
connected
configured
unknown
c0::rmt/0
tape
connected
configured
unknown
c1
scsi-bus
connected
unconfigured unknown
Notice that the Occupant column specifies unconfigured, indicating that the
SCSI bus has no configured occupants.
Configuring Devices
297

How to Configure a SCSI Controller
SCSI controller c1 provides an example of configuring a SCSI controller.
1. Become superuser.
2. Configure a SCSI controller.
# cfgadm -c configure c1
3. Verify the SCSI controller is configured.
# cfgadm -al
Ap_Id
Type
Receptacle
Occupant
Condition
c0
scsi-bus
connected
configured
unknown
c0::dsk/c0t0d0
disk
connected
configured
unknown
c0::rmt/0
tape
connected
configured
unknown
c1
scsi-bus
connected
configured
unknown
c1::dsk/c1t3d0
disk
connected
configured
unknown
c1::dsk/c1t4d0
unavailable
connected
unconfigured unknown
The previous unconfigure procedure removed all devices on the SCSI bus. Now
all the devices are configured back into the system.
How to Configure a SCSI Device
SCSI disk c1t4d0 provides an example of configuring a SCSI device.
1. Become superuser.
2. Identify the device to be configured.
cfgadm -al
Ap_Id
Type
Receptacle
Occupant
Condition
c0
scsi-bus
connected
configured
unknown
c0::dsk/c0t0d0
disk
connected
configured
unknown
c0::rmt/0
tape
connected
configured
unknown
c1
scsi-bus
connected
configured
unknown
c1::dsk/c1t3d0
disk
connected
configured
unknown
c1::dsk/c1t4d0
unavailable
connected
unconfigured unknown
3. Configure a specific SCSI device.
298