MG 615. Service Manual - part 12
EMERGENCY INFORMATION
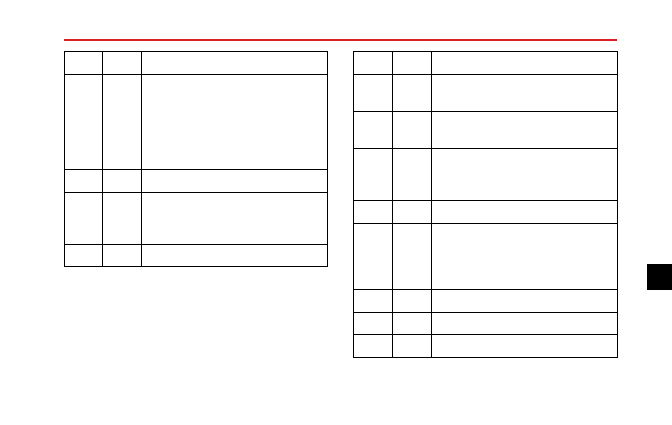
Code
Rating
Function
F7
30A
Lamp - Direction Indicator Front - LH,
Lamp - Direction Indicator Rear - LH,
Lamp - Side Repeater - LH, Relay -
Reverse Lamp, Relay - Position Lamp,
Lamp - Rear Brake - LH, Passenger
Compartment Fuses 3, 12, 36
F8
20A
Passenger Compartment Fuse 7
F9
10A
Relay - Compressor Clutch - Air
Conditioning, Compressor - Air
Conditioning Clutch
F10
30A
Relay - Wiper 1, Relay - Wiper 2
Code
Rating
Function
FL1
200A
Alternator, Engine Compartment Fuse
Links 2, 7,10 and Fuses 5, 8, 9
FL2
60A
Passenger Compartment Fuses 1, 6, 9,
22, 24, 25, 27, 28, 42, Relay - Switched
FL3
50A
Relay - Horn, Rotary Coupler,
Passenger Compartment Fuses 16, 17,
18
FL4
50A
Cooling Fan
FL5
100A
Relay - Dipped Beam, Relay - Rear Fog
Lamp, Passenger Compartment Fuses
19, 20, 21, 23, 30, 35, 37, 39, 40, 41,
43, 45, 46
FL6
70A
EHPAS ECU & Pump
FL7
40A
Relay - Starter, Starter Motor
FL8
40A
SCS ECU (Pump)
177
6