MG 615. Service Manual - part 5
 

  Index      Manuals     MG 615. Service Manual


Search            copyright infringement  


Content      ..     3      4      5      6     ..


MG 615. Service Manual - part 5


AIR CONDITIONING

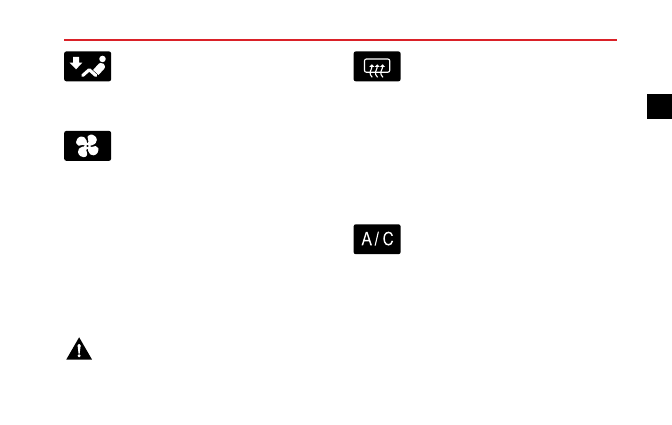
For ‘feet'. Directs air to the feet vents.

Blower

Rotate the blower control clockwise to increase the
blower speed or rotate anti-clockwise to reduce the
blower speed.

The blower speed set will be shown by the number of bars
(between 0 and 8) in the display. The greater the number
of bars, the faster the blower speed.

Note: Set the blower speed to 0 when A/C is switched
off.

Heated Rear Screen

The heating elements on the inside of the rear
screen are easily damaged. DO NOT scrape
or scratch the glass. DO NOT stick labels
over the heating elements.

The heated rear screen will only function with the engine
operating.

Press to operate; the LED in the switch will illuminate and
a symbol appears in the display. The heated rear screen
will switch off automatically after 12 minutes. The LED
extinguishes and the symbol disappears when the heated
rear screen is turned off.

A/C Button

A

 / C

Press the A/C Button to switch the air conditioning system
on. The A/C symbol will appear in the display. Press again
to switch off.

Note:

A/C will only operate when the engine is

running.

Note: The heating function is still available, when the
air conditioning system is switched off.

65

2

-------------------------------------------------------------------------------------------------------------------------------------------------------------

AIR CONDITIONING

When defrost/demist is selected pressing the A/C button
will isolate the compressor, the defrost/demist selection
will remain.

Air Recirculation

With this button pressed, the air inside the car is
recirculated and the air intake is closed, preventing the
entry of traffic fumes.

When reversing, or operating the front screen washers,
the system will automatically switch to interior air
recirculation. (If during this process a passenger presses
the interior/exterior air circulation switch, the air flow
will return to the exterior setting).

The system will check every minute if the reverse signal is
on and will automatically revert back to the previous setting
when it detects that the driver has finished reversing.

Note: Leaving the system in recirculation mode can
cause the windscreen to mist. If this happens, switch

off recirculation and turn the controls to maximum
demisting.

Defrost/Demist

With this button pressed, air conditioning is switched on,
the blower is set to maximum speed, air distribution is set
to windscreen, recirculation is set to fresh air . The defrost
symbol will appear in the display when this is selected. To
switch off Defrost/demist, press the button again.

66

-------------------------------------------------------------------------------------------------------------------------------------------------------------

AIR CONDITIONING

Automatic Air Conditioning Controls

*

Console Panel

1 Air conditioning display

2 For ‘face'

3 System off

4 Right side heated seat

5 Increase blower speed

6 MONO control/Right zone temperature selected

7 Decrease blower speed

8 Heated rear window

9 Air conditioning on

10 Air recirculation

11 Defrost/demist

12 For ‘feet'

13 AUTO control/Left zone temperature selected

14 For ‘windscreen'

15 Left side heated seat

67

2

-------------------------------------------------------------------------------------------------------------------------------------------------------------

AIR CONDITIONING

Automatic Air Conditioning Display

M

O N O
A C

A U T O

1

2

3

1

0

9

8

4

5

6

7

1 Left zone temperature

2 AUTO on

3 Air distribution

4 MONO on

5 Defrost/demist on

6 Right zone temperature

7 Heated rear window on

8 Air Conditioning on

9 Blower speed

10 Recirculation on

AUTO Control

Auto Control mode operation:

AUTO control is achieved by rotating both temperature
controls to set the desired temperature and then pressing
the AUTO control.

The air conditioning system is then programmed to
operate the blower, air distribution and recirculation
settings to maintain optimum levels of comfort within the
car. AUTO icons will appear on the display but the air
distribution and the blower icon will not appear in the
display.

Note:

In AUTO mode, if external temperature is

low, the blower speed will increase after the engine
temperature has risen.

Note: To ensure the AUTO control operates efficiently,
all windows must be closed and the inlet vents must be
clear of obstruction. Do not shield the sunlight sensor,
located on top of the fascia.

68

-------------------------------------------------------------------------------------------------------------------------------------------------------------

AIR CONDITIONING

Manual Control

You can set the blower and air distribution manually, if you prefer. In this condition, AUTO symbol is not shown, indicating
that AUTO is not selected.

Note: You can switch the air distribution mode by operating the button according to the current mode.

Current distribution mode in display

The air distribution mode after pressing button

Switch

69

2

-------------------------------------------------------------------------------------------------------------------------------------------------------------

AIR CONDITIONING

For ‘face'. Directs air to the side, centre and centre console
vents.

For ‘face' and ‘feet' . Directs air to the feet and to the face
vents.

For ‘feet'. Directs air to the feet vents.

For ‘windscreen' and ‘feet'. Directs air to the windscreen
and feet vents.

For ‘windscreen' . Directs air to the windscreen vents.

Blower

The blower speed is automatically set when in AUTO
mode.

In manual mode, press the ‘+' button to increase blower
speed or the ‘-' button to decrease. The blower speed will
be shown in the display, represented by between 1 and 8
bars.

Dual Zone Temperature Control

Operate right zone temperature knob or left zone
temperature

knob

to

set

the

corresponding

side

temperature in the car.

If setting a temperature higher than 28℃ or lower than
16℃, ‘HI' or ‘LO' will appear in the display.

MONO Control

Press this button to switch between single zone and
dual zone mode. With single zone mode selected, the
temperature setting for the car is set by rotating the right

70

-------------------------------------------------------------------------------------------------------------------------------------------------------------

AIR CONDITIONING

zone temperature selected , MONO will appear in the
display.

Press MONO again to switch to dual zone mode and the
left zone temperature selected to set the temperature for
the passenger side.

Heated Rear Screen

The heating elements on the inside of the rear
screen are easily damaged. DO NOT scrape
or scratch the glass. DO NOT stick labels
over the heating elements.

The heated rear screen will only function with the engine
running.

Press to operate; the LED in the switch will

illuminate and a symbol appears in the display. The heated
rear screen will switch off automatically after 12 minutes.
The LED extinguishes and the symbol disappears when the
heated rear screen is turned off.

A/C Button

A

 / C

Press the A/C Button to switch the air conditioning system
on. The A/C symbol will appear in the display. Press again
to switch off.

Note:

A/C will only operate when the engine is

running.

Note: The heating function is still available, when the
air conditioning system is switched off.

OFF

Press to switch the air conditioning system/screen on or
off. When the air conditioning system is switched back on,
it returns to the settings in use prior to being switched off.

71

2

-------------------------------------------------------------------------------------------------------------------------------------------------------------

AIR CONDITIONING

Air Recirculation

With this button pressed, the air inside the car is
recirculated and the air intake is closed, preventing the
entry of traffic fumes.

When reversing, or operating the front screen washers,
the system will automatically switch to interior air
recirculation. (If during this process a passenger presses
the interior/exterior air circulation switch, the air flow
will return to the exterior setting).

The system will check every minute if the reverse signal is
on and will automatically revert back to the previous setting
after four minutes or when it detects that the driver has
finished reversing.

During the summer months, in AUTO and fresh mode,
the system will monitor the interior temperature. If the
outside temperature is high, the system will automatically
switch to recirculation mode in order to maximise cabin
cooling.

Note: Leaving the system in recirculation mode can
cause the windscreen to mist.

Defrost/Demist

Pressing this button the indicator light illuminates, the
defrost/demist symbol appears in the display activating the
most efficient heater setting to clear the windscreen and
front side windows.

Pressing this button again will cancel defrost/demist and
restore the previous settings, or press ‘AUTO' to go
straight into Auto mode.

Note: In AUTO mode and the outside temperature is
lower than 5

℃,

the heated rear screen function will

operate automatically.

72

-------------------------------------------------------------------------------------------------------------------------------------------------------------

AIR CONDITIONING

Heated Front Seats

Pressing these buttons will activate the driver’s and
passenger’s heated seats.

During the 10 minute timed activation period these are
thermostatically controlled, so once the seat reaches 40°,
the heater will turn off. The heat pad will turn on again
should its temperature fall to 25°, this will continue until
either the switch is operated again to turn them off or the
10 minute operation period expires.

73

2

-------------------------------------------------------------------------------------------------------------------------------------------------------------

-------------------------------------------------------------------------------------------------------------------------------------------------------------

Audio System

76

Audio System

*

3

-------------------------------------------------------------------------------------------------------------------------------------------------------------

AUDIO SYSTEM

Audio System

*

This section of the handbook covers the audio systems
fitted to (S) model variants.

Please read the audio operating instructions carefully in
order to gain maximum enjoyment from the system.

1 When cleaning the vehicle, ensure that water does not

contact the audio system.

2 Use a soft cloth to clean the display.

Use alcohol

to remove stubborn dirt. Do not use water, solvent
or abrasive cleaner, these substances will damage the
display.

3 Do not attempt to play non standard discs, or any

shape which is not round. Do not use damaged discs
or place any other material into the CD slot.

4 The audio system is designed to operate between

temperatures of -20℃ and +70℃.

5 When travelling on rough or uneven roads, disc

reproduction may be impaired.

6 Distortion, interference and lack of signal clarity, are

often attributed to a fault in the radio. Problems of
this kind are usually caused by atmospheric conditions,
signal strength, hilly terrain, tall buildings, bridges and
even electrical interference from power lines.

7 While RDS (Radio Data System) automatic retuning

eases this problem, some manual retuning may still be
needed (especially for local stations) in areas of weak
reception.

8 The broadcast range for good quality stereo reception

is noticeably less than it is for mono.

IMPORTANT

Only use the CD player controls when road conditions
permit.

76

-------------------------------------------------------------------------------------------------------------------------------------------------------------

AUDIO SYSTEM

Audio System Control Panel

1

2

3

M E N U

A U D IO

E J E C T

M U T E

M IX

S R C

B A N D

T A

6

4

5

IN F O

1

2

3

4

5

6

7

8

1 1

1 3

1 4

1 5

1 0

9

1 2

1 SRC (Source)
2 BAND
3 MIX
4 TA (Traffic Announcement)
5 Folder
6 CD Slot
7 CD Eject Button
8 INFO
9 Sound Settings Button

10 MENU
11 Downward Search Button
12 On/Off, Volume
13 Upward Search Button
14 MUTE
15 Preset Station Number Buttons

77

3

-------------------------------------------------------------------------------------------------------------------------------------------------------------

AUDIO SYSTEM

Control Buttons

The audio control buttons are located in the centre of the
facia panel and have the following functions:

1

MFC (Multi-function Controller)

: Used to

move the cursor between the menu options. Rotate
clockwise to move the cursor down or right. Rotate
anti-clockwise to move the cursor up or left.

2

Select (SEL)

Button: Use to choose the option

highlighted by the cursor.

3

Button: Use to exit from current screen and return

to previous level.

Basic Operation

On/Off Power

Press the On/Off button to switch on the audio system,
press again to switch off.

30 Minutes Play Function

When the ignition is switched off, press the On/Off button
to operate the audio unit for up to 30 minutes. After 30
minutes the unit will switch off. To switch on again, press
the on/off button.

Select Mode

Press SRC button to change the source of the output. The
audio unit will cycle through the following options, radio,
CD play (if there is a disc in the CD player), USB (if USB is
connected), and AUX.

Note: CD play can only be selected when there is a
disc in the CD player.

Note: USB can only be selected when a USB source is
connected.

78

-------------------------------------------------------------------------------------------------------------------------------------------------------------

AUDIO SYSTEM

Volume Control

Rotate the volume control clockwise to increase the
volume or anti-clockwise to decrease volume.

Sound Settings

Press the Sound Settings button to adjust the sound to
suit your listening requirements. First press of the button
selects Bass. Rotate the On/Off volume control to achieve
the setting you require, then press the sound button again
to select, in turn, the Treble, Fader and Balance settings.

The display will revert to its previous mode 5 seconds after
the last button press.

MUTE

Press to mute the sound from the audio system. Press
again to resume audio sound.

If in CD/USB play, the MUTE button pauses CD/USB play.

TA (Traffic Announcement)

Press to enable TA function, if the radio is on, the player
will search automatically, if current station doesn’t support
TA, press the button again to disable TA.

When a TA is received during CD/USB playback, the MIX
function (if selected) is cancelled.

Select Folder

When a MP3/USB is playing, press the folder button and
rotate the MFC to select the folder, press the button
again, the first music track of the selected folder will play
automatically.

Setting Date and Time, Auto Volume, RDS

(Radio Data System)

Press MENU to select setting date and time, auto volume
and RDS.

Rotate the MFC to select the date and time, auto volume
and RDS options. Press the MENU button again and rotate
the knob to set.

79

3

-------------------------------------------------------------------------------------------------------------------------------------------------------------

AUDIO SYSTEM

Radio Operation

Select Source

Press the SRC button to select radio as the source.

BAND

Repeatedly press the BAND button to select FM1, FM2,
FM AST, MW or LW frequencies.

Radio Tuning

There are 3 tuning modes:

• Search tuning

• Manual tuning

• Pre-set tuning

Search Tuning Mode

Briefly press the up or down search button. The radio
automatically searches the frequency range (either up or
down depending upon which of the buttons is pressed)
looking for a radio station of acceptable strength. Once
a station is found, that station will be played.

Manual Tuning Mode

Press and hold either of the search buttons until the
‘MANUAL’ is display on the screen. Press either of the
search buttons to enter into manual tuning mode.

5

seconds after the last button press, the system will leave
manual tuning mode.

Pre-set Tuning Mode

Up to 30 radio stations can be stored (FM1, FM2, FM AST,
MW, LW). Press numbers 1-6 to select a stored frequency.

Store Station

There are manual store and auto store modes.

Manual Store

• Press the ‘BAND’ button and select the desired

waveband.

• Use search, manual or pre-set tuning modes to turn to

the desired station.

• Press any ‘Number’ button for more than 2 seconds.

The frequencies will be automatically stored.

80

-------------------------------------------------------------------------------------------------------------------------------------------------------------


Content      ..     3      4      5      6     ..