MG 316. Service Manual - part 2


  Index      Manuals     MG 316. Service Manual


Search            copyright infringement  


Content      ..      1      2      3      ..


MG 316. Service Manual - part 2


INSTRUMENTS AND CONTROLS

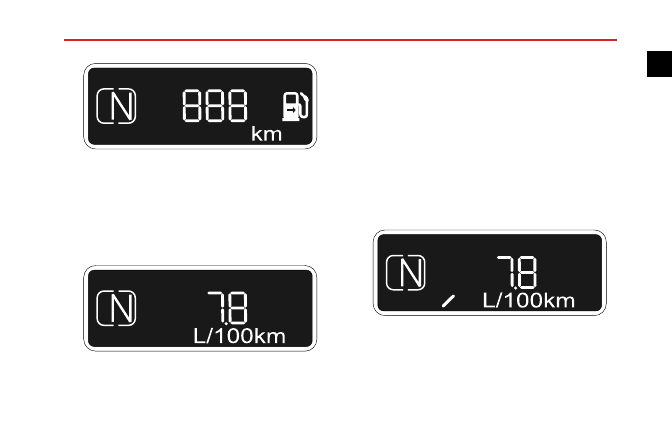
Instantaneous Fuel Consumption

This function is automatic and indicates the instantaneous
fuel consumption. When the vehicle stops moving or stops
using fuel, then the instantaneous fuel consumption display
shows “— L/100km”.

Average Fuel Consumption

This function is automatic and indicates the average fuel
consumption since the last time the trip computer was
reset (average consumption is calculated by dividing the
distance travelled by the amount of fuel used).

The

consumption value can be reset at any time to begin
calculating new consumption values for a particular journey
or driving conditions.

The average fuel consumption shall be calculated after the
engine starts when the vehicle speed exceeds 5 km/h.

0

Note:

Average consumption is related to driving

habits, road condition, load, tyre pressure, the quality
of oil, etc.

17

1

-------------------------------------------------------------------------------------------------------------------------------------------------------------

INSTRUMENTS AND CONTROLS

Average Speed

This function is automatic and indicates the average speed
since the last time it was reset. The average speed display
can be reset at any time to begin calculating a new average
speed value for a particular journey or driving condition.

Next Service

Shows the service interval announcement symbol, the
estimated distance of the next service remaining before it
should be carried out.

Note:

The

Service

Interval

Announcement

information can only be reset by an MG Authorised
Repairer.

TPMS Reset

Enter ‘TPMS RESET?’ display interface. By pressing and
holding the button for longer than 2 seconds. If the text
‘TPMS RESET √’ is displayed . It indicates TPMS reset
successful. If the text ‘TPMS RESET X’ is displayed . It
indicates TPMS reset fail. consult your MG Authorised
Repairer.

18

-------------------------------------------------------------------------------------------------------------------------------------------------------------

INSTRUMENTS AND CONTROLS

T P M S  R E S E T  ?

Note:

The TPMS reset menu will only be made

available when the car is stationary, with the hand
brake applied and ignition on position II.

19

1

-------------------------------------------------------------------------------------------------------------------------------------------------------------

INSTRUMENTS AND CONTROLS

Warning Lights and Indicators

Main Beam - Blue

Illuminates when the headlights are switched to

main beam.

Side Lamps - Green

Illuminates when the side or headlights are

switched on.

Direction Indicators - Green

The left and right direction indicators are

represented by directional arrows located at the top of the
instrument display. The warning lights flash synchronised
with the exterior left or right direction indicator lights
whenever they are operating.

If the hazard warning lights are operated, both warning
lights will flash together.

If either warning light flashes very rapidly, this means that
one of the front or rear direction indicator lights is not
operating.

Note: Failure of a side repeater light will have no effect
on the warning light flash frequency.

20

-------------------------------------------------------------------------------------------------------------------------------------------------------------

INSTRUMENTS AND CONTROLS

Rear Fog Light - Yellow

Illuminates when the rear fog lights are switched

on.

Airbag - Red

The warning light illuminates as a lamp check

when the ignition is switched on. If the light illuminates
at any other time or fails to extinguish after start up, an
airbag restraint system fault has been detected, then an
audible warning will be given when the engine is started.
Seek qualified assistance urgently.

Seat Belt Warning - Red

If a seat belt for an occupied front seat remains

unfastened, the warning light will illuminate. An audible
warning is heard to remind the driver to ensure that both
seat belts are securely fastened. If the seat belt for an
occupied seat remains unfastened once the vehicle speed

has exceeded 15 MPH (25 km/h), the warning lamp will
flash accompanied by an audible warning. The warning will
continue until either the seat belt is fastened correctly or
90 seconds has expired.

Low Oil Pressure - Red

The warning light illuminates when the ignition

is switched on and extinguishes when the engine is running.
If the light remains on or illuminates continuously when
driving, serious engine damage could occur; stop the
vehicle as soon as safety permits and SWITCH OFF THE
ENGINE IMMEDIATELY. Seek qualified assistance before
driving.

Battery Charging - Red

The warning light illuminates when the ignition

is switched on and extinguishes as soon as the engine is
running. If the light remains on or illuminates when driving,
a fault with the battery charging system is indicated. Seek
qualified assistance urgently.

21

1

-------------------------------------------------------------------------------------------------------------------------------------------------------------

INSTRUMENTS AND CONTROLS

ABS - Yellow

ABS

The warning light illuminates as a lamp check

when the ignition is switched on, If the light is illuminates,
a fault has occurred with the ABS system and you should
seek qualified assistance at the earliest opportunity.

If an ABS fault occurs while driving, ABS operation will be
suspended, but normal braking will still be available. Seek
qualified assistance at the earliest opportunity.

Parking Brake/Brake System Light - Red

The warning light illuminates as a lamp check

when the ignition is switched on, Subsequent illumination
may indicate a fault with the braking system such as parking
brake on or brake fluid level is low or electronic brake force
distribution failure.

The light illuminates when the parking brake is applied and
extinguishes when it is fully released. If the parking brake is
inadvertently left applied, the light will flash and an audible
warning will sound when the vehicle speed exceeds 3 MPH

(5 km/h). If the warning light remains illuminated after the
parking brake has been released, a fault with the braking
system is indicated. Check the brake fluid level. If the
light continues to illuminate, stop the car as soon as safety
permits and seek qualified assistance urgently.

When the ignition switch is off and the driver’s door is
open, if the parking brake has not been applied, the parking
brake alarm will be activated, and the warning light will flash
accompanied by an audible warning.

Engine Emission Fault - Yellow

This warning light which is used to indicate

an emissions related fault is detected by the engine
management system. The warning light illuminates as a
lamp check when the ignition is switched on, If an engine
operation problem occurs while the vehicle is being driven,
the indicator will illuminate. Seek qualified assistance.

22

-------------------------------------------------------------------------------------------------------------------------------------------------------------

INSTRUMENTS AND CONTROLS

Engine Check - Yellow

This warning light is used to indicate an

engine operation fault which is detected by the engine
management system.

The warning light illuminates as

a lamp check when the ignition is switched on, If a
non-emissions related fault occurs while the vehicle is
being driven, the indicator will illuminate. Seek qualified
assistance.

Engine Coolant Temperature Warning Light -

Red/Blue

The warning light is used to indicate the

temperature of engine coolant.

The warning light

illuminates as a system check when the ignition is switched
on. If the warning light illuminates blue, it indicates that
the coolant temperature is low, and if the warning light
illuminates red, it indicates that the coolant temperature
is high, When the temperature continues to rise, the

warning light will flash accompanied by an audible warning.
If the signal is missing, the warning light is flashed in blue.

If the engine is too hot, severe damage could result; stop
the vehicle as soon as safety permits and seek qualified
assistance at the earliest opportunity.

Stability Control System (SCS) - Yellow

The warning light indicates that the SCS system

is working or faulty. The warning light illuminates as a
lamp check when the ignition is switched on, If the SCS
system is working, the warning light is off. If the SCS system
has a fault, this warning light will stay on. Stop the car
as soon as safety permits and contact an MG Authorised
Repairer. When the SCS system has an intervention event.
the warning light will flash.

Stability Control System (SCS) Off - Yellow

O F F

The warning light indicates that the SCS system

is switched on or off. The warning light illuminates as a

23

1

-------------------------------------------------------------------------------------------------------------------------------------------------------------

INSTRUMENTS AND CONTROLS

lamp check when the ignition is switched on, If the function
of the SCS system is off. the warning light will illuminate all
the time.

Traction Control (TC) Warning Off - Yellow

T C

The warning light indicates that the traction

control is switched on or off. The warning light illuminates
as a lamp check when the ignition is switched on, If the
TC function is manually switched off, the warning light will
illuminate all the time.

Tyre Pressure Monitoring System (TPMS) -

Yellow

The warning light illuminates as a lamp and

system check when the ignition is switched on. If a low
tyre pressure is detected the warning light will illuminate.
If the light flashes yellow, It indicates the system has a fault.
Adjust your tyre pressures or seek qualified assistance.

Engine Immobilizer/Key Battery Low - Red

The warning light does not illuminate when

the ignition is switched on.

If the engine immobilizer

verification fails, the engine cannot be started, and the
warning light will be illuminated. If the remote key voltage
is too low, the warning light will flash accompanied by an
audible warning.

Panel Opening Warning - Red

The warning light indicates that the vehicle

doors, bonnet or tailgate are not closed. The warning light
does not illuminate when the ignition is switched on. If
there is a door, bonnet or tailgate not closed, the warning
light will illuminate. If the panel remains open once the
vehicle speed has exceeded 3 MPH (5 km/h), the warning
light will flash accompanied by an audible warning. The
warning will continue until all panels are closed correctly
or 30 seconds has expired.

24

-------------------------------------------------------------------------------------------------------------------------------------------------------------

INSTRUMENTS AND CONTROLS

Cruise Control - Yellow/Green

*

The warning light does not illuminate when the

ignition is switched on. It will illuminate in yellow when
cruise control is active and green when the master switch
is pressed but no cruise speed is active. If a fault is detected,
the warning light will flash yellow.

When cruise control is set, the target speed is shown in
LCD, The target speed remains displayed until the actual
speed is achieved, at which point the LCD reverts to its
previous display.

Intelligent Stop-Start Energy-Saving System

Status - Green

If the intelligent stop-start energy-saving system

is activated, this light illuminates to indicate to the driver
that the engine is being controlled by the intelligent
stop-start energy-saving system.

When the Stop-Start

function is inhibited, the light will extinguish after flashing
3 times.

Intelligent Stop-Start Energy-Saving System

Malfunction Warning - Yellow

If the light illuminates during driving, then the

Stop-Start system has detected a fault. Contact an MG
Authorised Repairer for advice.

25

1

-------------------------------------------------------------------------------------------------------------------------------------------------------------

INSTRUMENTS AND CONTROLS

Lights and Switches

Main Light Switch

2

3

1

A

U T O

1 Side / Tail / Instrument Pack Lights

2 Headlights

3 AUTO Lights

*

Side Lights, Tail Lights, Instrument Pack Light

Turn the main light switch to position 1 to switch on the
side, tail and instrument pack lights, the side light indicator
will illuminate.

If the lights are still switched on when the driver's door is
opened and the key is removed, an audible warning will be
given.

Headlights

Turn the lighting switch to position 2 to switch on the
headlights.

The headlights will only illuminate when the ignition is
switched on.

AUTO Lights

*

With the ignition is switched on, turn the lighting switch to
AUTO position 3. The AUTO lighting system constantly
monitors the ambient light levels and automatically
switches the appropriate lights on and off as required.

26

-------------------------------------------------------------------------------------------------------------------------------------------------------------

INSTRUMENTS AND CONTROLS

Fog Lights Switch

Fog lights should be used only when visibility
is very poor; other road users could be
dazzled in clear conditions.

1

A

U T O

A

U T O

1 Rear Fog Lights

Rear Fog Lights

When the ignition switch is at position 2 and the headlights
are switched on, switch the rear fog lights (figure 1) to the
ON position, and the rear fog lights will illuminate. The
warning light in the instrument pack will illuminate when
the fog lights are on.

27

1

-------------------------------------------------------------------------------------------------------------------------------------------------------------

INSTRUMENTS AND CONTROLS

Direction Indicators /Main Beam Lever

Take care not to dazzle oncoming vehicles
when driving using main beam headlights.

2

2

3

4

1

1

1 Press downward to indicate a left turn

2 Press upward to indicate a right turn

3 Main beam flash

4 Push away for main beam

Direction Indicators

Move the lever down to indicate a LEFT turn (figure 1), or
up to indicate a RIGHT turn (figure 2). The indicators will
cancel automatically once a turn has been completed.

The corresponding GREEN warning light in the instrument
pack will flash in time with the direction indicators. To
indicate a lane change, press the lever briefly and release,
the indicators will flash three times and then cancel.

Headlight Main and Dipped Beam

When the ignition switch is on and the main beam switch
is in position 2, push the lever fully towards the instrument
pack (figure 4) to switch on main beam (the BLUE warning
light in the instrument pack illuminates). Fully push the
lever switch towards the instrument pack (figure 4) to turn
off main beam and return to dipped beam headlights.

Headlights Flash

To briefly flash the main beam on and off, pull the lever
towards the steering wheel (figure 3) and then release.

28

-------------------------------------------------------------------------------------------------------------------------------------------------------------

INSTRUMENTS AND CONTROLS

Follow Me Home (Headlights Delayed OFF)

*

After the vehicle is stopped, turn off the ignition and
remove key. Momentarily push or pull the indicator lever
switch and release within 1 minute to activate the dipped
beam headlamps. The lamps will remain illuminated for
approximately 30 seconds. To switch off the lamps during
this time period, push or pull the indictor lever switch for
a second time.

Daytime Running Lights

The daytime running lights turn on automatically when
the ignition switch is in position 2. When the side or
headlights are switched on, the daytime running lights are
extinguished.

Hazard Warning Lights

Hazard warning switch location is dependent upon trim
level.

Vehicles fitted with electronic air conditioning feature the
switch in the centre console adjacent to the passenger
airbag disable switch.

29

1

-------------------------------------------------------------------------------------------------------------------------------------------------------------

INSTRUMENTS AND CONTROLS

0

1

2

3

4

0

1

2

3

4

Vehicles fitted with a standard heater feature the switch in
the heater control panel (see picture).

Press the button to operate the hazard warning lights, all
of the direction indicators will flash together. Press again
to switch off.

Headlight Levelling - Manual Adjustment

The angle of the dipped beam is affected by the distribution
of passenger and luggage weight within the car.

To ensure correct headlamp aim, and not dazzle on-coming
traffic, the headlamp levelling switch position should be
adjusted according to the vehicle loading condition in
accordance with the following table:

30

-------------------------------------------------------------------------------------------------------------------------------------------------------------

INSTRUMENTS AND CONTROLS

Position

Load

0

Driver, or driver & front passenger

1

All the seats occupied with no load

2

All the seats occupied plus an evenly
distributed load in the boot, or driver
with full load

3

Driver only, plus an evenly distributed
load in the boot

Touring Abroad

If your journey takes you to countries where cars are
driven on the opposite side of the road to your country
it will be necessary to fit headlamp beam deflectors.

Contact your MG dealer for further details.

31

1

-------------------------------------------------------------------------------------------------------------------------------------------------------------

INSTRUMENTS AND CONTROLS

Wipers and Washers

Front Windscreen Wiper Controls

The wipers and washers will operate with the ignition in
position 1 or position 2.

Push the lever up to select different wiper speeds:

• Intermittent wipe/automatic wipe (1)

• Normal speed wipe (2)

• Fast speed wipe (3)

IMPORTANT

• Avoid operating the wipers on a dry screen.

• In freezing or very hot conditions, ensure that the

blades are not frozen or stuck to the glass before
being operated.

• In winter, remove snow or ice from around the arms

and blades, including the wiped area of the screen.

Single Wipe

Pull the lever (4) down and release (if the lever is held
down, the wipers will operate at high speed until the lever
is released).

Variable Delay - intermittent wipe

*

To select intermittent wipe push the lever up to position(1),
Rotate the switch (5) to vary the intermittent time of wiper
operation.

Rain Sensor

*

Some models are equipped with a rain sensor fitted to
the inside of the windscreen behind the rear view mirror.

32

-------------------------------------------------------------------------------------------------------------------------------------------------------------


Content      ..      1      2      3      ..