Buick-Rainier (2004 year). Manual - part 8


  Index      Buick     Buick-Rainier (2004 year) - manual in english


Search            copyright infringement  


Content      ..     6      7      8      9     ..


Buick-Rainier (2004 year). Manual - part 8


Setting Cruise Control

1. Move the cruise control switch to on.

2. Get up to the speed you want.

3. Press the set button at the end of the lever

and release it.

4. Take your foot off the accelerator pedal.

The accelerator pedal will not go down.

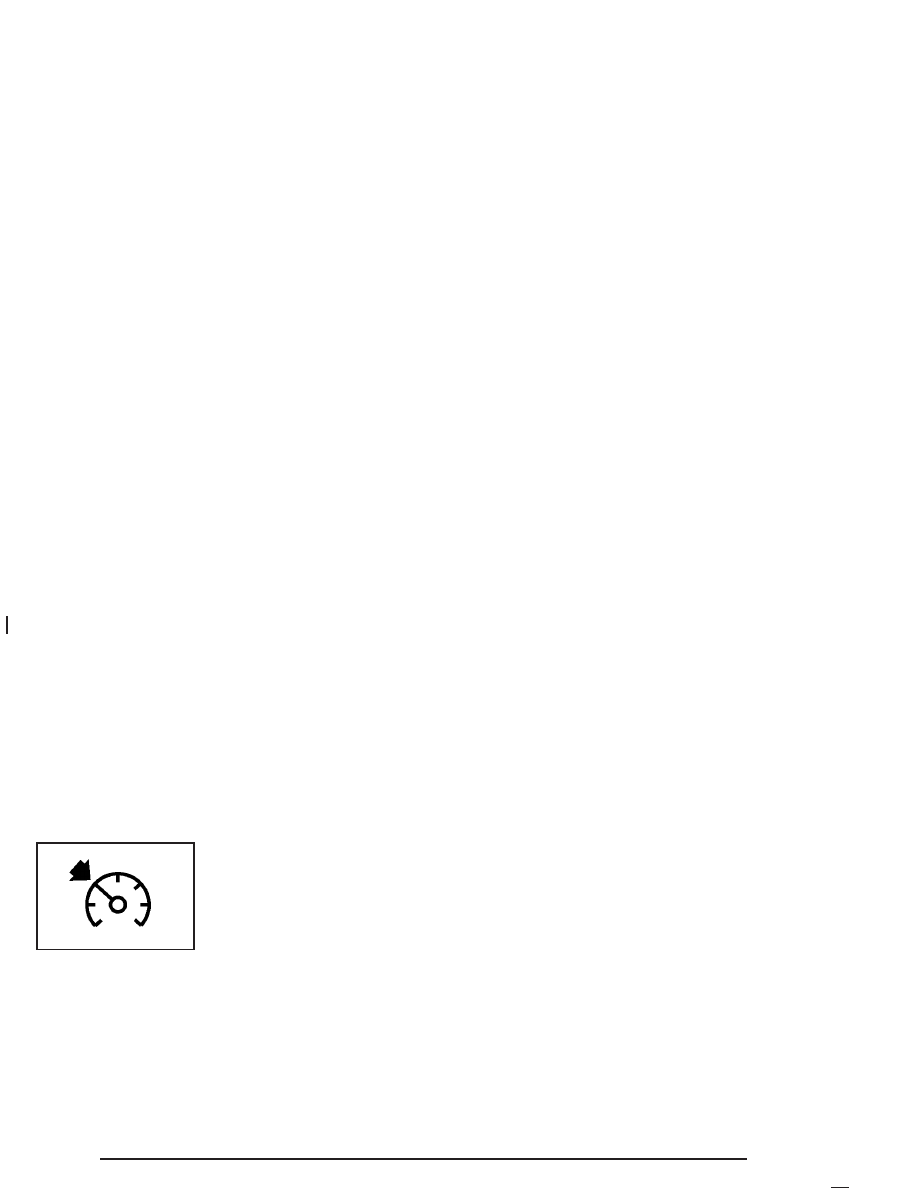
The cruise light on the
instrument panel cluster
will come on when
the cruise control is
engaged.

Resuming a Set Speed

Suppose you set your cruise control at a desired speed
and then you apply the brake. This, of course, shuts
off the cruise control. But you don’t need to reset it.

Once you’re going about 25 mph (40 km/h) or more,
you can move the cruise control switch briefly from on
to resume/accelerate.

You’ll go right back up to your chosen speed and
stay there.

If you hold the switch at resume/accelerate, the vehicle
will keep going faster until you release the switch or
apply the brake. So unless you want to go faster,
don’t hold the switch at resume/accelerate.

Increasing Speed While Using Cruise
Control

There are two ways to go to a higher speed:

Use the accelerator pedal to get to the higher
speed. Press the button at the end of the lever,
then release the button and the accelerator pedal.
You’ll now cruise at the higher speed.

Move the cruise switch from on to
resume/accelerate. Hold it there until you get up to
the speed you want, and then release the switch.
To increase your speed in very small amounts,
move the switch briefly to resume/accelerate.
Each time you do this, your vehicle will go about
1 mph (1.6 km/h) faster.

3-12

-------------------------------------------------------------------------------------------------------------------------------------------------------------

Reducing Speed While Using Cruise
Control

Press the set button at the end of the lever until you
reach the lower speed you want, then release it.
To slow down in very small amounts, briefly press
the set button. Each time you do this, you’ll go about
1 mph (1.6 km/h) slower.

Passing Another Vehicle While Using
Cruise Control

Use the accelerator pedal to increase your speed.
When you take your foot off the pedal, your vehicle will
slow down to the cruise control speed you set earlier.

Using Cruise Control on Hills

How well your cruise control will work on hills depends
upon your speed, load and the steepness of the
hills. When going up steep hills, you may want to
step on the accelerator pedal to maintain your speed.

When going downhill, you may have to brake or
shift to a lower gear to keep your speed down.
Of course, applying the brake takes you out of cruise
control. Many drivers find this to be too much
trouble and don’t use cruise control on steep hills.

Ending Cruise Control

There are three ways to turn off the cruise control:

Step lightly on the brake pedal.

Move the cruise switch to off, or

Shift the transmission to NEUTRAL (N).

Erasing Speed Memory

When you turn off the cruise control or the ignition,
your cruise control set speed memory is erased.

3-13

-------------------------------------------------------------------------------------------------------------------------------------------------------------

Exterior Lamps

Your exterior lamps
knob is located on your
instrument panel to the
left of the steering wheel.

c

(Off): Turn the knob to this symbol and release

it to turn off the Daytime Running Lamps (DRL) and
the automatic headlamps. An indicator will illuminate
when the position is selected. This position is not
available for vehicles first sold in Canada.

i

(Automatic DRL/AHS): Turning the knob to this

symbol puts the system into automatic headlamp mode.
An indicator will illuminate when the position is selected.

;

(Parking Lamps): Turn the knob to this symbol to

manually turn on the following:

Parking Lamps

Sidemarker Lamps

Taillamps

License Plate Lamps

Instrument Panel Lights

2

(Headlamps): Turn the knob to this symbol to turn

on all the lamps listed as well as the headlamps.

3-14

-------------------------------------------------------------------------------------------------------------------------------------------------------------

Automatic Headlamp System

When it is dark enough outside, your Automatic
Headlamp System will turn on your headlamps at the
normal brightness along with other lamps such as
the taillamps, sidemarker, parking lamps and the
instrument panel lights. The radio lights will also be on.

Your vehicle is equipped with a light sensor on the
top of the instrument panel. Be sure it is not covered or
the system will be on whenever the ignition is on.

The system may also turn on your lights when driving
through a parking garage, heavy overcast weather
or a tunnel. This is normal.

There is a delay in the transition between the daytime
and nighttime operation of the Daytime Running
Lamps (DRL) and the automatic headlamp systems,
so that driving under bridges or bright overhead street
lights does not affect the system. The DRL and
automatic headlamp system will only be affected when
the light sensor sees a change in lighting lasting
longer than the delay.

If you start your vehicle in a dark garage, the automatic
headlamp system will come on immediately. Once
you leave the garage, it will take about one minute for
the automatic headlamp system to change to DRL if it is
light outside. During that delay, your instrument panel
cluster may not be as bright as usual. Make sure
your instrument panel brightness control is in the full
bright position.

To idle your vehicle with the automatic headlamp system
off, set the parking brake while the ignition is off. Then
start your vehicle. The automatic headlamp system will
stay off until you release the parking brake, shift out of
park or turn the exterior lamp control to the off position as
described in “Exterior Lamps” listed previously.

Lamps On Reminder

A reminder tone will sound when your headlamps or
parking lamps are manually turned on, the driver’s door
is open and your ignition is in LOCK or ACCESSORY.
To turn the tone off, turn the knob all the way
counterclockwise. In the automatic mode, the headlamps
turn off once the ignition key is in LOCK.

3-15

-------------------------------------------------------------------------------------------------------------------------------------------------------------

Daytime Running Lamps (DRL)

Daytime Running Lamps (DRL) can make it easier for
others to see the front of your vehicle during the
day. DRL can be helpful in many different driving
conditions, but they can be especially helpful in the short
periods after dawn and before sunset. Fully functional
daytime running lamps are required on all vehicles
first sold in Canada.

The DRL system will make your headlamps come on
at reduced brightness when the following conditions
are met:

The ignition is on

the exterior lamps knob is in automatic
headlamp mode

the light sensor detects daytime light

the transmission is not in PARK (P)

When the DRL are on, only your headlamps will be on.
The taillamps, sidemarker and other lamps won’t be
on. The instrument panel won’t be lit up either.

When it begins to get dark, the headlamps will
automatically switch from DRL to the regular headlamps.

Fog Lamps

Use your fog lamps for better vision in foggy or misty
conditions. Your ignition must be in RUN for your
fog lamps to work.

The fog lamp button is
located on the instrument
panel to the right of
the exterior lamps knob.

Press the button to turn the fog lamps on. Press the
button again to turn them off. A light will glow near the
button while the fog lamps are on. Fog lamps will
turn off whenever your high-beam headlamps are on.

3-16

-------------------------------------------------------------------------------------------------------------------------------------------------------------

Interior Lamps

Instrument Panel Brightness

Press the knob
located next to the
exterior lamps knob
to extend it.

Turn the knob to adjust the instrument panel lights.
Turn the knob all the way up to turn on the interior
lamps. Press the knob back into its stored position
when you’re not using it.

Dome Lamp Override

The dome override
button is located
below the exterior
lamps knob.

To turn the dome lamps off, press the button. The dome
lamps will remain off when a door is open. This will
override the illuminated entry feature unless you
use your keyless entry transmitter to unlock the vehicle.

To return the lamps to automatic operation, press the
button again. The dome lamps will come on when
you open a door.

3-17

-------------------------------------------------------------------------------------------------------------------------------------------------------------

Entry Lighting

Your vehicle is equipped with entry lighting.

When a door is opened, the dome lamps will come on
if the dome override button is in the “out” position.
When all the doors are closed, the lamps will stay on for
a short period of time and will then turn off automatically.
If you use your keyless entry transmitter to unlock the
vehicle, the interior lights will come on for a short
time whether or not the dome override is on.

Exit Lighting

With exit lighting, the interior lamps will come on when
you remove the key from the ignition to help you
see while exiting the vehicle. With the dome override
button in the “out” position, these lights will stay on for
a short period of time and then will go out.

Reading Lamps

Press the lens on the lamp located above the doors
to turn the reading lamps on and off.

Dome Lamps

The dome lamps will come on when you open a door
unless the dome lamp override is pressed in.

You can also turn the dome lamps on by turning the
thumbwheel, located next to the exterior lamps knob,
all the way up to the top detent position. In this position,
the dome lamps will remain on until they are turned off.

Battery Run-Down Protection

This feature shuts off the dome, courtesy, vanity,
and reading lamps if they are left on for more than
20 minutes when the ignition is off. This will keep your
battery from running down.

If the battery run-down protection shuts off the interior
lamps, it may be necessary to do one of the following
to return to normal operation:

Shut off all lamps and close all doors, or

turn the ignition key to RUN.

This feature will also turn off the parking lamps and
headlamps under most circumstances, if they are left on.
If you would like to turn them back on, turn the exterior
lamps knob.

3-18

-------------------------------------------------------------------------------------------------------------------------------------------------------------

Accessory Power Outlets

With the accessory power outlets, you can plug in
auxiliary electrical equipment such as a cellular
telephone or CB radio.

The first outlet is located to the right of the cigarette
lighter on the instrument panel. The second outlet
is located on the rear of the center console.

Remove the cover from the outlet to use the outlet.
Be sure to put the cover back on when not using the
accessory power outlet.

Certain electrical accessories may not be compatible
with the accessory power outlet and could result
in blown vehicle or adaptor fuses. If you experience a
problem, see your dealer for additional information
on the accessory power outlets.

Notice: Adding any electrical equipment to your
vehicle may damage it or keep other components
from working as they should. The repairs would not
be covered by your warranty. Check with your
dealer before adding electrical equipment.

When adding electrical equipment, be sure to follow
the proper installation instructions included with
the equipment.

Notice: Improper use of the power outlet can cause
damage not covered by your warranty. Do not hang
any type of accessory or accessory bracket from the
plug because the power outlets are designed for
accessory power plugs only.

Ashtrays and Cigarette Lighter

Your vehicle may have this feature. The ashtray is
removable and fits into the front cupholder.

Notice: If you put papers or other flammable items
in the ashtray, hot cigarettes or other smoking
materials could ignite them and possibly damage
your vehicle. Never put flammable items in the
ashtray.

To remove the ashtray, pull the covered bin out of
the cupholder.

To use the lighter, press it in all the way, and let go.
When it’s ready, it will pop back out by itself.

Notice: Holding a cigarette lighter in while it is
heating will not allow the lighter to back away from
the heating element when it is hot. Damage from
overheating may occur to the lighter or heating
element, or a fuse could be blown. Do not hold
a cigarette lighter in while it is heating.

3-19

-------------------------------------------------------------------------------------------------------------------------------------------------------------

Climate Controls

Dual Automatic Climate Control
System

With this system you can control the heating, cooling and
ventilation for your vehicle. When your vehicle is first
started and the climate control system is on, or if the
climate control system has been turned on, the display
will show the driver’s temperature setting for five
seconds. Then it will show the outside temperature.

OFF: Press this button to turn off the entire climate
control system. Outside air will still enter the vehicle,
and will be directed to the floor. Press the AUTO button,
the mode button, the fan arrows, or either temperature
knob to turn the system on.

MODE: Press this button to manually select the air
delivery mode to the floor, instrument panel, or windshield
outlets. The system will stay in the selected mode until
the mode button is pressed again or the AUTO button
is pressed.

Driver’s Side Temperature Knob: Turn this knob
clockwise or counterclockwise to manually raise or lower
the temperature on the driver’s side of the vehicle.
The display will show the temperature setting decreasing
or increasing and the word DRIVER will appear on
the display. This knob can also adjust the passenger’s
side temperature setting simultaneously if the two
zones are linked. The words DRIVER and PASS will
then appear on the display.

3-20

-------------------------------------------------------------------------------------------------------------------------------------------------------------

Passenger’s Side Temperature Knob: Turn this knob
clockwise or counterclockwise to manually raise or lower
the temperature on the passenger’s side of the vehicle.
The display will show the temperature setting decreasing
or increasing and the word PASS will appear on the
display. The passenger’s temperature setting can be set
to match and link to the driver’s temperature setting by
pressing and holding the AUTO button for three seconds.
Now, by adjusting the driver’s side temperature setting,
the passenger’s side temperature setting will follow and
both DRIVER and PASS will appear on the display.
The passenger’s side temperature setting also resets
and relinks to the driver’s side temperature setting if the
vehicle has been off for more than two hours.

Automatic Operation

AUTO (Automatic): When automatic operation is
active, the system will control the inside temperature,
the air delivery mode, and the fan speed.

Use the steps below to place the entire system in
automatic mode:

1. Press the AUTO button.

When AUTO is selected, the air conditioning
operation and air inlet mode will be automatically
controlled. The air conditioning compressor will run
when the outside temperature is over approximately
40°F (4°C). The air inlet will normally be set to
outside air. If it’s hot outside, the air inlet will
automatically switch to recirculate inside air to
help quickly cool down your vehicle.

2. Set the driver’s and passenger’s temperature.

To find your comfort setting, start with a 72°F (22°C)
temperature setting and allow about 20 minutes
for the system to regulate. Turn the driver’s or
passenger’s side temperature knob to adjust the
temperature setting as necessary. If you choose the
temperature setting of 60°F (15°C), the system
will remain at the maximum cooling setting. If you
choose the temperature setting of 90°F (32°C),
the system will remain at the maximum heat setting.
Choosing either maximum setting may not cause
the vehicle to heat or cool any faster.

3-21

-------------------------------------------------------------------------------------------------------------------------------------------------------------

Manual Operation

To change the current setting, select one of the
following:

w9x

(Fan): This button allows you to manually

adjust the fan speed. Press the up arrow to increase fan
speed and the down arrow to decrease fan speed.
The display will change to show you the selected fan
speed and the driver’s side temperature setting for
five seconds.

(MODE): Press this button to manually change the
direction of the airflow in your vehicle. Keep pressing the
button until the desired mode appears on the display.
The display will change to show you the selected
air delivery mode and the driver’s temperature setting
for five seconds.

H

(Vent): This mode directs air to the instrument

panel outlets.

)

(Bi-Level): This mode directs approximately half of

the air to the instrument panel outlets, then directs the
remaining air to the floor outlets. A little air is directed
toward the windshield and the side window outlets.
Cooler air is directed to the upper outlets and warmer
air to the floor outlets.

6

(Floor): This mode directs most of the air to the

floor outlets. Some air also comes out of the
defroster and side window outlets. The recirculation
button cannot be selected in floor mode.

h

(Recirculation): Press this button to turn

recirculation mode on or off. When this button is
pressed, an indicator light in the button will also come
on to let you know that it is activated. Recirculation
mode is used to recirculate the air inside of
your vehicle. Use this mode to help prevent outside
odors and/or dust from entering your vehicle or
to help cool the air inside of your vehicle more
quickly. Recirculation mode can be used with vent and
bi-level modes, but it cannot be used with floor,
defog or defrost modes.

If the weather is cold and damp, the system may
cause the windows to fog while using recirculation
mode. If the windows do start to fog, select
defog or defrost mode.

3-22

-------------------------------------------------------------------------------------------------------------------------------------------------------------

#

A/C (Air Conditioning): Press this button to

manually turn the air conditioning system on or off.
When the system is on, the system will automatically
begin to cool and dehumidify the air inside of your
vehicle.

If you select air conditioning off while in front defrost or
defog mode, the air conditioning off symbol will flash to
let you know this option is not allowed.

You may notice a slight change in engine performance
when the air-conditioning compressor shuts off and
turns on again. This is normal.

A/C OFF (Air Conditioning Off): When you turn the
air conditioning off, the words A/C OFF will appear
on the display. When the air conditioning is selected or
in AUTO mode, the system will run the air conditioning
automatically.

Defogging and Defrosting

Fog on the inside of windows is a result of high humidity
(moisture) condensing on the cool window glass.
This can be minimized if the climate control system is
used properly. You can use either defog or front defrost
to clear fog or frost from your windshield.

-

(Defog): Use this setting to clear the windows of

fog or moisture. This setting will deliver air to the
floor and windshield outlets.

0

(Front Defrost): Press the front defrost button

to clear the windshield and side windows of frost or
fog quickly. The system will automatically control the
fan speed if you select defrost from AUTO mode.
If the outside temperature is 40°F (4°C) or warmer,
your air conditioning compressor will automatically
run to help dehumidify the air and dry the windshield.
Do not drive the vehicle until all the windows are clear.

3-23

-------------------------------------------------------------------------------------------------------------------------------------------------------------

Rear Window Defogger

The rear window defogger uses a warming grid to
remove fog from the rear window.

<

(Rear): Press this button to turn the rear window

defogger on or off.

An indicator light in the button will come on to let you
know that the rear window defogger is activated.

The rear window defogger will turn off approximately
10 minutes after the button is pressed. If you need
additional warming time, press the button again.

Notice: Using a razor blade or sharp object to
clear the inside rear window may damage the rear
window defogger. Repairs would not be covered
by your warranty. Do not clear the inside of the
rear window with sharp objects.

Outlet Adjustment

Use the air outlets located in the center and on the
side of your instrument panel to direct the airflow.

Ventilation System

For mild outside temperatures when little heating or
cooling is needed, use the vent setting to direct outside
air through your vehicle.

Your vehicle’s ventilation system supplies outside air to
the inside of your vehicle when it is moving. With the side
windows closed, air will flow into the front air inlet grilles,
through the vehicle and out the air exhaust valves.

Outside air will also enter the vehicle when the heater
or the air conditioning compressor is running, unless you
have pressed the recirculation button.

3-24

-------------------------------------------------------------------------------------------------------------------------------------------------------------

Operation Tips

Keep the hood and front air inlets free of ice, snow,
or any other obstruction (such as leaves). The
heater and defroster will work far better, reducing
the chance of fogging the inside of your windows.

When you enter a vehicle in cold weather, turn the
fan knob all the way to the right for a few moments
before driving. This helps clear the intake ducts
of snow and moisture, and reduces the chance of
fogging the inside of your window.

Keep the air path under the front seats clear of
objects. This helps air to circulate throughout
your vehicle.

Adding outside equipment to the front of your
vehicle, such as hood-air deflectors, may affect the
performance of the heating and air conditioning
system. Check with your dealer before adding
equipment to the outside of your vehicle.

Rear Climate Control System

The lower buttons on the rear seat audio are used to
adjust the rear seat climate controls. The temperature of
the air coming through the rear outlets is determined
by the front passenger’s temperature setting.

The left button with the fan symbol regulates the fan
speed. The right button is used to change the direction
of airflow (upper, bi-level or floor) to the rear seat
area. To turn the rear climate controls on or off, press
the middle button. The rear control will only turn on if the
front is on and is not in defrost mode.

3-25

-------------------------------------------------------------------------------------------------------------------------------------------------------------

Ventilation System

For mild outside temperatures when little heating or
cooling is needed, use the panel outlet setting to direct
outside air through your vehicle. Air will flow through
the instrument panel outlets.

Your vehicle’s flow-through ventilation system supplies
outside air into the vehicle when it’s moving. When
the vehicle is not moving, you can get outside air to flow
through by selecting any air delivery mode and any
fan speed.

Your vehicle has air outlets that allow you to adjust
the direction and amount of airflow inside the vehicle.
Move the control in the center of each outlet side-to-side
to direct the air from the outlet. Use the thumbwheel
under the outlet to close the louvers. For the most
efficient airflow and temperature control, keep the
louvers in the fully opened position.

Climate Controls Personalization

If your vehicle is equipped with the Driver Information
Center (DIC), you can store and recall the climate control
settings for temperature, air delivery mode and fan speed
for two different drivers. The personal choice settings
recalled are determined by the transmitter used to enter
the vehicle. After the button with the unlock symbol on a
remote keyless entry transmitter is pressed, the climate
control will adjust to the last settings of the identified
driver. The settings can also be changed by pressing one
of the memory buttons (1 or 2) located on the driver’s
door. When adjustments are made, the new settings are
automatically saved for the driver.

3-26

-------------------------------------------------------------------------------------------------------------------------------------------------------------

Warning Lights, Gages, and
Indicators

This part describes the warning lights and gages that
may be on your vehicle. The pictures will help you
locate them.

Warning lights and gages can signal that something is
wrong before it becomes serious enough to cause
an expensive repair or replacement. Paying attention
to your warning lights and gages could also save you
or others from injury.

Warning lights come on when there may be or is a
problem with one of your vehicle’s functions. As you will
see in the details on the next few pages, some warning
lights come on briefly when you start the engine just to let
you know they’re working. If you are familiar with this
section, you should not be alarmed when this happens.

Gages can indicate when there may be or is a problem
with one of your vehicle’s functions. Often gages and
warning lights work together to let you know when there’s
a problem with your vehicle.

When one of the warning lights comes on and stays
on when you are driving, or when one of the gages
shows there may be a problem, check the section that
tells you what to do about it. Please follow this
manual’s advice.

Waiting to do repairs can be costly–and even dangerous.
So please get to know your warning lights and gages.
They’re a big help.

Your vehicle may also have a Driver Information
Center (DIC) that works along with the warning lights
and gages. See Driver Information Center (DIC)
on page 3-43.

3-27

-------------------------------------------------------------------------------------------------------------------------------------------------------------


Content      ..     6      7      8      9     ..