Pontiac G5 (2008 year). Manual - part 14


  Index      Pontiac     Pontiac G5 (2008 year) - manual in english


Search            copyright infringement  


Content      ..     12      13      14      15     ..


Pontiac G5 (2008 year). Manual - part 14


Winter Driving

Here are some tips for winter driving:

Have your vehicle in good shape for winter.

You might want to put winter emergency supplies in
the trunk.

Include an ice scraper, a small brush or broom, a
supply of windshield washer fluid, a rag, some winter
outer clothing, a small shovel, a flashlight, a red cloth,
and a couple of reflective warning triangles. And, if you
will be driving under severe conditions, include a small
bag of sand, a piece of old carpet, or a couple of burlap
bags to help provide traction. Be sure you properly
secure these items in your vehicle.

Also see Tires on page 5-48.

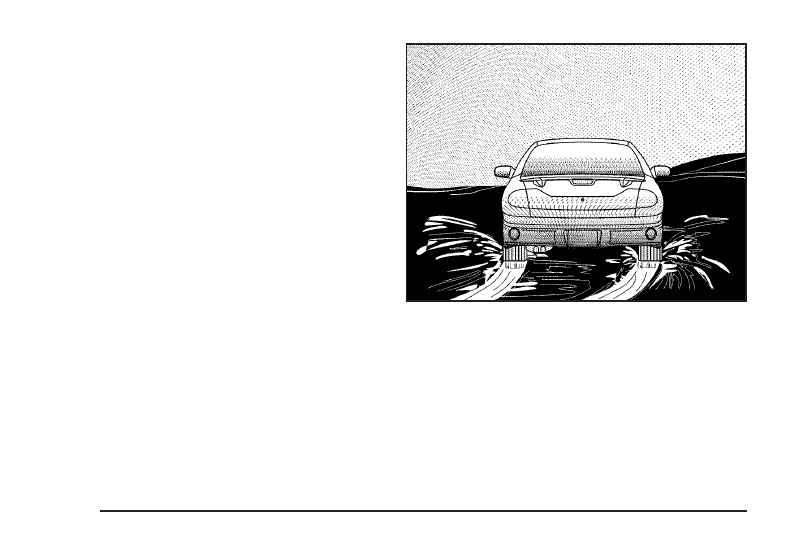
Driving on Snow or Ice

Most of the time, those places where the tires meet the
road probably have good traction.

However, if there is snow or ice between the tires and
the road, you can have a very slippery situation.
You have a lot less traction, or grip, and need to be
very careful.

What is the worst time for this? Wet ice. Very cold snow
or ice can be slick and hard to drive on. But wet ice can
be even more trouble because it can offer the least
traction of all. You can get wet ice when it is about
freezing, 32°F (0°C), and freezing rain begins to fall. Try
to avoid driving on wet ice until salt and sand crews can
get there.

Whatever the condition — smooth ice, packed, blowing,
or loose snow — drive with caution.

4-20

-------------------------------------------------------------------------------------------------------------------------------------------------------------

If you have the Enhanced Traction System (ETS), it will
improve your ability to accelerate when driving on a
slippery road. Even if you have ETS, slow down and
adjust your driving to the road conditions. See Enhanced
Traction System (ETS) 
on page 4-9.

If your vehicle does not have ETS, accelerate gently.
Try not to break the fragile traction. If you accelerate too
fast, the drive wheels will spin and polish the surface
under the tires even more.

Unless your vehicle has the Antilock Brake System
(ABS), you will want to brake very gently, too. If you do
have ABS, see Antilock Brake System (ABS) on
page 4-5
. ABS improves your vehicle’s stability when you
make a hard stop on a slippery road. Whether your
vehicle has ABS or not, begin stopping sooner than you
would on dry pavement. Without ABS, if you feel your
vehicle begin to slide, let up on the brakes a little. Push
the brake pedal down steadily to get the most traction
you can.

Remember, unless your vehicle has ABS, if you brake
so hard that the wheels stop rolling, your vehicle will just
slide. Brake so the wheels always keep rolling and you
can still steer.

Whatever your vehicle’s braking system, allow
greater following distance on any slippery road.

Watch for slippery spots. The road might be fine until
you hit a spot that is covered with ice. On an
otherwise clear road, ice patches can appear in
shaded areas where the sun cannot reach, such as
around clumps of trees, behind buildings, or under
bridges. Sometimes the surface of a curve or an
overpass can remain icy when the surrounding roads
are clear. If you see a patch of ice ahead of you,
brake before you are on it. Try not to brake while you
are actually on the ice, and avoid sudden steering
maneuvers.

4-21

-------------------------------------------------------------------------------------------------------------------------------------------------------------

If You Are Caught in a Blizzard

If you are stopped by heavy snow, you could be in a
serious situation. You should probably stay with your
vehicle unless you know for sure that you are near help
and you can hike through the snow. Here are some things
to do to summon help and keep yourself and your
passengers safe:

Turn on the hazard warning flashers.

Tie a red cloth to your vehicle to alert police that you
have been stopped by the snow.

Put on extra clothing or wrap a blanket around you.
If you do not have blankets or extra clothing, make
body insulators from newspapers, burlap bags, rags,
floor mats — anything you can wrap around yourself
or tuck under your clothing to keep warm.

You can run the engine to keep warm, but be careful.

4-22

-------------------------------------------------------------------------------------------------------------------------------------------------------------

{

CAUTION:

Snow can trap exhaust gases under your
vehicle. This can cause deadly CO (carbon
monoxide) gas to get inside. CO could
overcome you and kill you. You cannot see it
or smell it, so you might not know it is in your
vehicle. Clear away snow from around the base
of your vehicle, especially any that is blocking
the exhaust pipe. And check around again from
time to time to be sure snow does not collect
there.

Open a window just a little on the side of the
vehicle that is away from the wind. This will help
keep CO out.

Run the engine only as long as you must. This saves
fuel. When you run the engine, make it go a little faster
than just idle. That is, push the accelerator slightly. This
uses less fuel for the heat that you get and it keeps the
battery charged. You will need a well-charged battery to
restart the vehicle, and possibly for signaling later on with
the headlamps. Let the heater run for a while.

Then, shut the engine off and close the window almost
all the way to preserve the heat. Start the engine again
and repeat this only when you feel really uncomfortable
from the cold. But do it as little as possible. Preserve the
fuel as long as you can. To help keep warm, you can get
out of the vehicle and do some fairly vigorous exercises
every half hour or so until help comes.

4-23

-------------------------------------------------------------------------------------------------------------------------------------------------------------

If Your Vehicle is Stuck in Sand,
Mud, Ice, or Snow

Slowly and cautiously spin the wheels to free your
vehicle when stuck in sand, mud, ice, or snow. See
Rocking Your Vehicle to Get It Out on page 4-24.

If your vehicle has a traction system, it can often help to
free a stuck vehicle. Refer to your vehicle’s traction
system in the Index. If the stuck condition is too severe
for the traction system to free the vehicle, turn the
traction system off and use the rocking method.

{

CAUTION:

If you let your vehicle’s tires spin at high
speed, they can explode, and you or others
could be injured. The vehicle can overheat,
causing an engine compartment fire or other
damage. Spin the wheels as little as possible
and avoid going above 35 mph (55 km/h) as
shown on the speedometer.

For information about using tire chains on your vehicle,
see Tire Chains on page 5-70.

Rocking Your Vehicle to Get It Out

First, turn the steering wheel left and right to clear the
area around the front wheels. Then shift back and forth
between REVERSE (R) and a forward gear, or with a
manual transmission, between FIRST (1) or SECOND (2)
and REVERSE (R), spinning the wheels as little as
possible. To prevent transmission wear, wait until the
wheels stop spinning before shifting gears. Release the
accelerator pedal while you shift, and press lightly on the
accelerator pedal when the transmission is in gear.
By slowly spinning the wheels in the forward and reverse
directions, you will cause a rocking motion that could free
your vehicle. If that does not get your vehicle out after a
few tries, it might need to be towed out. If your vehicle
does need to be towed out, see Towing Your Vehicle on
page 4-30
.

4-24

-------------------------------------------------------------------------------------------------------------------------------------------------------------

Loading Your Vehicle

It is very important to know how much weight your
vehicle can carry. This weight is called the vehicle
capacity weight and includes the weight of all
occupants, cargo and all nonfactory-installed
options. Two labels on your vehicle show how much
weight it may properly carry, the Tire and Loading
Information label and the Certification label.

{

CAUTION:

Do not load your vehicle any heavier than
the Gross Vehicle Weight Rating (GVWR),
or either the maximum front or rear Gross
Axle Weight Rating (GAWR). If you do,
parts on your vehicle can break, and it
can change the way your vehicle handles.
These could cause you to lose control
and crash. Also, overloading can shorten
the life of your vehicle.

Tire and Loading Information Label

A vehicle specific Tire and Loading Information
label is attached to the vehicle’s center pillar
(B-pillar). With the driver’s door open, you will find
the label either attached above the door lock post
for a two door vehicle or below the door lock post
for a four door vehicle. The Tire and Loading
Information label shows the number of occupant
seating positions (A), and the maximum vehicle
capacity weight (B) in kilograms and pounds.

Label Example

4-25

-------------------------------------------------------------------------------------------------------------------------------------------------------------

The Tire and Loading Information label also shows
the tire size of the original equipment tires (C) and
the recommended cold tire inflation pressures (D).
For more information on tires and inflation see Tires
on page 5-48 and Inflation - Tire Pressure on
page 5-55
.

There is also important loading information on the
Certification label. It tells you the Gross Vehicle
Weight Rating (GVWR) and the Gross Axle Weight
Rating (GAWR) for the front and rear axle; see
“Certification Label” later in this section.

Steps for Determining Correct Load Limit

1.

Locate the statement “The combined weight
of occupants and cargo should never exceed
XXX kg or XXX lbs” on your vehicle placard.

2.

Determine the combined weight of the driver
and passengers that will be riding in your
vehicle.

3.

Subtract the combined weight of the driver
and passengers from XXX kg or XXX lbs.

4.

The resulting figure equals the available
amount of cargo and luggage load capacity.
For example, if the “XXX” amount equals
1400 lbs and there will be five 150 lb
passengers in your vehicle, the amount of
available cargo and luggage load capacity is
650 lbs (1400

750 (5 x 150) = 650 lbs).

5.

Determine the combined weight of luggage
and cargo being loaded on the vehicle. That
weight may not safely exceed the available
cargo and luggage load capacity calculated
in Step 4.

6.

If your vehicle will be towing a trailer, the load
from your trailer will be transferred to your
vehicle. Consult this manual to determine how
this reduces the available cargo and luggage
load capacity of your vehicle.

If your vehicle can tow a trailer, see Towing a
Trailer (Manual Transmission) 
on page 4-32
or Towing a Trailer (Automatic Transmission)
on page 4-32 for important information on
towing a trailer, towing safety rules, and
trailering tips.

4-26

-------------------------------------------------------------------------------------------------------------------------------------------------------------

Item

Description

Total

A

Vehicle Capacity
Weight for
Example 1

=

1,000 lbs
(453 kg)

B

Subtract Occupant
Weight 150 lbs
(68 kg)

×

2

=

300 lbs (136 kg)

C

Available Occupant
and Cargo Weight

=

700 lbs (317 kg)

Item

Description

Total

A

Vehicle Capacity
Weight for
Example 2

=

1,000 lbs
(453 kg)

B

Subtract Occupant
Weight 150 lbs
(68 kg)

×

5

=

750 lbs

(340 kg)

C

Available Cargo
Weight

=

250 lbs (113 kg)

Example 1

Example 2

4-27

-------------------------------------------------------------------------------------------------------------------------------------------------------------

Item

Description

Total

A

Vehicle Capacity
Weight for
Example 3

=

1,000 lbs
(453 kg)

B

Subtract Occupant
Weight 200 lbs
(91 kg)

×

5

=

1,000 lbs
(453 kg)

C

Available Cargo
Weight

=

0 lbs (0 kg)

Refer to your vehicle’s Tire and Loading
Information label for specific information about your
vehicle’s capacity weight and seating positions.

The combined weight of the driver, passengers,
and cargo should never exceed your vehicle’s
capacity weight.

Certification Label

A vehicle specific Certification label, found on the
rear edge of the driver’s door, tells you the gross
weight capacity of your vehicle, called the Gross
Vehicle Weight Rating (GVWR). The GVWR
includes the weight of the vehicle, all occupants,
fuel, and cargo. Never exceed the GVWR for your
vehicle, or the Gross Axle Weight Rating (GAWR)
for either the front or rear axle.

Example 3

4-28

-------------------------------------------------------------------------------------------------------------------------------------------------------------

And, if you do have a heavy load, you should
spread it out. See “Steps for Determining Correct
Load Limit” earlier in this section.

{

CAUTION:

Do not load your vehicle any heavier than
the Gross Vehicle Weight Rating (GVWR),
or either the maximum front or rear Gross
Axle Weight Rating (GAWR). If you do,
parts on your vehicle can break, and it can
change the way your vehicle handles.
These could cause you to lose control and
crash. Also, overloading can shorten the
life of your vehicle.

If you put things inside your vehicle — like
suitcases, tools, packages, or anything
else — they will go as fast as the vehicle goes.
If you have to stop or turn quickly, or if there is a
crash, they will keep going.

{

CAUTION:

Things you put inside your vehicle can
strike and injure people in a sudden stop
or turn, or in a crash.

Put things in the trunk of your vehicle.
In a trunk, put them as far forward as
you can. Try to spread the weight
evenly.

Never stack heavier things, like
suitcases, inside the vehicle so that
some of them are above the tops of
the seats.

Do not leave an unsecured child
restraint in your vehicle.

When you carry something inside the
vehicle, secure it whenever you can.

Do not leave a seat folded down
unless you need to.

4-29

-------------------------------------------------------------------------------------------------------------------------------------------------------------

Towing

Towing Your Vehicle

Consult your dealer/retailer or a professional towing
service if you need to have your disabled vehicle towed.
See Roadside Assistance Program on page 7-7.

If you want to tow your vehicle behind another vehicle
for recreational purposes (such as behind a motorhome),
see “Recreational Vehicle Towing” following.

Recreational Vehicle Towing

Recreational vehicle towing means towing your vehicle
behind another vehicle — such as behind a motorhome.
The two most common types of recreational vehicle
towing are known as “dinghy towing” (towing your
vehicle with all four wheels on the ground) and “dolly
towing” (towing your vehicle with two wheels on the
ground and two wheels up on a device known as
a “dolly”).

With the proper preparation and equipment, many
vehicles can be towed in these ways. See “Dinghy
Towing” and “Dolly Towing,” following.

Here are some important things to consider before you
do recreational vehicle towing:

What is the towing capacity of the towing vehicle?
Be sure you read the tow vehicle manufacturer’s
recommendations.

How far will you tow? Some vehicles have
restrictions on how far and how long they can tow.

Do you have the proper towing equipment?
See your dealer/retailer or trailering professional for
additional advice and equipment recommendations.

Is your vehicle ready to be towed? Just as you
would prepare your vehicle for a long trip, you
will want to make sure your vehicle is prepared to
be towed. See Before Leaving on a Long Trip
on page 4-18.

4-30

-------------------------------------------------------------------------------------------------------------------------------------------------------------

Dinghy Towing

You may dinghy tow your vehicle from the front following
these steps:

1. Set the parking brake.
2. Turn the ignition key to ACC/ACCESSORY to

unlock the steering wheel.

3. Shift an automatic transmission to NEUTRAL (N) or

a manual transmission to NEUTRAL.

4. Release the parking brake.

To prevent the battery from draining while the vehicle is
being towed, remove the following fuse from the floor
console fuse block: 8 (Ignition Switch, PASS-Key

®

III+).

See Floor Console Fuse Block on page 5-97 for more
information.

Remember to reinstall the fuse once you have reached
your destination.

Notice: If you exceed 65 mph (105 km/h) while
towing your vehicle, it could be damaged. Never
exceed 65 mph (105 km/h) while towing your vehicle.

Notice: Towing your vehicle from the rear could
damage it. Also, repairs would not be covered by
the warranty. Never have your vehicle towed from
the rear.

4-31

-------------------------------------------------------------------------------------------------------------------------------------------------------------

Dolly Towing

Your vehicle cannot be dolly towed, but can be dinghy
towed. See “Dinghy Towing” earlier in this section.

Notice: Dolly towing your vehicle may cause
damage because of reduced ground clearance.
Always tow your vehicle using the dinghy towing
procedure listed in this section or put your vehicle
on a flatbed truck.

Towing a Trailer
(Manual Transmission)

Do not tow a trailer if your vehicle is equipped with a
manual transmission.

Towing a Trailer
(Automatic Transmission)

{

CAUTION:

If you do not use the correct equipment and
drive properly, you can lose control when you
pull a trailer. For example, if the trailer is too
heavy, the brakes may not work well — or even
at all. You and your passengers could be
seriously injured. You may also damage your
vehicle; the resulting repairs would not be
covered by your warranty. Pull a trailer only if
you have followed all the steps in this section.
Ask your dealer/retailer for advice and
information about towing a trailer with your
vehicle.

Your vehicle can tow a trailer if it is equipped with an
automatic transmission and the proper trailer towing
equipment. If your vehicle is not equipped as stated
previously, do not tow a trailer. To identify the trailering
capacity of your vehicle, you should read the information
in “Weight of the Trailer” that appears later in this section.

4-32

-------------------------------------------------------------------------------------------------------------------------------------------------------------

Trailering is different than just driving your vehicle by
itself. Trailering means changes in handling, acceleration,
braking, durability and fuel economy. Successful, safe
trailering takes correct equipment, and it has to be used
properly.

That is the reason for this part. In it are many
time-tested, important trailering tips and safety rules.
Many of these are important for your safety and that of
your passengers. So please read this section carefully
before you pull a trailer.

Load-pulling components such as the engine,
transmission, wheel assemblies and tires are forced to
work harder against the drag of the added weight.
The engine is required to operate at relatively higher
speeds and under greater loads, generating extra heat.
Also, the trailer adds considerably to wind resistance,
increasing the pulling requirements.

If You Do Decide To Pull A Trailer

If you do, here are some important points:

There are many different laws, including speed limit
restrictions, having to do with trailering. Make sure
your rig will be legal, not only where you live but
also where you will be driving. A good source for this
information can be state or provincial police.

Consider using a sway control. You can ask a hitch
dealer about sway controls.

Do not tow a trailer at all during the first 1,000 miles
(1 600 km) your new vehicle is driven. Your engine,
axle or other parts could be damaged.

Then, during the first 500 miles (800 km) that you tow
a trailer, do not drive over 50 mph (80 km/h) and do
not make starts at full throttle. This helps your engine
and other parts of your vehicle wear in at the
heavier loads.

Obey speed limit restrictions when towing a trailer.
Do not drive faster than the maximum posted speed
for trailers, or no more than 55 mph (90 km/h), to
save wear on your vehicle’s parts.

Do not tow when the outside air temperature is
above 100°F (38°C).

Do not tow more than 1,000 miles (1 600 km)
per year.

Three important considerations have to do with weight:

The weight of the trailer

The weight of the trailer tongue

The total weight on your vehicle’s tires

4-33

-------------------------------------------------------------------------------------------------------------------------------------------------------------

Weight of the Trailer

How heavy can a trailer safely be?

It should never weigh more than 1,000 lbs (450 kg).
But even that can be too heavy.

It depends on how you plan to use your rig. For example,
speed, altitude, road grades, outside temperature and
how much your vehicle is used to pull a trailer are all
important. It can also depend on any special equipment
that you have on your vehicle, and the amount of tongue
weight the vehicle can carry. See “Weight of the Trailer
Tongue” later in this section for more information.

Maximum trailer weight is calculated assuming only the
driver is in the tow vehicle and it has all the required
trailering equipment. The weight of additional optional
equipment, passengers and cargo in the tow vehicle
must be subtracted from the maximum trailer weight.

You can ask your dealer/retailer for our trailering
information or advice. Also, see Customer Assistance
Offices 
on page 7-5 for more information.

Weight of the Trailer Tongue

The tongue load (A) of any trailer is an important weight
to measure because it affects the total or gross weight
of your vehicle. The Gross Vehicle Weight (GVW)
includes the curb weight of the vehicle, any cargo you
may carry in it, and the people who will be riding in the
vehicle.

If you have a lot of options, equipment, passengers, or
cargo in your vehicle, it will reduce the tongue weight your
vehicle can carry, which will also reduce the trailer weight
your vehicle can tow. And if you tow a trailer, you must
add the tongue load to the GVW because your vehicle will
be carrying that weight, too. See Loading Your Vehicle on
page 4-25 
for more information about your vehicle’s
maximum load capacity.

If you are using a weight-carrying hitch, the trailer
tongue (A) should weigh 10 to 15 percent of the total
loaded trailer weight (B).

After you have loaded your trailer, weigh the trailer and
then the tongue, separately, to see if the weights are
proper. If they are not, you may be able to get them right
simply by moving some items around in the trailer.

4-34

-------------------------------------------------------------------------------------------------------------------------------------------------------------

Total Weight on Your Vehicle’s Tires

Be sure your vehicle’s tires are inflated to the upper limit
for cold tires. You will find these numbers on the
Tire-Loading Information label. See Loading Your
Vehicle 
on page 4-25. Then be sure you do not go over
the GVW limit for your vehicle, including the weight of
the trailer tongue.

Hitches

It is important to have the correct hitch equipment.
Crosswinds, large trucks going by and rough roads are
a few reasons why you will need the right hitch. Here
are some rules to follow:

The rear bumper on your vehicle is not intended
for hitches. Do not attach rental hitches or other
bumper-type hitches to it. Use only a frame-mounted
hitch that does not attach to the bumper.

Will you have to make any holes in the body of your
vehicle when you install a trailer hitch? If you do, then
be sure to seal the holes later when you remove the
hitch. If you do not seal them, deadly carbon
monoxide (CO) from your exhaust can get into your
vehicle. See Engine Exhaust on page 2-36. Dirt and
water can also enter the vehicle.

Safety Chains

You should always attach chains between your vehicle
and your trailer. Cross the safety chains under the
tongue of the trailer so that the tongue will not drop to
the road if it becomes separated from the hitch.
Instructions about safety chains may be provided by the
hitch manufacturer or by the trailer manufacturer. Follow
the manufacturer’s recommendation for attaching safety
chains and do not attach them to the bumper. Always
leave just enough slack so you can turn with your rig.
And, never allow safety chains to drag on the ground.

Trailer Brakes

Does your trailer have its own brakes? Be sure to read
and follow the instructions for the trailer brakes so you
will be able to install, adjust and maintain them properly.
Do not try to tap into your vehicle’s brake system. If you
do, both brake systems will not work well, or at all.

4-35

-------------------------------------------------------------------------------------------------------------------------------------------------------------


Content      ..     12      13      14      15     ..