Oldsmobile Intrigue (2002 year). Manual - part 7


  Index      Oldsmobile     Oldsmobile Intrigue (2002 year) - manual in english


Search            copyright infringement  


Content      ..     5      6      7      8     ..


Oldsmobile Intrigue (2002 year). Manual - part 7


-------------------------------------------------------------------------------------------------------------------------------------------------------------
2-38

Windshield Washer

At the end of the lever on right side of the steering
wheel, is a wiper symbol.

To spray washer fluid on the windshield, push the button
on the end of the lever. The wipers will run for several
cycles and then either stop or return to the preset speed.

CAUTION:

In freezing weather, don’t use your washer until
the windshield is warmed. Otherwise the washer
fluid can form ice on the windshield, blocking
your vision.

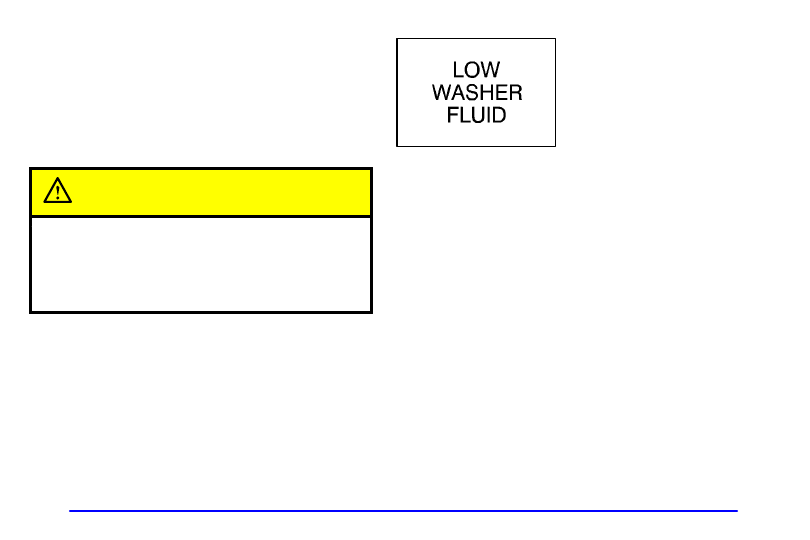
The LOW WASHER
FLUID light, located on the
instrument panel will come
on when your vehicle is low
on washer fluid.

If you see this light while driving, your vehicle’s washer
fluid is low. You should refill the windshield washer
fluid reservoir as soon as possible so that you’ll have
washer fluid when you need it.

-------------------------------------------------------------------------------------------------------------------------------------------------------------

-------------------------------------------------------------------------------------------------------------------------------------------------------------

2-39

Cruise Control

With cruise control, you can maintain a speed of about
25 mph (40 km/h) or more without keeping your foot 
on the accelerator. This can really help on long trips.
Cruise control does not work at speeds below about 
25 mph (40 km/h).

When you apply your brakes, the cruise control 
shuts off.

CAUTION:

Cruise control can be dangerous where you

can’t drive safely at a steady speed. So,
don’t use your cruise control on winding
roads or in heavy traffic.

Cruise control can be dangerous on

slippery roads. On such roads, fast changes
in tire traction can cause needless wheel
spinning, and you could lose control. Don’t
use cruise control on slippery roads.

If your vehicle is in cruise control when the optional
traction control system begins to limit wheel spin, 
the cruise control will automatically disengage. See
“Traction Control System” in the Index. When road
conditions allow you to safely use it again, you may turn
the cruise control back on.

-------------------------------------------------------------------------------------------------------------------------------------------------------------

-------------------------------------------------------------------------------------------------------------------------------------------------------------

2-40

Setting Cruise Control

CAUTION:

If you leave your cruise control switch on when
you’re not using cruise, you might hit a button
and go into cruise when you don’t want to. You
could be startled and even lose control. Keep the
cruise control switch off until you want to use
cruise control.

1. Press the CRUISE

button located on the
right side of the
instrument panel to turn
it on. A light in the
button will indicate that
the system is on.

2. Get up to the speed you want.

3. Press the COAST SET

button located on your
steering wheel and
release it.

4. Take your foot off the accelerator.

The CRUISE light on the instrument panel cluster will
come on after the cruise control has been set to the
desired speed. It will go off when you do the following:
D Step lightly on the brake pedal,
D press the CLEAR button located on the steering

wheel or

D press the CRUISE button located on the 

instrument panel.

-------------------------------------------------------------------------------------------------------------------------------------------------------------

-------------------------------------------------------------------------------------------------------------------------------------------------------------

2-41

Resuming a Set Speed

Suppose you set your cruise control at a desired speed
and then you either apply the brake or press the clear
button located on the steering column. This, of course
shuts off the cruise control. But you don’t need to reset
it because the system remembers the last set speed.

Once you’re going about 25 mph (40 km/h) or more,
press the RES ACCEL (Resume Accelerate) button
located on your steering wheel. You’ll go right back up
to your chosen speed and stay there.

Increasing Speed While Using Cruise Control

There are two ways to go to a higher speed:
D Use the accelerator pedal to get to the higher speed.

Press the COAST SET button located on the steering
wheel, then release the button and the accelerator
pedal. You’ll now cruise at the higher speed.

D Press the RES ACCEL button located on the steering

wheel. Hold it there until you get up to the speed you
want and then release the button. To increase your
speed in very small amounts, press the RES ACCEL
button briefly and then release it. Each time you do
this, your vehicle will go 1 mph (1.6 km/h) faster.

The accelerate feature will only work after you set the
cruise control speed by pressing the COAST SET button
located on the steering wheel.

Reducing Speed While Using Cruise Control

There are two ways to reduce your speed while using
cruise control:
D Press the COAST SET button located on the steering

wheel until you reach the lower speed you want, then
release it.

D To slow down in very small amounts, press the

COAST SET button located on the steering wheel
briefly and then release it. Each time you do this,
you’ll go 1 mph (1.6 km/h) slower.

Passing Another Vehicle While Using Cruise Control

Use the accelerator pedal to increase your speed. When
you take your foot off the pedal, your vehicle will slow
down to the cruise speed you set earlier.

-------------------------------------------------------------------------------------------------------------------------------------------------------------

-------------------------------------------------------------------------------------------------------------------------------------------------------------

2-42

Using Cruise Control on Hills

How well your cruise control will work on hills depends
upon your speed, load and the steepness of the hills.
When going up steep hills, you may have to step on the
accelerator pedal to maintain your speed. When going
downhill, you may have to brake or shift to a lower gear
to keep your speed down. Of course, applying the brake
takes you out of cruise control. Many drivers find this to
be too much trouble and don’t use cruise control on
steep hills.

Ending Cruise Control

There are three ways to cancel the cruise control:
D Step lightly on the brake pedal,
D press CLEAR located on the steering wheel or
D press the CRUISE button located on the 

instrument panel.

Erasing Cruise Speed Memory

When you turn off the cruise control or the ignition,
your cruise control set speed memory is erased.

Exterior Lamps

The lever on the left side of the steering column
operates the exterior lamps.

: Turn the outside part of the lever with this symbol

on it to operate the lamps.

The exterior lamp switch has three positions.

OFF:


Turning the switch to this position turns off all

lamps, except the Daytime Running Lamps, (DRL).

-------------------------------------------------------------------------------------------------------------------------------------------------------------

-------------------------------------------------------------------------------------------------------------------------------------------------------------

2-43

(Parking Lamps): Turning the switch to 

this position turns on the parking lamps together with
the following:
D Sidemarker Lamps
D Taillamps
D License Plate Lamp
D Instrument Panel Lights

 (Headlamps): Turning the switch to this position

turns on the headlamps, together with the previously
listed lamps and lights.

Turn the control to OFF to turn off the lamps.

A warning chime will sound, indicating the lamps are on
when the driver’s door is open and the ignition switch is
in the OFF or ACCESSORY position.

Daytime Running Lamps / Automatic
Headlamp Control

Daytime Running Lamps (DRL) can make it easier for
others to see the front of your vehicle during the day.
DRL can be helpful in many different driving
conditions, but they can be especially helpful in the
short periods after dawn and before sunset. Fully
functional daytime running lamps are required on all
vehicles first sold in Canada.

A light sensor on top of the instrument panel makes the
DRL work, so be sure it isn’t covered.

The DRL system will make your front turn signal lamps
come on when the following conditions are met:
D The ignition is on,
D the exterior lamp control is not in the headlamp

position position and

D the parking brake is released.
When the DRL are on, only your front turn signal lamps
will be on. The headlamps, taillamps, sidemarker and
other lamps won’t be on. The instrument panel won’t be
lit up either.

-------------------------------------------------------------------------------------------------------------------------------------------------------------

-------------------------------------------------------------------------------------------------------------------------------------------------------------

2-44

When it’s dark enough outside, your front turn signal
lamps will turn off and your headlamps and parking
lamps will turn on.

When it’s bright enough outside, your headlamps will go
off and your front turn signal lamps will come on.

To idle your vehicle with the DRL or automatic
headlamps off, set the parking brake while the ignition is
in OFF. Then start your vehicle. The DRL, headlamps
and parking lamps will stay off until you release the
parking brake.

To turn off the automatic headlamp feature when it’s
dark outside, move the exterior lamp control to the
parking lamp position. Your parking lamps will remain
illuminated and your headlamps will turn off. The fog
lamps (if equipped) will also be lit if they were on when
you changed to the parking lamp position.

As with any vehicle, you should turn on the regular
headlamp system when you need it.

Fog Lamps (If Equipped)

The fog lamps are located
on the left side of the
instrument panel.

The parking lamps must be on or your fog lamps will
not illuminate.

To turn the fog lamps on, press the top of the fog lamp
switch. Press the bottom of the switch to turn the fog
lamps off. A light will glow in the switch to let you
know that they are on.

The fog lamps will go off whenever you change to
high

-

beam headlamps. When you return to low beams,

the fog lamps will come on again.

-------------------------------------------------------------------------------------------------------------------------------------------------------------

-------------------------------------------------------------------------------------------------------------------------------------------------------------

2-45

Interior Lamps

Instrument Panel Brightness Control

This feature controls the brightness of the instrument
panel lights.

The thumbwheel for this
feature is located on the left
side of the instrument panel.

Turn the thumbwheel upward to increase the brightness
of the instrument panel lights or downward to decrease
the brightness.

Parade Mode

The instrument panel brightness control has an added
feature called parade mode to assist you in seeing
certain instrument panel controls if your headlamps 
are on in the daylight.

Without turning the courtesy lamps on, turn the
instrument panel brightness thumbwheel all the way to
the top. The radio, season/trip odometer, gearshift
selection indicator on the instrument panel cluster and
the heating and air conditioning controls will come on at
their maximum brightness. This will occur only when
the parking lamps or headlamps are on.

Courtesy Lamps

When any door is opened, several lamps come on. These
lamps are courtesy lamps. They make it easy for you to
enter and leave your vehicle. You can also turn these
lamps on by turning the instrument panel brightness
thumbwheel all the way up or by turning on each
individual lamp.

-------------------------------------------------------------------------------------------------------------------------------------------------------------

-------------------------------------------------------------------------------------------------------------------------------------------------------------

2-46

Illuminated Entry

Your courtesy lamps will come on and stay on for a set
time whenever you press UNLOCK on the remote
keyless entry transmitter (if equipped).

If you open a door, the lamps will stay on while it’s open
then turn off automatically about 25 seconds after you
close it. If you press UNLOCK and don’t open a door,
the lamps will turn off after about 40 seconds.

Illuminated entry includes a feature called theater
dimming. With theater dimming, the lamps don’t just
turn off at the end of the delay time. Instead, they slowly
dim after the delay time until they go out. The delay
time is cancelled if you turn the ignition key to ON 
so that the lamps will dim out right away. When the
ignition is on, illuminated entry is inactive, which 
means the courtesy lamps won’t come on unless 
a door is opened.

Illumination on Door Handle Activation

Illumination on door handle activation is a standard
feature intended to provide enhanced security and
convenience by allowing the driver to activate the
vehicle interior illumination without unlocking or
opening any vehicle door.

The ignition must be off and the doors locked for the
illumination on door handle activation to work. The
illumination on door handle activation feature can
function in two ways.

If the driver pulls and releases any front door handle
within one second, the interior lamps will illuminate
until one of the following occurs:
D The ignition is turned to ON,
D the power door locks are activated or
D an illumination period of 25 seconds has elapsed.
Or, if the driver pulls and holds any front door handle
for more than one second, the interior lamps will
illuminate until one of the following occurs:
D The ignition is turned to ON,
D the door handle is released or
D an illumination period of 50 seconds has elapsed.
If during the illumination period a door is opened, 
the timed illumination period will be cancelled, though
the interior lamps will remain on because a vehicle door
is open.

-------------------------------------------------------------------------------------------------------------------------------------------------------------

-------------------------------------------------------------------------------------------------------------------------------------------------------------

2-47

Delayed Illumination

The delayed illumination feature will continue to
illuminate the interior for 25 seconds after all doors have
been closed so that you can find the ignition and buckle
your seat belt at night. Delayed illumination will not
occur while the ignition is in ON. After 25 seconds have
elapsed, the interior lamps will slowly fade out. The
lamps will fade out before 25 seconds have elapsed if
you do one of the following:
D Turn the ignition to ON.
D Lock all doors using your remote keyless entry

transmitter (if equipped).

D Lock the doors using the power door lock switch.
If during the delayed illumination period a door is
opened, the timed illumination period will be cancelled,
though the interior lamps will remain on because a door
is open.

Exit Illumination

To see better when exiting your vehicle at night, your
vehicle is equipped with an exit illumination feature.
The interior lamps will illuminate for up to 25 seconds
when you remove your key from the ignition. After 
25 seconds have elapsed, the interior lamps will slowly
fade out. The lamps will fade out before the 25 seconds
have elapsed if you do one of the following:
D Turn the ignition to ON.
D Lock all doors using your remote keyless entry

transmitter (if equipped).

D Lock the doors using the power door lock switch.
When any door is opened, exit illumination is cancelled.
The interior lamps will stay on when any door is open.
The interior lamps may stay on for up to 25 seconds
after all the doors have been closed if they have not been
locked. See “Delayed Illumination” in the Index.

-------------------------------------------------------------------------------------------------------------------------------------------------------------

-------------------------------------------------------------------------------------------------------------------------------------------------------------

2-48

Battery Saver

Your vehicle has a feature to help prevent you from
draining the battery in case you accidentally leave an
interior or trunk lamp on. If you leave any of these
lamps on while the ignition is in ACCESSORY or 
OFF, they will automatically turn off after 20 minutes.
The lamps won’t come back on until you do one of 
the following:
D Turn the ignition to ON,
D turn the instrument panel brightness thumbwheel all

the way up or

D open or close and reopen a door that is closed.
If the vehicle has less than 15 miles (25 km) on the
odometer, the battery saver will turn off the lamps after
only three minutes.

Mirrors

Adjust all mirrors so you can see clearly when you are
sitting in a comfortable position.

Inside Day/Night Rearview Mirror

To reduce glare from any lights or headlamps behind
you, push the lever located on the bottom center of the
mirror away from you to the night position. To return
the mirror back to the day position, pull the lever 
toward you.

-------------------------------------------------------------------------------------------------------------------------------------------------------------

-------------------------------------------------------------------------------------------------------------------------------------------------------------

2-49

Electrochromic Day/Night Rearview Mirror
with Compass and Map Lamps (If Equipped)

Your vehicle may have an automatic electrochromic
day/night rearview mirror with a compass and map
lamps. The mirror automatically changes to reduce glare
from any headlamps behind you. A time delay feature
also prevents rapid changing from the day to the night
position while driving under lights and through traffic.

The mirror has an eight

-

point compass display located

in the upper corner of the mirror face. When the
compass display is turned on, the compass automatically
calibrates as the vehicle is driven.

The button to turn the compass/automatic dimming on
or off is located on the bottom of the rearview mirror It
has IO on it. Map lamp buttons are located on either side
of the compass automatic dimming button.

IO (Compass/Automatic Dimming): The compass
display feature is turned on or off by pressing the IO
button for more than three seconds. Automatic dimming
is turned on and off by pressing the IO button for less
than three seconds.

-------------------------------------------------------------------------------------------------------------------------------------------------------------

-------------------------------------------------------------------------------------------------------------------------------------------------------------

2-50

 (Maplamp): Press one of the buttons with this

symbol on it to turn on either the driver’s or passenger’s
maplamp. Press each button again to turn it off.

When cleaning the mirror, use a paper towel or similar
material dampened with glass cleaner. Do not spray
glass cleaner directly on the mirror housing.

If the compass needs to be recalibrated, see “Compass
Calibration” in the Index.

Electrochromic Day/Night Rearview 
Mirror with Compass Display and OnStar

R

(If Equipped)

Your vehicle may have an automatic electrochromic
day/night rearview mirror with a compass display and
the OnStar system.

When turned on, this mirror functions exactly like the
electrochromic mirror described previously. See
“Mirrors, Electrochromic Rearview with Compass” in
the Index for more information.

The mirror has an eight

-

point compass display in the

upper right corner of the mirror face and a three

-

button

OnStar system. There are also two map lamps located on
the bottom of the mirror. Each lamp is turned on or off
with a button located next to the lamp.

 (On/Off/Automatic Dimming): This button is

located on the lower left side of the mirror face. It is
used to turn the automatic dimming and compass
features of the mirror on and off.

The automatic dimming feature is turned on or off by
pressing the on/off button for up to three seconds. If the
button is pressed and held for five to seven seconds, the
compass display will go blank.

There are three buttons for the OnStar system. See your
dealer for more information on the system and how to
subscribe to OnStar. See “OnStar

R

 System” in the Index

for more information on the services OnStar provides.

-------------------------------------------------------------------------------------------------------------------------------------------------------------

-------------------------------------------------------------------------------------------------------------------------------------------------------------

2-51

Compass Calibration

Press the on/off button for eight seconds to activate 
the compass calibration mode. The letter C will be
displayed in the compass window on the mirror.

The mirror can be calibrated in one of two ways:
D Drive the vehicle in circles at 5 mph (8 km/h) or less

until the display indicates a direction or until C is no
longer displayed in the compass window.

D Drive the vehicle on your everyday routine.

Compass Variance

Compass variance is the difference between earth’s
magnetic north and true geographic north. If not
adjusted to account for compass variance, your compass
could give false readings. The mirror is set in zone eight
upon leaving the factory. It will be necessary to adjust
the compass to compensate for compass variance if you
live outside zone eight. Under certain circumstances,
such as during a long distance cross

-

country trip, it will

be necessary to adjust for compass variance.

To adjust for compass variance do the following:

1. Find your current location and variance zone number

on the following zone map.

2. Make sure the compass is in calibration mode. See

“Compass Calibration” in the Index. Press the on/off
button to display the zone number.

3. Scroll through the zone numbers that appear in the

compass window of the mirror. Once you find your
zone number in the window, release the on/off
button. After about four seconds, the mirror will
return to the compass display, and the new zone
number will be set. Compass calibration may be
necessary. See “Compass Calibration” in the Index.

-------------------------------------------------------------------------------------------------------------------------------------------------------------

-------------------------------------------------------------------------------------------------------------------------------------------------------------

2-52

Power Outside Rearview Mirrors

The power mirror controls
are located near the driver’s
window, on the armrest.

Move the selector switch to the left to adjust the driver’s
side mirror or to the right to adjust the passenger’s side
mirror. Use one of the arrows located on the control pad
to move the mirror in the direction that you want it to
go. Once the mirror is adjusted, move the selector
switch to the middle position.

You can fold the mirrors in before entering a car wash.
Pull the mirrors inward toward the vehicle. Push them
back out when finished.

Convex Outside Mirror

Your passenger’s side mirror is convex. A convex
mirror’s surface is curved so you can see more from the
driver’s seat.

CAUTION:

A convex mirror can make things (like other
vehicles) look farther away than they really are.
If you cut too sharply into the right lane, you
could hit a vehicle on your right. Check your
inside mirror or glance over your shoulder before
changing lanes.

Storage Compartments

Glove Box

Use the key to lock and unlock the glove box.

-------------------------------------------------------------------------------------------------------------------------------------------------------------

-------------------------------------------------------------------------------------------------------------------------------------------------------------

2-53

Center Console

To open the storage area located between the driver’s
and passenger’s seat, press back on the front edge and
lift the cover. The console has a cassette tape and
compact disc storage area and a coinholder. The
cupholder is located below the storage area. Push down
on the door and the cupholder will come out.

Rear Console Cupholders

Two cupholders are located in the rear of the front
console. Pull down to use the cupholders.

Convenience Net (If Equipped)

Your vehicle may have a convenience net. You’ll see it
on the back wall of the trunk.

Put small loads, like grocery bags, behind the net. It can
help keep them from falling over during sharp turns or
quick starts and stops.

The net isn’t for larger, heavier loads. Store them in the
trunk as far forward as you can.

You can unhook the net so that it will lie flat when
you’re not using it. You can also push the net down and
secure it under the plastic hooks.

Ashtray and Cigarette Lighter

When your vehicle is delivered, the ashtray and cigarette
lighter will be in a plastic bag placed in the center
console storage area. If the ashtray and lighter are
needed, insert the ashtray and holder into the stationary
open cupholder in front of the shift lever.

The cigarette lighter outlet is located behind a flip

-

out

door below the heating and air conditioning controls.

-------------------------------------------------------------------------------------------------------------------------------------------------------------


Content      ..     5      6      7      8     ..