Oldsmobile Intrigue (2002 year). Manual - part 5


  Index      Oldsmobile     Oldsmobile Intrigue (2002 year) - manual in english


Search            copyright infringement  


Content      ..     3      4      5      6     ..


Oldsmobile Intrigue (2002 year). Manual - part 5


-------------------------------------------------------------------------------------------------------------------------------------------------------------
2-6

Door Locks

CAUTION:

Unlocked doors can be dangerous.
Passengers 

--

 especially children 

--

 can

easily open the doors and fall out of a
moving vehicle. When a door is locked, the
handle won’t open it. You increase the
chance of being thrown out of the vehicle in
a crash if the doors aren’t locked. So, wear
safety belts properly and lock the doors
whenever you drive.

Young children who get into unlocked

vehicles may be unable to get out. A child
can be overcome by extreme heat and can
suffer permanent injuries or even death
from heat stroke. Always lock your vehicle
whenever you leave it.

Outsiders can easily enter through an

unlocked door when you slow down or stop
your vehicle. Locking your doors can help
prevent this from happening.

There are several ways to lock and unlock your vehicle.

From the outside, use your key or keyless entry
transmitter (if equipped).

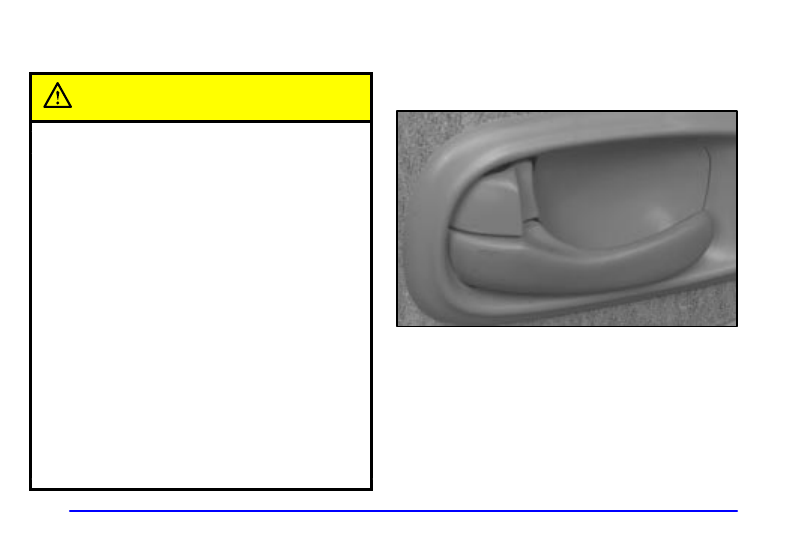
From the inside, use the manual lever located above
each door handle to lock or unlock each door. Move the
lever forward to lock a door and rearward to unlock it.

-------------------------------------------------------------------------------------------------------------------------------------------------------------

-------------------------------------------------------------------------------------------------------------------------------------------------------------

2-7

Power Door Locks

Press the power door lock
switch located on either
front door near the handle to
lock or unlock all the doors.

The rear doors do not have power door lock switches.
Push the manual lever located above each rear door
handle forward to lock and rearward to unlock 
each door.

Last Door Closed Locking

This feature allows the doors to be locked while the
passengers are leaving the vehicle. It also provides a
brief time period after all the doors are closed, 
but before the doors lock, in which the doors may 
be reopened.

Last door closed locking is activated by either pressing
one of the power door lock switches located on the front
doors inside the vehicle or by pressing LOCK on the
remote keyless entry transmitter (if equipped). After
pressing one of the power door lock switches or the
keyless entry LOCK once, three chimes will be heard.
The three chimes indicate that the last door closed
locking has been activated.

If you wish to let the last door closed locking feature
complete the locking cycle, no additional action is
required. The last door closed locking feature will lock
the doors automatically after all the doors have been
closed for a period of five seconds. During this five
second period, any door may be reopened.

You can customize the last door closed locking feature
to enable or disable it. If disabled, the doors will lock
immediately when a power door lock switch is pressed.

-------------------------------------------------------------------------------------------------------------------------------------------------------------

-------------------------------------------------------------------------------------------------------------------------------------------------------------

2-8

Programmable Modes

Mode 1: Last Door Closed Locking Feature is off.

Mode 2: Last Door Closed Locking Feature is on.

Before your vehicle was shipped from the factory, it was
programmed to Mode 2. The mode to which your
vehicle was programmed may have been changed since
it left the factory. To determine the mode to which your
vehicle is programmed or to program your vehicle to a
different mode, do the following:

1. Close all doors and turn the ignition switch to ON.

2. Press and hold the power door lock switch in the

unlock position.

3. While holding the door unlock switch, cycle the

transaxle out of and back into PARK (P). Count the
number of chimes you hear. The number of chimes
tells you which mode your vehicle is set for. (If you
do not wish to change the current mode, you can
either exit the programming mode by following the
instructions listed here or program the next feature
available on your vehicle).

4. A single chime will be heard if the last door closed

locking feature is disabled, and two chimes will be
heard if the feature is enabled. After the initial
transaxle cycle, each additional cycle will turn the
last door closed locking feature on or off.

5. When the door unlock switch is released, the vehicle

will remain in the most recent operating mode.

The mode you selected is now set. You can either 
exit the programming mode by following the
instructions above or program the next feature
available on your vehicle.

Disconnecting the battery for up to a year will not
change or delete any previously programmed modes.

-------------------------------------------------------------------------------------------------------------------------------------------------------------

-------------------------------------------------------------------------------------------------------------------------------------------------------------

2-9

Programmable Automatic Door Locks

Programmable automatic door locks is a standard
feature intended to provide enhanced security and
convenience by automatically locking and unlocking
vehicle doors. The automatic locking and unlocking 
of the vehicle will occur if the ignition key is in ON and
the driver’s door is closed when the vehicle is shifted
out of PARK (P).

Programmable Modes

Mode 1: No automatic door lock or unlock.

Mode 2: Automatic all door lock when the transaxle is
shifted out of PARK (P). No automatic door unlock.

Mode 3: Automatic all door lock when the transaxle is
shifted out of PARK (P). Automatic all door unlock
when the transaxle is shifted into PARK (P).

Mode 4: Automatic all door lock when the transaxle is
shifted out of PARK (P). Automatic driver’s door only
unlock when the transaxle is shifted into PARK (P).

Before your vehicle was shipped from the factory, it was
programmed to Mode 3. The mode to which your
vehicle was programmed may have been changed since
it left the factory. To determine the mode to which your
vehicle is programmed or to program your vehicle to a
different mode, do the following:

1. Close all doors and turn the ignition switch to ON.

2. Press and hold the power door lock switch in the

lock position.

3. While holding the door lock switch, cycle the

transaxle out of and back into PARK (P). The door
lock and unlock functions will operate as defined,
depending upon the current mode selected. (If you
do not wish to change the current mode, you can
either exit the programming mode by following the
instructions listed here or program the next feature
available on your vehicle).

4. After an initial transaxle cycle, each additional cycle

will advance the operating mode by one, starting
from the current operating mode.

5. If cycled beyond Mode 4, the vehicle will enter

operating Mode 1. When the door lock switch is
released, the vehicle will remain in the most recent
operating mode.

The mode you selected is now set. You can either 
exit the programming mode by following the
instructions above or program the next feature 
available on your vehicle.

Disconnecting the battery for up to a year will not
change or delete any previously programmed modes.

-------------------------------------------------------------------------------------------------------------------------------------------------------------

-------------------------------------------------------------------------------------------------------------------------------------------------------------

2-10

Rear-Door Security Locks

Your vehicle is equipped with rear door security locks
that help prevent passengers from opening the rear doors
of your vehicle from the inside.

To use one of these locks, do the following:

1. Open one of the rear doors.

2. On the inside of the rear

door will be a lock with
a label as shown. Slide
the lever located next to
the label upward to
engage the lock.

3. Close the door.

4. Repeat the procedure on the other rear door lock.

To disengage the lock(s), reverse the steps.

The rear doors on your vehicle cannot be opened from
the inside when this feature is in use. If you want to
open the rear door when the security lock is on, unlock
the door from the inside and then open the door from 
the outside.

Lockout Prevention

Lockout Prevention is a standard feature intended to
provide enhanced security and convenience. This feature
prevents a driver who has left the key in the ignition
from locking the doors using the power door lock switch
while any door is open.

This feature cannot guarantee that you will never be
locked out of your vehicle. If you don’t leave the key in
the ignition, or if you use the manual door lock, you
could still lock your keys inside your vehicle. Always
remember to take your keys with you.

-------------------------------------------------------------------------------------------------------------------------------------------------------------

-------------------------------------------------------------------------------------------------------------------------------------------------------------

2-11

Programmable Modes

Mode 1: Turns feature on.

Mode 2: Turns feature off.

Before your vehicle was shipped from the factory, it was
programmed to Mode 1. The mode to which your
vehicle was programmed may have been changed since
it left the factory. To determine the mode to which your
vehicle is programmed or to program your vehicle to a
different mode, do the following:

1. Open a door and put the key in the ignition.

2. Hold down the power door lock switch for more than

three seconds. This will turn the feature off or on,
depending upon the current mode selected. (If you
do not wish to change the current mode, you can
either exit the programming mode by following the
instructions listed here or program the next feature
available on your vehicle).

3. When the door lock switch is released, the vehicle

will remain in the most recent operating mode.

The mode you selected is now set. You can either 
exit the programming mode by following the
instructions above or program the next feature 
available on your vehicle.

Remote Keyless Entry System 
(If Equipped)

If your vehicle has this feature, you can lock and unlock
your doors or unlock your trunk from about 3 feet (1 m)
up to 30 feet (9 m) away using the remote keyless entry
transmitter supplied with your vehicle.

Your keyless entry system operates on a radio frequency
subject to Federal Communications Commission (FCC)
Rules and with Industry Canada.

This device complies with Part 15 of the FCC Rules.
Operation is subject to the following two conditions: 
(1) this device may not cause harmful interference, 
and (2) this device must accept any interference
received, including interference that may cause
undesired operation.

This device complies with RSS

-

210 of Industry Canada.

Operation is subject to the following two conditions: 
(1) this device may not cause interference, and (2) this
device must accept any interference received, including
interference that may cause undesired operation of 
the device.

-------------------------------------------------------------------------------------------------------------------------------------------------------------

-------------------------------------------------------------------------------------------------------------------------------------------------------------

2-12

Changes or modifications to this system by other than an
authorized service facility could void authorization to
use this equipment.

At times you may notice a decrease in range. This is
normal for any remote keyless entry system. If the
transmitter does not work or if you have to stand closer
to your vehicle for the transmitter to work, try this:
D Check the distance. You may be too far from your

vehicle. You may need to stand closer during rainy
or snowy weather.

D Check the location. Other vehicles or objects may be

blocking the signal. Take a few steps to the left or
right, hold the transmitter higher, and try again.

D Check to determine if battery replacement is

necessary. See the instructions that follow.

D If you’re still having trouble, see your dealer or a

qualified technician for service.

Operation

Press UNLOCK once to
unlock the driver’s door and
to turn the interior lamps
on. See “Illumination on
Remote Activation” in the
Index for more details.

Press UNLOCK again within five seconds to unlock all
doors. To lock all doors, press LOCK. To unlock the
trunk, press the trunk symbol on the remote keyless
entry transmitter. The trunk will only unlock when the
vehicle is in PARK (P).

-------------------------------------------------------------------------------------------------------------------------------------------------------------

-------------------------------------------------------------------------------------------------------------------------------------------------------------

2-13

Remote Panic Alarm

When you press the panic button with the horn symbol
on the remote keyless entry transmitter, the headlamps
will flash, the horn will sound repeatedly and the
interior lamps will illuminate. This will allow you to
attract attention if needed. The alarm will continue until
one of the following occurs:
D The driver presses the panic button with the horn

symbol on the remote keyless entry transmitter 
a second time,

D the ignition is turned to ON or
D 110 seconds has elapsed.

Remote Activation Verification (RAV)

This feature helps provide audible and/or visible
feedback that a remote keyless entry lock or unlock
command has been received and executed. The ignition
must be in OFF for the Remote Activation Verification
(RAV) to work.

You may select one of four operating modes for 
lock and unlock commands. The selection and
programming of the lock and unlock modes are
independent of each other.

Programmable Modes

Mode 1: No Verification

Mode 2: Horn Chirp only

Mode 3: Headlamp and Parking Lamp Flash only

Mode 4: Horn Chirp and Headlamp and Parking 
Lamp Flash

-------------------------------------------------------------------------------------------------------------------------------------------------------------

-------------------------------------------------------------------------------------------------------------------------------------------------------------

2-14

RAV Lock Mode Programming

Before your vehicle was shipped from the factory, it was
programmed to Mode 3. The mode to which your
vehicle was programmed may have been changed since
it left the factory. To determine the RAV lock mode to
which your vehicle is programmed, or to program your
vehicle to a different mode, do the following:

1. Close all doors and turn the ignition switch to ON.

2. Press and hold down the power door lock switch in

the lock position.

3. While holding the door lock switch, press and

release the remote keyless entry transmitter 
LOCK button. This button press will initialize the
customization mode. Upon initiation of this mode,
the chime will sound. Count the number of chimes
you hear. The number of chimes tells you which
mode your vehicle is set for. (If you do not wish to
change the current mode, you can either exit the
programming mode by following the instructions
listed here or program the next feature available on
your vehicle).

4. Each additional press of the remote keyless entry

transmitter LOCK button will cause the vehicle to
advance to the RAV lock mode by one, starting 
from the current RAV lock mode.

5. If cycled beyond RAV lock Mode 4, the vehicle will

enter RAV lock Mode 1. When the door lock switch
is released, the vehicle will remain in the most recent
RAV lock mode.

RAV Unlock Mode Programming

Before your vehicle was shipped from the factory, it was
programmed to Mode 1. The mode to which your
vehicle was programmed may have been changed since
it left the factory. To determine the RAV unlock mode to
which your vehicle is programmed or to program your
vehicle to a different mode, do the following:

1. Close all doors and turn the ignition switch to ON.

2. Press and hold down the power door lock switch in

the unlock position.

-------------------------------------------------------------------------------------------------------------------------------------------------------------

-------------------------------------------------------------------------------------------------------------------------------------------------------------

2-15

3. While holding the door lock switch, press and

release the remote keyless entry transmitter
UNLOCK button. This button press will initialize
the customization mode. Upon initiation of this
mode, the chime will sound. Count the number of
chimes you hear. The number of chimes tells you
which mode your vehicle is set for. (If you do not
wish to change the current mode, you can either exit
the programming mode by following the instructions
listed here or program the next feature available on
your vehicle).

4. Each additional press of the remote keyless entry

transmitter UNLOCK button will cause the vehicle
to advance the RAV unlock mode by one, starting
from the current RAV unlock mode.

5. If cycled beyond RAV unlock Mode 4, the vehicle

will enter RAV unlock Mode 1. When the door lock
switch is released, the vehicle will remain in the
most recent RAV unlock mode.

The mode you selected is now set. You can either 
exit the programming mode by following the
instructions above or program the next feature 
available on your vehicle.

Disconnecting the battery for up to a year will not
change or delete any previously programmed modes.

Illumination on Remote Activation

This feature is included on vehicles with the remote
keyless entry system. The interior illumination will be
activated when a remote keyless entry door unlock
command is received. The ignition must be off for the
remote activation illumination to work. The interior
lamps will illuminate until the ignition is turned to 
ON or until the illumination period of 40 seconds 
has elapsed.

If during the illumination period, a door is opened, the
timed illumination period will be cancelled, though the
interior lamps will remain on until all doors are closed.

Matching Transmitter(s) to Your Vehicle

Each remote keyless entry transmitter is coded to
prevent another transmitter from unlocking your vehicle.
If a transmitter is lost or stolen, a replacement can be
purchased through your dealer. Remember to bring any
remaining transmitters with you when you go to your
dealer. When the dealer matches the replacement
transmitter to your vehicle, any remaining transmitters
must also be matched. Once your dealer has coded the
new transmitter, the lost transmitter will not unlock your
vehicle. Each vehicle can have a maximum of four
transmitters matched to it.

-------------------------------------------------------------------------------------------------------------------------------------------------------------

-------------------------------------------------------------------------------------------------------------------------------------------------------------

2-16

Battery Replacement

Under normal use, the battery in your remote keyless
entry transmitter should last about three years.

You can tell the battery is weak if the transmitter won’t
work at the normal range in any location. If you have to
get close to your vehicle before the transmitter works,
it’s probably time to change the battery.

NOTICE:

When replacing the battery, use care not to 
touch any of the circuitry. Static from your 
body transferred to these surfaces may damage
the transmitter.

To replace the battery do the following:

1. Insert a flat object like a coin into the slot on the

back of the transmitter. Gently pry apart the front
and back.

2. Gently pry the battery out of the transmitter. 

Do not use a metal object.

3. Put the new battery into the transmitter as shown on

the transmitter. Use a type CR2032 battery.

4. Put the two halves back together. Make sure the

halves are together tightly so water won’t get in.

5. Test the operation of the transmitter.

-------------------------------------------------------------------------------------------------------------------------------------------------------------

-------------------------------------------------------------------------------------------------------------------------------------------------------------

2-17

Trunk

CAUTION:

It can be dangerous to drive with the trunk lid
open because carbon monoxide (CO) gas can
come into your vehicle. You can’t see or smell
CO. It can cause unconsciousness and even death.

If you must drive with the trunk lid open or if
electrical wiring or other cable connections must
pass through the seal between the body and the
trunk lid:
Make sure all other windows are shut.

Turn the fan on your heating or cooling

system to its highest speed with the setting
on VENT. That will force outside air into
your vehicle. See “Comfort Controls” in 
the Index.

If you have air outlets on or under the

instrument panel, open them all the way.

See “Engine Exhaust” in the Index.

Trunk Lock

To unlock the trunk from the outside, insert the key and
turn it clockwise.

You can also use the remote keyless entry transmitter 
(if equipped).

Remote Trunk Release

Press the button on the 
left side of the instrument
panel to unlock the trunk
from inside your vehicle.
Your vehicle must be 
in PARK (P).

-------------------------------------------------------------------------------------------------------------------------------------------------------------

-------------------------------------------------------------------------------------------------------------------------------------------------------------

2-18

Trunk Release Handle

NOTICE:

The trunk release handle was not designed to be
used to tie down the trunk lid or as an anchor
point when securing items in the trunk. Improper
use of the trunk release handle could damage it.

There is a glow

-

in

-

the

-

dark trunk release handle located

inside the trunk on the latch. This handle will glow
following exposure to light. Pull the release handle up to
open the trunk from the inside.

Trap-Resistant Trunk Kit

To help prevent a child from becoming trapped in your
trunk, you can order a trap

-

resistant trunk kit from your

dealer. This kit includes:
D a modified trunk latch,
D a lighted release handle, and
D seatback tethers (for vehicles with folding 

rear seatbacks).

See your dealer for additional information.

Theft

Vehicle theft is big business, especially in some cities.
Although your vehicle has a number of theft

-

deterrent

features, we know that nothing we put on it can make 
it impossible to steal. However, there are ways you 
can help.

-------------------------------------------------------------------------------------------------------------------------------------------------------------

-------------------------------------------------------------------------------------------------------------------------------------------------------------

2-19

Key in the Ignition

If you leave your vehicle with the keys inside, it’s an
easy target for joy riders or professional thieves 

--

 so

don’t do it.

When you park your vehicle and open the driver’s door,
you’ll hear a chime reminding you to remove your key
from the ignition and take it with you. Always do this.
Your ignition and transaxle will be locked. And
remember to lock the doors.

Parking at Night

Park in a lighted spot, close all windows and lock your
vehicle. Remember to keep your valuables out of sight.
Put them in a storage area, or take them with you.

Parking Lots

Even if you park in a lot where someone will be
watching your vehicle, it’s still best to lock it up and
take your keys. But what if you have to leave your
ignition key?
D If possible, park in a busy, well

-

lit area.

D Put your valuables in a storage area, like your trunk

or glove box.

D Be sure to close and lock the storage area.
D Close all windows.
D Lock the glove box.
D Lock all the doors except the driver’s.
D Then take the remote keyless entry transmitter 

with you.

-------------------------------------------------------------------------------------------------------------------------------------------------------------

-------------------------------------------------------------------------------------------------------------------------------------------------------------

2-20

Passlock

R

Your vehicle is equipped with the Passlock
theft

-

deterrent system.

Passlock is a passive theft

-

deterrent system. Passlock

enables fuel to go to the engine if the ignition lock
cylinder is turned with a valid key. If a correct key is not
used or the ignition lock cylinder is tampered with, fuel
flow is disabled.

During normal operation, the SECURITY light will 
go off approximately five seconds after the key is turned
to START.

If the engine stalls and the SECURITY light flashes,
wait until the light stops flashing before trying to restart
the engine. Remember to release the key from START
as soon as the engine starts.

If the engine is running and the SECURITY light comes
on, you will be able to restart the engine if you turn the
engine off. However, your Passlock system is not working
properly and must be serviced by your dealer. Your vehicle
is not protected by Passlock at this time. You may also
want to check the fuse. See “Fuses and Circuit Breakers”
in the Index. See your dealer for assistance.

In an emergency, contact Oldsmobile Roadside
Assistance. See “Roadside Assistance” in the Index 
for more information.

New Vehicle “Break

-

In”

NOTICE:

Your vehicle doesn’t need an elaborate
“break

-

in.” But it will perform better in the long

run if you follow these guidelines:
Don’t drive at any one speed 

--

 fast or 

slow 

--

 for the first 500 miles (805 km).

Don’t make full

-

throttle starts.

Avoid making hard stops for the first 

200 miles (322 km) or so. During this time
your new brake linings aren’t yet broken
in. Hard stops with new linings can mean
premature wear and earlier replacement.
Follow this breaking

-

in guideline every

time you get new brake linings.

Don’t tow a trailer during break

-

in. 

See “Towing a Trailer” in the Index for
more information.

-------------------------------------------------------------------------------------------------------------------------------------------------------------

-------------------------------------------------------------------------------------------------------------------------------------------------------------

2-21

Ignition Positions

With the key in the ignition switch, you can turn the key
to four different positions.

Your ignition switch is located on the instrument panel.

A (OFF): This position locks your ignition and
transaxle. It’s a theft

-

deterrent feature. It’s also the 

only position from which you can remove your key.

NOTICE:

If your key seems stuck in OFF and you can’t
turn it, be sure you are using the correct key; if
so, is it all the way in? Turn the key only with
your hand. Using a tool to force it could break
the key or the ignition switch. If none of this
works, then your vehicle needs service.

B (ACCESSORY): This position lets you turn off the
ignition. It also lets you use things like the radio and
windshield wipers when the engine is off. In this position
your steering wheel will unlock. Use ACCESSORY if you
must have your vehicle pushed or towed.

C (ON): This position is where the key returns to 
after you start the vehicle. With the engine off, you 
can use ON to display some of your warning and
indicator lights.

D (START): This position starts your engine.

-------------------------------------------------------------------------------------------------------------------------------------------------------------


Content      ..     3      4      5      6     ..