Tractors X60 Series. Manual - part 21
 

  Index      Tractors     Tractors X60 Series - service repair manual 2012 year


Search            


Content   ..  19  20  21  22   ..


Tractors X60 Series. Manual - part 21


85

Instruments and Programming

4

2.1.9  Menu of switch detecting 
gear selector lever in NEUTRAL 

Pressing UP again, the menu of the switch detecting gear
selector lever in NEUTRAL is accessed.
This value was set at the factory and must not be chan-
ged.
THE FOLLOWING SCREEN IS SHOWN.

2.1.8  Cab suspension (not avail-
able)

Pressing UP again will go to the Cab Suspension Present
menu.
The following screen is shown:

This is NOT an operator menu.
DO NOT enter this menu.

Entering this menu might affect the tractor operation.
See your dealer for more information.

This is NOT an operator menu.
DO NOT enter this menu.

Entering this menu might affect the tractor operation.
See your dealer for more information.

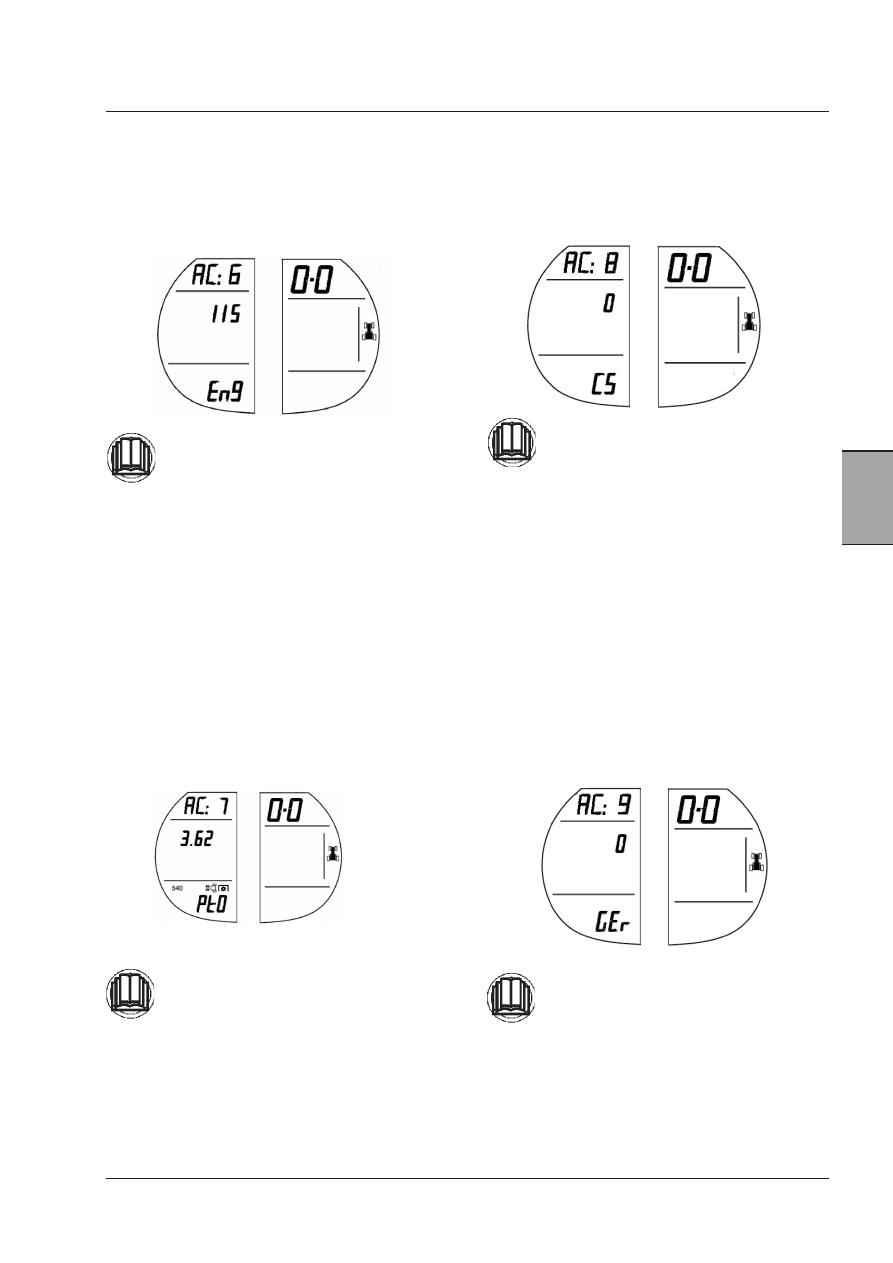
2.1.6  Engine constant

Pressing UP again will go to the Engine Constant menu.
This is a ratio used to calculate the actual engine speed
from the alternator pulses.
The following screen is shown:

This is NOT an operator menu.
DO NOT enter this menu.

Entering this menu might affect the tractor operation.
See your dealer for more information.

This is NOT an operator menu.
DO NOT press to enter this menu.

Entering this menu might affect the tractor operation.
See your dealer for more information.

2.1.7  Front/rear PTO options

Pressing the UP button again, the option menu of front/
rear PTO can be accessed.

THE FOLLOWING SCREEN IS SHOWN

86

Instruments and Programming

2.1.11  Previous work hours 

Pressing  UP  again  will  go  to  the  Previous  Work  Hours
menu. This is used in case the instrument cluster should
be replaced for any reason.
The following screen is shown:

2.1.10   Tractor model code

Pressing UP again will go to the Tractor Model Code menu.
The following screen is shown:

This is NOT an operator menu.
DO NOT enter this menu.

Entering this menu might affect the tractor operation.
See your dealer for more information.

This is NOT an operator menu.
DO NOT enter this menu.

Entering this menu might affect the tractor operation.
See your dealer for more information.

87

Instruments and Programming

4

2.1.12 Auto Function Settings

Pressing UP again will go to the Auto Function setting menu, to define if area worked, distance travelled or work timer
counter needs to be set as manual or auto mode. This means that all these counters will depend from the position of the
hitch (automatic) or from the start/stop menu button (manual). When the cluster is brand new, the default value should
be Manual for all the functions.
The first screen is the following:

depending on the current settings of Area worked (Auto/Man). "AFu" means Auto Function.

To change the Auto Function Settings:
1- Press the MENU button
2- The arrow below area worked symbol will start to flash.
3- Press UP or DOWN to switch between Area Worked, Distance Travelled and Working Time Counter with arrow still

flashing under the relevant symbol. The following screen should appear (depending on current settings - Auto/Man)

4- Once the right sub-menu to be modified has been selected, push Menu button again and the relevant Auto/Man text

(depending on current settings saved) will start to flash whilst arrow will go steady on.

5- press UP or DOWN button to change the settings.
6- To save this new setting press the MENU button, the text will stop flashing, the arrow will flash again and you go back

to point 3.

7- Pressing the UP and DOWN buttons will now access the other sub-menu of the Accessory menu.
8- Pressing and holding the MENU button longer than 2 seconds, you may in any moment save the current settings and

quit the menu. Pressing the UP and DOWN buttons will now access other parts of the Accessory menu.

If the key is turned to the OFF position before the new value is set, the old value is used.

88

Instruments and Programming

2.1.13 Screen brightness adjustment

Pressing UP again will go to the Screen Brightness menu. By this menu the operator can set the brightness of the lamps
and of the LCD when the sidelights are on. The brightness by day cannot be adjusted.
The value goes from 1 to 10, where:
- 1 means lamp light = 5% and LCD/indicators brightness = 13% of max. capacity.
- 10 means lamp light = 45% and LCD/indicators brightness = 53% of max. capacity.

The default value is = 5 that means lamp light = 13% and LCD/indicators brightness = 24% of max. capacity.

The screenshot is the following, according to the brightness setting.
"nbr" indicates brightness adjustment at night.

To adjust the brightness:
1- Press the MENU button.
2- The present value will flash.
3- Press UP or DOWN to scroll values from 1 to 10.
4- To save this new setting press and hold the MENU button for longer than 2 seconds (the number will stop flashing)

and press the UP and DOWN buttons to access other parts of the Accessory menu.

If the key is turned to the OFF position before the new value is set, the old value is used.

NOTE: The brightness of indicators, LCD and lamps by day is set on 70% of max. capacity.


Content   ..  19  20  21  22   ..