SINUMERIK 840D sl. Basesoftware and operating software. Manual (2019) - page 15

Graphic and logic elements
7.5 SIEsGraphCustomWidget
Note
This function automatically refreshes the display.
CursorX - cursor X position
Syntax:
ReturnValue = ReadCWProperty(GraphVarName, "CursorX")
WriteCWProperty(GraphVarName, "CursorX", Value)
Description:
X position of the cursor.
Parameters:
GraphVarName
Name of the display variable which contains a SlEs-
GraphCustomWidget
Return Value
Read value of the property (double)
Value
Value to be set (double).
Note
This function automatically refreshes the display.
CursorY - cursor Y position
Syntax:
ReturnValue = ReadCWProperty(GraphVarName, "CursorY")
WriteCWProperty(GraphVarName, "CursorY", Value)
Description:
Y position of the cursor.
Parameters:
GraphVarName
Name of the display variable which contains a SlEs-
GraphCustomWidget
Return Value
Read value of the property (double)
Value
Value to be set (double).
Note
This function automatically refreshes the display.
CursorY2 - cursor Y position referred to the second Y axis (right)
Syntax:
ReturnValue = ReadCWProperty(GraphVarName, "CursorY2")
WriteCWProperty(GraphVarName, "CursorY2", Value)
Description:
Y position of the cursor referred to the second Y axis (right).
Parameters:
GraphVarName
Name of the display variable which contains a SlEs-
GraphCustomWidget
Return Value
Read value of the property (double)
Value
Value to be set (double).
SINUMERIK Integrate Run MyScreens
Programming Manual, 06/2019, A5E40869575B AC
229
Graphic and logic elements
7.5 SIEsGraphCustomWidget
Note
This function automatically refreshes the display.
CursorStyle - cursor display type
Syntax:
ReturnValue = ReadCWProperty(GraphVarName, "CursorStyle")
WriteCWProperty(GraphVarName, "CursorStyle", Value)
Description:
Cursor display type.
Parameters:
GraphVarName
Name of the display variable which contains a SlEs-
GraphCustomWidget
Return Value
Read value of the property (int)
Value
Value to be set (int):
0 (= cross)
1 (= crosshairs)
2 (= vertical line)
3 (= horizontal line)
4 (= horizontal and vertical line))
ViewMoveZoomMode - response when zooming and shifting using gestures
Syntax:
ReturnValue = ReadCWProperty(GraphVarName, "ViewMoveZoomMode")
WriteCWProperty(GraphVarName, "ViewMoveZoomMode", Value)
Description:
The displayed view of the SlEsGraphCustomWidgets can be changed using
gestures. This property allows you to define which type should be permitted. For
example, in certain applications it may make sense that the view is only horizon-
tally shifted and zoomed, e.g. when displaying measured value characteristics.
Parameter:
GraphVarName
Name of the display variable which contains a SlEs-
GraphCustomWidget
Return Value
Read value of the property (int)
Value
Value to be set (int):
0 (= off)
1 (= only horizontal)
2 (= only vertical)
3 (= horizontal and vertical)
7.5.5
Functions
You can call the subsequently listed functions using the CallCWMethod() function.
Example
Setting the view of the SlEsGraphCustomWidget link using display variable "MyGraphVar".
SINUMERIK Integrate Run MyScreens
230
Programming Manual, 06/2019, A5E40869575B AC

Graphic and logic elements
7.5 SIEsGraphCustomWidget
The result is written to register 0.
REG[0] = CallCWMethod("MyGraphVar", "setView", -8, -5, 11- 20)
Overview
Function
Description
setView
Sets coordinate system
setMaxContourObjects
Sets maximum number of objects for a contour (ring buffer)
addContour
Adds a contour
showContour
Shows a contour
hideContour
Hides a contour
hideAllContours
Hides all contours
removeContour
Removes a contour
clearContour
Deletes graphic object of a contour
fitViewToContours
Automatic adaptation of the view
fitViewToContour
Automatic adaptation of the view
findX
Searches in a contour
setPolylineMode
Displays points of a contour as polyline/curve
setIntegralFillMode
Displays points of a contour as polyline/curve
repaint, update
Refreshes view
addPoint
Adds a point to a contour
addLine
Adds a line to a contour
addRect
Adds a rectangle to a contour
addRoundedRect
Adds a rectangle with rounded corners to a contour
addEllipse
Adds an ellipse to a contour
addCircle
Adds a circle to a contour
addArc
Adds an arc to a contour
addText
Adds text to a contour
setPenWidth
Sets the pen width
setPenStyle
Sets the pen style
setPenColor
Sets the pen color
setFillColor
Sets fill color
setCursorPosition
Positions the cursor
setCursorPositionY2
Positions the cursor referred to the second Y axis (right)
setCursorOnContour
Positions the cursor on contour
moveCursorOnContourBegin
Positions the cursor to the first graphic object of a contour
moveCursorOnContourEnd
Positions the cursor to the last graphic object of a contour
moveCursorOnContourNext
Positions the cursor to the next graphic object of a contour
serialize
Saves/restores the actual state
SINUMERIK Integrate Run MyScreens
Programming Manual, 06/2019, A5E40869575B AC
231
Graphic and logic elements
7.5 SIEsGraphCustomWidget
setView - sets the coordinate system
Syntax:
ReturnValue = CallCWMethod(GraphVarName, "setView", x1, y1, x2, y2)
Description:
Using this function, you define the size of the coordinate system that should be
displayed within the SlEsGraphCustomWidget. See also KeepAspectRatio prop-
erty.
Parameters:
GraphVarName
Name of the display variable which contains a SlEs-
GraphCustomWidget
Return Value
Error code (bool): TRUE = successful
x1
left-hand edge (double)
y1
upper edge (double)
x2
right-hand edge (double)
y2
lower edge (double)
Note
This function automatically refreshes the display.
Example
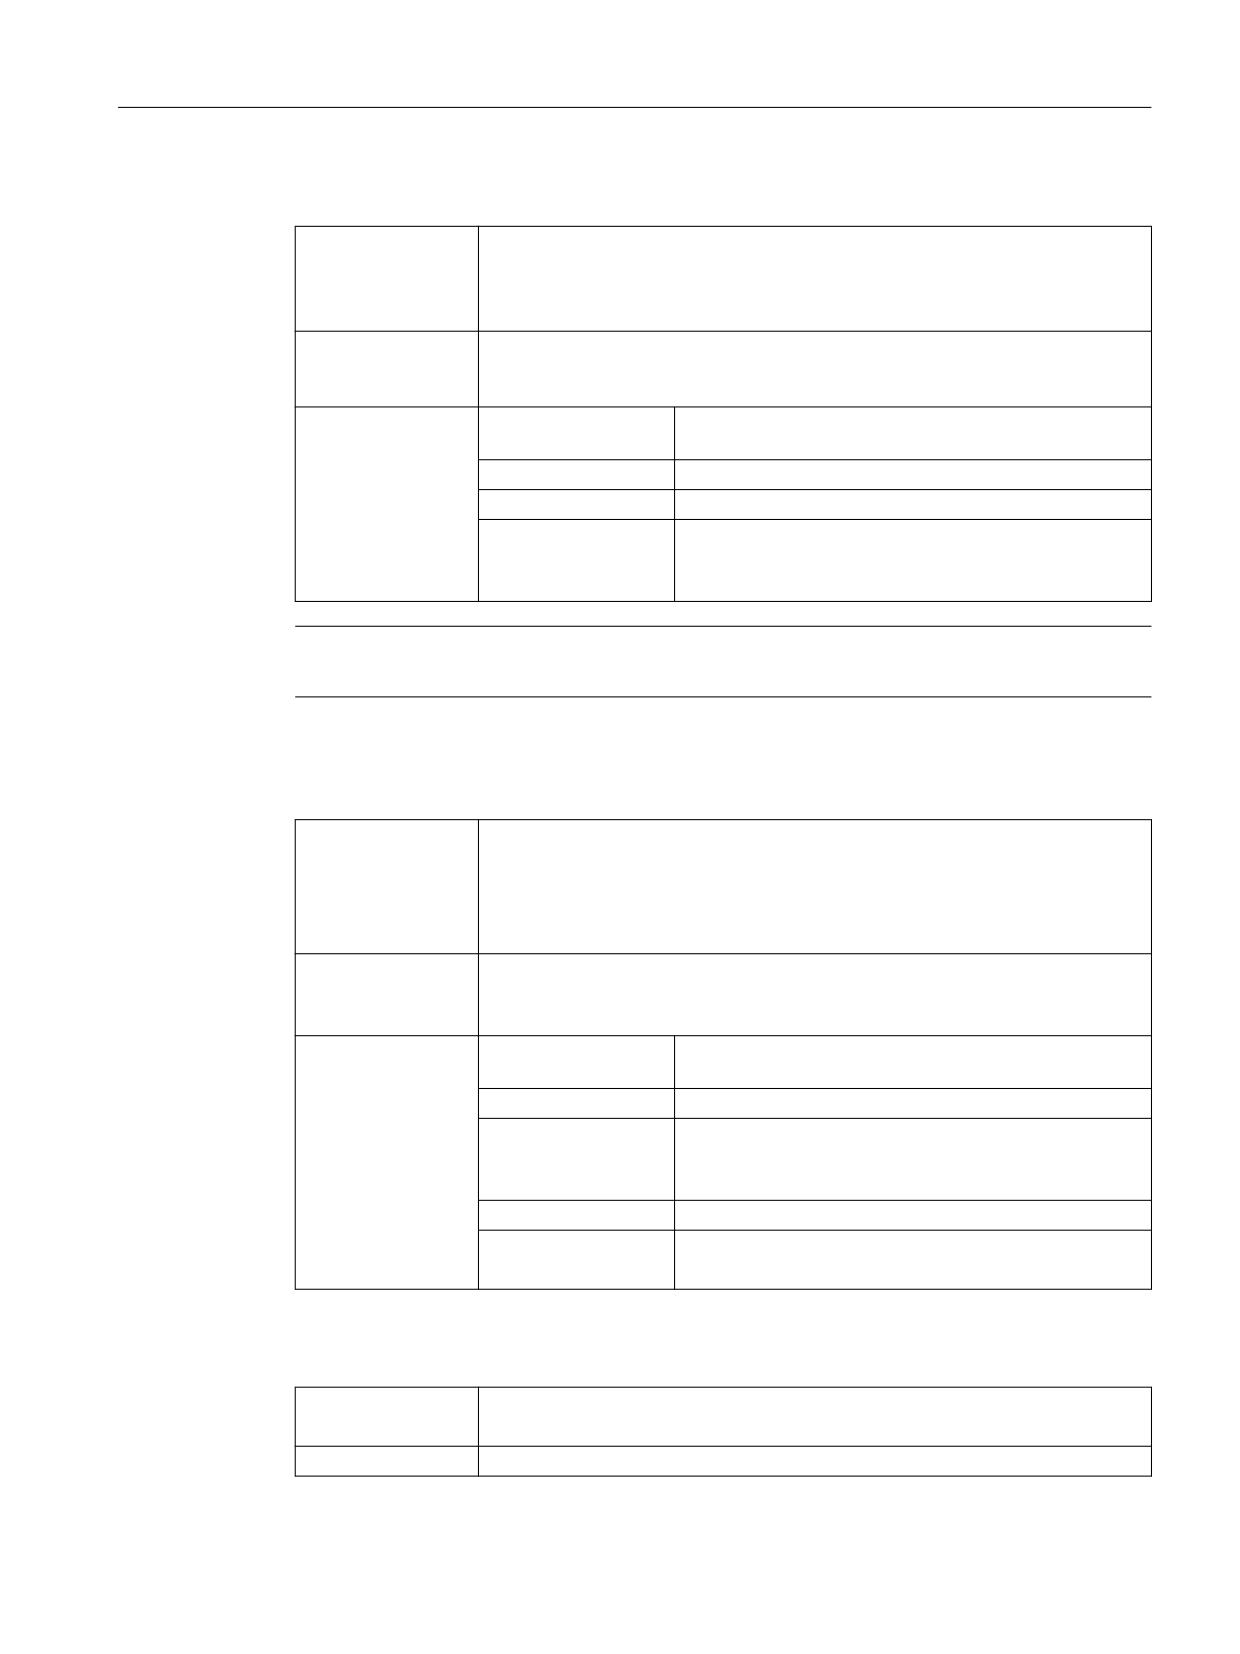
setView(-8, -5, 11, 20)
AxisNameX = "X"
AxisNameY = "Y"
ScaleTextOrientationYAxis = 1
ScaleTextEmbedded = false
KeepAspectRatio = false
update
Figure 7-11
Example - setView
SINUMERIK Integrate Run MyScreens
232
Programming Manual, 06/2019, A5E40869575B AC
Graphic and logic elements
7.5 SIEsGraphCustomWidget
setMaxContourObjects - sets the maximum number of objects of a contour (ring buffer)
Syntax:
ReturnValue = CallCWMethod(GraphVarName, "setMaxContourObjects", Val-
ue)
ReturnValue = CallCWMethod(GraphVarName, "setMaxContourObjects", Val-
ue, ContourName)
Description:
Using this function, you can define the size of a contour ring buffer. If the number
of objects added to the contour exceeds this limit, then the oldest object is de-
leted.
Parameter:
GraphVarName
Name of the display variable which contains a SlEs-
GraphCustomWidget
Return Value
Error code (bool): TRUE = successful
Value
Maximum number of graphic objects (uint)
ContourName
Name of the contour (QString).
If a contour is not specified, then the call automatically
refers to the currently selected contour.
Note
This function automatically refreshes the display.
addContour - add contour
Syntax:
ReturnValue = CallCWMethod(GraphVarName, "addContour", ContourName)
ReturnValue = CallCWMethod(GraphVarName, "addContour", ContourName,
Selected)
ReturnValue = CallCWMethod(GraphVarName, "addContour", ContourName,
Selected, AssignedY2)
Description:
Using this function, you can define a new contour.
Optionally, you can assign the contour to the coordinate system of the second Y
axis (right).
Parameter:
GraphVarName
Name of the display variable which contains a SlEs-
GraphCustomWidget
Return Value
Error code (bool): TRUE = successful
ContourName
Name of the contour (QString).
If a contour is not specified, then the call automatically
refers to the currently selected contour.
Selected
Contour should be selected (bool): TRUE or FALSE
AssignedY2
Contour should be assigned to the second Y axis (right)
(bool): TRUE or FALSE
showContour - shows a contour
Syntax:
ReturnValue = CallCWMethod(GraphVarName, "showContour")
ReturnValue = CallCWMethod(GraphVarName, "showContour", ContourName)
Description:
This function makes a contour visible.
SINUMERIK Integrate Run MyScreens
Programming Manual, 06/2019, A5E40869575B AC
233
Graphic and logic elements
7.5 SIEsGraphCustomWidget
Parameter:
GraphVarName
Name of the display variable which contains a SlEs-
GraphCustomWidget
Return Value
Error code (bool): TRUE = successful
ContourName
Name of the contour (QString).
If a contour is not specified, then the call automatically
refers to the currently selected contour.
hideContour - hide contour
Syntax:
ReturnValue = CallCWMethod(GraphVarName, "hideContour")
ReturnValue = CallCWMethod(GraphVarName, "hideContour", ContourName)
Description:
This function hides a contour.
Parameter:
GraphVarName
Name of the display variable which contains a SlEs-
GraphCustomWidget
Return Value
Error code (bool): TRUE = successful
ContourName
Name of the contour (QString).
If a contour is not specified, then the call automatically
refers to the currently selected contour.
showAllContours - shows all contours
Syntax:
ReturnValue = CallCWMethod(GraphVarName, "showAllContours")
Description:
This function makes all contours visible.
Parameter:
GraphVarName
Name of the display variable which contains a SlEs-
GraphCustomWidget
Return Value
Error code (bool): TRUE = successful
hideAllContours - hide all contours
Syntax:
ReturnValue = CallCWMethod(GraphVarName, "hideAllContours")
Description:
This function hides all contours.
Parameter:
GraphVarName
Name of the display variable which contains a SlEs-
GraphCustomWidget
Return Value
Error code (bool): TRUE = successful
removeContour - hides a contour
Syntax:
ReturnValue = CallCWMethod(GraphVarName, "removeContour")
ReturnValue = CallCWMethod(GraphVarName, "removeContour", Contour-
Name)
Description:
Removes a contour.
SINUMERIK Integrate Run MyScreens
234
Programming Manual, 06/2019, A5E40869575B AC
Graphic and logic elements
7.5 SIEsGraphCustomWidget
Parameter:
GraphVarName
Name of the display variable which contains a SlEs-
GraphCustomWidget
Return Value
Error code (bool): TRUE = successful
ContourName
Name of the contour (QString).
If a contour is not specified, then the call automatically
refers to the currently selected contour.
clearContour - delete graphic object of a contour
Syntax:
ReturnValue = CallCWMethod(GraphVarName, "clearContour")
ReturnValue = CallCWMethod(GraphVarName, "clearContour", ContourName)
Description:
Deletes all graphic objects on a contour.
Parameter:
GraphVarName
Name of the display variable which contains a SlEs-
GraphCustomWidget
Return Value
Error code (bool): TRUE = successful
ContourName
Name of the contour (QString).
If a contour is not specified, then the call automatically
refers to the currently selected contour.
fitViewToContours - automatic adaptation of the view
Syntax:
ReturnValue = CallCWMethod(GraphVarName, "fitViewToContours")
ReturnValue = CallCWMethod(GraphVarName, "fitViewToContours", OnlyVisi-
ble)
Description:
Using this function, the view is automatically adapted to the contours. Depending
on the transfer parameter, you define whether only all visible contours can be
seen or all contours can be seen.
Parameter:
GraphVarName
Name of the display variable which contains a SlEs-
GraphCustomWidget
Return Value
Error code (bool): TRUE = successful
OnlyVisible
Value to be set (bool): TRUE or FALSE
fitViewToContour - automatic adaptation of the view
Syntax:
ReturnValue = CallCWMethod(GraphVarName, "fitViewToContour", Contour-
Name)
Description:
Using this function, the view is automatically adapted so that only a specific
contours visible.
Parameter:
GraphVarName
Name of the display variable which contains a SlEs-
GraphCustomWidget
Return Value
Error code (bool): TRUE = successful
ContourName
Name of the contour (QString)
SINUMERIK Integrate Run MyScreens
Programming Manual, 06/2019, A5E40869575B AC
235
Graphic and logic elements
7.5 SIEsGraphCustomWidget
findX - search in a contour
Syntax:
ReturnValue = CallCWMethod(GraphVarName, "findX", x)
ReturnValue = CallCWMethod(GraphVarName, "findX", x, ContourName)
ReturnValue = CallCWMethod(GraphVarName, "findX", x, ContourName, Set-
Cursor)
Description:
Using this function, you can search for a previously defined point with a specific
X coordinate in a contour. You obtain the Y coordinate as result. Optionally, you
can also simultaneously position the cursor to this point.
Parameter:
GraphVarName
Name of the display variable which contains a SlEs-
GraphCustomWidget
Return Value
Error code (QString): If successful, the associated Y val-
ue is supplied
x
X value to be searched for (double)
ContourName
Name of the contour (QString).
If a contour is not specified, then the call automatically
refers to the currently selected contour
SetCursor
Set cursor (bool): TRUE or FALSE
Note
The display is automatically updated if you set the cursor using this function.
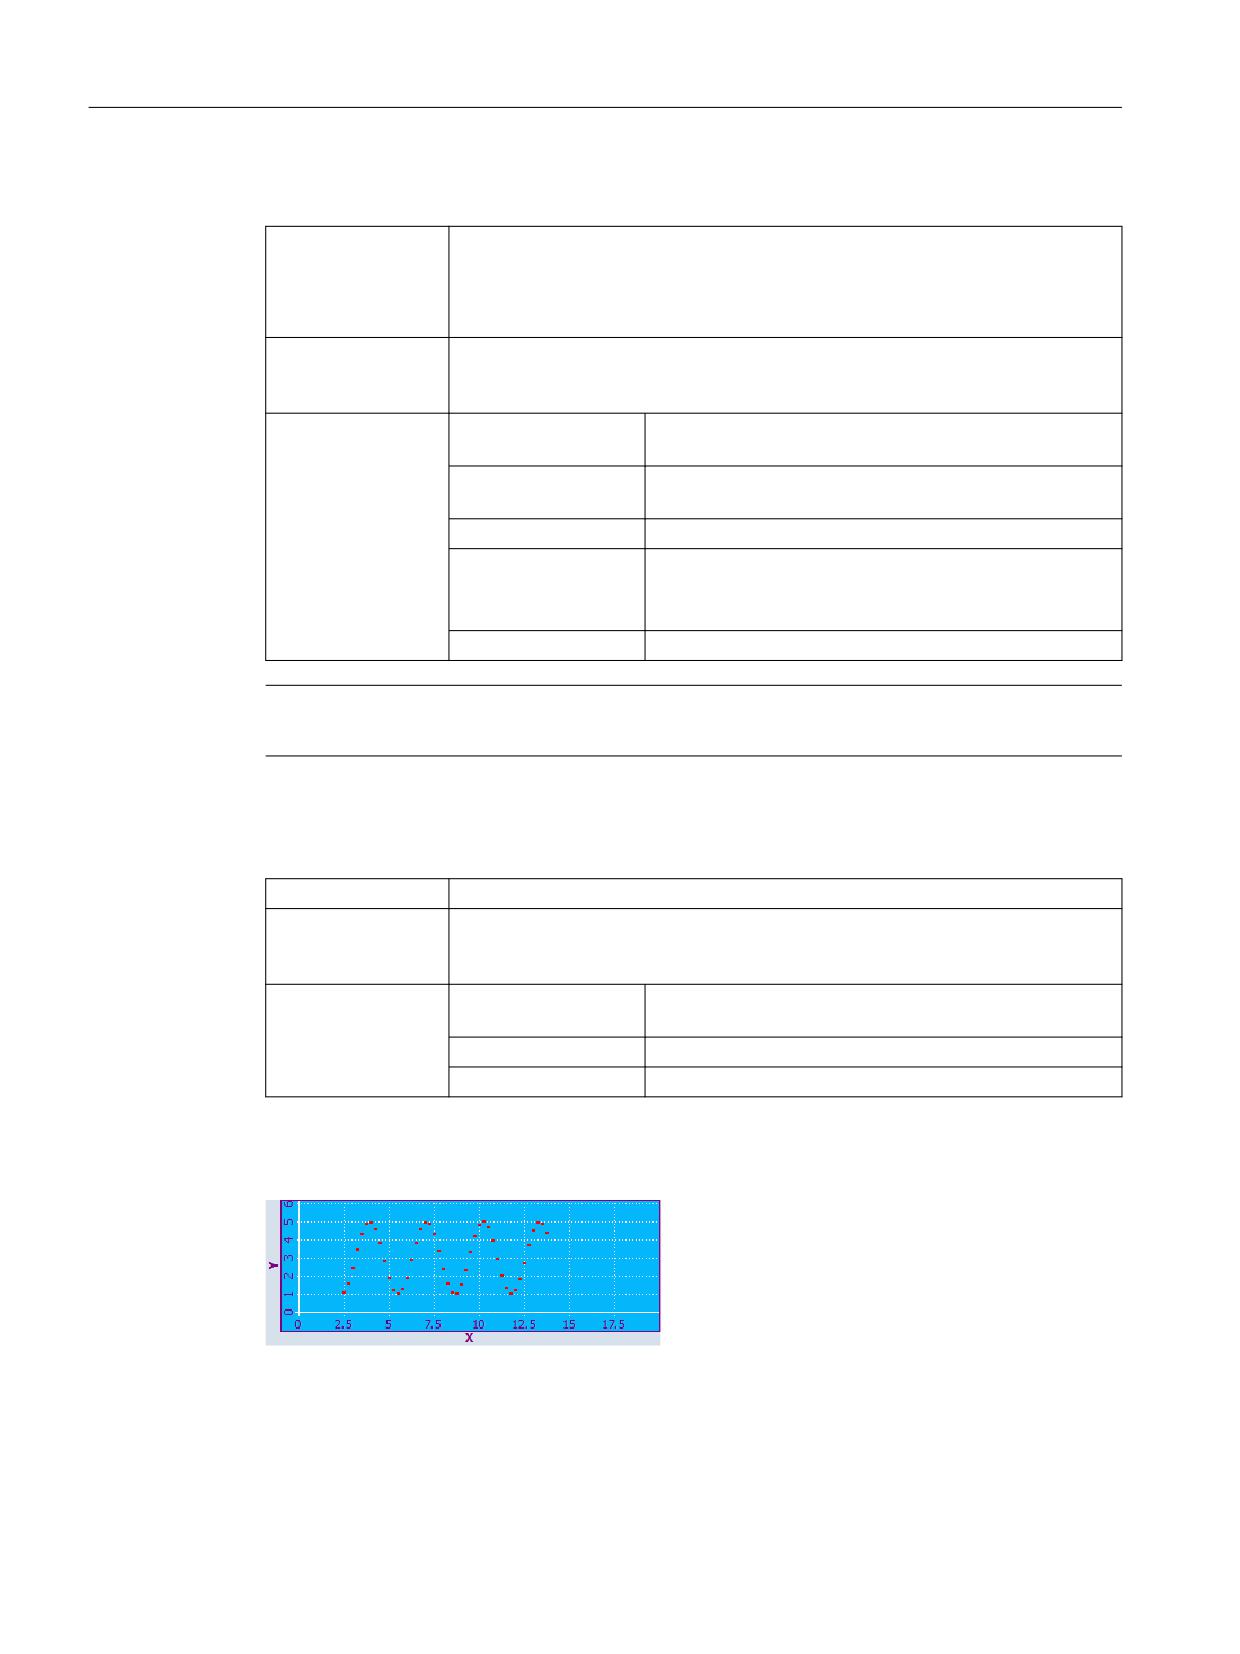
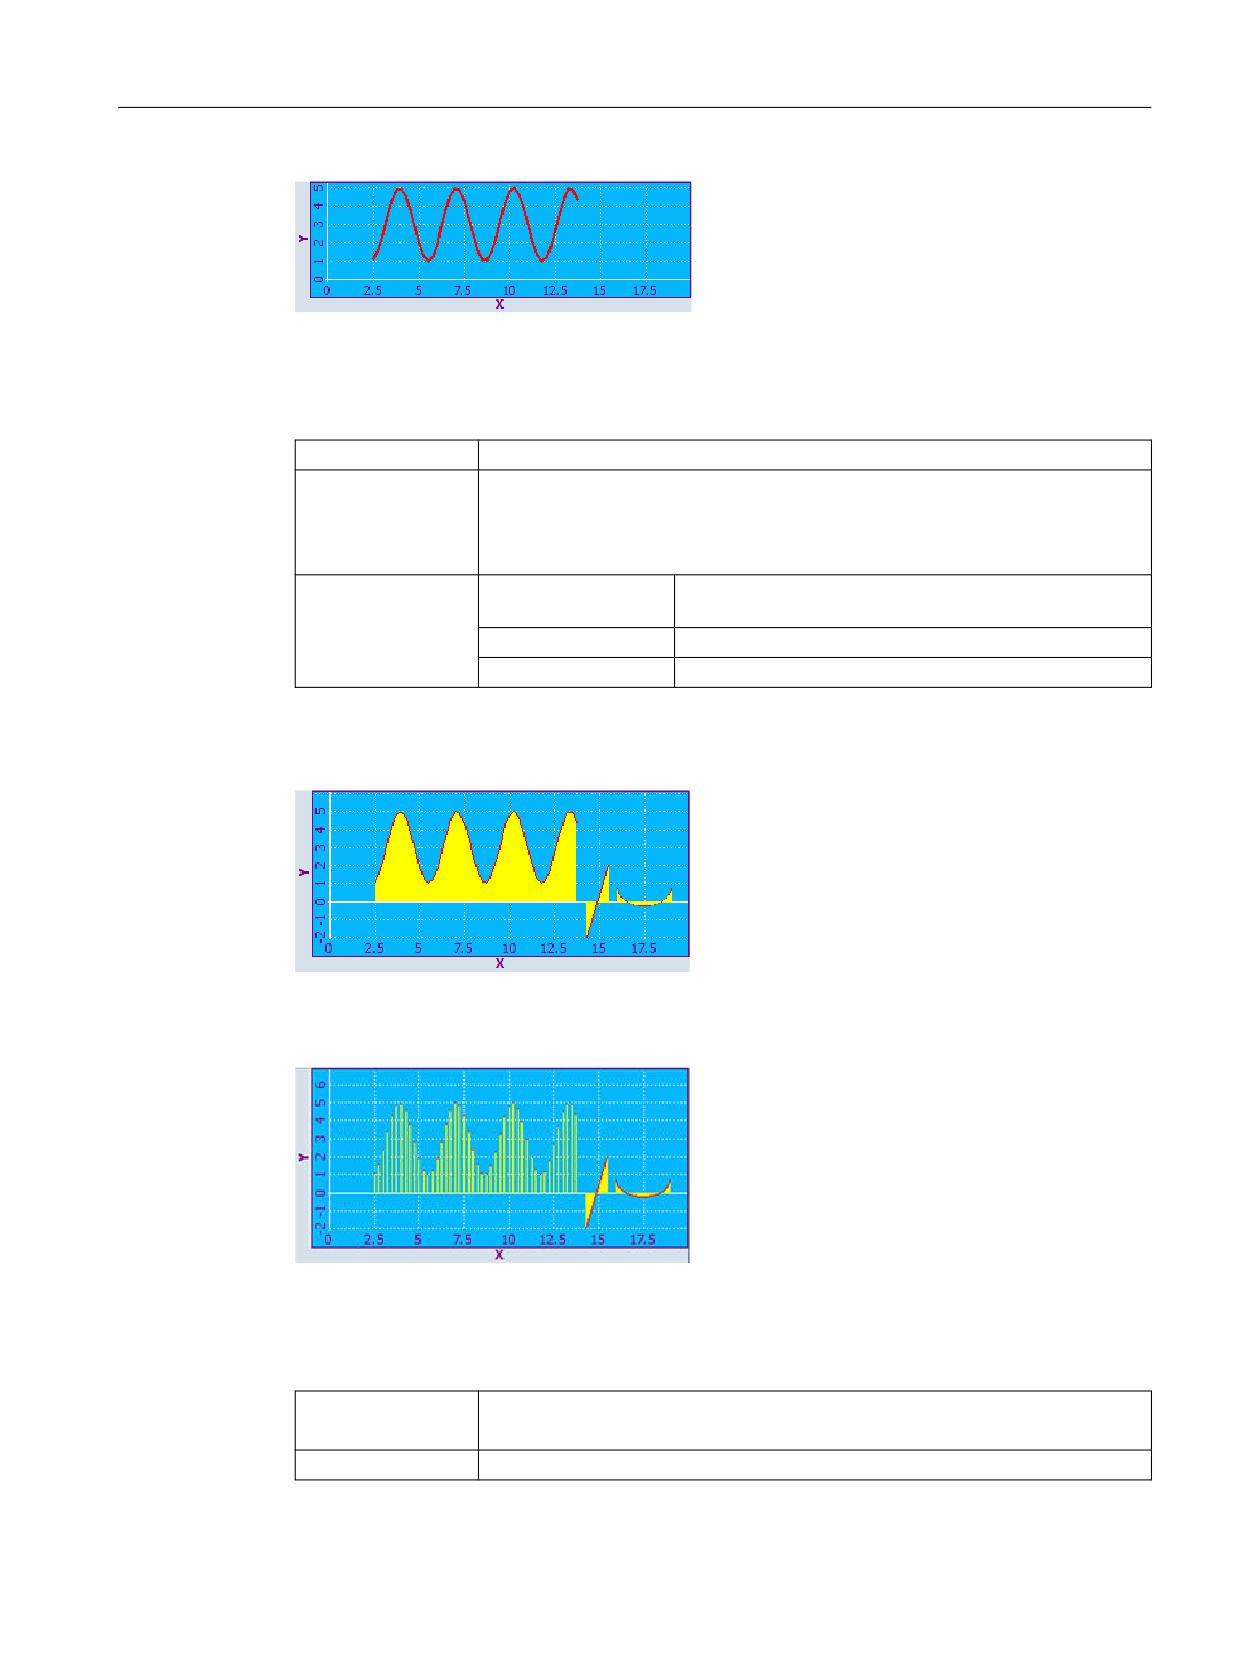
setPolylineMode - displays points on the contour as polyline/curve
Syntax:
ReturnValue = CallCWMethod(GraphVarName, "setPolylineMode", SetPoly)
Description:
All of the points of the actual contour added after this function call are connected
to create a polyline/curve. This function is contour-specific, and can be activated
and deactivated on a segment-for-segment basis.
Parameters:
GraphVarName
Name of the display variable which contains a SlEs-
GraphCustomWidget
Return Value
Error code (bool): TRUE = successful
SetPoly
PolylineMode (bool): TRUE = on
Example
Figure 7-12
Example - PolylineMode: Off
SINUMERIK Integrate Run MyScreens
236
Programming Manual, 06/2019, A5E40869575B AC
Graphic and logic elements
7.5 SIEsGraphCustomWidget
Figure 7-13
Example - PolylineMode: To
setIntegralFillMode - fills the areas between points, lines and arcs and the X axis
Syntax:
ReturnValue = CallCWMethod(GraphVarName, "setIntegralFillMode", SetIntFill)
Description:
Areas between points, lines and arcs of the X axis are filled with the current fill
color (independent of whether the points are +Y or -Y).
This function is contour-specific, and can be activated and deactivated on a seg-
ment-for-segment basis.
Parameters:
GraphVarName
Name of the display variable which contains a SlEs-
GraphCustomWidget
Return Value
Error code (bool): TRUE = successful
SetIntFill
IntegralFillMode (bool): TRUE = on
Example
Figure 7-14
Example - setIntegralFillMode: on
Figure 7-15
Example - setIntegralFillMode: Off
repaint, update - update view
Syntax:
ReturnValue = CallCWMethod(GraphVarName, "repaint")
ReturnValue = CallCWMethod(GraphVarName, "update")
Description:
Using this function, you can manually refresh the display.
SINUMERIK Integrate Run MyScreens
Programming Manual, 06/2019, A5E40869575B AC
237

Graphic and logic elements
7.5 SIEsGraphCustomWidget
Parameter:
GraphVarName
Name of the display variable which contains a SlEs-
GraphCustomWidget
Return Value
Error code (bool): TRUE = successful
● update()
The function refreshes the view, assuming that the Widget refresh is not deactivated, and
the Widget is not hidden. The function is optimized so that the application performance is
maintained, and the view does not flicker as a result of excessively high refresh rates.
● repaint()
The function refreshes the view directly after the function call. Therefore, you should only
use the repaint function if an immediate refresh is absolutely necessary, e.g. for animation
purposes
It is recommended that you always work with the update() function. Internally, the
SlEsGraphCustomWidget always works with the function update() e.g. for setView().
addPoint - add point to a contour
Syntax:
ReturnValue = CallCWMethod(GraphVarName, "addPoint", x, y)
ReturnValue = CallCWMethod(GraphVarName, "addPoint", x, y, DummyPoint)
Description:
Adds a point to the currently selected contour Further, you can set a dummy
point; although it does not show up in the drawing, it can be positioned with the
cursor.
Parameter:
GraphVarName
Name of the display variable which contains a SlEs-
GraphCustomWidget
Return Value
Error code (bool): TRUE = successful
x
x coordinate (double)
y
y coordinate (double)
DummyPoint
Point is treated as invisible (bool): TRUE = yes
addLine - add line to a contour
Syntax:
ReturnValue = CallCWMethod(GraphVarName, "addLine", x1, y1, x2, y2)
Description:
Adds a line to the currently selected contour
Parameter:
GraphVarName
Name of the display variable which contains a SlEs-
GraphCustomWidget
Return Value
Error code (bool): TRUE = successful
x1
x coordinate of the starting point (double)
y1
y coordinate of the starting point (double)
x2
x coordinate of the end point (double)
y2
y coordinate of the end point (double)
addRect - add rectangle to a contour
Syntax:
ReturnValue = CallCWMethod(GraphVarName, "addRect", x1, y1, x2, y2)
Description:
Adds a rectangle to the currently selected contour.
SINUMERIK Integrate Run MyScreens
238
Programming Manual, 06/2019, A5E40869575B AC

Graphic and logic elements
7.5 SIEsGraphCustomWidget
Parameter:
GraphVarName
Name of the display variable which contains a SlEs-
GraphCustomWidget
Return Value
Error code (bool): TRUE = successful
x1
left-hand edge (double)
y1
left-hand edge (double)
x2
right-hand edge (double)
y2
lower edge (double)
addRoundedRect - add rectangle with rounded corners to a contour
Syntax:
ReturnValue = CallCWMethod(GraphVarName, "addRoundedRect", x1, y1, x2,
y2, r)
Description:
Adds a rectangle with rounded off corners to the currently selected contour.
Parameter:
GraphVarName
Name of the display variable which contains a SlEs-
GraphCustomWidget
Return Value
Error code (bool): TRUE = successful
x1
left-hand edge (double)
y1
upper edge (double)
x2
upper edge (double)
y2
upper edge (double)
r
Radius (double)
addElipse - add ellipse to a contour
Syntax:
ReturnValue = CallCWMethod(GraphVarName, "addEllipse", x1, y1, x2, y2, ra-
dius)
Description:
Adds an ellipse to the currently selected contour.
Parameter:
GraphVarName
Name of the display variable which contains a SlEs-
GraphCustomWidget
Return Value
Error code (bool): TRUE = successful
x1
left-hand edge (double)
y1
upper edge (double)
x2
right-hand edge (double)
y2
lower edge (double)
Radius
Radius (double)
addCircle - add circle to a contour
Syntax:
ReturnValue = CallCWMethod(GraphVarName, "addCircle", x, y, radius)
Description:
Adds a circle to the currently selected contour
SINUMERIK Integrate Run MyScreens
Programming Manual, 06/2019, A5E40869575B AC
239

Graphic and logic elements
7.5 SIEsGraphCustomWidget
Parameter:
GraphVarName
Name of the display variable which contains a SlEs-
GraphCustomWidget
Return Value
Error code (bool): TRUE = successful
x
left-hand edge (double)
y
upper edge (double)
Radius
Radius (double)
addArc - add arc to a contour
Syntax:
ReturnValue = CallCWMethod(GraphVarName, "addArc", x1, y1, x2, y2, Star-
tAngle, SpanAngle
Description:
Adds an arc to the currently selected contour
Parameter:
GraphVarName
Name of the display variable which contains a SlEs-
GraphCustomWidget
Return Value
Error code (bool): TRUE = successful
x1
left-hand edge (double)
y1
upper edge (double)
x2
right-hand edge (double)
y2
lower edge (double)
StartAngle
Starting angle in degrees (double)
SpanAngle
Opening angle in degrees (double)
addText - add text to a contour
Syntax:
ReturnValue = CallCWMethod(GraphVarName, "addText", x, y, Text)
Description:
Adds a text to the currently selected contour
Parameter:
GraphVarName
Name of the display variable which contains a SlEs-
GraphCustomWidget
Return Value
Error code (bool): TRUE = successful
x
left-hand edge (double)
y
upper edge (double)
Text
Text (QString)
setPenWidth - sets the pen width
Syntax:
ReturnValue = CallCWMethod(GraphVarName, "setPenWidth") ReturnValue =
CallCWMethod(GraphVarName, "setPenWidth", width)
Description:
Defines the pen width from the instant that the function was called for the follow-
ing objects that were added to the actual contour.
Parameter:
GraphVarName
Name of the display variable which contains a SlEs-
GraphCustomWidget
Return Value
Error code (bool): TRUE = successful
width
Pen width (double).
If a pen width is not specified, then the default pen width
is set.
SINUMERIK Integrate Run MyScreens
240
Programming Manual, 06/2019, A5E40869575B AC

Graphic and logic elements
7.5 SIEsGraphCustomWidget
setPenStyle - sets the pen style
Syntax:
ReturnValue = CallCWMethod(GraphVarName, "setPenStyle")
ReturnValue = CallCWMethod(GraphVarName, "setPenStyle", style)
Description:
Defines pen style from the instant that the function is called for the following
objects that are added to the actual contour.
Parameter:
GraphVarName
Name of the display variable which contains a SlEs-
GraphCustomWidget
Return Value
Error code (bool): TRUE = successful
style
1 : Solid line (___
)
2 : Interrupted line (_ _)
3 : Dotted line (...)
4 : Line-point-line (_._)
5 : Line-point-point (_..)
setPenColor - sets the pen color
Syntax:
ReturnValue = CallCWMethod(GraphVarName, "setPenColor")
ReturnValue = CallCWMethod(GraphVarName, "setPenColor", Color)
Description:
Defines the pen color from the instant that the function was called for the following
objects that were added to the actual contour.
Parameter:
GraphVarName
Name of the display variable which contains a SlEs-
GraphCustomWidget
Return Value
Error code (bool): TRUE = successful
Color
Value to be set (QString) as RGB value in the form
"#RRGGBB", for example, "#04B7FB"
setFillColor - set fill color
Syntax:
ReturnValue = CallCWMethod(GraphVarName, "setFillColor")
ReturnValue = CallCWMethod(GraphVarName, "setFillColor", Color)
Description:
Defines the fill color from the instant that the function was called for the following
objects that were added to the actual contour.
Parameters:
GraphVarName
Name of the display variable which contains a SlEs-
GraphCustomWidget
Return Value
Error code (bool): TRUE = successful
Color
Value to be set (QString) as RGB value in the form
"#RRGGBB", for example, "#04B7FB"
setCursorPosition - position cursor
Syntax:
ReturnValue = CallCWMethod(GraphVarName, "setCursorPosition", x, y)
Description:
Sets the cursor to the specified position.
SINUMERIK Integrate Run MyScreens
Programming Manual, 06/2019, A5E40869575B AC
241

Graphic and logic elements
7.5 SIEsGraphCustomWidget
Parameters:
GraphVarName
Name of the display variable which contains a SlEs-
GraphCustomWidget
Return Value
Error code (bool): TRUE = successful
x
x coordinate (double)
y
y coordinate (double)
Note
This function automatically refreshes the display.
setCursorPositionY2Cursor - position cursor referred to the second Y axis (right)
Syntax:
ReturnValue = CallCWMethod(GraphVarName, "setCursorPositionY2", x, y2)
Description:
Sets the cursor to the specified position referred to the second Y axis (right)
Parameters:
GraphVarName
Name of the display variable which contains a SlEs-
GraphCustomWidget
Return Value
Error code (bool): TRUE = successful
x
x coordinate (double)
y2
Y coordinate referred to the second Y axis (right) (double)
Note
This function automatically refreshes the display.
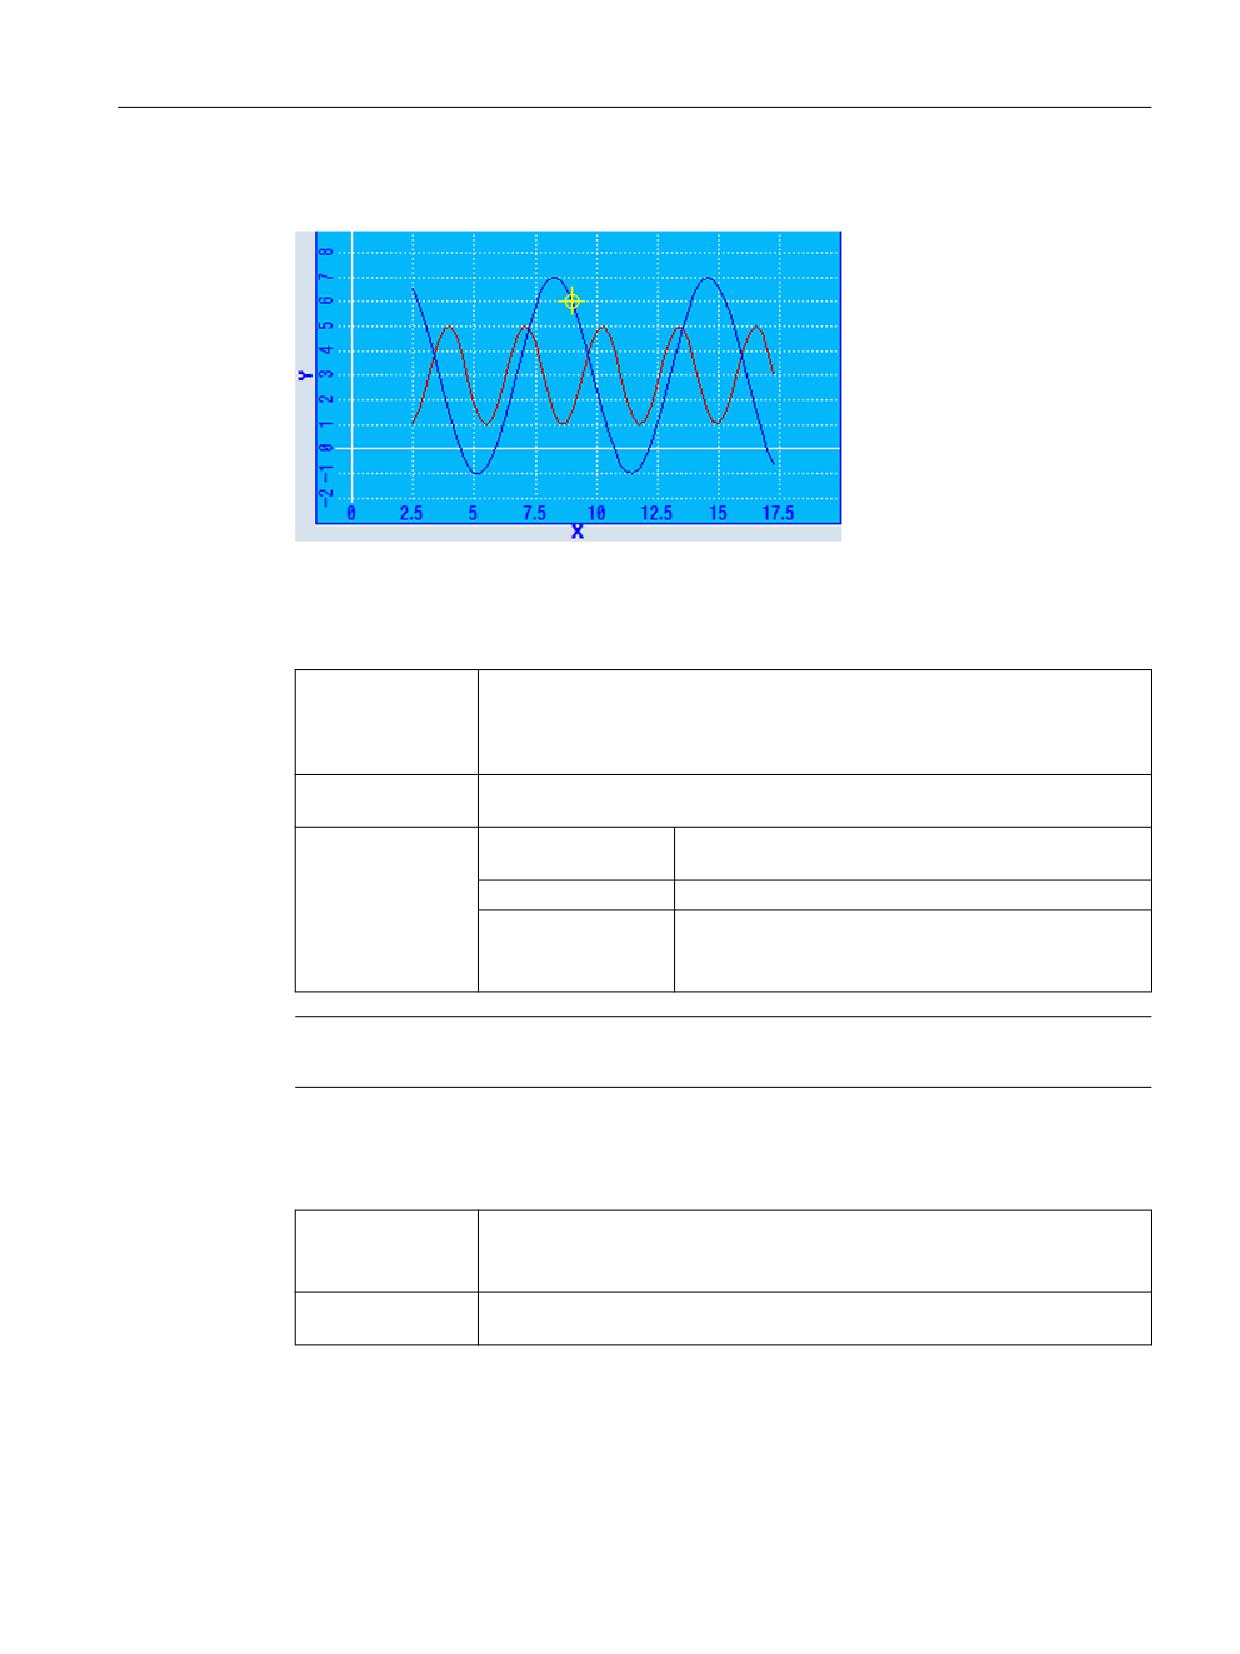
setCursorOnContour - position cursor on contour
Syntax:
ReturnValue = CallCWMethod(GraphVarName, "setCursorOnContour")
ReturnValue = CallCWMethod(GraphVarName, "setCursorOnContour", Con-
tourName)
Description:
Sets the cursor to the last cursor position within a contour.
Parameters:
GraphVarName
Name of the display variable which contains a SlEs-
GraphCustomWidget
Return Value
Error code (bool): TRUE = successful
ContourName
Name of the contour (QString).
If a contour is not specified, then the call automatically
refers to the currently selected contour.
Note
This function automatically refreshes the display.
SINUMERIK Integrate Run MyScreens
242
Programming Manual, 06/2019, A5E40869575B AC
Graphic and logic elements
7.5 SIEsGraphCustomWidget
Example
Figure 7-16
Example - setCursorOnContour
moveCursorOnContourBegin - position the cursor to the first graphic object of a contour
Syntax:
ReturnValue = CallCWMethod(GraphVarName, "moveCursorOnContourBe-
gin")
ReturnValue = CallCWMethod(GraphVarName, "moveCursorOnContourBegin",
ContourName)
Description:
Starting from the actual cursor position within a contour, using this function you
can navigate the cursor to the first point object of a contour.
Parameters:
GraphVarName
Name of the display variable which contains a SlEs-
GraphCustomWidget
Return Value
Error code (bool): TRUE = successful
ContourName
Name of the contour (QString).
If a contour is not specified, then the call automatically
refers to the currently selected contour.
Note
This function automatically refreshes the display.
moveCursorOnContourEnd - position the cursor to the last graphic object of a contour
Syntax:
ReturnValue = CallCWMethod(GraphVarName, "moveCursorOnContourEnd")
ReturnValue = CallCWMethod(GraphVarName, "moveCursorOnContourEnd",
ContourName)
Description:
Starting from the actual cursor position within a contour, using this function you
can navigate the cursor to the last point object of a contour.
SINUMERIK Integrate Run MyScreens
Programming Manual, 06/2019, A5E40869575B AC
243

Graphic and logic elements
7.5 SIEsGraphCustomWidget
Parameters:
GraphVarName
Name of the display variable which contains a SlEs-
GraphCustomWidget
Return Value
Error code (bool): TRUE = successful
ContourName
Name of the contour (QString).
If a contour is not specified, then the call automatically
refers to the currently selected contour.
Note
This function automatically refreshes the display.
moveCursorOnContourNext - position the cursor to the next graphic object of a contour
Syntax:
ReturnValue = CallCWMethod(GraphVarName, "moveCursorOnContourNext")
ReturnValue = CallCWMethod(GraphVarName, "moveCursorOnContourNext",
ContourName)
Description:
Starting from the actual cursor position within a contour, using this function you
can navigate the cursor to the next point object of a contour.
Parameters:
GraphVarName
Name of the display variable which contains a SlEs-
GraphCustomWidget
Return Value
Error code (bool): TRUE = successful
ContourName
Name of the contour (QString).
If a contour is not specified, then the call automatically
refers to the currently selected contour.
Note
This function automatically refreshes the display.
moveCursorOnContourBack - position the cursor to the previous graphic object of a contour
Syntax:
ReturnValue = CallCWMethod(GraphVarName, "moveCursorOnContourBack")
ReturnValue = CallCWMethod(GraphVarName, "moveCursorOnContourBack",
ContourName)
Description:
Starting from the actual cursor position within a contour, using this function you
can navigate the cursor to the previous point object of a contour.
Parameters:
GraphVarName
Name of the display variable which contains a SlEs-
GraphCustomWidget
Return Value
Error code (bool): TRUE = successful
ContourName
Name of the contour (QString).
If a contour is not specified, then the call automatically
refers to the currently selected contour.
SINUMERIK Integrate Run MyScreens
244
Programming Manual, 06/2019, A5E40869575B AC
Graphic and logic elements
7.5 SIEsGraphCustomWidget
Note
This function automatically refreshes the display.
serialize - save/restore the actual state
Syntax:
ReturnValue = CallCWMethod(GraphVarName, "serialize", FilePath, IsStoring)
Description:
Using this function, when required, you can write the actual state and content of
the SlEsGraphWidget in binary form to a file or datastream and also restore it.
Parameter:
GraphVarName
Name of the display variable which contains a SlEs-
GraphCustomWidget
Return Value
Error code (bool): TRUE = successful
FilePath
Complete path mit file name (QString)
IsStoring
Save/restore (bool): TRUE = save
Note
This function automatically refreshes the display.
7.5.6
Signals
You can capture the subsequently described ViewChanged signal in the configuration and
respond appropriately.
Overview
Function
Description
ViewChanged
Changing the view
ViewChanged - changing the view
Syntax:
SUB(on_<GraphVarName>_ViewChanged)
…
END_SUB
Description:
The "ViewChanged“ signal is sent if the view changes. You can respond to this
in the configuration in a specific SUB method. The SIGARG parameters are
appropriately set.
SINUMERIK Integrate Run MyScreens
Programming Manual, 06/2019, A5E40869575B AC
245
Graphic and logic elements
7.5 SIEsGraphCustomWidget
Parameters:
GraphVarName
Name of the display variable which contains a SlEs-
GraphCustomWidget
SIGARG[0]
left-hand edge (double)
SIGARG[1]
upper edge (double)
SIGARG[2]
right-hand edge (double)
SIGARG[3]
lower edge (double)
Example
DEF MyGraphVar = (W///,"slesgraphcustomwidget.SlEsGraphCustomWidget"/////
10,10,340,340/0,0,0,0)
SUB(on_MyGraphVar_ViewChanged
DLGL("Current view: " << SIGARG[0] << ", " << SIGARG[1] << ", " <<
SIGARG[2]
<< ", " << SIGARG[3]
END_SUB
SINUMERIK Integrate Run MyScreens
246
Programming Manual, 06/2019, A5E40869575B AC
Graphic and logic elements
7.6 SlEsTouchButton
7.6
SlEsTouchButton
7.6.1
SlEsTouchButton
General information
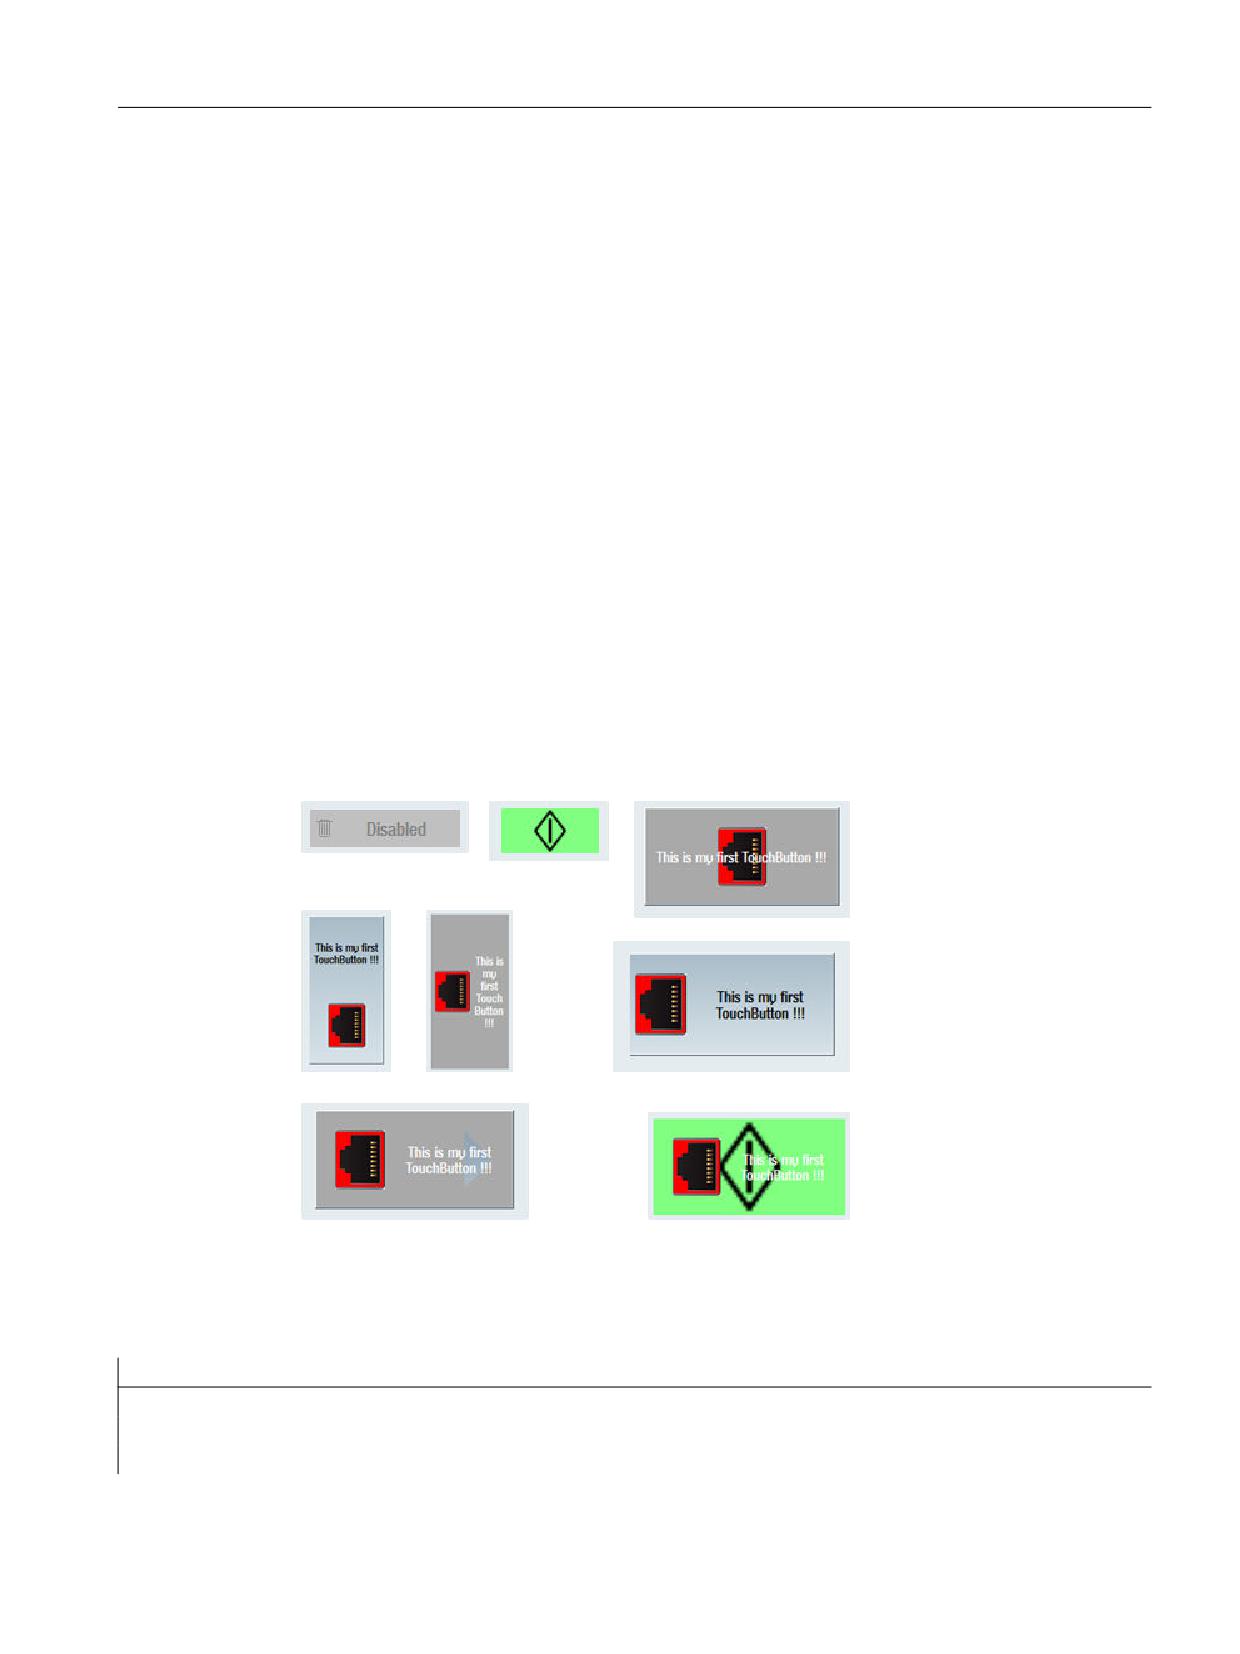
You can create even functionally demanding applications simply by using Run MyScreens. For
touch operation you can configure buttons that can be freely located (TouchButtons). The
following attributes apply when configuring TouchButtons:
● The two possible state changes of the "clicked" and "checked" buttons can be queried in the
configuration and the appropriate actions initiated.
● TouchButtons can be operated with single or multitouch, mouse and keyboard.
● The TouchButton is displayed corresponding to the actual resolution. This also applies to
the font and displayed graphics.
● The TouchButton has two styles "Softkey look&feel" and "Application-specific". In the
"Softkey look&feel" style, the TouchButton is displayed corresponding to the Operate
softkeys. Both display styles have functions, for example, to scale graphics.
● TouchButtons are implemented and made available as custom widgets.
Figure 7-17
Examples of TouchButtons
Example
//M(MyTBMask/"My CustomWidget TouchButton ...")
DEF MyTB1 = (W///,"slesstdcw.SlEsTouchButton"/////70,20,200,100/0,0,0,0)
LOAD
WRITECWPROPERTY("MyTB1", "text", "This is my first TouchButton !!!")
SINUMERIK Integrate Run MyScreens
Programming Manual, 06/2019, A5E40869575B AC
247
Graphic and logic elements
7.6 SlEsTouchButton
//M(MyTBMask/"My CustomWidget TouchButton ...")
WRITECWPROPERTY("MyTB1", "textPressed", "This is my first TouchButton (pressed)!!!")
WRITECWPROPERTY("MyTB1", "picture", "dsm_remove_trashcan_red.png") WRITECWPROPERTY("MyTB1", "pic-
tureAlignment", "left")
WRITECWPROPERTY("MyTB1", "scalePicture", FALSE)
WRITECWPROPERTY("MyTB1", "picturePressed", "slsu_topology_empty_round_slot.png") WRITECWPROPER-
TY("MyTB1", "picture", "slsu_topology_empty_slot_left_error.png")
END_LOAD
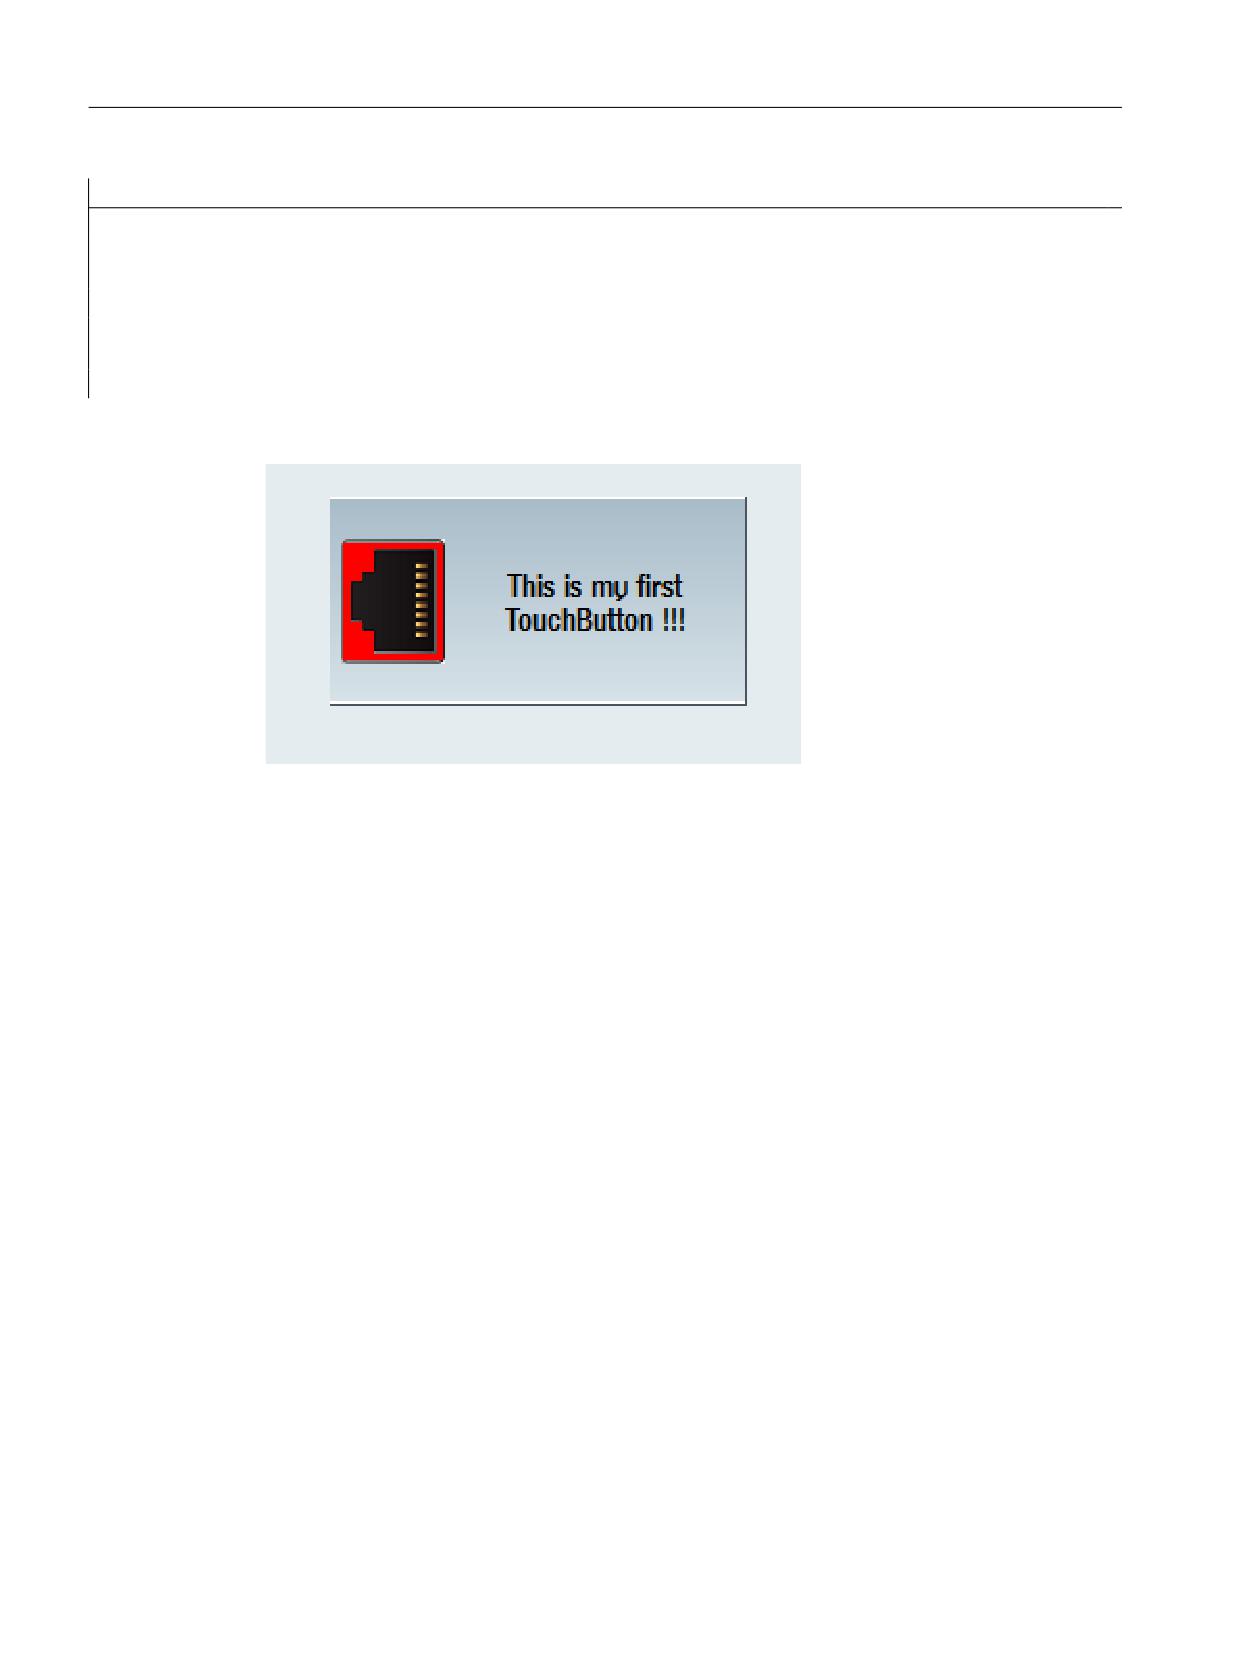
Figure 7-18
Example, "This is my first TouchButton !!!"
7.6.2
Reading and writing properties
Description
The properties listed in the following section are read with ReadCWProperty() and written with
WriteCWProperty().
Examples
Reading the "Text" property of the SlEsTouchButton linked using display variable
"MyTouchButton". The result is written to register 0.
REG[0] = ReadCWProperty("MyTouchButton", "Text")
Writing value "sk_ok.png" in the "Picture" property of the SlEsTouchButton, linked using display
variable "MyTouchButton".
WriteCWProperty("MyTouchButton", "Picture", "sk_ok.png")
SINUMERIK Integrate Run MyScreens
248
Programming Manual, 06/2019, A5E40869575B AC

Graphic and logic elements
7.6 SlEsTouchButton
7.6.3
Properties
Overview
Property
Description
ButtonStyle
TouchButton display style
Flat
Displayed flat or in 3D
Enabled
Activate/deactivate operability
Checkable
Activate/deactivate toggle function
Checked
TouchButton is presently checked
ShowFocusRect
Display focus square if the TouchButton has the input focus
Picture
Picture (image) that should be displayed if the TouchButton is in
the normal, non-actuated state
PicturePressed
Picture (image) to be displayed if the TouchButton is pressed or
checked
PictureAlignment
Alignment of the picture
PictureAlignmentString
ScalePicture
Picture is scaled (stretched or compressed)
PictureKeepAspectRatio
Picture aspect ratio
Text
Normal display text
TextPressed
Text that is displayed if the TouchButton is pressed
textAlignment
Alignment of the text
textAlignmentString
TextAlignedToPicture
Text is aligned relative to the picture - activate/deactivate
BackgroundPicture
Background screen to be displayed
BackgroundPictureAlignment
Alignment of the backg17round picture
BackgroundPictureAlignmentString
ScaleBackgroundPicture
Background picture is scaled (stretched or compressed)
BackgroundPictureKeepAspectRatio
Picture aspect ratio
BackColor
Background color if the TouchButton is in the normal and non-
actuated state
BackColorChecked
Background color if the TouchButton is checked
BackColorPressed
Background color if the TouchButton is presently pressed
BackColorDisabled
Background color if the TouchButton cannot be operated
TextColor
Text color if the TouchButton is in the normal and non-actuated
state
TextColorChecked
Text color if the TouchButton is checked
TextColorPressed
Text color if the TouchButton is presently pressed
TextColorDisabled
Text color if the TouchButton cannot be operated
SINUMERIK Integrate Run MyScreens
Programming Manual, 06/2019, A5E40869575B AC
249
Graphic and logic elements
7.6 SlEsTouchButton
Button style
Syntax:
ReturnValue = ReadCWProperty(TouchButtonVarName, "ButtonStyle")
WriteCWProperty(TouchButtonVarName, "ButtonStyle", Value)
Description:
Reads/sets the TouchButton style
Parameter:
TouchButtonVarName
Name of the display variable that contains a SlEs-
TouchButton
Return Value
read property value (int)
Value
value to be set (int)
0 = Softkey Look&Feel (default)
1 = user-specific
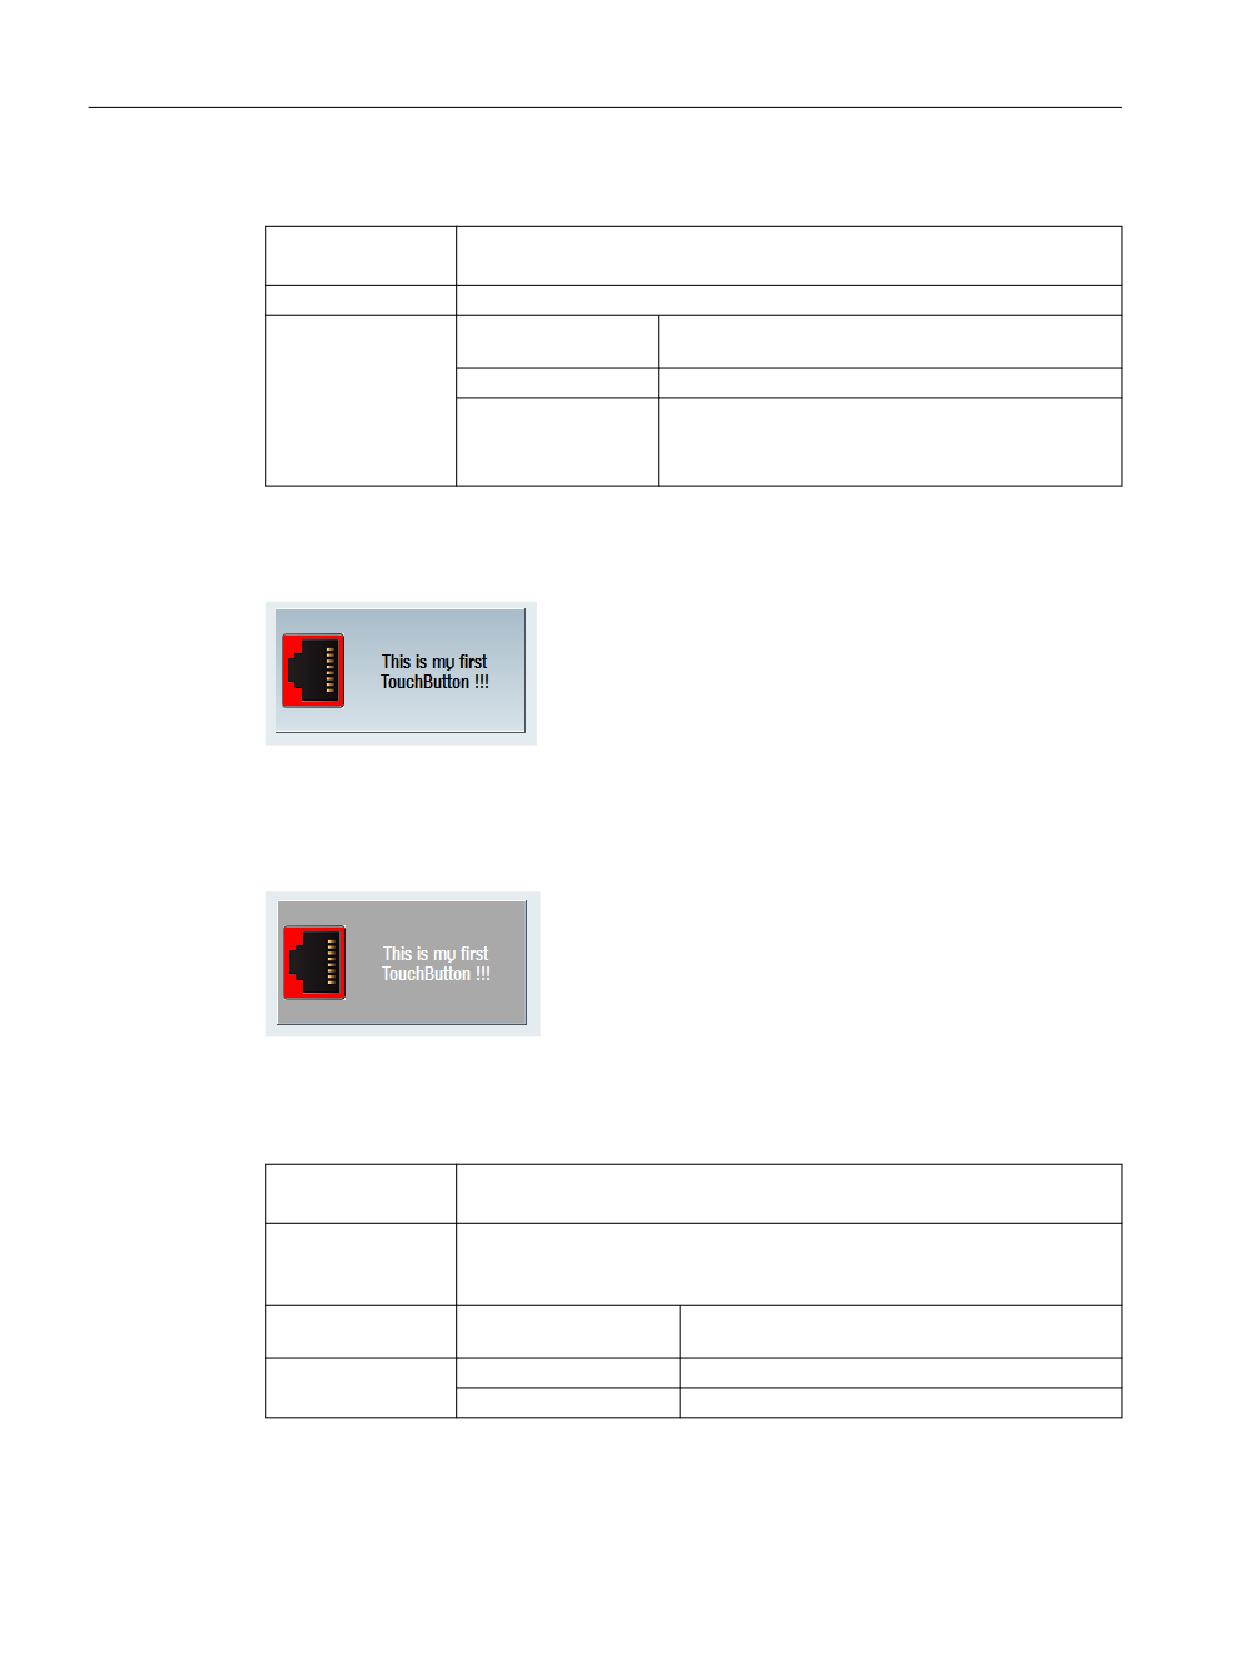
With the setting "0 = Softkey Look&Feel", the TouchButton is displayed and responds just like
a softkey. The currently set skin is taken into account - see display machine data 9112 =
$MM_HMI_SKIN.
Figure 7-19
ButtonStyle - Softkey Look&Feel
With setting "1 = user-specific", the text and backg17round color can be defined according to the
TouchButton state. Further, there is a 3D effect, which allows pictures to be automatically
scaled and influences the distances from the edges.
Figure 7-20
ButtonStyle - user-specific
Flat - display type
Syntax:
ReturnValue = ReadCWProperty(TouchButtonVarName, "Flat")
WriteCWProperty(TouchButtonVarName, "Flat", Value)
Description:
Reads/sets as to whether the TouchButton is shown flat (default) or in 3D
Note: This property is only available with active style (ButtonStyle) "1= user-
specific".
TouchButtonVarName
Name of the display variable that contains a SlEs-
TouchButton
Parameter:
Return Value
read value of the property (bool)
Value
value to be set (bool): TRUE (default) or FALSE
SINUMERIK Integrate Run MyScreens
250
Programming Manual, 06/2019, A5E40869575B AC
Graphic and logic elements
7.6 SlEsTouchButton
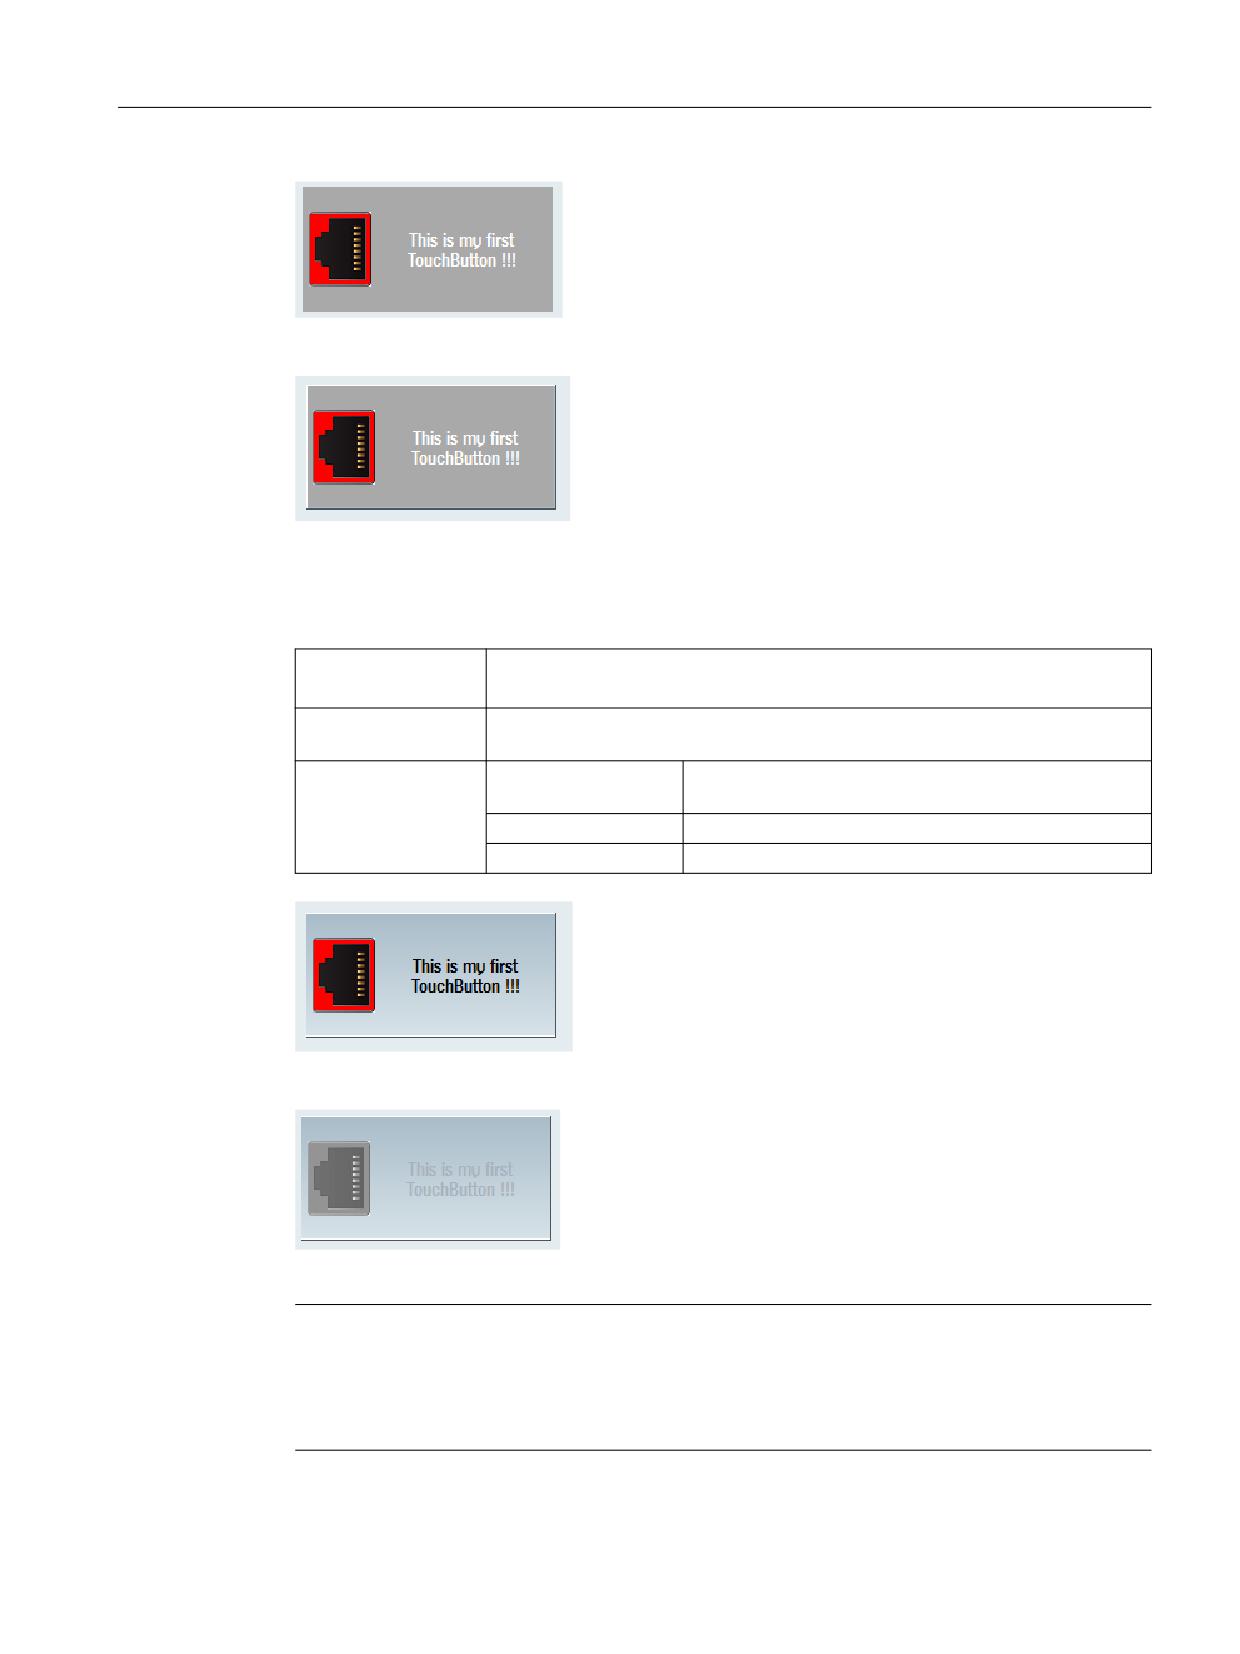
Figure 7-21
Flat display style
Figure 7-22
3D display style
Enabled - operability of the TouchButton
Syntax:
ReturnValue = ReadCWProperty(TouchButtonVarName, "Enabled")
WriteCWProperty(TouchButtonVarName, "Enabled", Value)
Description:
Read/sets as to whether the TouchButton can be operated (= TRUE) - or cannot
be operated (FALSE).
Parameter:
TouchButtonVar-
Name of the display variable that contains a SlEsTouch-
Name
Button
Return Value
Read value of the property (bool)
Value
Value to be set (bool): TRUE (default) or FALSE
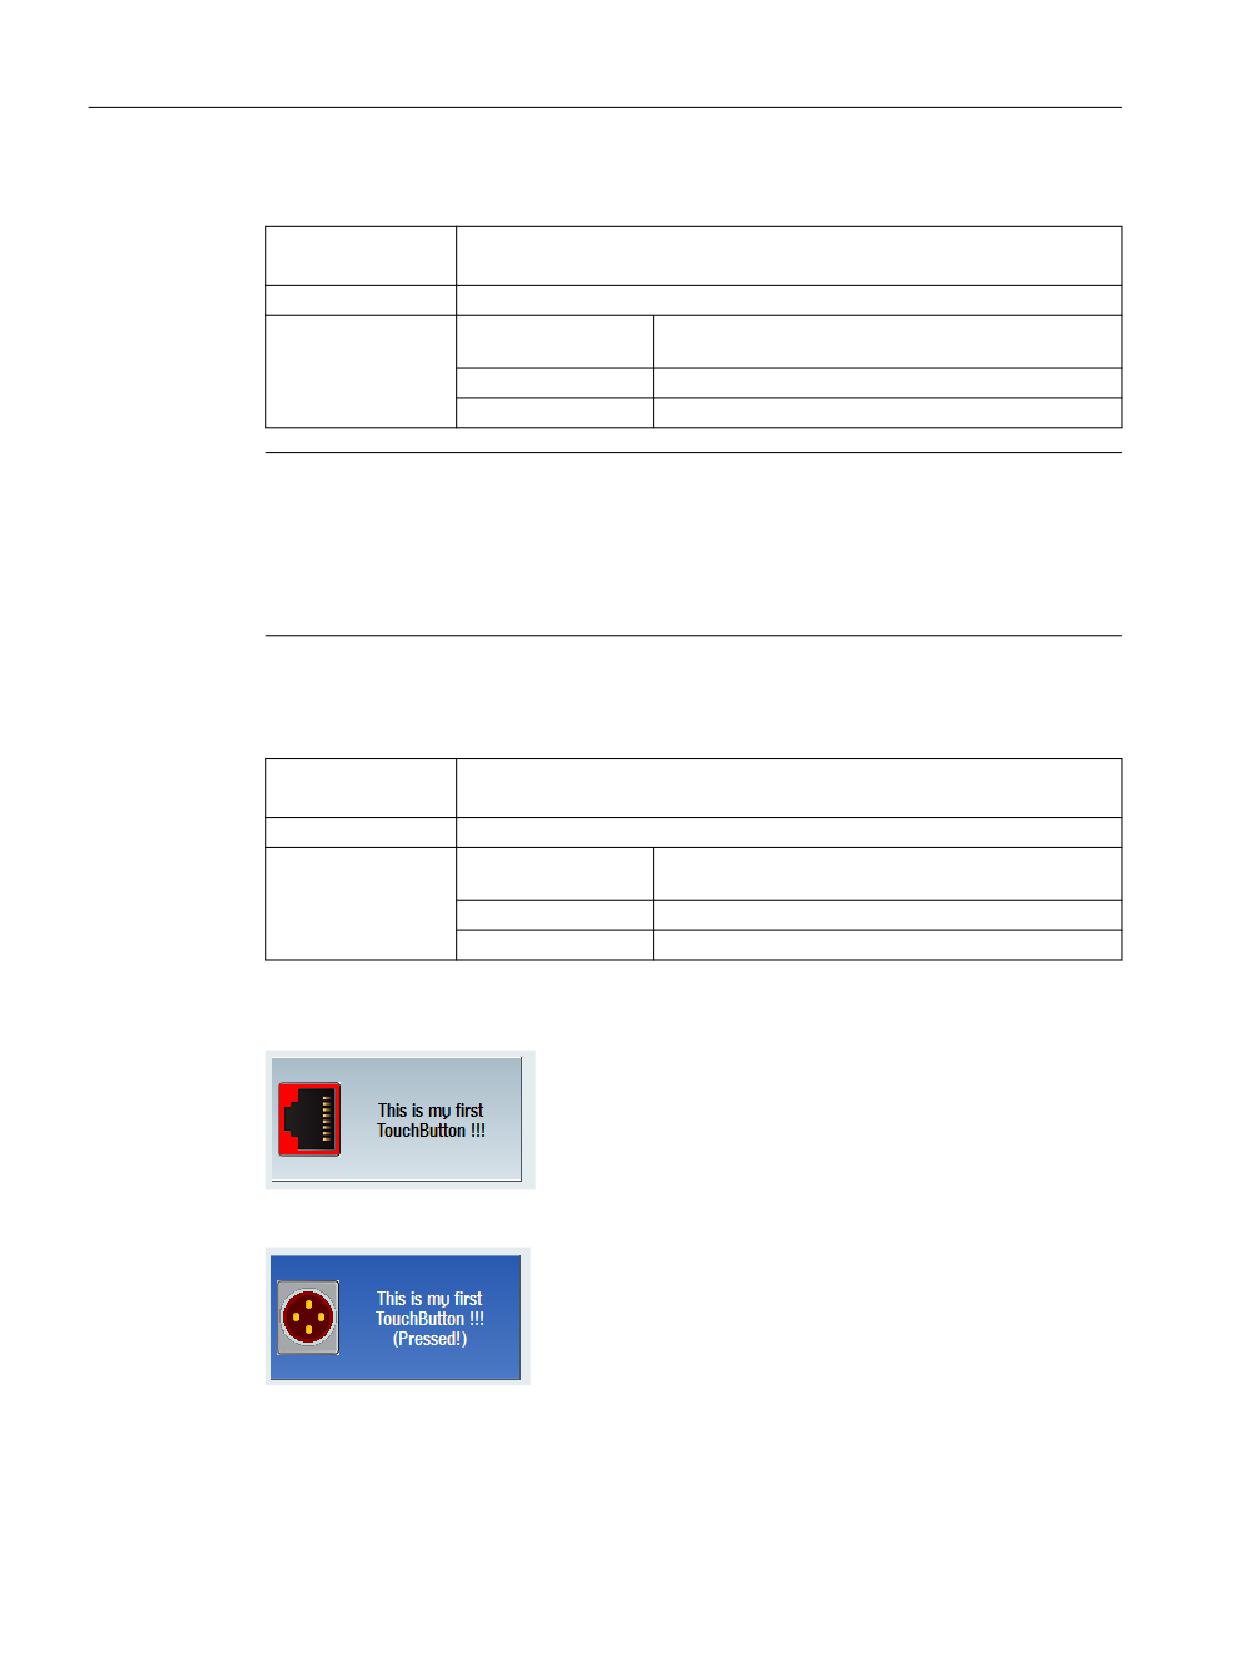
Figure 7-23
TouchButton can be operated
Figure 7-24
TouchButton cannot be operated
Note
If a TouchButton that cannot be operated is clicked, then signal "clickedDisabled" is sent. The
signal can be evaluated, for example an appropriate message issued as to why the
TouchButton and the associated function presently cannot be operated. In the deactivated
state, the picture or backg17round picture is automatically displayed in shades of gray.
SINUMERIK Integrate Run MyScreens
Programming Manual, 06/2019, A5E40869575B AC
251
Graphic and logic elements
7.6 SlEsTouchButton
Checkable - activate/deactivate toggle function
Syntax:
ReturnValue = ReadCWProperty(TouchButtonVarName, "Checkable")
WriteCWProperty(TouchButtonVarName, "Checkable", Value)
Description:
Reads/sets the TouchButton toggle function.
Parameter:
TouchButtonVar-
Name of the display variable that contains a SlEsTouch-
Name
Button
Return Value
read value of the property (bool)
Value
value to be set (bool): TRUE or FALSE (default)
Note
In the default setting, after it has been released, the TouchButton returns to its normal state (the
same as a pushbutton) However, if the TouchButton toggle functionality is activated (TRUE),
then after it is press, it initially remains in the pressed position. If it is actuated again, then it
changes back into its normal state (same as a switch).
See also the "Checked" property.
Checked - actual toggle state
Syntax:
ReturnValue = ReadCWProperty(TouchButtonVarName, "Checked")
WriteCWProperty(TouchButtonVarName, "Checked", Value)
Description:
Reads/sets the actual toggle state of the TouchButton
Parameters:
TouchButtonVar-
Name of the display variable that contains a SlEsTouch-
Name
Button
Return Value
read value of the property (bool)
Value
value to be set (bool): TRUE or FALSE (default)
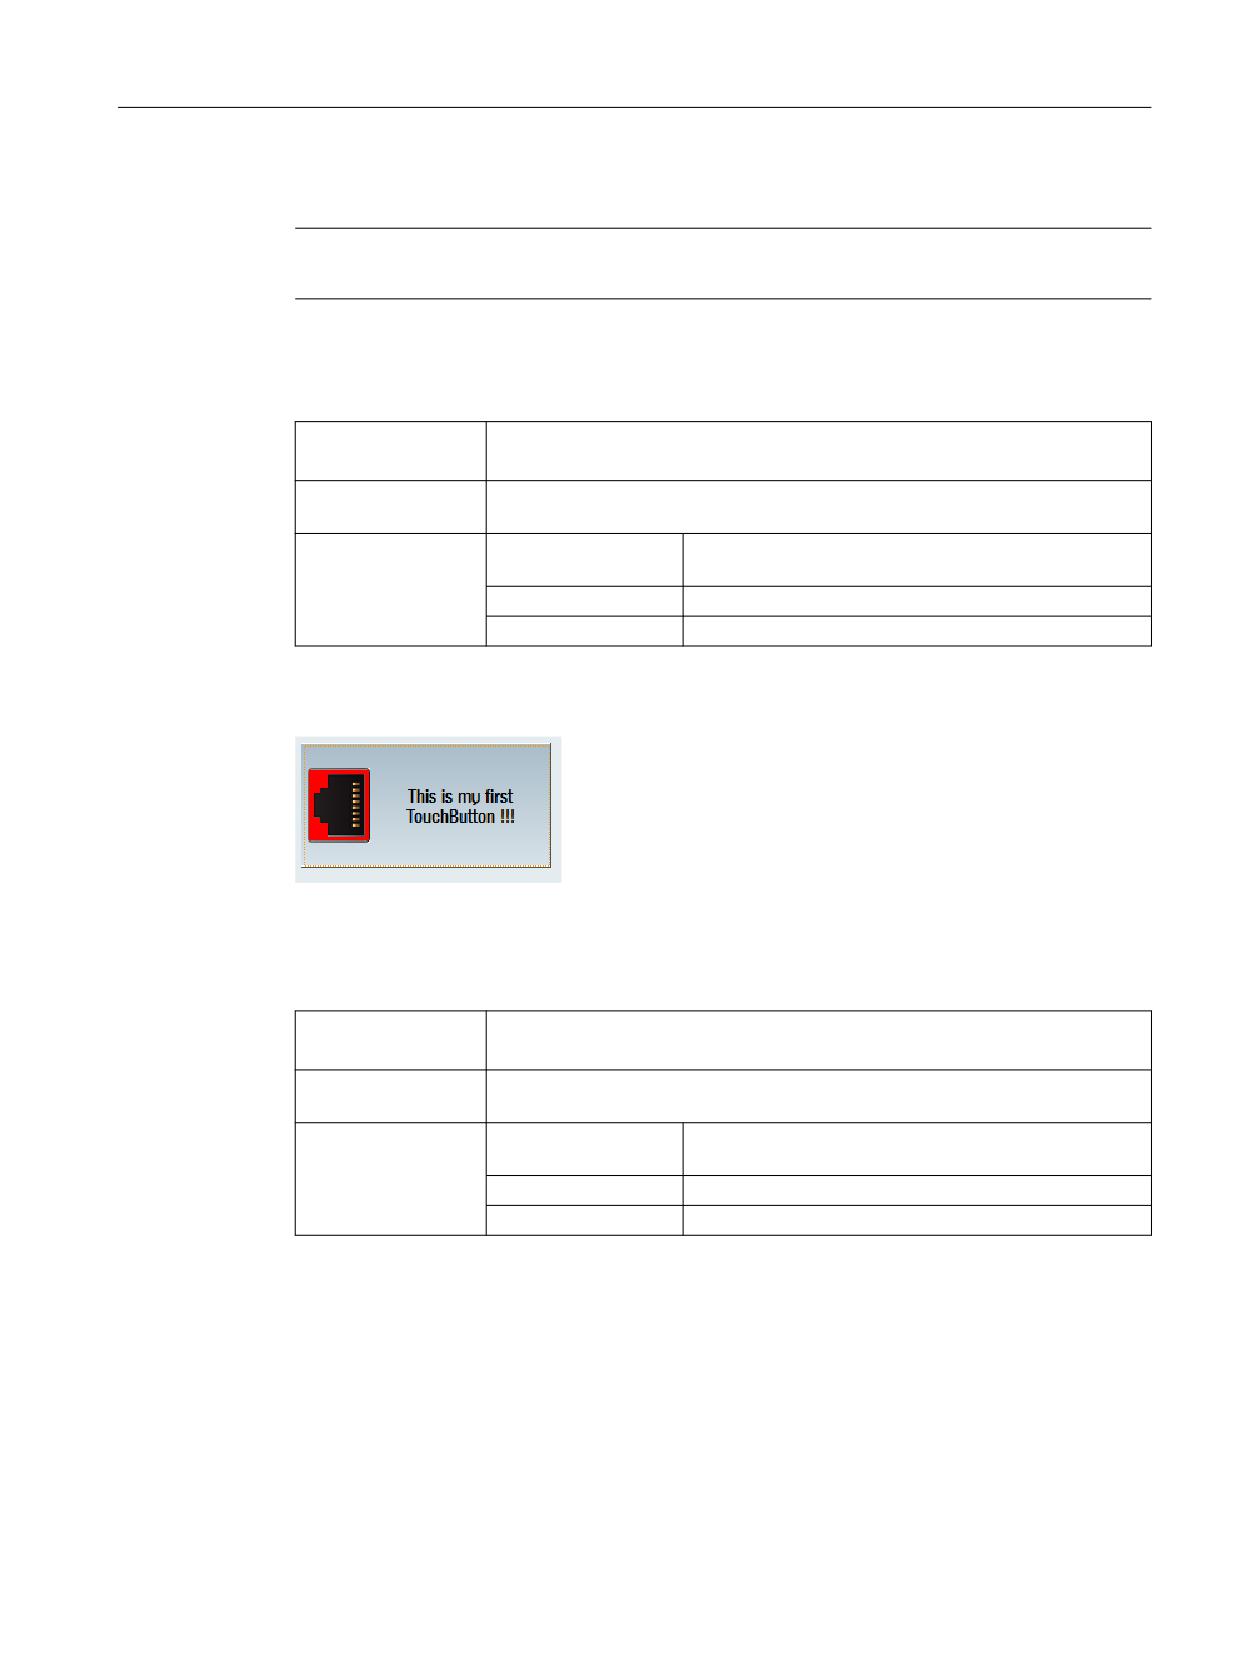
If the toggle function is activated as the property "Checkable" is "TRUE", then the actual toggle
state can be read or set using the "Checked" property.
Figure 7-25
Unchecked
Figure 7-26
Checked
SINUMERIK Integrate Run MyScreens
252
Programming Manual, 06/2019, A5E40869575B AC
Graphic and logic elements
7.6 SlEsTouchButton
For both states, text and picture can be specifically displayed.
Note
See also the "Checkable" property.
ShowFocusRect - focus rectangle display
Syntax:
ReturnValue = ReadCWProperty(TouchButtonVarName, "ShowFocusRect")
WriteCWProperty(TouchButtonVarName, "ShowFocusRect", Value)
Description:
Reads/sets as to whether the TouchButton should display a focus rectangle as
soon as it is assigned the input focus.
Parameters:
TouchButtonVar-
Name of the display variable that contains a SlEsTouch-
Name
Button
Return Value
Read value of the property (bool)
Value
Value to be set (bool): TRUE or FALSE (default)
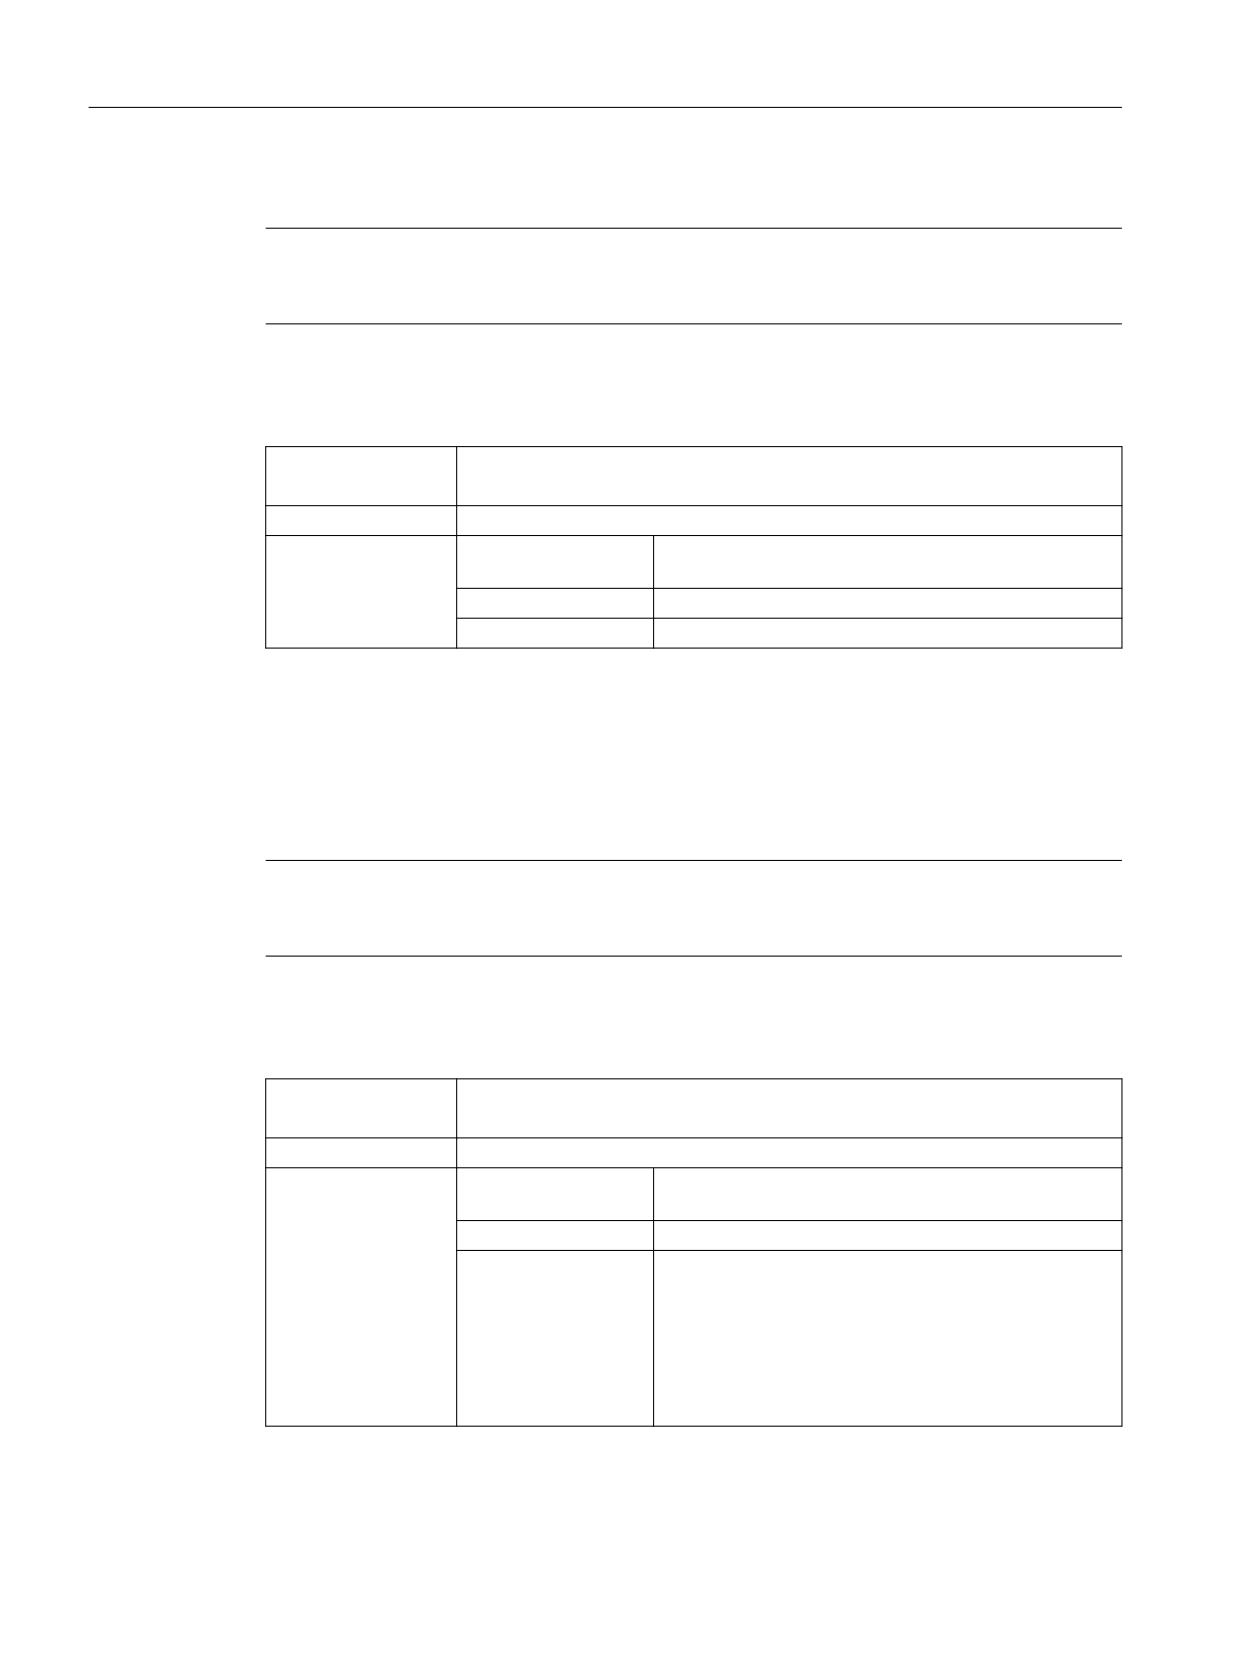
The focus frame color is automatically set with the Operate color setting, in the following
example "orange".
Figure 7-27
ShowFocusRect
Picture - displayed picture
Syntax:
ReturnValue = ReadCWProperty(TouchButtonVarName, "Picture")
WriteCWProperty(TouchButtonVarName, "Picture", Value)
Description:
Reads/sets the picture to be displayed if the TouchButton is in its quiescent state
(not actuated).
Parameter:
TouchButtonVar-
Name of the display variable that contains a SlEsTouch-
Name
Button
Return value
read value of the property (string)
Value
value to be set (string)
The file name is specified as value, for example "sk_ok.png". The TouchButton automatically
determines the correct picture file from the current resolution directory (see Chapter Using
display images/graphics (Page 61)).
SINUMERIK Integrate Run MyScreens
Programming Manual, 06/2019, A5E40869575B AC
253
Graphic and logic elements
7.6 SlEsTouchButton
In the deactivated state, the picture is automatically displayed in shades of gray.
Note
See also properties - "Text", "TextAlignedToPicture", "PictureAlignment", "ScalePicture",
"PictureKeepAspectRatio".
PicturePressed - picture in the pressed state
Syntax:
ReturnValue = ReadCWProperty(TouchButtonVarName, "PicturePressed")
WriteCWProperty(TouchButtonVarName, "PicturePressed", Value)
Description:
Reads/sets the picture to be displayed if the TouchButton is pressed or checked.
Parameter:
TouchButtonVar-
Name of the display variable that contains a SlEsTouch-
Name
Button
Return value
read value of the property (string)
Value
value to be set (string)
If a value is not specified (empty string " "), then in this state, the TouchButton shows the picture
specified with the "Picture" property.
The file name is specified as value, for example "sk_ok.png". The TouchButton automatically
determines the correct picture file from the current resolution directory (see Chapter Using
display images/graphics (Page 61)).
In the deactivated state, the picture is automatically displayed in shades of gray.
Note
See also properties - "Text", "TextAlignedToPicture", "PictureAlignment", "ScalePicture",
"PictureKeepAspectRatio".
PictureAlignment - picture alignment
Syntax:
ReturnValue = ReadCWProperty(TouchButtonVarName, "PictureAlignment")
WriteCWProperty(TouchButtonVarName, "PictureAlignment", Value)
Description:
Reads/sets the alignment of the picture on the TouchButton.
Parameters:
TouchButtonVar-
Name of the display variable that contains a SlEsTouch-
Name
Button
Return Value
Read value of the property (int)
Value
Value to be set (int):
1 = left (default)
2 = right
32 = top
64 = bottom
128 = centered
SINUMERIK Integrate Run MyScreens
254
Programming Manual, 06/2019, A5E40869575B AC
Graphic and logic elements
7.6 SlEsTouchButton
Note
See Chapter Positioning and aligning picture and text (Page 269).
Also see properties - "Text", "TextAlignedToPicture", "PictureAlignmentString", "ScalePicture",
"PictureKeepAspectRatio".
PictureAlignmentString - picture alignment
Syntax:
ReturnValue = ReadCWProperty(TouchButtonVarName, "PictureAlignment-
String")
WriteCWProperty(TouchButtonVarName, "PictureAlignmentString", Value)
Description:
Reads/sets the alignment of the picture. This property is analogous to the "Pic-
tureAlignment" property. However, the value is not transfigured here as number
(int), but as string.
Parameter:
TouchButtonVar-
Name of the display variable that contains a SlEsTouch-
Name
Button
Return value
read value of the property (string)
Value
value to be set (string):
"Left" = left (default)
"Right" = right
"Top" = top
"Bottom" = bottom
"Center" = centered
Note
See Chapter Positioning and aligning picture and text (Page 269).
See also properties - "Text", "TextAlignedToPicture", "PictureAlignment", "ScalePicture",
"PictureKeepAspectRatio".
ScalePicture - scale picture
Syntax:
ReturnValue = ReadCWProperty(TouchButtonVarName, "ScalePicture")
WriteCWProperty(TouchButtonVarName, "ScalePicture", Value)
Description:
Reads/sets whether the TouchButton (depending on the alignment) should
scale the picture to be displayed.
Parameters:
TouchButtonVar-
Name of the display variable that contains a SlEsTouch-
Name
Button
Return Value
Read value of the property (bool)
Value
value to be set (bool): TRUE or FALSE (default)
Note
See Chapter Positioning and aligning picture and text (Page 269).
SINUMERIK Integrate Run MyScreens
Programming Manual, 06/2019, A5E40869575B AC
255
Graphic and logic elements
7.6 SlEsTouchButton
PictureKeepAspectRatio - scale picture - keeping the aspect ratio
Syntax:
ReturnValue = ReadCWProperty(TouchButtonVarName, "PictureKeepAspec-
tRatio")
WriteCWProperty(TouchButtonVarName, "PictureKeepAspectRatio", Value)
Description:
Reads/sets, whether, when scaling (Property "ScalePicture" = "TRUE"), the
aspect ratio of the picture should be kept or not.
Parameter:
TouchButtonVar-
Name of the display variable that contains a SlEsTouch-
Name
Button
Return Value
read value of the property (bool)
Value
Value to be set (bool): TRUE (default) or FALSE
Note
See Chapter Positioning and aligning picture and text (Page 269).
Text - display text
Syntax:
ReturnValue = ReadCWProperty(TouchButtonVarName, "Text")
WriteCWProperty(TouchButtonVarName, "Text", Value)
Description:
Reads/sets the displayed text if the TouchButton is in its quiescent state (not
actuated).
Parameter:
TouchButtonVar-
Name of the display variable that contains a SlEsTouch-
Name
Button
Return value
read value of the property (string)
Value
value to be set (string)
The texts are automatically wrapped around at the word limits in the rectangle provided.
Line breaks are only forced as a result of the system if the text to be displayed comes from a
language file.
Note
See Chapter Language-dependent texts (Page 271).
TextPressed - displayed text in the pressed state
Syntax:
ReturnValue = ReadCWProperty(TouchButtonVarName, "TextPressed")
WriteCWProperty(TouchButtonVarName, "TextPressed", Value)
Description:
Reads/sets the displayed text if the TouchButton is pressed or checked.
Parameter:
TouchButtonVar-
Name of the display variable that contains a SlEsTouch-
Name
Button
Return value
read value of the property (string)
Value
value to be set (string)
The texts are automatically wrapped around at the word limits in the rectangle provided.
SINUMERIK Integrate Run MyScreens
256
Programming Manual, 06/2019, A5E40869575B AC
Graphic and logic elements
7.6 SlEsTouchButton
Line breaks are only forced as a result of the system if the text to be displayed comes from a
language file.
Note
See Chapter Language-dependent texts (Page 271).
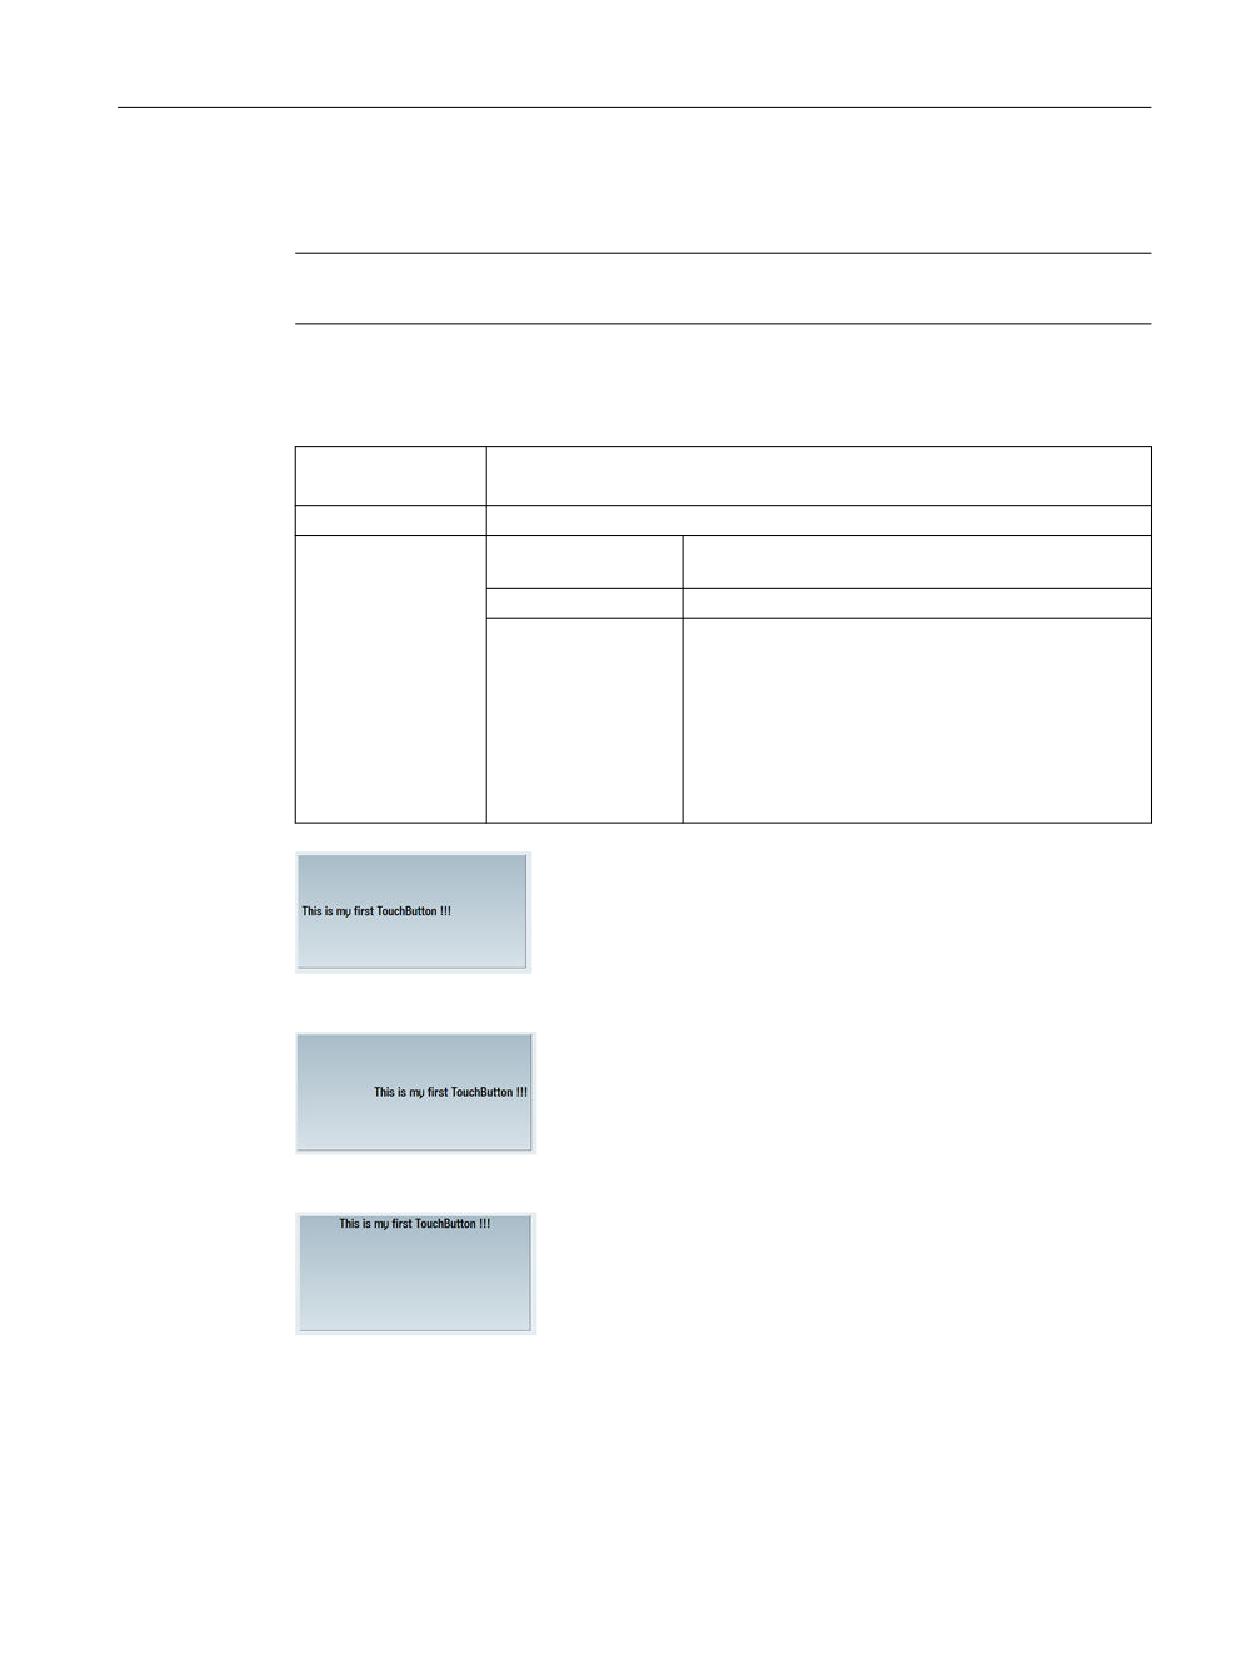
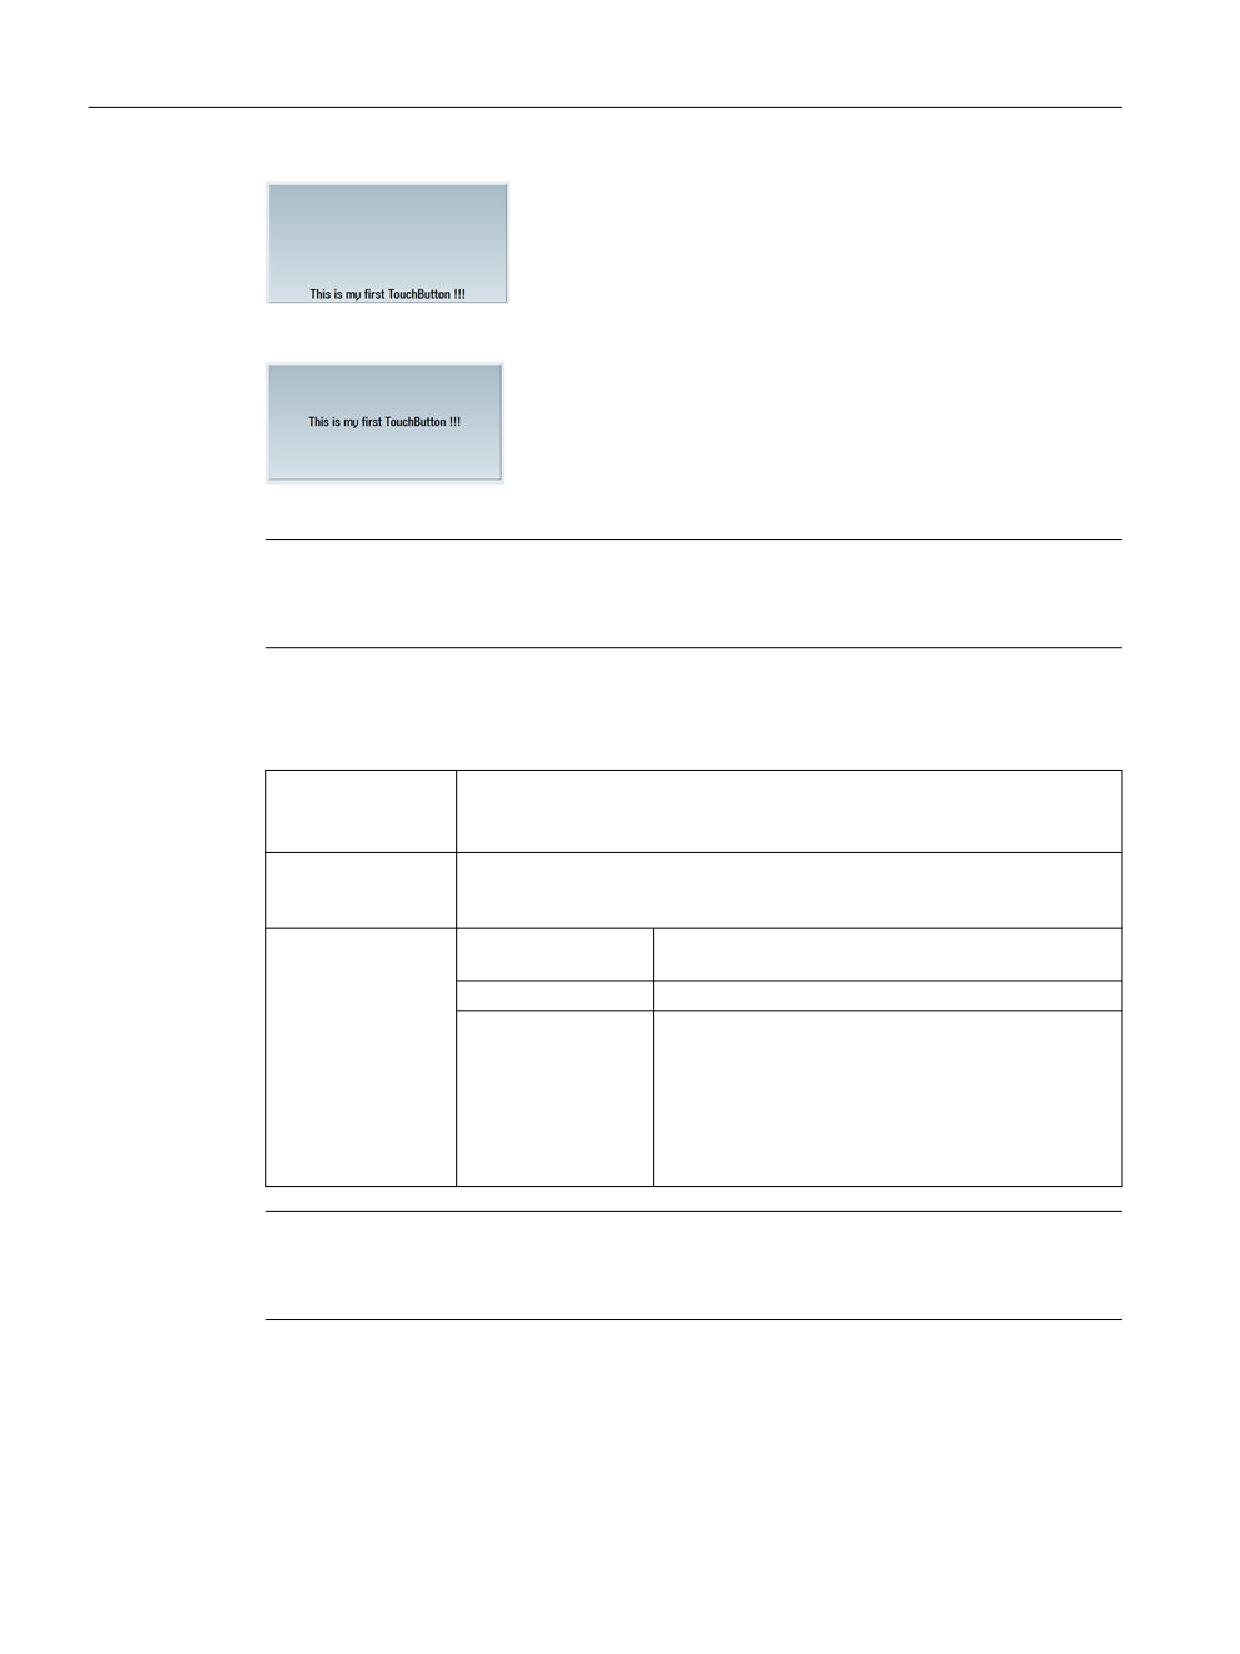
TextAlignment - alignment of the text
Syntax:
ReturnValue = ReadCWProperty(TouchButtonVarName, "TextAlignment")
WriteCWProperty(TouchButtonVarName, "TextAlignment", Value)
Description:
Reads/sets the alignment of the text on the TouchButton
Parameter:
TouchButtonVar-
Name of the display variable that contains a SlEsTouch-
Name
Button
Return Value
read property value (int)
Value
Value to be set (int):
1 = left
2 = right
32 = top
64 = bottom
128 = centered (default)
(see examples below)
Figure 7-28
TextAlignment - left
Figure 7-29
TextAlignment - right
Figure 7-30
TextAlignment - top
SINUMERIK Integrate Run MyScreens
Programming Manual, 06/2019, A5E40869575B AC
257
Graphic and logic elements
7.6 SlEsTouchButton
Figure 7-31
TextAlignment - bottom
Figure 7-32
TextAlignment - centered
Note
See Chapter Positioning and aligning picture and text (Page 269).
See also properties "Text", "TextAlignmentString", "TextAlignedToPicture".
TextAlignmentString - alignment of the text
Syntax:
ReturnValue = ReadCWProperty(TouchButtonVarName, "TextAlignment-
String")
WriteCWProperty(TouchButtonVarName, "TextAlignmentString", Value)
Description:
Reads/sets the alignment of the text. This property is analogous to the "TextA-
lignment" property. The value is not transfigured here as number (int), but as
string.
Parameter:
TouchButtonVar-
Name of the display variable that contains a SlEsTouch-
Name
Button
Return Value
read value of the property (string)
Value
value to be set (string):
"Left" = left
"Right" = right
"Top" = top
"Bottom" = bottom
"Center" = centered (default)
Note
See Chapter Positioning and aligning picture and text (Page 269).
See also properties - "Text", "TextAlignment", "TextAlignedToPicture".
SINUMERIK Integrate Run MyScreens
258
Programming Manual, 06/2019, A5E40869575B AC
Graphic and logic elements
7.6 SlEsTouchButton
TextAlignedToPicture - text aligned relative to the picture
Syntax:
ReturnValue = ReadCWProperty(TouchButtonVarName, "TextAlignedToPic-
ture")
WriteCWProperty(TouchButtonVarName, "TextAlignedToPicture", Value)
Description:
Reads/sets whether the displayed text should be positioned relative to the pic-
ture. If FALSE is set here, then the text is shown centered on the TouchButton.
Parameter:
TouchButtonVar-
Name of the display variable that contains a SlEsTouch-
Name
Button
Return Value
read value of the property (bool)
Value
value to be set (bool): TRUE (default) or FALSE
Note
See Chapter Positioning and aligning picture and text (Page 269).
See also properties "Text", "TextPressed", "Picture", "PicturePressed".
BackColor - backg17round color
Syntax:
ReturnValue = ReadCWProperty(TouchButtonVarName, " BackColor")
WriteCWProperty(TouchButtonVarName, " BackColor", Value)
Description:
Reads/sets the backg17round color if the TouchButton is in its quiescent state (not
actuated).
Parameter:
TouchButtonVar-
Name of the display variable that contains a SlEsTouch-
Name
Button
Return Value
Read color of the property (string)
Value
Value to be set (string) as RGB value in the form
"#RRGGBB",
for example, "#04B7FB"
Note
This property is only available with active style "1= user-specific".
BackColorChecked - backg17round color in the checked state
Syntax:
ReturnValue = ReadCWProperty(TouchButtonVarName, "BackColorCh-
ecked")
WriteCWProperty(TouchButtonVarName, " BackColorChecked", Value)
Description:
Reads/sets the backg17round color if the TouchButton is in the clicked state (tog-
gle function). See properties "Checked“, "Checkable“
SINUMERIK Integrate Run MyScreens
Programming Manual, 06/2019, A5E40869575B AC
259
Graphic and logic elements
7.6 SlEsTouchButton
Parameter:
TouchButtonVar-
Name of the display variable that contains a SlEsTouch-
Name
Button
Return Value
Read color of the property (string)
Value
Value to be set (string) as RGB value in the form
"#RRGGBB",
for example, "#04B7FB"
Note
This property is only available with active style "1= user-specific".
Note
See also properties "Checked", "Checkable".
BackColorPressed - backg17round color in the pressed state
Syntax:
ReturnValue = ReadCWProperty(TouchButtonVarName, "BackColorPressed")
WriteCWProperty(TouchButtonVarName, " BackColorPressed", Value)
Description:
Reads/sets the backg17round color if the TouchButton is in the pressed state
Parameter:
TouchButtonVar-
Name of the display variable that contains a SlEsTouch-
Name
Button
Return Value
Read color of the property (string)
Value
Value to be set (string) as RGB value in the form
"#RRGGBB"
e.g. "#04B7FB"
Note
This property is only available with active style "1= user-specific".
BackColorDisabled - backg17round color in the deactivated state
Syntax:
ReturnValue = ReadCWProperty(TouchButtonVarName, "BackColorDisabled")
WriteCWProperty(TouchButtonVarName, " BackColorDisabled", Value)
Description:
Reads/sets the backg17round color if the TouchButton is in the deactivated state.
Parameters:
TouchButtonVar-
Name of the display variable that contains a SlEsTouch-
Name
Button
Return Value
Read color of the property (string)
Value
Value to be set (string) as RGB value in the form
"#RRGGBB",
for example, "#04B7FB"
Note
This property is only available with active style "1= user-specific".
SINUMERIK Integrate Run MyScreens
260
Programming Manual, 06/2019, A5E40869575B AC
Graphic and logic elements
7.6 SlEsTouchButton
Note
See also the " Enabled" property.
TextColor - text color
Syntax:
ReturnValue = ReadCWProperty(TouchButtonVarName, "TextColor")
WriteCWProperty(TouchButtonVarName, " TextColor", Value)
Description:
Reads/sets the text color if the TouchButton is in its quiescent state (not actu-
ated).
Parameters:
TouchButtonVar-
Name of the display variable that contains a SlEsTouch-
Name
Button
Return Value
Read color of the property (string)
Value
Value to be set (string) as RGB value in the form
"#RRGGBB",
for example, "#04B7FB"
Note
This property is only available with active style "1= user-specific".
TextColorChecked - text color in the checked state
Syntax:
ReturnValue = ReadCWProperty(TouchButtonVarName, "TextColorChecked")
WriteCWProperty(TouchButtonVarName, " TextColorChecked", Value)
Description:
Reads/sets the text color if the TouchButton is in the checked state (toggle
function).
Parameters:
TouchButtonVar-
Name of the display variable that contains a SlEsTouch-
Name
Button
Return Value
Read color of the property (string)
Value
Value to be set (string) as RGB value in the form
"#RRGGBB",
for example, "#04B7FB"
Note
This property is only available with active style "1= user-specific".
Note
See also properties "Checked", "Checkable".
SINUMERIK Integrate Run MyScreens
Programming Manual, 06/2019, A5E40869575B AC
261
Graphic and logic elements
7.6 SlEsTouchButton
TextColorPressed - text color in the pressed state
Syntax:
ReturnValue = ReadCWProperty(TouchButtonVarName, "TextColorPressed")
WriteCWProperty(TouchButtonVarName, "TextColorPressed", Value)
Description:
Reads/sets the text color if the TouchButton is in the pressed state
Parameters:
TouchButtonVar-
Name of the display variable that contains a SlEsTouch-
Name
Button
Return Value
Read color of the property (string)
Value
Value to be set (string) as RGB value in the form
"#RRGGBB",
for example, "#04B7FB"
Note
This property is only available with active style "1= user-specific".
TextColorDisabled - text color in the deactivated state
Syntax:
ReturnValue = ReadCWProperty(TouchButtonVarName, "TextColorDisabled")
WriteCWProperty(TouchButtonVarName, "TextColorDisabled", Value)
Description:
Reads/sets the text color if the TouchButton is in the deactivated state
Parameters:
TouchButtonVar-
Name of the display variable that contains a SlEsTouch-
Name
Button
Return Value
Read color of the property (string)
Value
Value to be set (string) as RGB value in the form
"#RRGGBB",
for example, "#04B7FB"
Note
This property is only available with active style "1= user-specific".
Note
See also the " Enabled" property.
BackgroundPicture - backg17round picture
Syntax:
ReturnValue = ReadCWProperty(TouchButtonVarName, "BackgroundPic-
ture")
WriteCWProperty(TouchButtonVarName, "BackgroundPicture", Value)
Description:
Reads/sets the permanent backg17round picture to be displayed, i.e. independent
of the state.
SINUMERIK Integrate Run MyScreens
262
Programming Manual, 06/2019, A5E40869575B AC
Graphic and logic elements
7.6 SlEsTouchButton
Parameters:
TouchButtonVar-
Name of the display variable that contains a SlEsTouch-
Name
Button
Return Value
read value of the property (string)
Value
value to be set (string)
The file name is specified as value, for example "sk_ok.png". The TouchButton automatically
determines the correct picture file from the current resolution directory (see Chapter Using
display images/graphics (Page 61)).
In the deactivated state, the backg17round picture is automatically shown in shades of gray.
Note
See Chapter Using display images/graphics (Page 61).
See also properties - "BackgroundPictureAlignment", "ScaleBackgroundPicture",
"BackgroundPictureKeepAspectRatio".
BackgroundPictureAlignment - alignment of the backg17round picture
Syntax:
ReturnValue = ReadCWProperty(TouchButtonVarName, "BackgroundPictur-
eAlignment")
WriteCWProperty(TouchButtonVarName, "BackgroundPictureAlignment", Val-
ue)
Description:
Reads/sets the alignment of the backg17round picture.
Parameters:
TouchButtonVar-
Name of the display variable that contains a SlEsTouch-
Name
Button
Return Value
Read value of the property (int)
Value
Value to be set (int):
1 = left
2 = right
32 = top
64 = bottom
128 = centered (default)
Note
See Chapter Positioning and aligning picture and text (Page 269).
See also properties - "BackgroundPictureAlignment", "ScaleBackgroundPicture",
"BackgroundPictureKeepAspectRatio".
SINUMERIK Integrate Run MyScreens
Programming Manual, 06/2019, A5E40869575B AC
263
Graphic and logic elements
7.6 SlEsTouchButton
BackgroundPictureAlignmentString - alignment of the backg17round picture
Syntax:
ReturnValue = ReadCWProperty(TouchButtonVarName, "BackgroundPictur-
eAlignmentString")
WriteCWProperty(TouchButtonVarName, "BackgroundPictureAlignment-
String", Value)
Description:
Reads/sets the alignment of the backg17round picture. This property is analogous
to the property "BackgroundPictureAlignment". However, the value is not trans-
figured here as number (int), but as string.
Parameter:
TouchButtonVar-
Name of the display variable that contains a SlEsTouch-
Name
Button
Return Value
Read value of the property (int)
Value
Value to be set (int):
"Left" = left
"Right" = right
"Top" = top
"Bottom" = bottom
"Center" = centered (default)
Note
See Chapter Positioning and aligning picture and text (Page 269).
See also properties - "BackgroundPictureAlignment", "ScaleBackgroundPicture",
"BackgroundPictureKeepAspectRatio".
ScaleBackgroundPicture - scale backg17round picture
Syntax:
ReturnValue = ReadCWProperty(TouchButtonVarName, "ScalePicture")
WriteCWProperty(TouchButtonVarName, "ScalePicture", Value)
Description:
Reads/sets whether the TouchButton (depending on the alignment) should
scale the picture to be displayed.
Parameter:
TouchButtonVar-
Name of the display variable that contains a SlEsTouch-
Name
Button
Return value
read value of the property (bool)
Value
value to be set (bool): TRUE or FALSE (default)
Note
See Chapter Positioning and aligning picture and text (Page 269).
See also properties - "BackgroundPictureAlignment", "ScaleBackgroundPicture",
"BackgroundPictureKeepAspectRatio".
SINUMERIK Integrate Run MyScreens
264
Programming Manual, 06/2019, A5E40869575B AC
Graphic and logic elements
7.6 SlEsTouchButton
BackgroundPictureKeepAspectRatio - scale backg17round picture and keep aspect ratio
Syntax:
ReturnValue = ReadCWProperty(TouchButtonVarName, "BackgroundPicture-
KeepAspectRatio")
WriteCWProperty(TouchButtonVarName, "BackgroundPictureKeepAspectRa-
tio", Value)
Description:
Reads/sets, whether, when scaling (property "ScaleBackgroundPicture" =
"TRUE") the aspect ratio of the backg17round picture should be kept or not.
Parameter:
TouchButtonVar-
Name of the display variable that contains a SlEsTouch-
Name
Button
Return value
read value of the property (bool)
Value
value to be set (bool): TRUE (default) or FALSE
Note
See Chapter Positioning and aligning picture and text (Page 269).
7.6.4
Functions
You can call the subsequently listed functions using the CallCWMethod() function.
Example
Setting the margins of the SlEsTouchButton linked using display variable "MyTouchButton".
The result is written to register 0.
REG[0] = CallCWMethod("MyTouchButton", "setMargins", 20, 20, 20, 20,
20)
Overview
Function
Description
setMargins
Setting the margins
serialize
Saves/restores the actual state
setMargins - setting the margins
Syntax:
ReturnValue = CallCWMethod(TouchButtonVarName, "setMargins", left, top,
right, bottom, center)
ReturnValue = CallCWMethod(TouchButtonVarName, "setMargins", left, top,
right, bottom, center, marginAlignment)
Description:
Using this function, the margin clearances and the distance between picture and
text are defined.
If a value of "-1" is specified, then this value is applicable for the system default
clearance. If the value is greater or equal to "0", then the value is set as edge
clearance.
SINUMERIK Integrate Run MyScreens
Programming Manual, 06/2019, A5E40869575B AC
265
Graphic and logic elements
7.6 SlEsTouchButton
Parameters:
TouchButtonVarName
Name of the display variable that contains a SlEs-
TouchButton
Return Value
Error code (bool): TRUE = successful
left
lefthand edge (int)
top
top edge (int)
right
right-hand edge (int)
bottom
bottom edge (int)
center
Clearance between picture and text (int), if the align-
ment is not "center"
marginAlignment
Optional: Defines whether the margin next to the dis-
played picture should also apply when positioning the
display text (bool), TRUE (default)
serialize - save/restore the actual state
Syntax:
ReturnValue = CallCWMethod(TouchButtonVarName, "serialize", FilePath, Is-
Storing)
Description:
With this function, when required, you can write and restore the actual state and
content of the SlEsTouchButton binary into a file or Data Stream. This function
automatically refreshes the display.
Parameters:
TouchButtonVar-
Name of the display variable that contains a SlEsTouch-
Name
Button
Return Value
Error code (bool): TRUE = successful
FilePath
Complete path mit file name (QString)
IsStoring
Save/restore (bool): TRUE = save
Note
Programming engineers do not directly use this function!
7.6.5
Signals
You can capture the subsequently described signals in the configuration and respond
appropriately.
Overview
Function
Description
clickedDisabled
Press a deactivated TouchButton
clicked
A click or tap is executed
checked
It was toggled
SINUMERIK Integrate Run MyScreens
266
Programming Manual, 06/2019, A5E40869575B AC
Graphic and logic elements
7.6 SlEsTouchButton
● If a TouchButton can be operated - but it cannot be toggled - then "clicked" signal is sent
when the TouchButton is pressed.
● If a TouchButton can be operated and toggled - then the following sequence of signals is
sent when the TouchButton is pressed.
"checked" → "clicked"
● If a TouchButton cannot be operated - then the "clickedDisabled" signal is sent when the
TouchButton is pressed.
All of the signals mentioned above are only sent after an operator action, i.e. only once the
mouse or the space bar has been released or after a tap for multitouch.
As a consequence, the SlEsTouchButton has a pure switch function, i.e. a pushbutton function
is not possible.
Note
For multitouch operation, note that a click can only be sent if a tap gesture has been completely
identified (pressing and releasing within approximately 0.7 seconds). If an action was already
carried out when simply pressing, it would not be possible for example to scroll/shift the
ScrollArea behind, or it could lead to operator input errors.
clicked - the TouchButton was clicked
Syntax:
SUB(on_<TouchButtonVarName>_clicked)
…
END_SUB
Description:
A complete sequence comprising pressing and releasing a TouchButton (that
can be operated) results in a "clicked" signal. We recommend working predom-
inantly with this signal.
Parameters:
TouchButtonVar-
Name of the display variable that contains a SlEsTouch-
Name
Button
SIGARG[0]
Supplies the toggle state of the TouchButton (bool)
Example
DEF MyTouchButton = (W///,"slesstdcw.SlEsTouchButton"/////70,20,200,100/0,0,0,0)
SUB(on_MyTouchButton_clicked)
DLGL("checked: " << SIGARG[0])
END_SUB
SINUMERIK Integrate Run MyScreens
Programming Manual, 06/2019, A5E40869575B AC
267

Graphic and logic elements
7.6 SlEsTouchButton
checked - a TouchButton was toggled
Syntax:
SUB(on_<TouchButtonVarName>_checked)
…
END_SUB
Description:
A TouchButton that can be toggled was pressed, which changed its state.
Parameters:
TouchButtonVar-
Name of the display variable that contains a SlEsTouch-
Name
Button
SIGARG[0]
Supplies the toggle state of the TouchButton (bool)
Example
DEF MyTouchButton = (W///,"slesstdcw.SlEsTouchButton"/////70,20,200,100/0,0,0,0)
SUB(on_MyTouchButton_toggled)
DLGL("toggled: " << SIGARG[0])
END_SUB
clickedDisabled - a TouchButton that cannot be operated was clicked
Syntax:
SUB(on_<TouchButtonVarName>_clickedDisabled)
…
END_SUB
Description:
A complete sequence comprising pressing and releasing a TouchButton (that
cannot be operated) results in a "clickedDisabled" signal.
Parameters:
TouchButtonVar-
Name of the display variable that contains a SlEsTouch-
Name
Button
SIGARG[0]
Supplies the toggle state of the TouchButton (bool)
Example
DEF MyTouchButton = (W///,"slesstdcw.SlEsTouchButton"/////70,20,200,100/0,0,0,0)
SUB(on_MyTouchButton_clickedDisabled)
DLGL("checkedDisabled: " << SIGARG[0])
END_SUB
SINUMERIK Integrate Run MyScreens
268
Programming Manual, 06/2019, A5E40869575B AC
Graphic and logic elements
7.6 SlEsTouchButton
7.6.6
Positioning and aligning picture and text
Positioning pictures
A picture is positioned as follows with the specified alignment:
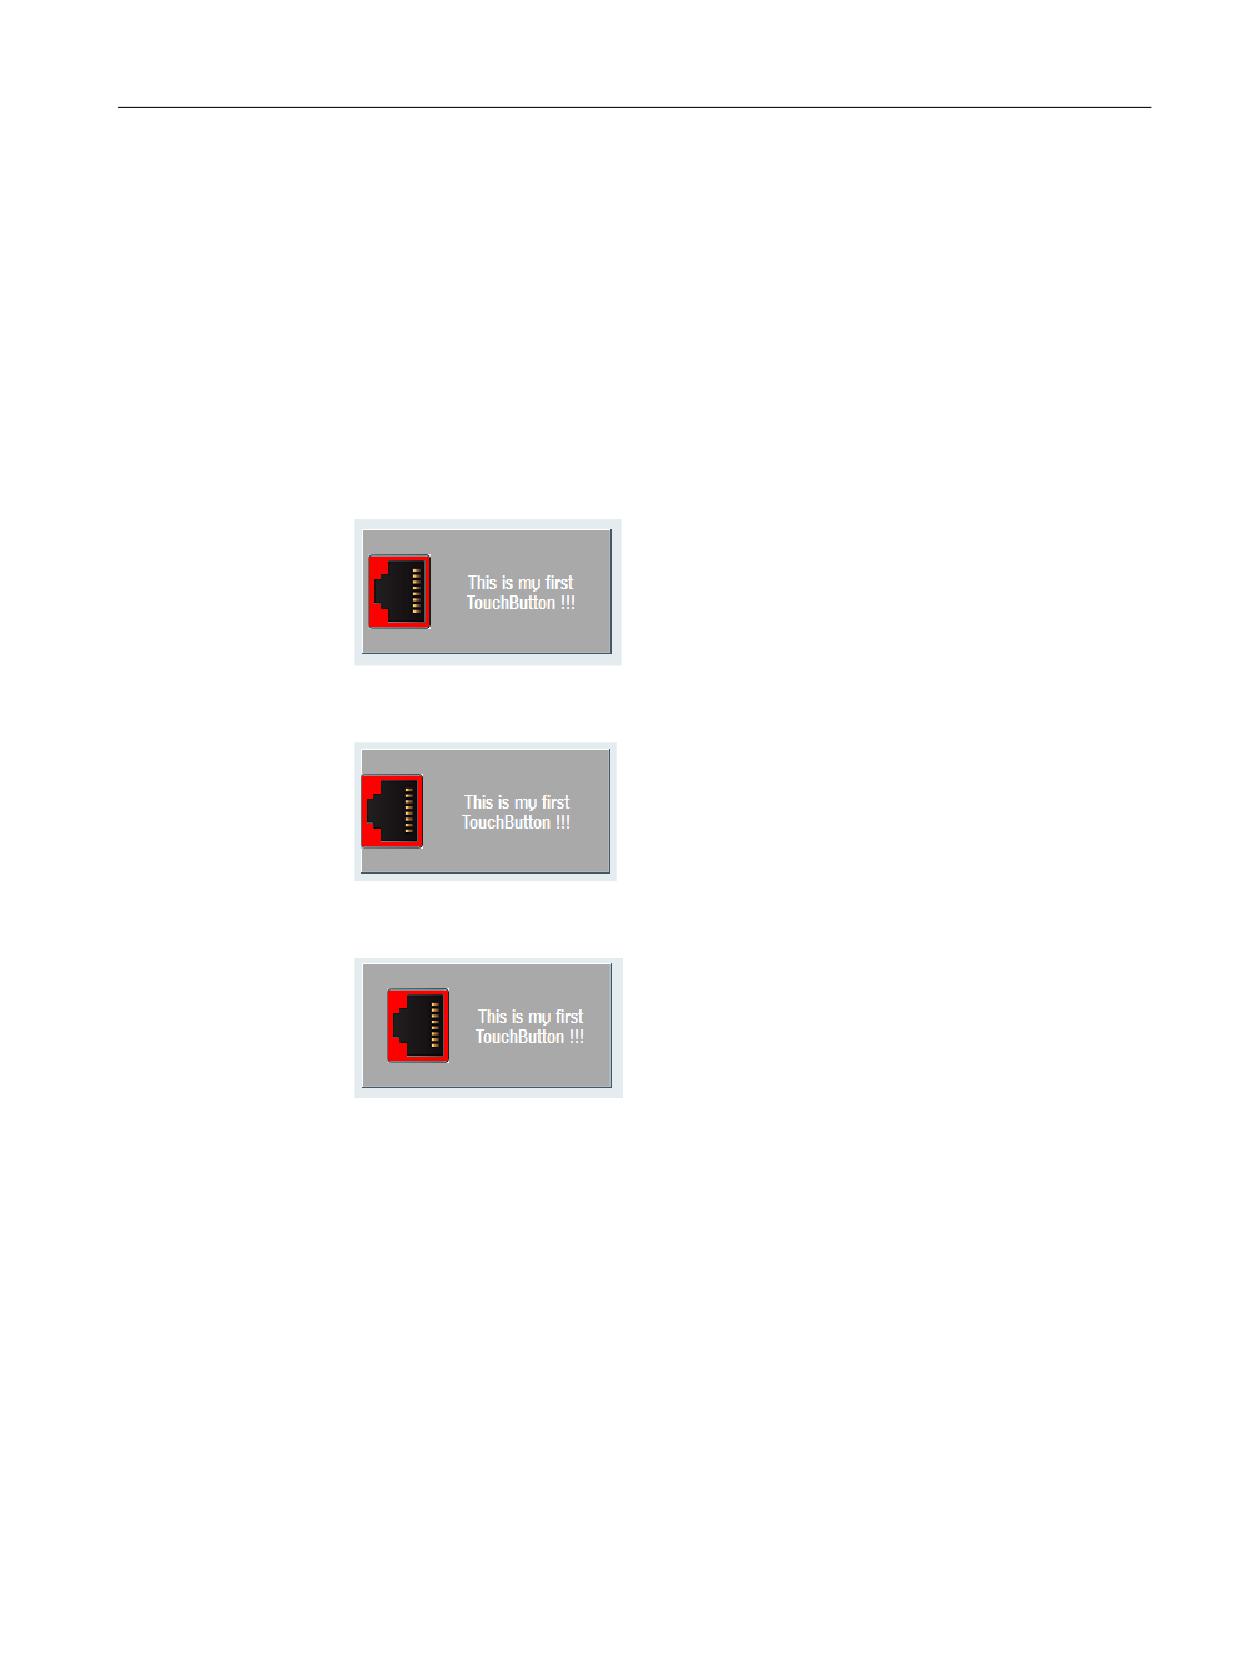
● In a first step, the picture matching the current resolution is determined from the associated
resolution directory.
● The rectangle of the area (ClientArea) is then reduced by the specified clearances to the
edges (MarginArea).
The MarginArea can be influenced using the "setMargins" function:
- setMargins(-1, -1, -1, -1, -1)
Figure 7-33
setMargins(-1, -1, -1, -1, -1)
– setMargins(0, 0, 0, 0, 0)
Figure 7-34
setMargins(0, 0, 0, 0, 0)
– setMargins(20, 20, 20, 20, 20)
Figure 7-35
setMargins(20, 20, 20, 20, 20)
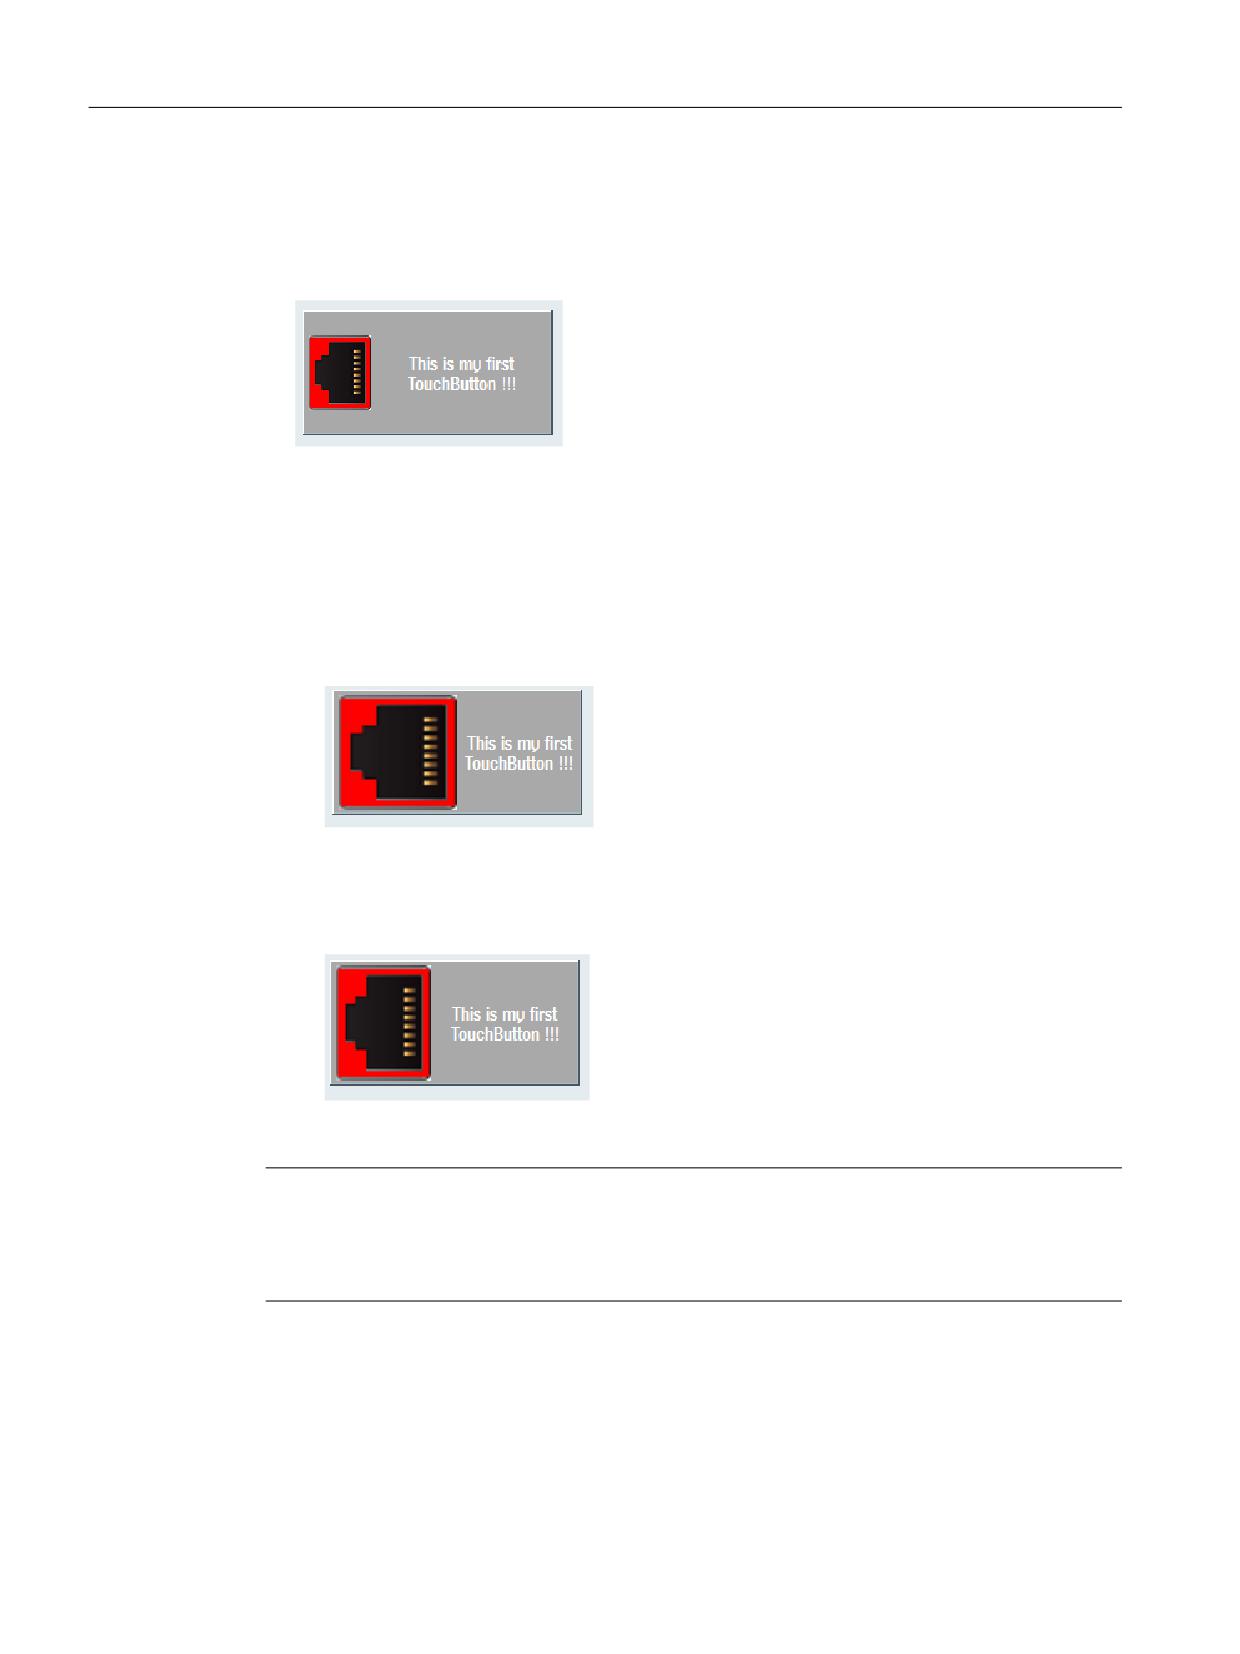
Example for alignment "left"
The area is horizontally halved, so that the picture to be displayed can assume half (maximum)
of the area.
SINUMERIK Integrate Run MyScreens
Programming Manual, 06/2019, A5E40869575B AC
269
Graphic and logic elements
7.6 SlEsTouchButton
The picture is then drawn as follows:
● Property "scalePicture": FALSE
The picture is drawn at this location without any scaling. It must be ensured that the basic
picture is not too large, and can be completely displayed within the TouchButton.
Figure 7-36
scalePicture FALSE
● Property "scalePicture": TRUE
The picture is scaled (stretched or compressed), so that it fits into the left-hand half of the
TouchButton. The "pictureKeepAspectRatio" property is taken into account as follows:
- Property "pictureKeepAspectRatio": FALSE
The picture is scaled horizontally and vertically so that it precisely fits into the left-hand
half of the TouchButton. In so doing, the aspect ratio of the original picture is no longer
taken into consideration.
Figure 7-37
scalePicture - pictureKeepAspectRatio FALSE
– Property "pictureKeepAspectRatio": TRUE
Taking into consideration the aspect ratio of the original picture, the picture is scaled
large enough so that it just fits into the left-hand half of the TouchButton.
Figure 7-38
scalePicture - pictureKeepAspectRatio TRUE
Note
The same principle applies for "right", "top" and "bottom" alignments.
For the "centered" alignment, an attempt is made to fit the picture - depending on the
"scalePicture" and "pictureKeepAspectRatio" properties - in the complete MarginArea.
SINUMERIK Integrate Run MyScreens
270
Programming Manual, 06/2019, A5E40869575B AC
Graphic and logic elements
7.6 SlEsTouchButton
Positioning the text
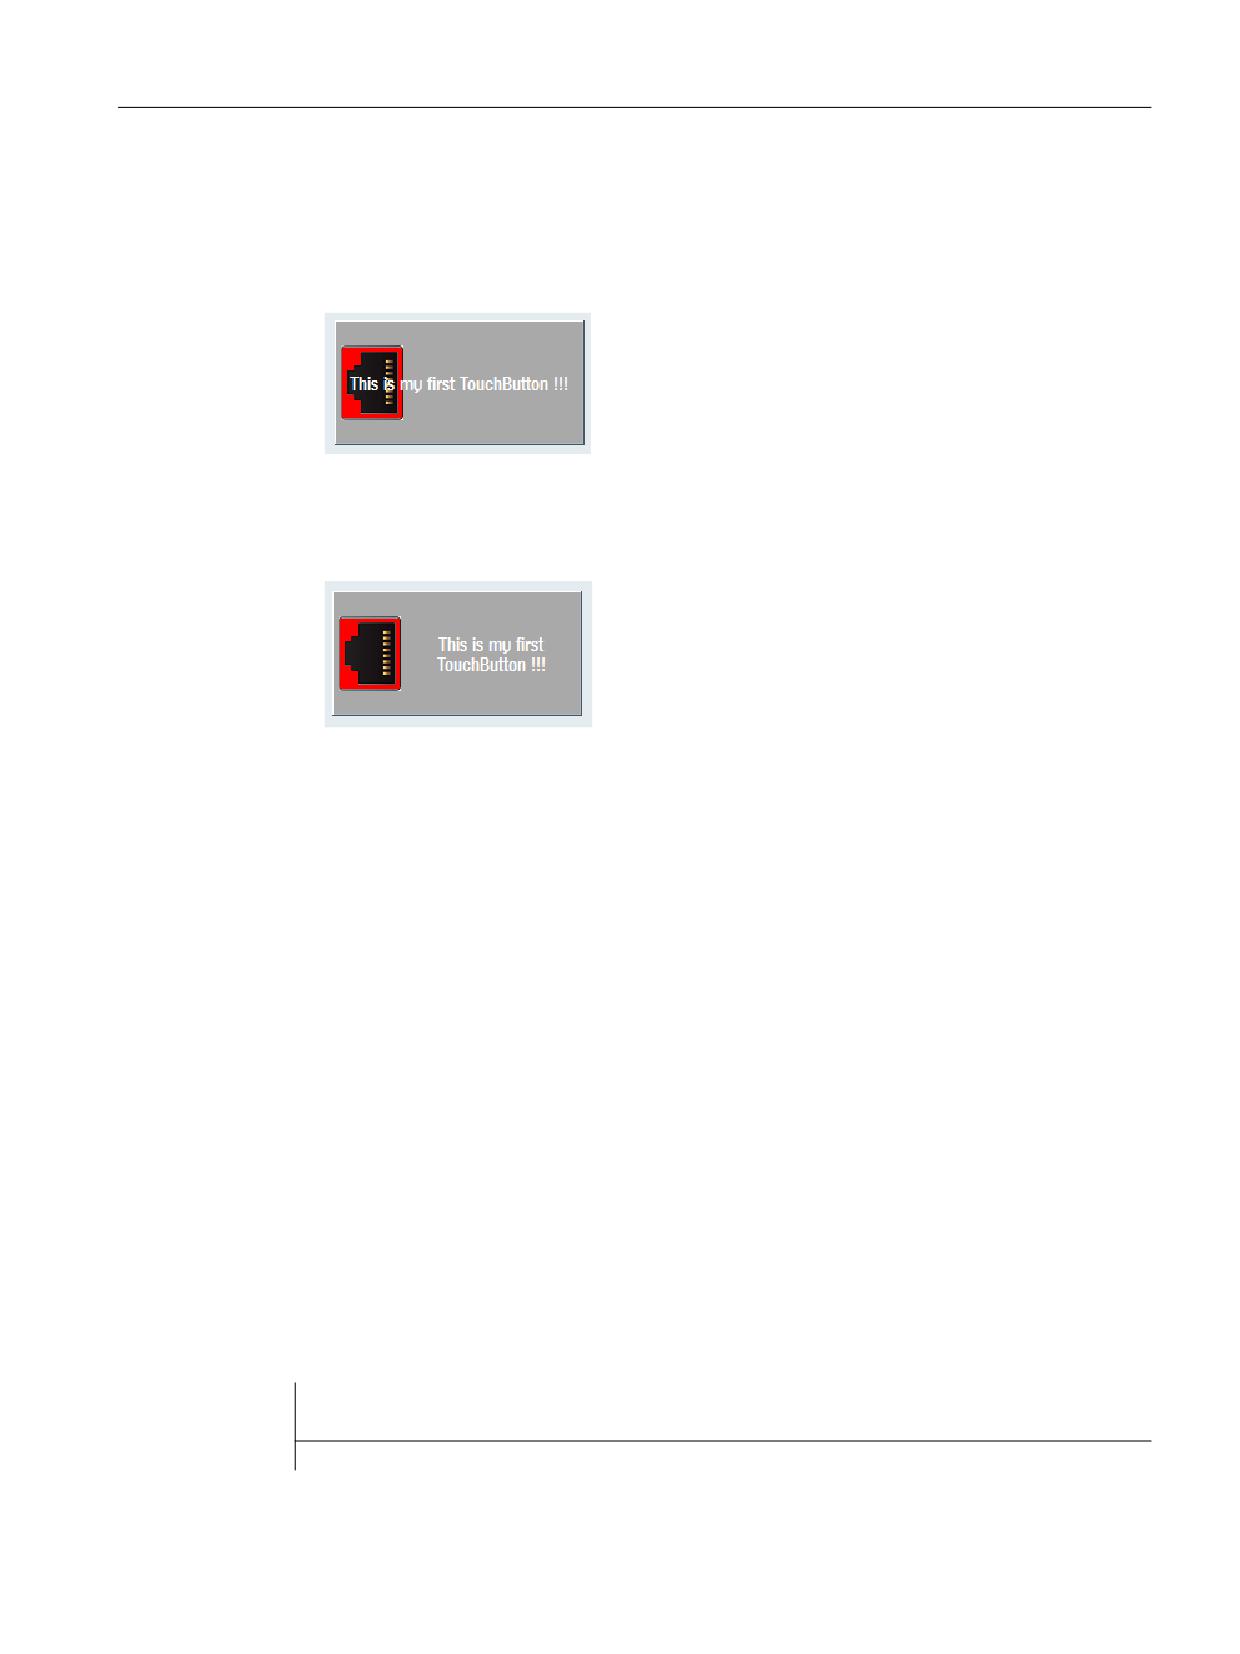
The text is positioned as follows depending on the "textAlignedToPicture" property:
● Property "textAlignedToPicture": FALSE
The text is shown in the MarginArea centered vertically and horizontally.
Figure 7-39
textAlignedToPicture FALSE
● Property "textAlignedToPicture": TRUE
The text is output in the remaining area of the MarginArea minus the area of the drawn
picture, centered horizontally and vertically.
Figure 7-40
textAlignedToPicture TRUE
7.6.7
Language-dependent texts
SlEsTouchButton does not support foreign languages by itself. However, the following example
shows how you can implement language dependency:
Example
easyscreen.ini:
[LANGUAGEFILES]LngFile03 = user.txt
user_eng.txt:
85000 0 0 "This is my first TouchButton !!!"
user_deu.txt:
85000 0 0 "Das ist mein erster TouchButton !!!"
Configuration file:
//M(MyTBMask/"My CustomWidget TouchButton ...")
DEF MyTB1 = (W///,"slesstdcw.SlEsTouchButton"/////70,20,200,100/0,0,0,0)
LOAD
SINUMERIK Integrate Run MyScreens
Programming Manual, 06/2019, A5E40869575B AC
271
Graphic and logic elements
7.6 SlEsTouchButton
//M(MyTBMask/"My CustomWidget TouchButton ...")
DEF MyTB1 = (W///,"slesstdcw.SlEsTouchButton"/////70,20,200,100/0,0,0,0)
WRITECWPROPERTY("MyTB1", "text", $85000)
END_LOAD
LANGUAGE
WRITECWPROPERTY("MyTB1", "text", $85000)
END_LANGUAGE
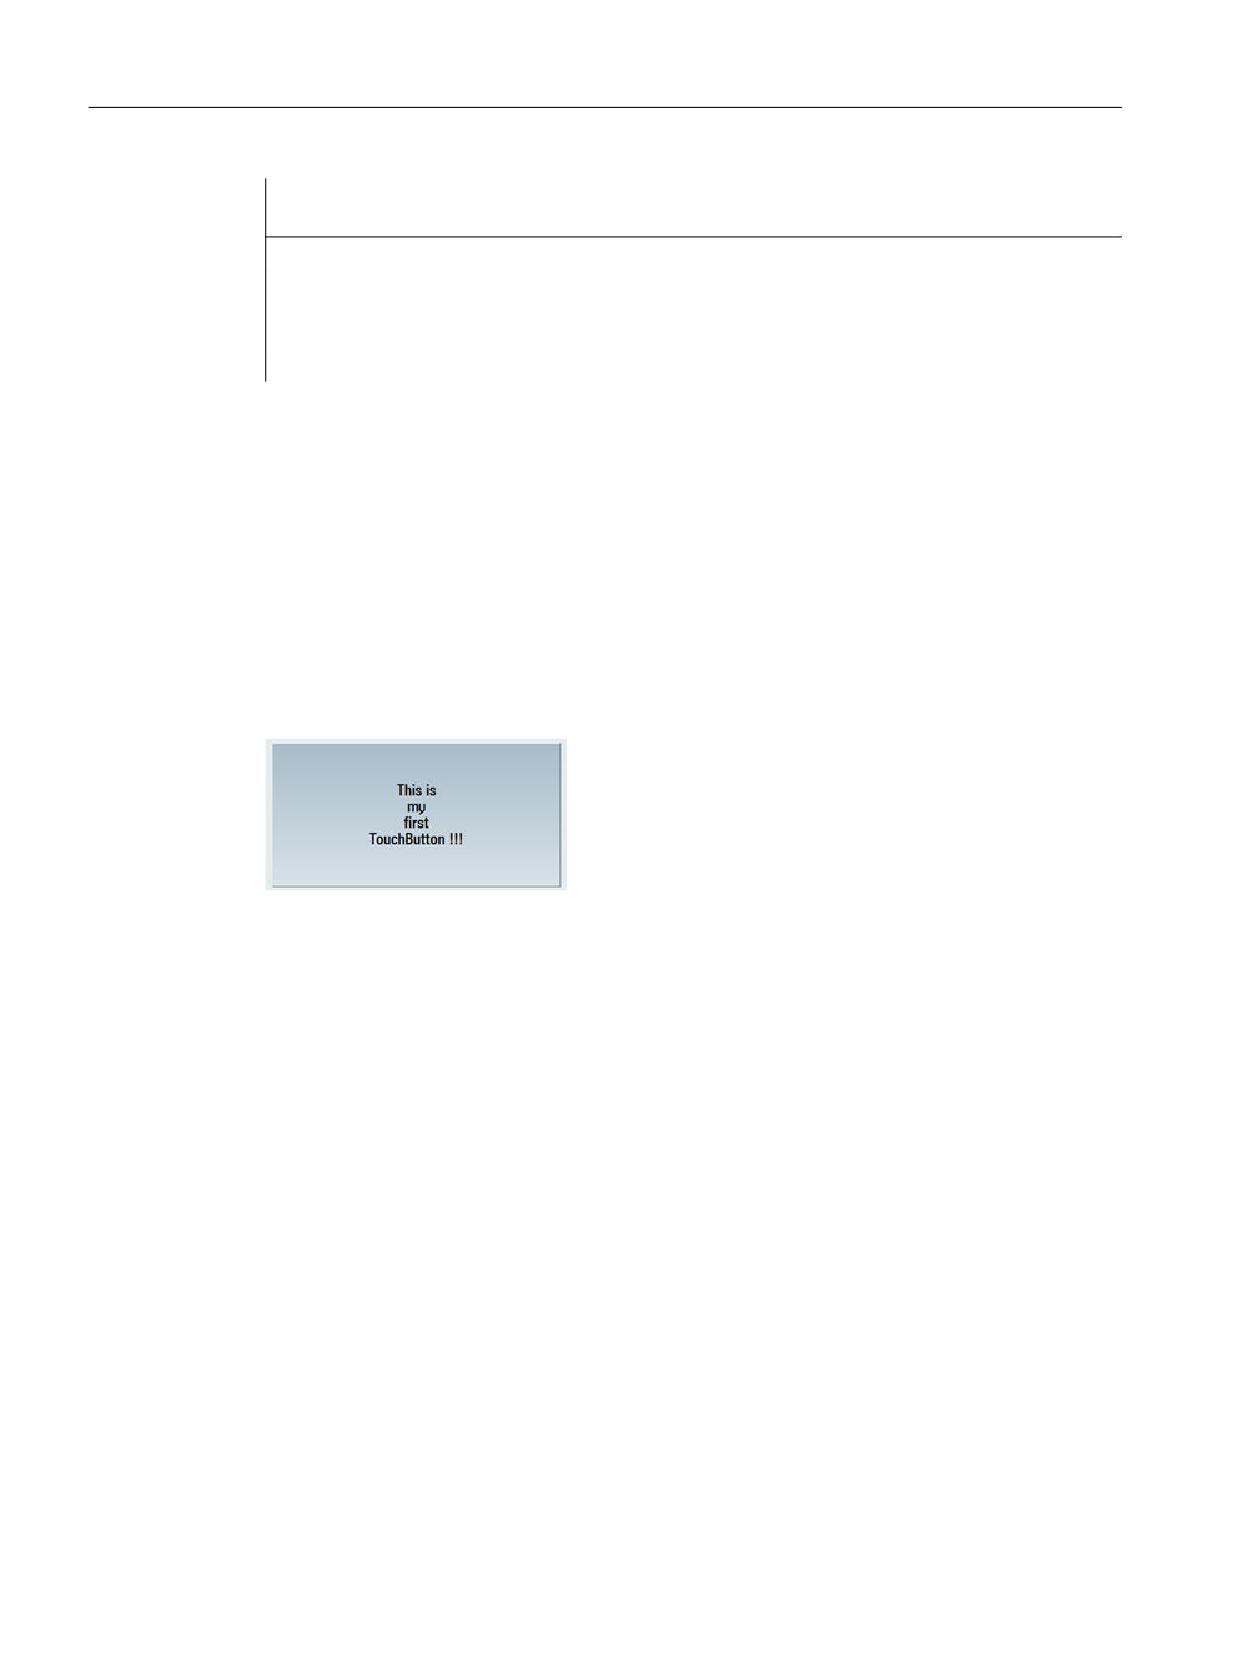
The texts are automatically wrapped around at the word limits in the rectangle provided. The
forced line break is only possible if the text to be displayed is sourced from a language file A
"%n" must be inserted at the appropriate location in the text (see the following example).
user_eng.txt:
85001 0 0 "This is%nmy%nfirst%nTouchButton !!!"
Configuration file:
WRITECWPROPERTY("MyTB1", "text", $85001)
Result
Figure 7-41
Example of a line break in a language-dependent text
SINUMERIK Integrate Run MyScreens
272
Programming Manual, 06/2019, A5E40869575B AC
"Custom" operating area
8
8.1
How to activate the "Custom" operating area
Activating the "Custom" operating area
The "Custom" operating area is not activated on delivery.
1. First copy the "slamconfig.ini" file from the [System Siemens directory]/cfg directory to
the [System oem directory]/cfg directory
or correspondingly to the [System add_on directory]/cfg directory or [System user
directory]/cfg directory.
2. To activate the "Custom" operating area, the following must be entered:
[Custom]
Visible=True
Result
After activation is complete, the softkey for the "Custom" operating area can be found in the
main menu (F10) on the menu continuation bar on the HSK4 (= default).
The "Custom" operating area displays an empty window covering the entire operating area,
with a configurable header. All horizontal and vertical softkeys can be configured.
SINUMERIK Integrate Run MyScreens
Programming Manual, 06/2019, A5E40869575B AC
273
"Custom" operating area
8.2 How to configure the "Custom" softkey
8.2
How to configure the "Custom" softkey
Configuring the softkey for the "Custom" operating area
The labeling and position of the softkey for the "Custom" operating area are configured in the
"slamconfig.ini" file.
The following options are available for configuring the start softkey:
1. To replace a softkey label with a language-dependent text, the following must be entered in
the [Custom] section:
TextId=MY_TEXT_ID
TextFile=mytextfile
TextContext=mycontext
In this example, the softkey shows the language-dependent text which was saved with the
text ID "MY_TEXT_ID" in text file mytextfile_xxx.qm under "MyContext" (xxx stands for
language code).
2. To replace a softkey label with a language-neutral text, the following must be entered in the
[Custom] section:
TextId=HELLO
TextFile=<empty>
TextContext=<empty>
In this example, the softkey for the "Custom" operating area displays the text "HELLO" for
every language.
3. An icon can also be displayed on the softkey in addition to the text.
To do this, the following must be entered in the [Custom] section:
Picture=mypicture.png
The softkey then displays the icon from the file mypicture.png. Graphics and bitmaps are
stored at the following path: [System oem directory]/ico/ico<resolution>. The directory that
corresponds to the display resolution must be used.
4. The position of the softkey can also be set. The following entry in the [Custom] section
makes this setting:
SoftkeyPosition=12
The default is position 12. This corresponds to the HSK4 on the menu continuation bar of the
operating area's menu. Positions 1 - 8 correspond to HSK1 to HSK8 on the menu bar,
positions 9 - 16 to HSK1 to HSK8 on the menu continuation bar.
SINUMERIK Integrate Run MyScreens
274
Programming Manual, 06/2019, A5E40869575B AC
"Custom" operating area
8.3 How to configure the "Custom" operating area
8.3
How to configure the "Custom" operating area
Configuring the softkey for the "Custom" operating area
You need the "easyscreen.ini" and "custom.ini" files to configure the operating area. Templates
for both these files are available in the [System Siemens directory]/templates/cfg directory.
1.
First copy the files to the [System oem directory]/cfg directory and make your changes from
there.
2.
The "easyscreen.ini" file already contains a definition line for the "Custom" operating area:
;StartFile02 = area := Custom, dialog := SlEsCustomDialog,
startfile := custom.com
The ";" at the start of the line represents the comment character. This means the line is
commented out and, as such, not active. To change this, the ";" must be deleted.
The "startfile" attribute in this line defines that the entry will refer to the "custom.com" project
file when the "Custom" operating area is selected.
3.
You create the project file "custom.com" in the [System oem directory]/proj directory. This
contains the relevant configuration which is created in the same way as the "aeditor.com"
file of the "Program" operating area. The configured start softkeys are then displayed in the
"Custom" operating area.
4.
You configure the language-neutral text for the title bar of the dialog in the "custom.ini" file.
The following entry is available in the template for this purpose:
[Header]
Text=Custom
You can replace this text with a customized one.
5.
The template contains the following entry for configuring a start screen for the "Custom"
operating area:
[Picture]
Picture=logo.png
Logo.png is the name of the start screen which appears on the "Custom" operating area's
start dialog. Here you can display a company logo, for example, or another image. The file
should be saved in the directory for the corresponding resolution under: [System oem
directory]/ico/ …
6.
In order to display a specific "Run MyScreens" screen when the "Custom" operating area is
shown the first time, the following entry is available in the template:
; Mask shown with startup of area "custom"
[Startup]
;Startup = Mask:=MyCustomStartupMask, File:=mycustommasks.com
Typically, SINUMERIK Operate is started directly with a specific "Run MyScreens" screen.
The "startuparea" key must be set as follows in the "[miscellaneous]" section of the
"systemconfiguration.ini" file:
[miscellaneous]
;name of the area to be shown at system startup
startuparea = Custom
SINUMERIK Integrate Run MyScreens
Programming Manual, 06/2019, A5E40869575B AC
275
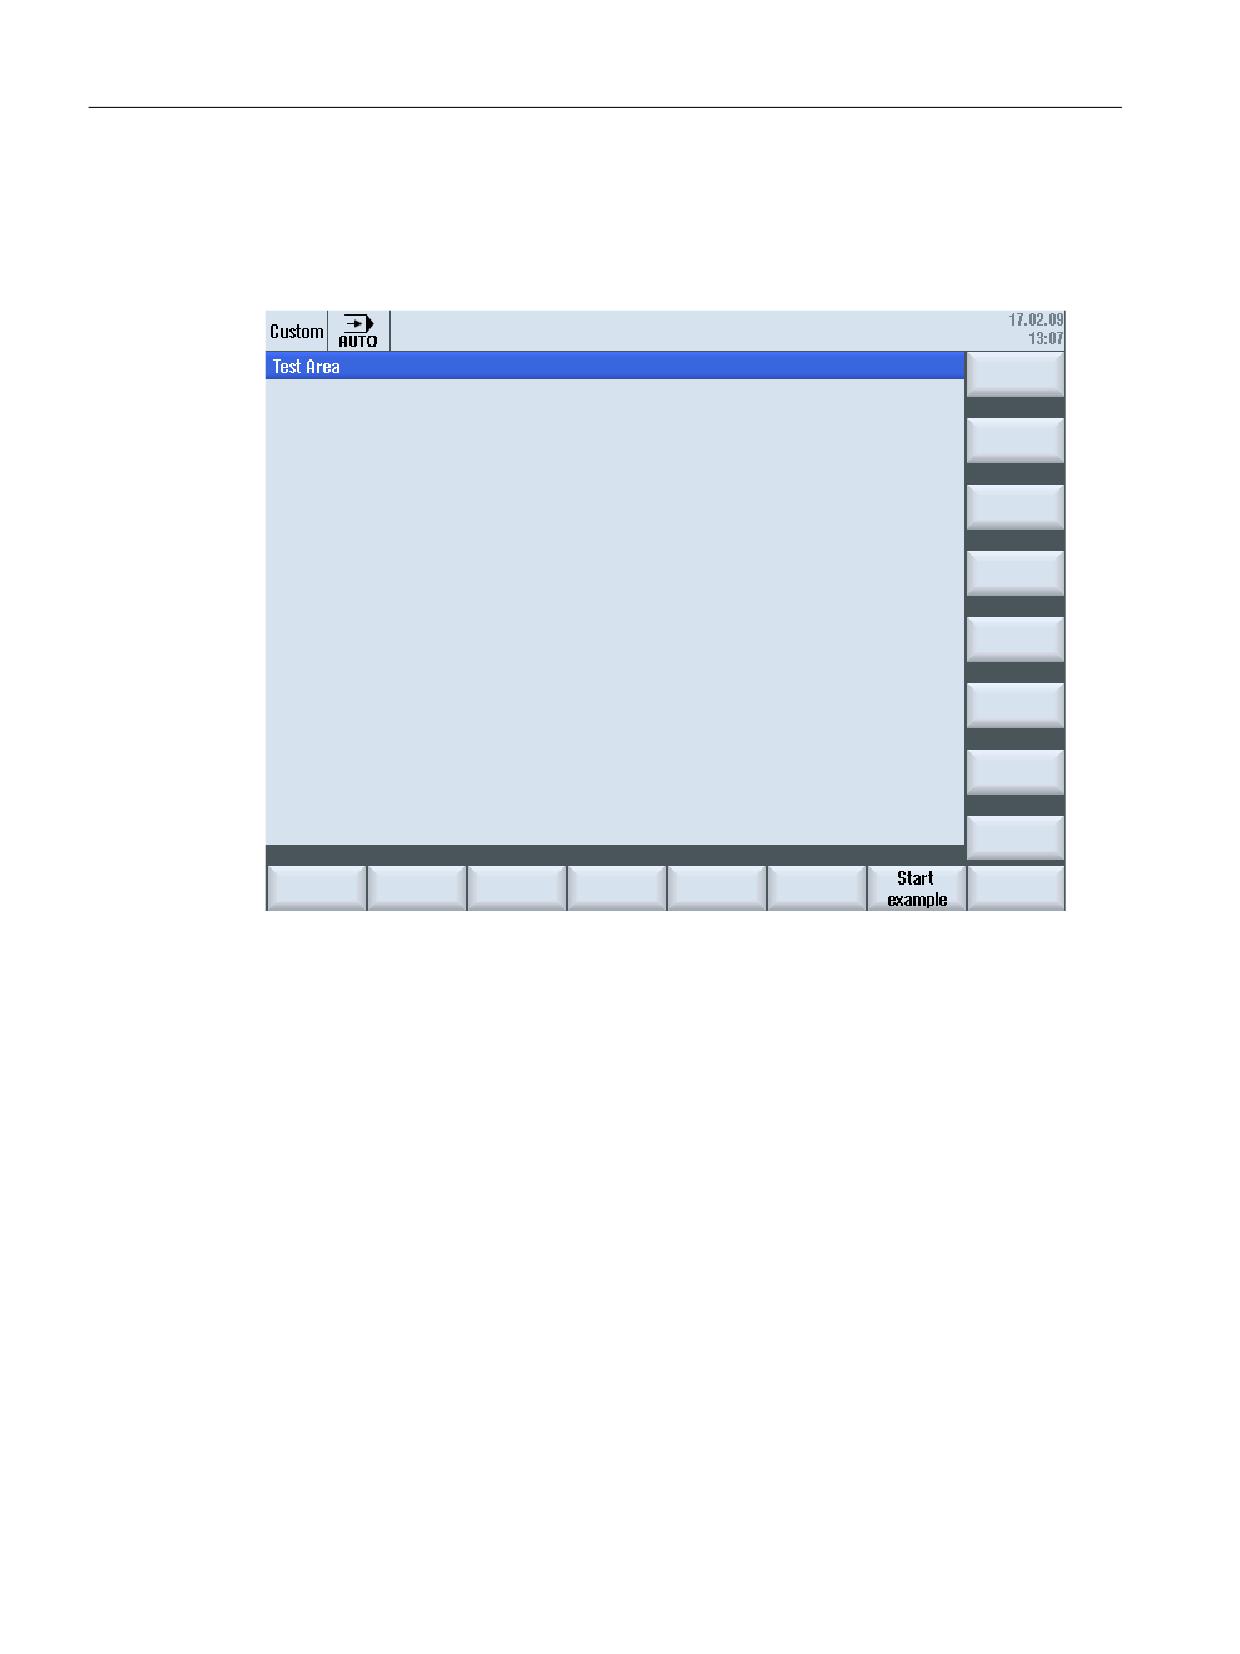
"Custom" operating area
8.4 Programming example for the "Custom" area
8.4
Programming example for the "Custom" area
Example
Figure 8-1
Example with "Start example" softkey
SINUMERIK Integrate Run MyScreens
276
Programming Manual, 06/2019, A5E40869575B AC
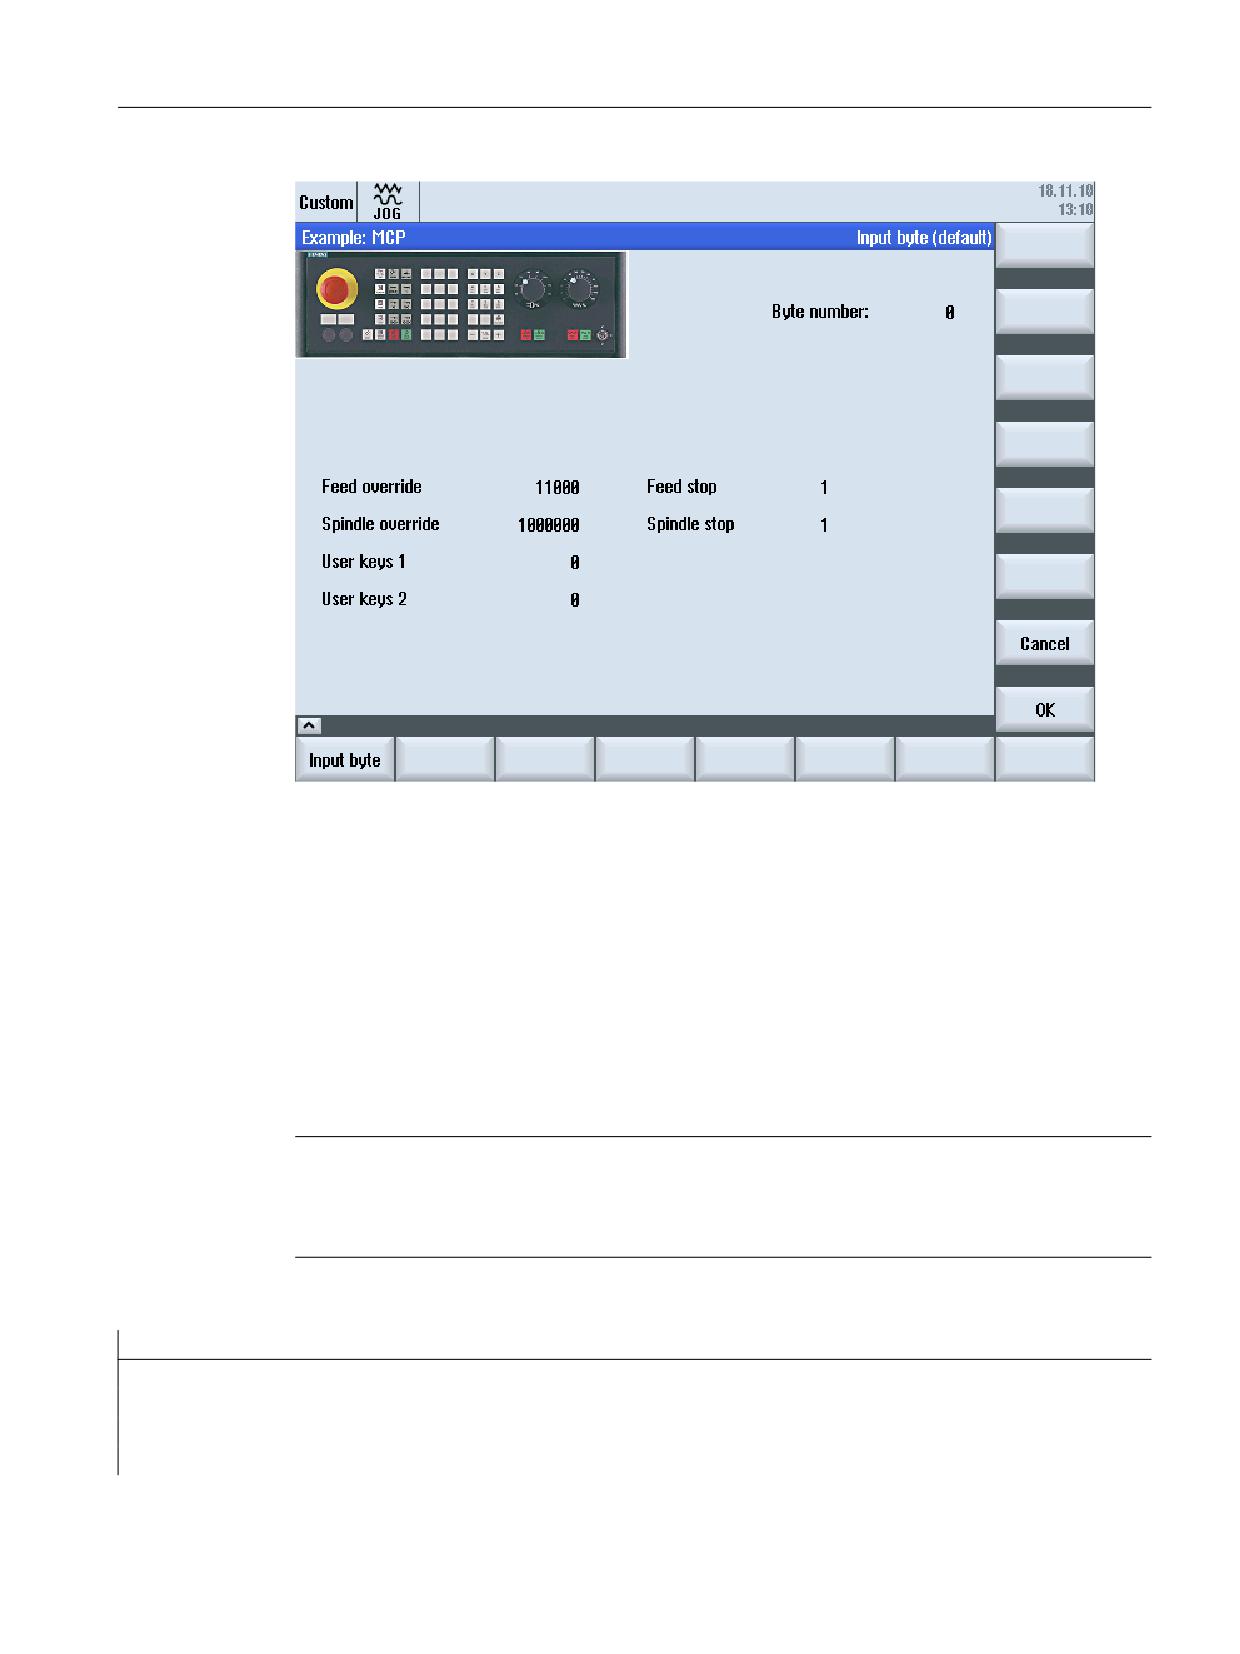
"Custom" operating area
8.4 Programming example for the "Custom" area
Figure 8-2
Example with bitmap and text fields
File overview
The following files are required:
● "custom.com"
● "easyscreen.ini"
Programming
Content of file "custom.com":
Note
The graphic file "mcp.png" integrated in the example is also only a sample file. If you wish to use
this programming example in your application, you must replace the graphic by one of your own
graphics.
//S(Start)
HS7=("Start example", se1, ac7)
PRESS(HS7)
LM("Maske4")
SINUMERIK Integrate Run MyScreens
Programming Manual, 06/2019, A5E40869575B AC
277
"Custom" operating area
8.4 Programming example for the "Custom" area
END_PRESS
//END
//M(Maske4/"Example: MCP"/"mcp.png")
DEF byte=(I/0/0/"Input byte=0 (default)","Byte number:",""/wr1,li1///380,40,100/480,40,50)
DEF Feed=(IBB//0/"","Feed override",""/wr1//"EB3"/20,180,100/130,180,100), Axistop=(B//0/"","Feed
stop",""/wr1//"E2.2"/280,180,100/380,180,50/100)
DEF Spin=(IBB//0/"","Spindle override",""/wr1//"EB0"/20,210,100/130,210,100), spinstop=(B//
0/"","Spindle stop",""/wr1//"E2.4"/280,210,100/380,210,50/100)
DEF custom1=(IBB//0/""," User keys 1",""/wr1//"EB7.7"/20,240,100/130,240,100)
DEF custom2=(IBB//0/"","User keys 2",""/wr1//"EB7.5"/20,270,100/130,270,100)
DEF By1
DEF By2
DEF By3
DEF By6
DEF By7
HS1=("Input byte", SE1, AC4)
HS2=("")
HS3=("")
HS4=("")
HS5=("")
HS6=("")
HS7=("")
HS8=("")
VS1=("")
VS2=("")
VS3=("")
VS4=("")
VS5=("")
VS6=("")
VS7=("Cancel", SE1, AC7)
VS8=("OK", SE1, AC7)
PRESS(VS7)
EXIT
END_PRESS
PRESS(VS8)
EXIT
END_PRESS
LOAD
By1=1
By2=2
By3=3
SINUMERIK Integrate Run MyScreens
278
Programming Manual, 06/2019, A5E40869575B AC
"Custom" operating area
8.4 Programming example for the "Custom" area
By6=6
By7=7
END_LOAD
PRESS(HS1)
Byte.wr=2
END_PRESS
CHANGE(Byte)
By1=byte+1
By2=byte+2
By3=byte+3
By6=byte+6
By7=byte+7
Feed.VAR="EB"<<By3
Spin.VAR="EB"<<Byte
Custom1.VAR="EB"<<By6
Custom2.VAR="EB"<<By7
Axisstop.VAR="E"<<By2<<".2"
Spinstop.VAR="E"<<By2<<".4"
Byte.wr=1
END_CHANGE
CHANGE(Axis stop)
IF Axistop==0
Axistop.BC=9
ELSE
Axistop.BC=11
ENDIF
END_CHANGE
CHANGE(Spin stop)
IF Spinstop==0
Spinstop.BC=9
ELSE
Spinstop.BC=11
ENDIF
END_CHANGE
//END
SINUMERIK Integrate Run MyScreens
Programming Manual, 06/2019, A5E40869575B AC
279
"Custom" operating area
8.4 Programming example for the "Custom" area
SINUMERIK Integrate Run MyScreens
280
Programming Manual, 06/2019, A5E40869575B AC
Dialog selection
9
9.1
Dialog selection using PLC softkeys
Configuration
Description of the procedure:
● The "systemconfiguration.ini" contains a section [keyconfiguration]. The entry specifies an
action for a special PLC softkey.
● A number is given as an action. A "Run MyScreens" call is involved if the number is greater
than or equal to 100.
● A section for defining the action to be performed must be created in the "easyscreen.ini" file.
The name of the section is based on the name of the operating area and the dialog name
(see entry under [keyconfiguration] → Area:=..., Dialog:=...) → [<Area>_<Dialog>]
→ e.g. [AreaParameter_SlPaDialog]
● The action numbers (which were given in the "systemconfiguration.ini" → see Action:=...) are
defined in this section. There are two commands involved:
1. LS("Softkey menu1","param.com") ... Loading a softkey menu
2. LM("Screen form1","param.com") ... Loading a screen form
Selecting softkey menus via PLC softkeys
"Run MyScreens" makes it possible to select "Run MyScreens" softkey menus and
"Run MyScreens" dialogs via PLC softkeys. This can only be done if the "action" attribute to be
specified when configuring the relevant PLC softkeys has a value greater than or equal to 100.
PLC softkeys are configured in the file "systemconfiguration.ini" in the section
[keyconfiguration]:
[keyconfiguration]
KEY75.1 = Area:=area, Dialog:=dialog, Screen:=screen, Action:= 100,
SINUMERIK Integrate Run MyScreens
Programming Manual, 06/2019, A5E40869575B AC
281
Dialog selection
9.1 Dialog selection using PLC softkeys
The LM and LS commands to be executed upon activation of the relevant PLC softkeys are
configured in the "easyscreen.ini" file. The names of the sections that are used for the purpose
of configuration are structured as follows:
[areaname_dialogname]
The first part of the name "areaname" refers to the operating
area and the second part "dialogname" designates the dialog to
which the commands configured in this section apply.
The names given in the "systemconfiguration.ini" file for the op-
erating area and dialog should be used. The dialog does not
have to be specified.
This is particularly true for operating areas which are only im-
[AreaParameter_SlPaDialog]
plemented by means of a single dialog. Please refer to the ex-
100.screen1 = LS("Softkey1","param.com")
ample on the left.
101.screen3 = LM("Screen
If "screen1" is displayed in the AreaParameter operating area
form1","param.com")
implemented by the SlPaDialog dialog, the "LS("Softkey1","par-
am.com")" command will be executed when the "action" with the
value 100 occurs.
action.screen=Command
Both the "action" and "screen" attributes clearly indicate when
the specified command will be executed.
The "screen" information is optional.
The following commands are permissible:
LM (LoadMask)
LS (LoadSoftkeys)
9.1.1
Calling cycle screens from the program editor
Application
PLC keys give you the option to directly access selected cycle screens. This allows you to call
cycle screens in the program editor.
Boundary condition
A technology cycle can only be selected when the program editor is open. The technology cycle
parameterized via the screen will be inserted at the current cursor position in the program
editor.
SINUMERIK Integrate Run MyScreens
282
Programming Manual, 06/2019, A5E40869575B AC
Dialog selection
9.1 Dialog selection using PLC softkeys
Procedure
1. Create the cycle call using PLC hard keys (Page 284).
2. To ensure the Run MyScreens screen can be properly integrated in the program editor
(SlProgramEdit), you need to expand the PLC key configuration with the following setting:
RunMyScreenMode:=HandledByDialog
Example of a complete key configuration:
[keyconfiguration]
KEY52.0 = area:=AreaProgramEdit, action:=200, RunMyScreenMode:=HandledByDialog
3. You can check the feedback from the open cycle screen via the PLC interface
"DB19.DBW24".
Example:
Configuration with PLC ID=1234:
//M(Measurement/$85605///////"measure.txt"/2000) or
//M{Measurement, HD=$85605, LANGFILELIST="measure.txt", PLC_ID=2000}
See also: Function Manual SINUMERIK 840D sl Basic Functions
Status of program editor (for OA applications)
You can query the status of the program editor via the CAP local variable "/Hmi/StepEditorInfo".
Name of variable:
/Hmi/StepEditorInfo
Description of variable:
Information from the editor about the program that
has the focus.
The string contains the following information
[fileName]
Program path definition
[channel]
Channel number
[technology]
Technology
[appearance]
Program identifier (ShopMill/ShopTurn/G code)
[state]
Step editor status:
● EditorClosed: Editor is closed (e.g. HMI not in
program operating area)
● EditEnabled: Editing allowed
● EditDisabled: Editing not allowed (e.g. read
only or invalid cursor position)
SINUMERIK Integrate Run MyScreens
Programming Manual, 06/2019, A5E40869575B AC
283
Dialog selection
9.2 Dialog selection using PLC hard keys
9.2
Dialog selection using PLC hard keys
Field of application
The following functions can be initiated in the operating software by the PLC:
● Select an operating area
● Select certain scenarios within operating areas
● Execute functions configured at softkeys
Hardkeys
All keys - also the PLC keys - are subsequently referred to as hardkeys. A maximum of 254
hardkeys can be defined. The following allocation applies:
Key number
Application
Key 1 - key 9
Keys on the operator panel front
Key 10 - key 49
Reserved
Key 50 - key 254
PLC keys:
Key 50 - key 81
Reserved for OEMs
Key 255
Pre-assigned by control information.
Hardkeys 1 - 9 are pre-assigned as follows:
Key designation
Action / effect
HK1
MACHINE
Selects "Machine" operating area, last dialog
HK2
PROGRAM
Selects "Program" operating area, last dialog or last program
HK3
OFFSET
Selects "Parameter" operating area, last dialog
HK4
PROGRAM MANAG-
Selects "Program" operating area, "Program Manager" basic screen
ER
HK5
ALARM
Selects "Diagnostics" operating area, "Alarm list" dialog
HK6
CUSTOM
Selects "Custom" operating area
HK7 1)
MENU SELECT
Selects "Main menu"
HK8 1)
MENU FUNCTION
Selects "Function" operating area
HK9 1)
MENU USER
Selects "User" operating area
1) For 828D only
Configuration
The configuring is realized in the "systemconfiguration.ini" configuration file in the section
[keyconfiguration]. Each line defines what is known as a hardkey event. A hardkey event is the
n-th actuation of a specific hardkey. For example, the second and third actuation of a specific
hardkey can result in different responses.
The entries in the "systemconfiguration.ini" configuration file can be overwritten with user-
specific settings. The directories [System user directory]/cfg and [System oem directory]/cfg
are available for this purpose.
SINUMERIK Integrate Run MyScreens
284
Programming Manual, 06/2019, A5E40869575B AC
Dialog selection
9.2 Dialog selection using PLC hard keys
The lines for configuring the hardkey events have the following structure:
KEYx.n = area:=area, dialog:=dialog, screen:=screen, forms:=form,
menus:=menu,
action:=menu.action, cmdline:=cmdline
KEYx.n = area:=area, dialog:=dialog, cmdline:=cmdline, action:=
action
x: Number of the hardkey, range of values: 1 - 254
n: Event number - corresponds to the nth actuation of the hardkey, range of values: 0 - 9
Requirement
The PLC user program must fulfill the following requirement:
Only one hardkey is processed. As a consequence, a new request can only be set if the
operating software has acknowledged the previous request. If the PLC user program derives
the hardkey from an MCP key, it must provide sufficient buffer storage of the key(s) to ensure
that no fast keystrokes are lost.
PLC interface
An area to select a hardkey is provided in the PLC interface. The area is in DB19.DBB10. Here,
the PLC can directly specify a key value of between 50 and 254.
Acknowledgment by the operating software takes place in two steps. This procedure is
necessary so that the operating software can correctly identify two separate events if the same
key code is entered twice consecutively. In the first step, control information 255 is written to
byte DB19.DBB10. This defined virtual key stroke enables the HMI to identify every PLC key
sequence uniquely. The control information is of no significance to the PLC user program and
must not be changed. In the second step, the actual acknowledgment takes place with respect
to the PLC by clearing DB19.DBB10. From this point in time, the PLC user program can specify
a new hardkey. In parallel, the actual hardkey request is processed in the operating software.
Example
Configuration file:
; PLC hardkeys (KEY50-KEY254)
[keyconfiguration]
KEY50.0 = name := AreaMachine, dialog := SlMachine
KEY51.0 = name := AreaParameter, dialog := SlParameter
KEY52.0 = name := AreaProgramEdit, dialog := SlProgramEdit
KEY53.0 = name := AreaProgramManager, dialog := SlPmDialog
KEY54.0 = name := AreaDiagnosis, dialog := SlDgDialog
KEY55.0 = name := AreaStartup, dialog := SlSuDialog
KEY56.0 = name := Custom, dialog := SlEsCustomDialog
SINUMERIK Integrate Run MyScreens
Programming Manual, 06/2019, A5E40869575B AC
285
Dialog selection
9.2 Dialog selection using PLC hard keys
The area and dialog identifiers can be found in the "systemconfiguration.ini" from [System
Siemens directory]/cfg.
SINUMERIK Integrate Run MyScreens
286
Programming Manual, 06/2019, A5E40869575B AC
Dialog selection
9.3 Dialog selection via NC
9.3
Dialog selection via NC
MMC command in HMI Operate
You can use MMC commands as described in the following:
1. Definition of MMC commands
The following combinations are available in the standard "systemconfiguration.ini" file:
address:=MCYCLES --> command:=LM
address:=CYCLES --> command:=PICTURE_ON
This distinction is necessary, in order to make a differentiation between measuring cycles
and other cycles. This means that:
- LM is always applicable for measuring cycles, PICTURE_ON always for non-measuring
cycles
- It is not permissible that newly defined MMC commands are designated PICTURE_ON
and LM
2. "Run MyScreens" license
All of the dialogs opened by "Run MyScreen" - with the exception of the measuring cycles
- fall under the "Run MyScreens" license, and therefore without license, only a limited
number of dialogs can be used.
Example call with "test.com" (Run MyScreens):
g0 f50
MMC("CYCLES,PICTURE_ON,test.com,screen form1","A")
m0
MMC("CYCLES,PICTURE_OFF","N")
M30
SINUMERIK Integrate Run MyScreens
Programming Manual, 06/2019, A5E40869575B AC
287
Dialog selection
9.3 Dialog selection via NC
SINUMERIK Integrate Run MyScreens
288
Programming Manual, 06/2019, A5E40869575B AC
Examples for cycle masks
10
10.1
Examples for cycle masks
When installing SINUMERIK Operate, examples for cycle masks created with Run MyScreens
are also saved to the system.
The Run MyScreens examples are available under the following archive paths:
[System Siemens directory]
...\siemens\sinumerik\hmi\template\easyscreen\
standard\
Help screens, PNG
x3d\
Help screens / animations
Milling\
Fräsbearbeitung
Turning\
Drehbearbeitung
deu\
German description
eng\
English description
Examples in the commissioning operating area can be found on the HMI user interface:
Horizontal softkey system data → HMI data → Templates → Examples → Easy Screen → … (see
above).
Brief description of the examples
● Milling
- Drilling example: This is where a position can be added
- Measure workpiece example: This is where a cycle call can be generated and processed
via NC start while the dialog is open
- Workpiece counter example: This shows how GUDs should be handled
● Turning
- Fixtures: this contains a tailstock, bar loader, part catcher
- Measure workpiece example: This is where a cycle call can be generated and processed
via NC start while the dialog is open
- Drilling example: This is where a position can be added
SINUMERIK Integrate Run MyScreens
Programming Manual, 06/2019, A5E40869575B AC
289
Examples for cycle masks
10.1 Examples for cycle masks
SINUMERIK Integrate Run MyScreens
290
Programming Manual, 06/2019, A5E40869575B AC
Configuration in the side screen
11
The following options are available to you for displaying Run MyScreens configurations in the
side screen:
1. Display of a Run MyScreens configuration in a (separate) side screen page:
The Run MyScreens configuration takes up all of the space of the side screen page.
2. Display of several Run MyScreens configurations in a (separate) side screen page:
The individual Run MyScreens configurations are displayed above each other within the
side screen page, in so-called side screen elements. The side screen elements, and thus
also the Run MyScreens configurations, can be scrolled vertically.
3. Adding one or more Run MyScreens configurations to an existing side screen page:
I.e. the Run MyScreens configuration is added to a side screen page contained in the
SIEMENS delivery kit. This case matches point 2 with the exception of the affected side
screen page.
4. Adding one or more Run MyScreens configurations to a side screen element:
The individual Run MyScreens configurations are displayed next to each other in so-called
side screen widgets and can be scrolled horizontally.
SINUMERIK Integrate Run MyScreens
Programming Manual, 06/2019, A5E40869575B AC
291
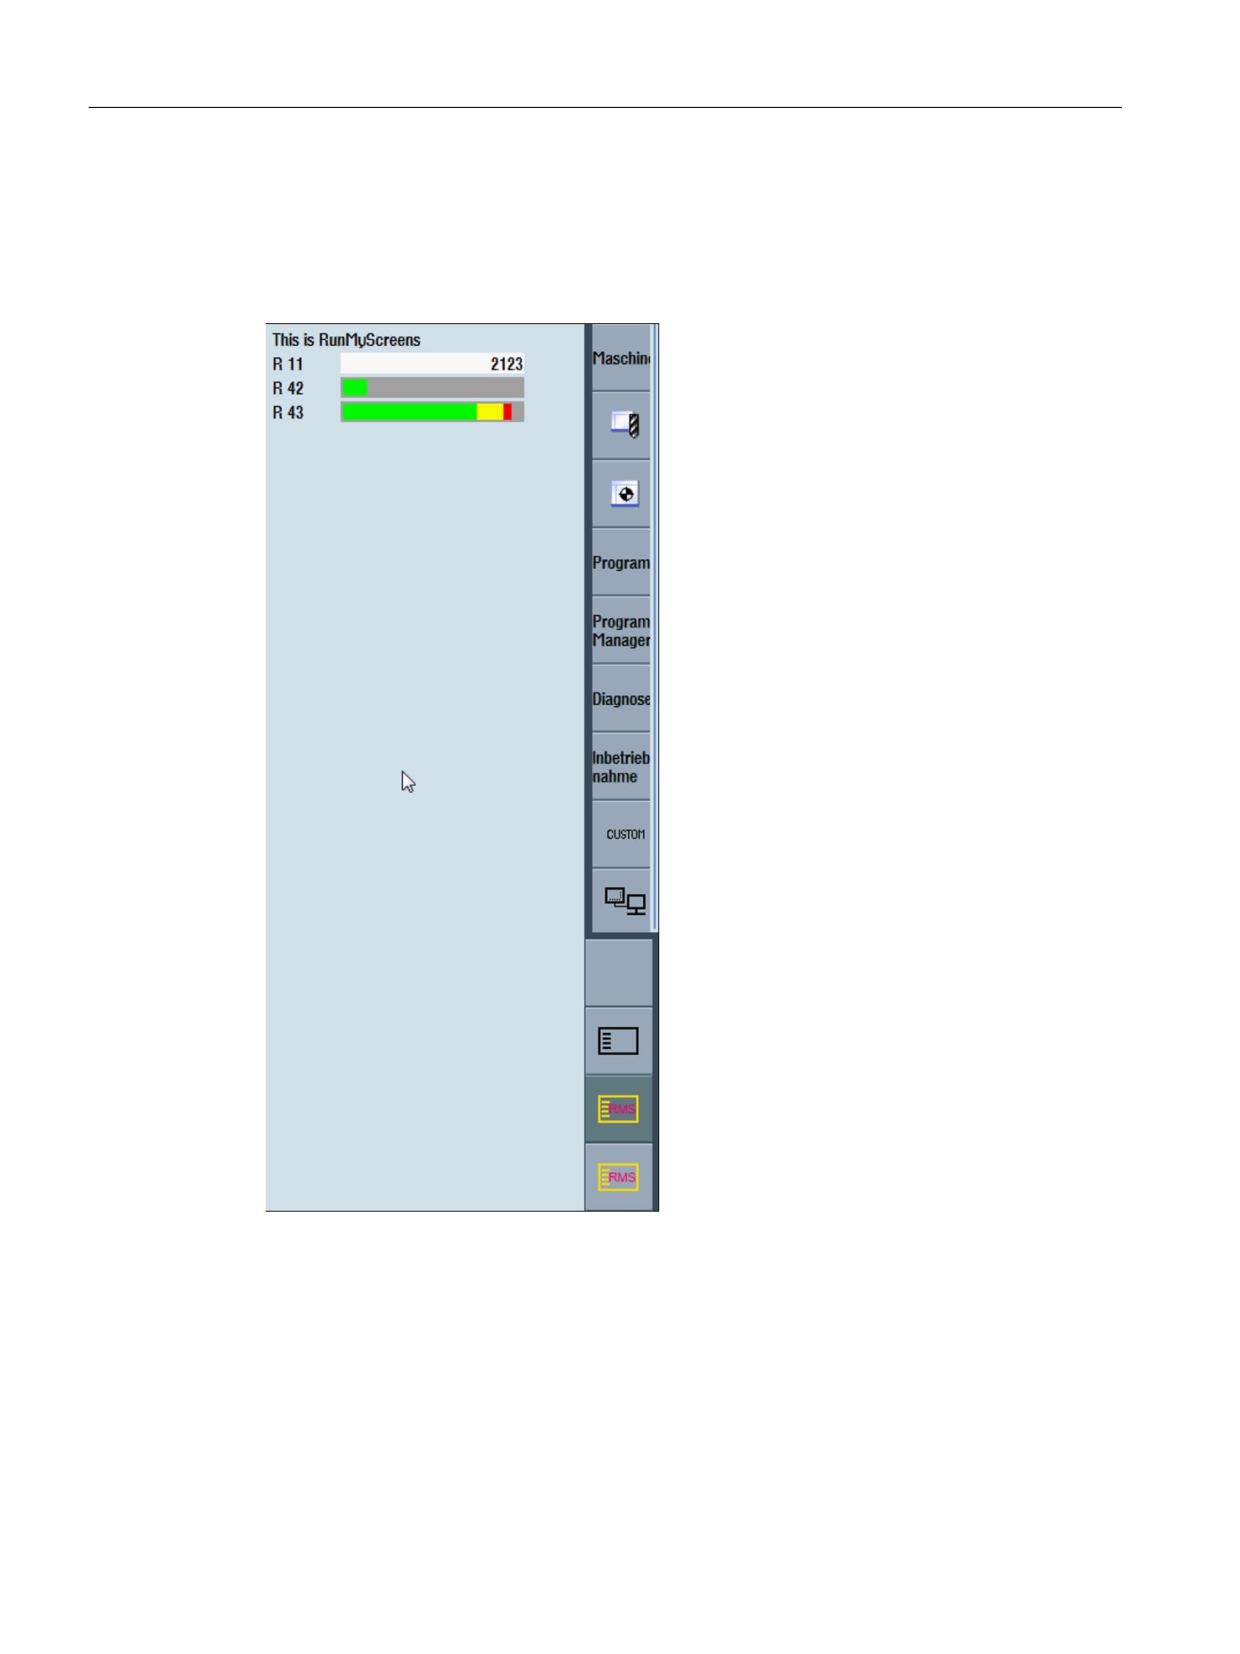
Configuration in the side screen
11.1 Display of a Run MyScreens configuration in a side screen page
11.1
Display of a Run MyScreens configuration in a side screen page
To display a Run MyScreens configuration in a (separate) side screen page, you must add a
new side screen page to the existing side screen configuration ("slsidescreen.ini"). The Run
MyScreens configuration is then displayed or executed in this side screen page.
Figure 11-1
Display of a Run MyScreens configuration in a side screen page
Procedure
Expand the file "slsidescreen.ini" by the following entry:
[Sidescreen]
PAGE100= name:=RMSPage,
implementation:=sleseasyscreen.SlEsSideScreenPage
SINUMERIK Integrate Run MyScreens
292
Programming Manual, 06/2019, A5E40869575B AC
Configuration in the side screen
11.1 Display of a Run MyScreens configuration in a side screen page
● The number of the page, "100" in this case, must be counted up corresponding to existing
side screen pages. The number of the page must be ≥ 100. This avoids conflicts with the
SIEMENS pages.
● You can freely select the name of the page, "RMSPage" in this case.
● You cannot change the specification for implementing the page,
"sleseasyscreen.SlEsSideScreenPage" in this case.
Configure the Run MyScreens configuration that is to be carried out in the next step. To do this,
create a new section with a name that contains the name of the newly created page:
[Page_RMSPage]
Icon=rmspage.png
PROPERTY001= name:=maskPath, type:=QString,
value:="sidescreenmask.com"
PROPERTY002= name:=maskName, type:=QString, value:="Mask"
PROPERTY003= name:=focusable, type:=bool, value:="true"
● The name of the section is formed by appending the name of the page to the prefix "Page_",
in this case "RMSPage".
● Under Icon, specify the file name, "rmspage.png" in this case. The file contains the icon for
the button for selecting the page. Store the file in the directory /user/sinumerik/hmi/ico/
ico640 or /oem/sinumerik/hmi/ico/ico640.
● In the property maskPath, specify the name of the file that contains the RunMyScreens
configuration, "sidescreenmask.com" in this case.
● In the property maskName, specify the name of the RunMyScreens mask that is to be
displayed, "sidescreenmask.com" in this case.
● Specify the input focus in the Property focusable. The page can be assigned the input focus
only if this attribute has the value "true". This attribute is required for pages with input
elements.
Store the "slsidescreen.ini" in the directory /oem/sinumerik/hmi/cfg or /user/sinumerik/hmi/cfg.
The Run MyScreens configuration is available after the next HMI power-up.
Example
Example for a complete configuration in "slsidescreen.ini":
[Sidescreen]
PAGE005= name:=RMSPage,
implementation:=sleseasyscreen.SlEsSideScreenPage
[Page_RMSPage]
PROPERTY001= name:=maskPath, type:=QString,
value:="sidescreenmask.com"
PROPERTY002= name:=maskName, type:=QString, value:="Mask"
SINUMERIK Integrate Run MyScreens
Programming Manual, 06/2019, A5E40869575B AC
293
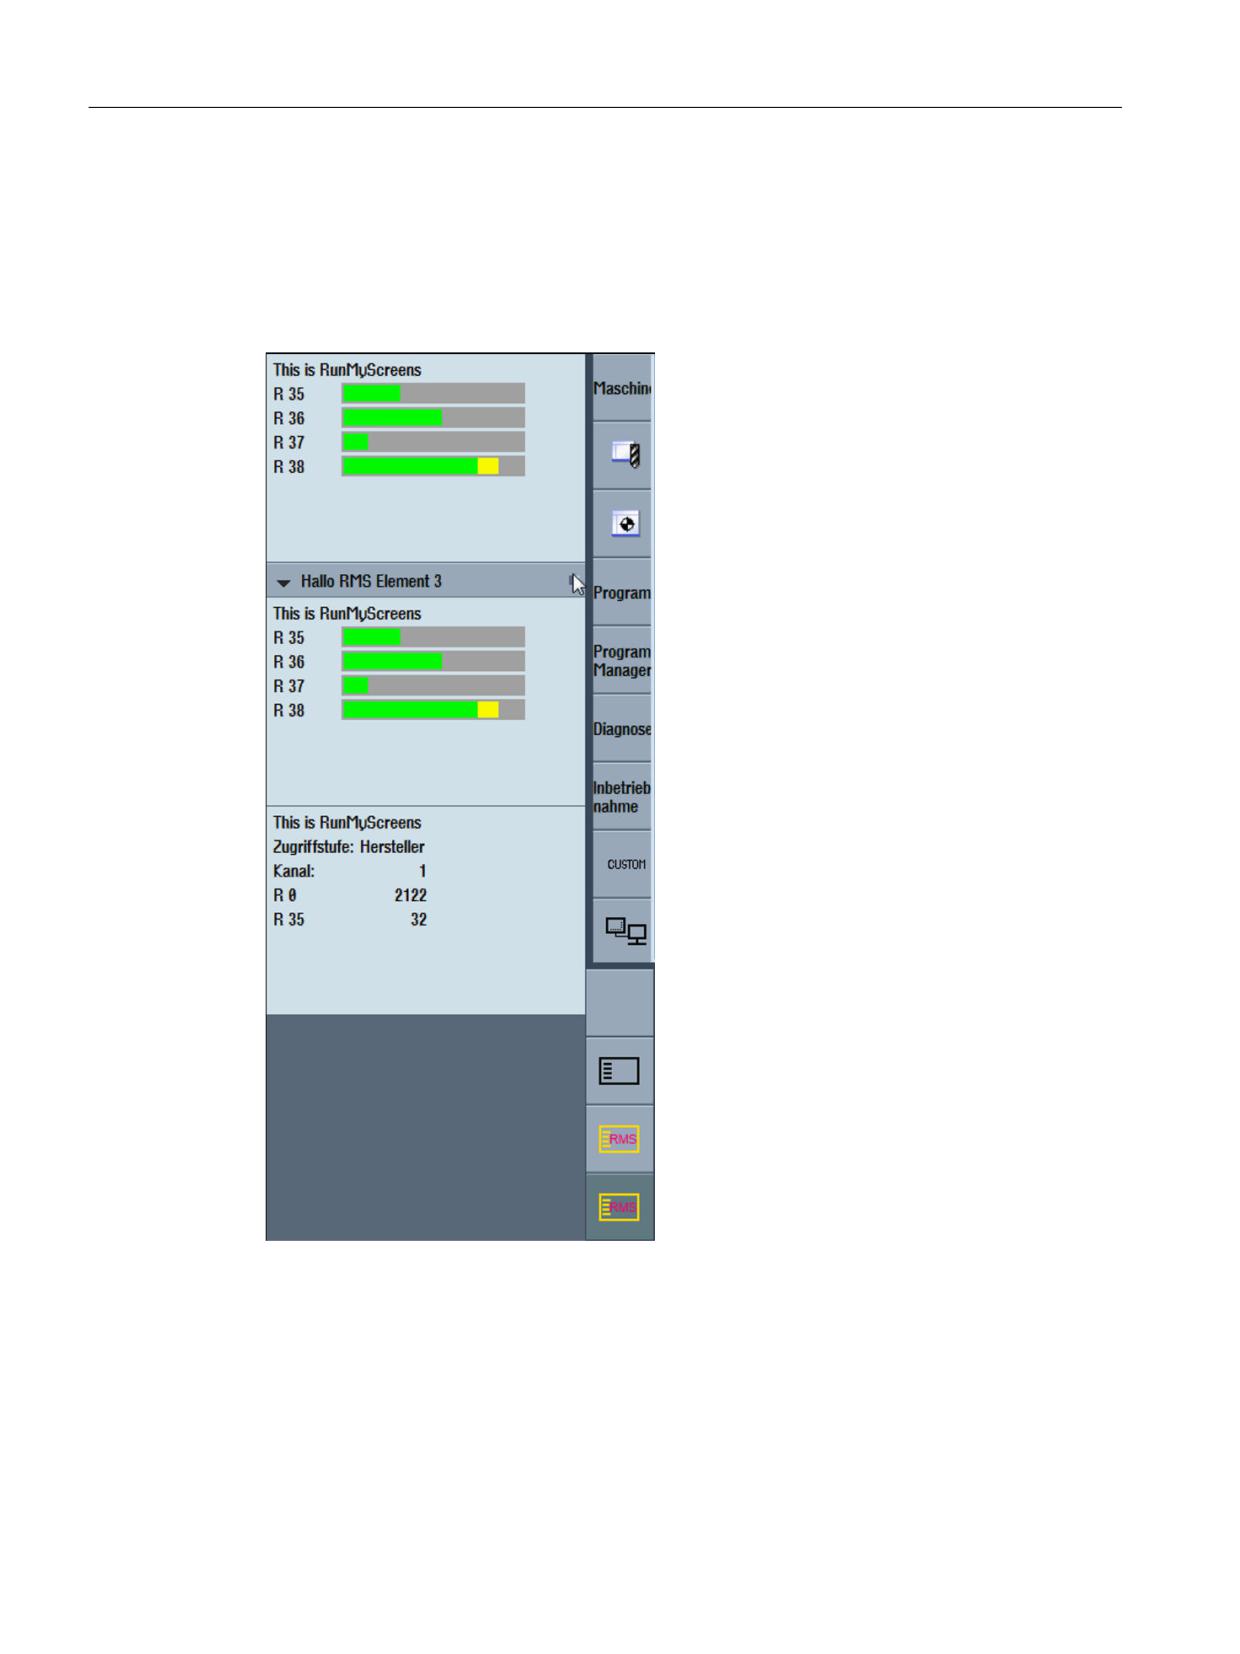
Configuration in the side screen
11.2 Display of several Run MyScreens configurations in a side screen page
11.2
Display of several Run MyScreens configurations in a side screen
page
For the display of several Run MyScreens configurations in a (separate) side screen page, you
must also configure so-called side screen elements, in addition to the side screen page. The
side screen elements are used to display the Run MyScreens configurations.
Figure 11-2
Display of several Run MyScreens configurations in a side screen page
Procedure
Expand the "slsidescreen.ini" by the following entries:
[Sidescreen]
PAGE100= name:=RMSPage, implementation:=SlSideScreenPage
SINUMERIK Integrate Run MyScreens
294
Programming Manual, 06/2019, A5E40869575B AC
Configuration in the side screen
11.2 Display of several Run MyScreens configurations in a side screen page
● The number of the page, "100" in this case, must be counted up corresponding to existing
side screen pages. The number of the page must be ≥ 100. This avoids conflicts with the
SIEMENS pages.
● You can freely select the name of the page, "RMSPage" in this case.
● You cannot change the specification for implementing the page, "SlSideScreenPage" in this
case.
[Page_RMSPage]
ELEMENT001= name:=RMSElement001,
implementation:=sleseasyscreen.SlEsSideScreenElement
ELEMENT002= name:=RMSElement002,
implementation:=sleseasyscreen.SlEsSideScreenElement
● Two side screen elements are assigned to the page - RMSElement001 and
RMSElement002. You can freely select the names of the elements.
● You cannot change the specification for implementing the elements,
"sleseasyscreen.SlEsSideScreenElement" in this case.
Finally, you must assign Run MyScreens configurations that are still to be displayed in these
elements to the side screen elements:
[Element_RMSElement001]
PROPERTY001= name:=maskPath, type:=QString,
value:="sidescreenmask.com"
PROPERTY002= name:=maskName, type:=QString, value:="Mask001"
…
[Element_RMSElement002]
PROPERTY001= name:=maskPath, type:=QString,
value:="sidescreenmask.com"
PROPERTY002= name:=maskName, type:=QString, value:="Mask002"
Store the "slsidescreen.ini" in the directory /oem/sinumerik/hmi/cfg or /user/sinumerik/hmi/cfg.
The Run MyScreens configuration is available after the next HMI power-up.
SINUMERIK Integrate Run MyScreens
Programming Manual, 06/2019, A5E40869575B AC
295
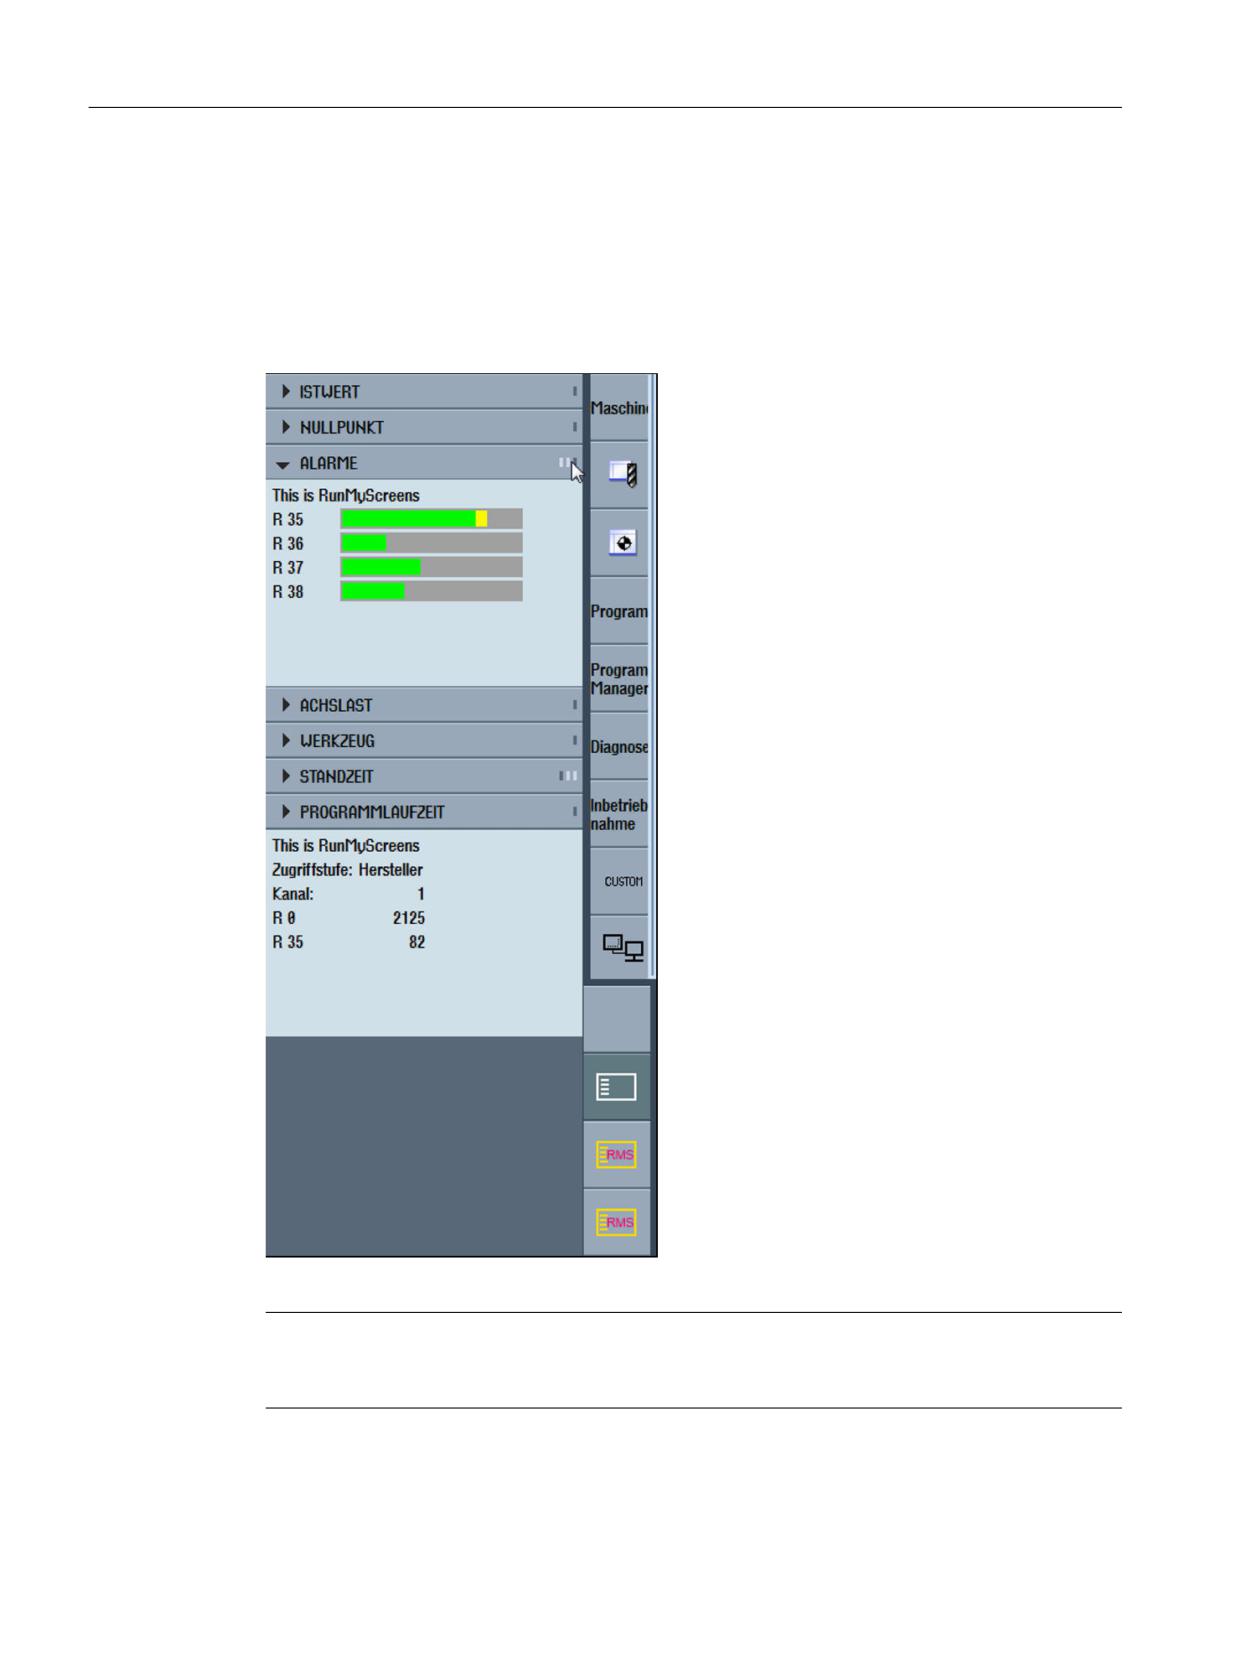
Configuration in the side screen
11.3 Adding Run MyScreens configurations to a side screen page
11.3
Adding Run MyScreens configurations to a side screen page
The procedure for integrating one or several Run MyScreens configurations for an existing side
screen page is identical to the procedure described in Chapter Display of several Run
MyScreens configurations in a side screen page (Page 294). The only difference is that the side
screen elements for displaying the Run MyScreens configurations are added to an existing side
screen page.
Figure 11-3
Adding Run MyScreens configurations to a side screen page
Note
Of the side screen pages contained in the SIEMENS delivery kit, you can only expand the
WidgetsPage (see file "slsidescreen.ini") with Run MyScreens configurations.
SINUMERIK Integrate Run MyScreens
296
Programming Manual, 06/2019, A5E40869575B AC
Configuration in the side screen
11.3 Adding Run MyScreens configurations to a side screen page
Procedure
Expand the "slsidescreen.ini" by the following entries:
In the [Page_WidgetsPage] section, add a corresponding element for receiving the Run
MyScreens configuration.
[Page_WidgetsPage]
ELEMENT100= name:=RMSElement,
implementation:=sleseasyscreen.SlEsSideScreenElement
● Use a number range ≥ 100 for new elements. This avoids conflicts with the SIEMENS
display elements. The RMSElement is inserted in the WidgetsPage under the SIEMENS
elements according to this numbering.
[Element_RMSElement]
PROPERTY001= name:=maskPath, type:=QString,
value:="sidescreenmask.com"
PROPERTY002= name:=maskName, type:=QString, value:="Mask001"
SINUMERIK Integrate Run MyScreens
Programming Manual, 06/2019, A5E40869575B AC
297