MC Acadia Owner (2023 year). Manual in english - page 4
 

  Index      Manuals     General Motors MC Acadia Owner (2023 year). Manual in english


Search            copyright infringement  


Content      ..     2      3      4      5     ..


MC Acadia Owner (2023 year). Manual in english - page 4


GMC Acadia/Acadia Denali Owner Manual (GMNA-Localizing-U.S./Canada/

Mexico-16402009) - 2023 - CRC - 3/28/22

Instruments and Controls

97

Driver Information Center (DIC) (Midlevel)

0

116

or

Driver Information Center (DIC) (Uplevel)

0

119

.

.

Options

Options

Press

V

to select the Options app, then

press

p

to enter the Options menu. Use

w

or

x

to scroll through items in the

Options menu.

Units :

Press

p

while Units is displayed to

enter the Units menu. Choose English or
Metric units by pressing

V

while the

desired item is highlighted.

Info Pages :

Press

p

while Info Pages is

displayed to enter the Info Pages menu and
select the items to be displayed in the
Info app.

Speed Warning :

The Speed Warning display

allows you to set a speed not to be
exceeded. To set, press

p

when Speed

Warning is displayed.

Scroll

w

or

x

to adjust the value. Press

V

to set the speed.

Once the speed is set, this feature can be
turned off by pressing

V

while viewing this

page. If the selected speed limit is exceeded,
a pop-up warning is displayed with a chime.

Midlevel Cluster Menu

There is an interactive display area in the
center of the instrument cluster.

Use the right steering wheel control to open
and scroll through the different items and
displays.

Press

o

or

p

to change between the

cluster applications. Use

w

or

x

to scroll

through the list of available features within
each application. Not all applications will be

available on all vehicles. Some may be
temporarily restricted when the vehicle
is off.

.

Home Page

.

Info App. This is where the selected Driver
Information Center (DIC) displays can be
viewed. See

Driver Information Center

(DIC) (Base Level)

0

114

or

Driver Information Center (DIC) (Midlevel)

0

116

or

Driver Information Center (DIC) (Uplevel)

0

119

.

.

Audio

.

Navigation

.

Phone

.

Options

Home

Information displayed here can be
customized from the Options menu.

Speedometer :

Displays how fast the vehicle

is moving in either kilometers per hour
(km/h) or miles per hour (mph).

Speed Sign :

Shows sign information, which

comes from a roadway database in the
onboard navigation, if equipped.

Time :

Displays the current time.

GMC Acadia/Acadia Denali Owner Manual (GMNA-Localizing-U.S./Canada/

Mexico-16402009) - 2023 - CRC - 3/28/22

98

Instruments and Controls

Fuel Range :

Displays the approximate

distance the vehicle can be driven without
refueling. The fuel range estimate is based
on an average of the vehicle

s fuel economy

over recent driving history and the amount
of fuel remaining in the fuel tank. Fuel
range cannot be reset.

Audio

Use

w

or

x

to scroll through options,

browse for music, select from favorites,
or change the audio source. In the main
view, scroll to change the station or go to
the next or previous track.

Navigation

In the Navigation menu, if there is no active
route, press

V

to access Recents or

Favorites. If there is an active route, press

V

to cancel or resume route guidance, mute or
unmute voice guidance, or access Recents or
Favorites.

Phone

In the Phone menu, if there is no active
phone call, view recent calls, scroll through
contacts, select from the favorites, or change
the phone source. If there is an active call,
mute the phone or switch to handset
operation.

Options

Use

w

or

x

to scroll through items in the

Options menu. Press

V

to select the item.

Press

o

to exit the item.

Units :

Choose US or Metric units. A selected

mark will be displayed next to the
selected item.

Info Page Options :

Select the items to be

displayed in the Info app. A selected mark
will be displayed next to the selected item.

Home Page Options :

Select the available

elements to display. Not all elements will be
available on all vehicles: Speedometer,
Active Safety, Speed Sign, Time, and Fuel
Range.

Speed Warning :

Allows you to set a speed

not to be exceeded. To set, press

V

when

Speed Warning is displayed. Use

w

or

x

to adjust the value. Press

V

to set the

speed. Once the speed is set, this feature
can be turned off by pressing the

V

while

viewing this page. If the selected speed limit
is exceeded, a pop-up warning is displayed
with a chime.

Software Information :

Displays open source

software information.

GMC Acadia/Acadia Denali Owner Manual (GMNA-Localizing-U.S./Canada/

Mexico-16402009) - 2023 - CRC - 3/28/22

Instruments and Controls

99

Instrument Cluster (Uplevel)

English Uplevel Standard Theme Shown, Metric Similar

1.

Engine Oil Temperature Gauge (Uplevel
only)

0

102

2.

Speedometer

0

101

3.

Voltmeter Gauge (Uplevel only)

0

103

4.

Engine Coolant Temperature Gauge

0

103

5.

Fuel Gauge

0

101

6.

Driver Information Center (DIC) (Base
Level)

0

114

or

Driver Information Center (DIC)
(Midlevel)

0

116

or

Driver Information Center (DIC)
(Uplevel)

0

119

7.

Tachometer

0

101

Cluster Menu

There is an interactive display area in the
center of the instrument cluster.

Use the right steering wheel control to open
and scroll through the different items and
displays.

Press

o

to access the cluster applications.

Use

w

or

x

to scroll through the list of

available applications. Press

V

to select. Not

all applications will be available on all
vehicles.

.

Info App. This is where the selected Driver
Information Center (DIC) displays can be
viewed. See

Driver Information Center

(DIC) (Base Level)

0

114

or

GMC Acadia/Acadia Denali Owner Manual (GMNA-Localizing-U.S./Canada/

Mexico-16402009) - 2023 - CRC - 3/28/22

100

Instruments and Controls

Driver Information Center (DIC) (Midlevel)

0

116

or

Driver Information Center (DIC) (Uplevel)

0

119

.

.

Audio

.

Phone

.

Navigation

.

Options

Audio

Press

V

to select the Audio app, then press

p

to enter the Audio menu. In the Audio

menu browse for music, select from the
favorites, or change the audio source. Use

w

or

x

to change the station or go to the

next or previous track.

Phone

Press

V

to select the Phone app, then press

p

to enter the Phone menu. In the Phone

menu, if there is no active phone call, view
recent calls, or scroll through contacts.
If there is an active call, mute the phone or
switch to handset operation.

Navigation

Press the

V

to select the Navigation app,

then press

p

to enter the Navigation menu.

If there is no active route, you can resume
the last route and turn the voice prompts
on/off. If there is an active route, press

V

to cancel or resume route guidance or turn
the voice prompts on or off.

Options

Press the

V

to select the Options app, then

press

p

to enter the Options menu. Use

w

or

x

to scroll through items in the

Options menu.

Units :

Press

p

while Units is displayed to

enter the Units menu. Choose English or
Metric units by pressing

V

while the

desired item is highlighted.

Display Themes :

There are two instrument

cluster display configurations to choose
from: Sport and Touring.

Info Pages :

Press

p

while Info Pages is

displayed to enter the Info Pages menu and
select the items to be displayed in the Info
app. See

Driver Information Center (DIC)

(Base Level)

0

114

or

Driver Information Center (DIC) (Midlevel)

0

116

or

Driver Information Center (DIC) (Uplevel)

0

119

.

Speed Warning :

The Speed Warning display

allows you to set a speed not to be
exceeded. To set, press

p

when Speed

Warning is displayed.

Scroll to set speed and press

p

. Scroll

w

or

x

to adjust the value and press the

V

to

set the speed. Once the speed is set, this
feature can be turned off by pressing

V

while viewing this page. If the selected
speed limit is exceeded, a pop-up warning is
displayed with a chime.

Head-up Display (HUD) Rotation :

If equipped, this feature allows for adjusting
the angle of the HUD image. Press the

V

on the steering wheel controls while
Head-up Display Rotation is highlighted to
enter Adjust Mode. Press

w

or

x

to adjust

the angle of the HUD display. Press the

V

to save the setting or press

o

to cancel the

setting. The vehicle must be in P (Park).

Software Information :

Displays open source

software information.

GMC Acadia/Acadia Denali Owner Manual (GMNA-Localizing-U.S./Canada/

Mexico-16402009) - 2023 - CRC - 3/28/22

Instruments and Controls

101

Speedometer

The speedometer shows the vehicle speed in
either kilometers per hour (km/h) or miles
per hour (mph).

Odometer

The odometer shows how far the vehicle has
been driven, in either kilometers or miles.

Trip Odometer

The trip odometer shows how far the
vehicle has been driven since the trip
odometer was last reset.

The trip odometer is accessed and reset
through the Driver Information Center (DIC).
See

Driver Information Center (DIC) (Base

Level)

0

114

or

Driver Information Center (DIC) (Midlevel)

0

116

or

Driver Information Center (DIC) (Uplevel)

0

119

.

Tachometer

The tachometer displays the engine speed in
revolutions per minute (rpm).

For vehicles with the Stop/Start system,
when the ignition is on, the tachometer
indicates the vehicle status. When pointing

to AUTO STOP, the engine is off but the
vehicle is on and can move. The engine
could auto start at any time. When the
indicator points to OFF, the vehicle is off.

When the engine is on, the tachometer will
indicate the rpm. The tachometer may vary
by several hundred rpm, during Auto Stop
mode, when the engine is shutting off and
restarting.

Fuel Gauge

Metric Base Level and Midlevel

English Base Level and Midlevel

Metric Uplevel

GMC Acadia/Acadia Denali Owner Manual (GMNA-Localizing-U.S./Canada/

Mexico-16402009) - 2023 - CRC - 3/28/22

102

Instruments and Controls

English Uplevel

When the ignition is on, the fuel gauge
indicates the approximate amount of fuel
left in the tank.

There is an arrow near the fuel gauge
pointing to the side of the vehicle the fuel
door is on.

When the indicator nears empty, the low
fuel light comes on. There still is a little fuel
left, but the vehicle should be refueled soon.

The fuel gauge may:

.

Take a little more, or less fuel to fill up
than it indicates. For example, the gauge
may have indicated the tank is half full,

but it actually will take a little more,
or less than half the tank's capacity to fill
the tank.

.

Moves a little while turning a corner,
speeding up, or braking.

.

Take a few seconds to stabilize after the
ignition is turned on and goes back to
empty when the ignition is turned off.

These are normal conditions, none of which
indicate a problem with the fuel gauge.

Engine Oil Temperature Gauge
(Uplevel only)

Metric

English

This gauge shows the engine oil
temperature.

If the gauge pointer moves into the high
end, it means that the engine oil has
overheated. If the vehicle has been operated
under normal driving conditions, pull off the
road, stop the vehicle, and turn off the
engine as soon as possible.

See

Engine Oil

0

268

.

GMC Acadia/Acadia Denali Owner Manual (GMNA-Localizing-U.S./Canada/

Mexico-16402009) - 2023 - CRC - 3/28/22

Instruments and Controls

103

Engine Coolant Temperature
Gauge

Metric Base Level and Midlevel

English Base Level and Midlevel

Metric Uplevel

English Uplevel

This gauge shows the engine coolant
temperature.

If the pointer moves toward the warning
area at the high end of the gauge, the
engine is too hot.

If the engine coolant has overheated and
the vehicle has been operating under normal
driving conditions, pull off the road, stop the
vehicle, and turn off the engine as soon as
possible. See

Engine Overheating

0

276

.

Voltmeter Gauge (Uplevel only)

When the ignition is on, this gauge indicates
the battery voltage.

When the engine is running, this gauge
shows the condition of the charging system.
The gauge can transition from a higher to
lower or a lower to higher reading. This is

GMC Acadia/Acadia Denali Owner Manual (GMNA-Localizing-U.S./Canada/

Mexico-16402009) - 2023 - CRC - 3/28/22

104

Instruments and Controls

normal. If the vehicle is operating outside
the normal operating range, the charging
system light comes on. See

Charging System

Light

0

106

.

Readings outside the normal operating
range can also occur when a large number
of electrical accessories are operating in the
vehicle and the engine is left idling for an
extended period. This condition is normal
since the charging system is not able to
provide full power at engine idle. As engine
speeds are increased, this condition should
correct itself as higher engine speeds allow
the charging system to create maximum
power.

The vehicle can only be driven for a short
time with the readings outside the normal
operating range. If the vehicle must be
driven, turn off all accessories, such as the
radio and air conditioner, and unplug all
chargers and accessories.

Readings outside the normal operating
range indicate a possible problem in the
electrical system. Have the vehicle serviced
as soon as possible.

Seat Belt Reminders

Driver Seat Belt Reminder Light

There is a driver seat belt reminder light on
the instrument cluster.

When the vehicle is started, this light
flashes and a chime may come on to remind
the driver to fasten their seat belt.

Then the light stays on solid until the belt is
buckled. This cycle may continue several
times if the driver remains or becomes
unbuckled while the vehicle is moving.

If the driver seat belt is buckled, neither the
light nor the chime comes on.

Front Passenger Seat Belt Reminder
Light

The vehicle may have a front passenger seat
belt reminder light near the passenger
airbag status indicator. See

Passenger

Sensing System

0

59

.

When the vehicle is started, this light
flashes and a chime may come on to remind
passengers to fasten their seat belt.

Then the light stays on solid until the belt is
buckled. This cycle continues several times if
the front passenger remains or becomes
unbuckled while the vehicle is moving.

If the front passenger seat belt is buckled,
neither the chime nor the light comes on.

The front passenger seat belt reminder light
and chime may come on if an object is put
on the seat such as a briefcase, handbag,
grocery bag, laptop, or other electronic
device. To turn off the reminder light and/or
chime, remove the object from the seat or
buckle the seat belt.

Airbag Readiness Light

This light shows if there is an electrical
problem with the airbag system. It is
located in the instrument cluster. The
system check includes the airbag sensor(s),

GMC Acadia/Acadia Denali Owner Manual (GMNA-Localizing-U.S./Canada/

Mexico-16402009) - 2023 - CRC - 3/28/22

Instruments and Controls

105

the passenger sensing system, the
pretensioners, the airbag modules, the
wiring, and the crash sensing and diagnostic
module. For more information on the airbag
system, see

Airbag System

0

54

.

The airbag readiness light comes on for
several seconds when the vehicle is started.
If the light does not come on then, have it
fixed immediately.

{

Warning

If the airbag readiness light stays on
after the vehicle is started or comes on
while driving, it means the airbag system
might not be working properly. The
airbags in the vehicle might not inflate in
a crash, or they could even inflate
without a crash. To help avoid injury,
have the vehicle serviced right away.

If there is a problem with the airbag
system, a Driver Information Center (DIC)
message may also come on.

Passenger Airbag Status Indicator

The vehicle has a passenger sensing system.
See

Passenger Sensing System

0

59

for

important safety information. The overhead
console has a passenger airbag status
indicator.

When the vehicle is started, the passenger
airbag status indicator will light ON and OFF,
or the symbol for on and off, for several
seconds as a system check. Then, after
several more seconds, the status indicator
will light either ON or OFF, or either the on
or off symbol, to let you know the status of
the front outboard passenger frontal airbag.

If the word ON, or the on symbol, is lit on
the passenger airbag status indicator, it
means that the front outboard passenger
frontal airbag is allowed to inflate.

If the word OFF, or the off symbol, is lit on
the passenger airbag status indicator, it
means that the passenger sensing system
has turned off the front outboard passenger
frontal airbag.

If, after several seconds, both status
indicator lights remain on, or if there are no
lights at all, there may be a problem with
the lights or the passenger sensing system.
See your dealer for service.

{

Warning

If the airbag readiness light ever comes
on and stays on, it means that
something may be wrong with the airbag
system. To help avoid injury to yourself
or others, have the vehicle serviced right
away. See

Airbag Readiness Light

0

104

for more information, including important
safety information.

GMC Acadia/Acadia Denali Owner Manual (GMNA-Localizing-U.S./Canada/

Mexico-16402009) - 2023 - CRC - 3/28/22

106

Instruments and Controls

Charging System Light

The charging system light comes on briefly
when the ignition is turned on, but the
engine is not running, as a check to show
the light is working. It should go out when
the engine is started.

If the light stays on, or comes on while
driving, there may be a problem with the
electrical charging system. Have it checked
by your dealer. Driving while this light is on
could drain the battery.

When this light comes on, or is flashing, the
Driver Information Center (DIC) also displays
a message.

If a short distance must be driven with the
light on, be sure to turn off all accessories,
such as the radio and air conditioner. Find a
safe place to stop the vehicle.

Malfunction Indicator Lamp
(Check Engine Light)

This light is part of the vehicle

s emission

control on-board diagnostic system. If this
light is on while the engine is running, a
malfunction has been detected and the
vehicle may require service. The light should
come on to show that it is working when
the ignition is in Service Mode. See

Ignition

Positions

0

204

.

Malfunctions are often indicated by the
system before any problem is noticeable.
Being aware of the light and seeking service
promptly when it comes on may prevent
damage.

Caution

If the vehicle is driven continually with
this light on, the emission control system
may not work as well, the fuel economy
may be lower, and the vehicle may not

(Continued)

Caution (Continued)

run smoothly. This could lead to costly
repairs that might not be covered by the
vehicle warranty.

Caution

Modifications to the engine, transmission,
exhaust, intake, or fuel system, or the
use of replacement tires that do not
meet the original tire specifications, can
cause this light to come on. This could
lead to costly repairs not covered by the
vehicle warranty. This could also affect
the vehicle

s ability to pass an Emissions

Inspection/Maintenance test. See

Accessories and Modifications

0

262

.

If the light is flashing :

A malfunction has

been detected that could damage the
emission control system and increase vehicle
emissions. Diagnosis and service may be
required.

To help prevent damage, reduce vehicle
speed and avoid hard accelerations and
uphill grades. If towing a trailer, reduce the
amount of cargo being hauled as soon as
possible.

GMC Acadia/Acadia Denali Owner Manual (GMNA-Localizing-U.S./Canada/

Mexico-16402009) - 2023 - CRC - 3/28/22

Instruments and Controls

107

If the light continues to flash, find a safe
place to park. Turn the vehicle off and wait
at least 10 seconds before restarting the
engine. If the light is still flashing, follow
the previous guidelines and see your dealer
for service as soon as possible.

If the light is on steady :

A malfunction has

been detected. Diagnosis and service may be
required.

Check the following:

.

If fuel has been added to the vehicle
using the capless fuel funnel adapter,
make sure that it has been removed. See

Filling the Tank with a Portable Gas Can

under

Filling the Tank

0

247

The

diagnostic system can detect if the
adapter has been left installed in the
vehicle, allowing fuel to evaporate into
the atmosphere. A few driving trips with
the adapter removed may turn off the
light.

.

Poor fuel quality can cause inefficient
engine operation and poor driveability,
which may go away once the engine is
warmed up. If this occurs, change the fuel
brand. It may require at least one full
tank of the proper fuel to turn the light
off. See

Recommended Fuel

0

247

.

If the light remains on, see your dealer.

Emissions Inspection and Maintenance
Programs

If the vehicle requires an Emissions
Inspection/Maintenance test, the test
equipment will likely connect to the
vehicle's Data Link Connector (DLC).

The DLC is under the instrument panel to
the left of the steering wheel. Connecting
devices that are not used to perform an
Emissions Inspection/Maintenance test or to
service the vehicle may affect vehicle
operation. See

Add-On Electrical Equipment

0

259

. See your dealer if assistance is

needed.

The vehicle may not pass inspection if:

.

The light is on when the engine is
running.

.

The light does not come on when the
ignition is in Service Mode.

.

Critical emission control systems have not
been completely diagnosed. If this
happens, the vehicle would not be ready
for inspection and might require
several days of routine driving before the
system is ready for inspection. This can
happen if the 12-volt battery has recently
been replaced or run down, or if the
vehicle has been recently serviced.

See your dealer if the vehicle will not pass
or cannot be made ready for the test.

Brake System Warning Light

Metric

English

This light comes on briefly when the vehicle
is turned on to show that the light is
working. If it does not come on then, have
it fixed so it will be ready to warn you if
there is a problem.

GMC Acadia/Acadia Denali Owner Manual (GMNA-Localizing-U.S./Canada/

Mexico-16402009) - 2023 - CRC - 3/28/22

108

Instruments and Controls

If the light comes on and stays on, there is
a brake problem. Have the brake system
inspected right away. This light may come
on if the brake fluid is low. See

Brake Fluid

0

278

.

If the light comes on while driving, pull off
the road and stop carefully. If equipped with
electric brake boost, vehicle speed may be
limited when the brake system warning
light comes on. The brake pedal might be
harder to push, or the brake pedal may go
closer to the floor. It could take longer to
stop. If the light is still on, have the vehicle
towed for service. See

Transporting a

Disabled Vehicle

0

326

.

{

Warning

The brake system might not be working
properly if the brake system warning
light is on. Driving with the brake system
warning light on can lead to a crash.
If the light is still on after the vehicle has
been pulled off the road and carefully
stopped, have the vehicle towed for
service.

Electric Parking Brake Light

Metric

English Base Level

English Uplevel

This light comes on when the parking brake
is applied. If the light continues flashing
after the parking brake is released, or while
driving, there is a problem with the Electric
Parking Brake system. A message may also
display in the Driver Information
Center (DIC).

If the light does not come on, or remains
flashing, see your dealer.

Service Electric Parking Brake
Light (Uplevel and Midlevel
Cluster Only)

This light should come on briefly when the
vehicle is turned on. If it does not come on,
have it fixed so it will be ready to warn if
there is a problem.

If this light stays on or comes on while
driving, there is a problem with the Electric
Parking Brake (EPB). Take the vehicle to a
dealer as soon as possible. In addition to the
parking brake, other safety functions that
utilize the EPB may also be degraded.
A message may also display in the Driver
Information Center (DIC). See

Electric Parking

Brake

0

216

.

GMC Acadia/Acadia Denali Owner Manual (GMNA-Localizing-U.S./Canada/

Mexico-16402009) - 2023 - CRC - 3/28/22

Instruments and Controls

109

Antilock Brake System (ABS)
Warning Light

This light comes on briefly when the vehicle
is turned on to show that the light is
working. If it does not come on then, have
it fixed so it will be ready to warn you if
there is a problem.

If the ABS warning light stays on, or comes
on again while driving, the vehicle needs
service. A chime may also sound when the
light stays on.

If the ABS warning light is the only light on,
the vehicle has regular brakes, but ABS is
not functioning.

If both the ABS warning light and the brake
system warning light are on, ABS is not
functioning and there is a problem with the
regular brakes. See your dealer for service.

See

Brake System Warning Light

0

107

.

Gear Shifting Light

If equipped, this light will display when
Performance Algorithm Liftfoot (PAL) is
activated. See

Driver Mode Control

0

220

.

Hill Descent Control Light

If equipped, the Hill Descent Control light
comes on when the system is ready for use.
When the light flashes, the system is active.

See

Hill Descent Control (HDC)

0

219

.

Lane Keep Assist (LKA) Light

If equipped, the Lane Keep Assist Light may
display the following colors:

.

Blank: LKA is disabled.

.

White: Appears when the vehicle starts.
A steady white light indicates that LKA is
not ready to assist.

.

Green: Appears when LKA is turned on
and ready to assist. LKA will gently turn
the steering wheel if the vehicle
approaches a detected lane marking.

.

Amber: Appears when LKA is active. The
light flashes amber as a Lane Departure
Warning (LDW) alert to indicate that the
lane marking has been unintentionally
crossed. If the system detects you are
steering intentionally (to pass or change
lanes), the LDW alert may not display.

GMC Acadia/Acadia Denali Owner Manual (GMNA-Localizing-U.S./Canada/

Mexico-16402009) - 2023 - CRC - 3/28/22

110

Instruments and Controls

LKA will not assist or alert if the turn signal
is active in the direction of lane departure,
or if LKA detects that you are accelerating,
braking, or actively steering. See

Lane Keep

Assist (LKA)

0

244

.

Vehicle Ahead Indicator

If equipped, this indicator will display green
when a vehicle is detected ahead and amber
when you are following a vehicle ahead
much too closely.

See

Forward Collision Alert (FCA) System

0

237

.

FCA/ACC Following Gap Light

If equipped, this light indicates the following
gap setting (near, medium, or far) for FCA,
and, if equipped, Adaptive Cruise
Control (ACC).

Pedestrian Ahead Indicator

If equipped, this indicator will display amber
when a nearby pedestrian is detected in
front of the vehicle.

See

Front Pedestrian Braking (FPB) System

0

241

.

Traction Off Light

This light comes on briefly when the vehicle
is turned on to show that the light is
working. If it does not come on then, have
it fixed so it will be ready to warn you if
there is a problem.

The traction off light comes on when the
Traction Control System (TCS) has been
turned off. If StabiliTrak/Electronic Stability
Control (ESC) is turned off, TCS is also
turned off. To turn TCS and ESC off and on,
see

Traction Control/Electronic Stability

Control

0

218

.

If TCS is off, wheel slip during acceleration is
not limited unless necessary to help protect
the driveline from damage. Adjust driving
accordingly.

StabiliTrak OFF Light

This light comes on briefly when the vehicle
is turned on to show that the light is
working. If it does not come on then, have
it fixed so it will be ready to warn you if
there is a problem.

GMC Acadia/Acadia Denali Owner Manual (GMNA-Localizing-U.S./Canada/

Mexico-16402009) - 2023 - CRC - 3/28/22

Instruments and Controls

111

This light comes on when the StabiliTrak/
Electronic Stability Control (ESC) system is
turned off. If StabiliTrak/ESC is off, the
Traction Control System (TCS) is also off. To
turn ESC off and on, see

Traction Control/

Electronic Stability Control

0

218

.

If ESC and TCS are off, the systems do not
assist in controlling the vehicle. Adjust
driving accordingly.

Traction Control System (TCS)/
StabiliTrak Light

This light comes on briefly when the vehicle
is turned on to show that the light is
working. If it does not come on then, have
it fixed so it will be ready to warn you if
there is a problem.

If the light is on and not flashing, the TCS
and potentially the StabiliTrak/ESC system
are not fully operational and may not assist
in maintaining control. Adjust driving
accordingly. If the condition persists, see

your dealer as soon as possible. A Driver
Information Center (DIC) message may
display.

The light flashes when the TCS and/or the
StabiliTrak/ESC system is actively working.

See

Traction Control/Electronic Stability

Control

0

218

.

Engine Coolant Temperature
Warning Light

This light comes on briefly while starting
the vehicle.

If it does not, have the vehicle serviced by
your dealer. If the system is working
normally the indicator light goes off.

Caution

The engine coolant temperature warning
light indicates that the vehicle has
overheated. Driving with this light on can

(Continued)

Caution (Continued)

damage the engine and it may not be
covered by the vehicle warranty. See

Engine Overheating

0

276

.

The engine coolant temperature warning
light comes on when the engine has
overheated.

If this happens, pull over and turn off the
engine as soon as possible. See

Engine

Overheating

0

276

.

Driver Mode Control Light

This light comes on when Sport Mode is
selected.

GMC Acadia/Acadia Denali Owner Manual (GMNA-Localizing-U.S./Canada/

Mexico-16402009) - 2023 - CRC - 3/28/22

112

Instruments and Controls

This light comes on when Snow Mode is
selected.

This light comes on when Off-Road Mode is
selected.

This light comes on when the Tow/Haul
Mode is selected.

Tire Pressure Light

If equipped with the Tire Pressure Monitor
System (TPMS), this light comes on briefly
when the vehicle is started. It provides
information about tire pressures and
the TPMS.

When the Light Is On Steady

This indicates that one or more of the tires
are significantly underinflated.

A Driver Information Center (DIC) tire
pressure message may also display. Stop as
soon as possible, and inflate the tires to the
pressure value shown on the Tire and
Loading Information label. See

Tire Pressure

0

299

.

When the Light Flashes First and Then Is On
Steady

If the light flashes for about a minute and
then stays on, there may be a problem with
the TPMS. If the problem is not corrected,
the light will come on every time the
vehicle is started. See

Tire Pressure Monitor

Operation

0

302

.

Engine Oil Pressure Light

Caution

Driving the vehicle with low engine oil
pressure can damage the engine and the
repairs would not be covered by the
vehicle warranty.

If the engine oil pressure light comes on
while driving:

1. Stop in a safe location and turn off

the engine.

2. Check the oil level. See

Engine Oil

0

268

.

3. Add oil if the oil level is below the

normal operating range.

4. Restart the vehicle. If the engine oil

pressure light stays on for more
than 10 seconds, turn the vehicle
back off. Do not restart the vehicle.
See your dealer for service.

GMC Acadia/Acadia Denali Owner Manual (GMNA-Localizing-U.S./Canada/

Mexico-16402009) - 2023 - CRC - 3/28/22

Instruments and Controls

113

This light should come on briefly when the
engine starts. When the engine is off and
the vehicle is on, the light should remain
illuminated. If it does not come on under
either condition, contact your dealer.

If the light comes on and stays on when the
engine is running, it may not have adequate
oil pressure. The oil level may be low or
there may be some other oil system
problem. Turn the engine off when it is safe
to do so and contact your dealer.

Low Fuel Warning Light

A Low Fuel Warning Light near the fuel
gauge comes on briefly when the ignition is
turned on as a check to show it is working.

It also comes on when the fuel gauge
indicator nears empty. The light turns off
when fuel is added. If it does not, have the
vehicle serviced.

Security Light

The security light should come on briefly as
the engine is started. If it does not come on,
have the vehicle serviced by your dealer.
If the system is working normally, the
indicator light turns off.

If the light stays on and the engine does
not start, there could be a problem with the
theft-deterrent system. See

Immobilizer

Operation

0

26

.

High-Beam On Light

This light comes on when the high-beam
headlamps are in use. See

Headlamp High/

Low-Beam Changer

0

129

.

IntelliBeam Light

This light comes on when the IntelliBeam
system, if equipped, is enabled. See

Exterior

Lamp Controls

0

128

.

Front Fog Lamp Light

For vehicles with fog lamps, this light comes
on when the fog lamps are turned on.

The light goes out when the fog lamps are
turned off. See

Fog Lamps

0

131

.

GMC Acadia/Acadia Denali Owner Manual (GMNA-Localizing-U.S./Canada/

Mexico-16402009) - 2023 - CRC - 3/28/22

114

Instruments and Controls

Lamps On Reminder

This light comes on when the exterior lamps
are in use, except when only the Daytime
Running Lamps (DRL) are active. See

Exterior

Lamp Controls

0

128

.

Cruise Control Light

The cruise control light is white when the
cruise control is on and ready, and turns
green when the cruise control is set and
active. See

Cruise Control

0

221

.

Adaptive Cruise Control Light

This light is white when the Adaptive Cruise
Control (ACC, if equipped) is on and ready,
and turns green when the ACC is set and
active. See

Adaptive Cruise Control

(Advanced)

0

223

.

Door Ajar Light

Base Level and

Midlevel

Uplevel

This light comes on when a door is open or
not securely latched. Before driving, check
that all doors are properly closed.

Information Displays

Driver Information Center (DIC)
(Base Level)

The DIC displays are shown in the center of
the instrument cluster in the Info app.
See

Instrument Cluster (Base Level and

Midlevel)

0

96

or

Instrument Cluster (Uplevel)

0

99

The

displays show the status of many vehicle
systems. The controls for the DIC are on the
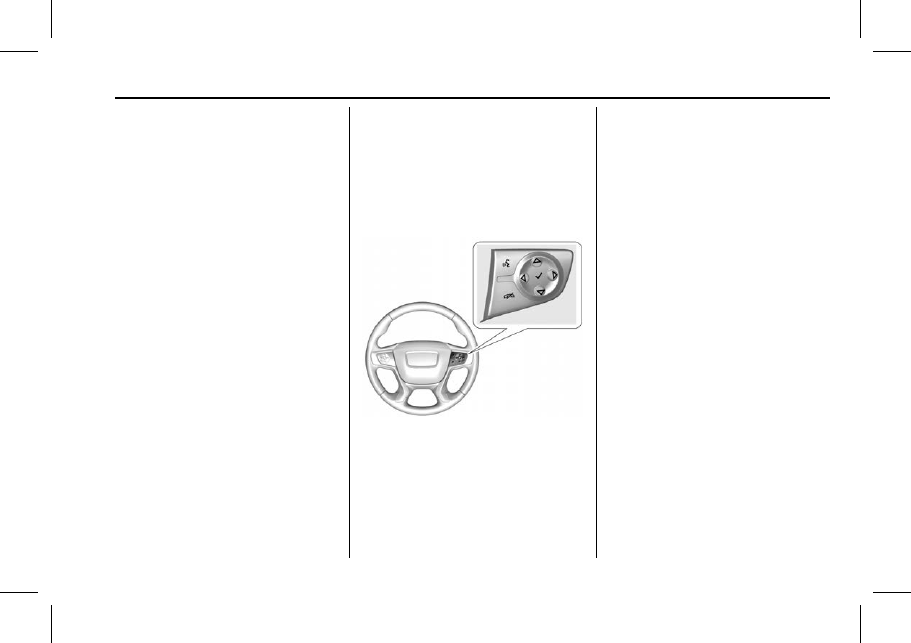
right steering wheel control.

w

or

x

:

Press to move up or down in

a list.

GMC Acadia/Acadia Denali Owner Manual (GMNA-Localizing-U.S./Canada/

Mexico-16402009) - 2023 - CRC - 3/28/22

Instruments and Controls

115

o

or

p

:

Press to move between the

interactive display zones in the cluster.

V

:

Press to open a menu or select a menu

item. Press and hold to reset values on
certain screens.

DIC Info Page Options

The info pages on the DIC can be turned on
or off through the Options menu.

1. Press

o

to access the cluster

applications.

2. Press

w

or

x

to scroll to the Options

application.

3. Press

V

to enter the Options menu.

4. Scroll to Info Pages and press

p

.

5. Press

w

or

x

to move through the list

of possible information displays.

6. Press

V

while an item is highlighted to

select or deselect that item. When an
item is selected, a checkmark will appear
next to it.

DIC Info Pages

The following is the list of all possible DIC
info page displays. Some may not be
available for your particular vehicle. Some

items may not be turned on by default but
can be turned on through the Options app.
See

DIC Info Page Options

earlier in this

section.

Speed :

Shows the vehicle speed in either

kilometers per hour (km/h) or miles per
hour (mph). A speed limit sign can also be
shown, if equipped.

Trip A or Trip B :

Shows the current distance

traveled, in either kilometers (km) or
miles (mi), since the trip odometer was last
reset.

This also shows the approximate average
liters per 100 kilometers (L/100 km) or miles
per gallon (mpg). This number is calculated
based on the number of L/100 km (mpg)
recorded since the last time this menu item
was reset. This number reflects only the
approximate average fuel economy that the
vehicle has right now, and will change as
driving conditions change.

Press and hold

V

while this display is active

to reset the trip odometer and the average
fuel economy. Trip A and Trip B can also be
reset by pressing

p

and choosing reset.

Fuel Range :

Shows the approximate

distance the vehicle can be driven without
refueling. LOW will be displayed when the

vehicle is low on fuel. The fuel range
estimate is based on an average of the
vehicle's fuel economy over recent driving
history and the amount of fuel remaining in
the fuel tank.

Remaining Oil Life :

Shows an estimate of

the oil's remaining useful life. If REMAINING
OIL LIFE 99% is displayed, that means 99%
of the current oil life remains.

When the remaining oil life is low, the
CHANGE ENGINE OIL SOON message will
appear on the display. The oil should be
changed as soon as possible. See

Engine Oil

0

268

In addition to the engine oil life

system monitoring the oil life, additional
maintenance is recommended in the
Maintenance Schedule. See

Maintenance

Schedule

0

339

.

The Oil Life display must be reset after each
oil change. It will not reset itself. Do not to
reset the Oil Life display at any time other
than when the oil has just been changed.
It cannot be reset accurately until the next
oil change. To reset, see

Engine Oil Life

System

0

270

.

Tire Pressure :

Shows the approximate

pressures of all four tires. Tire pressure is
displayed in either kilopascal (kPa) or in
pounds per square inch (psi). If the pressure

GMC Acadia/Acadia Denali Owner Manual (GMNA-Localizing-U.S./Canada/

Mexico-16402009) - 2023 - CRC - 3/28/22

116

Instruments and Controls

is low, the value for that tire is shown in
amber. See

Tire Pressure Monitor System

0

301

and

Tire Pressure Monitor Operation

0

302

.

Average Vehicle Speed :

Displays the

average vehicle speed of the vehicle in
kilometers per hour (km/h) or miles per
hour (mph). This average is based on the
various vehicle speeds recorded since the
last reset. Reset the average speed by
pressing

V

when it is displayed.

Fuel Economy :

The center displays the

approximate instantaneous fuel economy as
a number and bar graph. Displayed above
the bar graph is a running average of fuel
economy for the most recently traveled
selected distance. Displayed below the bar
graph is the best average fuel economy that
has been achieved for the selected distance.
The selected distance is displayed at the top
of the page as

last xxx mi/km.

Press

V

to select the distance or reset best

value. Use

w

and

x

to choose the

distance and press

V

. Press

w

and

x

to

select

Reset Best Score.

Press

V

to reset

the best average fuel economy. After reset,
the best value displays

-,-

until the

selected distance has been traveled.

The display provides information on how
current driving behavior affects the running
average and how well recent driving
compares to the best that has been
achieved for the selected distance.

Economy Trend :

Shows history of the

Average Fuel Economy from the last 50 km
(30 mi). Each bar represents about 5 km
(3 mi) of driving. During driving the bars will
shift to always reflect the most recent
distance on the right side. Press and hold

V

to clear the graph or to reset through
the menu.

ECO Index :

Provides feedback on the

efficiency of current driving behavior. The
bar graph shows a value that is based on
current fuel consumption compared to what
is expected from the vehicle with good and
bad driving habits.

Timer :

This display can be used as a timer.

To start the timer, press

V

while this

display is active. The display will show the
amount of time that has passed since the
timer was last reset. To stop the timer,
press

V

briefly while this display is active

and the timer is running. To reset the timer
to zero, press and hold

V

while this display

is active, or press

p

and select reset.

Battery Voltage :

Displays the current

battery voltage, if equipped. Battery voltage
changes are normal while driving. See

Charging System Light

0

106

. If there is a

problem with the battery charging system,
the DIC will display a message.

Transmission Fluid Temperature :

Shows the

temperature of the automatic transmission
fluid in either degrees Celsius (°C) or degrees
Fahrenheit (°F).

Blank Page :

Shows no information.

Driver Information Center (DIC)
(Midlevel)

The DIC displays are shown in the center of
the instrument cluster in the Info App.
See

Instrument Cluster (Base Level and

Midlevel)

0

96

or

Instrument Cluster (Uplevel)

0

99

The

displays show the status of many vehicle
systems.

GMC Acadia/Acadia Denali Owner Manual (GMNA-Localizing-U.S./Canada/

Mexico-16402009) - 2023 - CRC - 3/28/22

Instruments and Controls

117

w

or

x

:

Press to move up or down in

a list.

o

or

p

:

Press to move between the

interactive display zones in the cluster.

V

:

Press to open a menu or select a menu

item. Press and hold to reset values on
certain screens.

Info Page Options

The info pages on the DIC can be turned on
or off through the Options menu.

1. Press

o

or

p

to scroll to the Options

application.

2. Press

w

or

x

to scroll to the Info Page

Options and press

V

.

3. Press

w

or

x

to move through the list

of possible information displays.

4. Press

V

while an item is highlighted to

select or deselect that item. When an
item is selected, a checkmark will appear
next to it.

Info Pages

The following is the list of all possible DIC
info page displays. Some may not be
available for your particular vehicle. Some
items may not be turned on by default but
can be turned on through the Options app.
See

Info Page Options

earlier in this

section.

Speed :

Shows the vehicle speed in either

kilometers per hour (km/h) or miles per
hour (mph). If equipped, press

V

to open

the menu and select to display speed limit
signs. The sign will show

− −

when there

is no detected speed limit or the system is
unavailable.

Speed Signs :

Shows sign information, which

comes from a roadway database in the
onboard navigation, if equipped. The sign
will show

− −

when there is no detected

speed limit or the system is unavailable.

Press

V

while this display is active to

toggle Speed Limit sign on or off.

Trip 1 or Trip 2 :

Shows the current distance

traveled, in either kilometers (km) or
miles (mi), since the trip odometer was last
reset.

If equipped, shows the average fuel
economy since the last reset. This number
reflects only the approximate average fuel
economy that the vehicle has right now,
and will change as driving conditions
change. The average fuel economy can be
displayed as mpg, km/L, or L/100km where
applicable.

If equipped, shows the average speed since
the last reset. This number reflects only the
approximate average speed that the vehicle
has, and will change as driving conditions
change. Average speed can be displayed
as mph or km/h where applicable.

Press

V

while this display is active to show

a confirmation window to reset all values to
zero. Use

o

or

p

to select yes or no and

press

V

.

Fuel Information or Fuel Range :

Shows the

approximate distance the vehicle can be
driven without refueling. LOW will be

GMC Acadia/Acadia Denali Owner Manual (GMNA-Localizing-U.S./Canada/

Mexico-16402009) - 2023 - CRC - 3/28/22

118

Instruments and Controls

displayed when the vehicle is low on fuel.
The fuel range estimate is based on an
average of the vehicle's fuel economy over
recent driving history and the amount of
fuel remaining in the fuel tank. If equipped,
may also show the instantaneous fuel
economy.

Oil Life :

Shows an estimate of the oil's

remaining useful life. If REMAINING OIL LIFE
99% is displayed, that means 99% of the
current oil life remains.

When the remaining oil life is low, the
CHANGE ENGINE OIL SOON message will
appear on the display. The oil should be
changed as soon as possible. See

Engine Oil

0

268

In addition to the engine oil life

system monitoring the oil life, additional
maintenance is recommended. See

Maintenance Schedule

0

339

.

The Oil Life display must be reset after each
oil change. It will not reset itself. Do not
reset the Oil Life display at any time other
than when the oil has just been changed.
It cannot be reset accurately until the next
oil change. To reset, see

Engine Oil Life

System

0

270

.

Tire Pressure :

Shows the approximate

pressures of all four tires. Tire pressure is
displayed in either kilopascal (kPa) or in

pounds per square inch (psi). If the pressure
is low, the value for that tire is shown in
amber. See

Tire Pressure Monitor System

0

301

and

Tire Pressure Monitor Operation

0

302

.

Air Filter Life :

Shows an estimate of the

engine air filter

s remaining useful life and

the state of the system. Engine Air Filter Life
95% means 95% of the current air filter life
remains. Messages will display based on the
engine air filter life and the state of the
system. When the REPLACE AT NEXT OIL
CHANGE message displays, the engine air
filter should be replaced at the time of the
next oil change. When the REPLACE SOON
message displays, the engine air filter
should be replaced at the earliest
convenience.

The Air Filter Life display must be reset after
the engine air filter replacement. To reset,
see

Engine Air Filter Life System

0

271

.

Fuel Economy :

The center displays the

approximate instantaneous fuel economy as
a number and bar graph. Displayed above
the bar graph is a running average of fuel
economy for the most recently traveled
selected distance. Displayed below the bar
graph is the best average fuel economy that

has been achieved for the selected distance.
The selected distance is displayed at the top
of the page as

last xxx mi/km.

Press

V

to select the distance or reset best

value. Use

w

and

x

to choose the

distance and press

V

. Press

w

and

x

to

select

Reset Best Score.

Press

V

to reset

the best average fuel economy. After reset,
the best value displays

-,-

until the

selected distance has been traveled.

The display provides information on how
current driving behavior affects the running
average and how well recent driving
compares to the best that has been
achieved for the selected distance.

Timer :

This display can be used as a timer.

To start the timer, press

V

to open the

menu while this display is active. Use

w

and

x

to select Start Timer or Reset. Press

V

. To stop the timer, press

V

while this

display is active. The display will show the
amount of time that has passed since the
timer was last reset.

Follow Distance/Gap Setting :

If equipped,

the current follow time to the vehicle ahead
is displayed as a time value on this page.
When Adaptive Cruise Control (ACC) has

GMC Acadia/Acadia Denali Owner Manual (GMNA-Localizing-U.S./Canada/

Mexico-16402009) - 2023 - CRC - 3/28/22

Instruments and Controls

119

been engaged, the display switches to the
gap setting page. This page shows the
current gap setting along with the vehicle
ahead indicator.

Driver Assistance :

If equipped, shows

information for Lane Keep Assist (LKA), Lane
Departure Warning (LDW), and Forward
Collision Alert (FCA).

Battery Voltage :

Displays the current

battery voltage, if equipped. Battery voltage
changes are normal while driving. See

Charging System Light

0

106

If there is a

problem with the battery charging system, a
DIC will display a message.

Economy Trend :

Shows history of the

Average Fuel Economy from the last 50 km
(30 mi). Each bar represents about 5 km
(3 mi) of driving. During driving the bars will
shift to always reflect the most recent
distance on the right side. Press

V

to open

the menu while this display is active to clear
the graph. Select yes or no and press

V

.

ECO Index :

Provides feedback on the

efficiency of current driving behavior. The
bar graph shows a value that is based on
current fuel consumption compared to what
is expected from the vehicle with good and
bad driving habits.

Off Road :

Displays vehicle pitch and roll

information, road wheel angle, and
four-wheel drive (4WD) status.

Blank Page :

Shows no information.

Driver Information Center (DIC)
(Uplevel)

The DIC displays are shown in the center of
the instrument cluster in the Info app.
See

Instrument Cluster (Base Level and

Midlevel)

0

96

or

Instrument Cluster (Uplevel)

0

99

. The

displays show the status of many vehicle
systems. The controls for the DIC are on the
right steering wheel control.

w

or

x

:

Press to move up or down in

a list.

o

or

p

:

Press to move between the

interactive display zones in the cluster.

V

:

Press to open a menu or select a menu

item. Press and hold to reset values on
certain screens.

DIC Info Page Options

The info pages on the DIC can be turned on
or off through the Options menu.

1. Press

p

to go to the Options

application.

2. Press

V

to enter the Options menu.

3. Press

w

or

x

to move through the list

of possible information displays.

4. Press

V

while an item is highlighted to

select or deselect that item. When an
item is selected, a checkmark will appear
next to it.

DIC Info Pages

The following is the list of all possible DIC
info page displays. Some may not be
available for your particular vehicle. Some
items may not be turned on by default but

GMC Acadia/Acadia Denali Owner Manual (GMNA-Localizing-U.S./Canada/

Mexico-16402009) - 2023 - CRC - 3/28/22

120

Instruments and Controls

can be turned on through the Options app.
See

DIC Info Page Options

earlier in this

section.

Speed :

Shows the vehicle speed in either

kilometers per hour (km/h) or miles per
hour (mph). The vehicle odometer is also
shown on this page.

Trip A or Trip B, Average Fuel Economy, and
Average Speed :

Shows the current distance

traveled, in either kilometers (km) or
miles (mi), since the trip odometer was last
reset.

The Average Fuel Economy display shows
the approximate average liters per
100 kilometers (L/100 km) or miles per
gallon (mpg). This number is calculated
based on the number of L/100 km (mpg)
recorded since the last time this menu item
was reset. This number reflects only the
approximate average fuel economy that the
vehicle has right now, and will change as
driving conditions change.

The Average Speed display shows the
average speed of the vehicle in kilometers
per hour (km/h) or miles per hour (mph).
This average is calculated based on the
various vehicle speeds recorded since the
last reset of this value.

Press and hold

V

while this display is active

to reset the trip odometer, the average fuel
economy, and the average speed. Or press

p

and select reset in the menu.

Fuel Range and Instantaneous Fuel
Economy :

Shows the approximate distance

the vehicle can be driven without refueling.
LOW will be displayed when the vehicle is
low on fuel. The fuel range estimate is
based on an average of the vehicle's fuel
economy over recent driving history and the
amount of fuel remaining in the fuel tank.

The Instantaneous Fuel Economy display
shows the current fuel economy in either
liters per 100 kilometers (L/100 km) or miles
per gallon (mpg). This number reflects only
the approximate fuel economy that the
vehicle has right now and changes
frequently as driving conditions change.

Timer :

Can be used as a timer. To start the

timer, press

V

while this display is active.

The display will show the amount of time
that has passed since the timer was last
reset. To stop the timer, press

V

briefly

while this display is active and the timer is
running. To reset the timer to zero, press
and hold

V

while this display is active.

Oil Life :

Shows an estimate of the oil's

remaining useful life. If REMAINING OIL LIFE
99% is displayed, that means 99% of the
current oil life remains.

When the remaining oil life is low, the
CHANGE ENGINE OIL SOON message will
appear on the display. The oil should be
changed as soon as possible. See

Engine Oil

0

268

In addition to the engine oil life

system monitoring the oil life, additional
maintenance is recommended in the
Maintenance Schedule. See

Maintenance

Schedule

0

339

.

The Oil Life display must be reset after each
oil change. It will not reset itself. Do not to
reset the Oil Life display at any time other
than when the oil has just been changed.
It cannot be reset accurately until the next
oil change. To reset, see

Engine Oil Life

System

0

270

.

Tire Pressure :

Shows the approximate

pressures of all four tires. Tire pressure is
displayed in either kilopascal (kPa) or in
pounds per square inch (psi). If the pressure
is low, the value for that tire is shown in
amber. See

Tire Pressure Monitor System

0

301

and

Tire Pressure Monitor Operation

0

302

.

GMC Acadia/Acadia Denali Owner Manual (GMNA-Localizing-U.S./Canada/

Mexico-16402009) - 2023 - CRC - 3/28/22

Instruments and Controls

121

Best Fuel Economy :

Displays average fuel

economy, the best fuel economy over the
selected distance, and a bar graph showing
instantaneous fuel economy.

Press

p

to change the selected distance.

Press and hold

V

while this display is active

to reset the best fuel economy and average
fuel economy. This display can also be reset
by selecting reset in the menu.

Top Consumers :

Shows a list of the features

that are currently impacting the fuel
economy, in order from highest to lowest.
If a feature is turned off, it will be removed
from the list.

Economy Trend :

Shows history of the

Average Fuel Economy from the last 50 km
(30 mi). Each bar represents about 5 km
(3 mi) of driving. During driving the bars will
shift to always reflect the most recent
distance on the right side. Press and hold

V

to clear the graph or press

p

to reset

through the menu.

Speed Signs :

Shows sign information, which

comes from a roadway database in the
onboard navigation.

Off Road :

Displays vehicle pitch and roll

information, road wheel angle, and
four-wheel drive (4WD) status.

Following Distance :

The following distance

to a moving vehicle ahead in your path is
indicated in following time in seconds. See

Forward Collision Alert (FCA) System

0

237

.

Blank Page :

Shows no information.

Transmission Fluid Temperature Gauge :

Shows the temperature of the automatic
transmission fluid in either degrees Celsius (°
C) or degrees Fahrenheit (°F).

Head-Up Display (HUD)

{

Warning

If the HUD image is too bright or too
high in your field of view, it may take
you more time to see things you need to
see when it is dark outside. Be sure to
keep the HUD image dim and placed low
in your field of view.

If equipped with HUD, some information
concerning the operation of the vehicle is
projected onto the windshield. The
information is projected through the HUD

lens on the driver side of the instrument
panel and focused out toward the front of
the vehicle.

Caution

If you try to use the HUD image as a
parking aid, you may misjudge the
distance and damage your vehicle. Do not
use the HUD image as a parking aid.

The HUD information can be displayed in
various languages. The speedometer reading
and other numerical values can be displayed
in either English or metric units.

The language selection is changed through
the radio and the units of measurement are
changed through the instrument cluster. See

Settings

0

170

and

Options

under

Instrument Cluster (Base Level and Midlevel)

0

96

or

Instrument Cluster (Uplevel)

0

99

.

GMC Acadia/Acadia Denali Owner Manual (GMNA-Localizing-U.S./Canada/

Mexico-16402009) - 2023 - CRC - 3/28/22

122

Instruments and Controls

HUD Display on the Windshield

The HUD may display some of the following
vehicle information and vehicle messages or
alerts:

.

Speed

.

Tachometer

.

Audio

.

Phone

.

Navigation

.

Collision Alert

.

Adaptive Cruise Control and set speed

.

Lane Departure Warning/Lane Keep Assist

.

Low Fuel

Some vehicle messages or alerts displayed in
the HUD may be cleared by using the
steering wheel controls. See

Vehicle

Messages

0

124

.

The HUD control is to the left of the
steering wheel.

To adjust the HUD image:

1. Adjust the driver seat.
2. Start the engine.
3. Use the following settings to adjust

the HUD.

$

:

Press or lift to center the HUD image.

The HUD image can only be adjusted up and
down, not side to side.

!

:

Press to select the display view. Each

press will change the display view.

D

:

Lift and hold to brighten the display.

Press and hold to dim the display. Continue
to hold to turn the display off.

The HUD image will automatically dim and
brighten to compensate for outside lighting.
The HUD brightness control can also be
adjusted as needed.

The HUD image can temporarily light up
depending on the angle and position of
sunlight on the HUD display. This is normal.

Polarized sunglasses could make the HUD
image harder to see.

HUD Rotation Option

This feature allows for adjusting the angle
of the HUD image.

Press the

V

on the steering wheel controls

while Head-up Display Rotation is
highlighted to enter Adjust Mode. Press

w

or

x

to adjust the angle of the HUD

display. Press the

V

to save the setting or

press

o

to cancel the setting. The vehicle

must be in P (Park). See

Instrument Cluster

(Base Level and Midlevel)

0

96

or

Instrument Cluster (Uplevel)

0

99

.

HUD Views

There are four views in the HUD. Some
vehicle information and vehicle messages or
alerts may be displayed in any view.

GMC Acadia/Acadia Denali Owner Manual (GMNA-Localizing-U.S./Canada/

Mexico-16402009) - 2023 - CRC - 3/28/22

Instruments and Controls

123

Metric

English

Speed View :

This displays digital speed in

English or metric units, speed limit, vehicle
ahead indicator, Lane Departure Warning/
Lane Keep Assist, and Adaptive Cruise
Control and set speed. Some information
only appears on vehicles that have these
features, and when they are active.

Metric

English

Audio/Phone View :

This displays digital

speed, indicators from speed view along
with audio/phone information. The current
radio station, media type, and incoming calls
will be displayed.

All HUD views may briefly display audio
information when the steering wheel
controls are used to adjust the audio
settings appearing in the instrument cluster.

Incoming phone calls may display in any
HUD view.

Metric

English

Navigation View :

This displays digital

speed, indicators from speed view along
with Turn-by-Turn Navigation information in
some vehicles. The compass heading is
displayed when navigation routing is not
active.

Navigation Turn-by-Turn Alerts shown in the
instrument cluster may also be displayed in
any HUD view.

GMC Acadia/Acadia Denali Owner Manual (GMNA-Localizing-U.S./Canada/

Mexico-16402009) - 2023 - CRC - 3/28/22

124

Instruments and Controls

Metric

English

Performance View :

This displays digital

speed, indicators from speed view along
with rpm reading, transmission positions,
and gear shift indicator (if equipped).

Care of the HUD

Clean the inside of the windshield as needed
to remove any dirt or film that could reduce
the sharpness or clarity of the HUD image.

Clean the HUD lens with a soft cloth
sprayed with glass cleaner. Wipe the lens
gently, then dry it.

HUD Troubleshooting

If you cannot see the HUD image when the
ignition is on, check that:

.

Nothing is covering the HUD lens.

.

The HUD brightness setting is not too
dim or too bright.

.

The HUD is adjusted to the proper height
and rotation.

.

Polarized sunglasses are not worn.

.

The windshield and HUD lens are clean.

If the HUD image is not correct, contact
your dealer.

The windshield is part of the HUD system.
See

Windshield Replacement

0

281

.

Vehicle Messages

Messages displayed on the DIC indicate the
status of the vehicle or some action that
may be needed to correct a condition.
Multiple messages may appear one after
another.

The messages that do not require
immediate action can be acknowledged and
cleared by pressing

V

. The messages that

require immediate action cannot be cleared
until that action is performed.

All messages should be taken seriously;
clearing the message does not correct the
problem.

If a SERVICE message appears, see your
dealer.

Follow the instructions given in the
messages. The system displays messages
regarding the following topics:

.

Service Messages

.

Fluid Levels

.

Vehicle Security

.

Brakes

.

Steering

.

Ride Control Systems

.

Driver Assistance Systems

.

Cruise Control

.

Lighting and Bulb Replacement

.

Wiper/Washer Systems

.

Doors and Windows

.

Seat Belts

.

Airbag Systems

.

Engine and Transmission

.

Tire Pressure

.

Battery

GMC Acadia/Acadia Denali Owner Manual (GMNA-Localizing-U.S./Canada/

Mexico-16402009) - 2023 - CRC - 3/28/22

Instruments and Controls

125

Engine Power Messages

ENGINE POWER IS REDUCED

This message displays when the vehicle's
propulsion power is reduced. A reduction in
propulsion power can affect the vehicle's
ability to accelerate. If this message is on,
but there is no observed reduction in
performance, proceed to your destination.
Under certain conditions the performance
may be reduced the next time the vehicle is
driven. The vehicle may be driven while this
message is on, but maximum acceleration
and speed may be reduced. Anytime this
message stays on, or displays repeatedly,
the vehicle should be taken to your dealer
for service as soon as possible.

Under certain operating conditions,
propulsion will be disabled. Try restarting
after the ignition has been off for
30 seconds.

Vehicle Speed Messages

SPEED LIMITED TO XXX KM/H (MPH)

This message shows that the vehicle speed
has been limited to the speed displayed. The
limited speed is a protection for various

propulsion and vehicle systems, such as
lubrication, thermal, brakes, suspension,
Teen Driver if equipped, or tires.

Universal Remote System

See

Radio Frequency Statement

0

359

or

Radio Frequency Statement

0

359

.

Universal Remote System
Programming

If equipped, these buttons are in the
overhead console.

This system can replace up to three remote
control transmitters used to activate devices
such as garage door openers, security

systems, and home automation devices.
These instructions refer to a garage door
opener, but can be used for other devices.

Do not use the Universal Remote system
with any garage door opener that does not
have the stop and reverse feature. This
includes any garage door opener model
manufactured before April 1, 1982.

Read these instructions completely before
programming the Universal Remote system.
It may help to have another person assist
with the programming process.

Keep the original hand-held transmitter for
use in other vehicles as well as for future
programming. Erase the programming when
vehicle ownership is terminated. See

Erasing Universal Remote System Buttons

later in this section.

To program a garage door opener, park
outside directly in line with and facing the
garage door opener receiver. Clear all people
and objects near the garage door.

Make sure the hand-held transmitter has a
new battery for quicker and more accurate
transmission of the radio-frequency signal.

GMC Acadia/Acadia Denali Owner Manual (GMNA-Localizing-U.S./Canada/

Mexico-16402009) - 2023 - CRC - 3/28/22

126

Instruments and Controls

Programming the Universal Remote
System

For questions or programming help, see
www.homelink.com/gm or call
1-800-355-3515. For calls placed outside the
U.S., Canada, or Puerto Rico, international
rates will apply and may differ based on
landline or mobile phone.

Programming involves time-sensitive actions,
and may time out causing the procedure to
be repeated.

To program up to three devices:

1. Hold the end of the hand-held

transmitter about 3 to 8 cm (1 to 3 in)
away from the Universal Remote system
buttons with the indicator light in view.
The hand-held transmitter was supplied
by the manufacturer of the garage door
opener receiver.

2. Press and release one of the three

Universal Remote system buttons to be
programmed. Press and hold the
hand-held transmitter button. Do not
release the hand-held transmitter button
until the indicator light changes from a
slow to a rapid flash or continuous light.
Then release the hand-held transmitter
button.

Some garage door openers may require
substitution of Step 2 with the procedure
under

Radio Signals for Some Gate

Operators

later in this section.

3. Press and hold the newly programmed

Universal Remote system button for
five seconds while watching the indicator
light and garage door activation.

.

If the indicator light stays on
continuously or the garage door
moves when the button is pressed,
then programming is complete. There
is no need to complete Steps 4

6.

.

If the indicator light does not come
on or the garage door does not
move, a second button press may be
required. For a second time, press
and hold the newly programmed
button for five seconds. If the
indicator light is continuously lit,
or the garage door moves,
programming is complete.

.

If the indicator light flashes rapidly
and the garage door does not move,
continue with programming
Steps 4

6.

Learn or Smart Button

4. After completing Steps 1

3, locate the

Learn or Smart button inside the garage
on the garage door opener receiver. The
name and color of the button may vary
by manufacturer.

5. Press and release the Learn or Smart

button. Step 6 must be completed within
30 seconds of pressing this button.

6. Return to the vehicle and firmly press

and hold the trained Universal Remote
system button for two seconds and
release. Repeat the

press/hold/release

sequence up to three times to complete
the training process.

The Universal Remote system should now
activate the garage door.

Repeat the process for programming the
two remaining buttons.

GMC Acadia/Acadia Denali Owner Manual (GMNA-Localizing-U.S./Canada/

Mexico-16402009) - 2023 - CRC - 3/28/22

Instruments and Controls

127

Radio Signals for Some Gate Operators

For questions or programming help, see
www.homelink.com/gm or call
1-800-355-3515. For calls placed outside the
U.S., Canada, or Puerto Rico, international
rates will apply and may differ based on
landline or mobile phone.

Some radio-frequency laws and gate
operators require transmitter signals to time
out or quit after several seconds of
transmission. This may not be long enough
for the Universal Remote system to pick up
the signal during programming.

If the programming did not work, replace
Step 2 under

Programming the Universal

Remote System

with the following:

Press and hold the Universal Remote system
button while pressing and releasing the
hand-held transmitter button every
two seconds until the signal has been
successfully accepted by the Universal
Remote system. The Universal Remote
system indicator light will flash slowly at
first and then change to a rapid flash or
continuous solid-light. Proceed with Step 3
under

Programming the Universal Remote

System

to complete.

Universal Remote System
Operation

Using the Universal Remote System

Press and hold the appropriate Universal
Remote system button for at least one-half
second. The indicator light will come on
while the signal is being transmitted.

Erasing Universal Remote System
Buttons

Erase all programmed buttons when vehicle
ownership is terminated.

To erase:

1. Press and hold the two outside buttons

until the indicator light begins to flash.
This should take about 10 seconds.

2. Release both buttons.

Reprogramming a Single Universal
Remote System Button

To reprogram any of the system buttons:

1. Press and hold any one of the buttons.

Do not release the button.

2. The indicator light will begin to flash

after 20 seconds. Without releasing the
button, proceed with Step 1 under

Programming the Universal Remote

System.

GMC Acadia/Acadia Denali Owner Manual (GMNA-Localizing-U.S./Canada/

Mexico-16402009) - 2023 - CRC - 3/28/22

128

Lighting

Lighting

Exterior Lighting

Exterior Lamp Controls . . . . . . . . . . . . . . . . 128
Exterior Lamps Off Reminder . . . . . . . . . . 129
Headlamp High/Low-Beam Changer . . . 129
Flash-to-Pass . . . . . . . . . . . . . . . . . . . . . . . . . . . 129
Daytime Running Lamps (DRL) . . . . . . . . . 130
Automatic Headlamp System . . . . . . . . . . 130
Hazard Warning Flashers . . . . . . . . . . . . . . . 131
Turn and Lane-Change Signals . . . . . . . . . . 131
Fog Lamps . . . . . . . . . . . . . . . . . . . . . . . . . . . . . 131

Interior Lighting

Instrument Panel Illumination

Control . . . . . . . . . . . . . . . . . . . . . . . . . . . . . . . 132

Courtesy Lamps . . . . . . . . . . . . . . . . . . . . . . . . 132
Dome Lamps . . . . . . . . . . . . . . . . . . . . . . . . . . . 132
Reading Lamps . . . . . . . . . . . . . . . . . . . . . . . . . 132

Lighting Features

Entry Lighting . . . . . . . . . . . . . . . . . . . . . . . . . 133
Exit Lighting . . . . . . . . . . . . . . . . . . . . . . . . . . . 133
Battery Load Management . . . . . . . . . . . . . 133
Battery Power Protection . . . . . . . . . . . . . . 134
Exterior Lighting Battery Saver . . . . . . . . 134

Exterior Lighting

Exterior Lamp Controls

The exterior lamp control is on the turn
signal lever.

Turn the control to the following positions:

O

:

Turns off the exterior lamps and

deactivates AUTO mode. The knob returns to
the AUTO position after it is released. Turn
to

O

again to reactivate the AUTO mode.

In Canada, the headlamps will automatically
reactivate when the vehicle is shifted out of
P (Park).

AUTO :

Automatically turns the exterior

lamps on and off, depending on outside
lighting.

;

:

Turns on the parking lamps including

all lamps, except the headlamps.

2

:

Turns on the headlamps together with

the parking lamps and instrument panel
lights.

IntelliBeam System

If equipped, this system turns the vehicle's
high-beam headlamps on and off according
to surrounding traffic conditions.

The system turns the high-beam headlamps
on when it is dark enough and there is no
other traffic present.

This light

b

comes on in the instrument

cluster when the IntelliBeam system is
enabled.

Turning On and Enabling IntelliBeam

To enable the IntelliBeam system, press the
button on the end of the turn signal lever
when the exterior lamp control is in the
AUTO or

2

position.


Content      ..     2      3      4      5     ..