Toyota Tundra. Manual - part 742


  Index      Toyota     Toyota Tundra (2007-2010 year) - Service and Repair Manual


Search            copyright infringement  


Content   ..  740  741  742  743   ..


Toyota Tundra. Manual - part 742


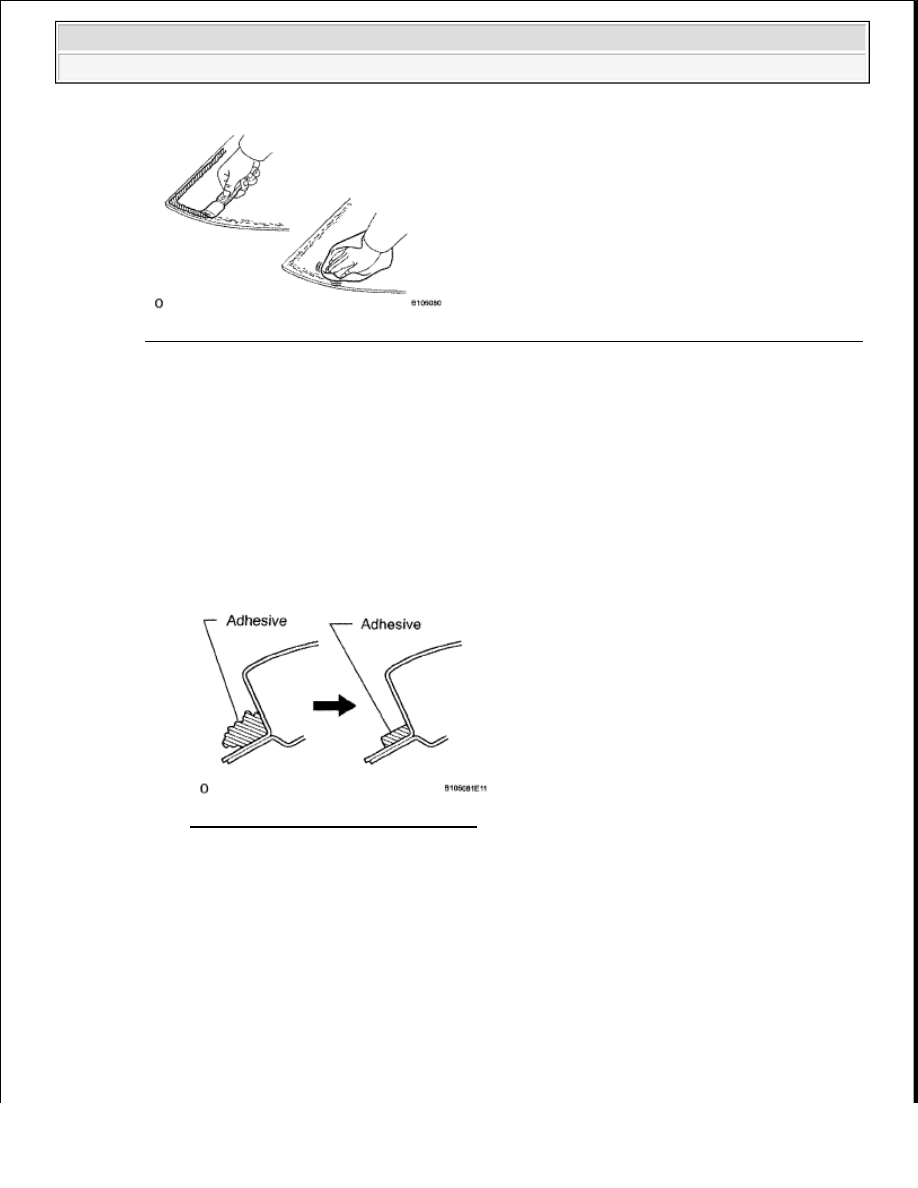
Fig. 102: Removing Damaged Stoppers, Dams And Adhesive Sticking To Glass Using Scraper 
Courtesy of TOYOTA MOTOR SALES, U.S.A., INC. 

b. Clean the outer edges of the glass with non-residue solvent. 

30. CLEAN VEHICLE BODY 

a. Clean and shape the contact surface of the vehicle body. 

1. On the contact surface of the vehicle body, use a knife to cut away excess adhesive as shown 

in the illustration. 

Fig. 103: Identifying Excess Adhesive 
Courtesy of TOYOTA MOTOR SALES, U.S.A., INC. 

HINT: 

Leave as much adhesive on the vehicle body as possible. 

b. Clean the contact surface of the vehicle body with cleaner. 

HINT: 

NOTE:

Do not touch the glass surface after cleaning it. Even if using new 
glass, clean it with non-residue solvent.

NOTE:

Be careful not to damage the vehicle body.


2009 Toyota Tundra 

2009 ACCESSORIES AND EQUIPMENT Windshield/WindowGlass - Tundra


Even if all the adhesive has been removed, clean the vehicle body. 

INSTALLATION 

1. INSTALL NO. 2 WINDSHIELD GLASS STOPPER 

a. Apply Primer G to the glass where the spacers will be installed. 

b. Install 2 new stoppers onto the glass as shown in the illustration. 

Fig. 104: Identifying Length Between Ceramic Notch And Windshield Glass 
Courtesy of TOYOTA MOTOR SALES, U.S.A., INC. 

Standard measurement  

NO. 2 WINDSHIELD GLASS STOPPER 

2. INSTALL NO. 1 WINDSHIELD GLASS STOPPER 

a. Install 2 new stoppers to the vehicle body as shown in the illustration.  

NOTE:

Allow the primer to dry for 3 minutes or more. 

Throw away any leftover primer.  

Do not apply too much primer.  

Area Specified Condition

a

8.5 mm (0.334 in.)


2009 Toyota Tundra 

2009 ACCESSORIES AND EQUIPMENT Windshield/WindowGlass - Tundra


Fig. 105: Identifying No. 1 Windshield Glass Stopper 
Courtesy of TOYOTA MOTOR SALES, U.S.A., INC. 

3. INSTALL WINDOW GLASS ADHESIVE DAM 

a. Apply Primer G to the glass where the glass adhesive dams will be installed. 

b. Remove the peeling paper from the adhesive part of the dam. While aligning the dam to the 

ceramic notch and dam reference line, install the dam (adhesive side) to the glass (Primer G area). 

Fig. 106: Identifying Window Glass Adhesive Dam 
Courtesy of TOYOTA MOTOR SALES, U.S.A., INC. 

Standard measurement  

WINDOW GLASS ADHESIVE DAM 

NOTE:

Allow the primer to dry for 3 minutes or more. 

Throw away any leftover primer.  

Do not apply too much primer.  


2009 Toyota Tundra 

2009 ACCESSORIES AND EQUIPMENT Windshield/WindowGlass - Tundra


4. INSTALL UPPER WINDSHIELD OUTSIDE MOULDING 

a. Using a brush or sponge, coat the edge of the glass and the contact surface with Primer G. 

b. Install the windshield outside moulding, as shown in the illustration. 

Fig. 107: Identifying Windshield Outside Moulding 
Courtesy of TOYOTA MOTOR SALES, U.S.A., INC. 

Usage time frame  

USAGE TIME FRAME 

5. INSTALL WINDSHIELD GLASS 

a. Using a brush, apply Primer M to the exposed part of the vehicle body. 

Area Specified Condition

a

29.2 mm (1.15 in.)

NOTE:

Allow the primer to dry for 3 minutes or more. 

Throw away any leftover primer.  

Do not apply too much primer.  

NOTE:

Do not drive the vehicle for the amount of time written in the table 
below.

Temperature Usage Time Frame

35°C (95°F)

15 minutes

20°C (68°F)

1 hour 40 minutes

5°C (41°F)

8 hours


2009 Toyota Tundra 

2009 ACCESSORIES AND EQUIPMENT Windshield/WindowGlass - Tundra


Content   ..  740  741  742  743   ..