Mazda 6. Manual - part 272


  Index      Mazda     Mazda 6 - service repair manual 2002 year


Search            


Content   ..  270  271  272  273   ..


Mazda 6. Manual - part 272


FRONT SUSPENSION 

R–23

R

STABILIZER CONTROL LINK INSPECTION

A6E741434150W01

1. Remove the stabilizer control link from the vehicle.
2. Inspect for bending and damage.
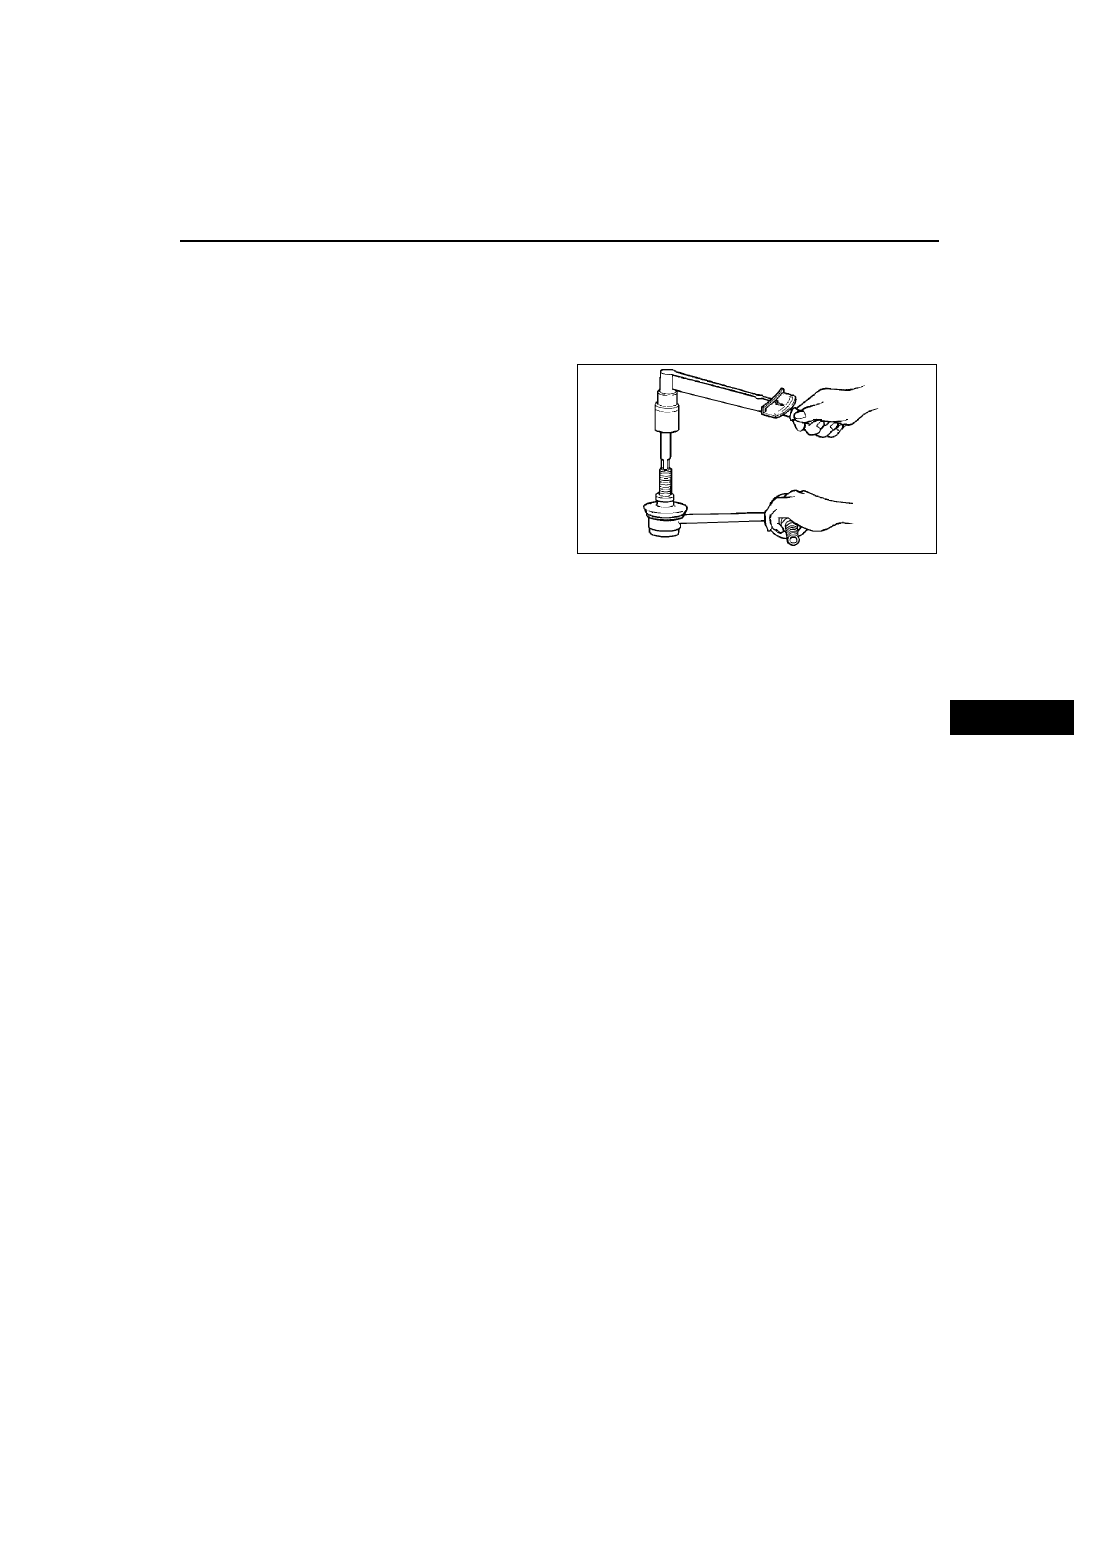
3. Measure the ball joint starting torque.

(1) Rock the ball joint stud side to side 10 times.
(2) Rotate the ball joint stud 10 times.
(3) Measure the starting torque using a suitable 

allen socket and a torque wrench.

Starting torque

0.23—0.47 N·m 

{2.4—4.7 kgf·cm, 2.1—4.1 in·lbf}

End Of Sie

FRONT CROSSMEMBER REMOVAL/INSTALLATION

A6E741434800W01

1. Remove the under cover.
2. Remove the splash shield.
3. Remove the front auto leveling sensor.

(See 

T–32 FRONT AUTO LEVELING SENSOR REMOVAL/INSTALLATION

.)

4. Remove the transverse member.

(See 

R–27 TRANSVERSE MEMBER REMOVAL/INSTALLATION

.)

5. Remove the steering gear and linkage, and pipe assembly installation bolts from the front crossmember, then 

suspend the steering gear and linkage with a cable.

Tightening torque

• Steering gear and linkage: 74.4—104.8 N·m {7.857—10.68 kgf·m, 54.88—77.29 ft·lbf}

• Pipe assembly: 7.8—10.8 N·m {79.6—110.0 kgf·cm, 69.1—95.5 in·lbf}

6. Remove in the order indicated in the table.
7. Install in the reverse order of removal.
8. Adjust the headlight zeroset.

(See 

T–31 HEADLIGHT ZEROSET

.)

9. Inspect the front wheel alignment.

(See 

R–5 FRONT WHEEL ALIGNMENT

.)

A6E7414W021

R–24

FRONT SUSPENSION 

.

A6E7414W100

1

Nut (stabilizer control link)

2

Front lower arm (front) ball joint
(See 

R–16 Front Lower Arm (Front) Ball Joint 

Removal Note

)

3

Front lower arm (rear) ball joint
(See 

R–19 Front Lower Arm (Rear) Ball Joint 

Removal Note

)

4

Bolt (front shock absorber lower side)

5

No.1 engine mount center bolt
(See 

R–25 No.1 Engine Mount Center Bolt Removal 

Note

)

6

Crossmember bracket
(See 

R–25 Crossmember Bracket Removal Note

)

7

Crossmember component

8

Stabilizer bracket and bushing

9

Front Stabilizer

10

Front lower arm (front)

11

Front lower arm (rear)

12

Front crossmember

13

Front crossmember bushing
(See 

R–25 Front Crossmember Bushing Removal 

Note

)

(See 

R–26 Front Crossmember Bushing Installation 

Note

)

FRONT SUSPENSION 

R–25

R

No.1 Engine Mount Center Bolt Removal Note

1. Suspend the engine using the SST.
2. Remove the No.1 engine mount center bolt.

Crossmember Bracket Removal Note

Warning

• Removing the crossmember is dangerous. The crossmember component could fall and cause 

serious injury or death. Verify that the jack securely supports the crossmember component before 
removing the crossmember bracket.

1. Support the crossmember component with a jack 

and remove the nuts.

2. Remove the crossmember bracket.

Front Crossmember Bushing Removal Note

1. Mark the crossmember as shown in the figure 

(rear upper side only).

2. Remove the bushings using screw driver (-), 

being care not to damage the front crossmember.

A6E7414W016

A6E7414W036

A6E7414W040

A6E7414W032

R–26

FRONT SUSPENSION 

Front Crossmember Bushing Installation Note

1. Set the bushings as shown in the figure.

2. Install the bushing onto the crossmember using 

the SSTs.

End Of Sie

A6E7414W041

A6E7414W042


Content   ..  270  271  272  273   ..