Hummer H3. Manual - part 1444


  Index      Hummer     Hummer H3 - service repair manual 2006-2009 year


Search            


Content   ..  1442  1443  1444  1445   ..


Hummer H3. Manual - part 1444


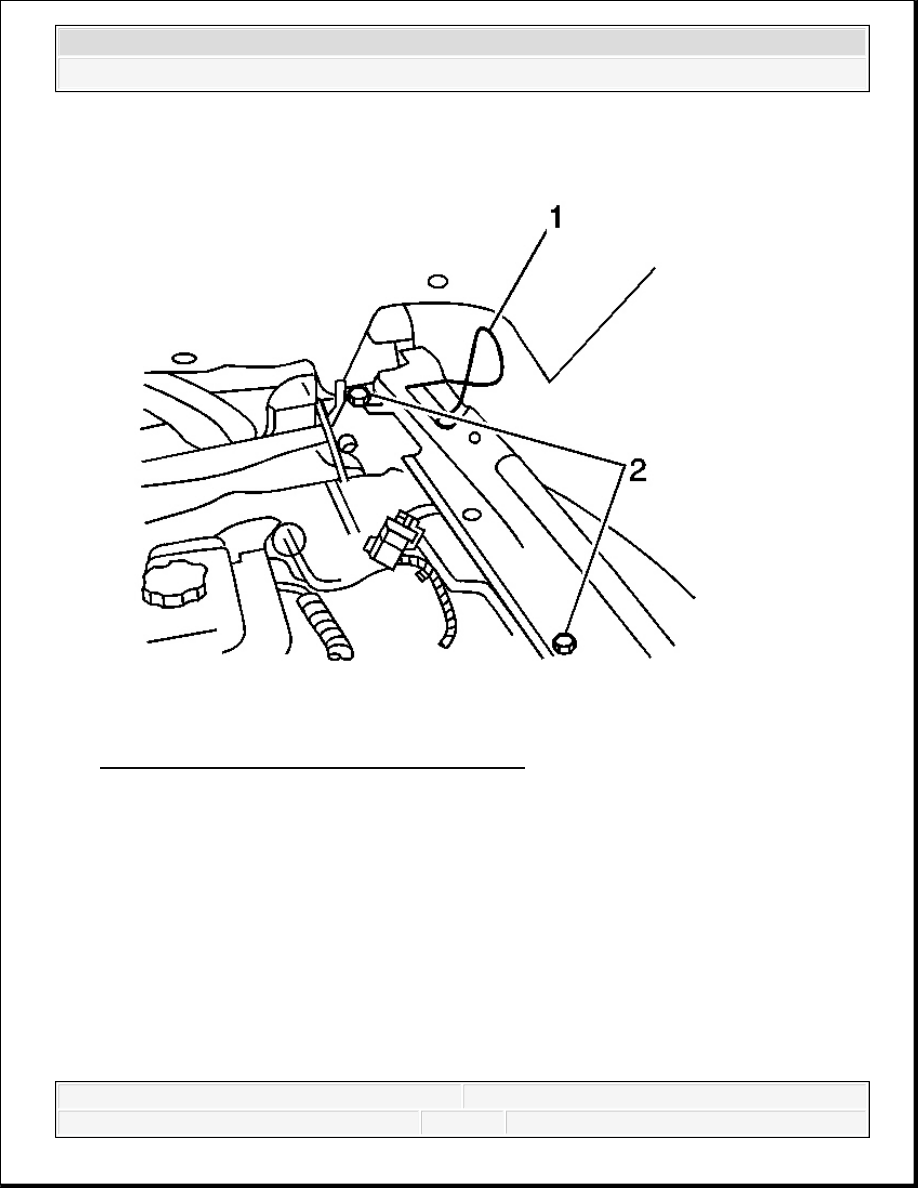
Fig. 144: Loosening 2 Screws At Fender Flange 
Courtesy of GENERAL MOTORS CORP. 

30. Loosen the 2 screws (2) at the fender flange under the air inlet cover to allow the electrical 

harness (1) to pass underneath.  

31. Move the black foam out of the way.  

32. Tighten the fender flange attaching screws. 

Tighten: Tighten the fender flange screws to 7 N.m (45 lb in). 

33. Reposition the black foam under fender flange.  

34. Rotate the lightbar to the correct orientation.  

35. Position the front edge of light bar approximately 3 mm (1/8 in) rearward from the front 


2007 Hummer H3 

2007 ACCESSORIES & EQUIPMENT Lighting - H3


edge of the windshield reveal molding. Using the 6 fasteners provided and T25® Torx 
driver, install the lightbar to the roof. 

36. Maintain a parallel gap to the windshield reveal molding and luggage rack side rails. 

Tighten: Tighten the fasteners to 4.5 N.m (30 lb in). 

37. Ensure the lightbar is centered between A-pillars, adjust if necessary. 

Fig. 145: Identifying Fastener Covers 
Courtesy of GENERAL MOTORS CORP. 

38. Install the 6 fastener covers (1) by aligning the cover's tab to the driver's side and gently 

pressing in place.  

IMPORTANT: Ensure the wiring is not trapped beneath the fasteners.


2007 Hummer H3 

2007 ACCESSORIES & EQUIPMENT Lighting - H3


39. Mount the clearance lamps to A-pillars by sliding hook at front edge into 1/2 inch hole. 

Secure the rear edge with T20® torx driver and screw provided.  

40. Ensure left hand lamp is on the driver side A-pillar and right hand lamp is on the passenger 

side A-pillar.  

41. Plug in the bulb and socket on clearance lamps by pressing the socket in and turning 1/4 turn 

clockwise.  

42. Reinstall the A-pillar trim on both driver and passenger sides by hooking rear edge under 

tab at luggage rack siderail and pressing the clips into place.  

43. Install the 2 screws behind the weatherstrip. 

Tighten: Tighten the screws to 2 N.m(18 lb in). 

44. Reposition the weatherstrip. 

Fig. 146: Locating 6 Blunt Wiring Cuts 


2007 Hummer H3 

2007 ACCESSORIES & EQUIPMENT Lighting - H3


Courtesy of GENERAL MOTORS CORP. 

45. Locate the 6 blunt wiring cuts (1) in the engine compartment behind the driver's side 

wheelhouse. The engine compartment blunt cuts have seals on them that must be removed 
prior to using the splice sleeve.  

46. Carefully remove some of the seal on the appropriate wire using a wiring stripping tool.  

47. Using the splice sleeve provided, splice the blunt black cut wire to the black wire in the 

electrical harness.  

48. Replace the conduit over the splice and tape the wiring in position. 

Fig. 147: Locating Battery Vent Tube 


2007 Hummer H3 

2007 ACCESSORIES & EQUIPMENT Lighting - H3


Content   ..  1442  1443  1444  1445   ..