Freightliner Coronado 132 / 122SD. Manual - part 10


  Index      Freightliner     Freightliner Coronado 132, Freightliner 122SD - service repair manual


Search            


Content   ..  8  9  10  11   ..


Freightliner Coronado 132 / 122SD. Manual - part 10


25–00 Safety Precautions

Safety Precautions in this section apply to all
procedures within this group.

DANGER

When working on the vehicle, shut down the en-
gine, set the parking brake, and chock the tires.
Before working under the vehicle, always place
jack stands under the frame rails to ensure the
vehicle can not drop. Failure to follow these steps
could result in serious personal injury or death.

25–01 Eaton Fuller Heavy-Duty

Clutch Release Bearing
Lubrication

1.

Park the vehicle on a level surface. Apply the
parking brakes, and chock the rear tires.

NOTE: Some clutch release bearings are
equipped with a lubrication extension, or lube
tube, that extends outside of the clutch housing.

2.

Remove the clutch inspection plate. See

Fig. 1

.

NOTE: For lubrication of the release bearing,
Eaton Fuller recommends NLGI Grade 2 or 3
EP lithium grease with a 325°F (163°C) operat-
ing temperature, or Roadranger Grease MP-2.

3.

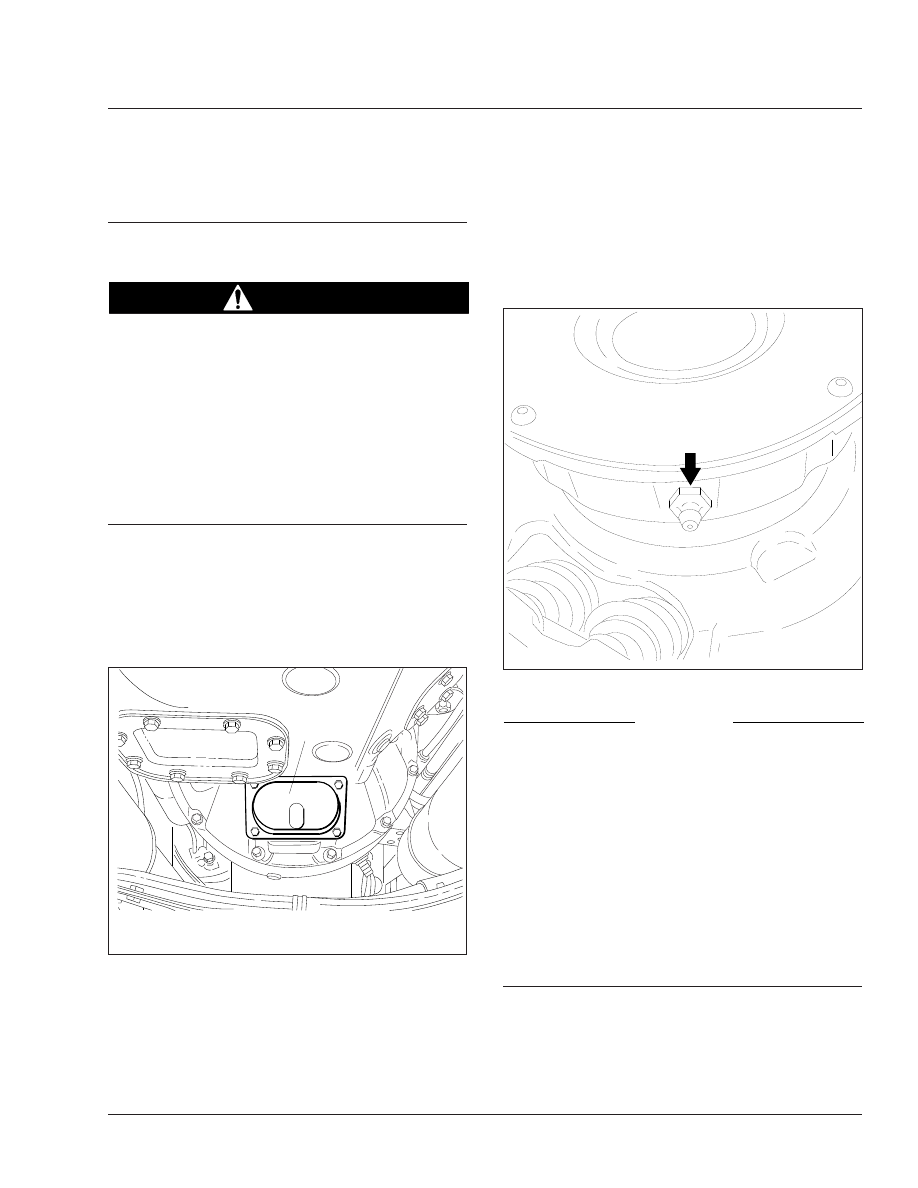
Wipe any dirt away from the grease fitting. See

Fig. 2

Using a pressure-type grease gun

equipped with the recommended grease, lubri-
cate the bearing until excess grease purges from
the rear of the release bearing (toward the
transmission).

NOTICE

Do not over-lubricate the clutch release bearing.
Over-lubrication could contaminate the clutch in-
ternally, causing clutch slippage and premature
failure. Do not use chassis grease or multipurpose
lubricants.

4.

Wipe off excess grease and apply to both the
yoke finger and sleeve bushing contact points.
See

Fig. 3

.

5.

Install the clutch inspection plate, if removed.

25–02 Clutch Release Cross-

Shaft Lubrication

The clutch release cross-shaft is equipped with two
grease fittings on the transmission clutch housing.
See

Fig. 4

and

Fig. 5

Wipe any dirt from the grease

fittings, and lubricate with NLGI Grade 2 or 3 EP

f250002a

1

03/01/94

1.

Clutch Inspection Plate

Fig. 1, Clutch Inspection Plate

f250081a

05/27/93

Fig. 2, Release Bearing Grease Fitting

Clutch

25

25/1

lithium grease with a 325°F (163°C) operating tem-
perature, or Roadranger Grease MP-2.

25–03 Meritor LitePedal

Clutch Release Bearing
Lubrication

If the clutch is equipped with an optional sealed
clutch release bearing
, lubricate the bronze bushing
located between the clutch bearing housing and the
transmission input shaft. Use a pressure-type grease
gun with Meritor Specification 0-661 Lithium Complex
Grease, NLGI Grade 3, and lubricate until grease

flows from the release bearing housing. Depress the
clutch pedal a couple of times before starting the
engine.

If the clutch is equipped with a standard non-sealed
clutch release bearing with a grease fitting
, lubricate
the bearing as follows:

1.

Park the vehicle on a level surface. Apply the
parking brakes, and chock the rear tires.

NOTE: Some clutch release bearings are
equipped with a lubrication extension that ex-
tends outside of the clutch housing. It is not
necessary to remove the clutch inspection plate
when the lubrication extension is used.

2.

Remove the clutch inspection plate, if necessary.
See

Fig. 1

.

NOTE: For lubrication of the release bearing,
use Meritor Specification 0-661 Lithium Complex
Grease, NLGI Grade 3.

3.

Wipe any dirt from the grease fitting. See

Fig. 2

.

Using a pressure-type grease gun equipped with
recommended grease, lubricate the bearing until
excess grease purges from the rear of the re-
lease bearing (toward the transmission).

NOTICE

Do not over-lubricate the clutch release bearing.
Over-lubrication could contaminate the clutch in-
ternally, causing clutch slippage and premature
failure. Do not use chassis grease or multipurpose
lubricants.

08/10/2009

f250444

1

2

1.

Sleeve Bushing Contact Point

2.

Yoke Finger Contact Points

Fig. 3, Grease the Contact Points

f250048a

1

2

10/19/93

1.

Clutch Release Cross-Shaft

2.

Grease Fitting

Fig. 4, Cross-Shaft Grease Fitting, Left-Side

f260146a

05/27/93

Fig. 5, Cross-Shaft Grease Fitting, Right-Side

Clutch

25

25/2

4.

Wipe off excess grease, and apply it to both the
yoke finger and sleeve bushing contact points.
See

Fig. 3

.

5.

Install the clutch inspection plate, if removed.

Clutch

25

25/3

Title of Maintenance Operation (MOP)

MOP Number

Allison Transmission Fluid and Filter Change. . . . . . . . . . . . . . . . . . . . . . . . . . . . . . . . . . . . . . . . . . . . . . 26–04

Eaton Fuller Transmission Fluid Change, and Magnetic Plug Cleaning. . . . . . . . . . . . . . . . . . . . . . . . . . . 26–01

Manual Transmission Air Filter/Regulator Check, Cleaning, or Replacement . . . . . . . . . . . . . . . . . . . . . . . 26–03

Safety Precautions . . . . . . . . . . . . . . . . . . . . . . . . . . . . . . . . . . . . . . . . . . . . . . . . . . . . . . . . . . . . . . . . . 26–00

Transmission Fluid Level Inspection . . . . . . . . . . . . . . . . . . . . . . . . . . . . . . . . . . . . . . . . . . . . . . . . . . . . 26–02

Transmission

26

Index, Alphabetical


Content   ..  8  9  10  11   ..