DAF LF45, LF55 Series. Manual - part 119


  Index      DAF     DAF LF45, LF55 Series - service repair manual


Search            


Content   ..  117  118  119  120   ..


DAF LF45, LF55 Series. Manual - part 119


1

LF45/55 series

Removal and installation

EXTERNAL CAB COMPONENTS

4-11

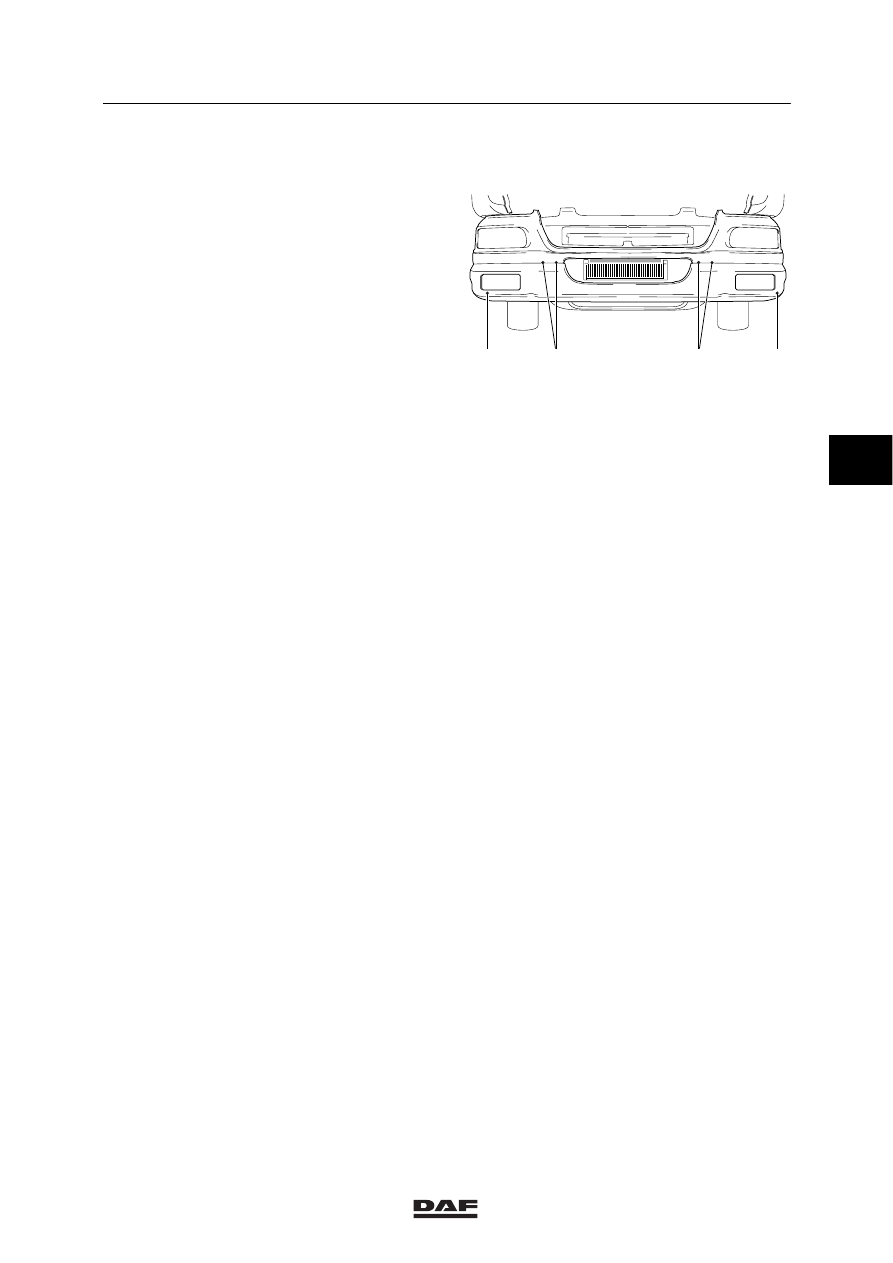
4.11 REMOVAL AND INSTALLATION, BUMPER

Removing the bumper
1.

Remove the attachment bolts on the
underside of the bumper (1).

2.

Remove the attachment bolts (2) on the top
of the bumper (1). These attachment bolts
can be reached using an open-end spanner
on the rear of the bumper.

3.

If applicable, remove the lighting
connectors.

Installing the bumper
1.

Fit the bumper.

2.

Position the bumper. Secure the attachment
bolts (1 and 2) on the top and underside.

3.

If applicable, fit the lighting connectors.

K1 01 132

1

1

2

2

4

ǹ 0210

1

EXTERNAL CAB COMPONENTS

Removal and installation

LF45/55 series

4-12

4.12 REMOVAL AND INSTALLATION, WINDSCREEN

Removing the windscreen
1.

Remove the grille.

2.

Take the cover panel out of the window
frame.

3.

Remove the windscreen wiper arms.

4.

Remove the plastic cover strips on the
inside of the front-screen pillars (A-pillar).

5.

Protect the curved areas on the outside of
the windscreen frame with linen tape. Also
use tape to protect the plastic parts on the
inside and the defroster openings of the
heating and ventilation system.

Note:
Take care not to damage the paint.

6.

Put the wire (special tool,
DAF no. 1329415) at approximately the
middle of the upper and lower side of the
glass using pliers or a special pass-through
tool (special tool, DAF no. 1240458)
through the sealant.

Note:
Remove the wire pass-through tool before
fitting the wire ends to the handles of the
cutting wire set.

7.

The length of the cutting wire should be
1.5 x the height of the windscreen.

8.

Secure the handles that are part of the set,
special tool (DAF no. 0499817) to the
cutting wire.

K1 00 715

4

ǹ 0210

1

LF45/55 series

Removal and installation

EXTERNAL CAB COMPONENTS

4-13

9.

Use tape strips to protect the glass from
falling out accidentally (after the sealant has
been cut through).

10. Start the cutting in the middle. Make sure

the wire is kept moving and tightly stretched
all the time. If the wire gets twisted, it will
inevitably break.

11. Keep the cutting wire as close as possible

to the edge of the glass.

12. Make sure the wire ends are crossed before

the bottom corners are reached.

13. Take the windscreen out of the frame using

the two suction pads, special tool
(DAF no. 0484800).

14. Remove any remaining sealant in the

window frame with a scraper, special tool
(DAF no. 1329417). Make sure the
remaining layer of sealant has a thickness
of at most 1 to 1.5 mm and that it is flat and
smooth.

15. Remove frayed pieces and granules of old

sealant and clean the frame thoroughly with
a cleaner.

Important tips
-

If the new windscreen is fitted at a later
time, the old, fully cured sealant should be
cleaned 15 minutes before the glass is
fitted, to ensure proper adhesion.

-

Repair any damage to the paint on the
window frame immediately with the right
type of paint.

-

Always work in a clean area.

-

Wear industrial gloves or use a special
hand cream.

-

Use paper towels or tissues instead of
cleaning rags.

A

K1 00 698

4

ǹ 0210

1

EXTERNAL CAB COMPONENTS

Removal and installation

LF45/55 series

4-14

Installing the windscreen

Be careful when using cleaner.
Contact with the cleaner will cause
skin irritation and swallowing will
cause burning.
Inhaling may cause breathing
problems.

1.

Any damage to the paint should be repaired
well before the windscreen glass is placed.
Use the right type of paint.

2.

Make sure that the guide rail is smooth and
flat (no major irregularities).

3.

Check the windscreen for damage.

4.

Attach two double suction pads, special tool
(DAF no. 0484800) to the outside of the
glass.

5.

Put the windscreen with the suction pads on
a completely clean workbench.

6.

Fit the rubber trimming to the glass and
secure it with tape on the outside of the
glass.

7.

Place the glass in the frame without using
sealant, starting at the bottom and ensuring
that it fits exactly in the frame. If necessary,
fill up the rubber spacer blocks by means of
which the glass rests on the support blocks.

8.

Mark the correct position of the glass in the
frame with strips of tape.
Cut through the tape in the frame.

9.

Remove the glass from the frame and place
the glass on the workbench.

10. Clean the glass where the layer of sealant

is to be applied. See “Technical data”.

11. Clean the sealant within the frame.

K1 01 474

4

ǹ 0210


Content   ..  117  118  119  120   ..