Volvo V60 Twin Engine (2018 year). Instruction - part 23
MAINTENANCE AND SERVICE
}}
* Option/accessory.
391
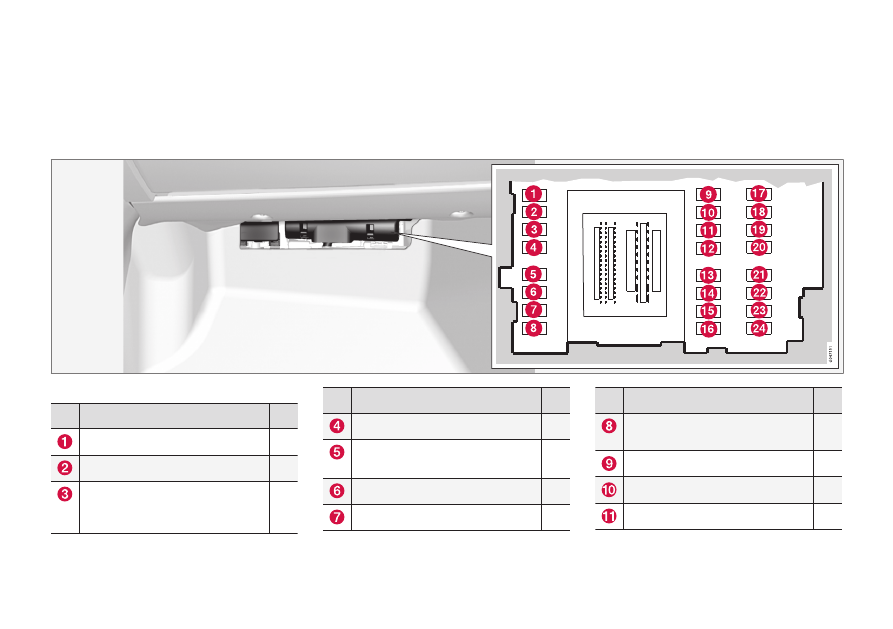
Fuses - in the control module under
the glovebox
Fuses in the control module under the glovebox
protect airbag and collision warning system
functions, amongst other things.
Positions
Function
A
A
Rear window wiper
15
-
-
Interior lighting; Driver's door con-
trol panel, power windows; Power
seats
*
7.5
Function
A
A
Combined instrument panel
5
Adaptive cruise control, ACC
*; colli-
sion warning system
*
10
Interior lighting; Rain sensor
*
7.5
Steering wheel module
7.5
Function
A
A
Central locking system, fuel filler
flap
10
Heated steering wheel
*
15
-
-
Unlocking, tailgate
10