Volkswagen Golf / Golf GTI / Jetta. Manual - part 1213


  Index      Volkswagen     Volkswagen Golf / Golf GTI / Jetta - service repair manual 1999-2005 year


Search            copyright infringement  


Content   ..  1211  1212  1213  1214   ..


Volkswagen Golf / Golf GTI / Jetta. Manual - part 1213
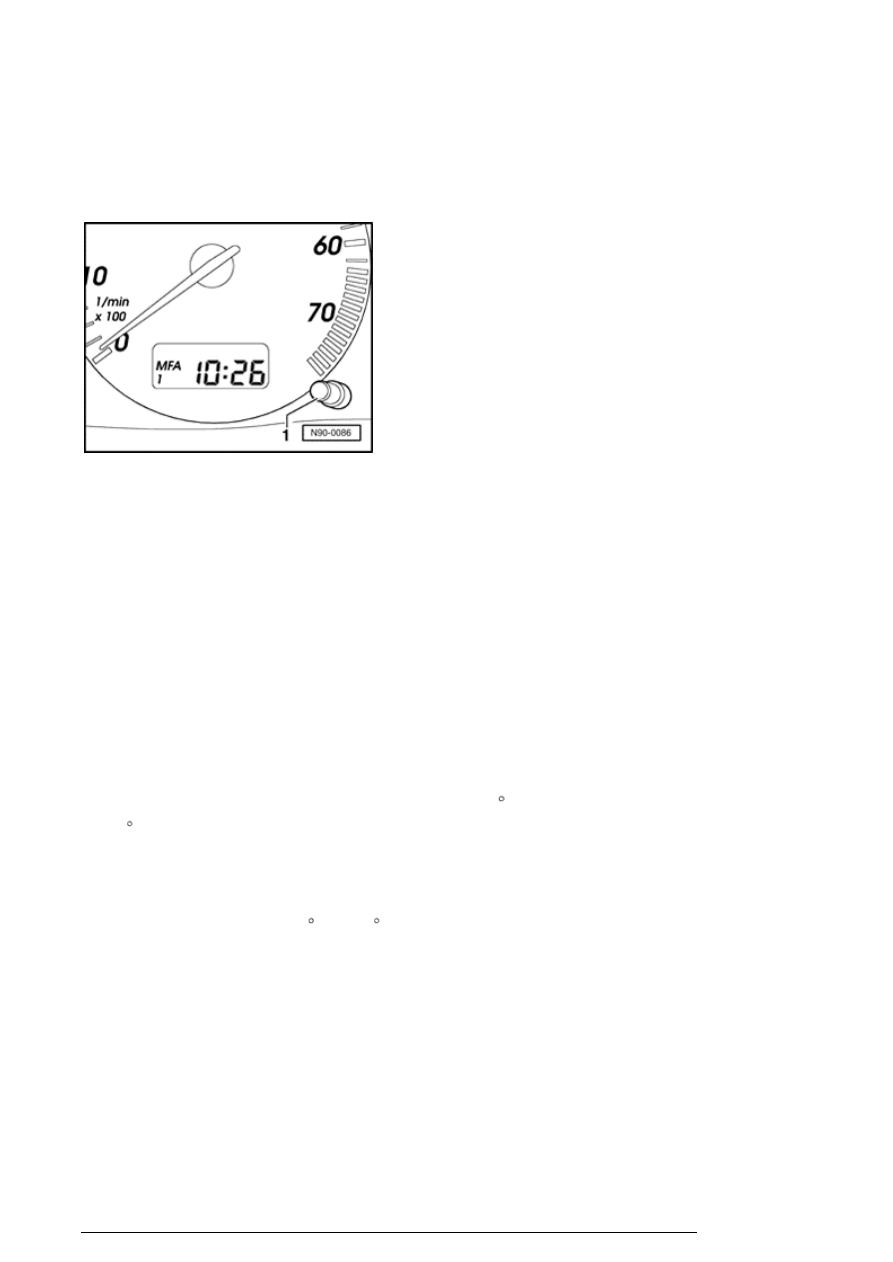


- Turn the adjusting button - 1 - clockwise. 


With every brief turn of the adjusting button, the setting 
changes by one minute. When turning and holding the 
adjusting button, the setting continually adjusts.

With the adjusting button - 1 - the clock can be set to the 
exact second: 

- Turn the adjusting button to the right until the clock is one 
minute less than the time that is to be set. 

- Briefly turn the adjusting button to the right as soon as the 
second indicator of the reference clock reaches the full 
minute mark. 

Climatronic, setting temperature to 72   F 
(22   C) 

Note: 

A comfortable climate in vehicle is reached most quickly at 
a temperature setting of 72   F (22   C)  
 
Therefore, this setting should only be adjusted when it is 
personally preferred.  
 

- Switch ignition on 

Description of work (part 1 of 2)

13/2/2005


- Check to see if 72   F (22   C) is set - 3 - in the display. 


If necessary, perform the temperature setting as follows:

- Press button - 1 - for automatic operation. The display - 2 
will indicate AUTO. 

- Adjust temperature to 72   F (22   C) by pressing button 
- 4 - for "cooler" or button - 5 - for "warmer" . 

Radio and radio/navigation system, 
activating anti-theft coding 


Radios and radio/navigation systems are delivered with a 
security code. Security code means that every unit with 
anti-theft coding is programmed with its own code. This 
code is not active from factory.

Perform work sequence 

- Refer to 


Repair Manual, Communication, Repair Group 91, 

Radio, Telephone, Navigation, Trip computer


Wheel cover caps 

- Removing and installing wheel cover caps 


Alloy wheel of Jetta GLI has a bolted wheel trim. You can 
remove or install this using appropriate tool in vehicle.


Assembly tool for wheel trim is located in glove box.

Warning!  


Do not use other assembly tools! Otherwise wheel trim 
or alloy wheel can be damaged.

Description of work (part 1 of 2)

13/2/2005


Wheel bolts, tighten to correct torque 
setting 

Special tools, testers and auxiliary items required 

Torque wrench V.A.G 1332/ (40 -200 Nm)   


Wheel cover, removing


The removal hook is part of the vehicles tool kit


Wheel bolts


The adapter to loosen/tighten the anti-theft wheel bolts is 
located with the vehicle tool kit.

Note: 

Be sure to tighten wheel bolts one after the other to the 
following specified torque:  
 
Tightening torque: 120 Nm  
 
After completion of work, return adapter and hook for wheel 
cover to vehicle tool kit.  


Full wheel cover, installing

Description of work (part 1 of 2)

13/2/2005


- Install full wheel cover with tire valve positioned in the cut-
out - arrow - 

Installation tool for wheel cover (Golf GTI 337 Edition) 

- Place the wheel cover installation tool in the vehicle tool 
kit, as shown in the illustration - arrow - 

Wheelhousing liner, bolting to front apron 
(only anniversary Golf GTI with 132 kW 
engine) 

Note: 

The wheel house lining must be fastened to the front apron 
by an additional fixing bolt. This will help prevent damage 
to the wheel house lining.  
 
The following illustration shows the right wheel house 
lining. The fastening of the left wheel house lining is the 
same but reversed.  
 
The fastening - 1 - in the illustration was performed by the 
factory.  


Necessary material:

2 x "N 015 439 1" spring nut  
 
2 x "N 907 750 01" Torx socket head self-tapping screw 
(4.8 x 16)  
 

Work sequence for the additional fastener  - 2 - : 

Description of work (part 1 of 2)

13/2/2005


Content   ..  1211  1212  1213  1214   ..