Volkswagen Fox (2004 year). Manual - part 47


  Index      Volkswagen     Volkswagen Fox - service repair manual 2004 year


Search            copyright infringement  


Content   ..  45  46  47  48   ..


Volkswagen Fox (2004 year). Manual - part 47


necessary.

– Drain the engine oil.
– Tightening torque for the draining plug:
seta - 4-cylinder engines 30 Nm.

Note

Please note that the tightening torque must not be exceeded.

A very high tightening torque may lead to damage or even

leaks in the oil draining plug area.

Install a new sealing ring in the oil drainage plug

WARNING

♦ Follow the rules for disposal!

Engine identification letters BNM
– Aspirate the engine oil with the Oil aspirator - VAG 1307 A- or

Oil aspirator -VAG 1358 A-

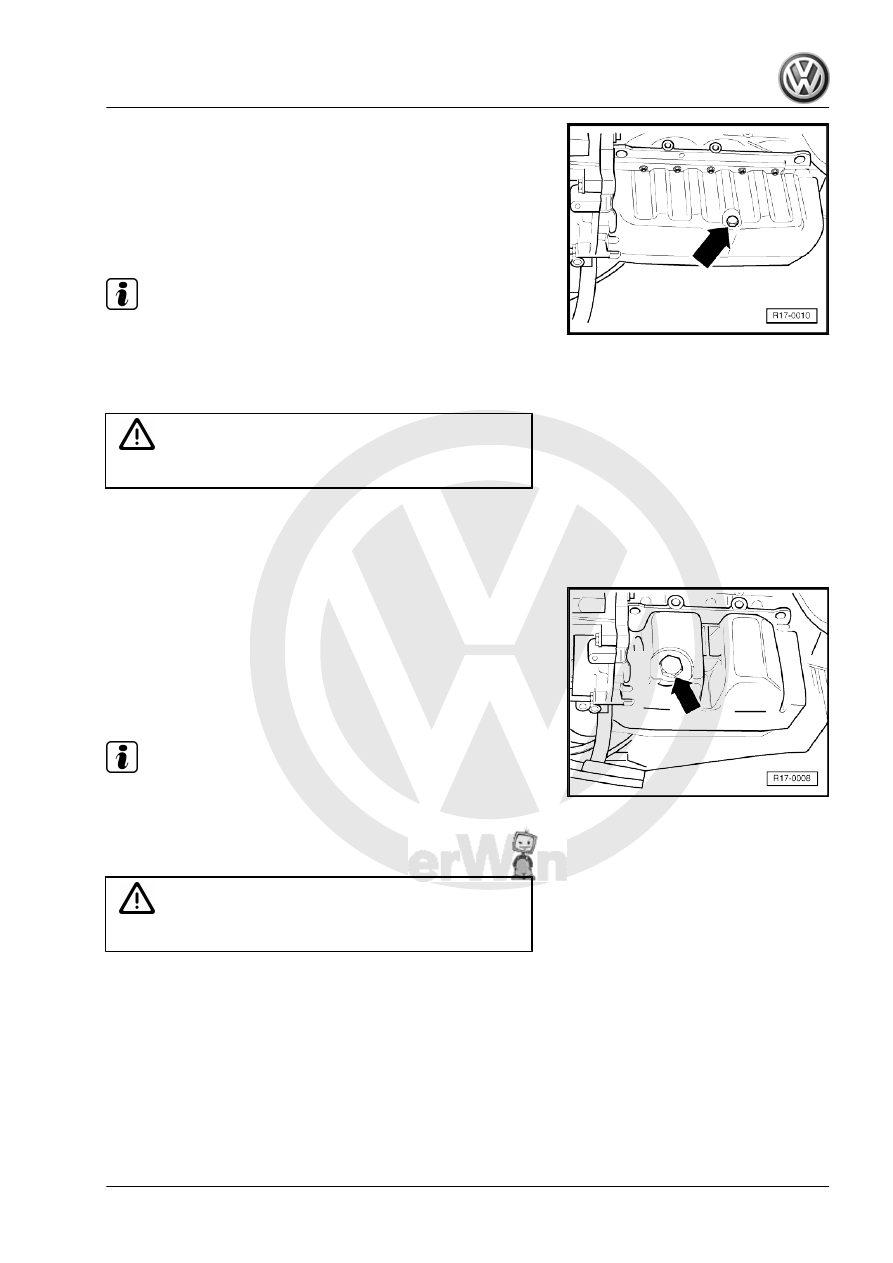
– Remove the oil draining plug -arrow-.
– Remove the sealing ring from the oil draining plug and cut if

necessary.

– Drain the engine oil.
– Tightening torque for the draining plug:
seta - 3-cylinder engines 30 Nm.

Note

Please note that the tightening torque must not be exceeded.

A very high tightening torque may lead to damage or even

leaks in the oil draining plug area.

Install a new sealing ring in the oil drainage plug

WARNING

♦ Follow the rules for disposal!

4.19.1

Replace the oil filter

Special tools and workshop equipment required
♦ Screwdriver -SW 30-
♦ Screwdriver -SW 36-
Carry out work sequence as follows:

FOX 2004 ➤

4. Service descriptions    

61

-SW 30- and remove it.

WARNING

♦ Follow the rules for disposal!

– Clean the engine sealing surface.
– Lightly lubricate the new filter rubber sealing. With this, the

filter is better seated and ideal sealing condition is achieved.

– Install the filter and tighten it manually.
Engine identification letters ASY
Carry out work sequence as follows:

– Unscrew the sealing cover -1- with the Wrench -SW 36- and

remove the cover with the filter.

– Remove the old filter from the fastening cover.

Note

Make sure that no foreign object enters the filter case.

WARNING

♦ Follow the rules for disposal!

– Replace the cover sealing ring -2-.
– Install the new filter.

– Install the fastening cover -1-.
Tightening torque in the fastening cover: 25 Nm.
Engine identification letters BNM

Special tools and workshop equipment required
♦ 36 mm wrench

FOX 2004 ➤

62

    4. Service descriptions

Wrench .

WARNING

♦ Follow the rules for disposal!

– Clean the engine sealing surface.
– Replace the sealing ring.
– Lightly lubricate the new filter rubber sealing. With this, the

filter is better seated and ideal sealing condition is achieved.

Tightening torque for the filter: 25 Nm.
Engine identification letters BMD
Carry out the following work sequence:
– Loosen the cover -5- with a Wrench -SW 36- and remove the

cover with the filter.

– Remove the filter -1-.
– Replace the cover sealing ring -4-.

– Replace the sealing rings -2- and -3-.

WARNING

♦ Follow the rules for disposal!

– Clean the engine sealing surface.
– Lightly lubricate the new filter rubber sealing. With this, the

filter is better seated and ideal sealing condition is achieved.

Tightening torque: 25 Nm.

4.19.2

Replenish the engine with oil

Based on the oil properties 

⇒ page 29

 , use only the following

approved engine oils:

4.19.3

Oil specification for engine identification

letters AQZ, BAH, BLH, BKR, BMD

– Vehicles with “service based on time and kilometers

traveled” (QG0): VW 502 00.

4.19.4

Oil specification for diesel engines with

identification letters ASY

– Vehicles with “service based on time and kilometers

traveled” (QG0): VW 505 00 or VW 505 01.

4.19.5

Oil specification for diesel engines with

identification letters BNM

– Vehicles with “service based on time and kilometers

traveled” (QG0): VW 505 01.

FOX 2004 ➤

4. Service descriptions    

63

♦ Follow the rules for disposal!

– After replenishing the engine with oil, wait for at least 3 minutes

and then check the level.

– Pull the oil dipstick out, clean it with a clean cloth, and then

push the oil dipstick in again up to the seat (stop).

– Pull the oil dipstick out again and check the oil level for the

following conditions:

Condition 1

Area -a-

Minimum marking region. Replenish the oil. It is

sufficient for the oil level to be anywhere within

area -b-.

Area -b-

It is not necessary to replenish the oil.

Area -c-

Maximum marking region. Oil cannot be replen‐

ished.

Note

There is danger of damaging the catalytic converter when oil

level is above area -c-

The oil level must be between the minimum and maximum

markings. Make sure that the oil level does not exceed the

maximum marking.

– Pull the oil dipstick out again and check the oil level.

Condition 2

Area -A-

Oil must not be replenished.

Area -B-

It is not necessary to replenish the oil.

Area -C-

Replenish the oil level. It is sufficient for the oil

level to be anywhere within area -B-.

Arrow -1-

Maximum marking

Arrow -2-

Minimum marking

– Pull the oil dipstick out again and check the oil level.

FOX 2004 ➤

64

    4. Service descriptions


Content   ..  45  46  47  48   ..